The Avada WooCommerce Builder – Shop
Last Update: February 17, 2026
Avada is a website builder for WordPress and eCommerce. You can design and build anything from a blog to a marketing website or eCommerce stores using the Avada WooCommerce Builder and more. Avada provides a wide range of WooCommerce features, allowing you to design and build a custom customer flow for your online shop. From using Avada Layouts for individual WooCommerce Products to creating a custom shop, cart, checkout, and product layouts, all using the design flexibility and power of Avada and the extended range of Woo Design and othe Avada Design & Layout Elements.
In this help file, we look at how to create a custom layout for your WooCommerce Shop page. See below for links to customizing the other main areas of WooCommerce, and watch the video below for a visual overview of the Shop page creation process.
The Default WooCommerce Shop Page
Unlike the process of creating product layouts, there is no need to create a custom Avada Layout when building a WooCommerce Shop page. With WooCommerce, the Shop page is a bit different from the Woo Cart and Woo Checkout pages, which, by default, use a simple shortcode.
The WooCommerce shop loop is the system WooCommerce uses to display a collection of products on shop and archive pages. It’s called a “loop” because it cycles through each product in a query and outputs them one after another in a structured layout, typically showing the product image, title, price, rating, and add-to-cart button.
By default, when the WooCommerce plugin is installed and the Woo Wizard has run, various pages can be automatically generated, including the shop page. Whenever you view a WooCommerce shop page, product category, tag archive, or search results page, WooCommerce runs the shop loop to determine which products to display and how they should be displayed.
WordPress themes and website builders—such as Avada’s WooCommerce Builder—can customize the design and structure of this loop, allowing you to control the layout, styling, and elements that appear for each product while WooCommerce handles the underlying product data.
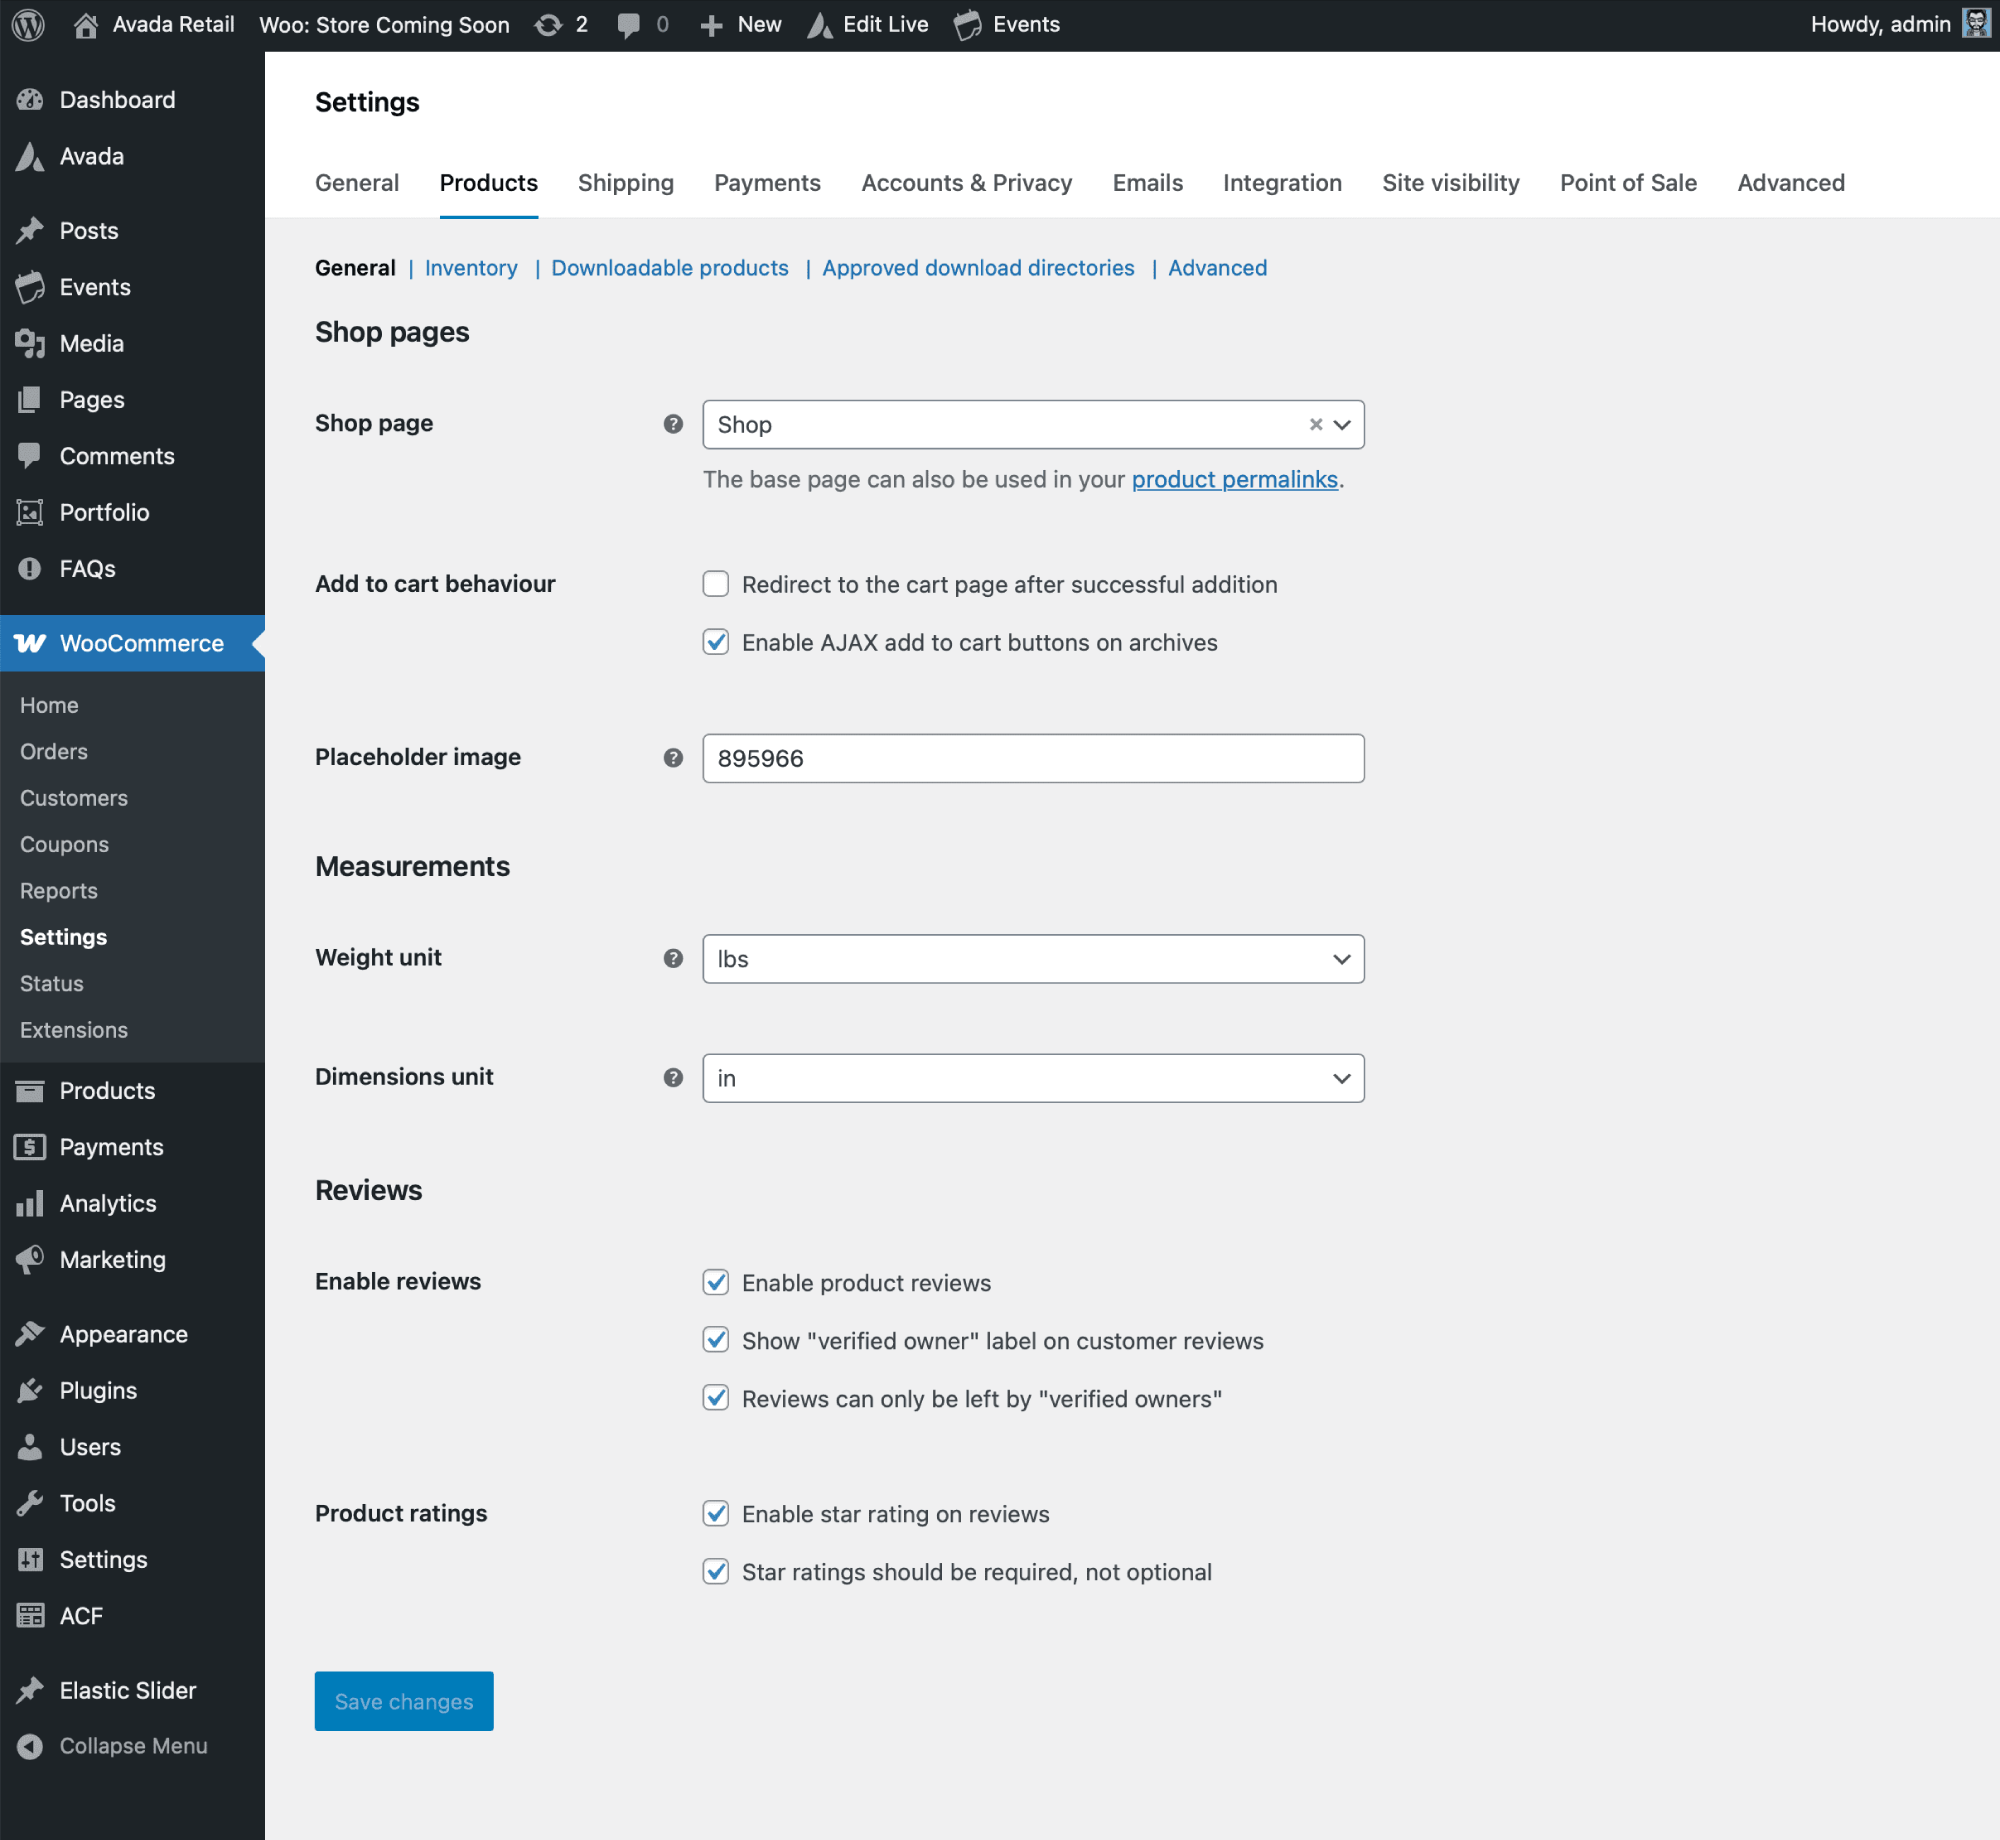
The shop page assignment setting can be accessed by navigating to:
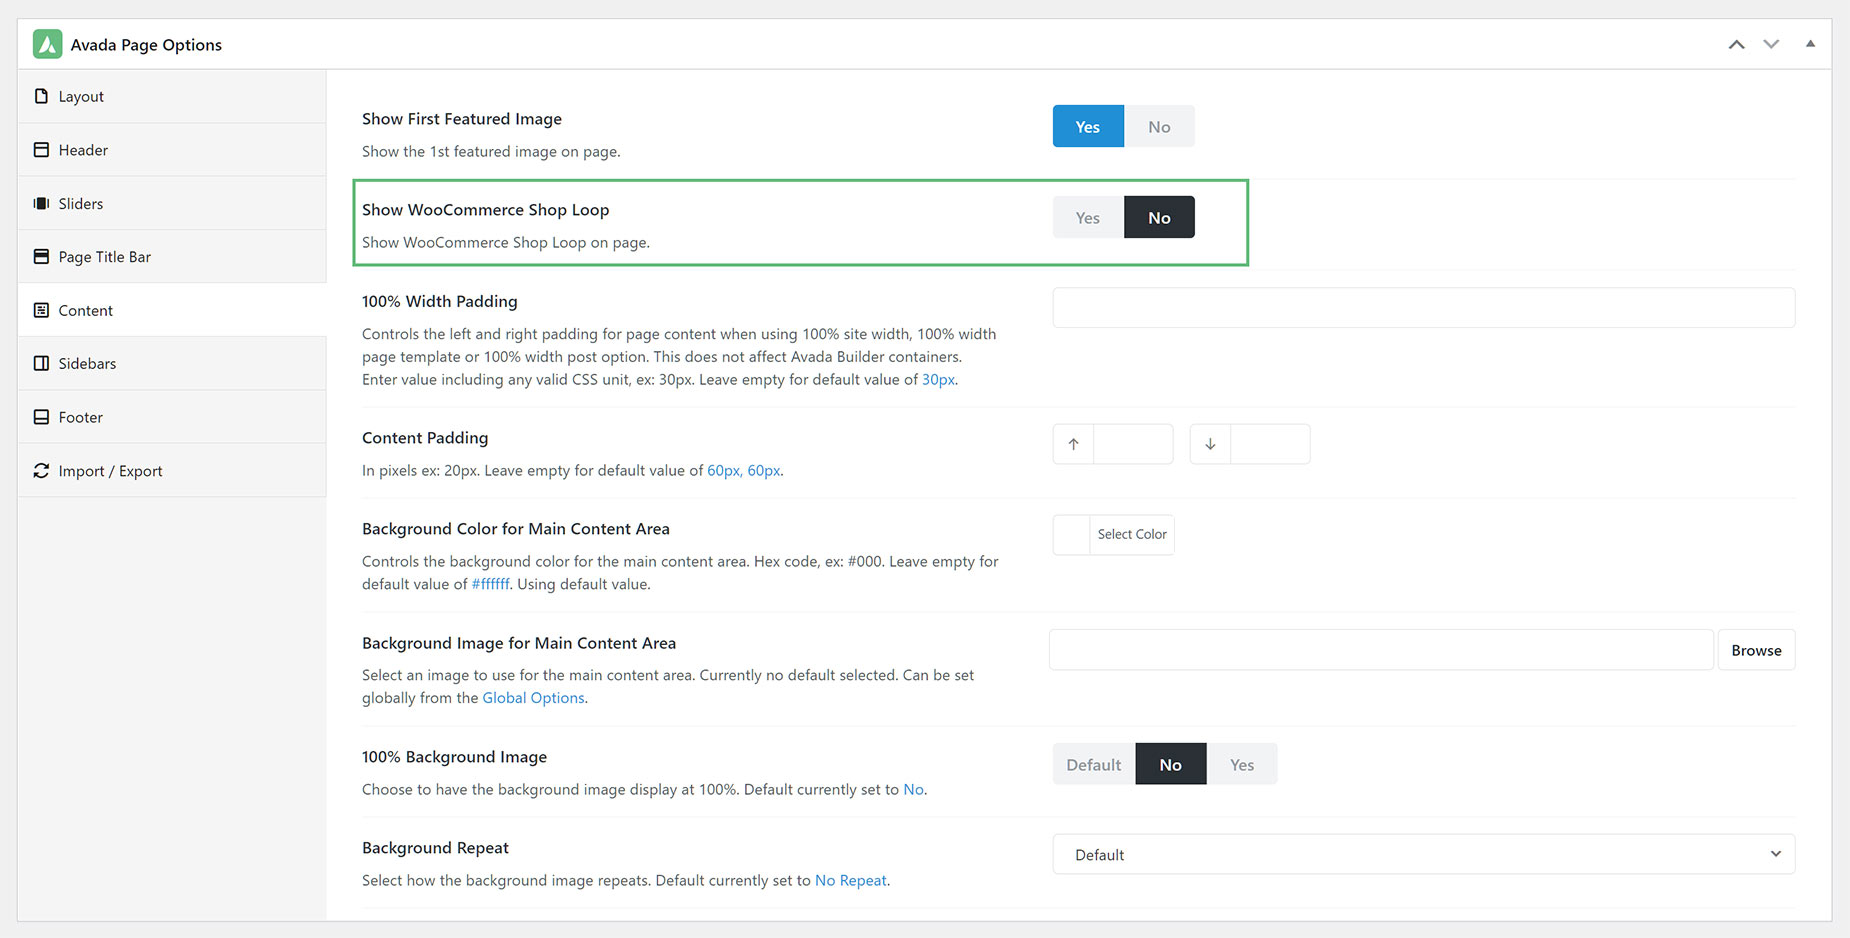
There is just one additional step to stop the default loop from showing up, and that is to go to the Page Options of the Shop page, head to the Content tab, and select “No” for the “Show WooCommerce Shop Loop” in the second option, as you can see in the screenshot below. That will remove the default shop layout, and now you can start designing and building your own Shop page using your preferred interface of the Avada Builder, and your choice of Woo and other Design Elements.
For the Shop page, the most obvious Elements to use are the Woo Sorting and Woo Product Grid Elements, as well as any other Design Elements you’d like to use. You can also create and design an Avada Post Card for products, then use the Avada Post Cards Element to display them.
When To Create a Custom Avada Layout For The Woo Shop
If you plan to add Avada WooCommerce Filter Elements to your shop’s product listings, you will need to create a custom Avada Layout for your store. To filter products in the store, WooCommerce Filters, which are, of course, the basis for the Avada Filter Elements, rely on the URL to provide that functionality.
In order to make filtering work, under the conditions, the layout must be active for the Products Archive Types, and in the Content Layout Section, the Avada Post Card Archives Element must be used, because that Element doesn’t construct its own query based on user selection, but instead picks up the query that WordPress itself does, based on the page URL. When you filter, the archives respond accordingly and display the content that is requested in the URL. See the video above for a working example.
Designing A Custom Shop Page
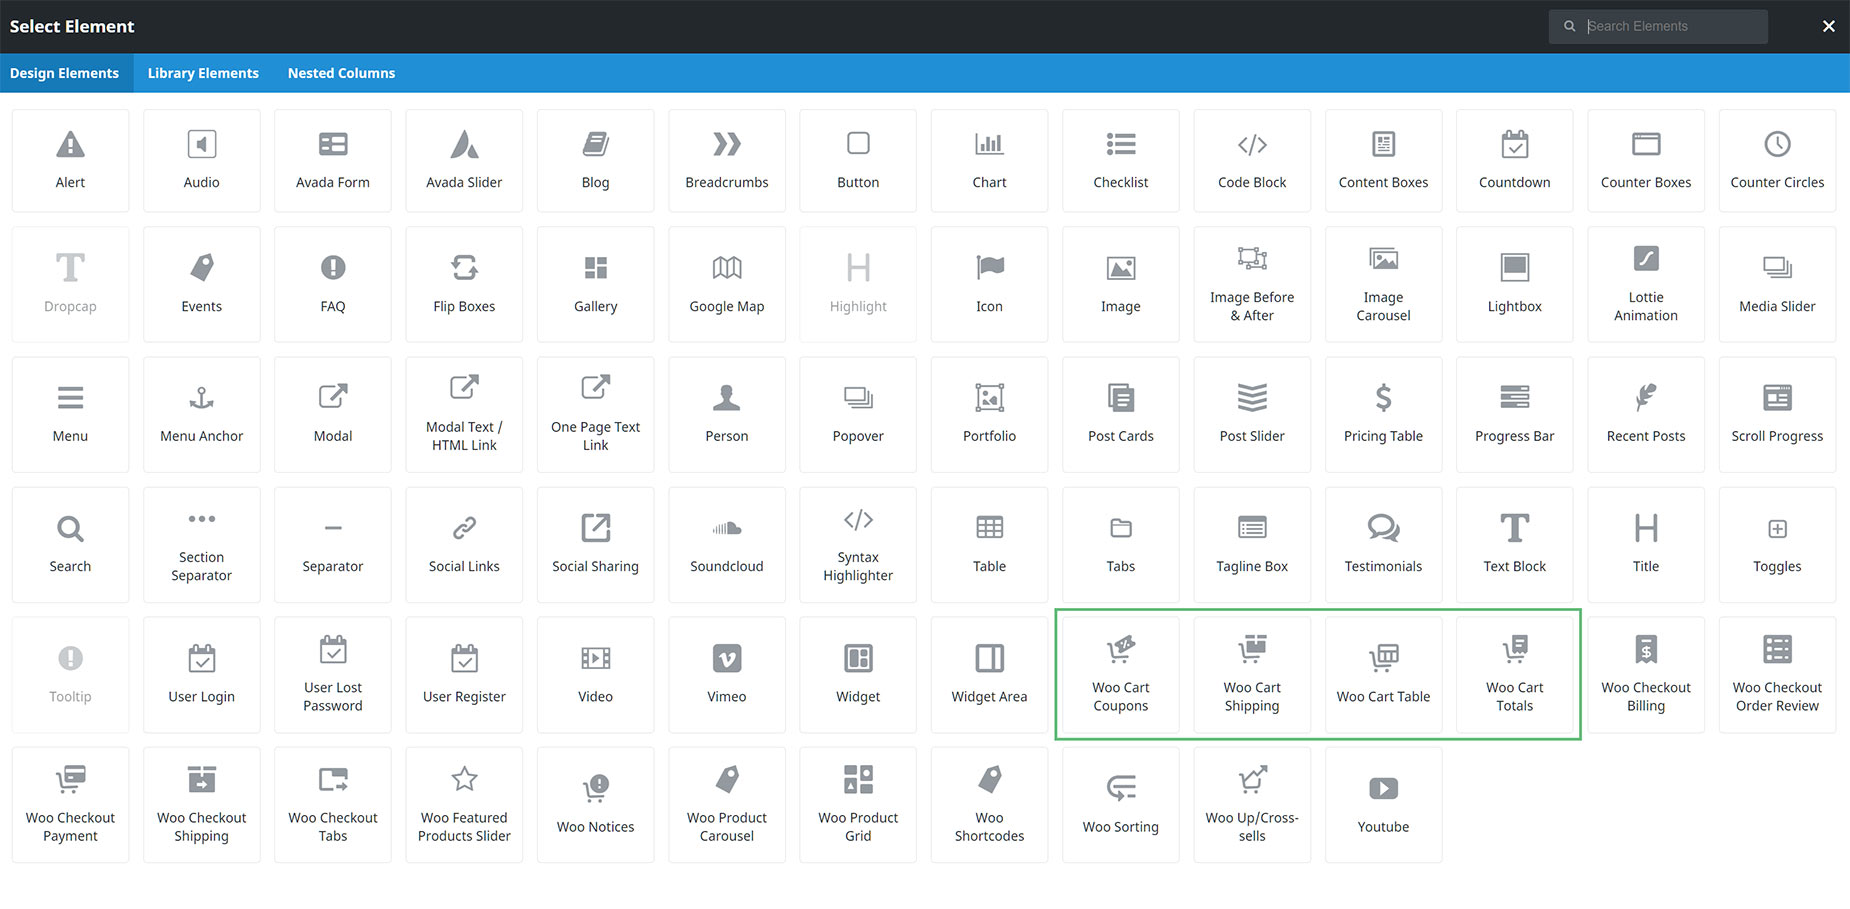
Using the Avada WooCommerce Builder allows you to create any design you want for your shop page. Start with a Container/Column arrangement, and when you add your first Avada Design Element, you will see the available Avada Woo Elements at the bottom of the Elements dialog, as seen in the screenshot below. There are not really any specific Woo Shop Elements as such, but rather a number of Elements you are likely to use, such as the Woo Sorting and the Woo Product Grid Elements.
These two Elements would recreate the standard WooCommerce shop functionality. For further control over the layout, you could also use the Post Cards Element, utilizing an Avada Product Post Card. The real benefit of using the Avada WooCommerce Builder to build your Shop page is that you can add these Avada Design Elements in whatever structure and order you wish, and have complete control over the shop page’s design and content.
You might want an Avada Woo Product Images Element or a custom Avada Page Title Bar Layout at the top, along with other Elements, like the Title, Separator, or any other Elements that fit your design and circumstances for complete design freedom.
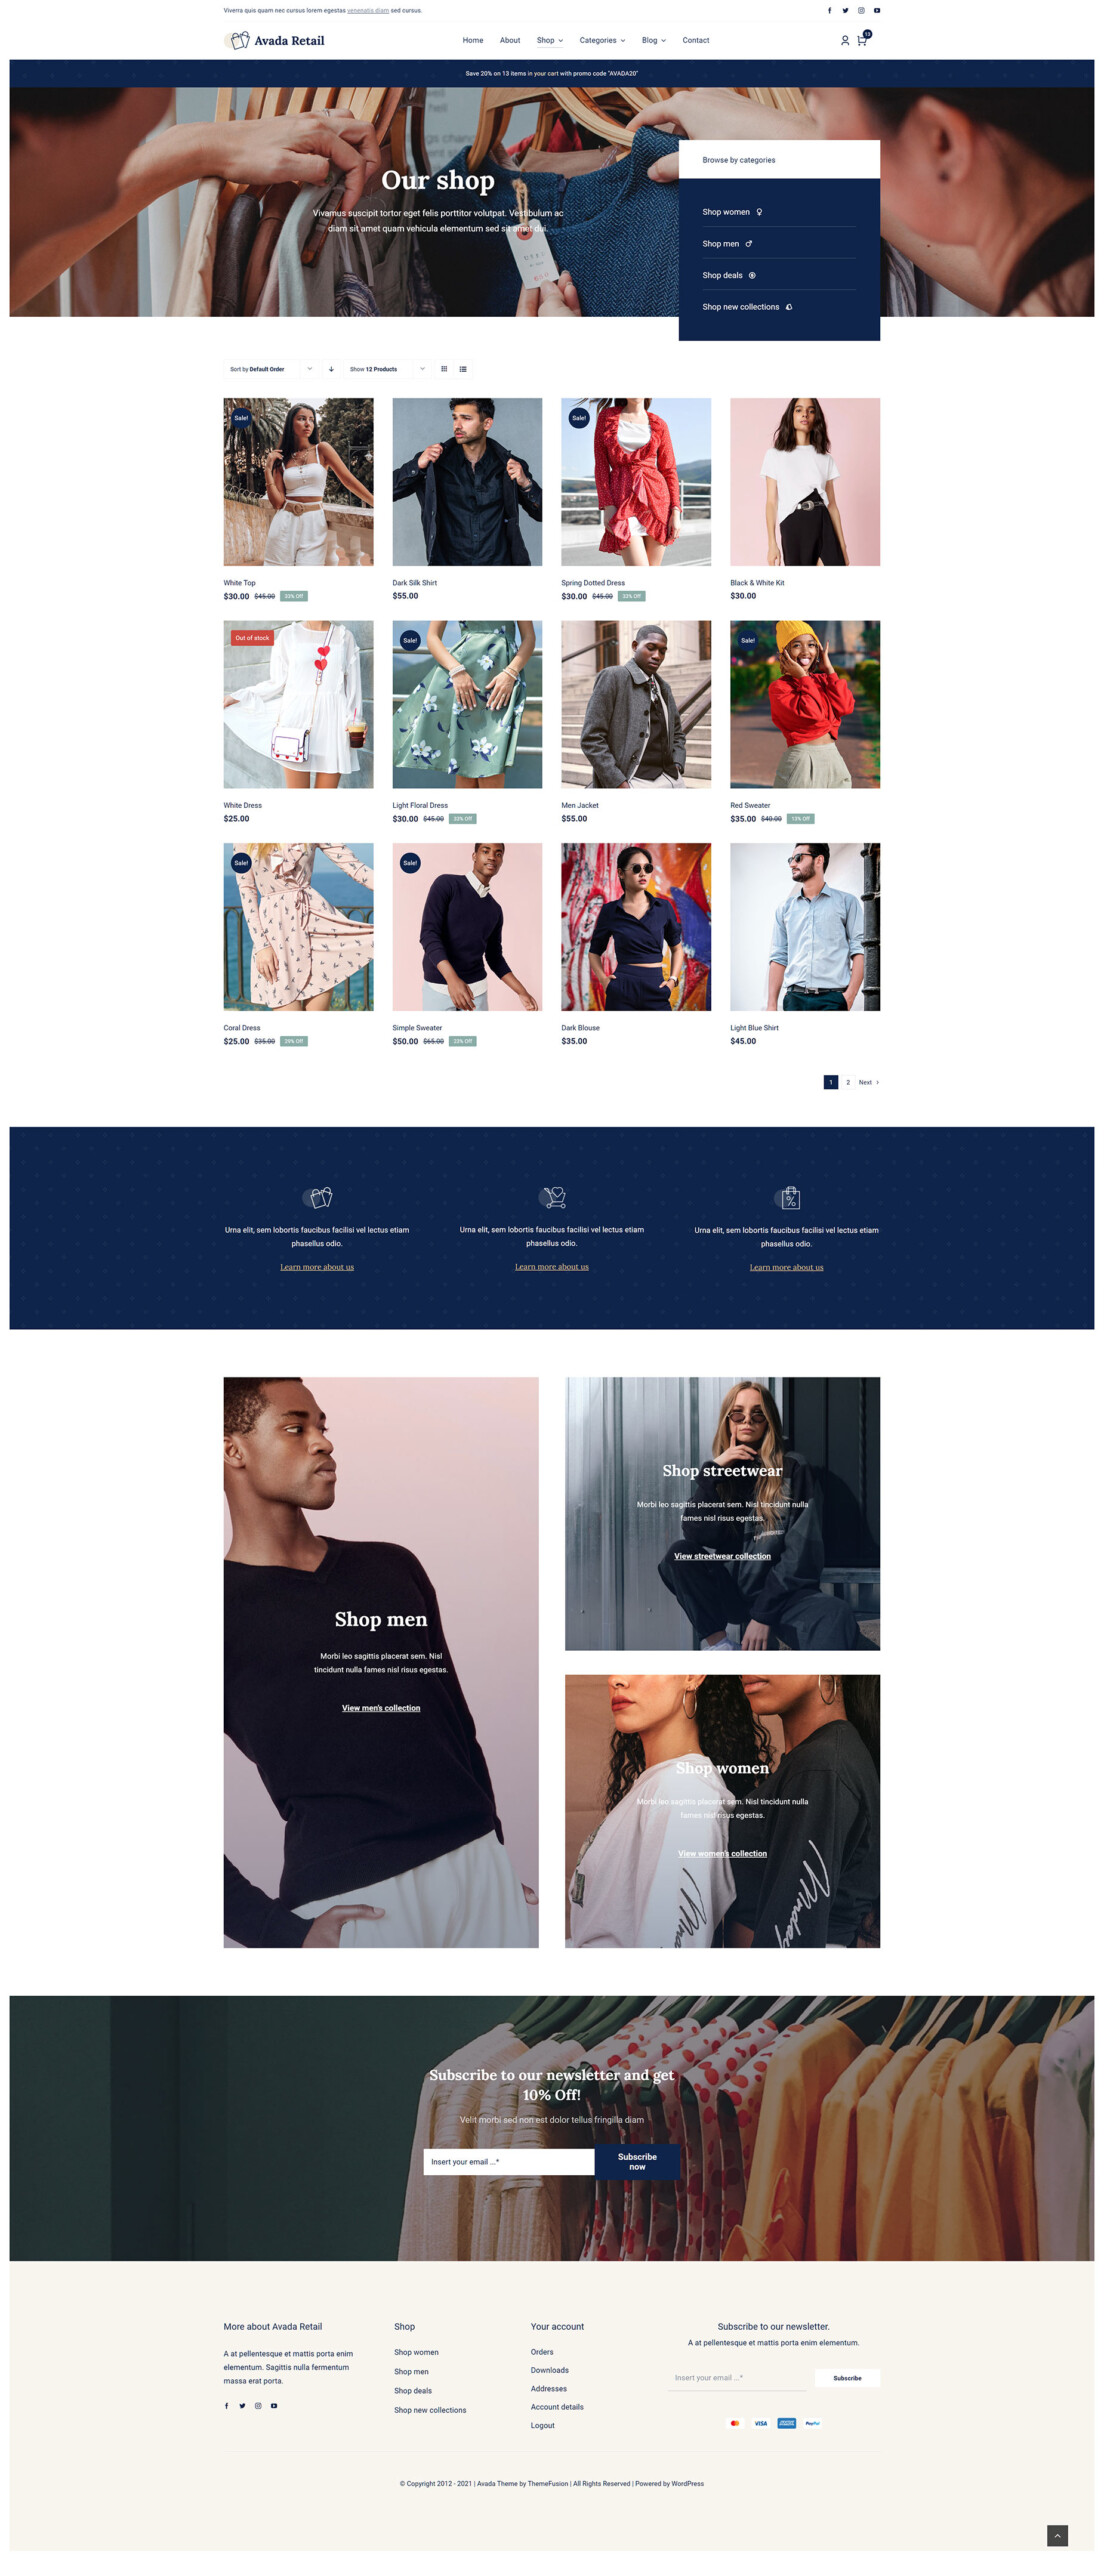
Example of a Custom Shop Page
The example below shows the Avada Live Navigator in the Avada Live Visual Builder. The Avada Live Navigator is a powerful visual panel that provides a structured, real-time overview of your entire page layout. It displays a hierarchical tree of Containers, Columns, and Design Elements, making it easy to see how your page is built and where everything is situated on the page or post.

Below is a live example of a custom shop page layout. For some inspiration, please see this 10 Inspiring Avada WooCommerce Store Designs for WordPress article.