How To Use WooCommerce Attribute Swatches
Last Update: February 11, 2026
As part of the Avada WooCommerce Builder, we also added three Avada attribute types to WooCommerce – Avada Color, Avada Image, and Avada Button. These attribute types can be used in both standard WooCommerce Layouts, as well as Layouts created using the Avada WooCommerce Builder.
Read on on to closer look at WooCommerce Attributes, and Attribute Swatches, and how you can use them in your Avada eCommerce store, and watch the video for a detailed visual overview.
Adding Global Attributes
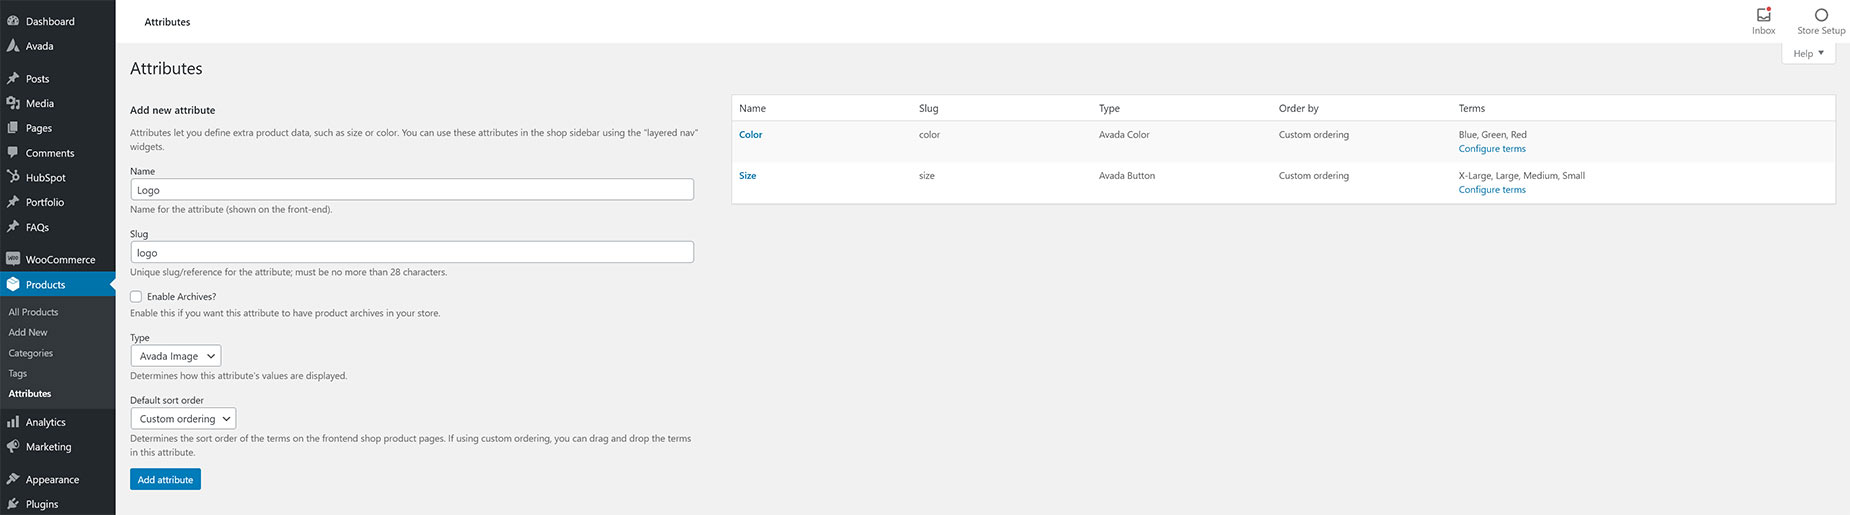
You can now add specific types of global attributes to WooCommerce, and then apply them independently on the product level. To start, head to Products > Attributes from the WordPress dashboard.
Here, you can create a new global attribute. Start by giving it a name, a slug, and then choosing a type of attribute. This can be either Avada Color, Avada Image, or Avada Button. A color attribute is useful for products that have different colors, and you can select color swatches when you configure the attribute terms. Avada Image is a useful attribute type for any visual differences in attributes, and Avada Button is useful for sizes, or anything else that works as a simple label.
In the screenshot below you can see a Logo attribute about to be added, using the Avada Image attribute type. Note how the other two attributes are using the other attribute types, Avada Color, and Avada Button.
Adding Attribute Terms
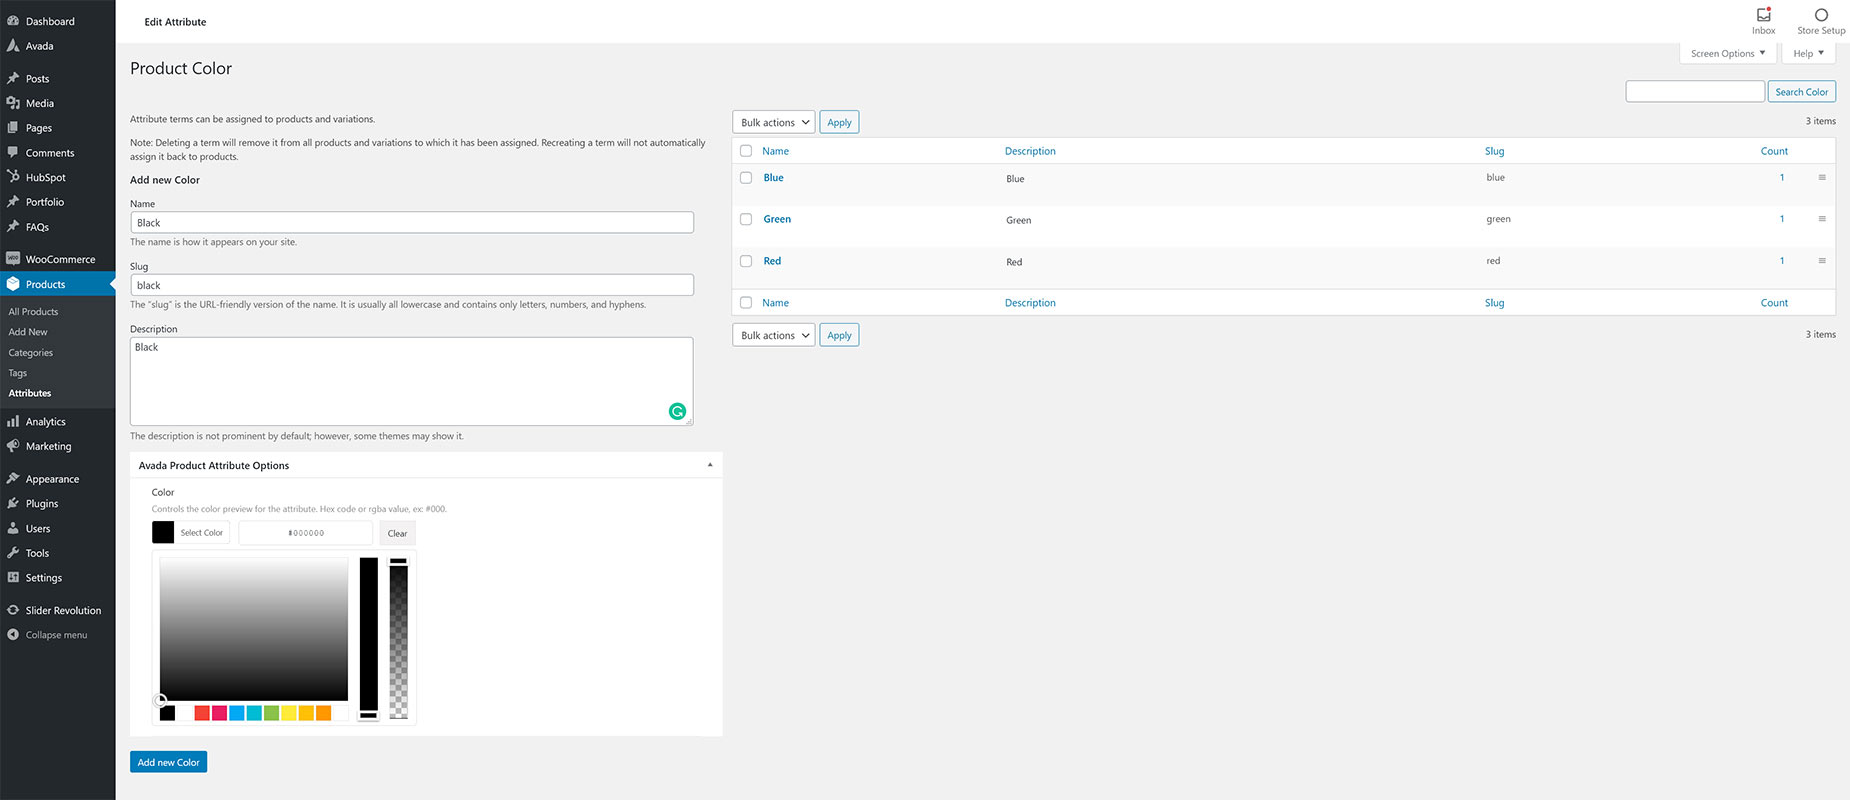
Once you have created your Attributes, you can add the attribute terms. There is a ‘Configuring terms’ link at the right of the attribute to do this. This edits the attribute, and here you can add the attribute terms. For an Avada Color attribute for example, you would create as many colors as you needed across your products, and using the Avada Product Attribute Options, you could select the color preview for the attribute using a color picker.
As you can see in the screenshot below, a black variation is about to be added while three others variations have already been created.
Adding Attributes To Individual Products
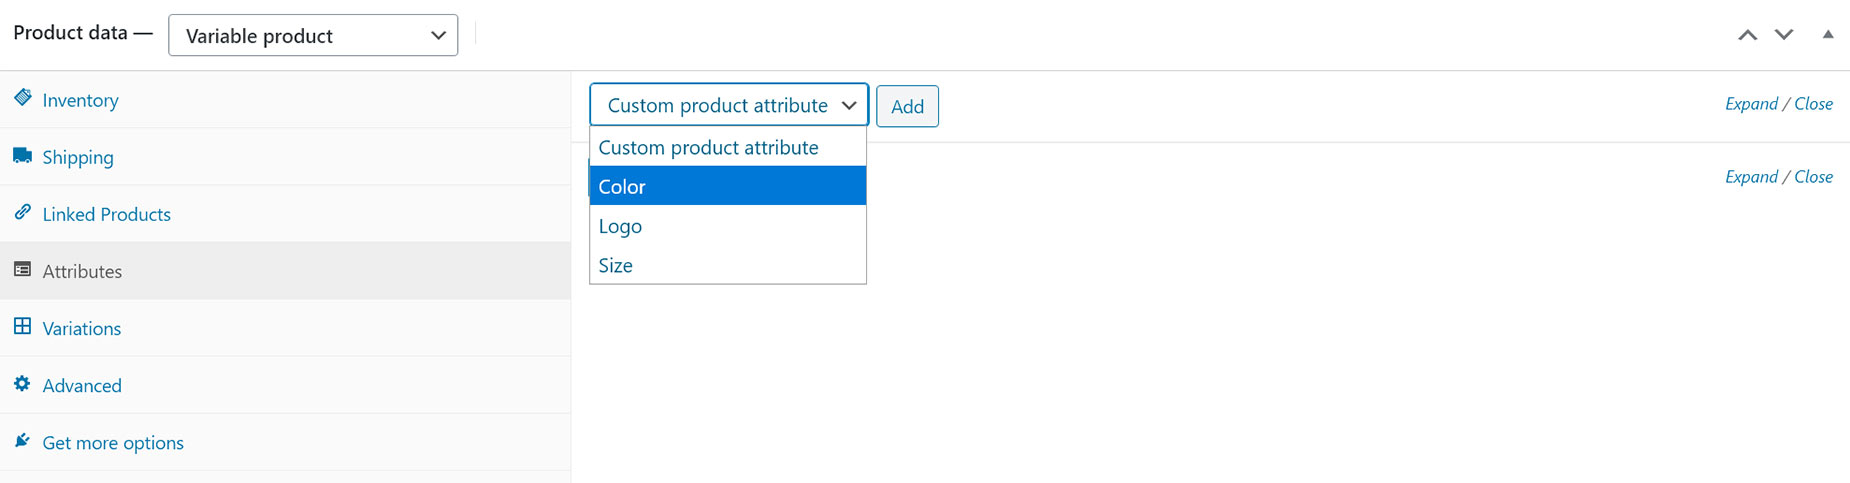
Once you have completed making your global attributes and attribute terms, you can add them to individual products and generate product variations. The first step to do this is to ensure the product to a variable product. This is done in the product, from the Product Data dropdown list.

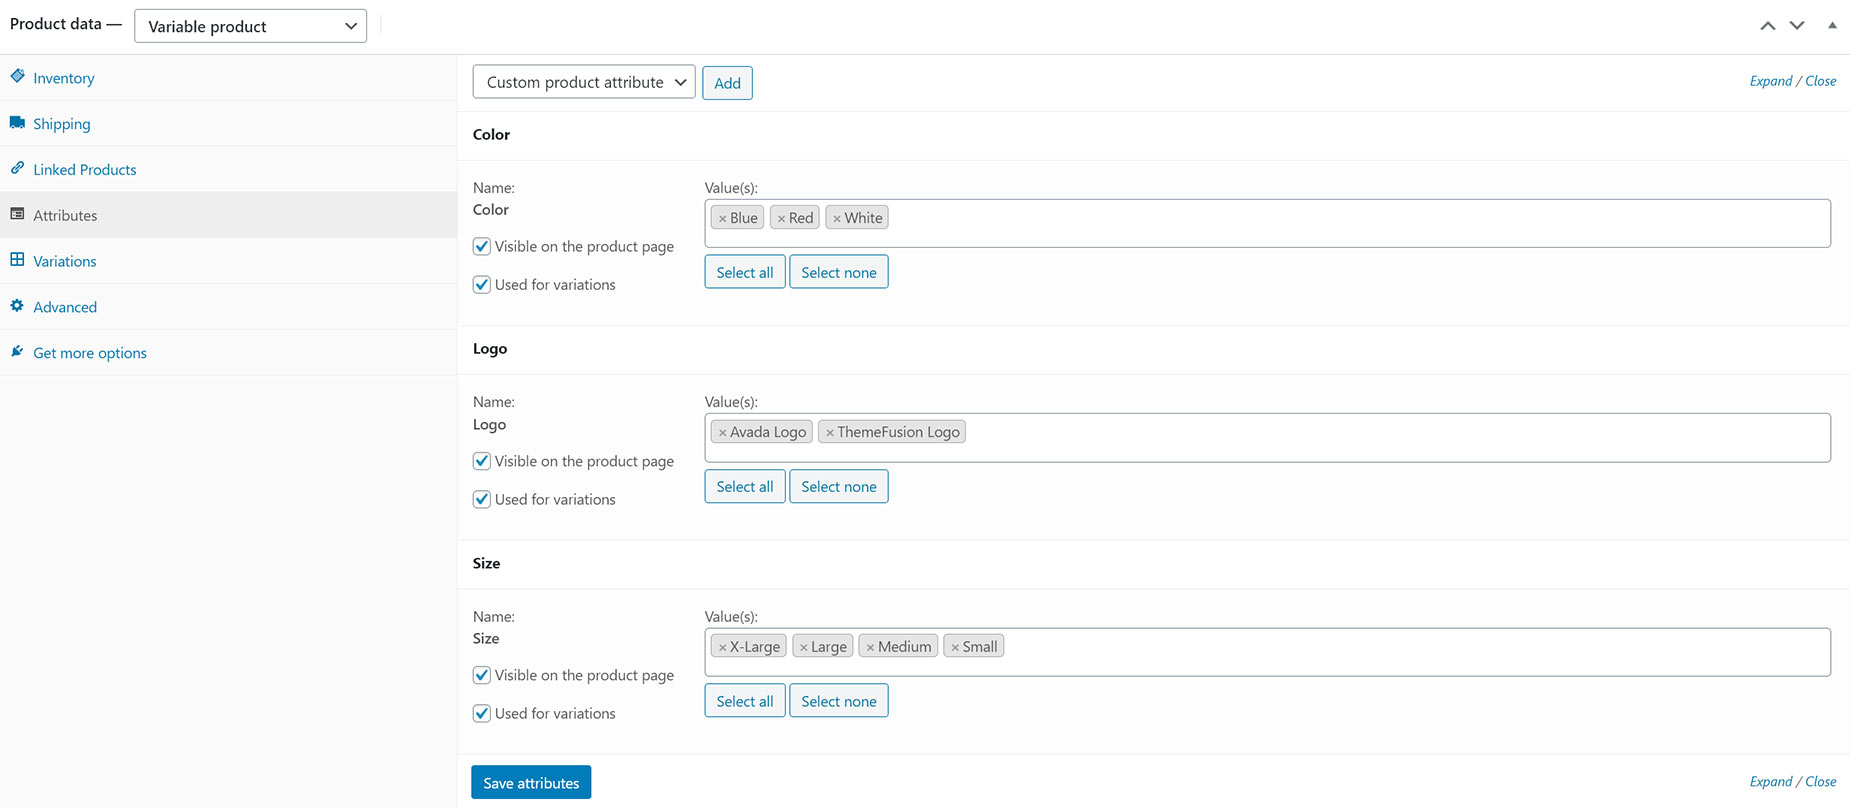
Next, you can add any Custom Product Attributes. All global attributes created will display in the dropdown list, but you can add just the ones you want to any product. In this example, I will add all three – Color, Logo and Size.
Once you have added the product attributes, you can then choose which values to add to the attribute. In the screenshot below, I have added three colors, two logos, and four sizes. Check the ‘Used for Variations’ tick box to use these values in your variations.
Creating Product Variations
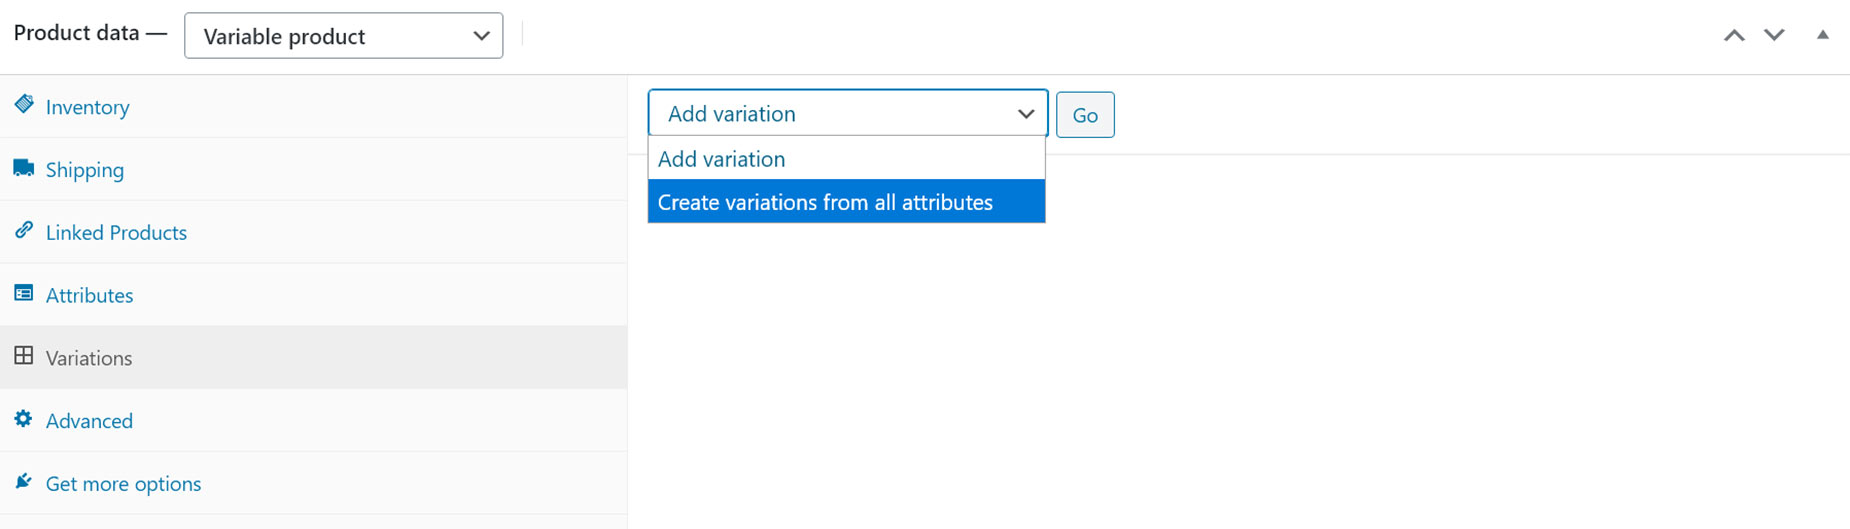
Once you have added your custom product attributes, it’s time to create the variations. WooCommerce makes this easy with an automatic option to ‘Create variations from all attributes’. If you prefer, you can also add them manually.
Here is a screenshot of all the variable products once WooCommerce has created all combinations from the attributes. At this point they have no price, or other details, and these need to be set individually.
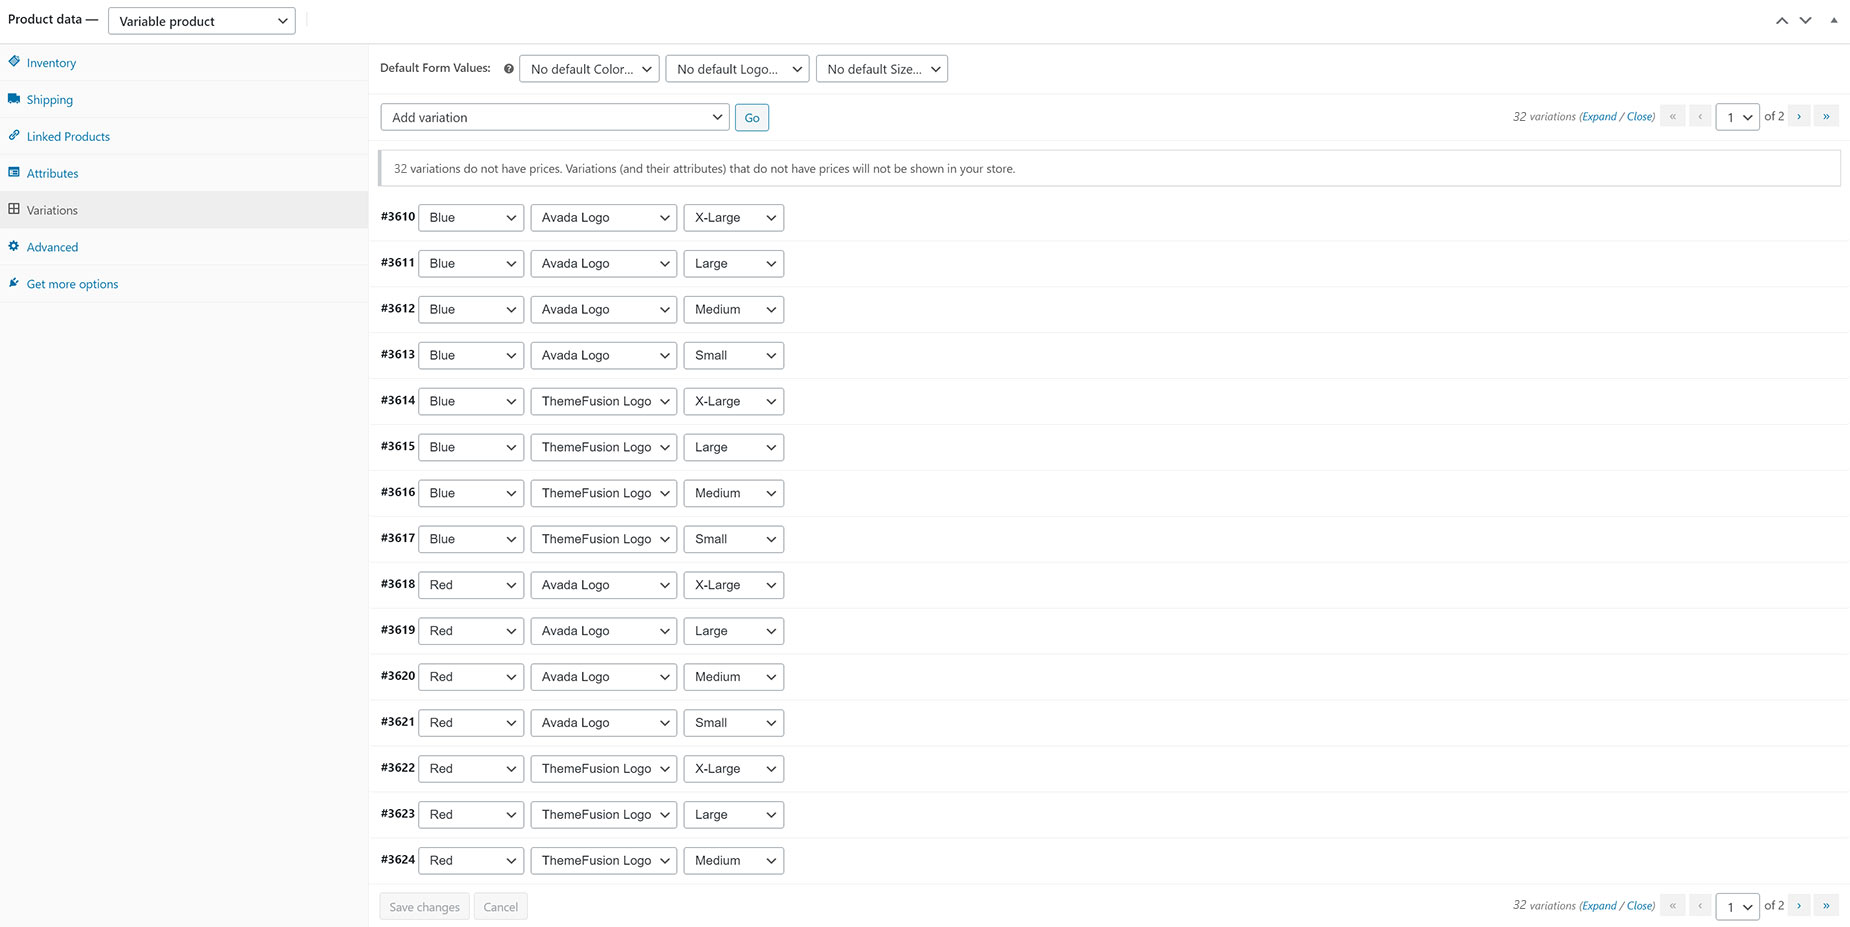
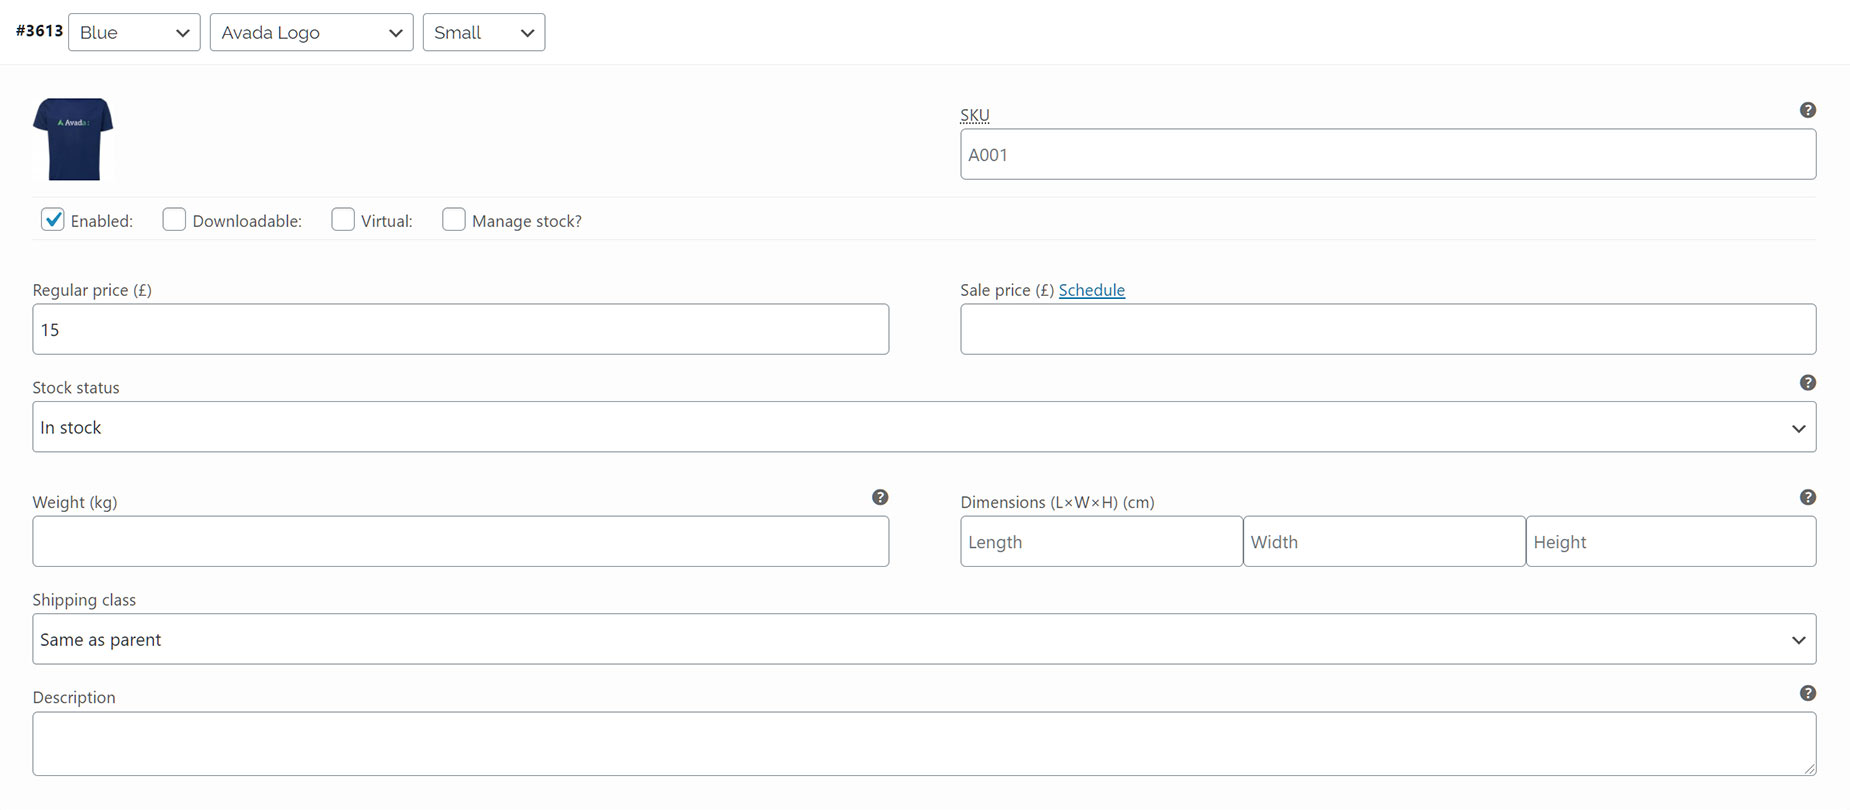
You can either click on the Expand link at the top right to expand all the variations, or you can click on the variation itself to just open or close them one at a time. Depending on your product, you would add various information in here, but the price is needed for the product to display. Here, I have also added an image to match the attributes (i.e. blue t-shirt with the particular logo). This image is then displayed on the front end when someone selects those specific attributes.
Displaying Variations In Your Layout
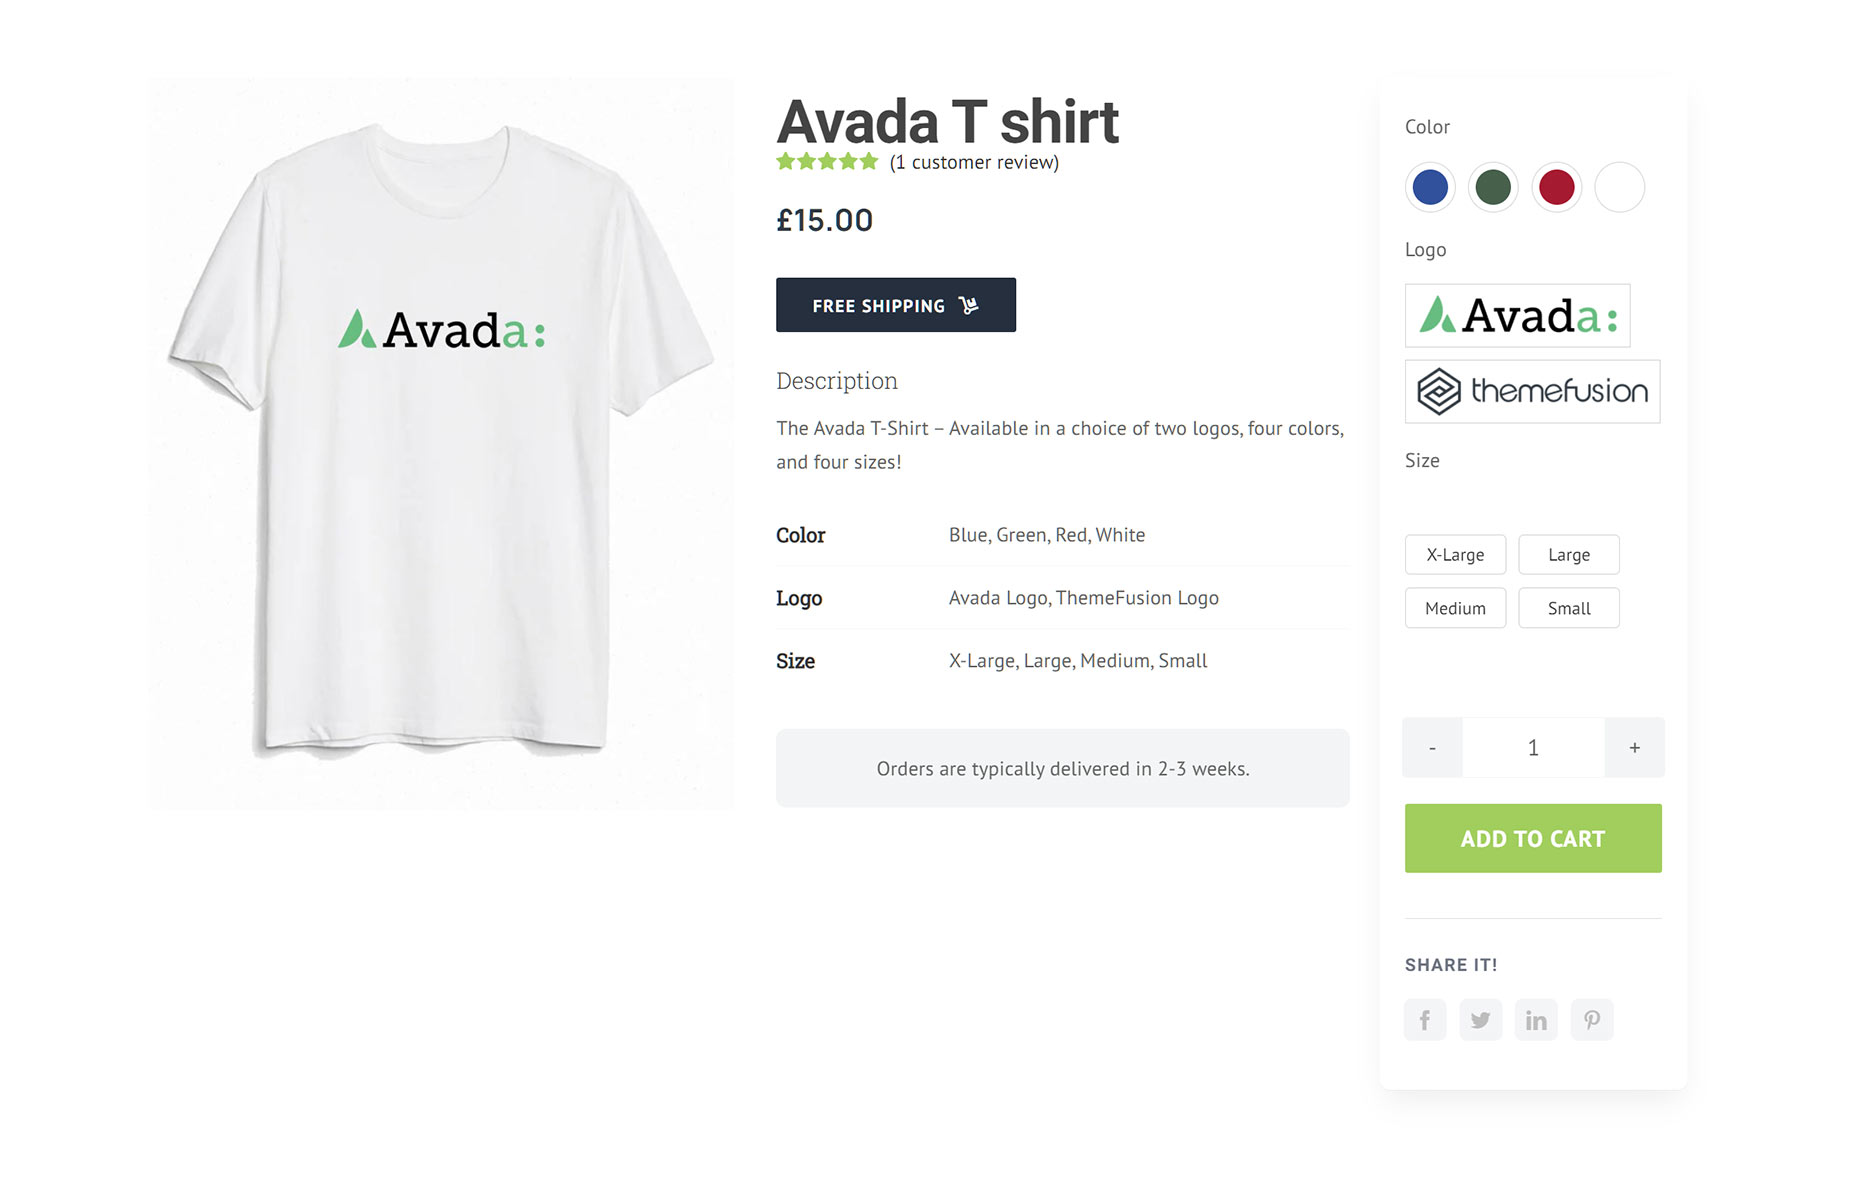
By default, WooCommerce will then display your variations on the product page. You can also however build your own WooCommerce Product Layout, and use the Add To Cart Element to display and style your variations. Below is the standard WooCommerce template for a variable product.
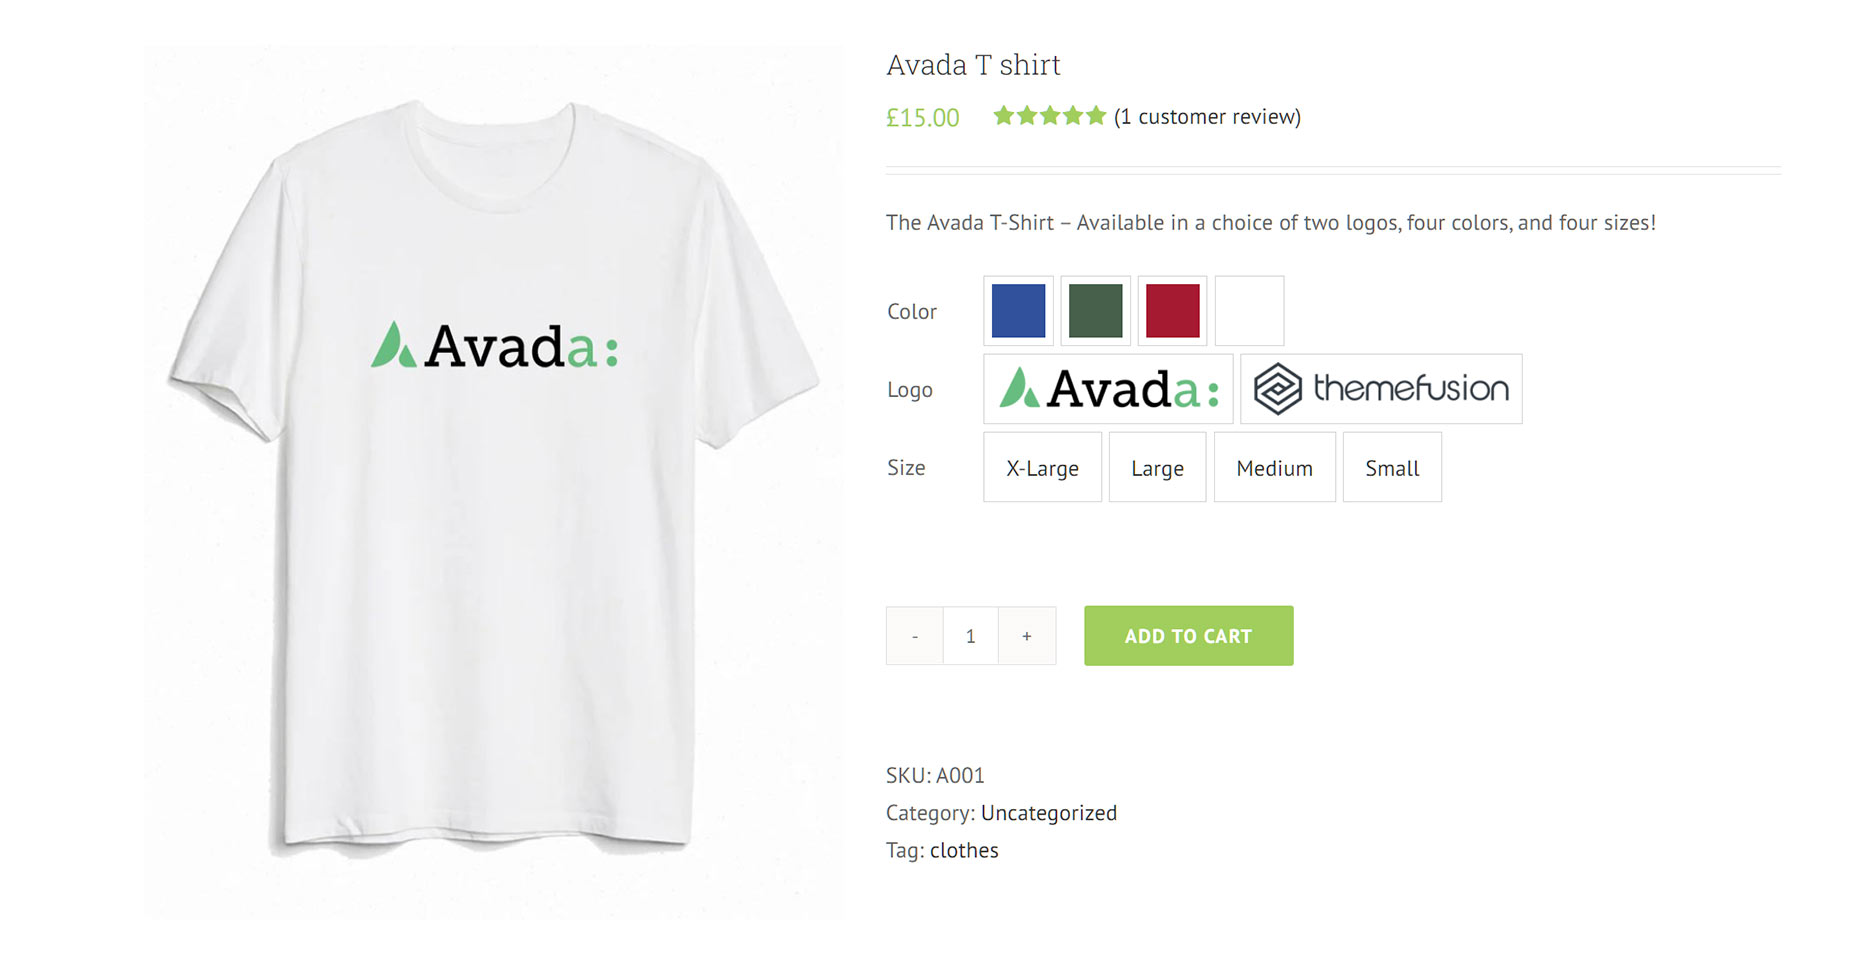
And here is a screenshot with the same product, using a WooCommerce Single Product Layout. To learn how to create these, check the Avada WooCommerce Builder documentation.