Share
Good or bad website page speed correlates directly to a positive user experience and is vital to a successful digital strategy in today’s competitive online environment. Furthermore, improving your website’s performance can enhance the user experience, support SEO efforts, drive higher leads and conversions, and positively reflect the brand, making them a priority for website owners and developers.
In this beginners’ guide, we will cover the main factors affecting website performance and introduce you to the Avada Performance Wizard. We will explain how the wizard works and cover each step in detail to ensure readers can effectively enhance their Avada website’s performance.
Overview
Why Is Website Performance Important?
An optimized website is vital to ensure a positive user experience. Think of it this way: If you sit down at a restaurant and order some food and the server takes too long to deliver your order, it will negatively impact your experience and likely cause you to not frequent the restaurant in the future.
Here are some key reasons explaining why good or bad website performance is impactful:
User Experience and Retention
Search Engine Optimization (SEO)
Conversions and Revenue
Mobile Accessibility
Reduced Operational Costs
First Impressions and Brand Perception
Which factors affect site speed negatively?
Many factors can negatively impact site speed. Understanding these factors is essential for optimizing website performance. By addressing issues like unoptimized images, excessive plugins, and render-blocking resources and implementing best practices like caching, compression, and using a CDN, site owners can make significant strides toward a faster, more responsive website.

Here’s an overview look at the main culprits that slow down website performance:
Large and Unoptimized Images
Excessive HTTP Requests
Too Many Plugins
Unoptimized JavaScript and CSS
Uncached Content
Poor Server Performance and Slow Hosting
Too Many Redirects
Third-Party Scripts
Uncompressed Data
Heavy Animations and Complex Code
Poor Database Optimization
Not Using a Content Delivery Network (CDN)
Non-Mobile-Friendly Design
Excessive DOM Size
How to Access the Avada Performance Wizard
The Avada Performance Wizard can be accessed by logging into our website and navigating to WordPress Dashboard > Avada > Performance.
From here, and before starting the performance process, users should run a PageSpeed Insights test to get an initial performance benchmark for the website.
Using the Avada Performance Wizard
The Performance Wizard is a step-by-step process that walks users through each of the website’s settings, focusing on which elements and functions can be turned off or adjusted to boost loading speeds. By navigating through global options, the tool pinpoints settings that could slow down performance and recommends improvement.
Before diving into the optimization process, running a Lighthouse report in an incognito browser window (Chrome, Firefox, Safari) is recommended. This avoids interference from admin asset loading and provides you with a benchmark. Establishing a baseline load score will help identify areas of potential improvement, particularly on mobile, which is the focus of Google’s performance tests.
The Step-by-Step Optimization Process
For this example, we will examine the Avada Business website, one of more than 100 professionally designed pre-built websites that can be installed with a few clicks. First, we run the site through Google’s PageSpeed Insights to determine a baseline for mobile and desktop speeds.
Step 1: Start
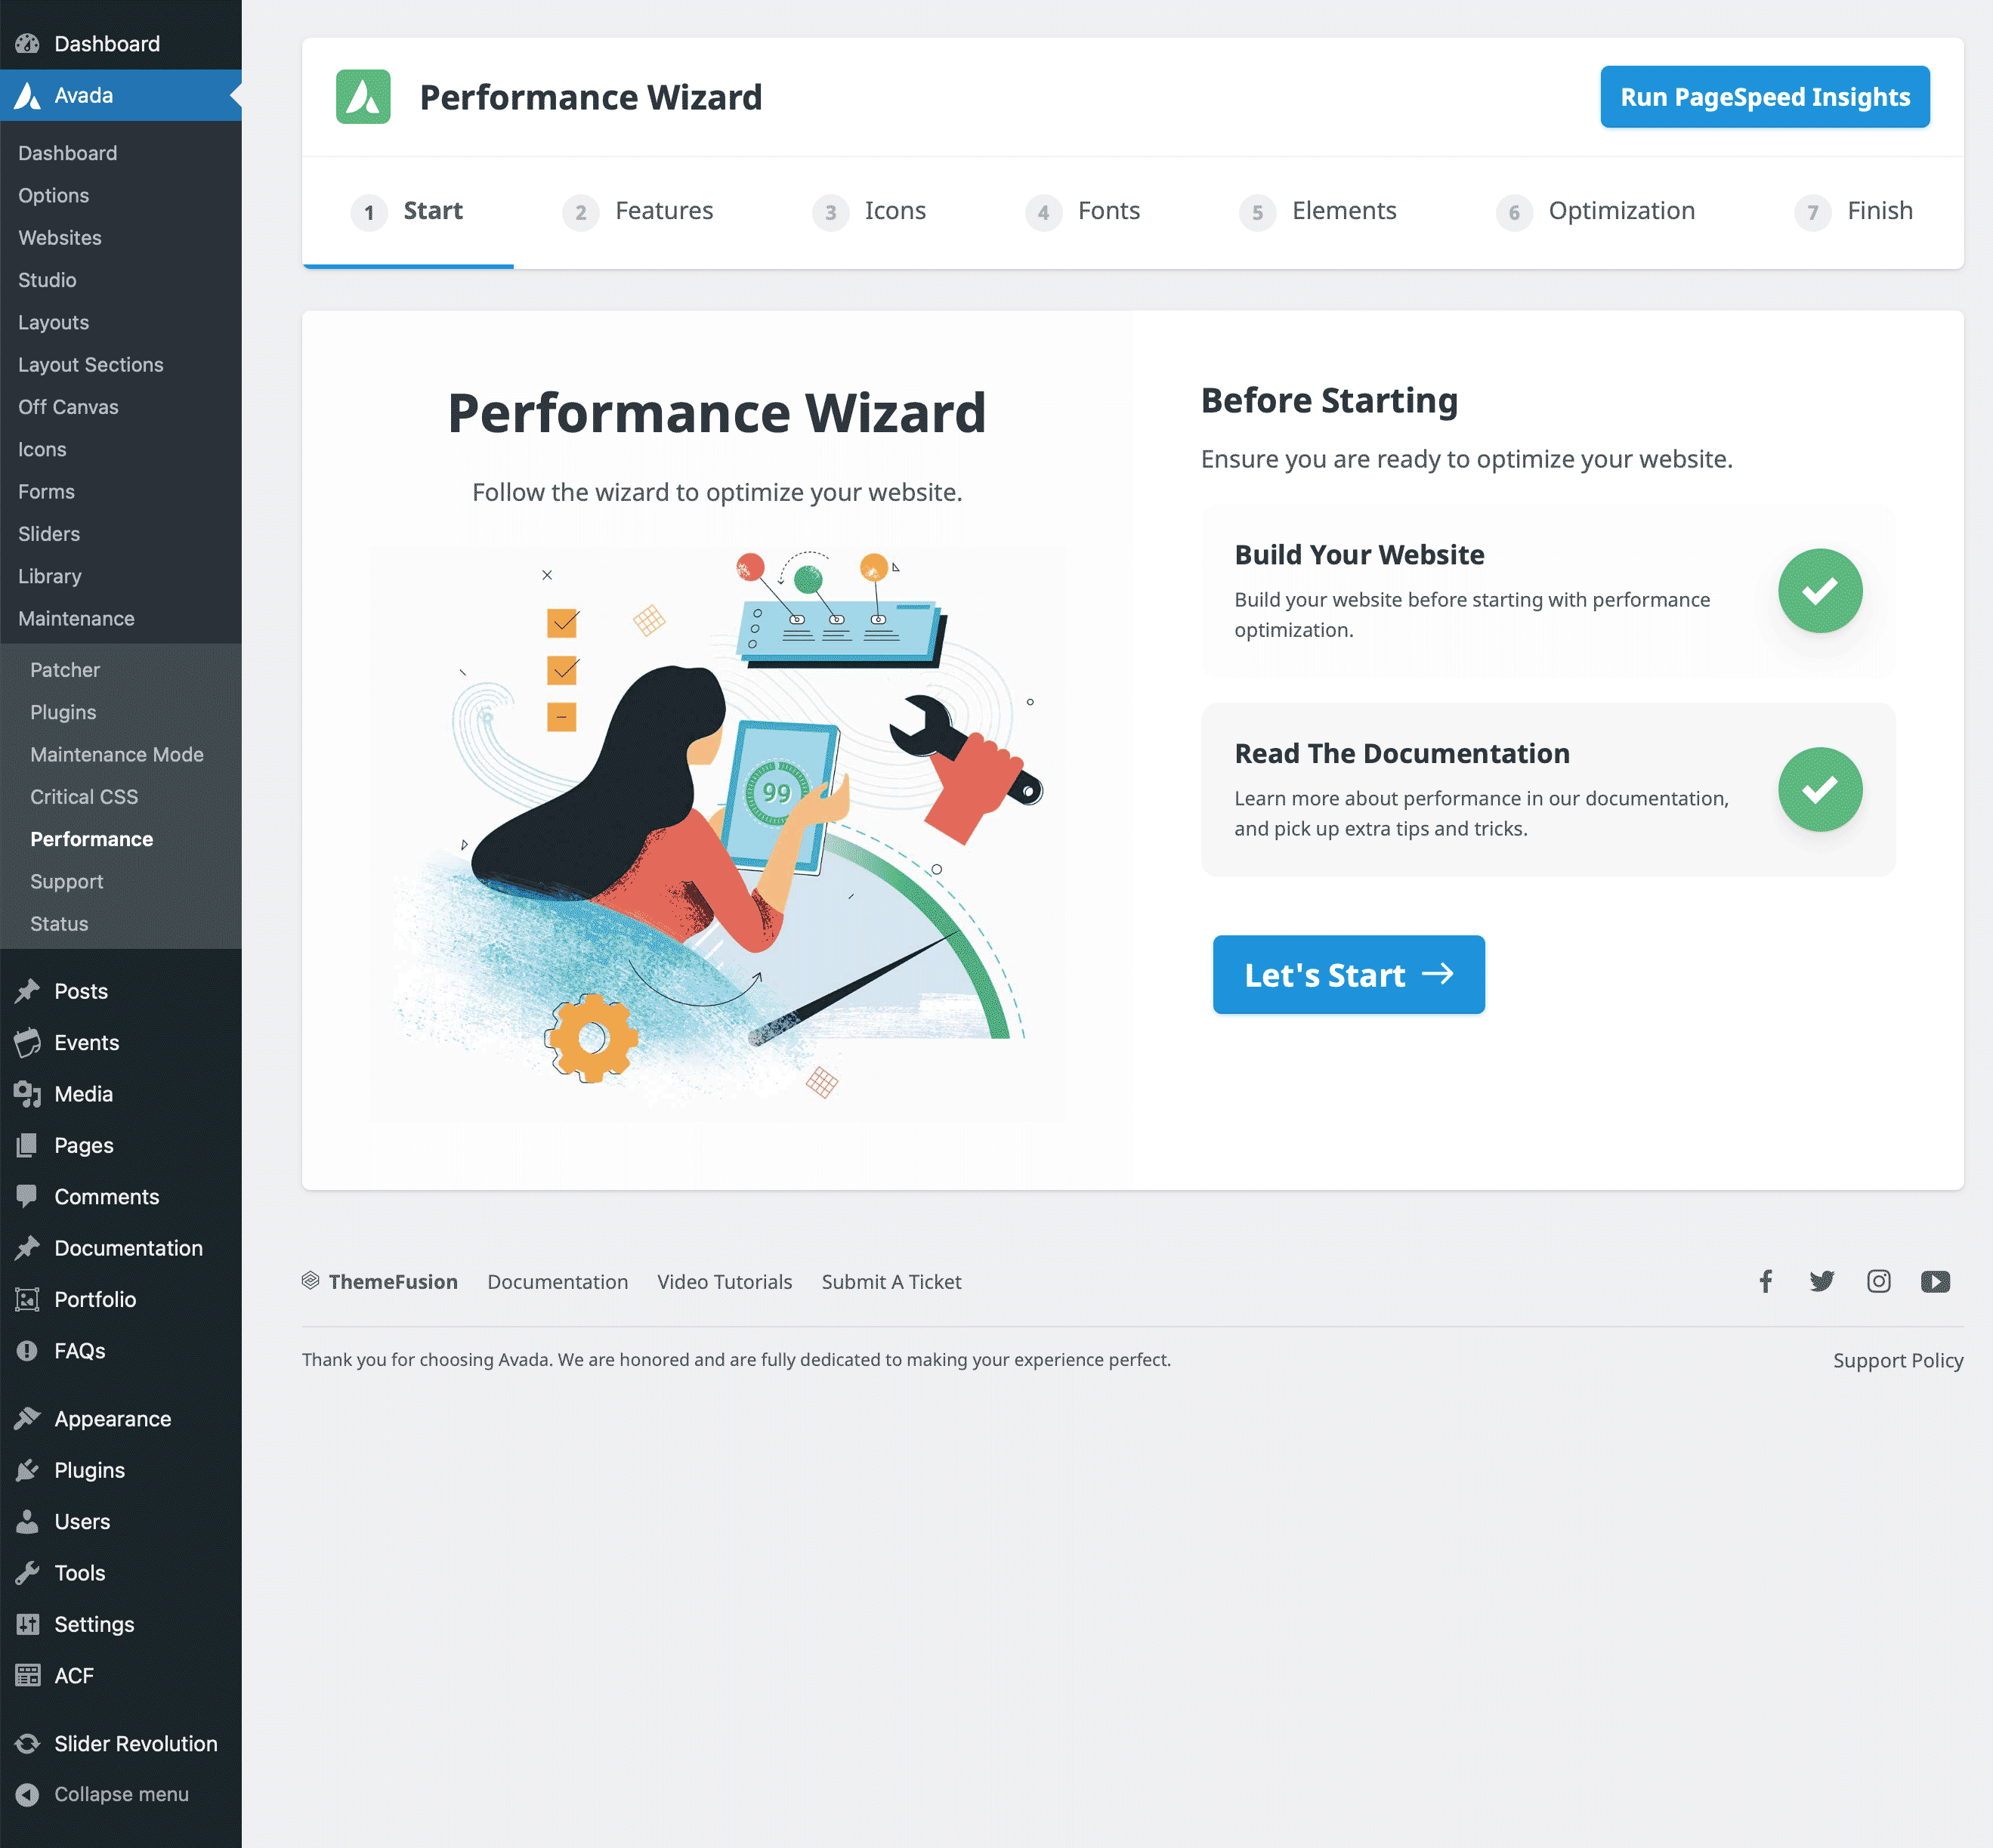
This is the main starting point. Run the site through Google Lighthouse to generate a baseline report, read the Avada documentation, and for best results, only run this process once your website is complete.
Step 2: Features
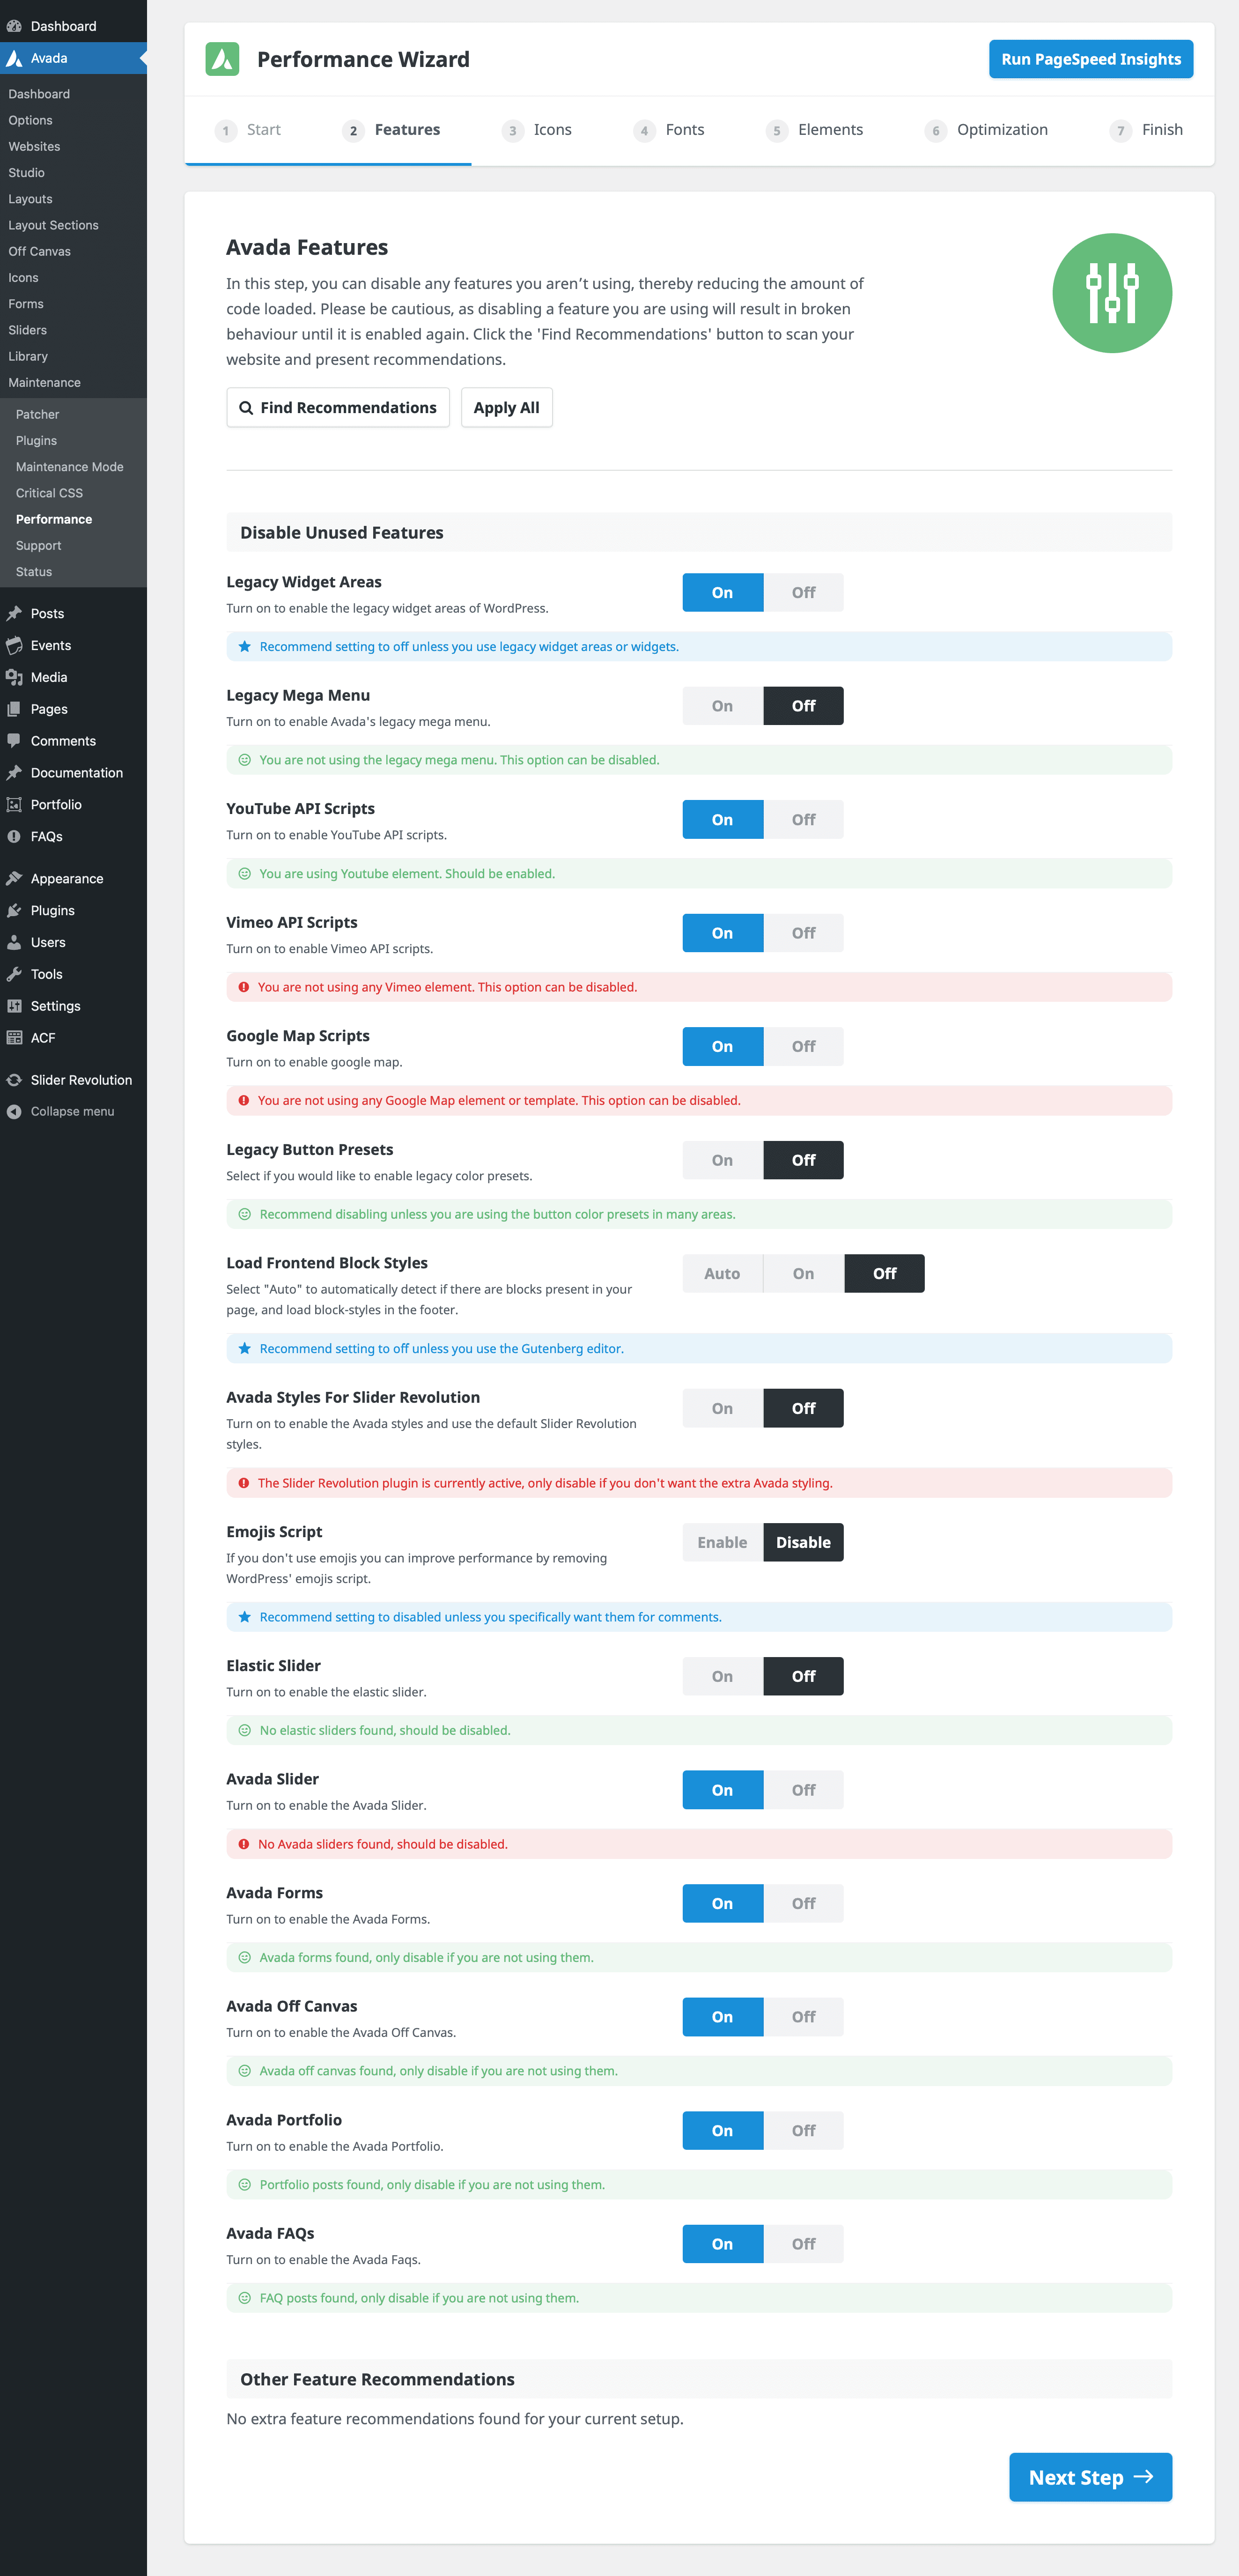
The wizard’s second step allows users to turn off unused Avada features, helping reduce the website’s code base. By selecting the “Find Recommendations” button, the wizard scans the site and suggests which features are unnecessary. Recommendations are color-coded:
Once satisfied with the recommendations, users can select “Apply All” to make the changes and save them before proceeding to the next step.
Step 3: Icons
In step three, the wizard scans for the icons being used on the website. It identifies the specific icons and their locations, allowing users to turn off unused subsets. For instance, if only the solid icon subset is necessary, other options, like Font Awesome compatibility, can be turned off. Additionally, users may convert all Font Awesome icons into a custom icon set for further optimization.
Step 4: Fonts
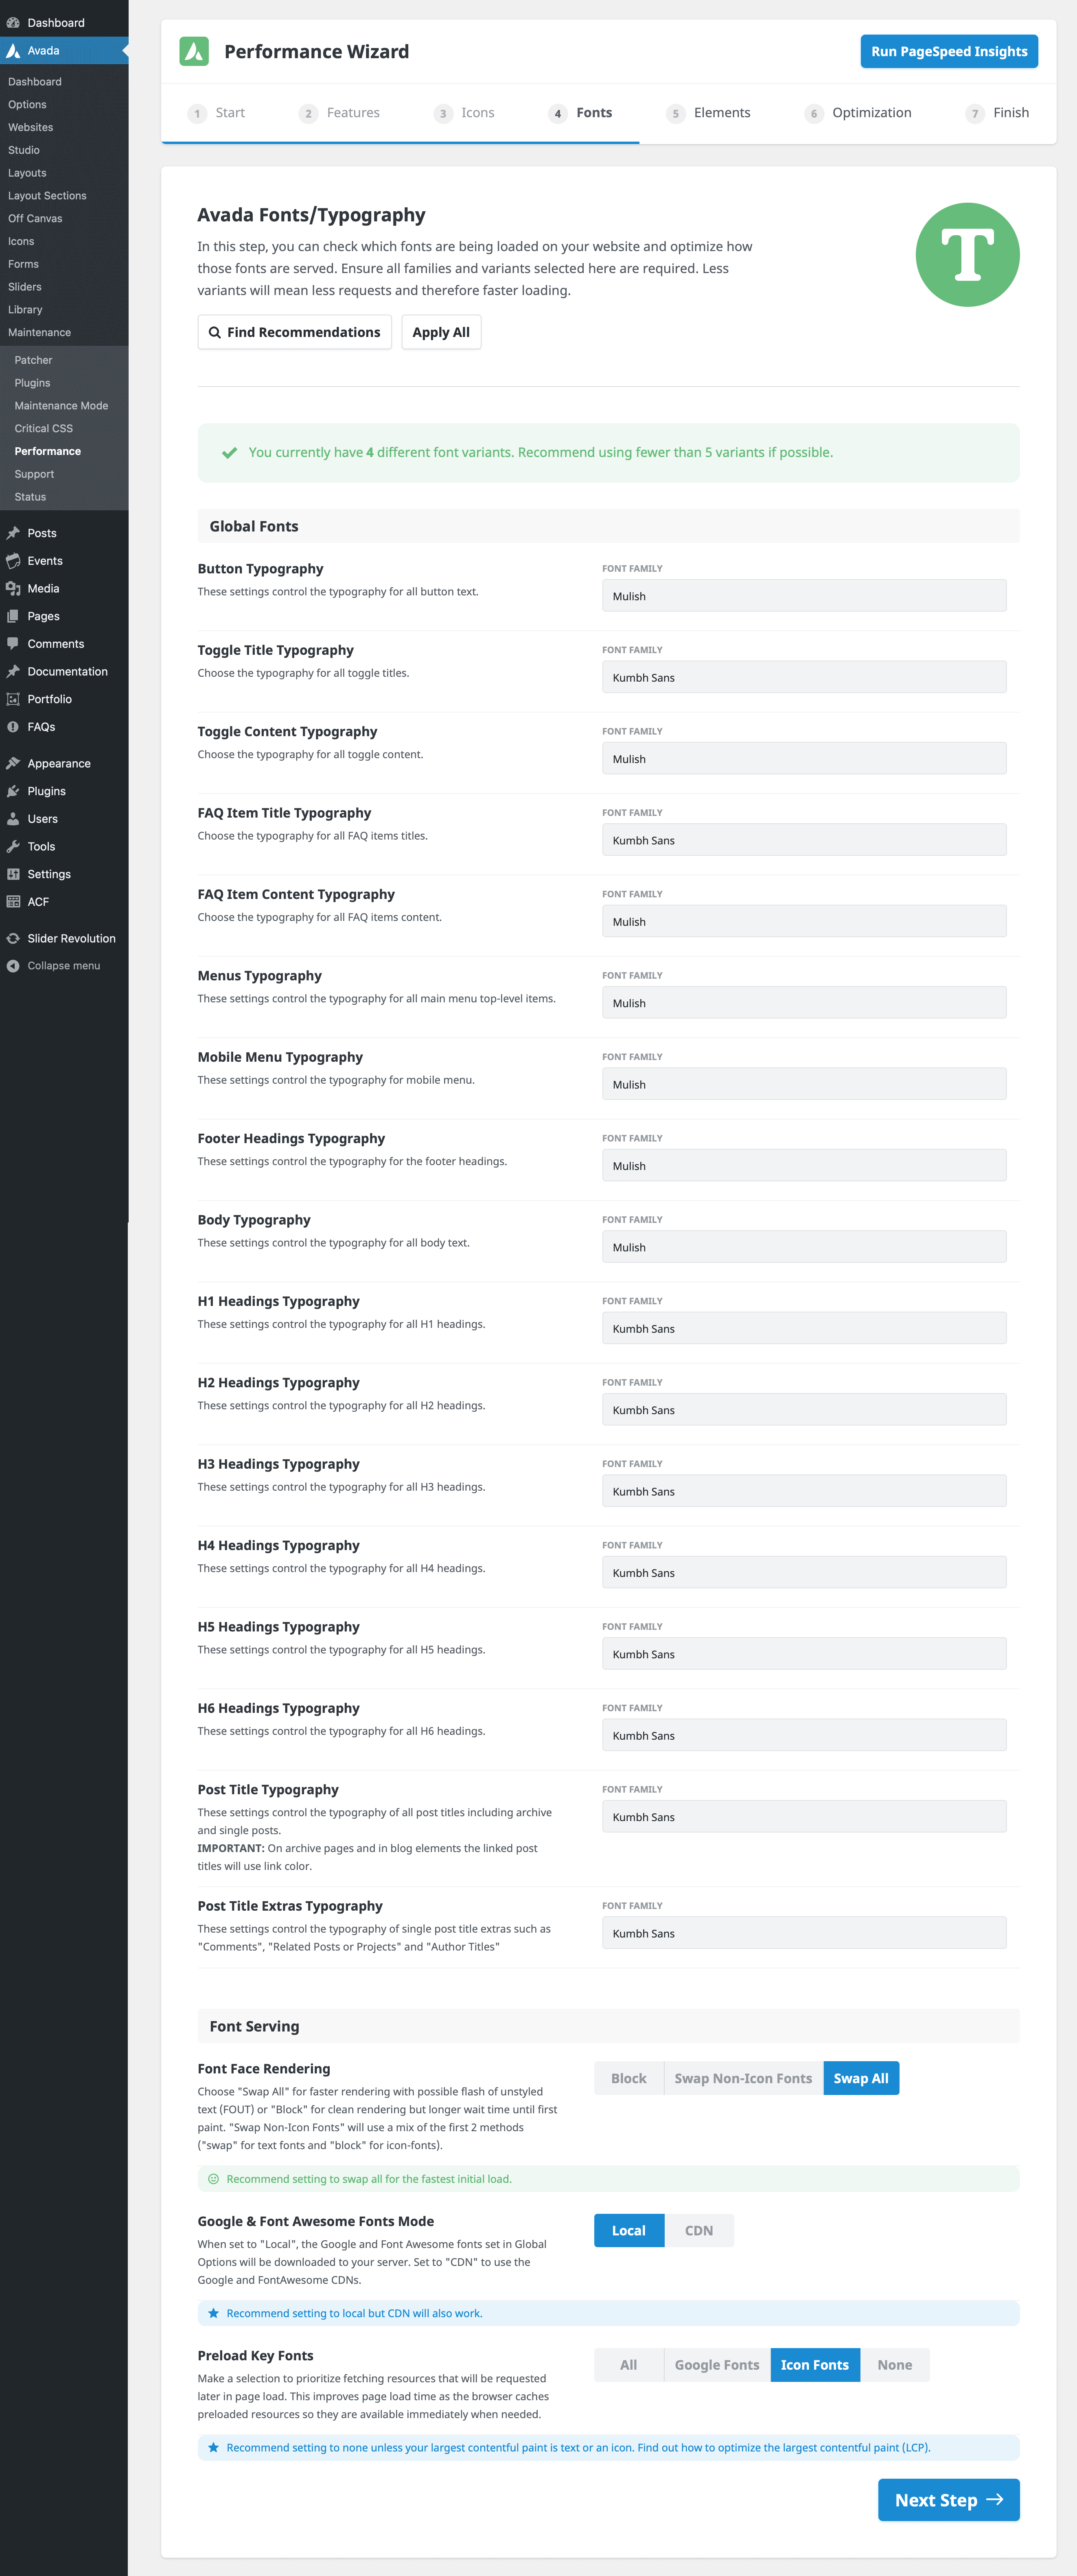
The Fonts step identifies fonts currently in use and recommends adjustments to reduce the number of variants loaded if applicable. For example, if a specific variant like Open Sans is used minimally, it can be replaced with a primary font to simplify the selection. The wizard also suggests changing the font rendering option to “Swap All” for better load times and preloading the essential fonts, such as headers, to improve initial load performance.
Step 5: Elements
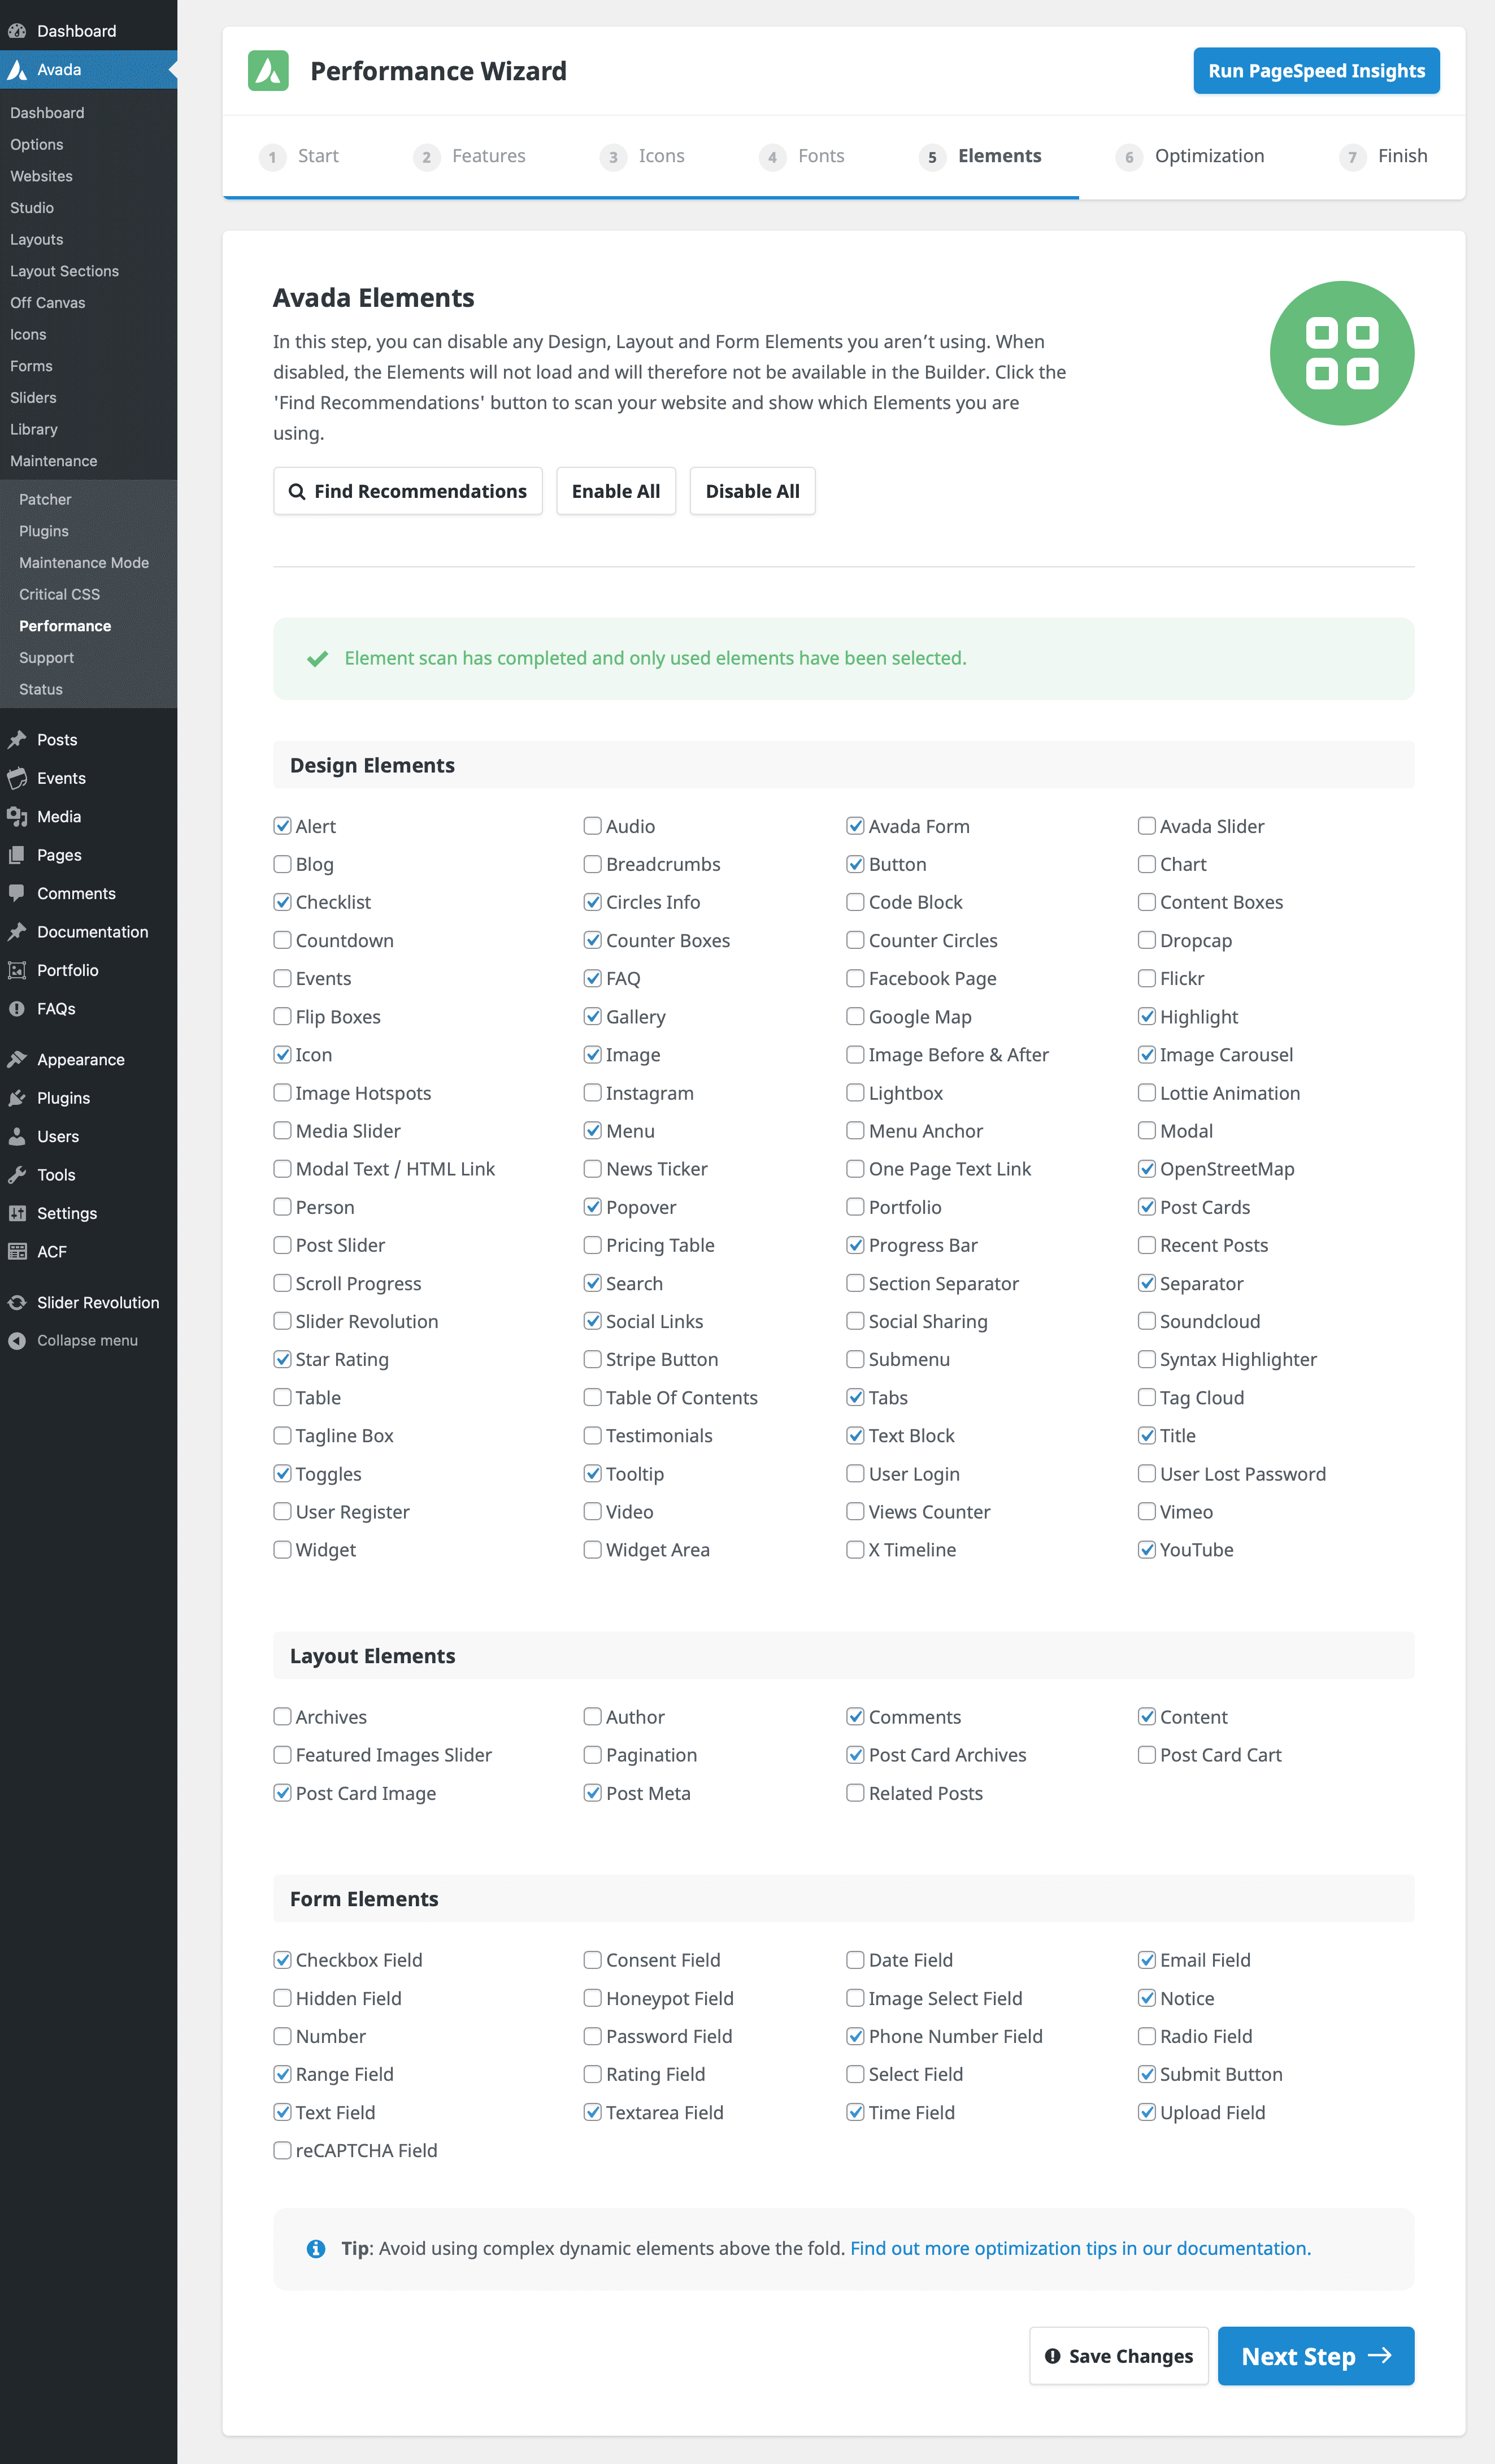
In this step, you can turn off any Design, Layout, or Form Elements you aren’t using. The wizard scans the site to determine which elements are used and automatically disables unused ones. Reducing unnecessary elements decreases DOM size and improves loading times. Users can re-enable elements later if they add new content, as all changes are reversible from the Builder Options page. We also suggest that you read this comprehensive Avada Optimization Guide.
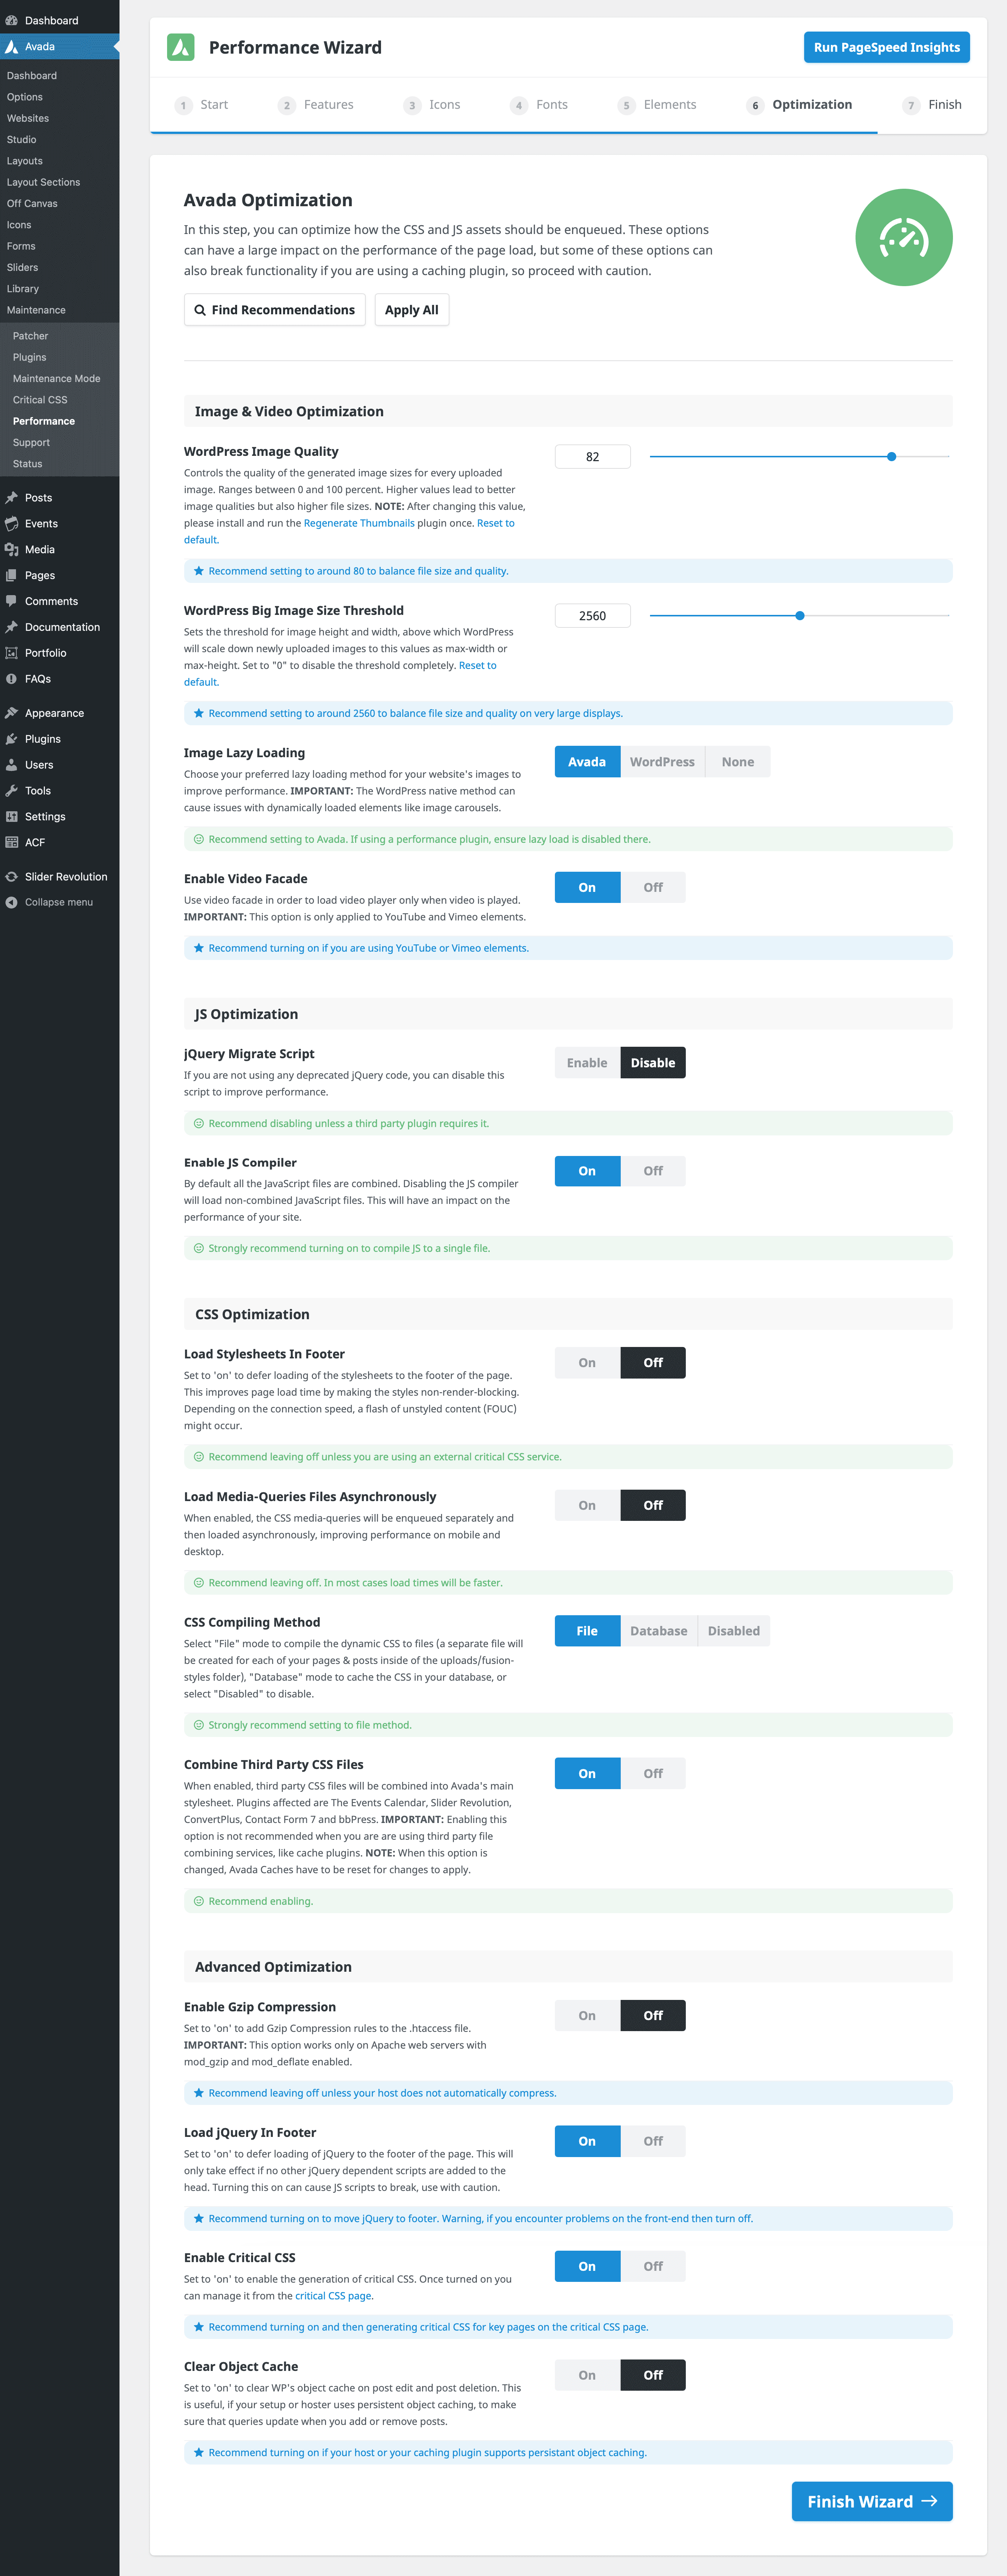
Step 6: Optimization
In this step, you can optimize how the CSS and JS assets should be queued. These options can significantly impact the page load’s performance, but some of them can also break functionality if you are using a caching plugin, so proceed with caution.
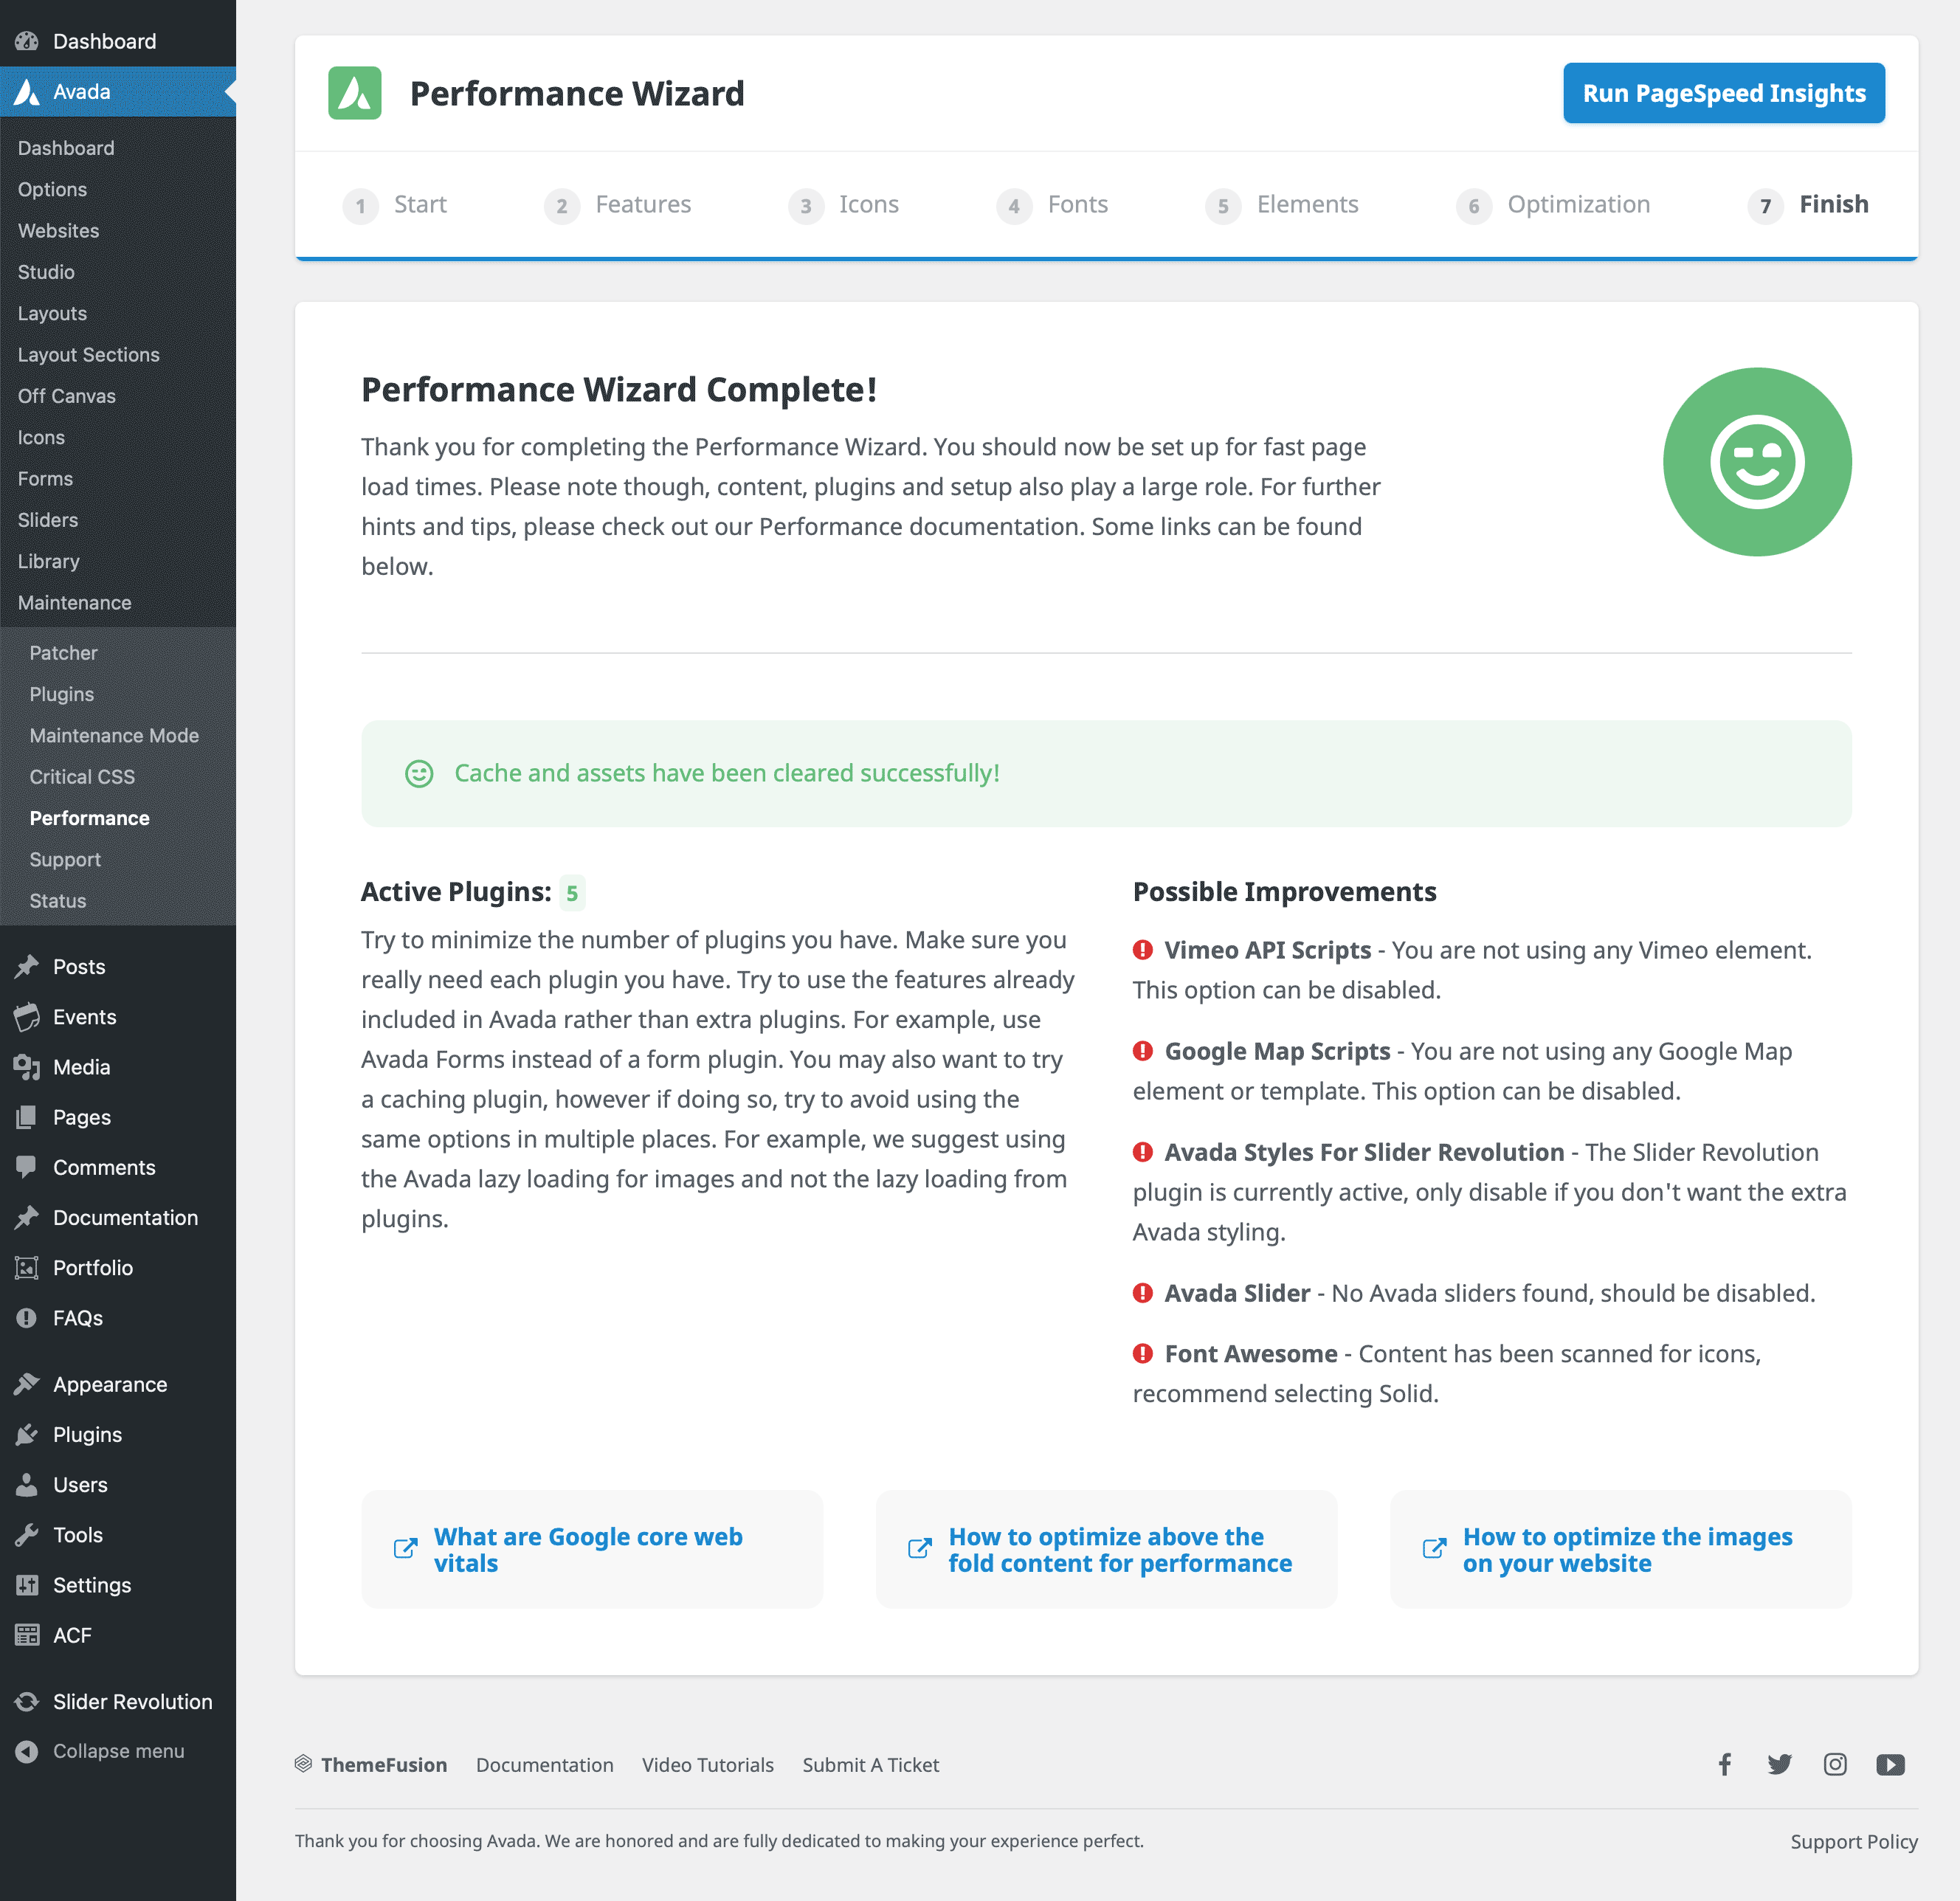
Step 7: Finish
You have reached the final stage and completed the optimization of your Avada website. Critical CSS optimizes above-the-fold content, allowing the site to render key styles while deferring the rest. By generating critical CSS for all pages, users can ensure faster initial loading, enhancing the user experience. This step can take some time, based on the site’s content.
Retesting and Further Optimization Tips
After completing the wizard, users can clear the site cache and revisit the Lighthouse report for an updated performance score. Improvements in load scores will reflect the impact of the adjustments made. Avada suggests additional techniques for further optimization, such as using a CDN, selecting faster hosting, and ensuring all images are appropriately sized and optimized.
Resources
Summary
The Avada Performance Wizard is an excellent tool for users looking to improve their website’s performance. Following the wizard’s recommendations, users can make impactful changes with minimal effort, setting up their website for better loading speeds and a smoother user experience. Avada provides additional resources for further insights on optimizing above-the-fold content and advanced load time strategies.

