How To Use Font Awesome Icons with Avada
Last Update: October 31, 2025
Font Awesome is the world’s most popular and easiest to use icon set. We have integrated it into Avada, so you can add any of the thousands of free Font Awesome Icons to your content. The full set of styling options available allows you to choose any icon size, weight, color, background, rotation, and more. And every icon is 100% full vector, so they look incredibly sharp and are retina-ready!
As well as all the free icons, there is also Font Awesome Pro Integration in Avada, giving you access to a crazy 22,000+ Font Awesome Icons through the Avada Builder.
How To Use Font Awesome Icons with Avada
Before using Font Awesome Icons in Avada Builder, it’s best to start in the Global Options, as there are several options that affect how Font Awesome Icons are displayed in the Builder.

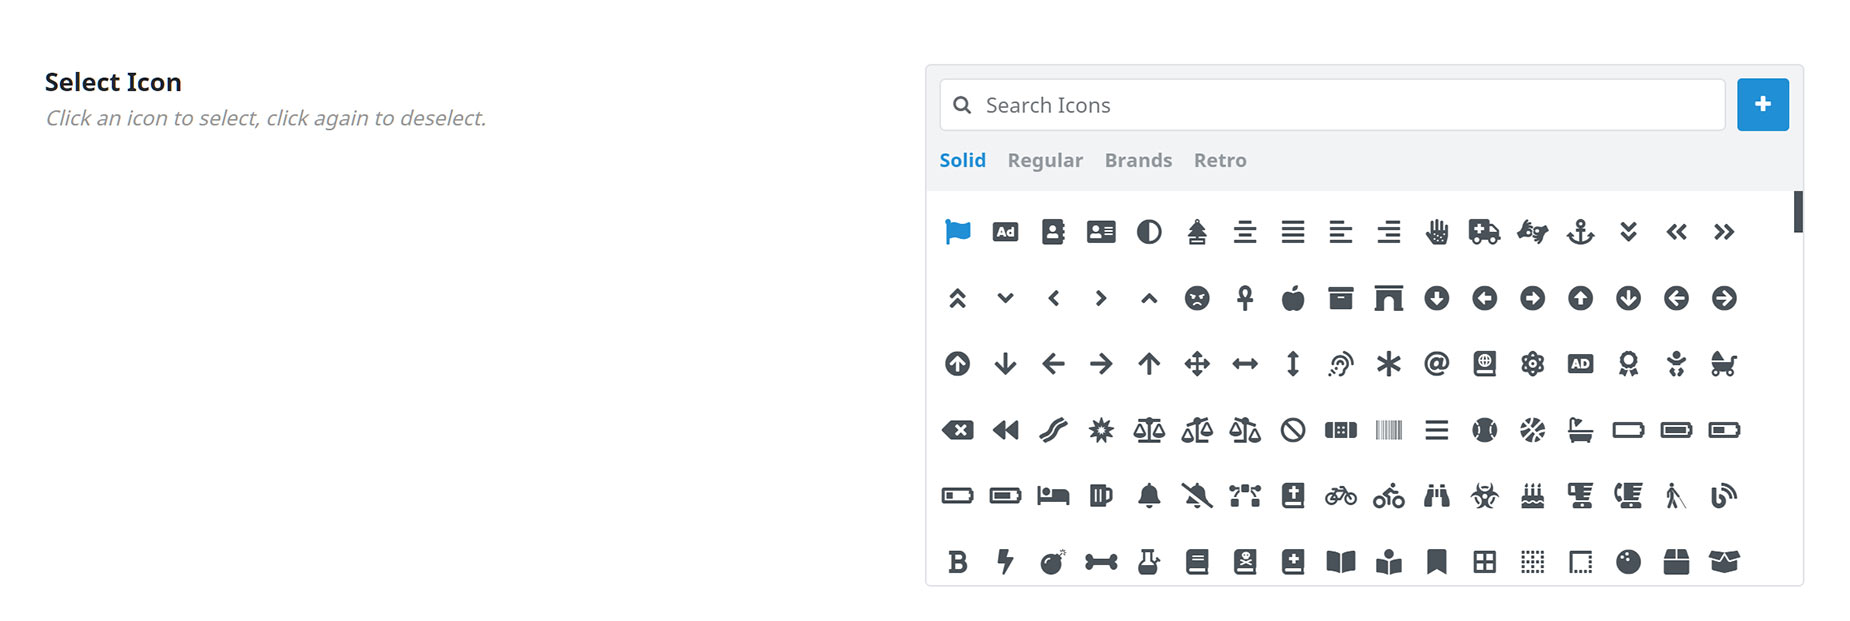
Accessing Font Awesome Icons in Avada Builder
Once you’re set up in the options, you can add Font Awesome Icons in any of the Elements that support icons. If you want to add an icon on its own, use the new Icon Element. But icons can also be used in several other elements, including the Alert, Button, Checklist, and Content Boxes Element, to name just a few. In short, anywhere you find the Icon Picker, you will be able to use the Font Awesome Icons in your content.
How To Fix Missing Font Awesome Icons Or Custom Fonts
There are a few scenarios when Font Awesome icons or Custom Fonts might not show up. Read below to see the most common causes of this issue.
Fonts Hosted On Different Domain
All browsers require fonts to be hosted on the same domain (and a sub-domain is considered a separate domain name). If your Font Awesome Icons or custom fonts are not showing up in a certain browser (mainly Firefox or IE), then you have two solutions for the issue.
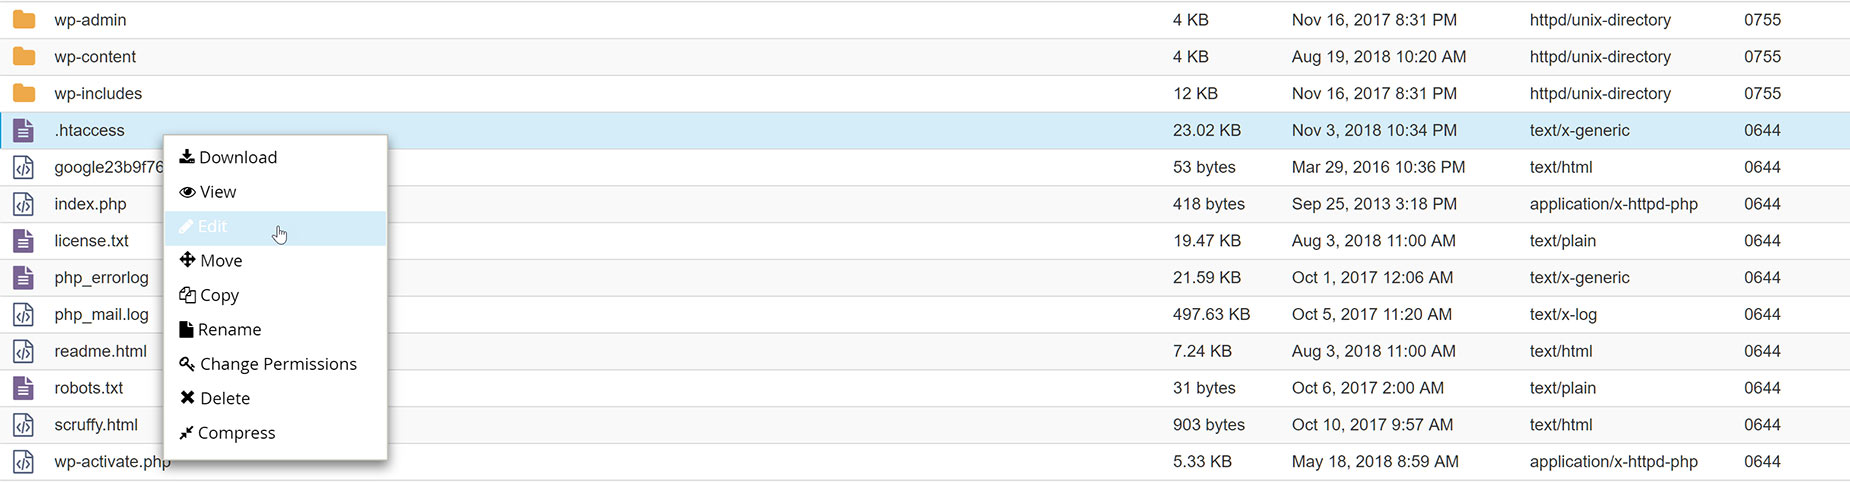
To create or edit your .htaccess file, you need to log in to your server via FTP or through your cPanel File Manager, and find the root folder of your WordPress installation (you can see the ‘wp-admin’, ‘wp-content’ etc folders there). If there is already a .htaccess file there, you can right click and edit it directly on the server if you are using File Manager. If you are using FTP, you will need to download it, edit it and then upload it. (In Filezilla, there is a right click ‘edit’ and this effectively does the same thing.)
If you don’t have a .htaccess file (on File Manager, make sure you have ‘Show Hidden Files (dotfiles)’ selected in the Settings Menu), then you will need to create one, add the code above, and upload it. You can do this in any text editor. For a more step by step tutorial, read this!
Font Awesome Subsets Not Selected
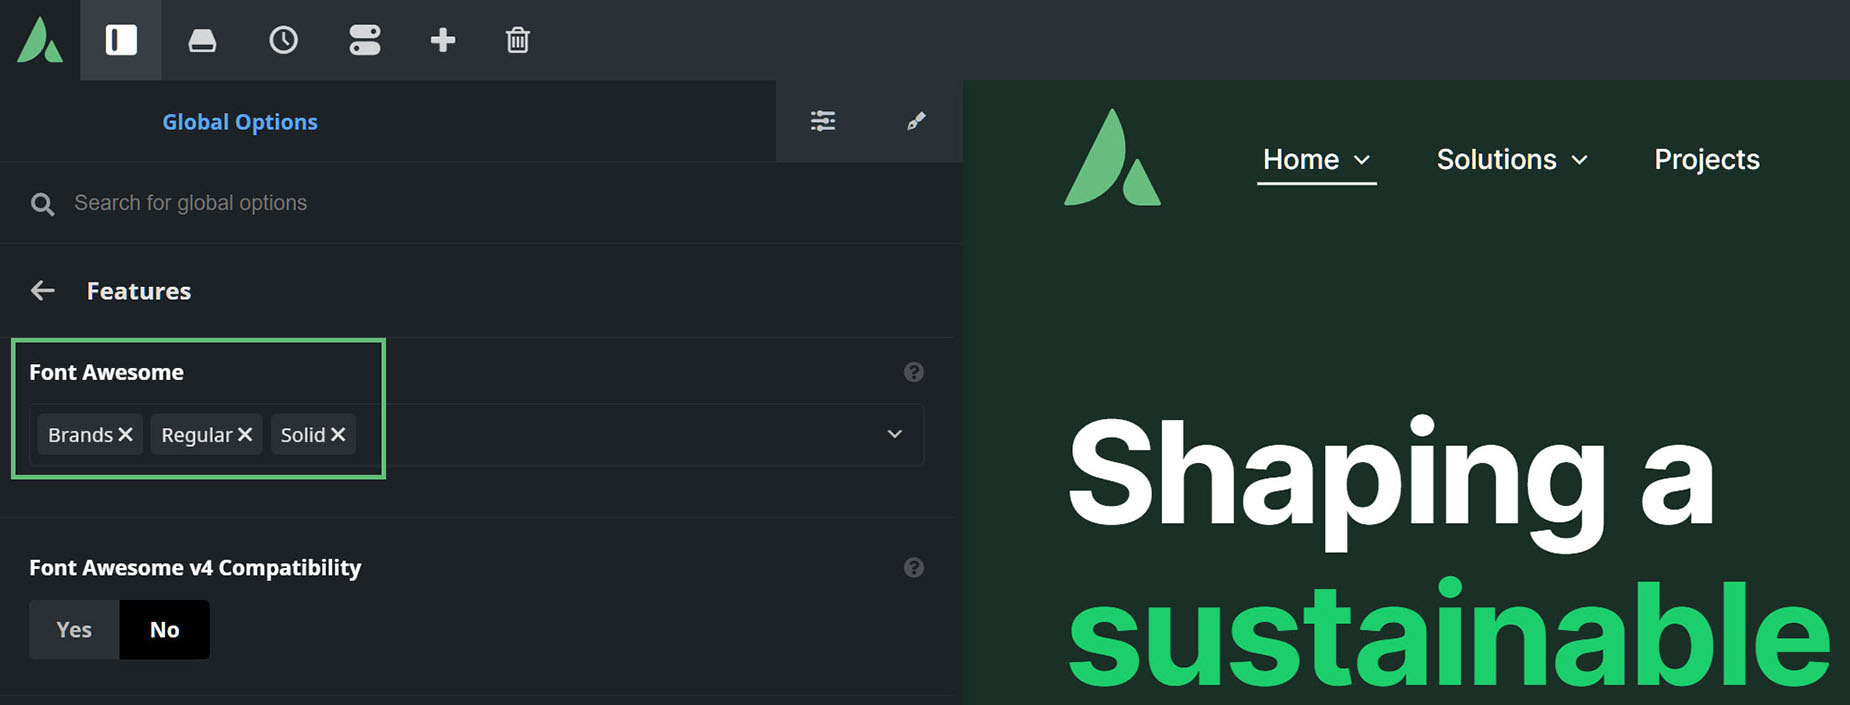
Another scenario when the Font Awesome icons do not show, is when no Font Awesome font subset is selected in the Features section of the global options (Avada > Options > Advanced > Features > Font Awesome). Ensure at least one subset is selected.
After Site Migration
In some cases, when users migrate sites, the Font Awesome files can still show a path to the old site, and this causes the font to now show. Resetting the Avada Caches easily fixes this (Avada > Options > Performance > Reset Avada Caches).


