How To Update The Avada Website Builder
Last Update: February 25, 2026
Updating your WordPress website is essential for keeping it secure, stable, and performing at its best. Updates often include important security fixes that protect your site from vulnerabilities, as well as bug fixes that prevent errors or unexpected behavior. Staying up to date also ensures compatibility between WordPress, Avada, and plugins, reducing the risk of conflicts or broken features.
In addition to security and stability, updates bring performance improvements and new features that enhance how your site works and how easy it is to manage. For a feature-rich Avada setup, regular updates help ensure everything runs smoothly, giving you access to the latest tools while maintaining a reliable, professional website.
There are two ways to update a WordPress website. The first method is to auto-update via WordPress, which requires you to register your Avada website. The second is to manually update via FTP. Before you update, it’s best practice always to check the Important Update Information help file, which is updated with each new version.
To make a full site and database backup, please see this help file. This ensures you can revert to a working version if anything unexpected occurs. Read on to find out all there is to know about updating Avada, and watch the video below for a visual overview of the auto update method in WordPress.
Updating Your WordPress Website: Best Practices
Avada Important Update Information
Before updating Avada to a new version, it’s important to check the Important Update Information help file. This article is regularly updated and updated whenever a new version is released.
Updating From Much Older Avada Versions?
If you have not updated your Avada website in a very long time, you must update it in a sequential process to avoid potential issues. The link below provides detailed information and the steps to follow.
Method 1: Update via The WordPress Dashboard
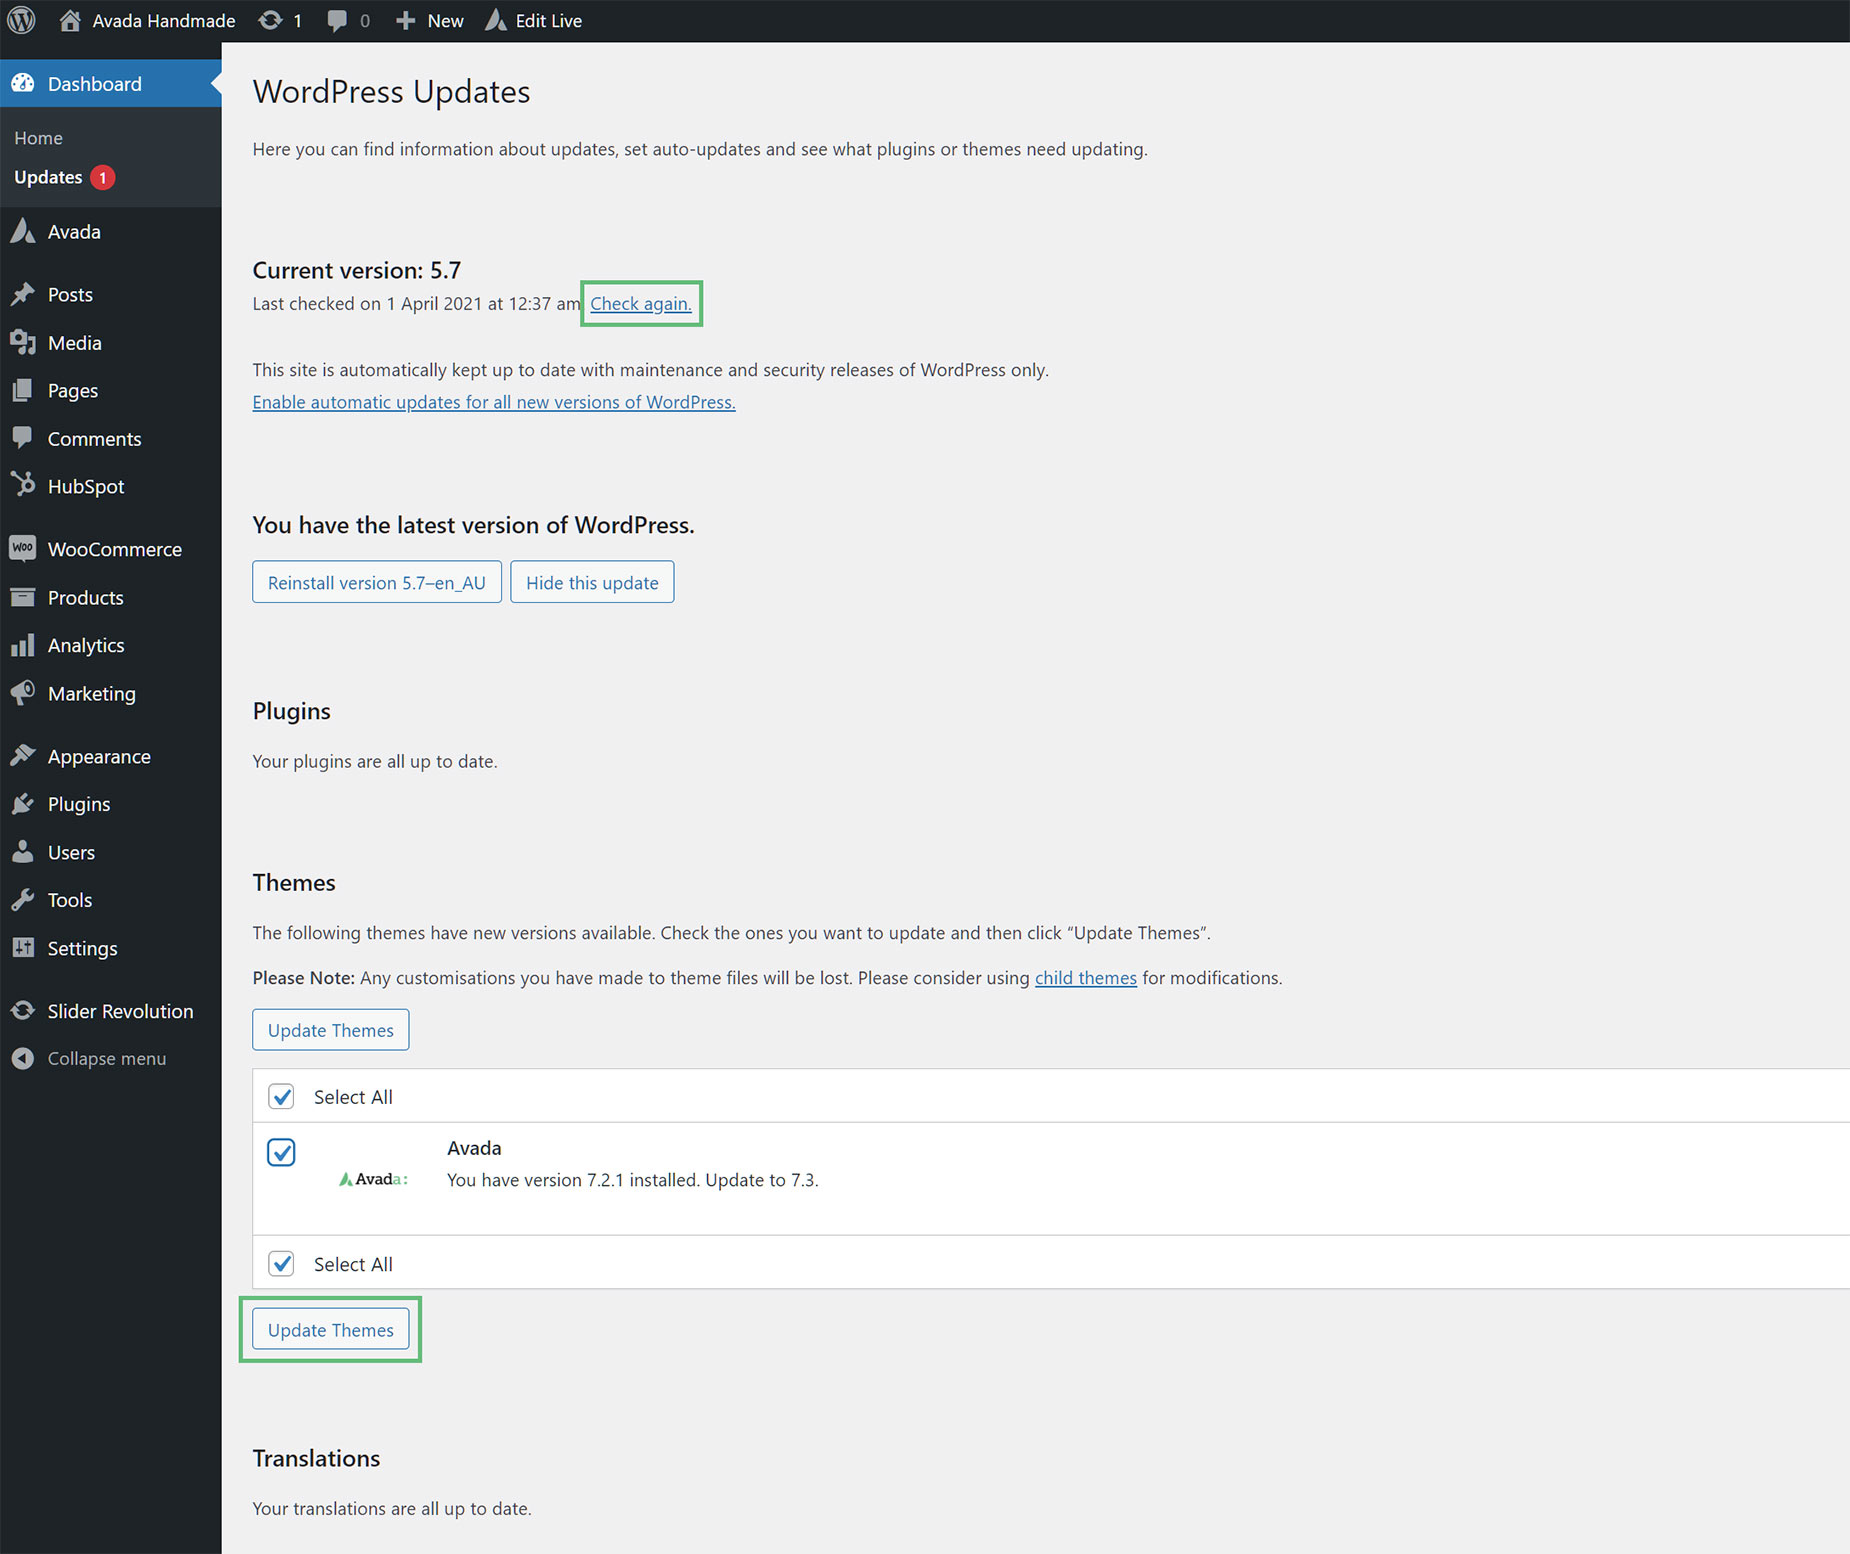
Providing that your Avada website is registered, you will receive update notifications in the WordPress Dashboard > Updates section of your installation, and the update will require user confirmation to complete.
How To Update Via WordPress
Method 2: Update Manually via FTP
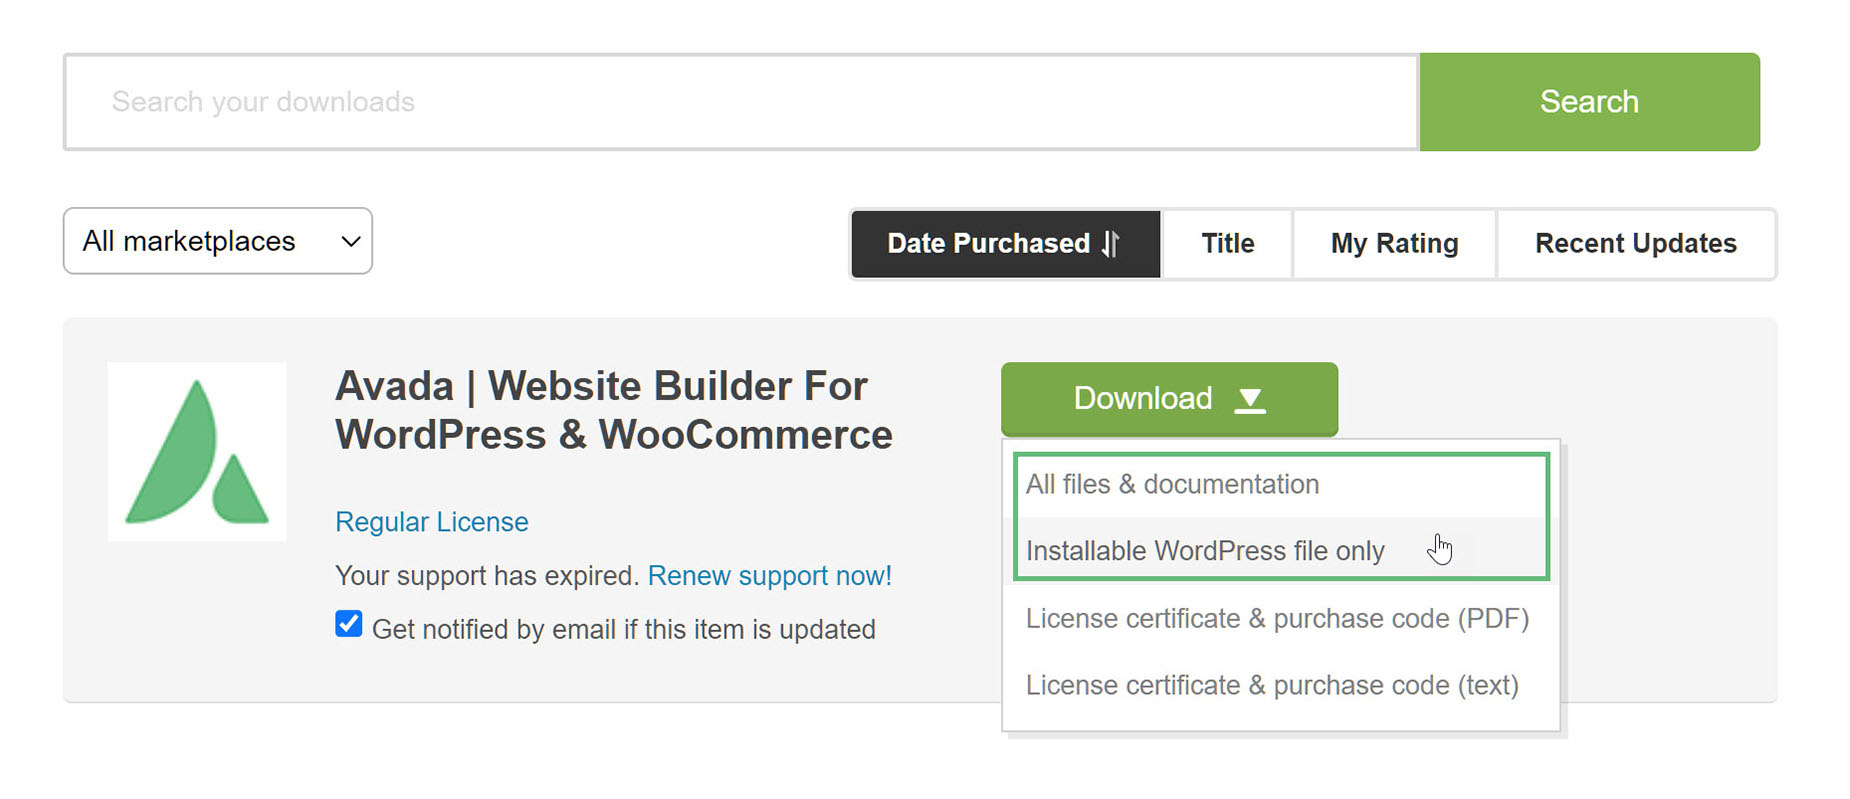
With this manual method, you can upload the Avada theme files using FTP to the web server. Before you can update manually, you have to download the Avada theme files from Themeforest as explained below.
Download The Latest Avada Files From Themeforest
How To Update Via FTP
When updating via FTP, you must delete the old Avada folder (not replace or overwrite it). If you only overwrite the folder, any files removed in the new version will remain in your site’s theme files. This is because it only updates files with exactly matching names. This will cause issues in the theme, including fatal errors.

Updating The Avada Required Plugins
Avada has two required plugins – Avada Core & Avada Builder. Without these plugins, Avada won’t work properly. With every Avada update, the required plugins need to be updated as well to avoid compatibility issues. To learn how, please follow the link below.
Troubleshooting
“Are You Sure You Want To Do This?” Error Message
If you get the “Are You Sure You Want To Do This” message when installing the “Avada.zip” file via WordPress (Method 1), it means your server has an upload file size limit set by your host. If this happens, contact your hosting company to increase the limit. The recommended upload minimum limit is 32M.
Theme Install Failed “Destination Folder Already Exists”
You may be getting this error because you have a duplicate “Avada” folder. This error occurs because WordPress only allows you to upload one theme with the same name when using the WordPress Dashboard.
When a plugin or theme’s installation fails, it leaves behind an empty destination folder. The same happens when an old plugin or theme’s folder isn’t removed properly due to an interruption. This rogue folder stops WordPress from completing the installation.
To resolve this, delete the “Avada” folder using FTP or using your web host’s cPanel interface. Alternatively, you can update the theme using FTP.


