How To Update The Avada Website Builder
Last Update: October 1, 2025
We want to ensure your Avada update goes as smoothly as possible. And so, we’ve created a comprehensive guide to help you with this process, regardless of which Avada version you’re currently on, and what methods you prefer to use. Please read this in full so you’re informed of how to best update your Avada site. Take note of our Table of Contents section to the right to help guide you through this post’s content.
There are basically two ways to update Avada. The first method is our Auto Update feature via WordPress, which just requires you to register Avada via Purchase Code Registration. The second is to update Avada manually, either via FTP or WordPress. These method require you to first download the Avada files from ThemeForest.
Before you update, it’s best practice to always check our Important Update Information article which is updated for each new version, and to make a full site and database backup. This will ensure you can revert to a working version if anything unexpected occurs. Read on to find out all there is to know about updating Avada, and watch the video below for a visual overview of the Auto Update method in WordPress.
How To Update: Best Practices
Important Update Information
Before you update to a new version of the theme, it’s important to always check our Important Update Information article. This article is regularly updated and changes every time a new version is released.
Updating From Older Avada Versions
If you’re on an old version of Avada, it’s important that you update in a sequential process. Please see the linked article below for specific information for your old version.
The WordPress Auto Update Method
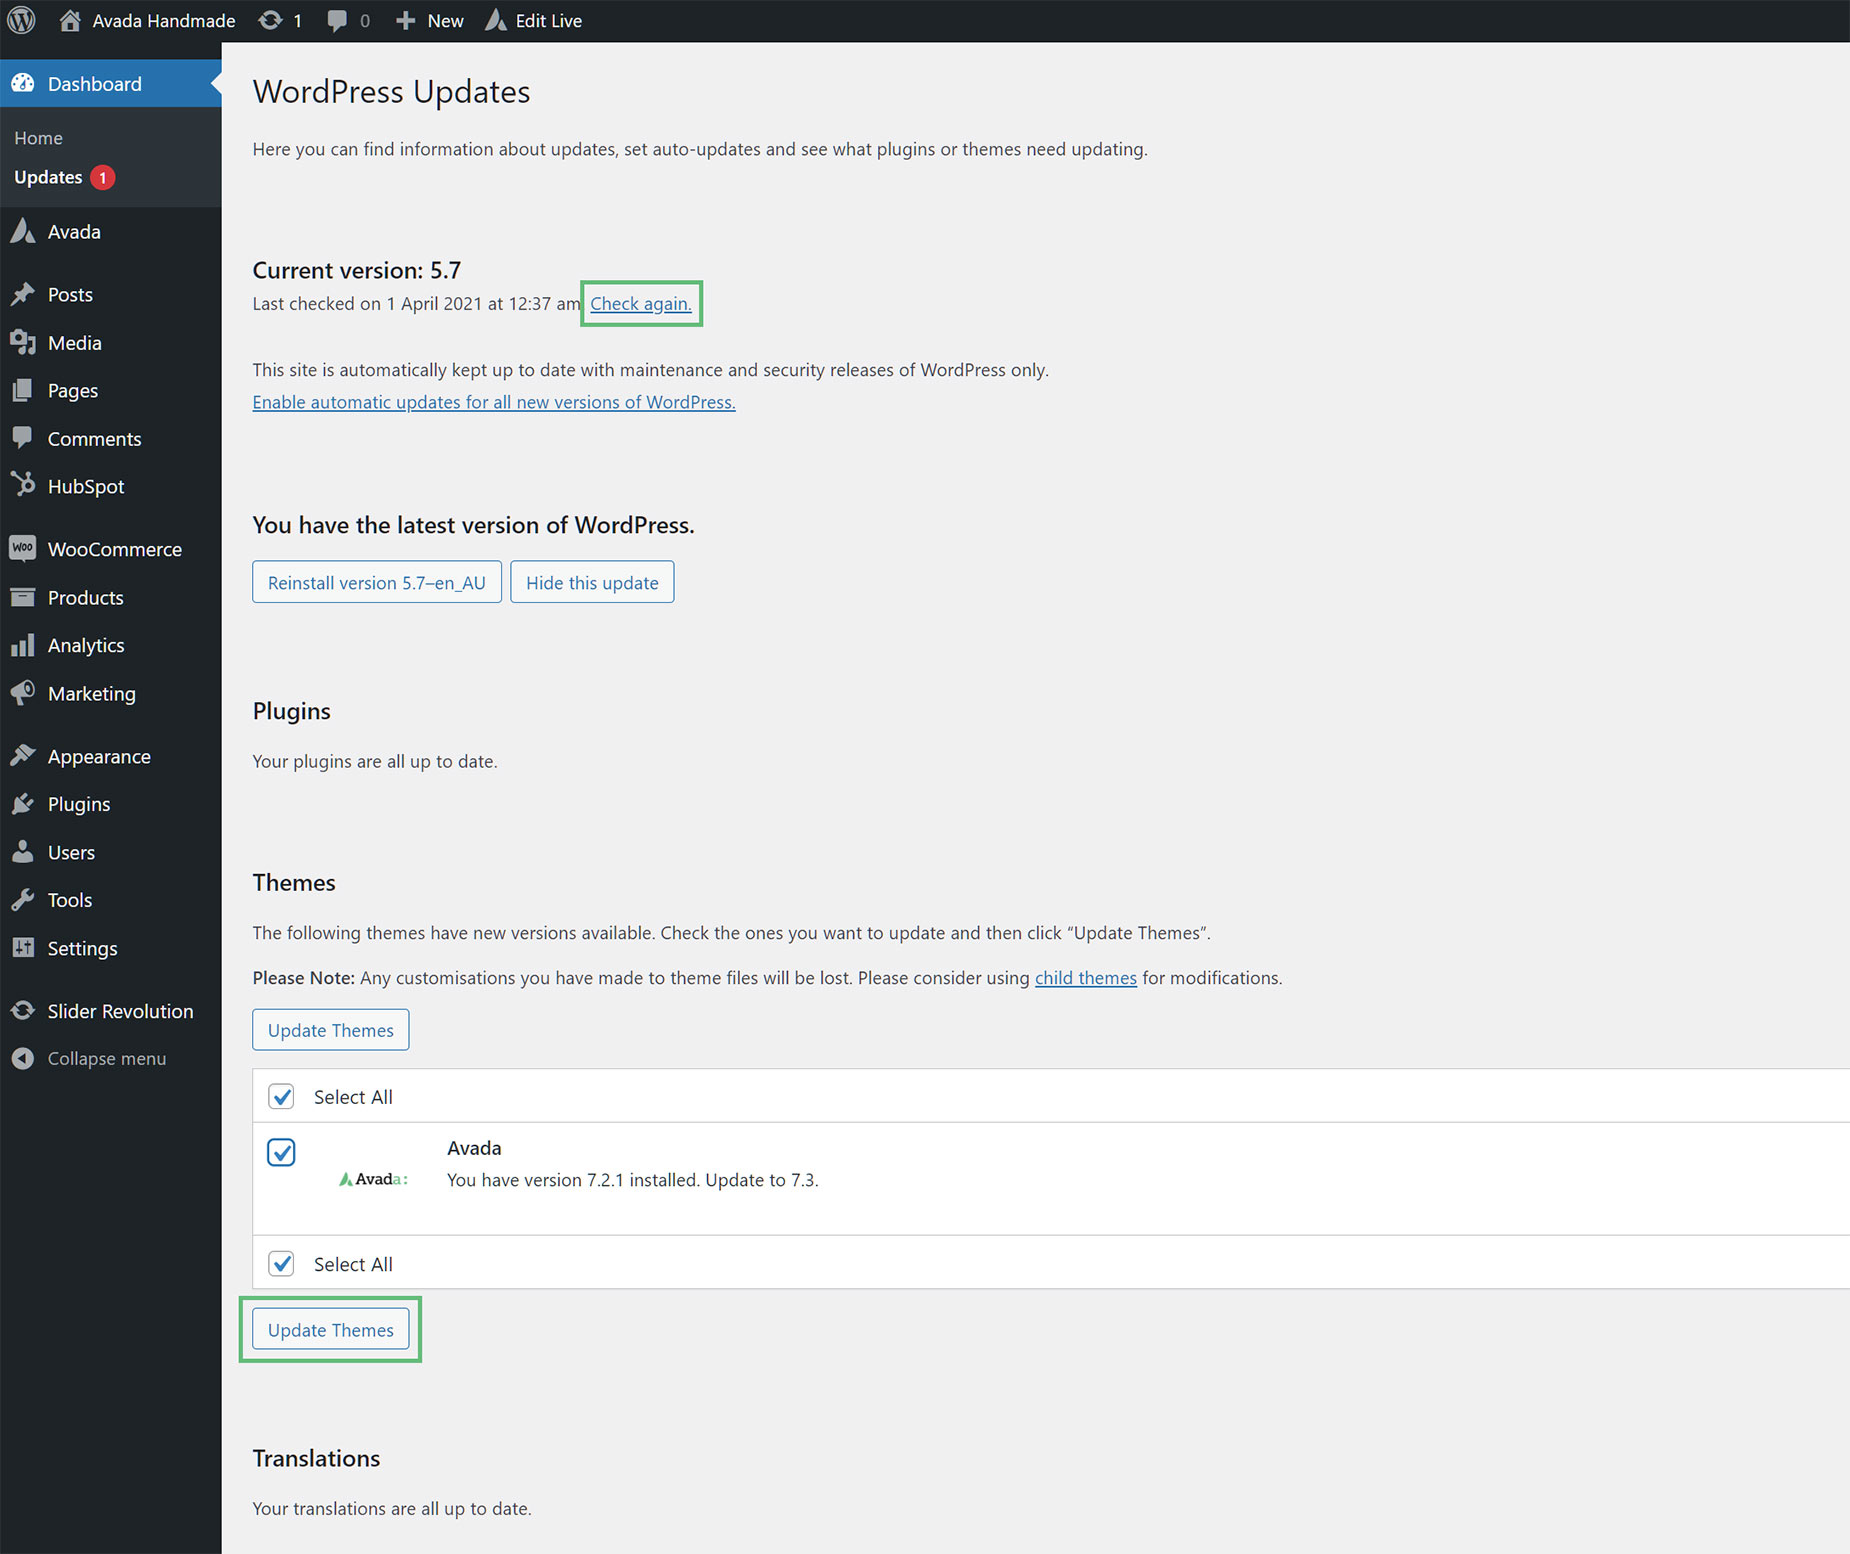
The easiest way to update Avada is to use our Automatic Update feature, which requires you to register your product. Once you have registered the product and an Avada update is released, you will receive an update notification in the WP Dashboard > Updates section of your installation and requires user acknowledgment to complete the update. NOTE: To ensure you receive the notification, make sure you have a second, backup theme installed, such as Twenty Twenty Three.
How To Update Via WordPress
The Manual Update Methods
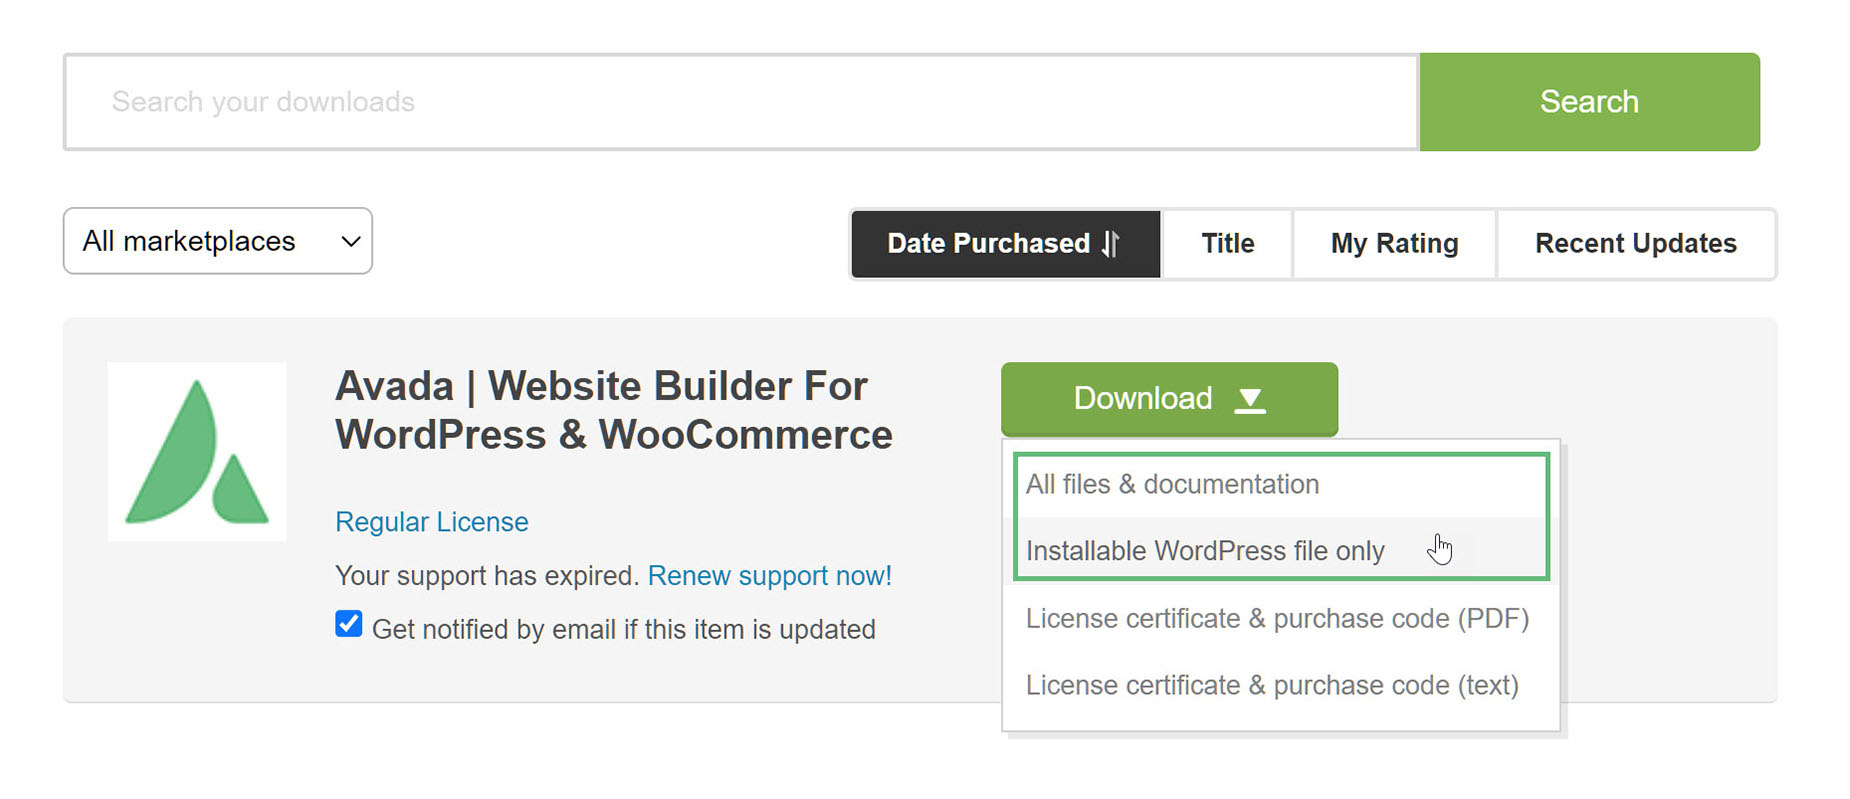
With the Manual Update Methods, you can either choose to upload the theme files manually via FTP or WordPress. Before you can update manually, you have to download the theme files from Themeforest. Continue reading below for instructions on how to download the theme files and how to upload them.
Download The Latest Avada Files From Themeforest
1: How To Update Avada Manually Via FTP
If you update via FTP, it’s important that you delete (not replace or overwrite) the old Avada folder. If you only overwrite the folder, then any files that were removed in the new version will remain in your site’s theme files. This is because it only updates exactly matching file names. This will cause issues in the theme, including fatal errors. When you update via the WordPress admin, the folder is automatically deleted first in the installation process.
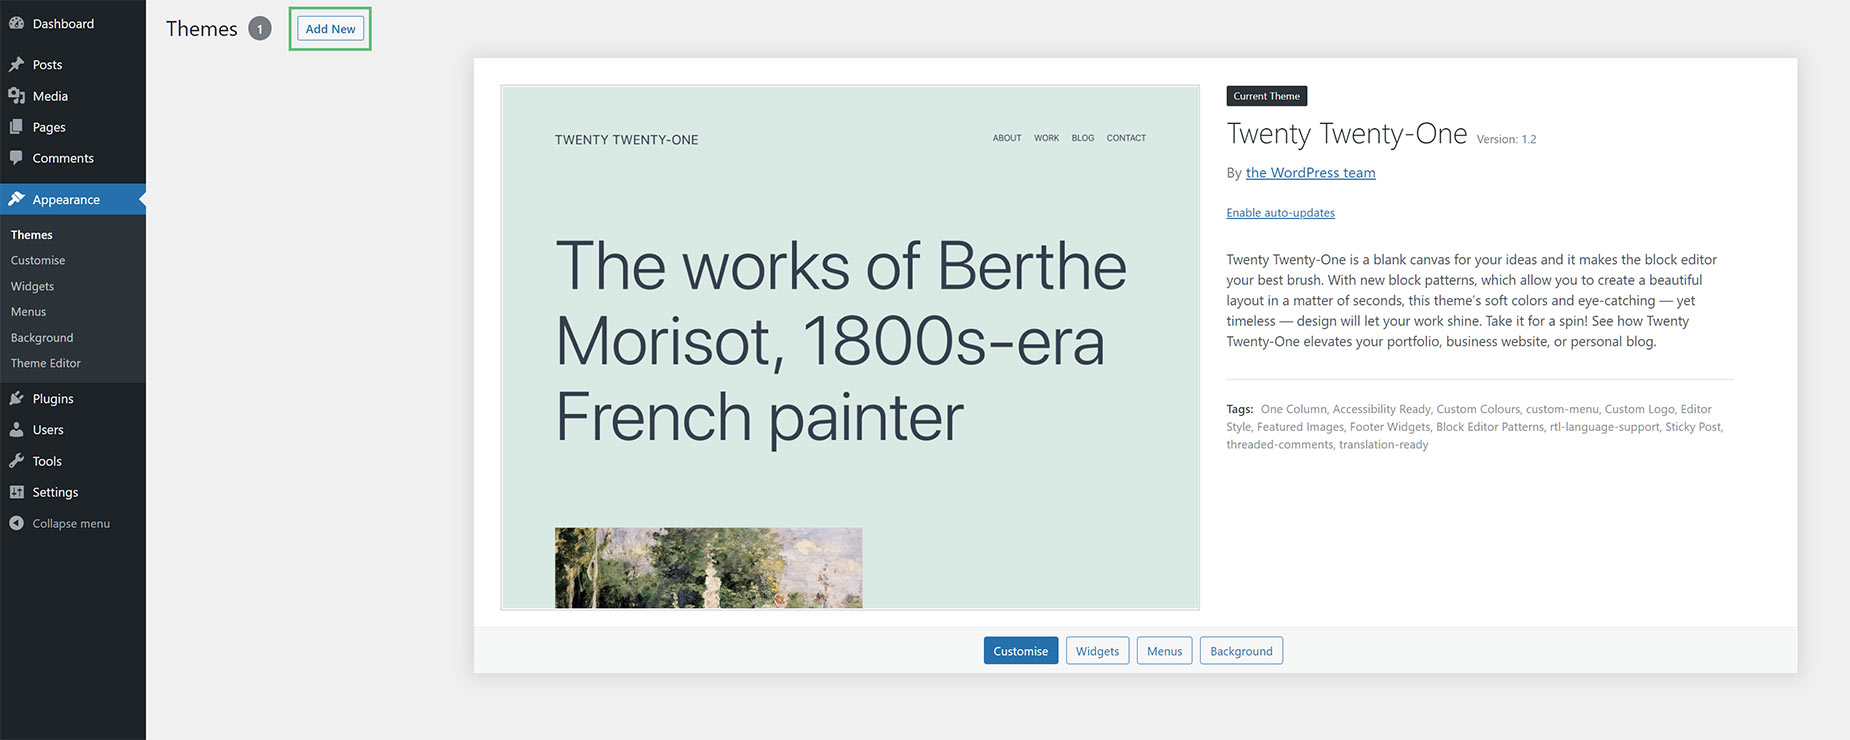
2: How To Update Avada Manually Via WordPress
When you auto update via WordPress, your old theme folder will be deleted automatically, so you won’t need to do that yourself.
Updating The Required Plugins
Avada has two required plugins – Avada Core and Avada Builder. Without these plugins, Avada won’t work properly. With every update, there’s always an update for the required plugins. Make sure you update the required plugins after updating the theme to ensure that you don’t run into any compatibility issues. To learn how, please follow the link below.
Troubleshooting
‘Are You Sure You Want To Do This?’ Error Message
If you get the “Are You Sure You Want To Do This” message when installing the ‘Avada.zip’ file via WordPress, it means your server has an upload file size limit, which is set by your host. If this happens, install the theme via FTP, or contact your hosting company and ask them to increase the limit. We recommended an upload limit of 32M.
Theme Install Failed ‘Destination Folder Already Exists’
You may be getting this error because you have a duplicate ‘Avada’ folder. This error happens because WordPress only allows you to have one theme with the same name when uploading the theme via WordPress admin. We recommend updating the theme via the Auto Update method to get around this, or you can update the theme via FTP.


