Avada Speed & Performance

Last Update: May 20, 2026

Avada is created with both speed and performance in mind. Avada is highly optimized and provides you with the ability to get good speed test scores on most tools like Google PageSpeed Insights, GTMetrix, Pingdom, and Web Page Speed Test.

Of course, the final result will depend heavily on your site’s content. But Avada also offers a range of options to help you further tweak performance and load times. Let’s have a look at an overview of what’s on offer, and where you can tweak your settings.

Performance Wizard

This Wizard is meant to be used after your website has been completed, and it takes you through several steps to help you decide what features to turn off to help optimize the loading speed of your website. Please see the Performance Wizard documentation for more information on how to use this feature. This process allows you to tweak options from most of the sections listed below, in a semi-automated fashion. But for most control, you can also adjust the settings in the various sections individually.

Performance Wizard - Step 1

Global Options > Performance Tab

Towards the bottom of the Avada Global Options, you will find the Performance tab. This tab has a range of options to help tweak load times, depending on your preferences. These are split into three categories, Performance, Dynamic CSS & JS, and Progressive Web App.

Performance

  • PERFORMANCE

  • Image Lazy Loading – Choose your preferred lazy loading method for your website’s images to improve performance. Choose from Avada, WordPress, or None. IMPORTANT: The WordPress native method can cause issues with dynamically loaded elements like image carousels.

  • Font Face Rendering – Choose “Swap All” for faster rendering with possible flash of unstyled text (FOUT) or “Block” for clean rendering but longer wait time until first paint. “Swap Non-Icon Fonts” will use a mix of the first 2 methods (“swap” for text fonts and “block” for icon-fonts).

  • Preload Key FontsMake a selection to prioritize fetching resources that will be requested later in page load. This improves page load time as the browser caches preloaded resources so they are available immediately when needed. Choose from All, Google Fonts, Icon Fonts, or None.

  • Optimize Offscreen Rendering – When enabled, Containers that are below the fold are only rendered when the visitor scrolls near them. This reduces the amount of work the browser does during the initial load, which can make pages load faster and scroll more smoothly — especially on content-heavy pages. Headers, footers, and the first (few) above-the-fold Containers are automatically exempted so hero content is unaffected. You can override the behaviour per Container in its Extras tab.
  • Emojis ScriptIf you don’t use emojis you can improve performance by removing WordPress’ emojis script.

  • jQuery Migrate ScriptIf you are not using any deprecated jQuery code, you can disable this script to improve performance.

  • Load jQuery In FooterSet to ‘on’ to defer loading of jQuery to the footer of the page. This will only take effect if no other jQuery dependent scripts are added to the head. Turning this on can cause JS scripts to break, use with caution.

  • Load Stylesheets In Footer – Set to ‘on’ to defer loading of the stylesheets to the footer of the page. This improves page load time by making the styles non-render-blocking. Depending on the connection speed, a flash of unstyled content (FOUC) might occur.

  • Enable Gzip CompressionSet to ‘on’ to add Gzip Compression rules to the .htaccess file. IMPORTANT: This option works only on Apache web servers with mod_gzip and mod_deflate enabled.

  • Enable Video FacadeUse video facade in order to load video player only when video is played. IMPORTANT: This option is only applied to YouTube and Vimeo elements.

  • Clear Object CacheSet to ‘on’ to clear WP’s object cache on post edit and post deletion. This is useful, if your setup or hoster uses persistent object caching, to make sure that queries update when you add or remove posts.

  • IMAGES

  • SVG Media UploadEnable upload of SVG files and improve performance through their smaller image and logo file size.

  • Upload Image Format – Select a modern format to use when uploading new images to the media library. If you choose AVIF but your server is not able to convert to this format, it will automatically fall back to webP. You can also convert all your existing images on the System Status page.

  • WordPress Image Quality – Controls the quality of the generated image sizes for every uploaded image. Ranges between 0 and 100 percent. Higher values lead to better image qualities but also higher file sizes. NOTE: After changing this value, please install and run the Regenerate Thumbnails plugin once.

  • Avada Image Sizes – Choose which Avada image sizes should be created for every image uploaded to the Media Library. NOTE: Image sizes used in legacy areas/features of Avada are marked with (L). When you remove image sizes here, please check your site to make sure all layouts display correctly. After changing this value, please install and run the Regenerate Thumbnails plugin once.

  • WordPress Big Image Size Threshold – Sets the threshold for image height and width, above which WordPress will scale down newly uploaded images to this values as max-width or max-height. Set to “0” to disable the threshold completely. In pixels.

  • Image Lazy LoadingChoose your preferred lazy loading method for your website’s iframe to improve performance. Choose from Avada, WordPress, or None.

  • DYNAMIC CSS & JS

  • CSS Compiling Method – Select “File” mode to compile the dynamic CSS to files (a separate file will be created for each of your pages & posts inside of the uploads/fusion-styles folder), “Database” mode to cache the CSS in your database, or select “Disabled” to disable.

  • Combine Third Party CSS Files – Third party CSS files of the selected plugins will be combined into Avada’s main stylesheet. IMPORTANT: Enabling this option is not recommended when you are are using third party file combining services, like cache plugins. When this option is changed, Avada Caches have to be reset for changes to apply.

  • Load Media-Queries Files Asynchronously – When enabled, the CSS media-queries will be enqueued separately and then loaded asynchronously, improving performance on mobile and desktop.

  • Enable Critical CSS – Set to ‘on’ to enable the generation of critical CSS. Once turned on your can manage from the Critical CSS page.

  • Cache Server IP – For unique cases where you are using cloud flare and a cache server, ex: varnish cache. Enter your cache server IP to clear the theme options dynamic CSS cache. Consult with your server admin for help.

  • Enable JS Compiler – By default all the javascript files are combined. Disabling the JS compiler will load non-combined javascript files. This will have an impact on the performance of your site.

  • Reset Avada Caches – Resets all Dynamic CSS & Dynamic JS, cleans-up the database and deletes the uploads/fusion-styles and uploads/fusion-scripts folders. (Only in back end options)

Progressive Web App

  • Enable Progressive Web App – Enable this option if you want to enable the Progressive Web App feature and options on your website. This is primarily a caching app, under development at Google. For more information on this, please refer to this document.

  • Cache-First strategy file types – File types added in this list will be cached in the browser. Subsequent page requests will use the cached assets. Use this for static assets that don’t change like images and fonts.

  • Network-First strategy file typesFile types added in this list will be cached in the browser. Subsequent page requests will first try to get a more recent version of these files from the network, and fallback to the cached files in case the network is unreachable. If your site’s content gets updated often we recommend you can use this for your content.

  • Stale-While-Revalidating strategy file types – Any file types added here will be served with a cache-first strategy, and after the page has been loaded the caches will be updated with more recent versions of the selected file types from the network. Use this for assets that may get updated but having their latest version is not critical.

  • App Splash Screen Logo – Logo displayed for your website at 512px x 512px when installing as an app. Logo image must be in PNG format.

  • App Display Mode – If the user installs your site as an app, select how the app will behave.
  • App Theme Color – Select a color that will be used for the header of your app, as well as the browser toolbar-color on mobile devices.

Advanced Options

Features

In the Avada Global Options, you will find Features under Advanced > Features. This tab has a large range of options to enable or disable various Avada features, such as Mega Menus, YouTube and Vimeo API Scripts, Google Map Scripts and many more. If you are sure you won’t be using them, turning these features off will help improve load times, as the features will not be loaded.

To help decided which features to disable, you can now use the Performance Wizard to get recommendations your your install.

Post Types

Under Advanced > Post Types, you will find options to completely disable various post types within Avada. These include Avada Slider, Avada Forms, Avada Portfolio and Avada FAQ. Disabling these will reduce the overall footprint of the theme, offering a modest improvement.

Avada Builder Elements

You can also disable any of the Avada Builder Elements you are not using, including Layout Elements and Form Elements. You can find these at Options > Builder Options > Avada Builder Elements, from the Avada Dashboard. Disabling unused Elements can lead to a small increase in performance, but use with caution. Disabling an element will remove it from all pages/posts, old and new. If it was on a previous page/post, it will render as regular element markup on the front end.

You will also find the Run Element Scan button, which will scan your site and deselect all unused Elements for you. All you have to do is then save the options. See the Avada Builder Options doc for more info.
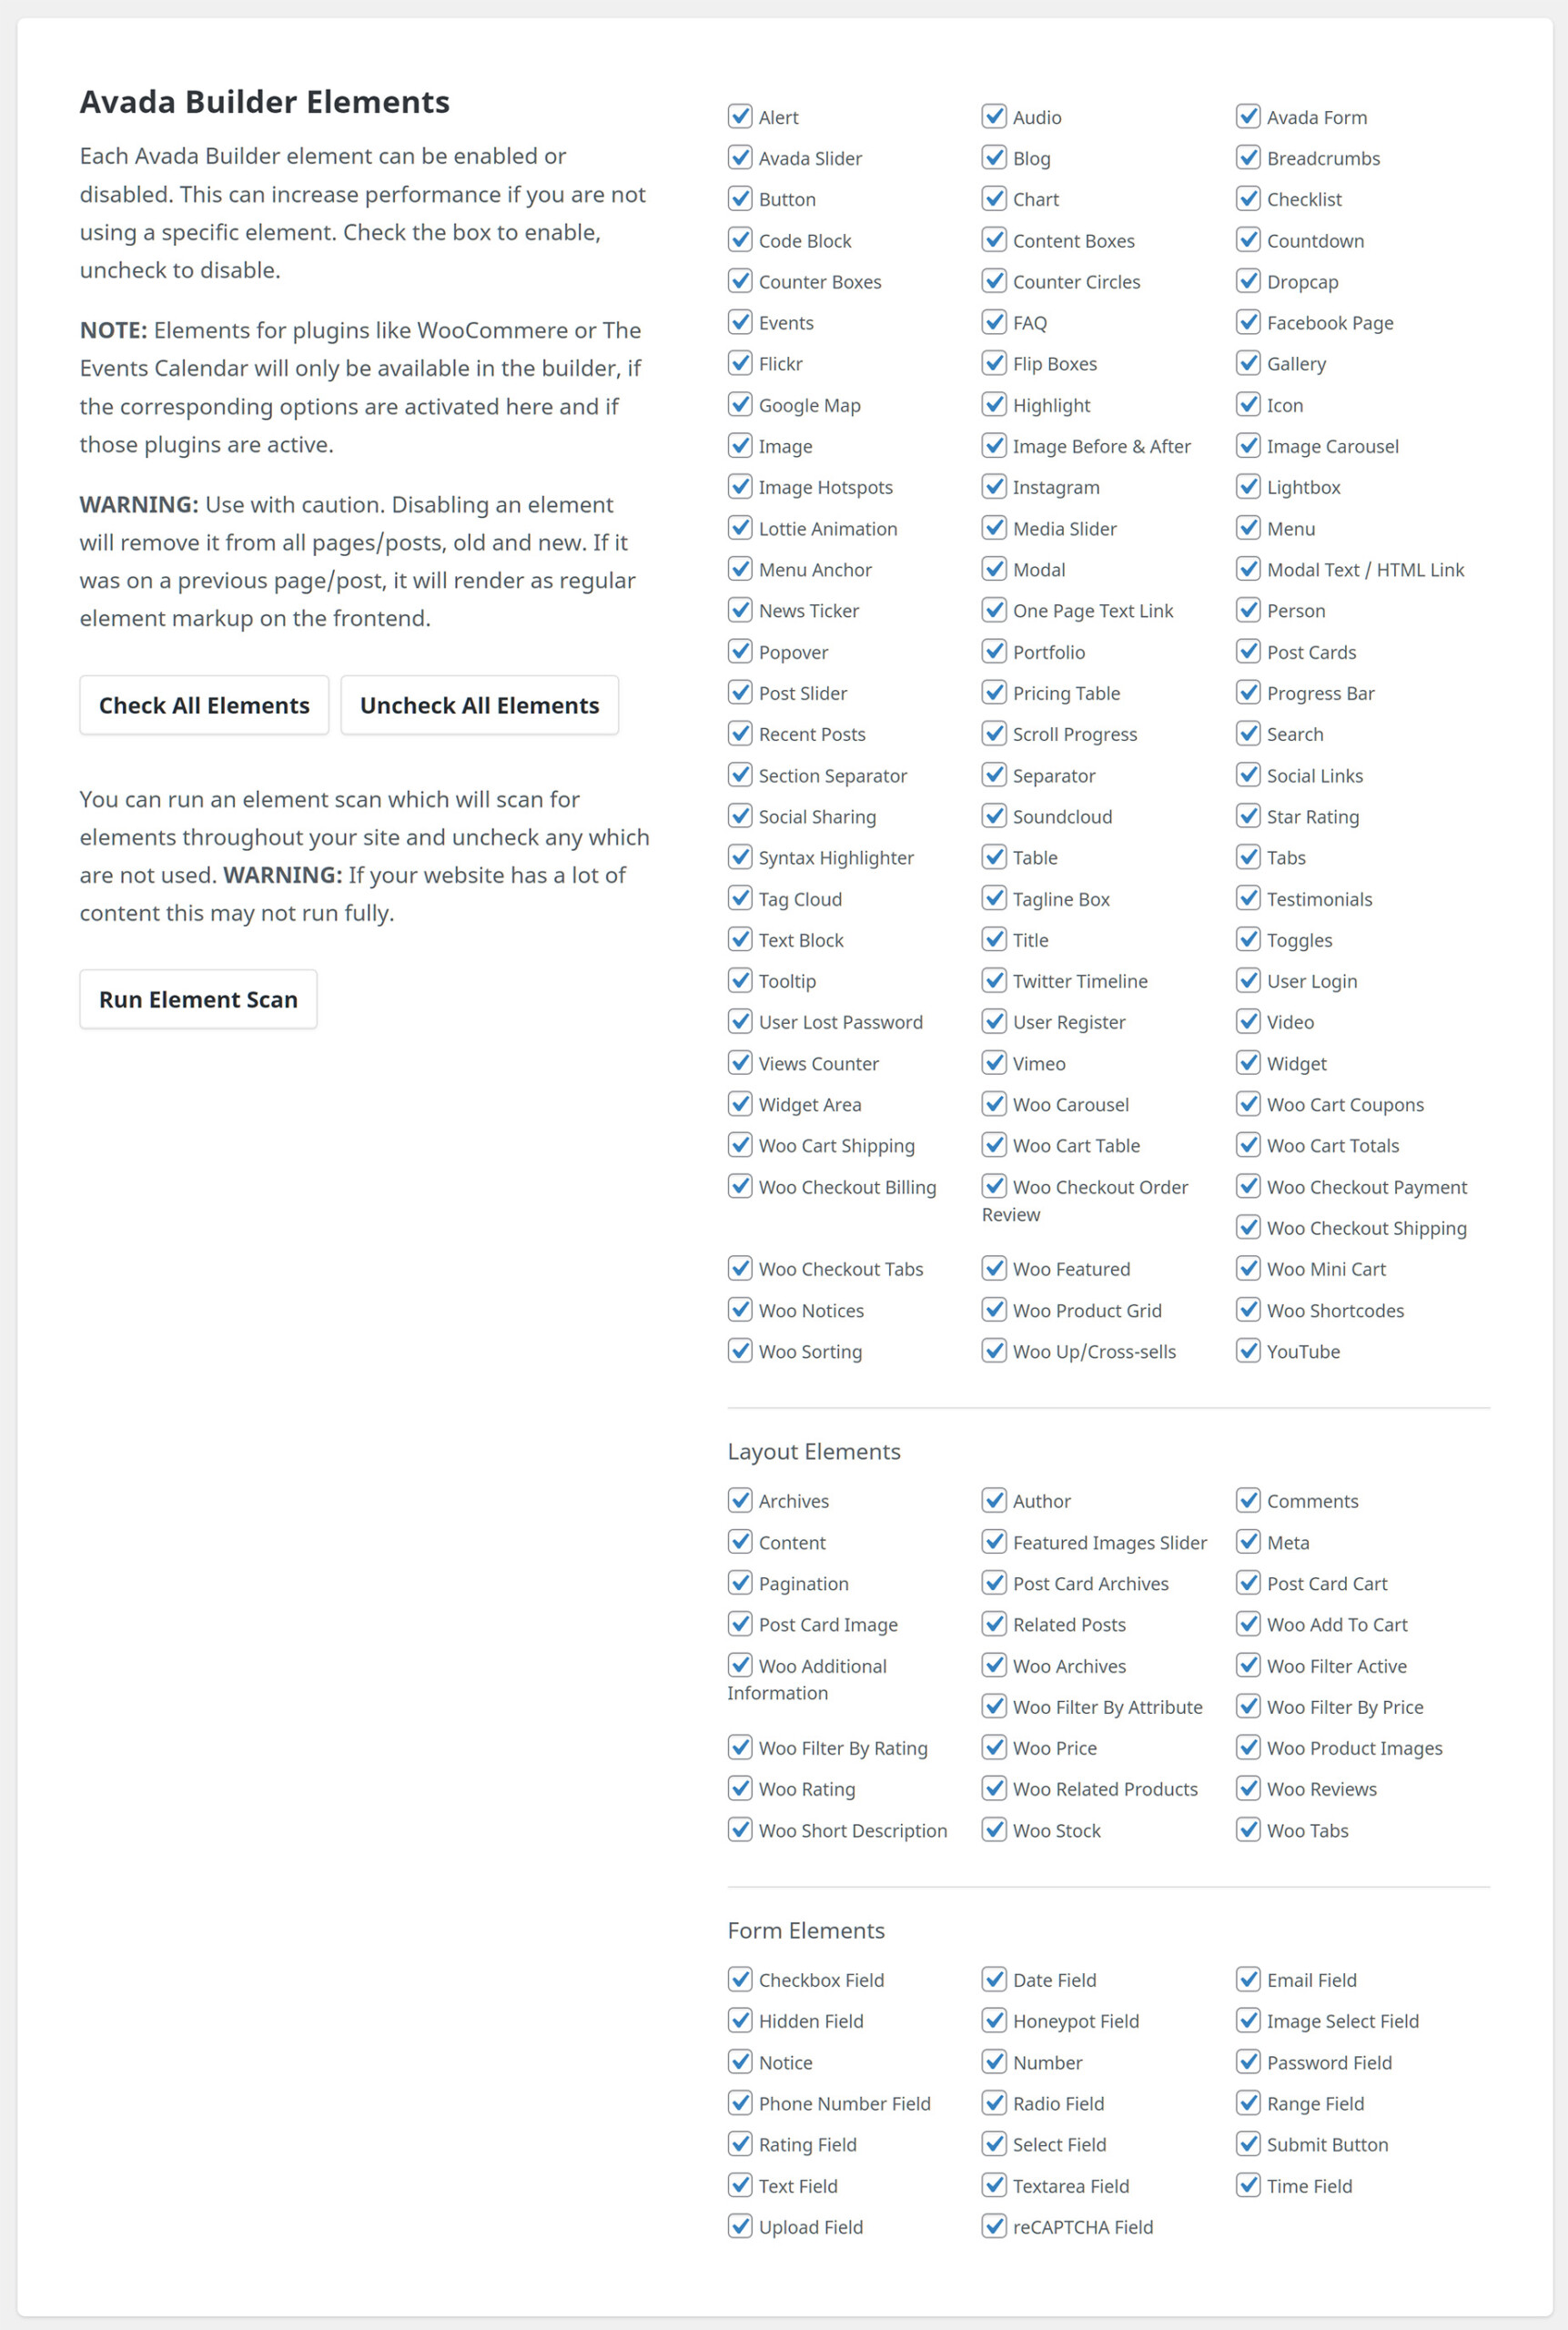
Builder Options > Avada Builder Elements

Site Optimization

Despite all the performance options we provide, when it comes to site optimization, Avada plays a much smaller part than you might imagine. Avada is optimized so that it’s fast on its own, and can be tweaked to be faster as shown above, but ultimately, user content will primarily dictate how fast your site will perform. Images play a huge factor in speed results, as well as hosting, extra plugins, content, and more.

Just as an example, if you have a site that’s 1100px wide and upload a 2000px image on a page, your page speed score will drop heavily. This is because sites like Google or GTMetrix will see a 1100px container that unnecessarily has an image in it that is almost twice its size.

There is a wealth of external tools you can use to analyze your site’s loading times, and to find the bottlenecks and non-optimized content that will affect the load speed of your pages. For more information on these tools, please see the following docs:


In this article