How To Use The Performance Wizard
Last Update: December 26, 2025
The Avada Performance Wizard is a step-by-step wizard to help you optimize the performance of your Avada website. it can be found at Avada > Performance from the WordPress Dashboard, or Maintenance > Performance Wizard from the Avada Dashboard. Please read on for more information about how the Wizard can help you, and watch the video below for a visual overview.
Performance Wizard Steps
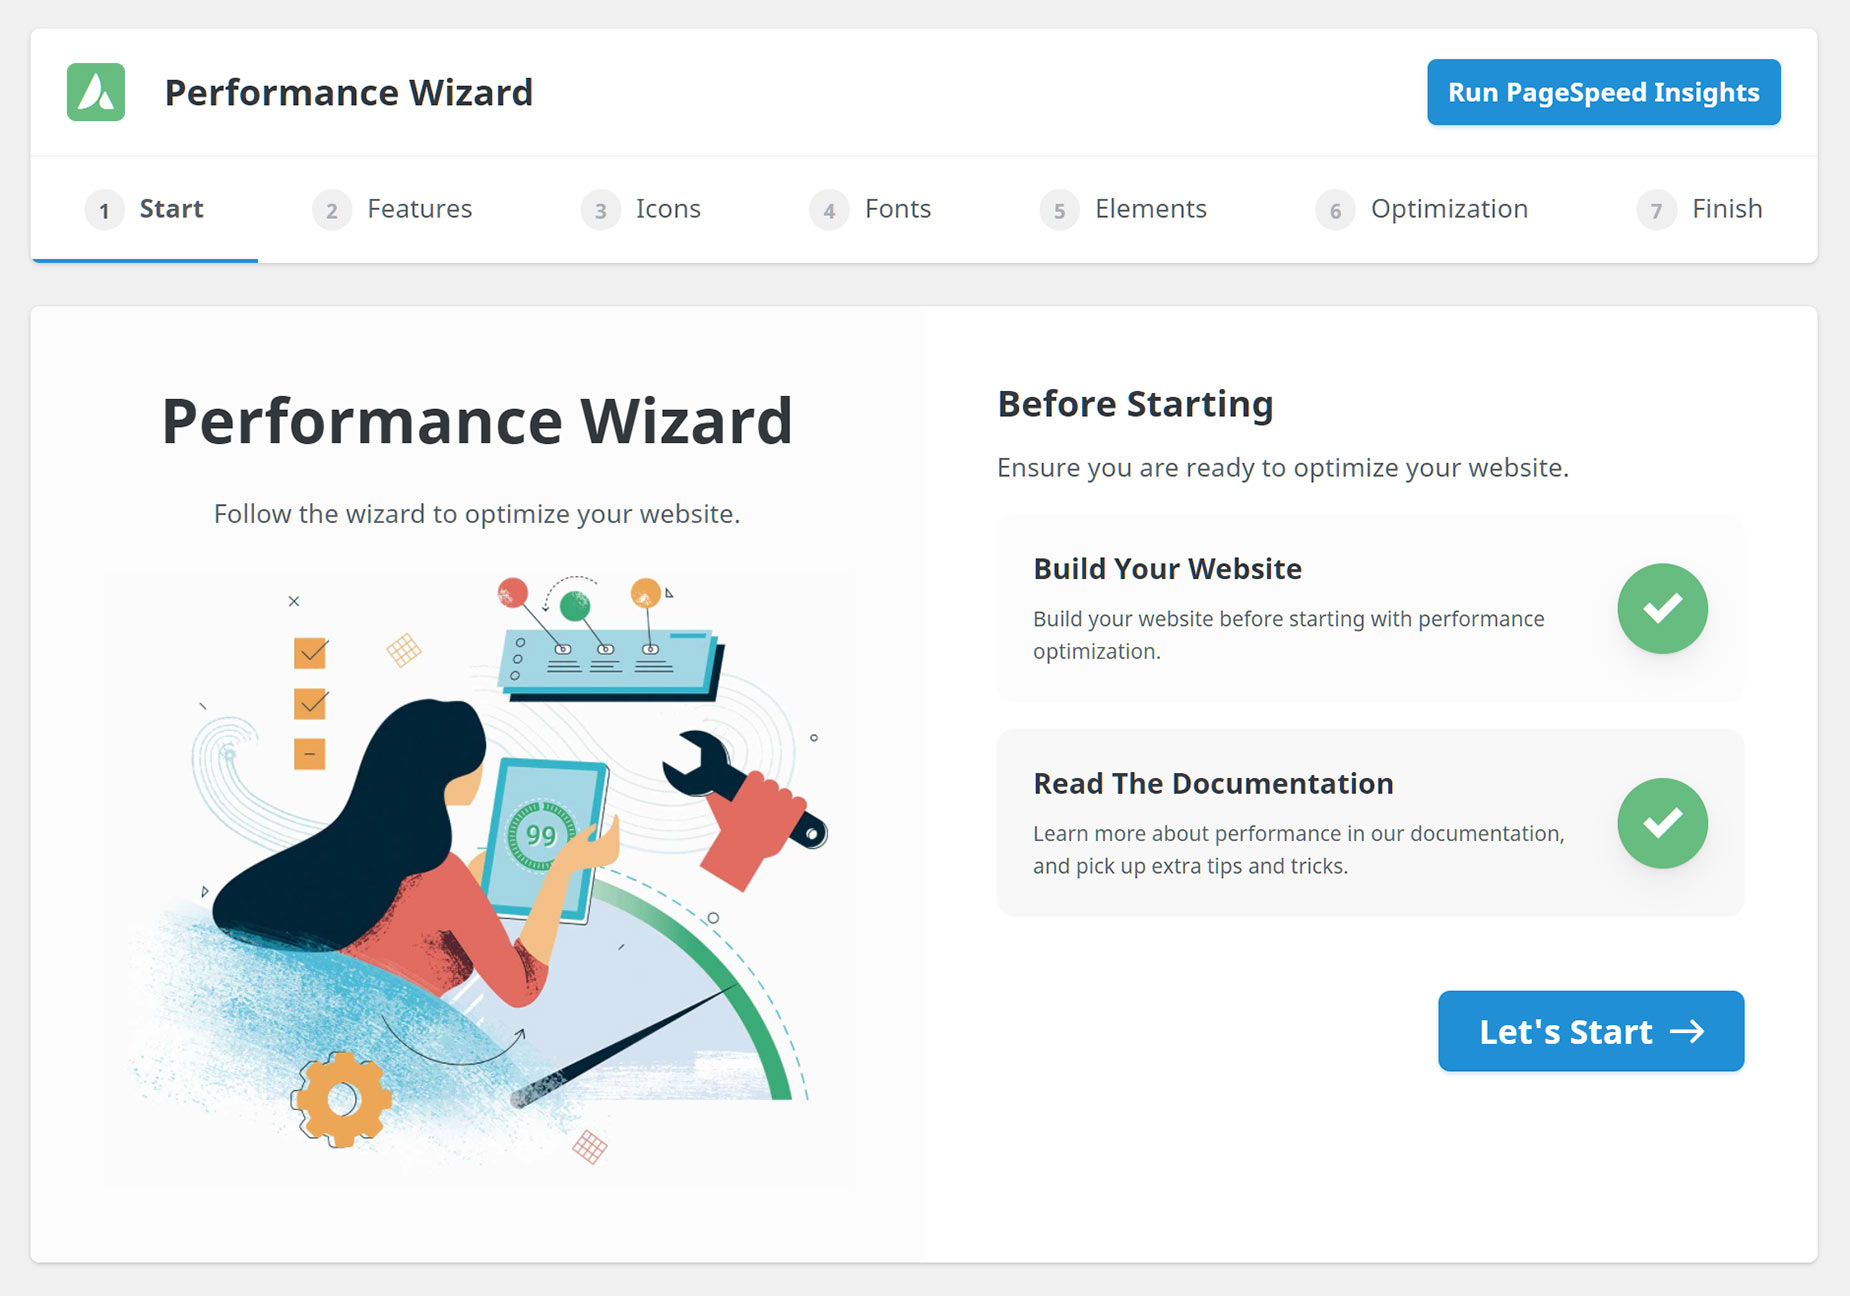
1. Start
This screen is just where you begin the Performance Wizard. At the top of the page, there is a Run PageSpeed Insights buton, which you can use to do a before and after comparison of your page loading times.
There is a reminder that the optimization process should only be run once the website has been completed, and there is a link to the Performance related documentation, and a Let’s Start button. Click that to begin the Performance Wizard.
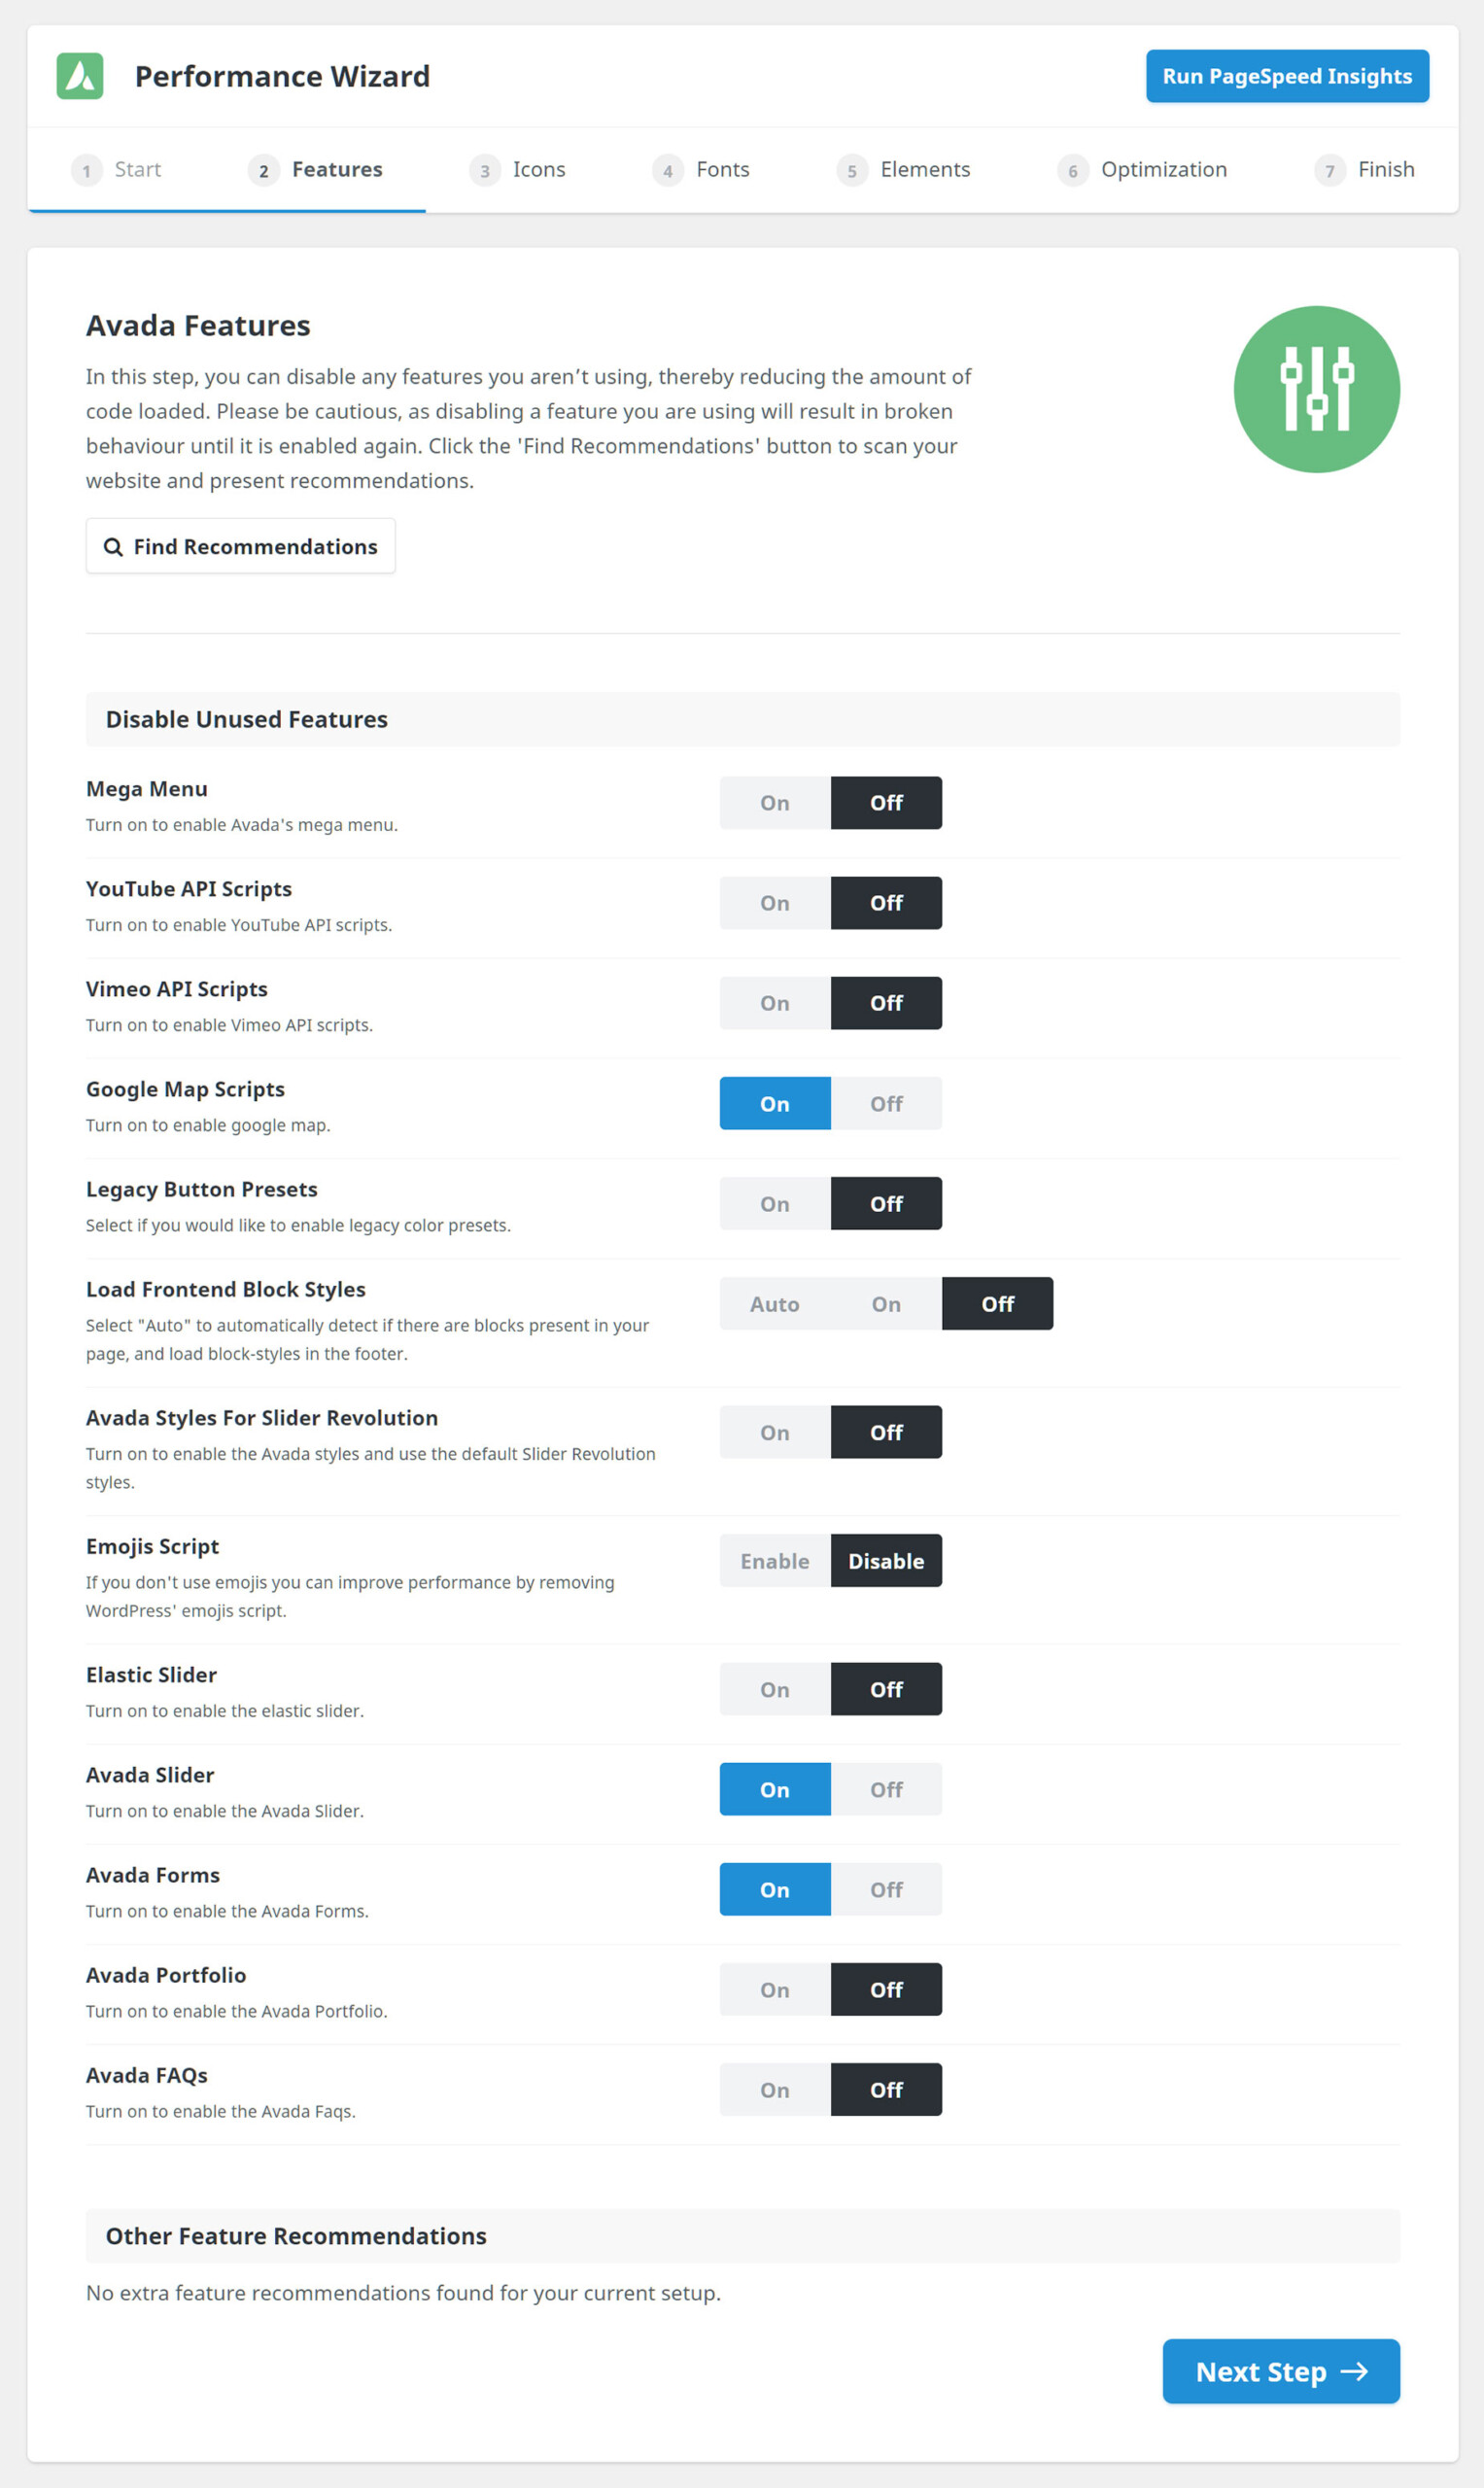
2. Features
In this step, you can disable any features you aren’t using, thereby reducing the amount of code loaded. Please be cautious, as disabling a feature you are using will result in broken behaviour until it is enabled again.
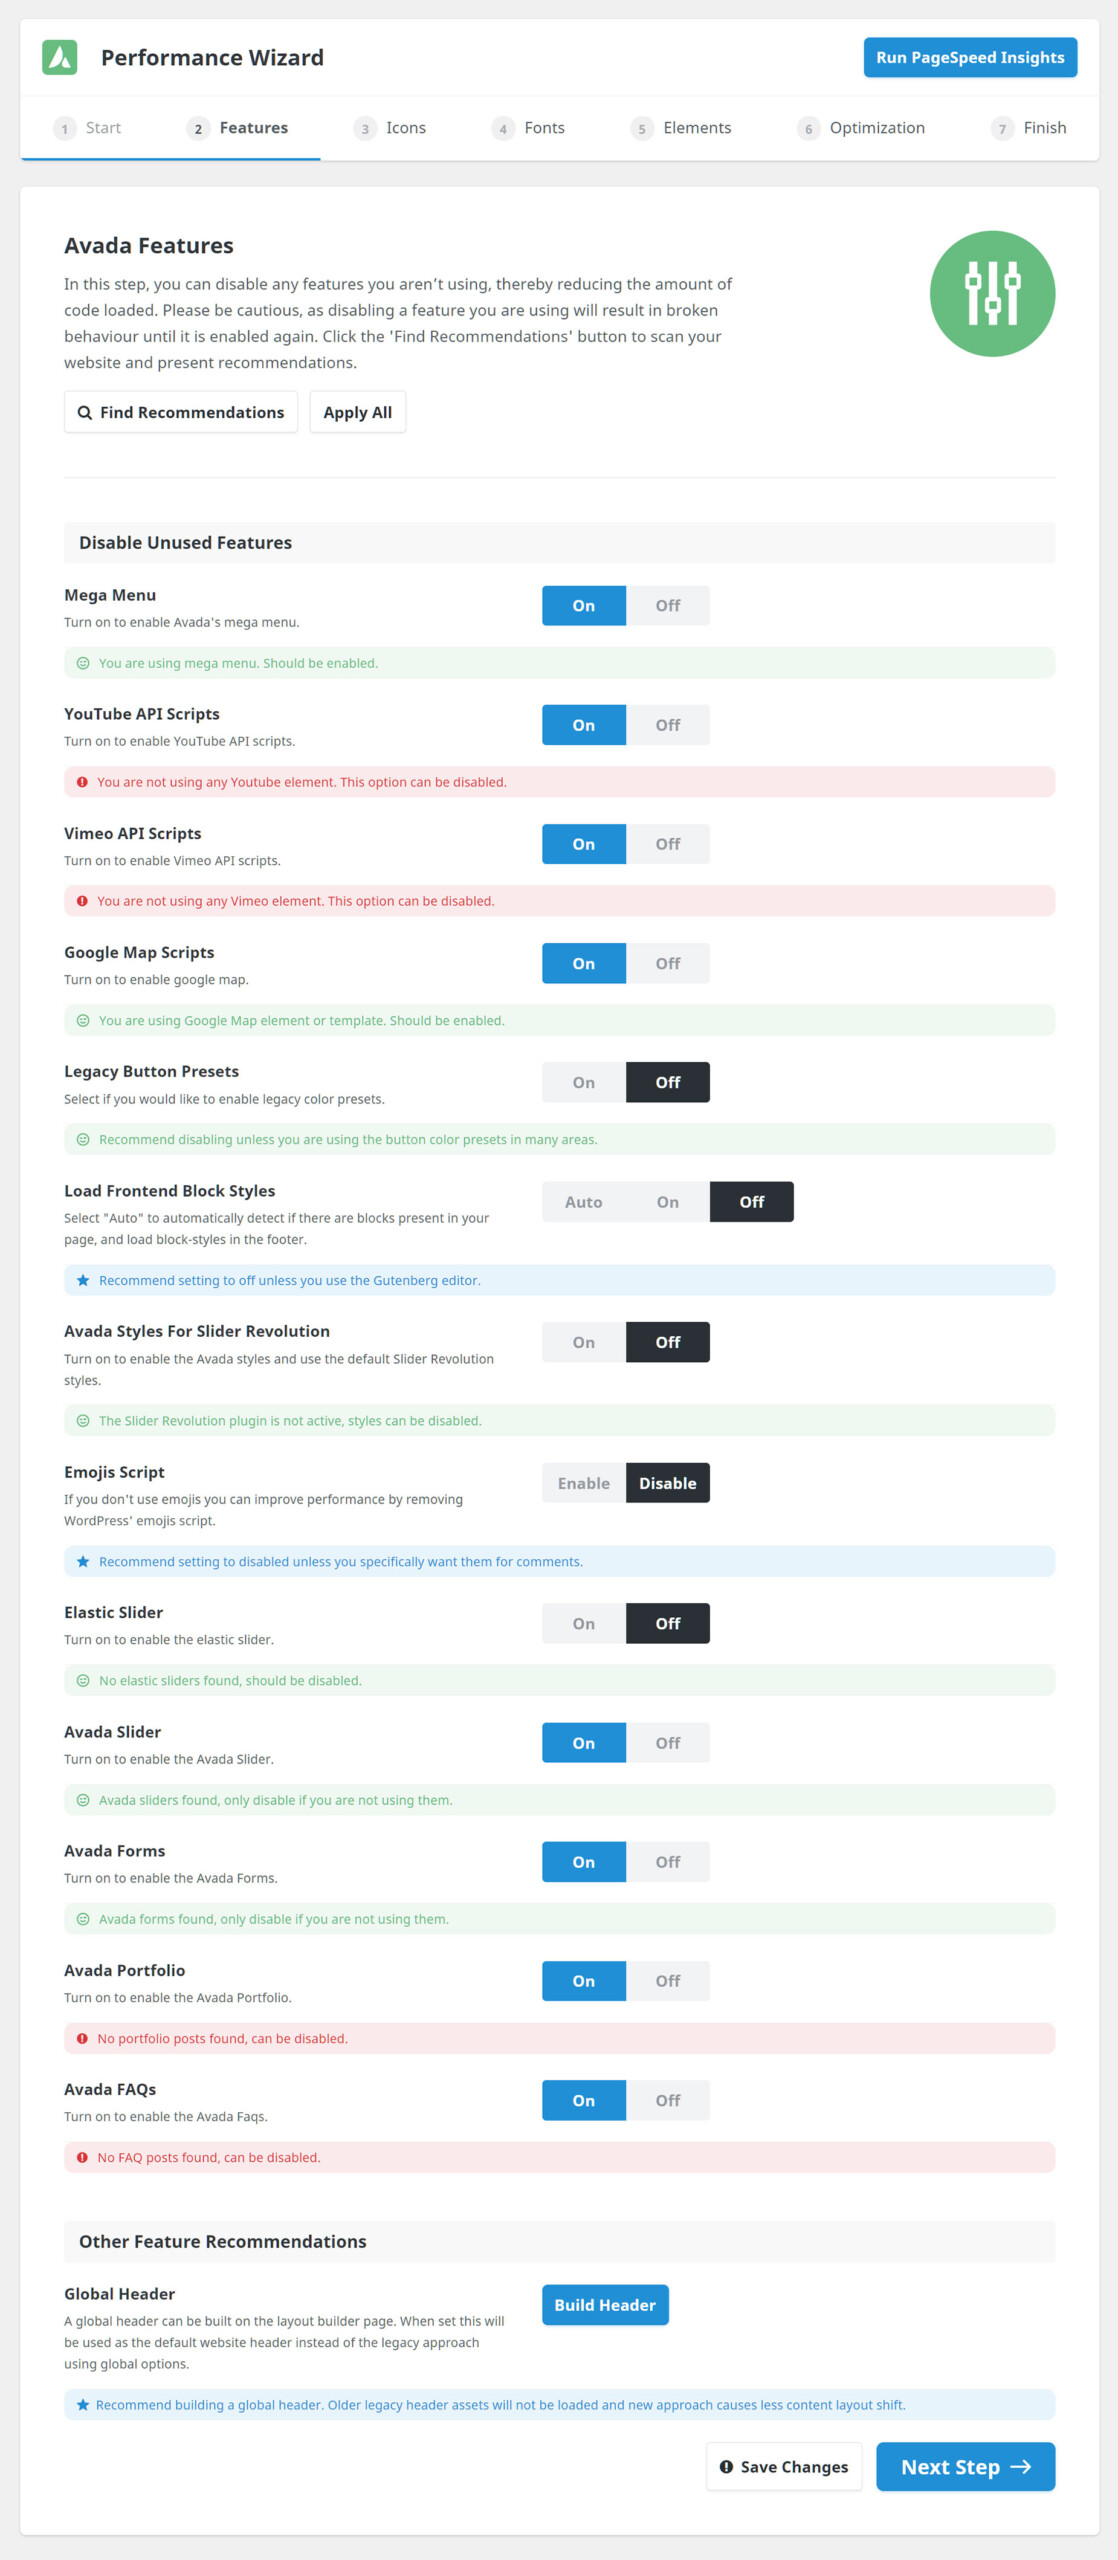
As you can see in the screenshot below, the Wizard loads with the current Features as set in the Global Options. At the top of the page, there is a Find Recommendations button, which when clicked will scan your website and offer you recommendations about the various features.
Once, the scan is complete, you will see the Wizard’s recommendations. The green ones mean that the current option is appropriate, the red ones are options which the Wizard recommends be changed, and the blue ones are ones that can’t be automated, and require you to consider the options yourself. The Apply All button, found next to the Find Recommendations button at the top, will apply all the red recommendations. But best practice here is to take your time to go through each of these features and make your changes.
Once you have made your choices, click the Save Changes button at the bottom, before clicking Next Step.
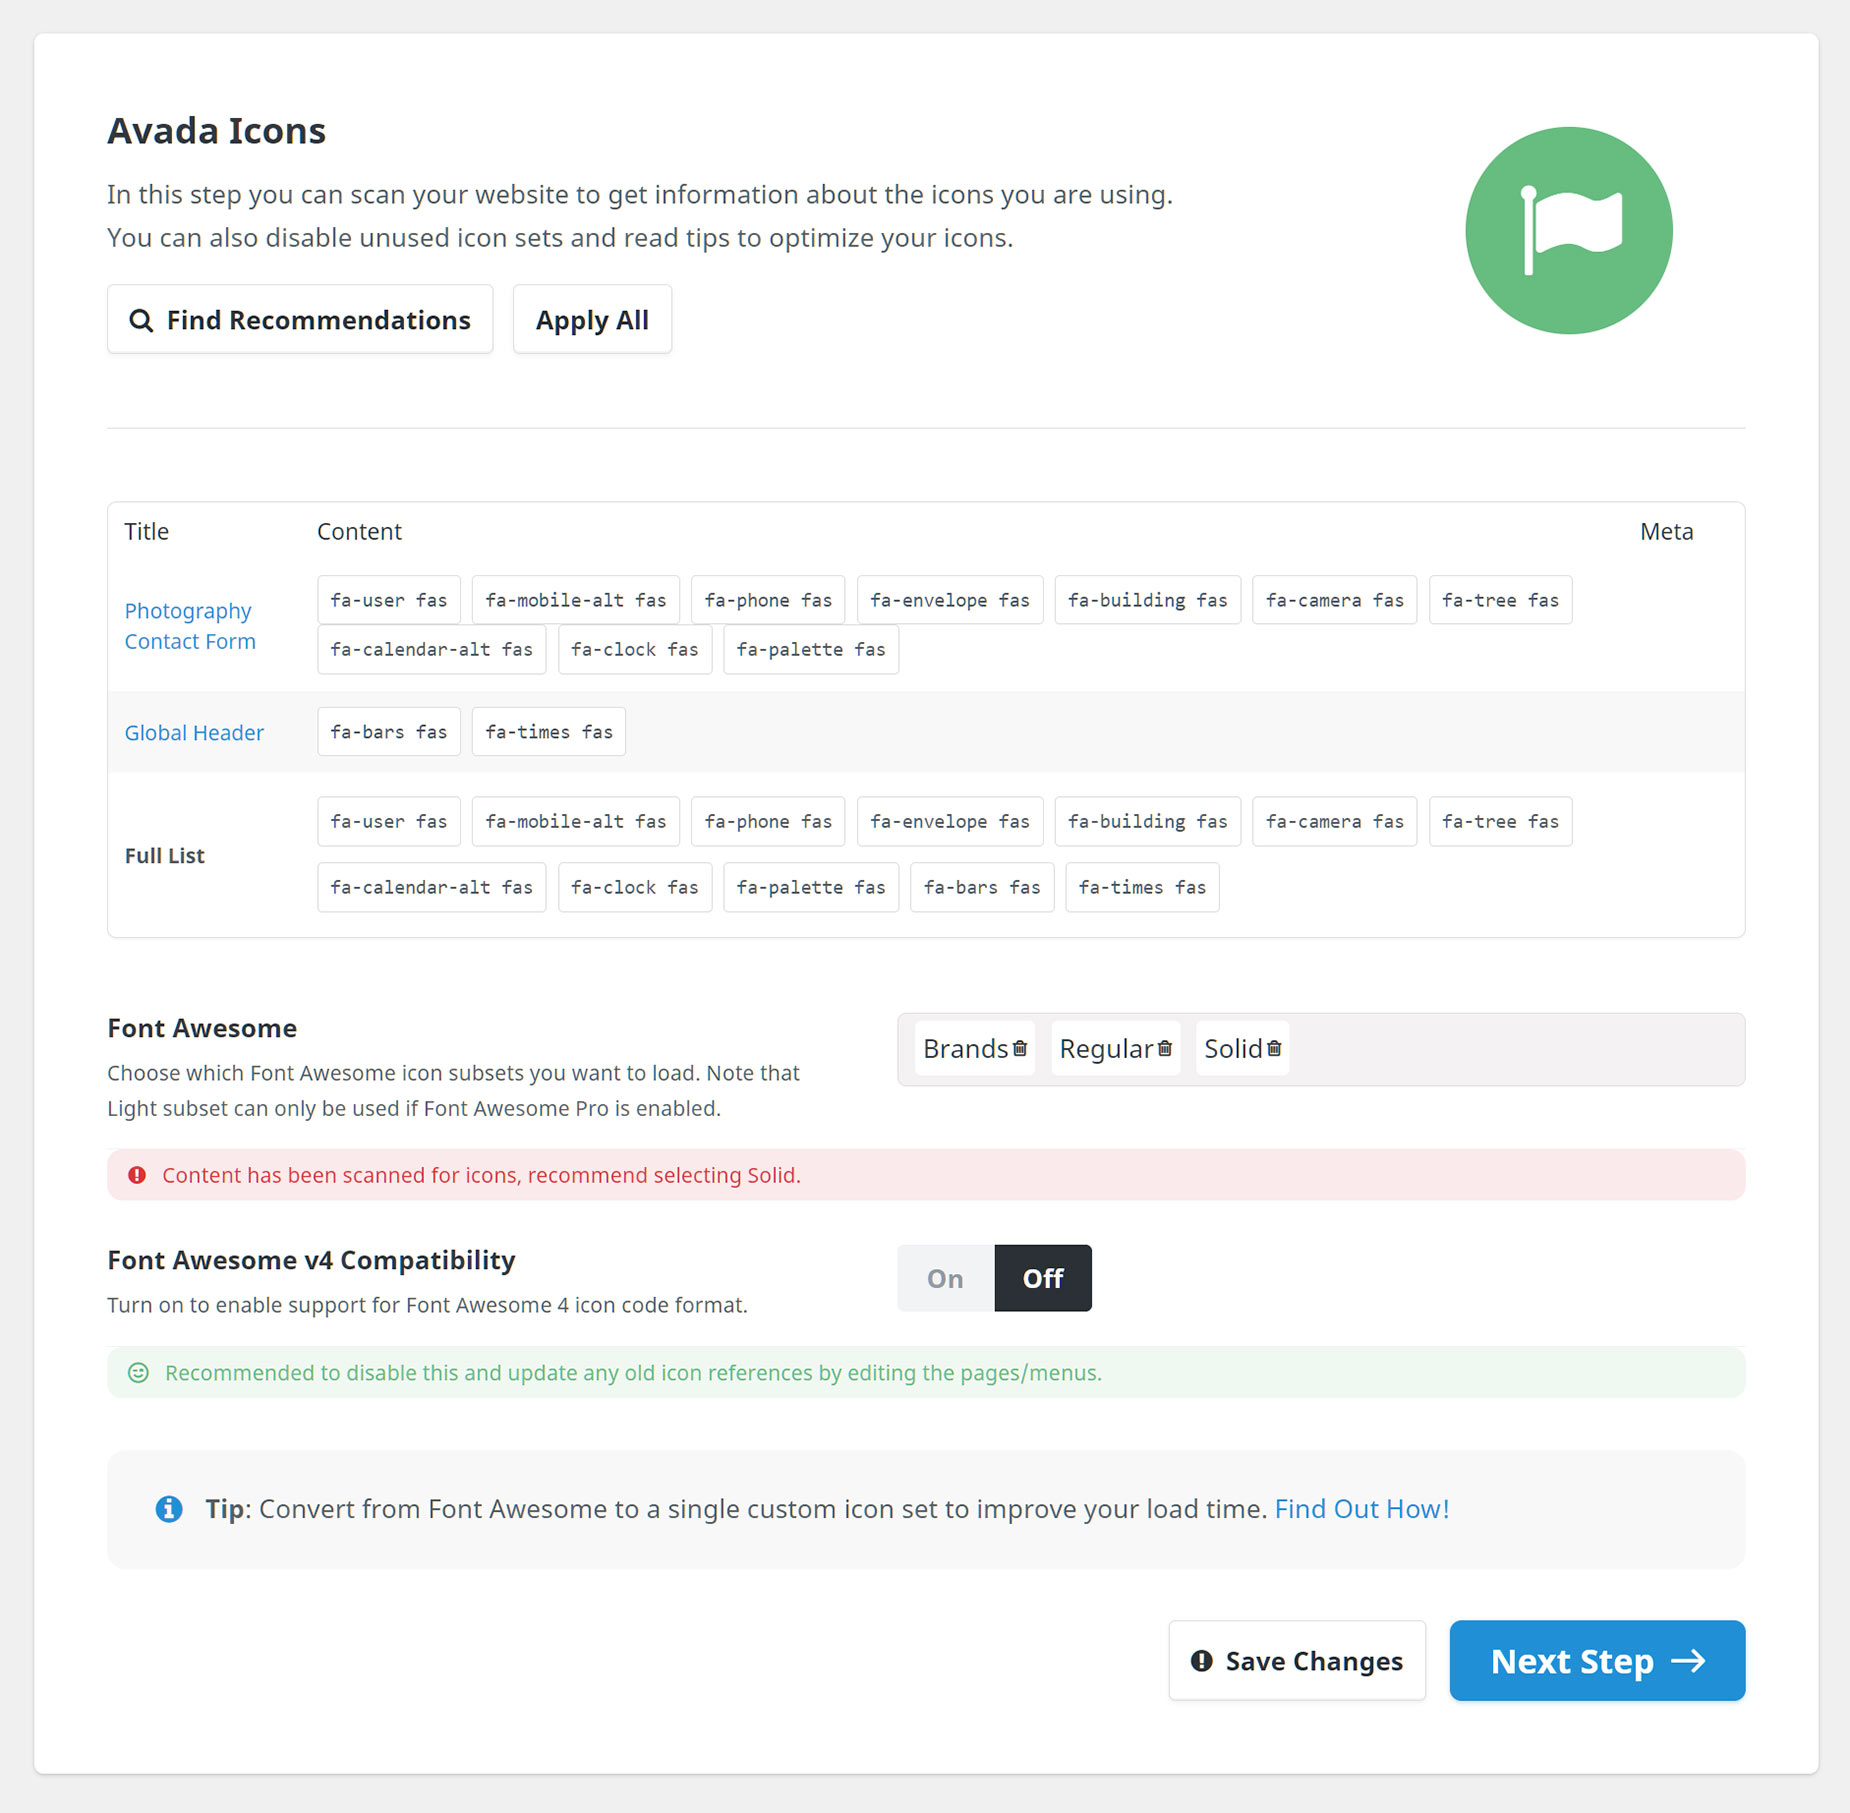
3. Icons
In this step, there are two options relating to Icons. You can choose which Font Awesome icon subsets you want to load, and you can set Font Awesome v4 Compatibility.
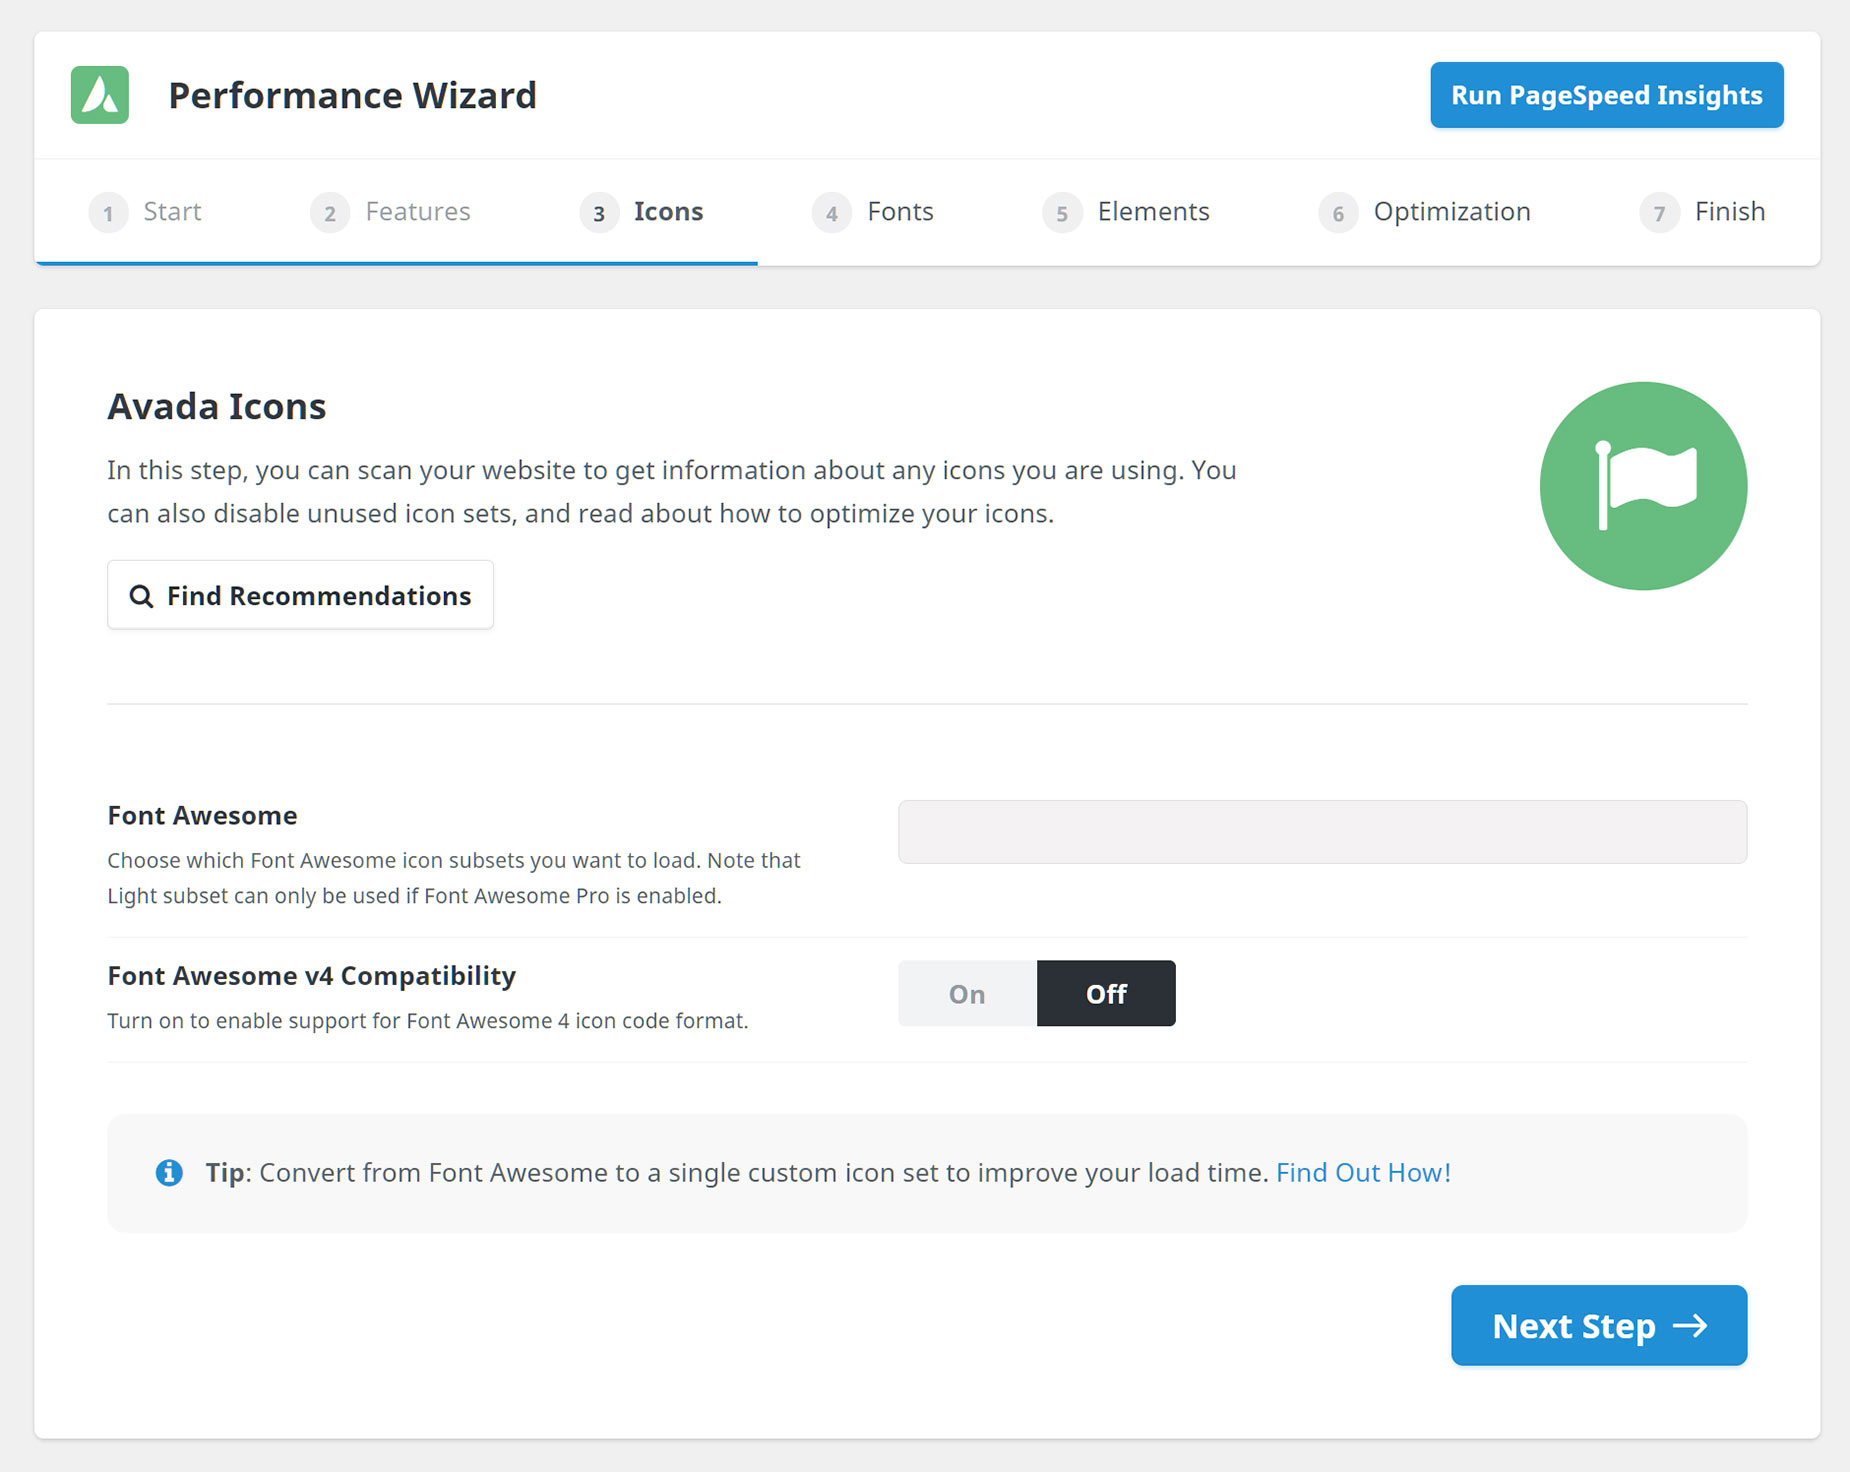
If you click the Find Recommendations button, the Wizard scans your website and offers a range of infomation pertaining to the icons used on the site, to help you make your choices. It offers a full list of all the icons used on the site, breaking them down into the individual pages they are used on. (If they are under the Meta column, this means they are not used directly in the content, but are in used in a menu). This list is useful if you want to convert your Font Awesome icons to a single custom icon set to improve your load time. See the How To Replace Font Awesome Icons With A Custom Icon Set documentation for more information on that process.
The recommendations for the two font options let you know which subsets you can turn off, or need on, and in the Font Awesome v4 Compatibility option, the recommendation also lets you know if you have any old v4 icons, which you could then update, so you could turn off v4 compatibility.
Once you have made your changes on this page, click Save Changes, and then Next Step.
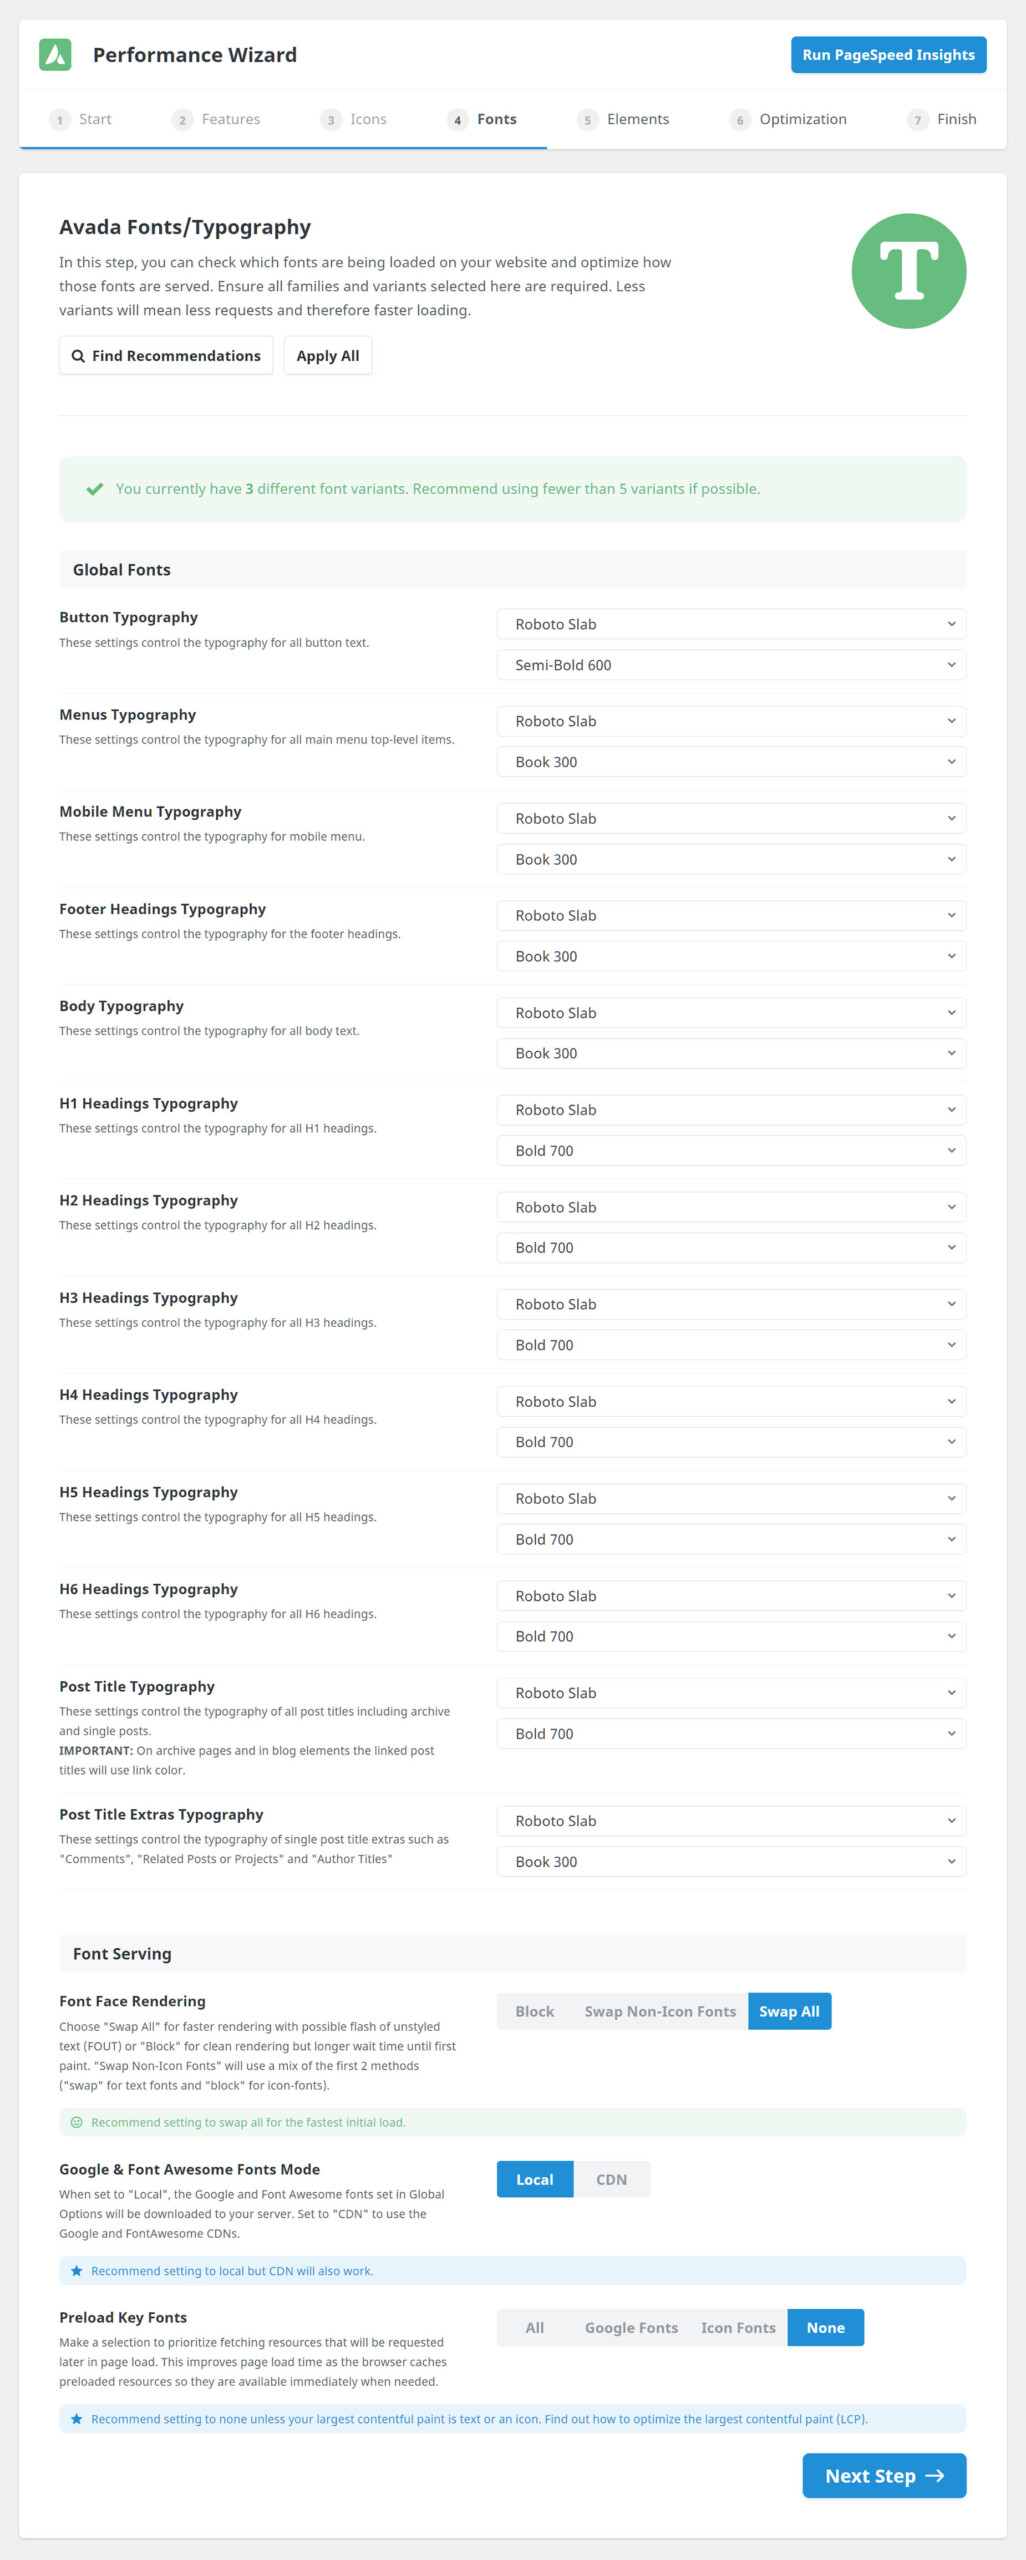
4. Fonts
In this step, you can check which fonts are being loaded on your website and optimize how those fonts are served. Ensure all families and variants selected here are required. Fewer variants will mean fewer requests and therefore faster loading. This page is split into two sections – the Global Fonts, and the Font Serving Global Options.

Clicking on Find Recommendations checks how many font variants are being used on the site, and makes recommendations about the Font Serving options. There are five font options you can change, depending on your website. They will all affect performance to some degree. For example, you can Preload Key Font Variants for a faster LCP (Largest Contentful Paint) if the LCP on your site is a font. Again, when you are done, click Save Changes and then Next Step.
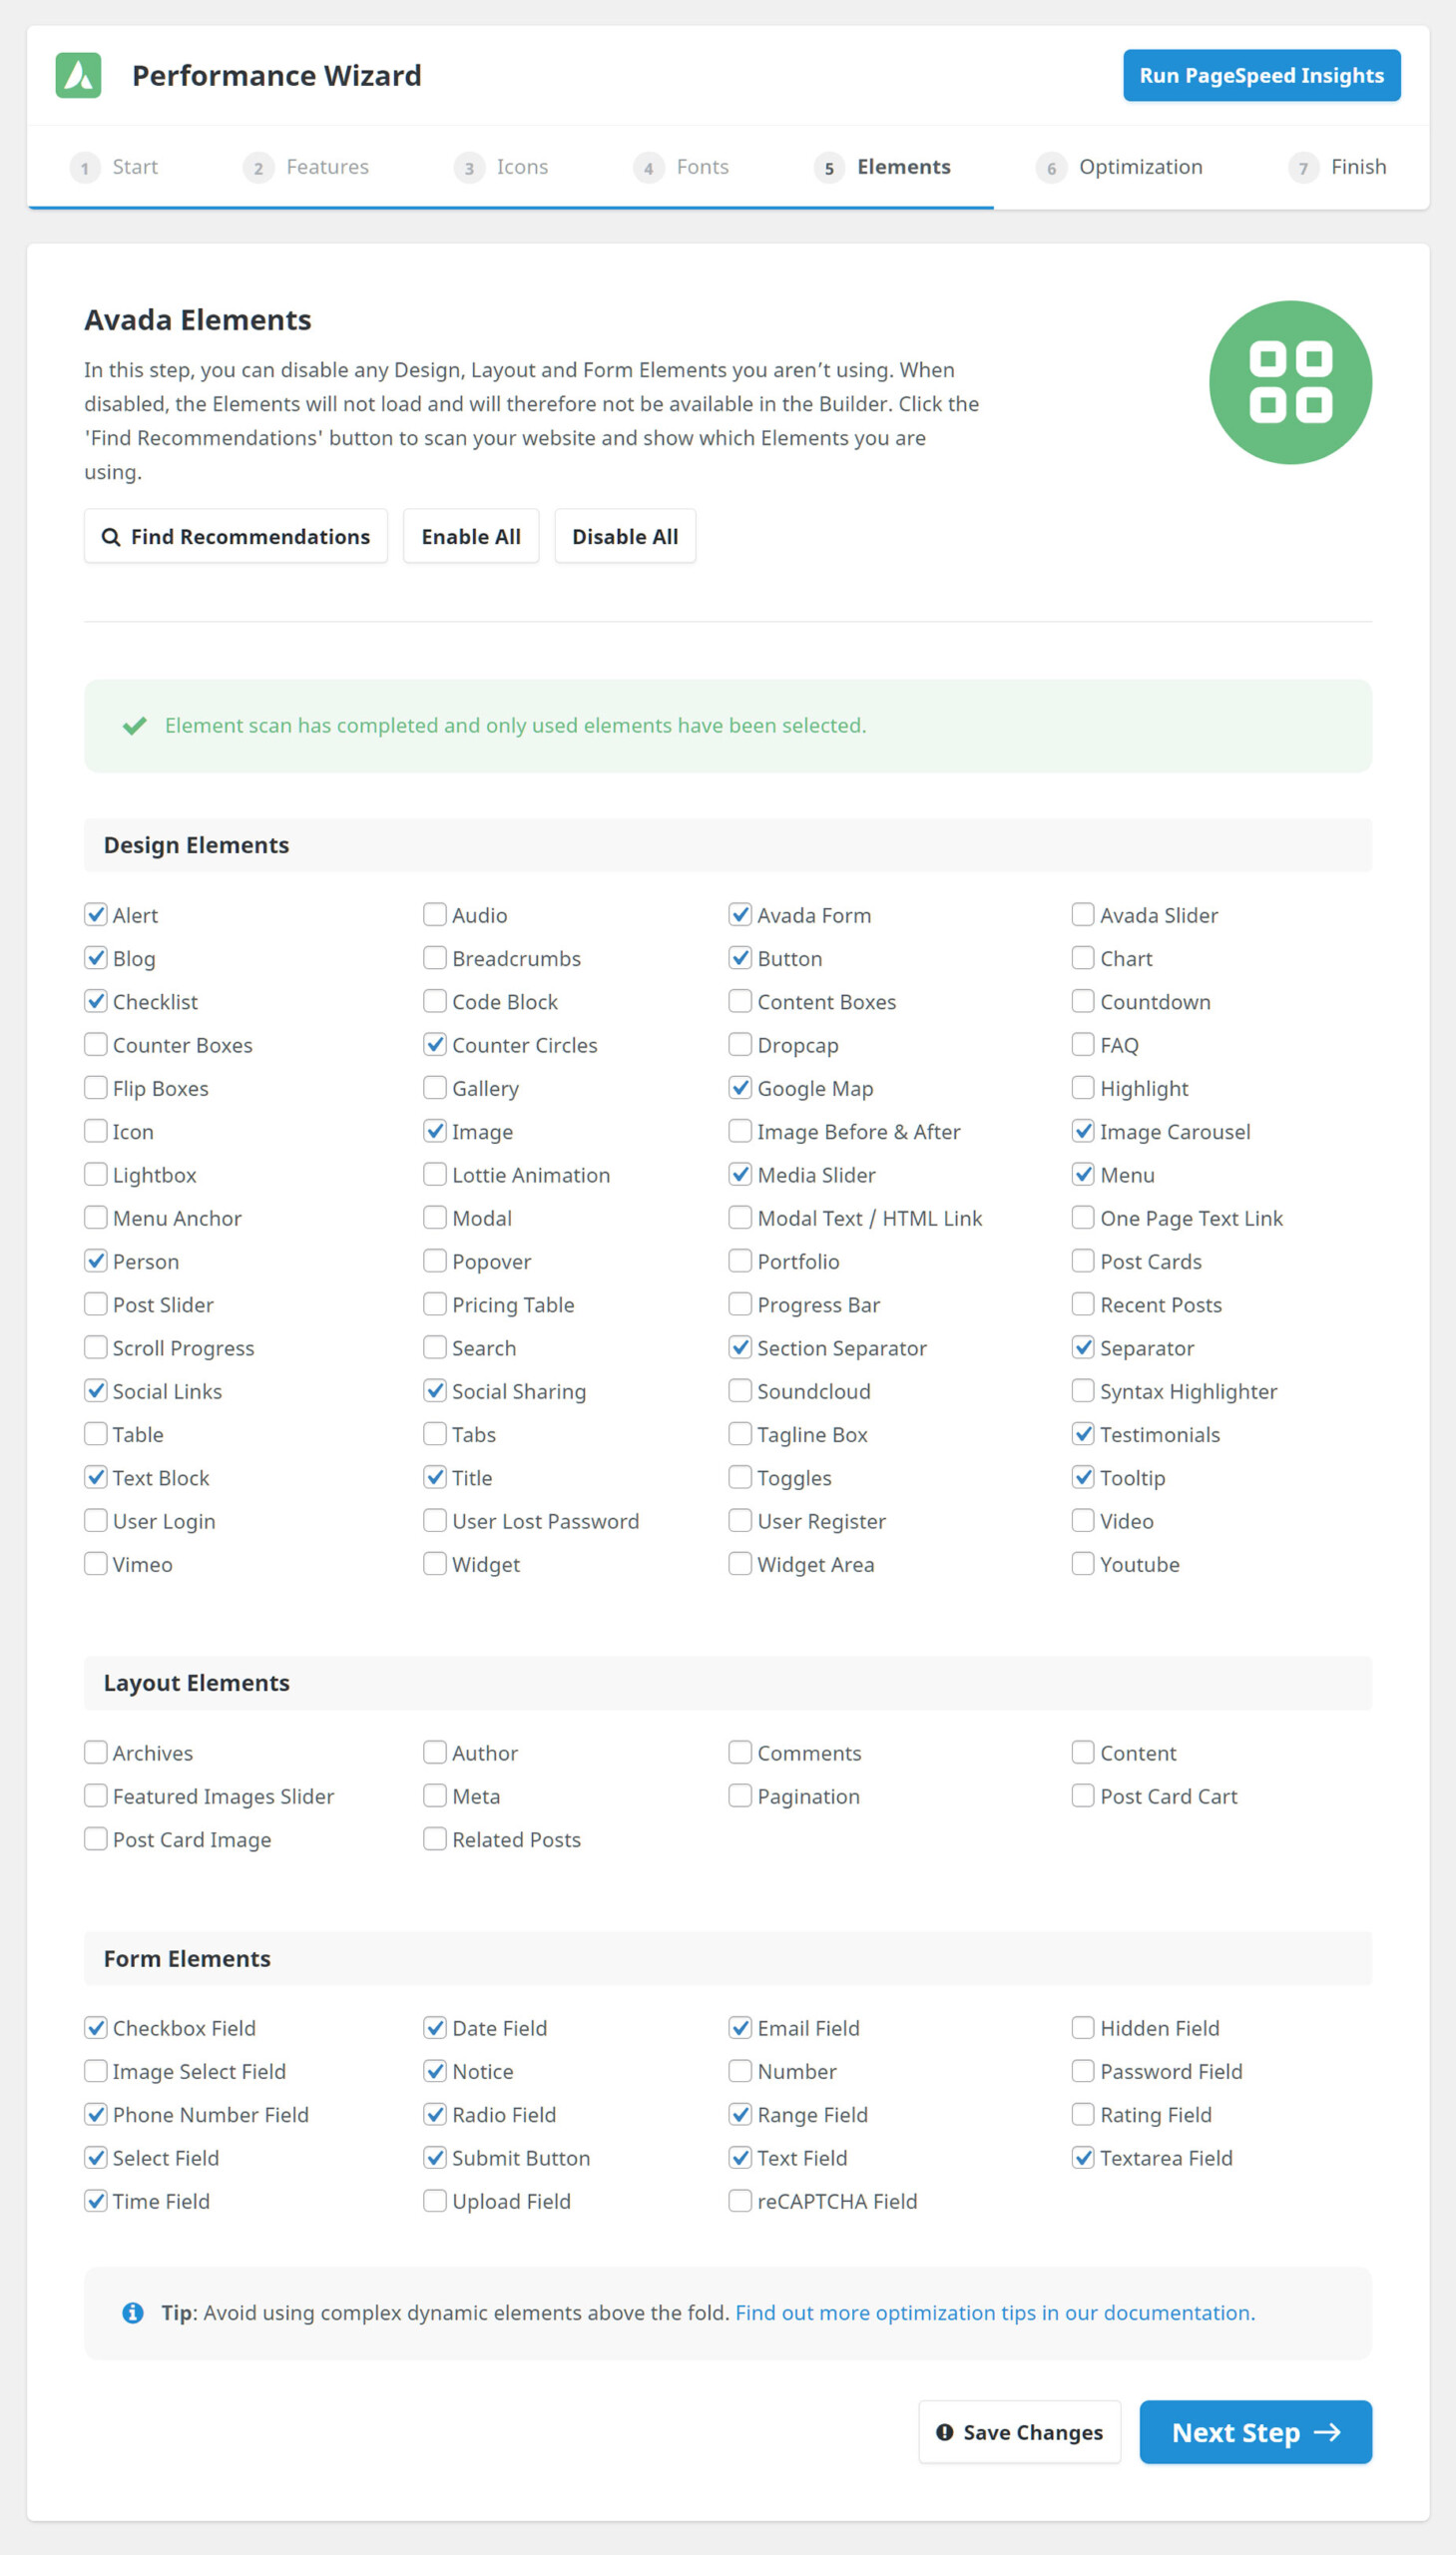
5. Elements
In this step, you can disable any Design, Layout or Form Elements you aren’t using. When disabled, the Elements will not load and will therefore not be available in the Builder.
There are three buttons at the top of this page. Find Recommendations, Enable All, and Disable All.

Clicking on Find Recommendations scans your website to see which Elements you are using, and deselects all the Elements you are NOT using. If your website is finished, you could then save your changes, thus stopping any unused Elements from loading. Just be aware that you would have to re-enable these Elements to use them at a future time.
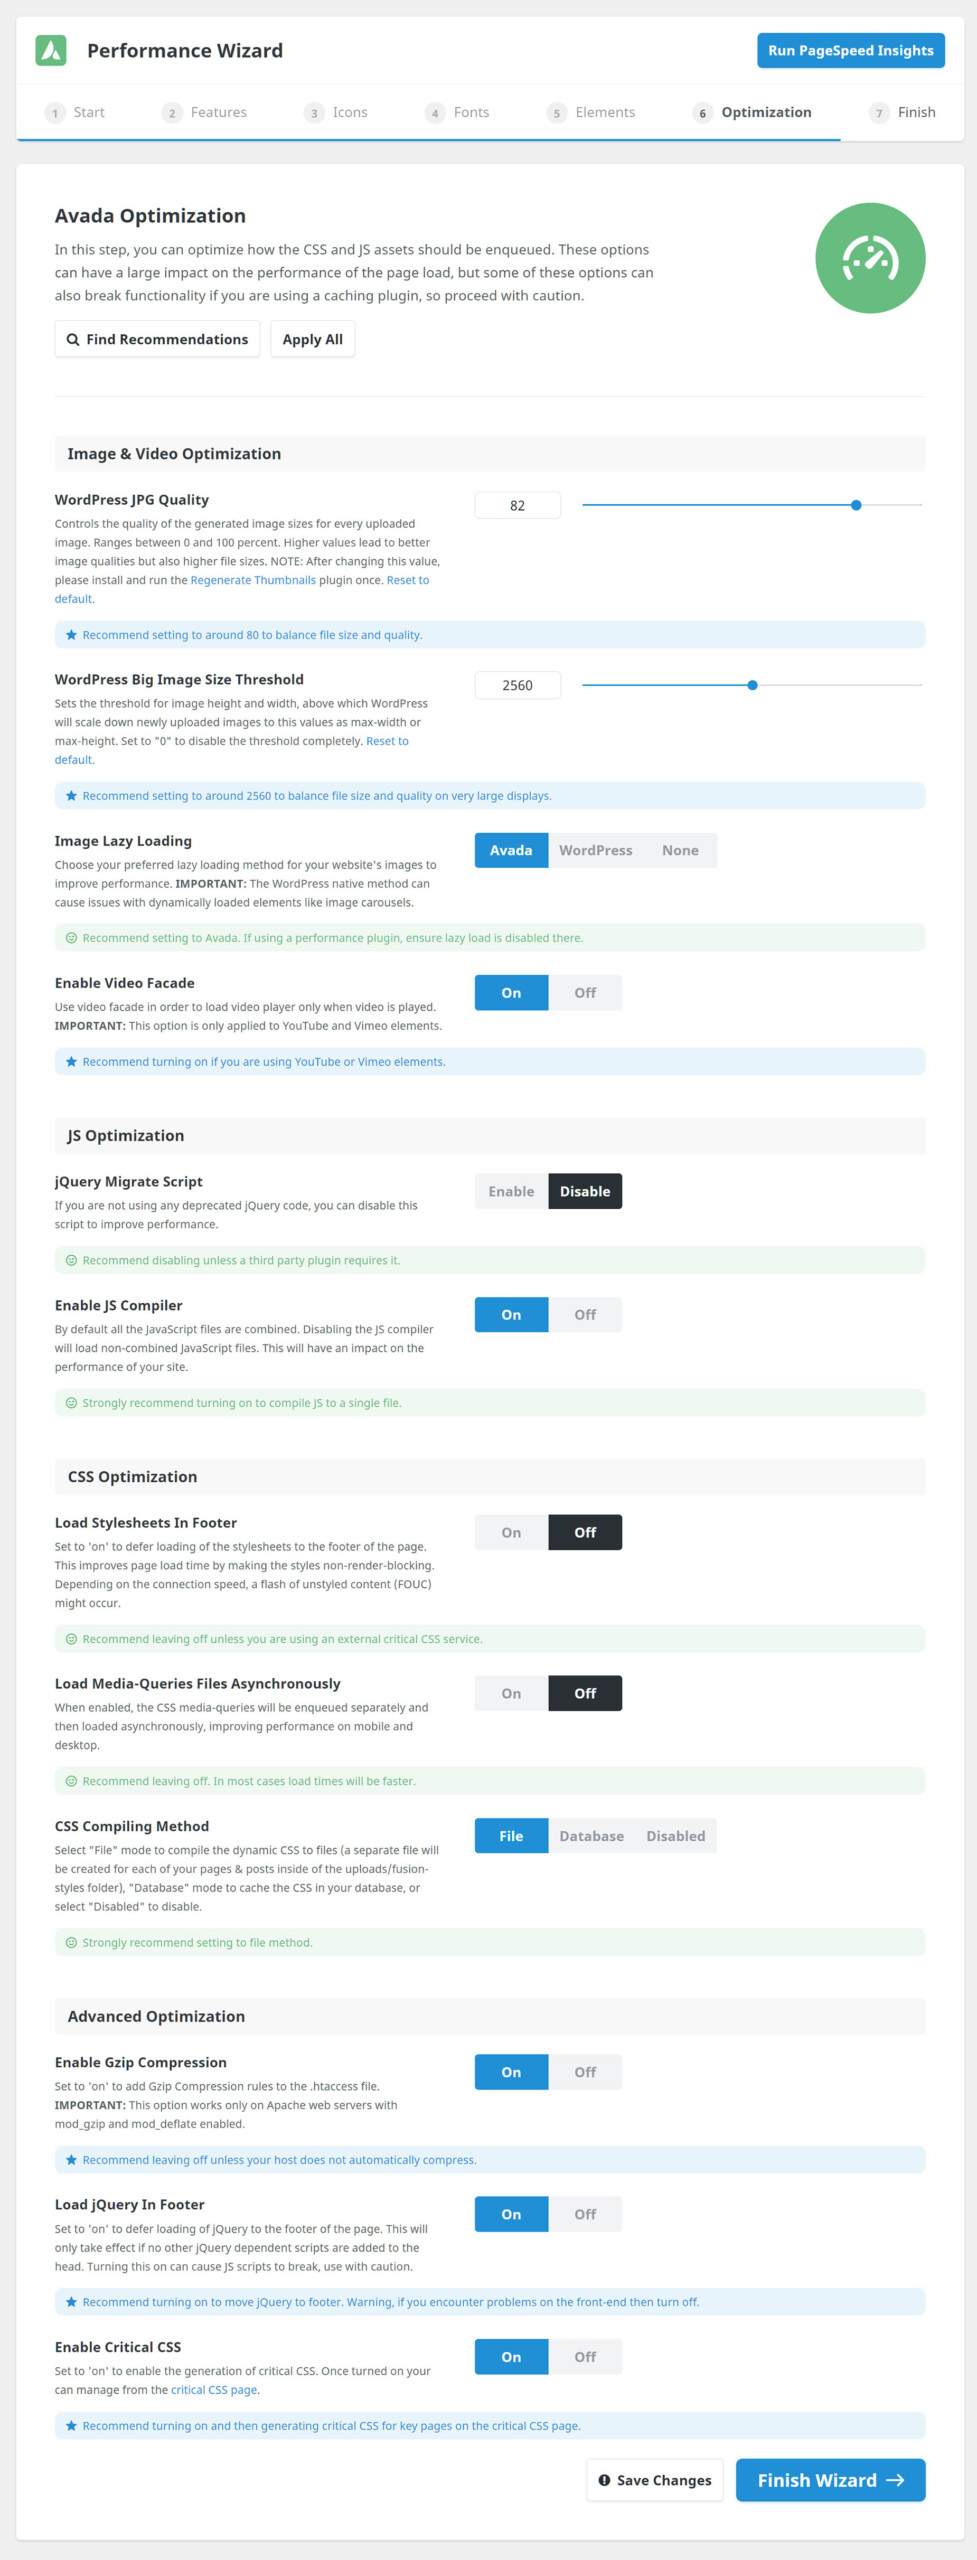
6. Optimization
In this penultimate step of the Wizard, you can optimize how the CSS and JS assets should be enqueued. These options can have a large impact on the performance of the page load but some of these can also break functionality, particularly if you are using a caching plugin, so be sure to test your site after any changes.
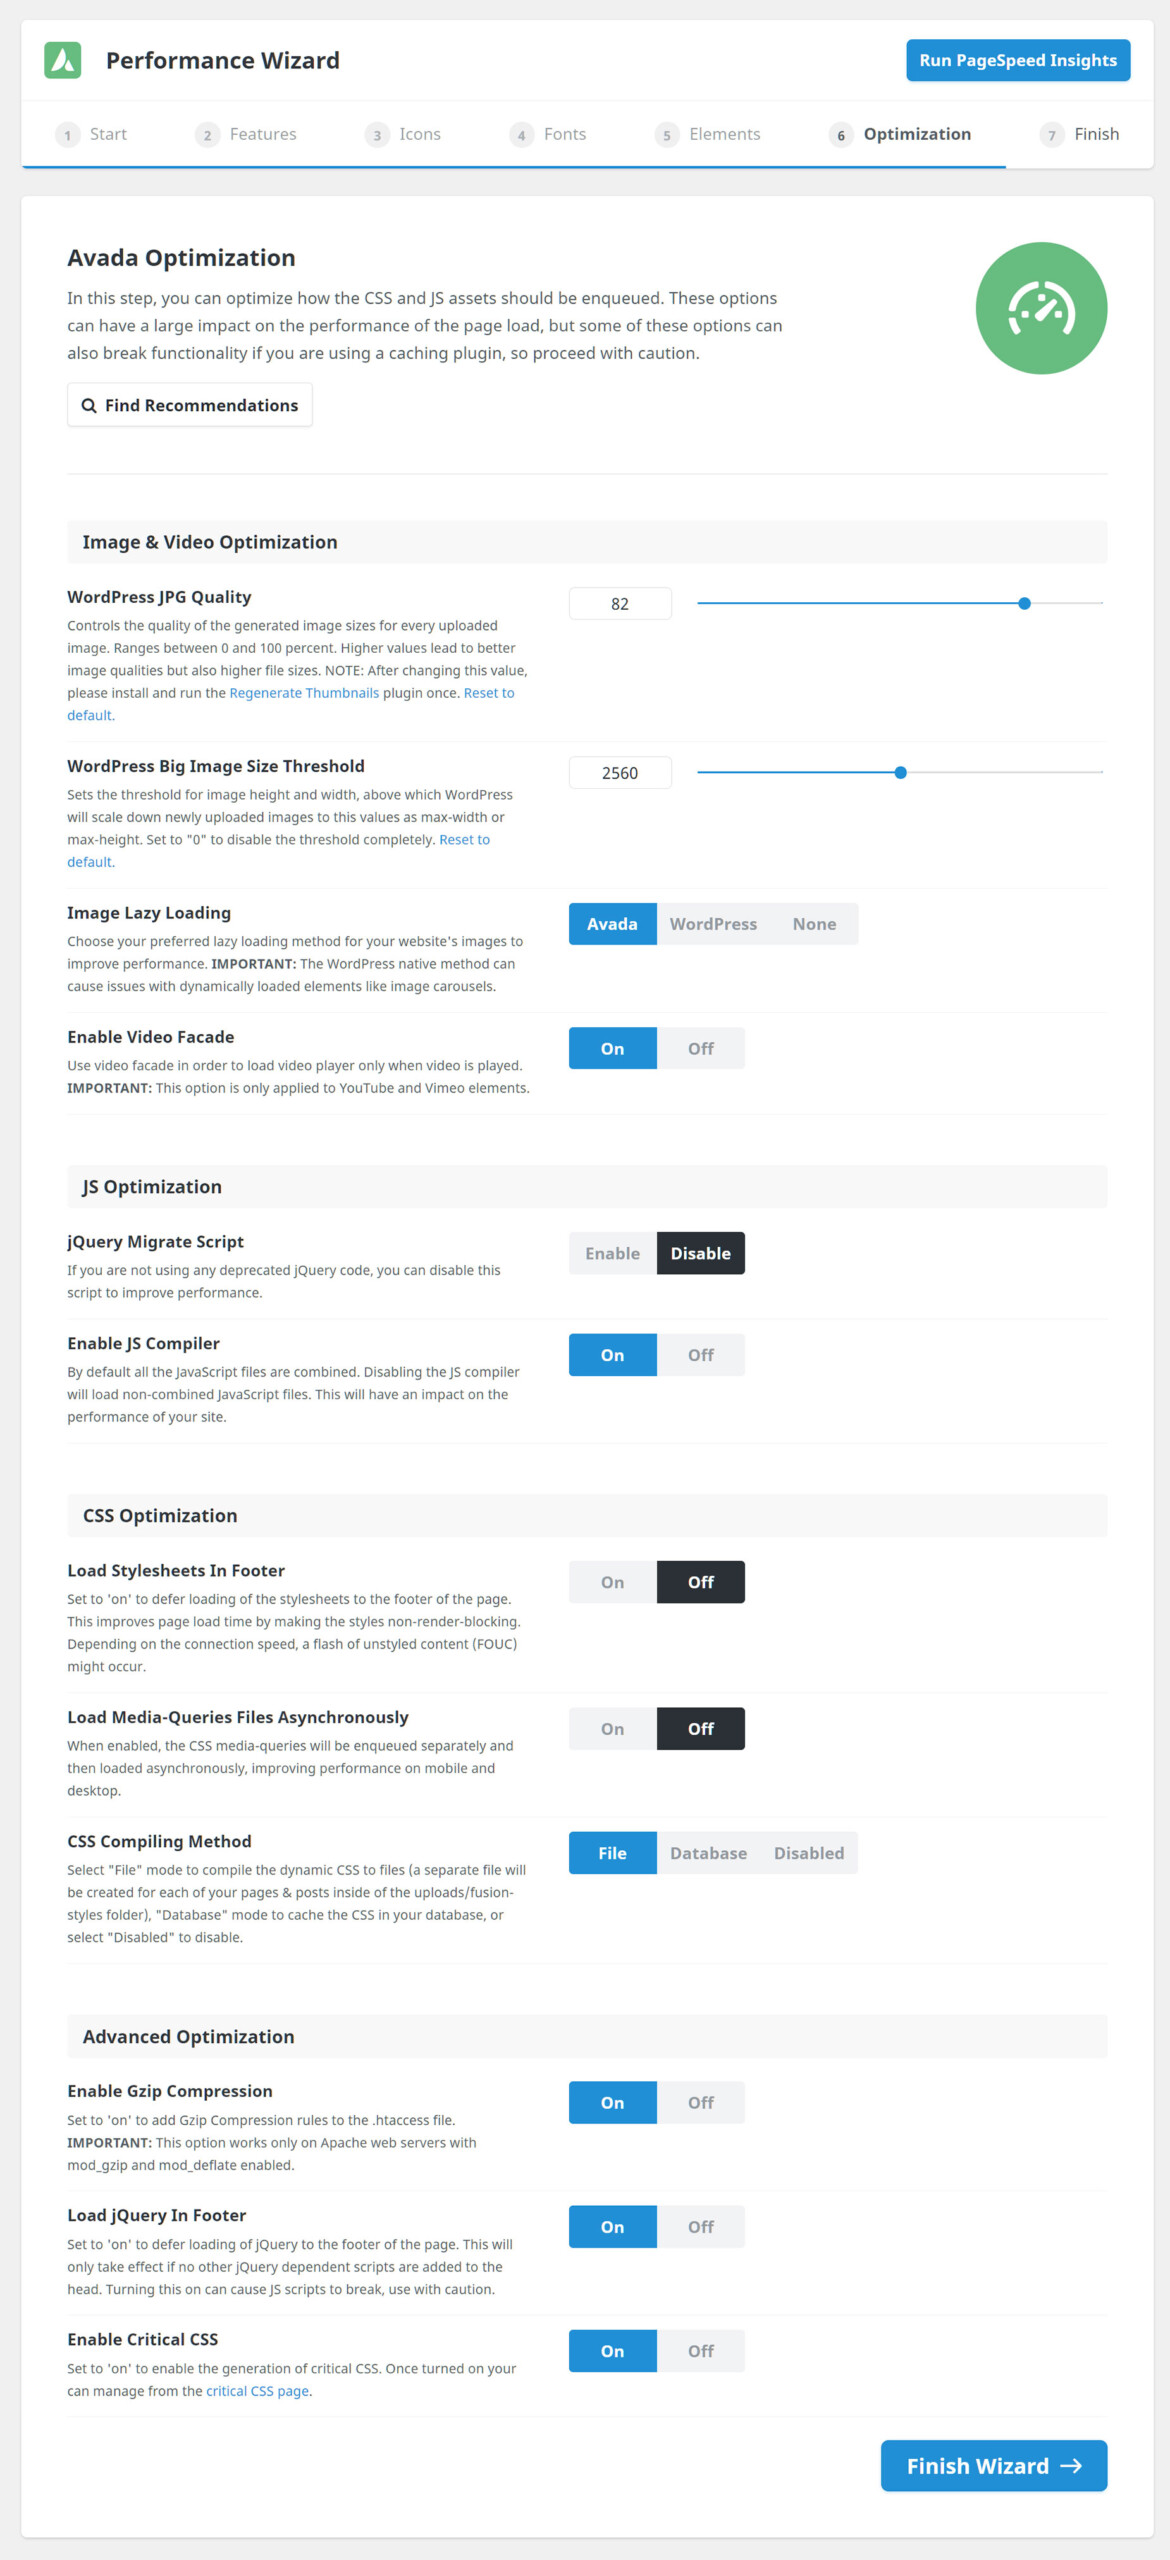
When you are done with your changes, click Save Changes and then Finish Wizard.
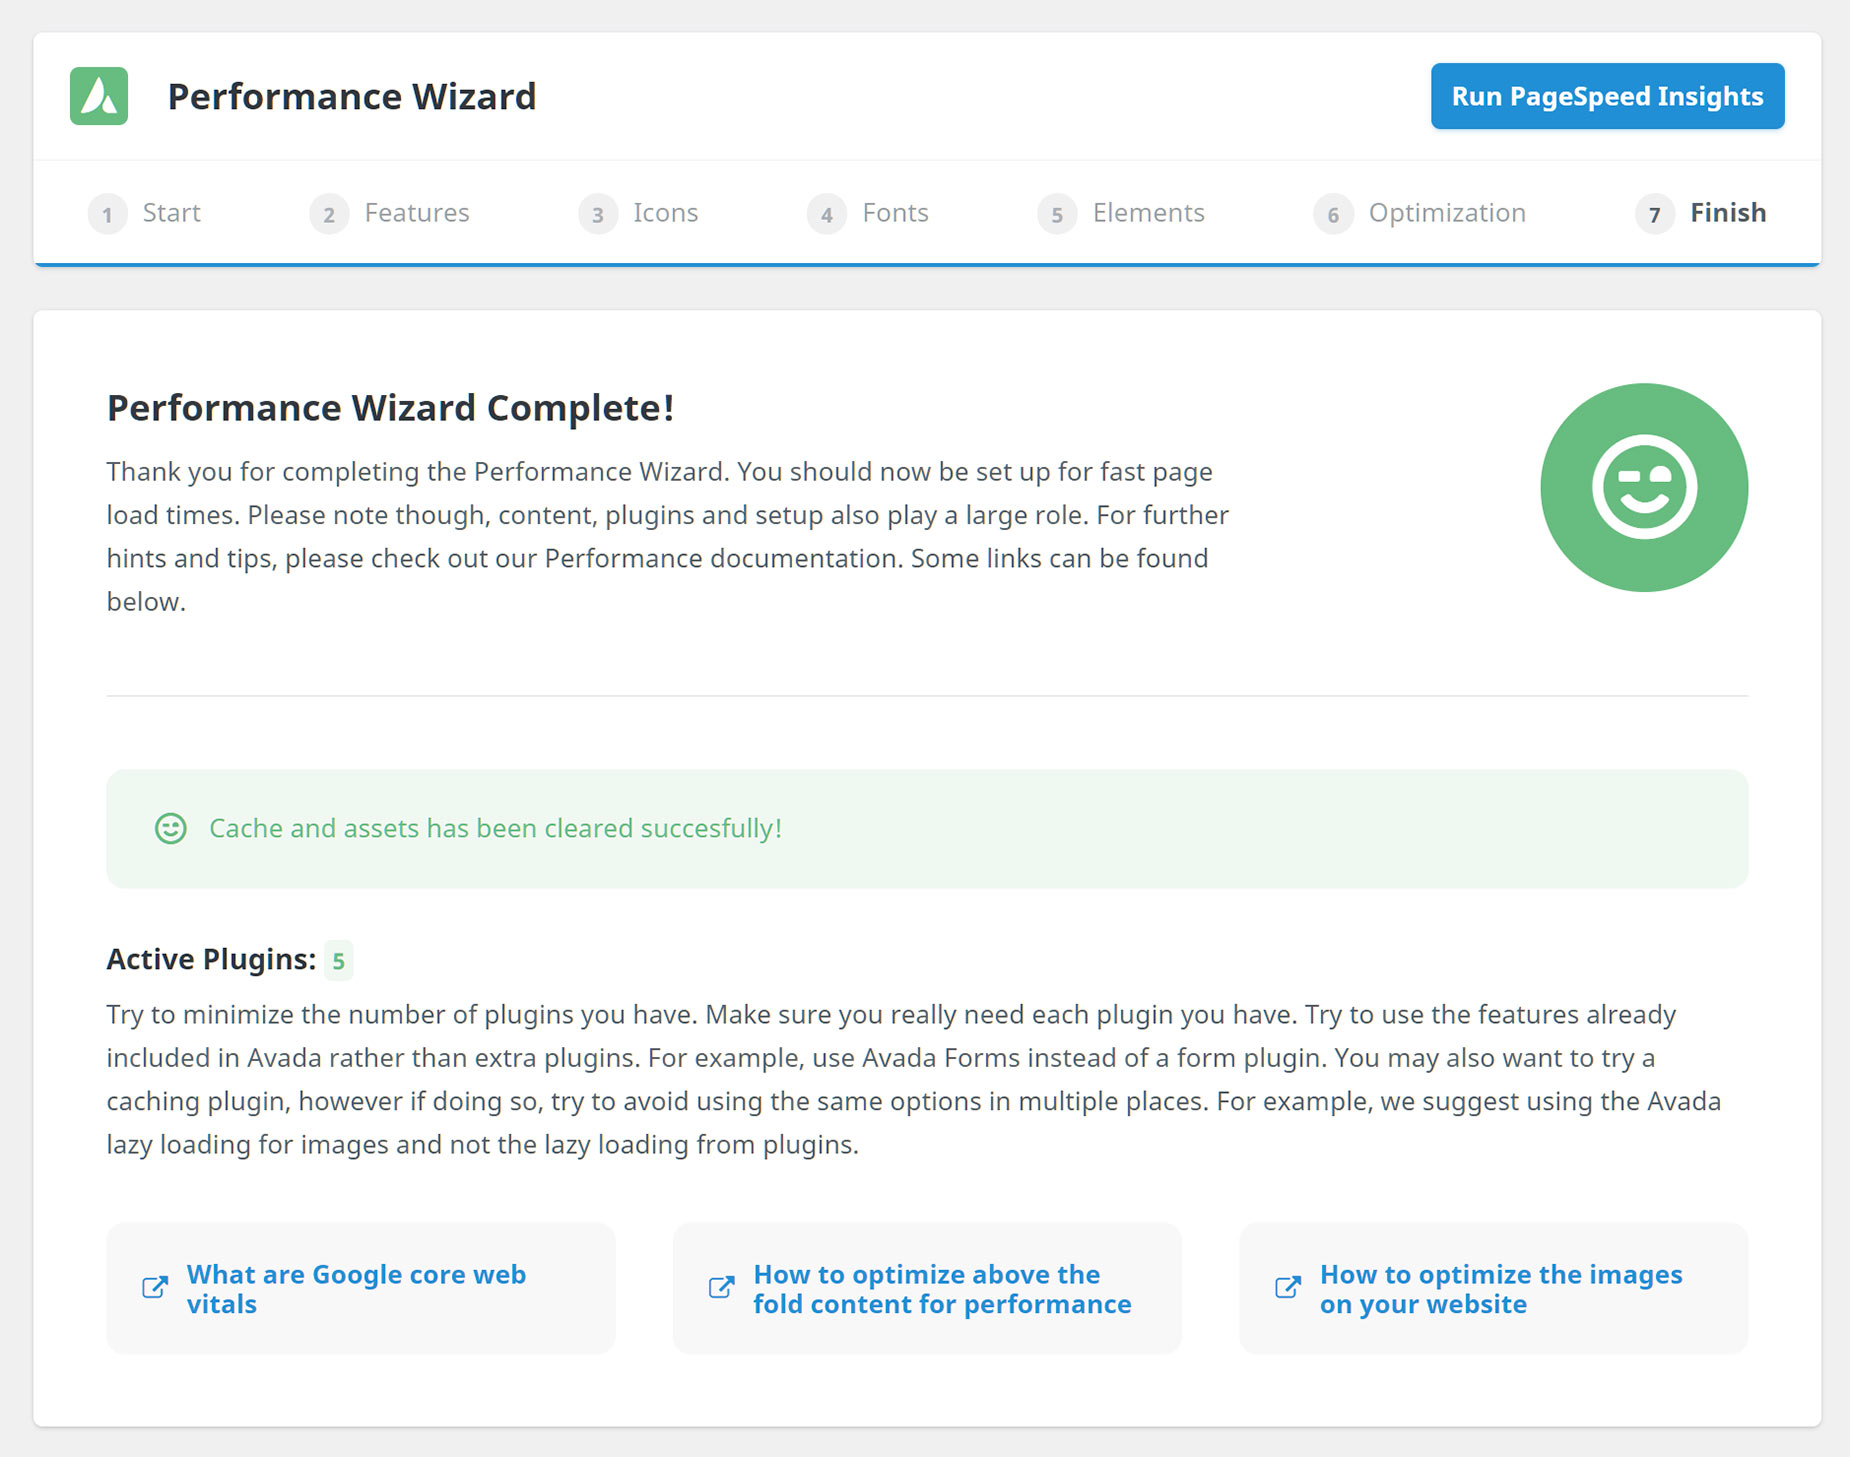
7. Finish
This takes you to the FInish page, which clears the site cache and assets. The Wizard also displays how many plugins you have, as these can have a big effect on performance. If you have missed any possible improvements, these will be listed on the right-hand side, next to the Active Plugins.
At the bottom, are some links to specific docs that can help with your understanding of website optimization, and how to perform further optimization, such as optimizing for above-the-fold content, and ensuring that your images are all the right size and optimized as well. Finally, at the top, you can click the Run PageSpeed insights button again, to see how the site has improved.
There are always more things you can to to optimize your site, like choosing faster hosting, running a CDN, installing a caching plugin, further optimize your images and much, much more, but the Performance Wizard is a great first step once you have completed your site, to get it up to speed.


