Share
In part one of our three-part series on creating an online store, we showed you how to create a successful and stylish eCommerce website using the Avada and one of its prebuilt websites. Now, in part two, we’re going to show you how to take that design and start selling with WooCommerce.
By the end of this post, you should have a working store with real products. Shoppers will be able to browse your store and purchase products. Then, you’ll be able to view and fulfill those orders. Basically, your store will be totally functioning!
Then, in part three of our series, we’re going to show you how you can start making more sales and boosting your revenue. But we’re getting ahead of ourselves – let’s focus on setting up WooCommerce for now.
Overview
What Is WooCommerce?
In part one of this series, we had you set up the design of your e-commerce store using one of Avada’s 111 pre-built websites. As part of setting up that store, Avada automatically installed WooCommerce for you, but we never really talked about what WooCommerce is.
In a nutshell, WooCommerce is a powerful WordPress plugin that turns your WordPress site into a fully functioning e-commerce store. It handles all the core features you need from an e-commerce platform, including:
By the numbers, WooCommerce is the most popular way to make an e-commerce store. We don’t mean the most popular WordPress e-commerce plugin (though it is that), we mean that it’s actually more popular than other e-commerce platforms such as Shopify and Magento.
According to BuiltWith, WooCommerce powers 28% of the e-commerce stores in the top one million sites, whereas Shopify powers 19% and Magento powers 9%. Your store will be joining those numbers by the time you get to the bottom of this post.
The Benefits of Using WooCommerce With Avada
At a high level, here’s how you can think about pairing WooCommerce and Avada:
So – what are the benefits of using WooCommerce with Avada?
For a deeper look, check out our post on how Avada can improve your store’s shopping experience.
How to Set Up WooCommerce
Now, let’s talk about how to set up WooCommerce so that you can start selling. If you followed part one in our series, you should have already installed the WooCommerce plugin as part of importing the Avada e-commerce demo site.
If you haven’t done that yet, you can jump back to part one to follow those steps. Or, you can always manually install the free WooCommerce plugin from WordPress.org. Once you have it installed, here’s how you can set it up.
Follow the WooCommerce Setup Wizard
To set up the basics for your store, you should use the WooCommerce setup wizard. If you click on the WooCommerce tab in your WordPress dashboard, it should automatically launch the setup wizard:
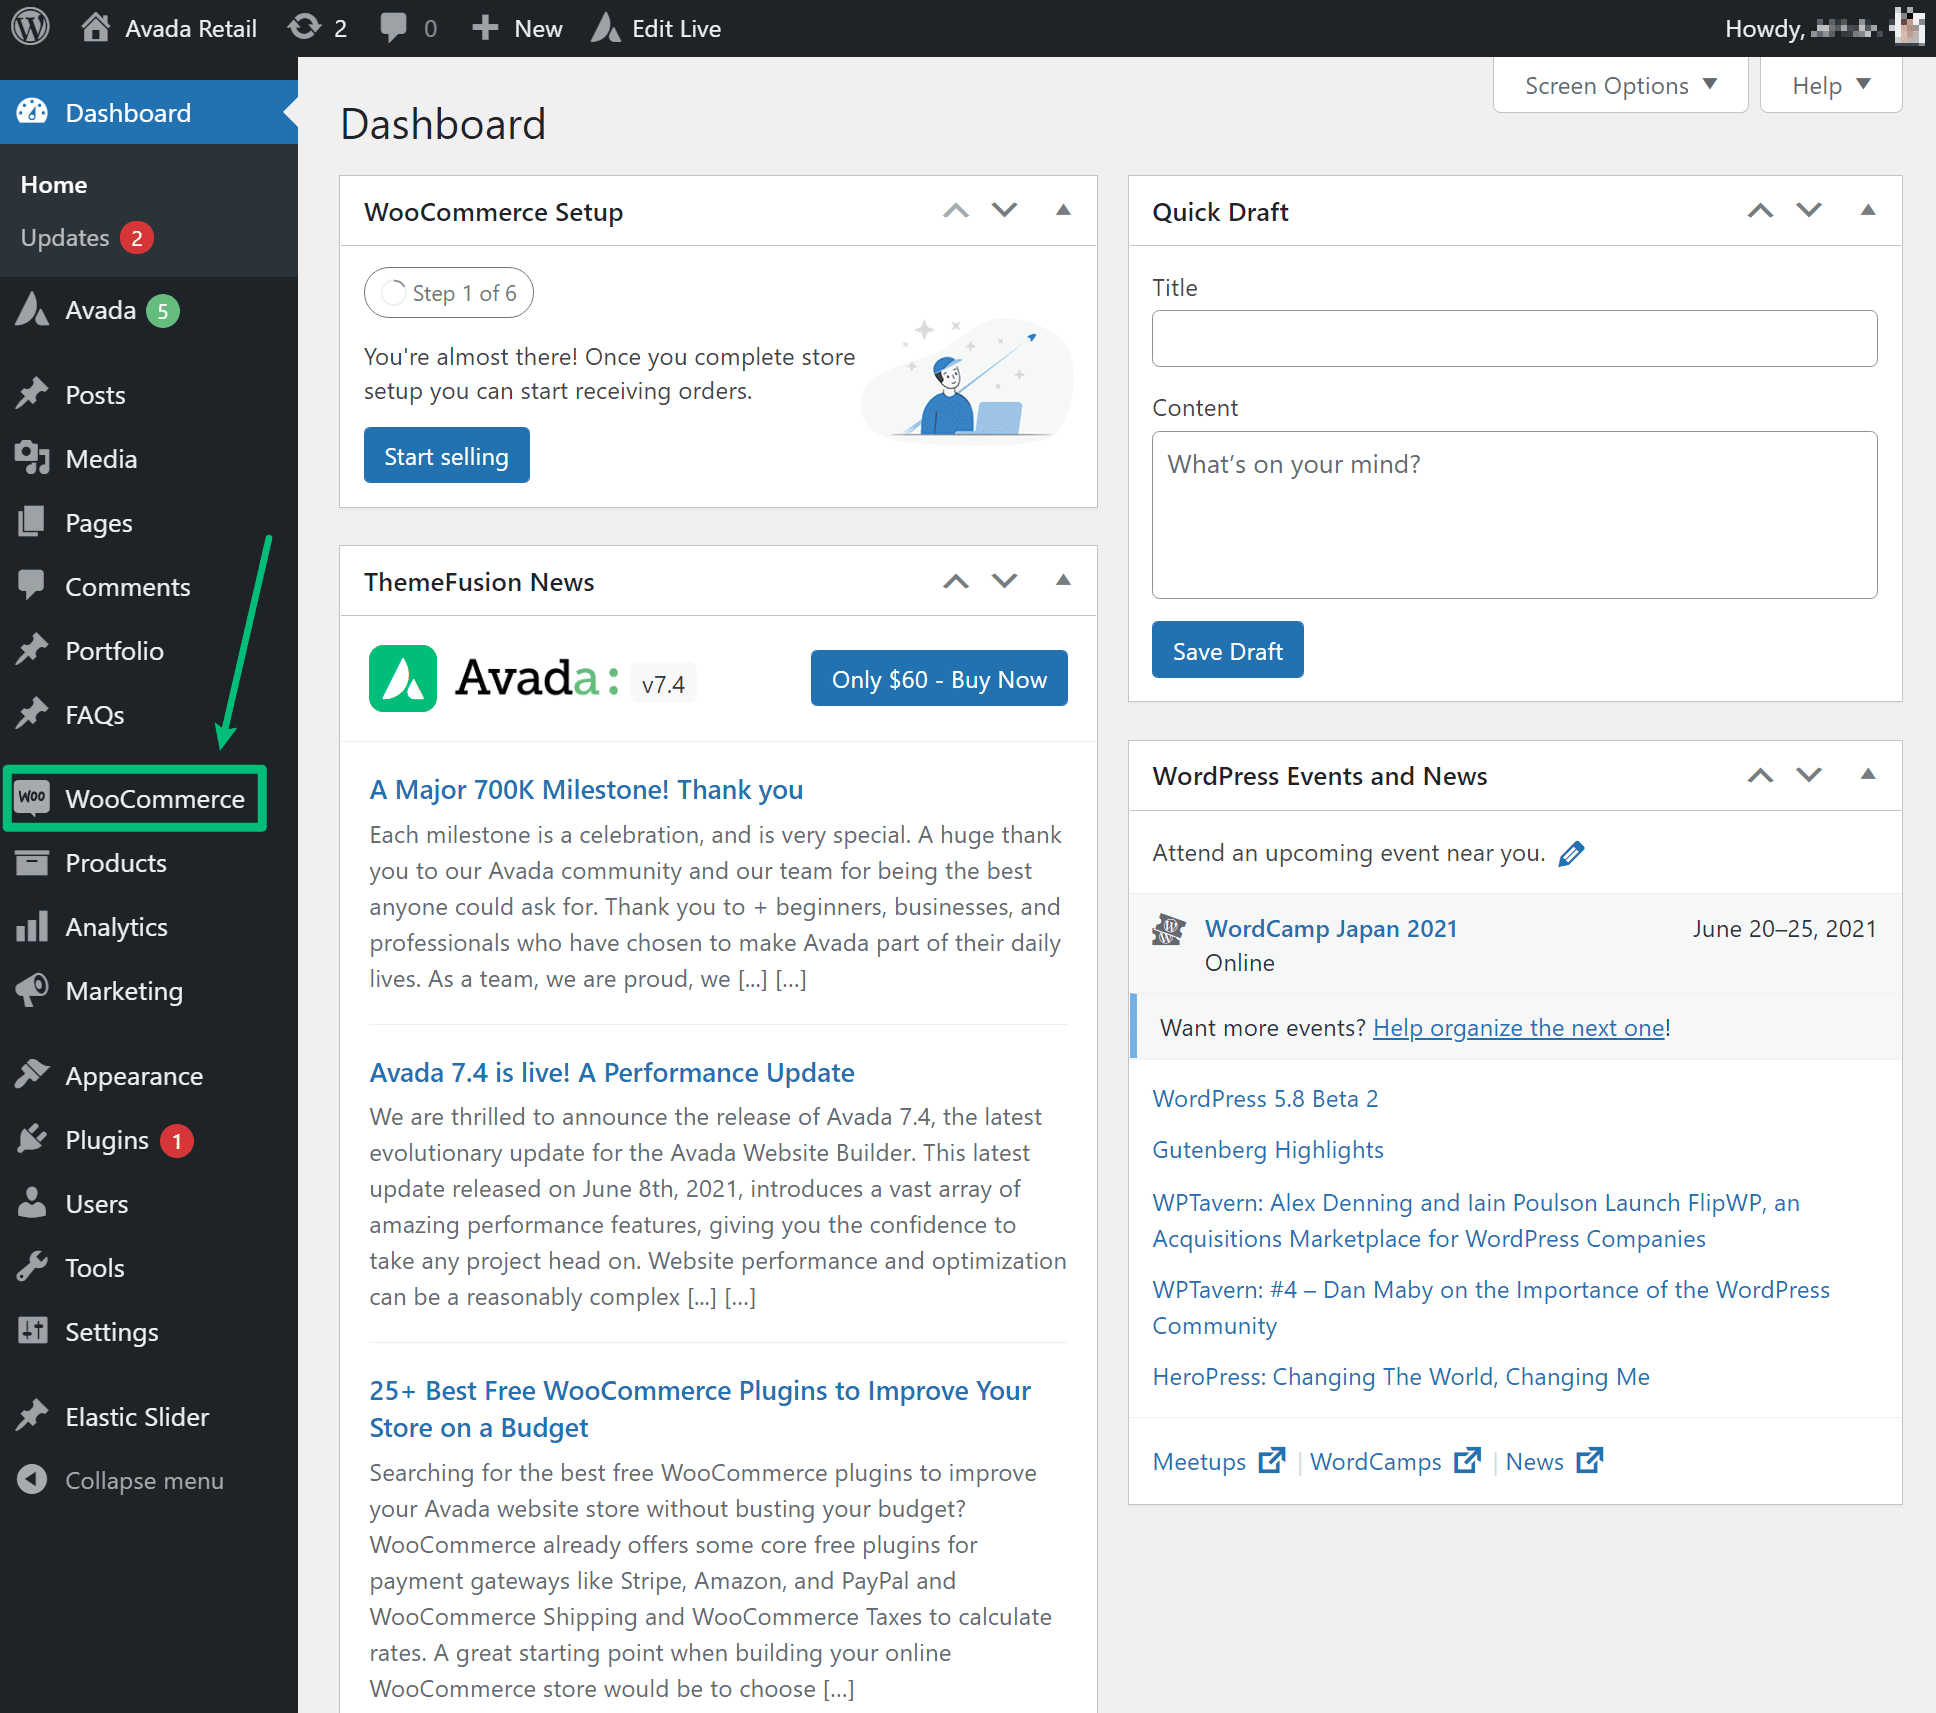
If the setup wizard doesn’t launch automatically, you can manually activate it by following these instructions. In the first step of the wizard, you’ll enter your store’s location:
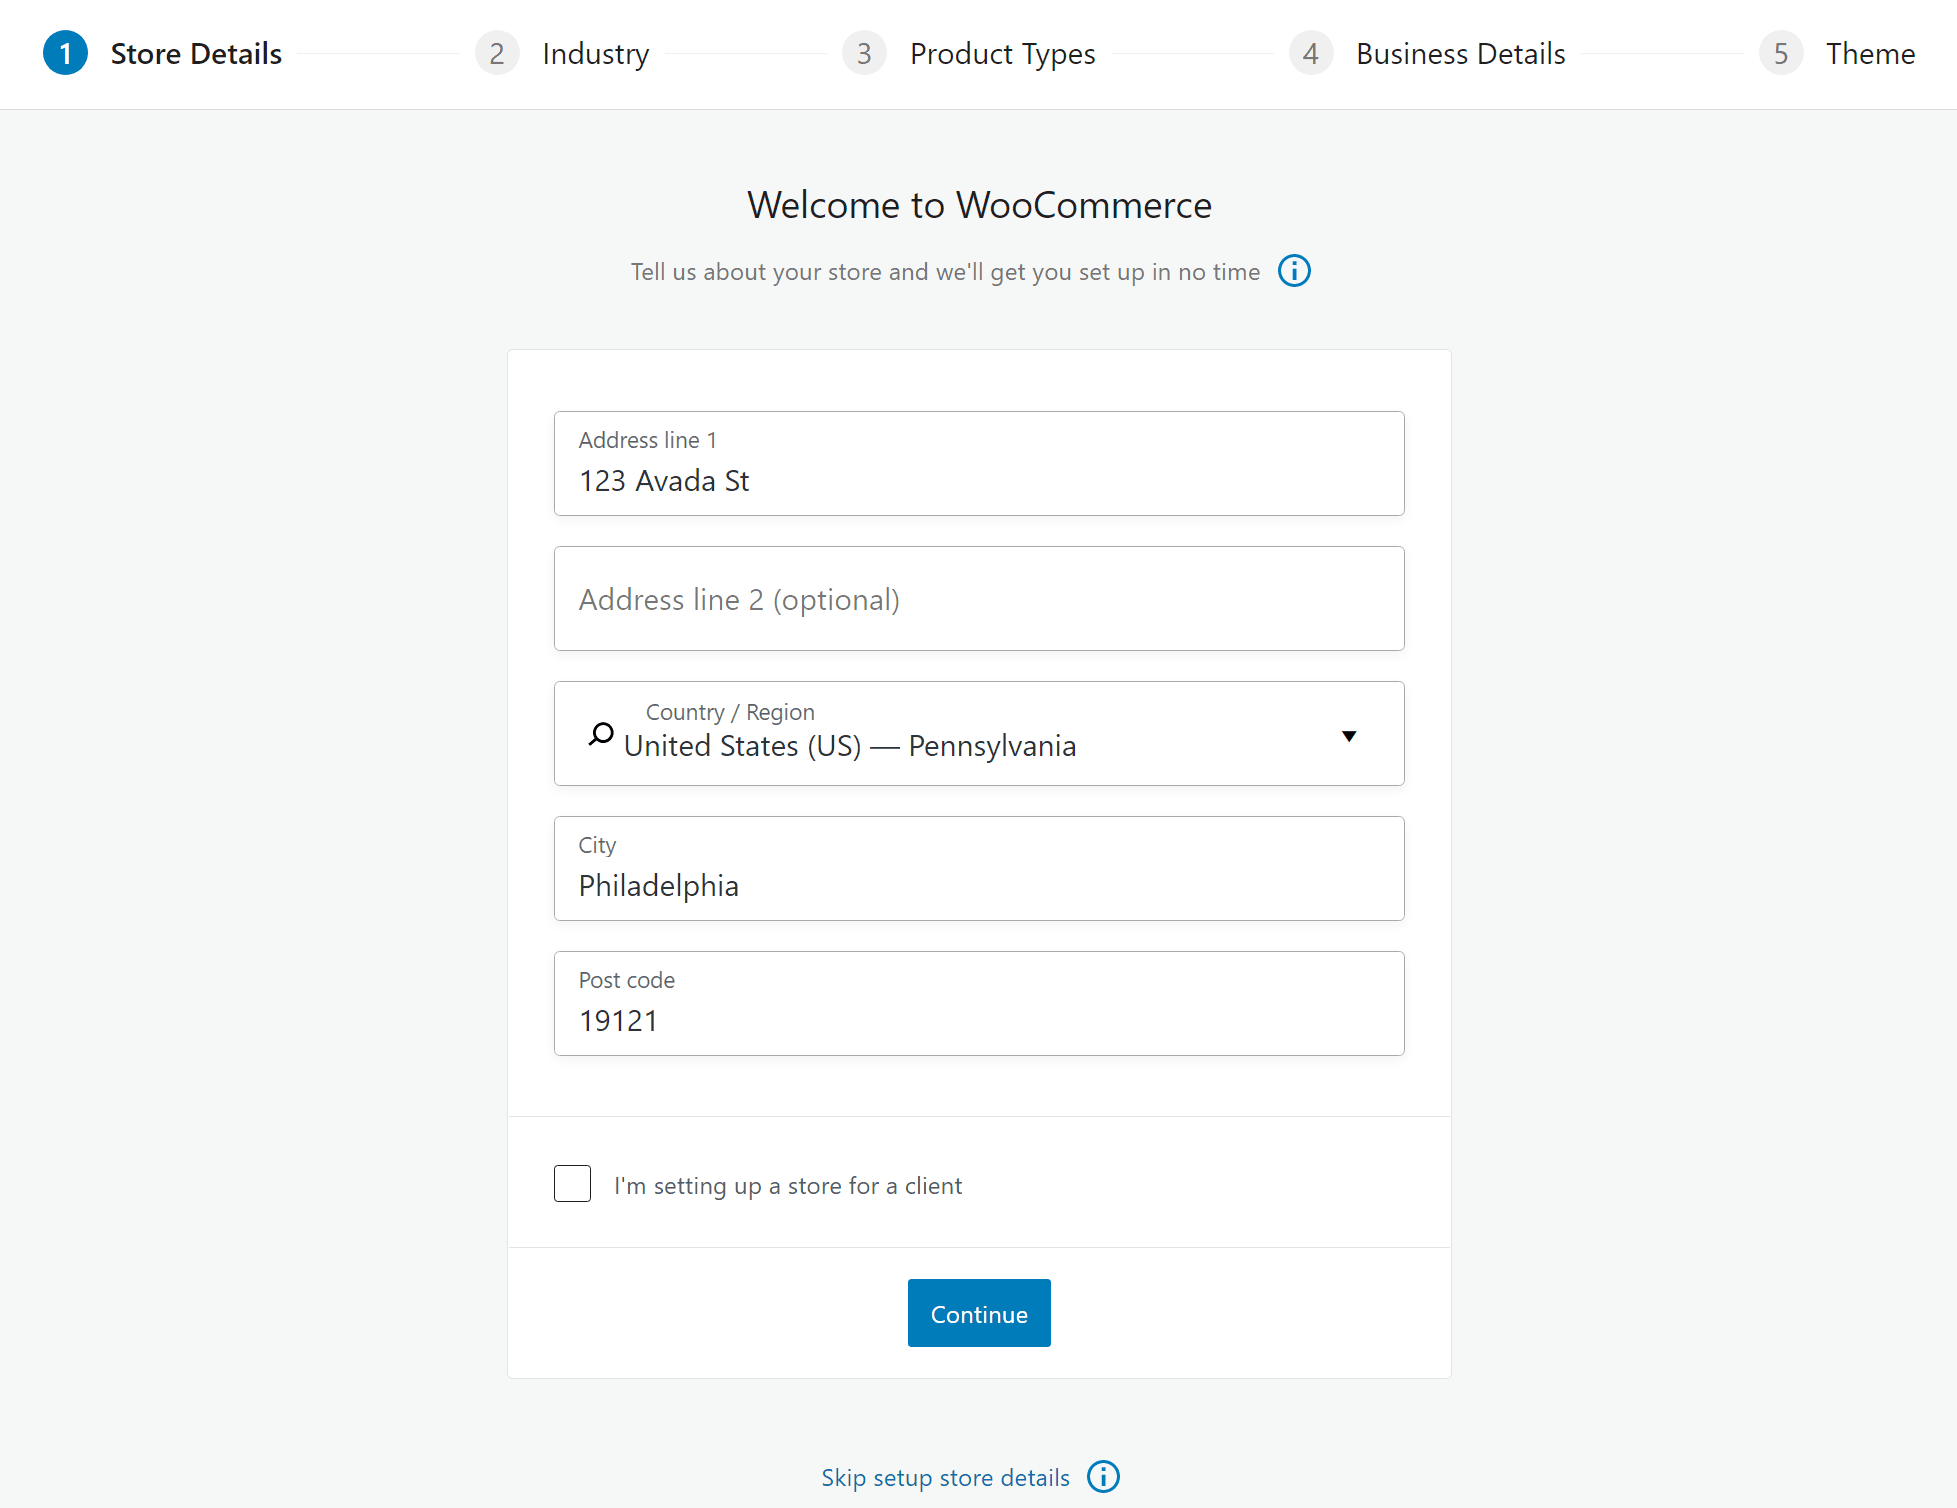
Next, you can choose your store’s industry, which can help adapt the WooCommerce experience to your needs:
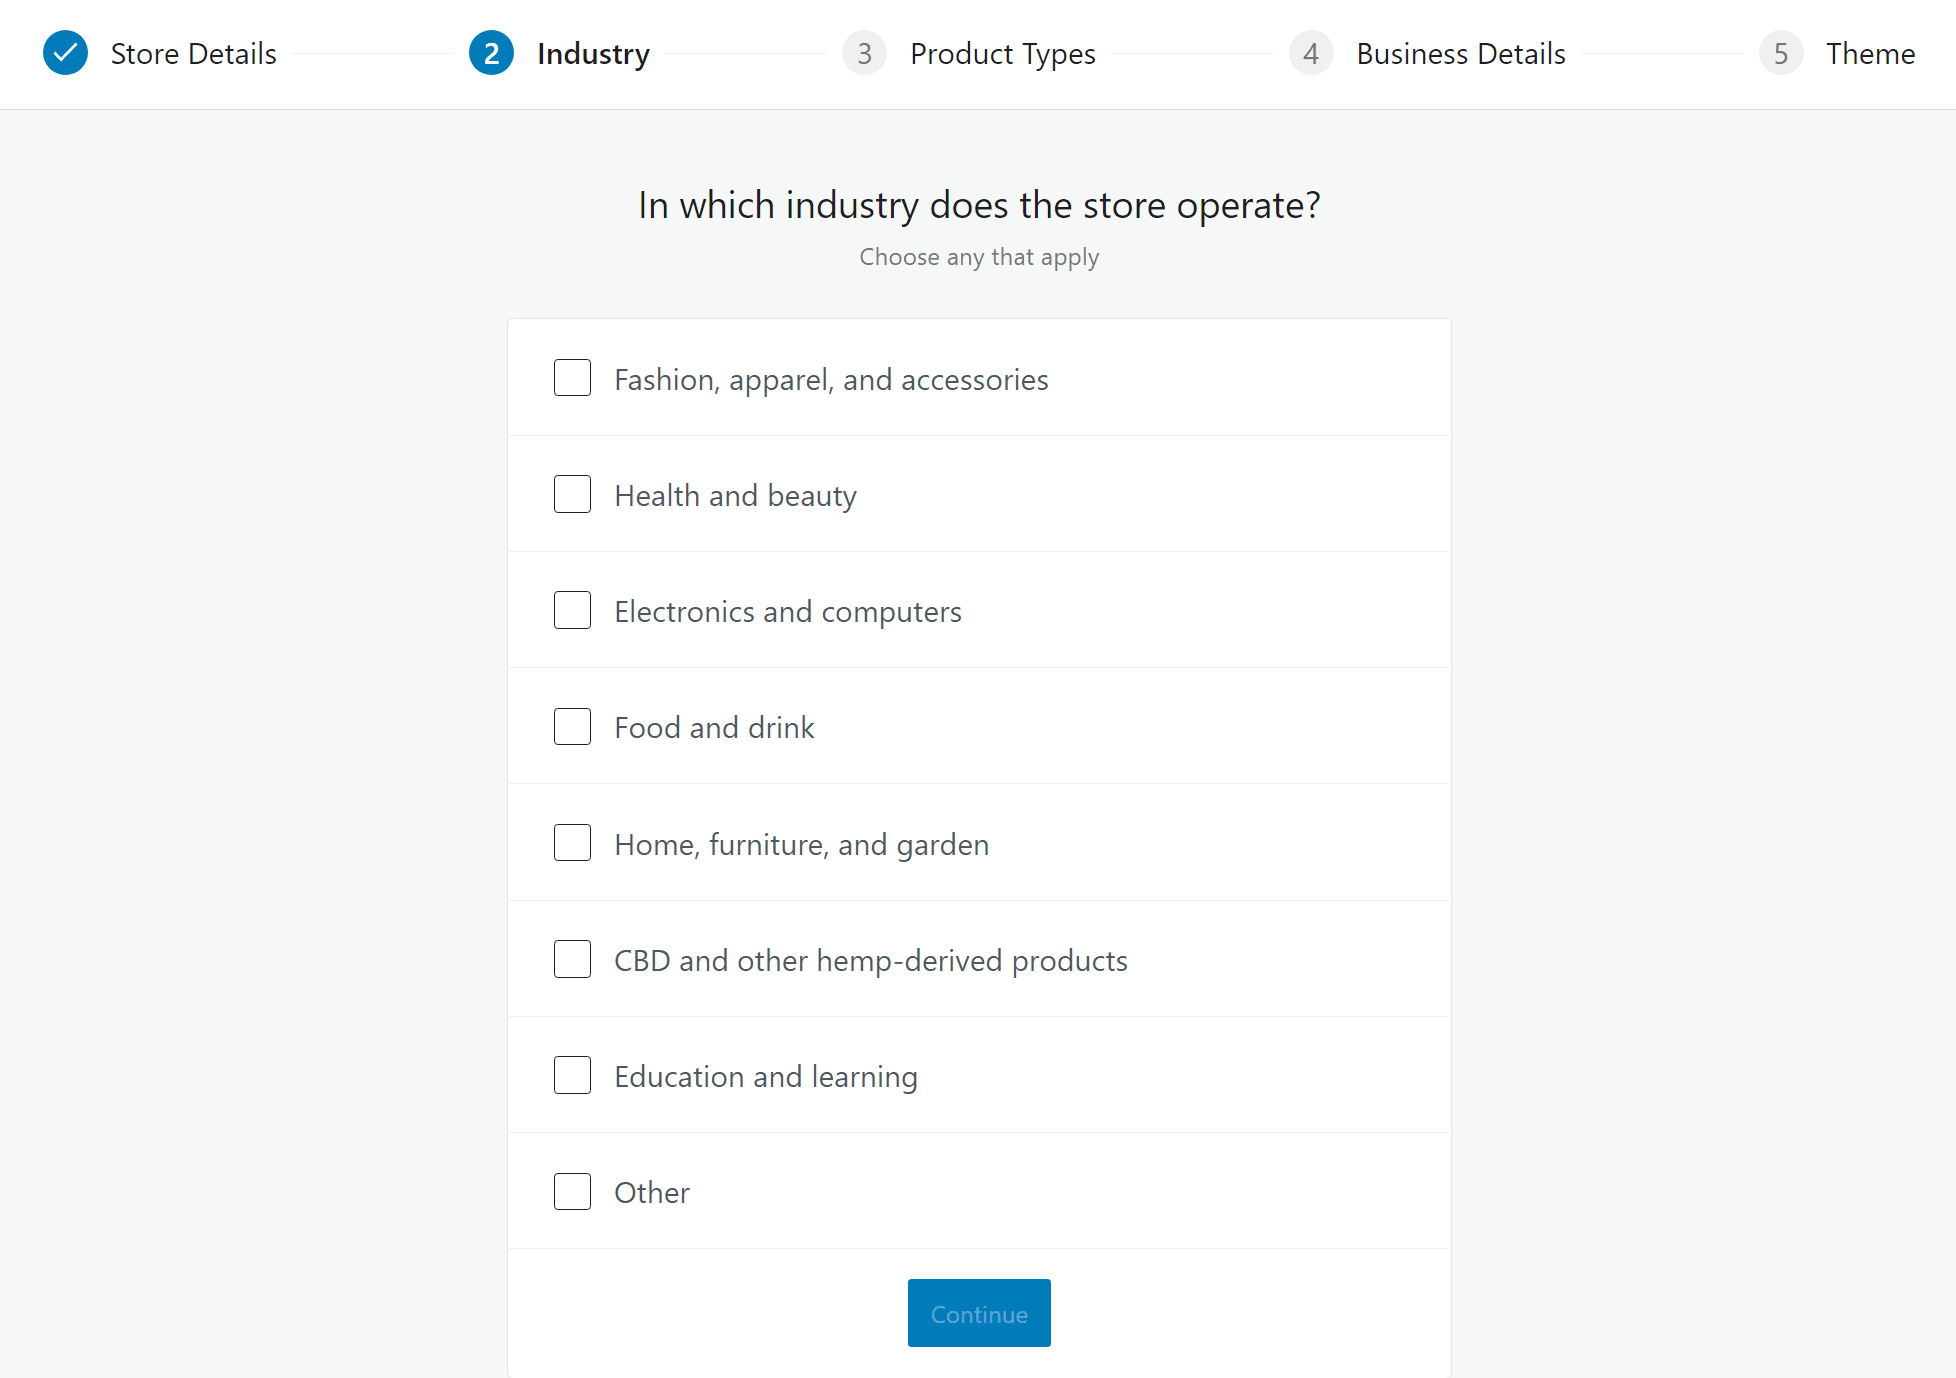
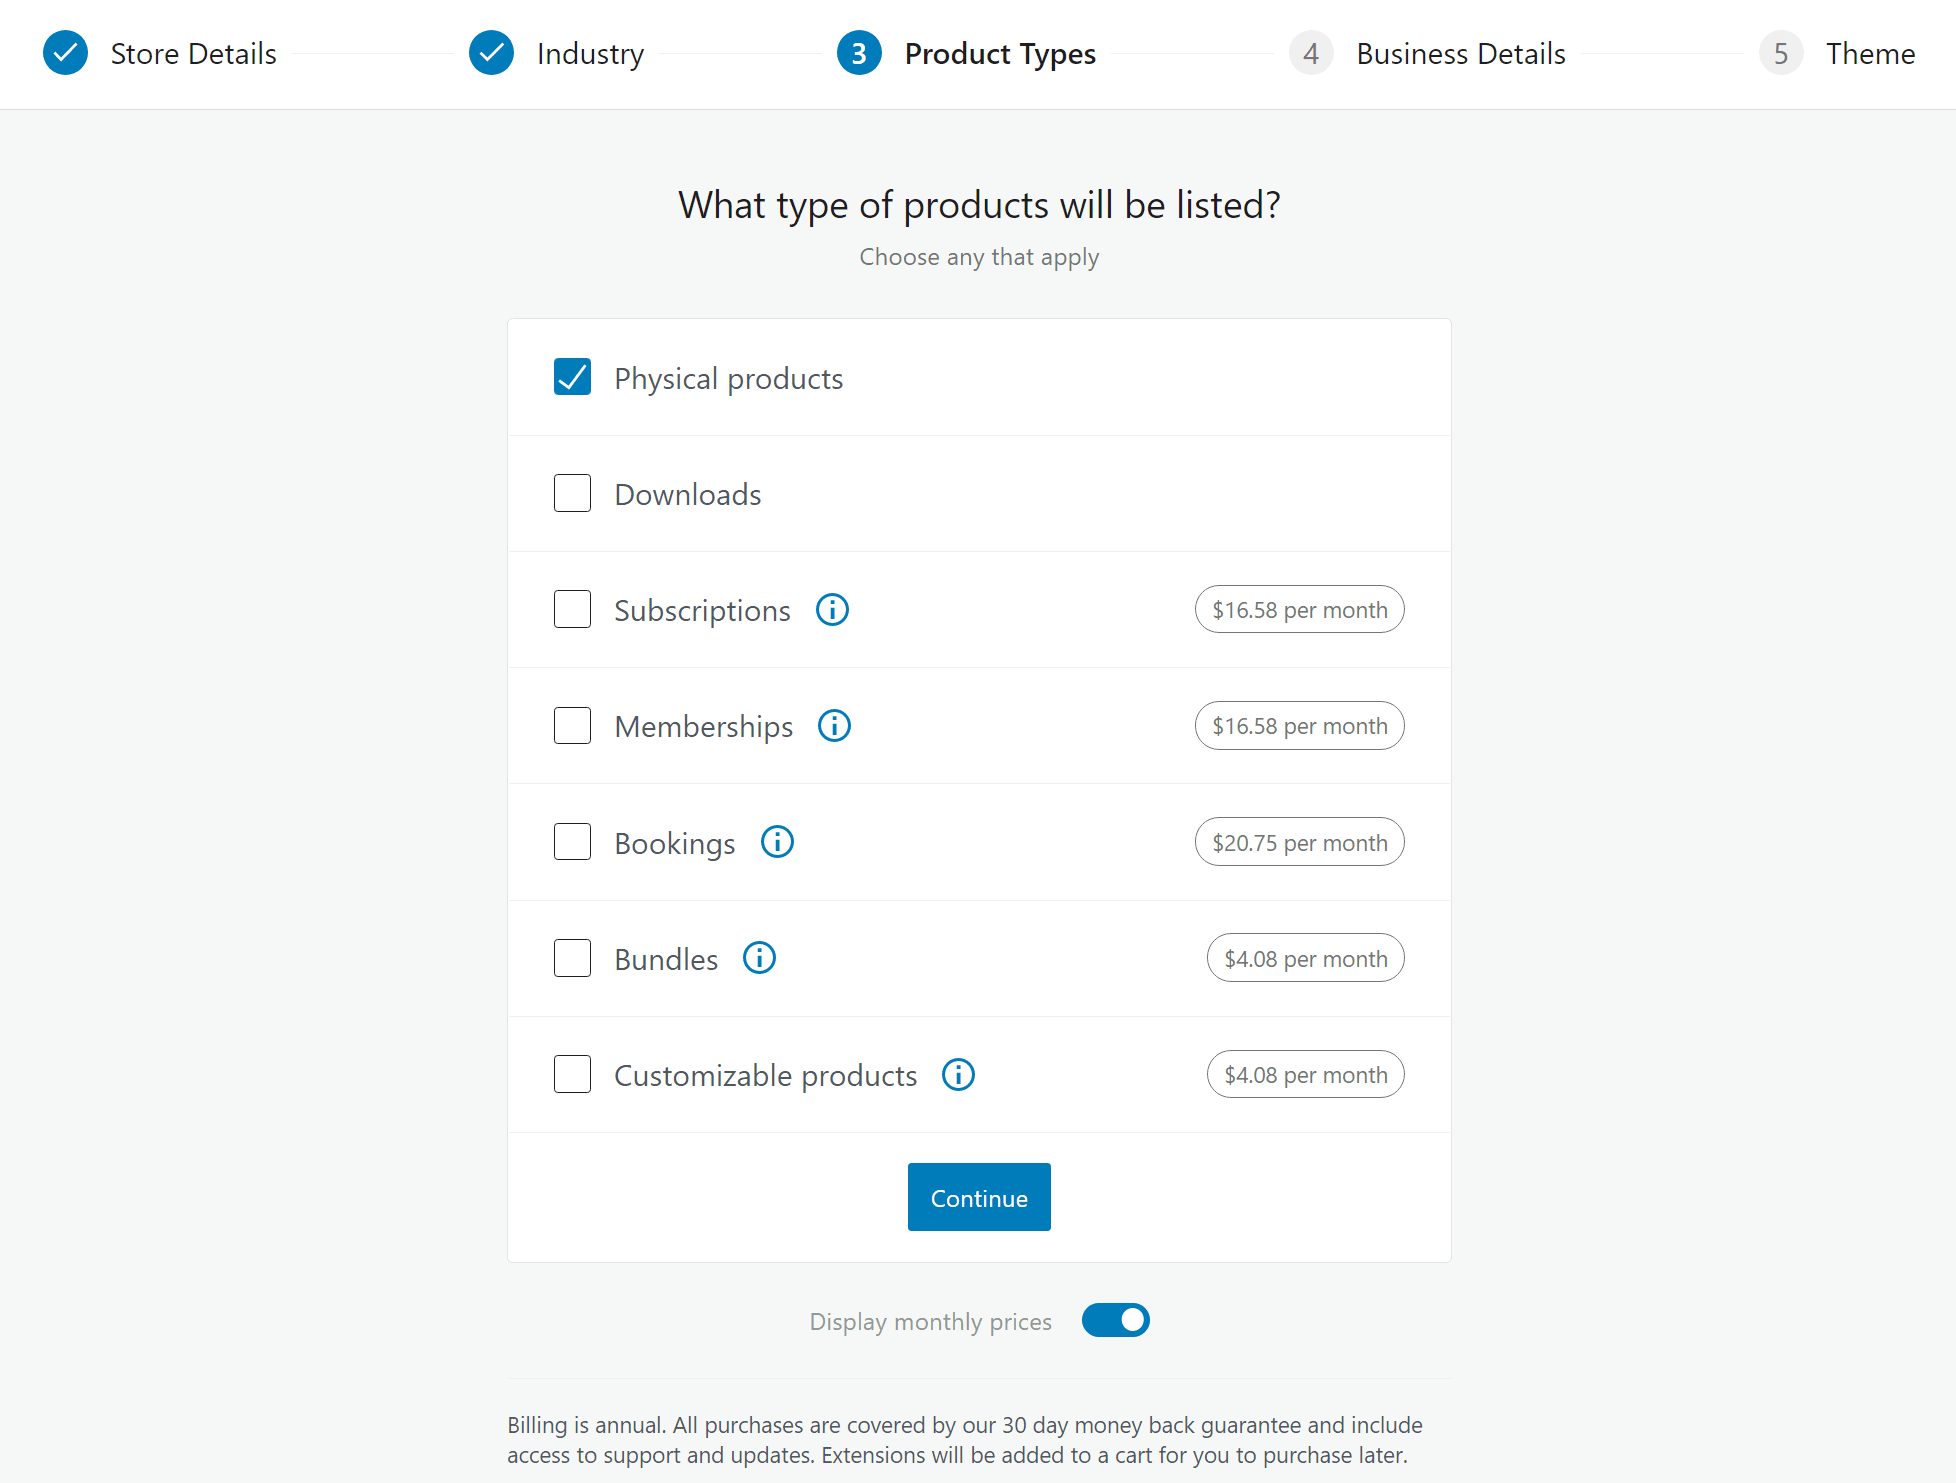
Under Product Types, you’ll be prompted to choose which types of products you want to sell. Most of the time, this will just be “Physical products” or “Downloads.”
For some types of products, like subscriptions or bookings, you’ll need to add an additional plugin, which is why you see a price listed next to those product types. We’ll talk more about WooCommerce plugins later in this tutorial:
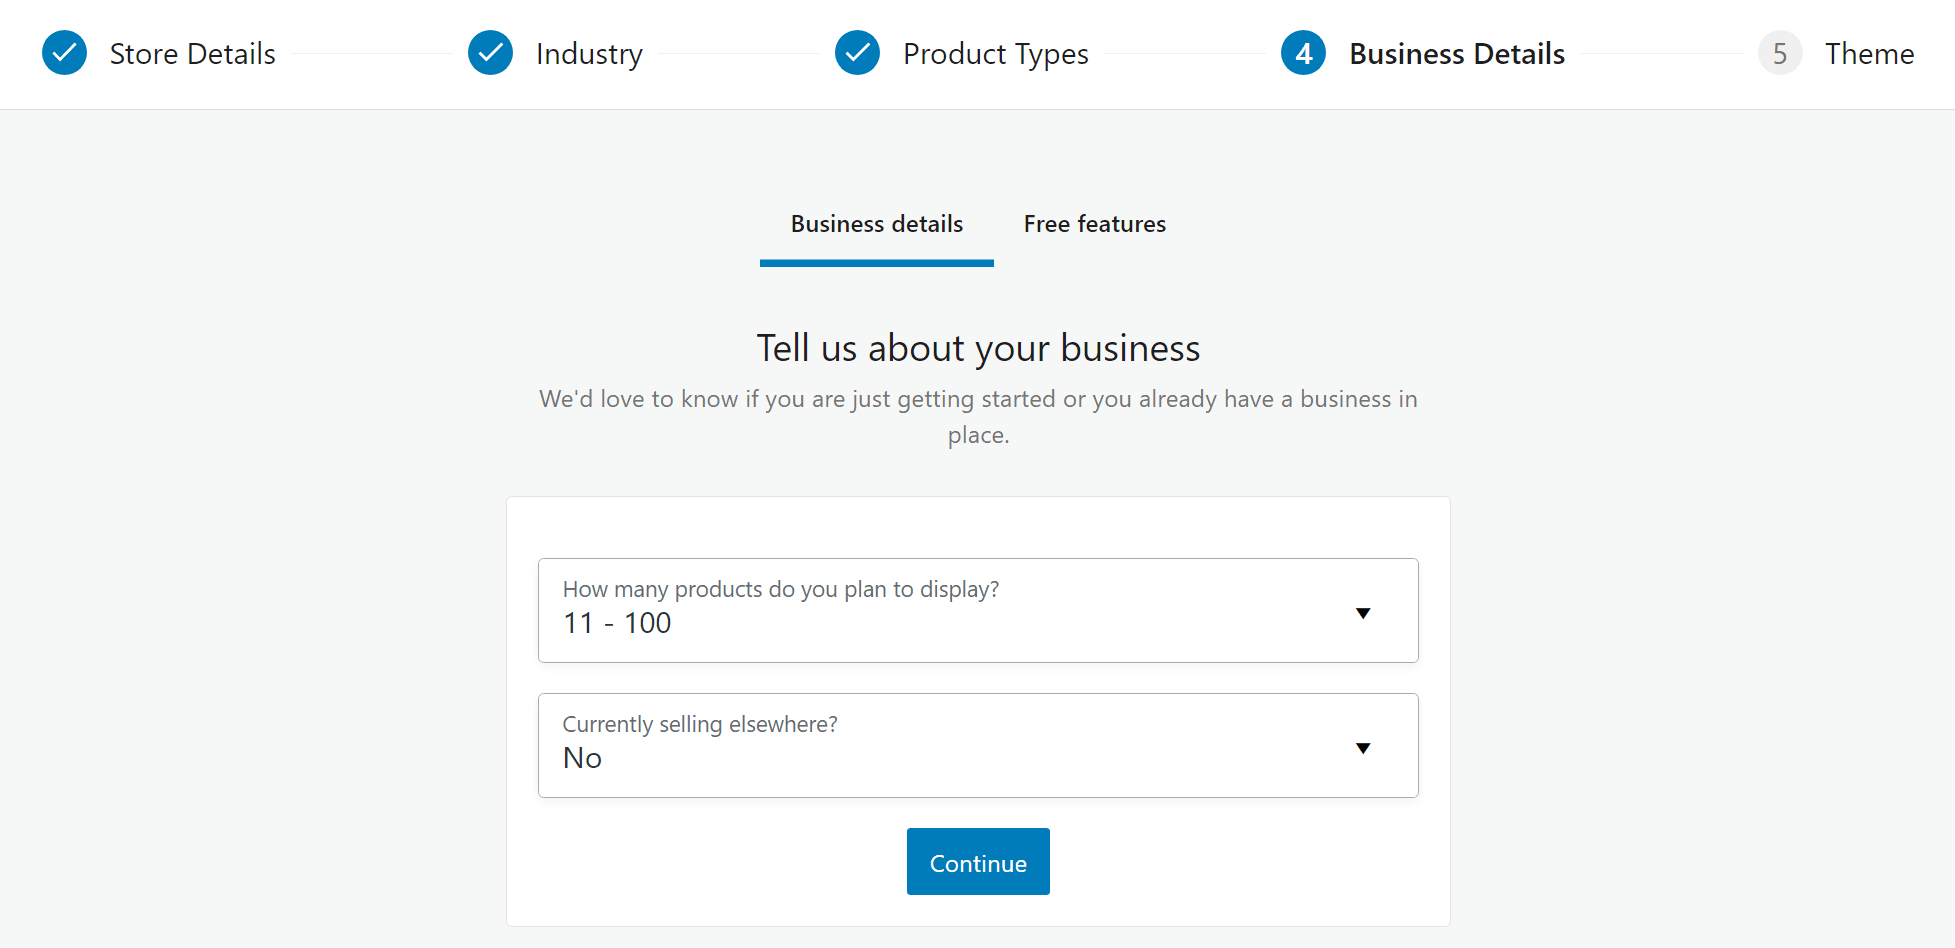
The Business Details section has two parts. First, it will ask you how many products you plan to sell and whether you’re already selling via any other channels (such as a physical store or another online platform like eBay or Amazon):
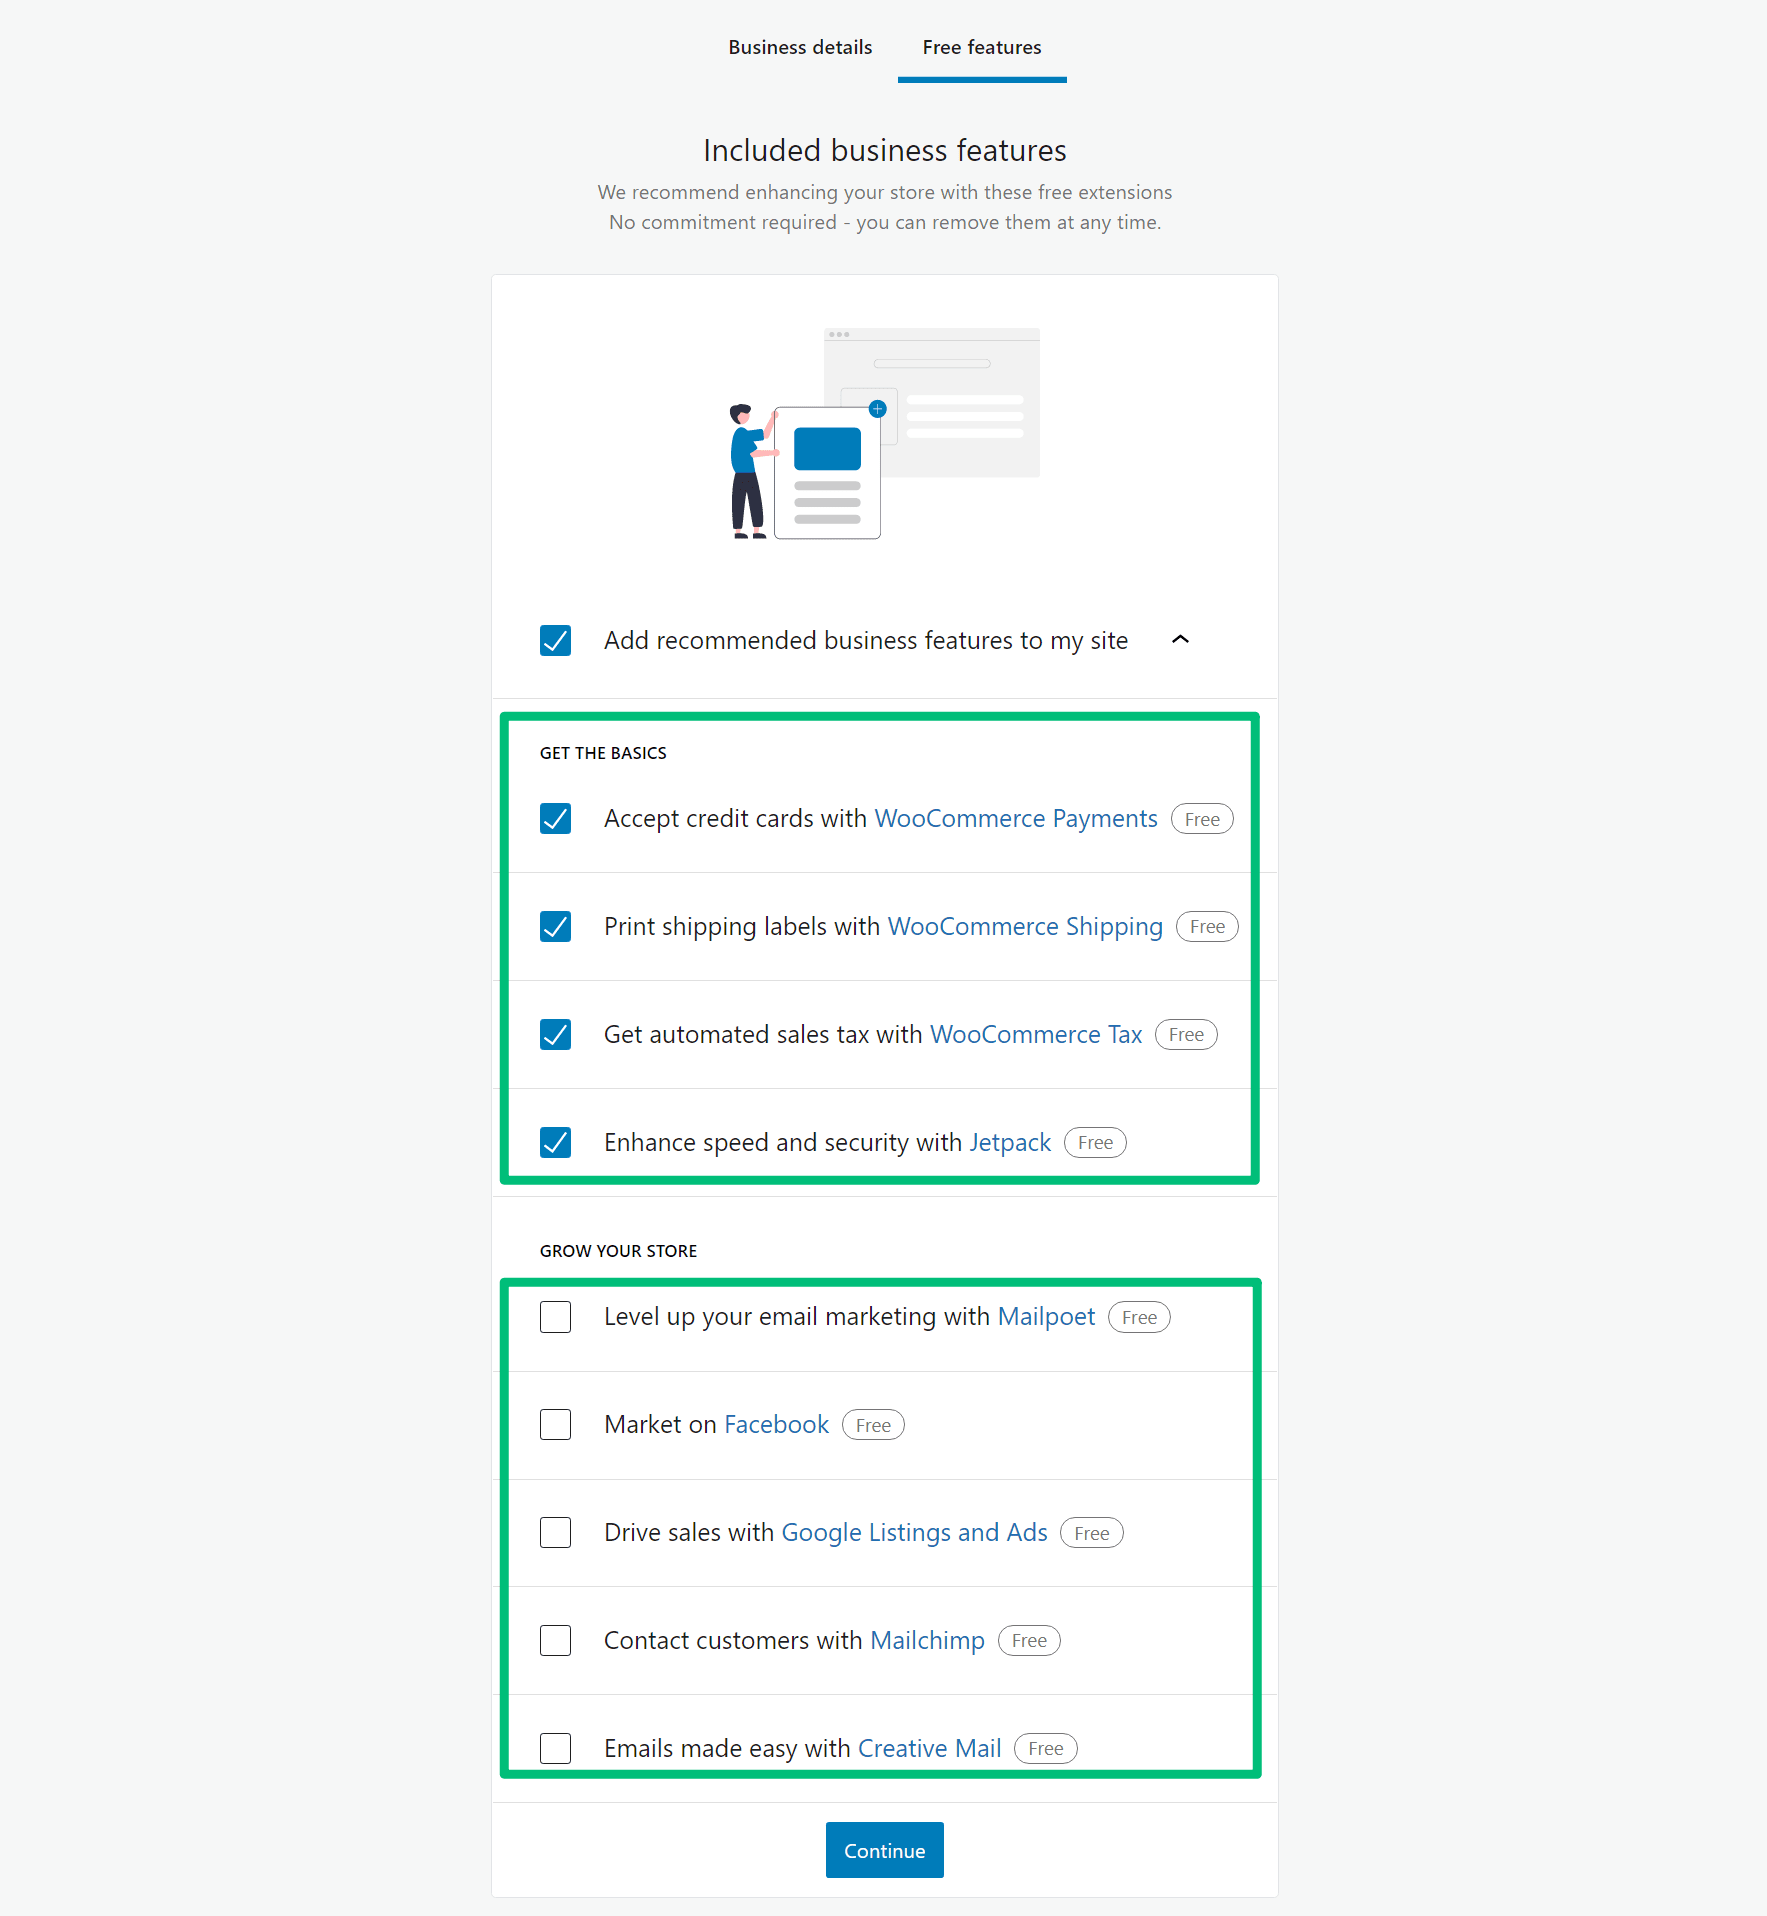
Then, WooCommerce will prompt you to add “Included business features.” These come in the form of plugins. We recommend expanding the complete list and unchecking all tools in the “Grow Your Store” section. In the next part of this series, we’ll cover marketing your store and recommend some better options.
However, you probably do want to install the tools under “Get the Basics,” as these are just helpful extensions for baseline features like payments, shipping, and tax:
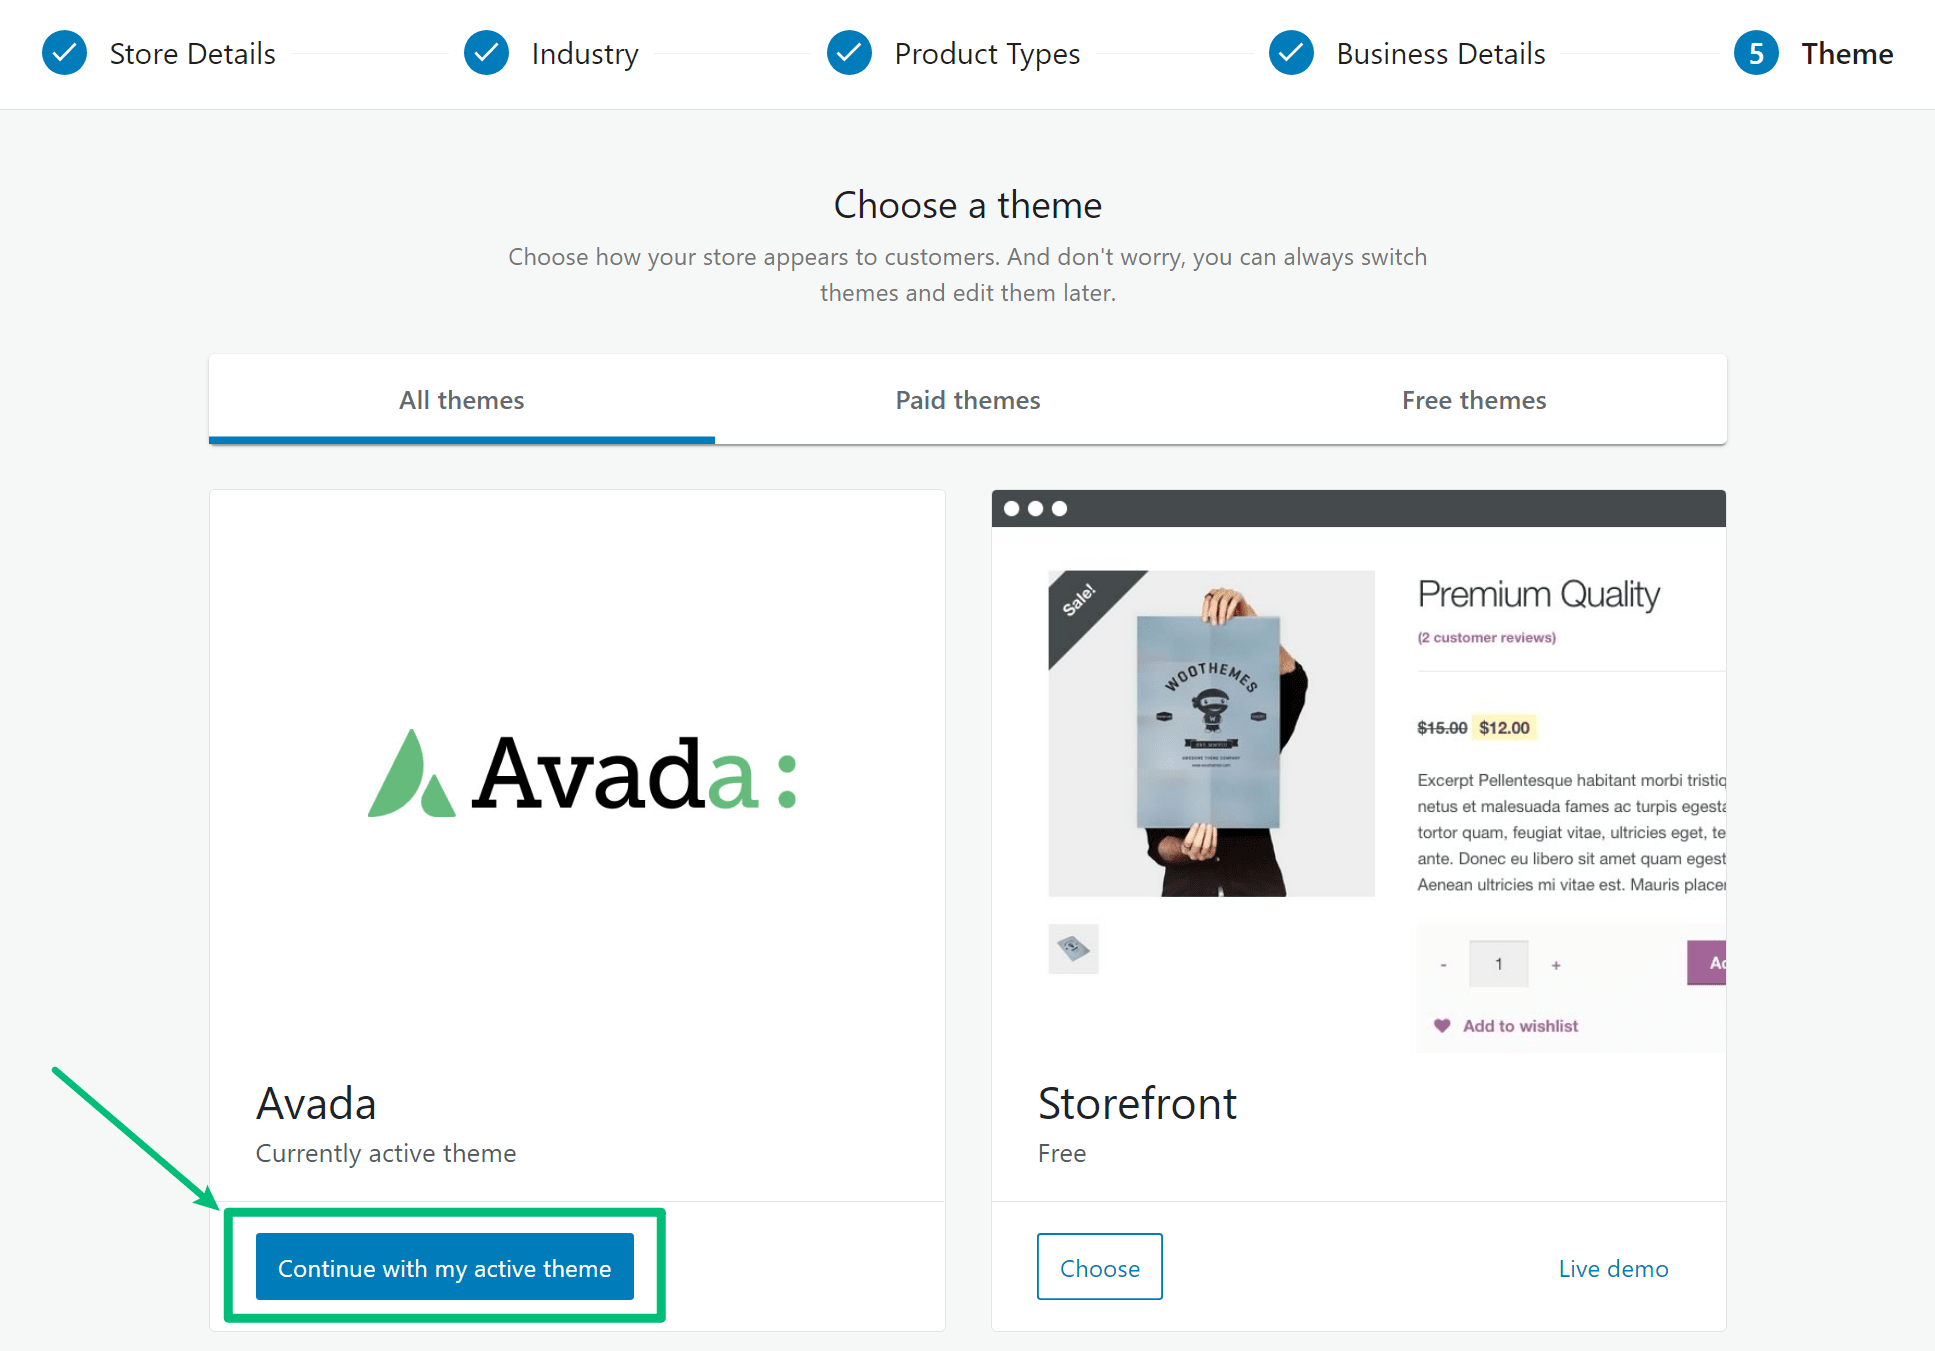
To finish out the setup wizard, WooCommerce will prompt you to choose a theme. You already did this in part one of our series when you installed and configured the Avada theme, so you can just click the Continue with my active theme button to keep using Avada:
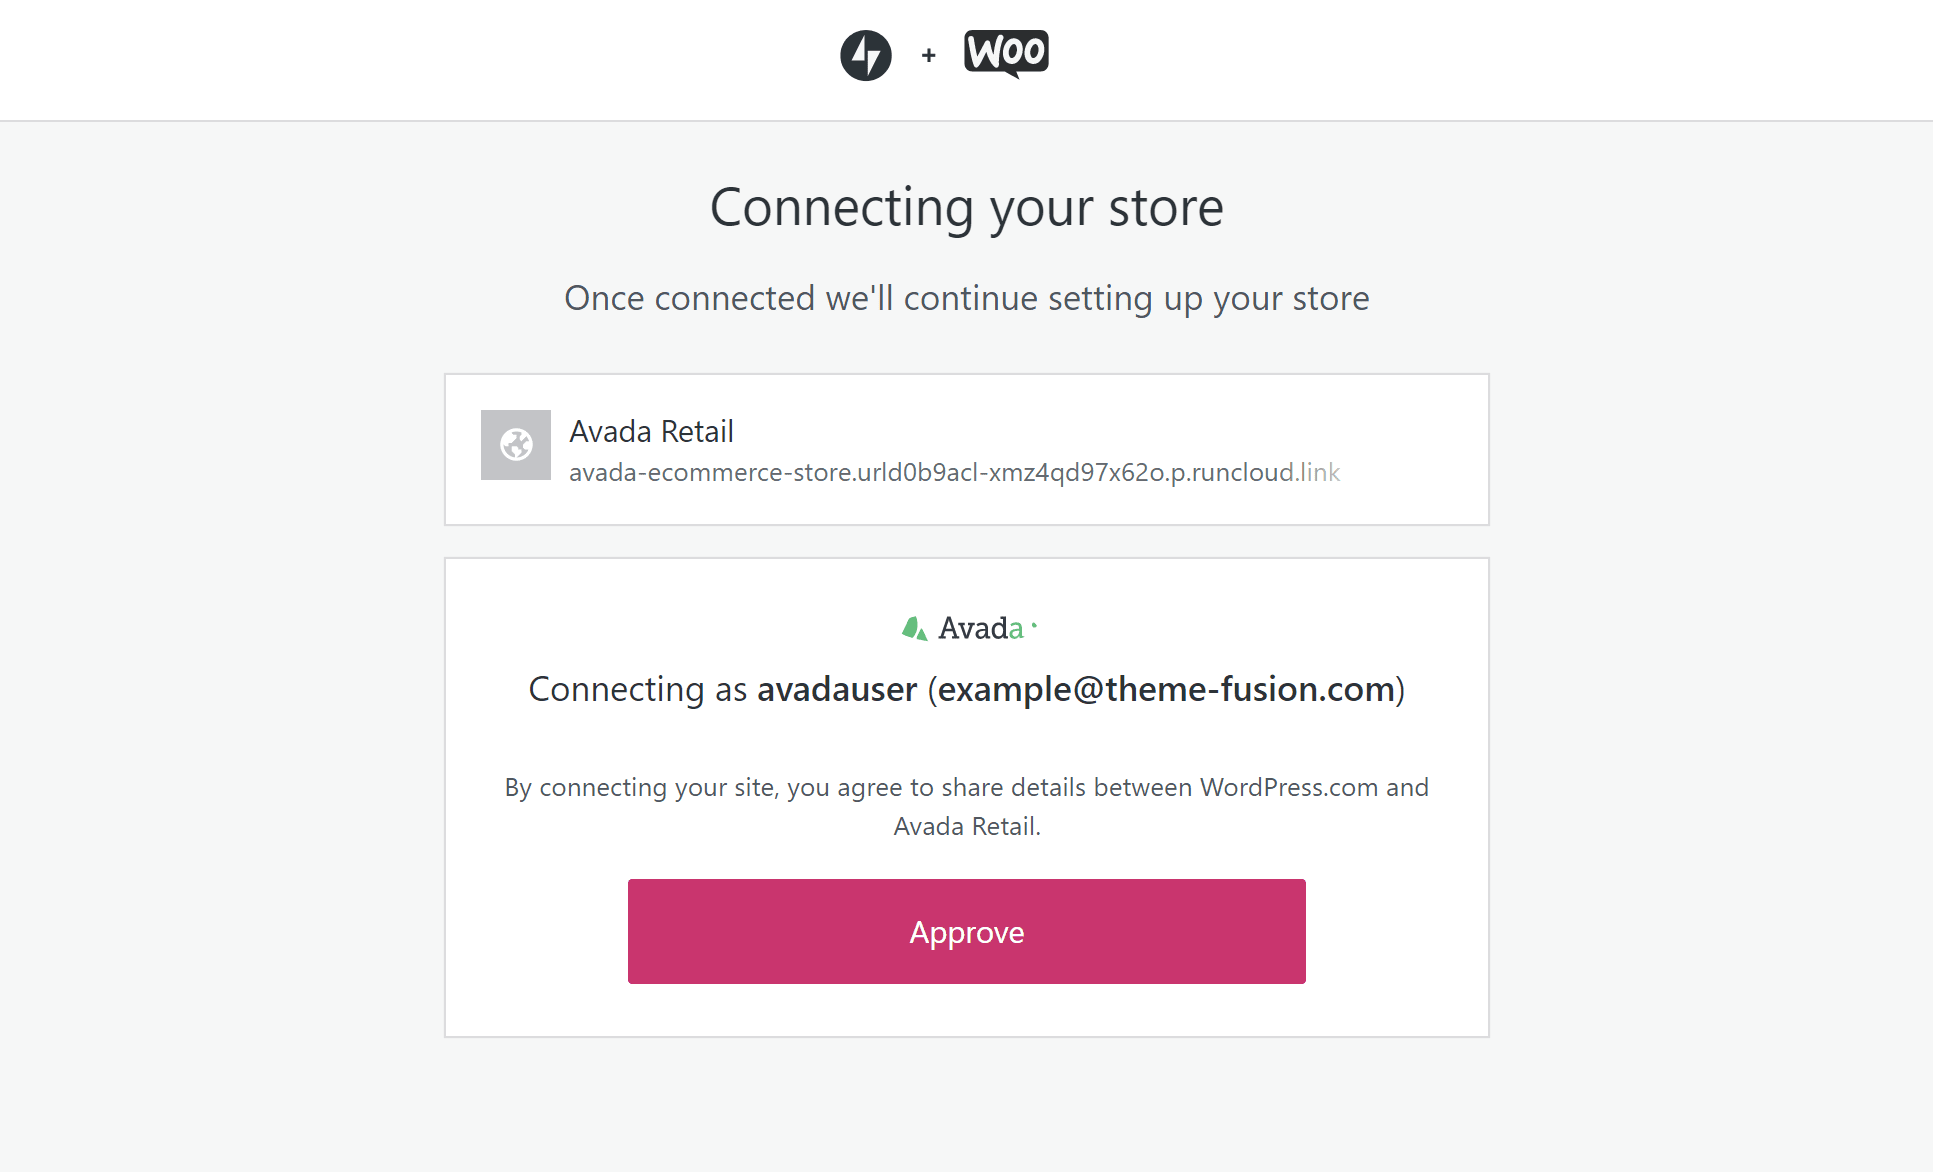
And that’s it for the basic WooCommerce setup wizard! If you installed the “Get the Basics” tools in the setup wizard, the following screen will prompt you to connect your store to your WordPress.com account to activate the Jetpack plugin and other WooCommerce services, which you can do by clicking the Approve button (or creating a WordPress.com account if you don’t have one already):
Configure Other Key Details (Payments, Tax, Shipping, Personalization)
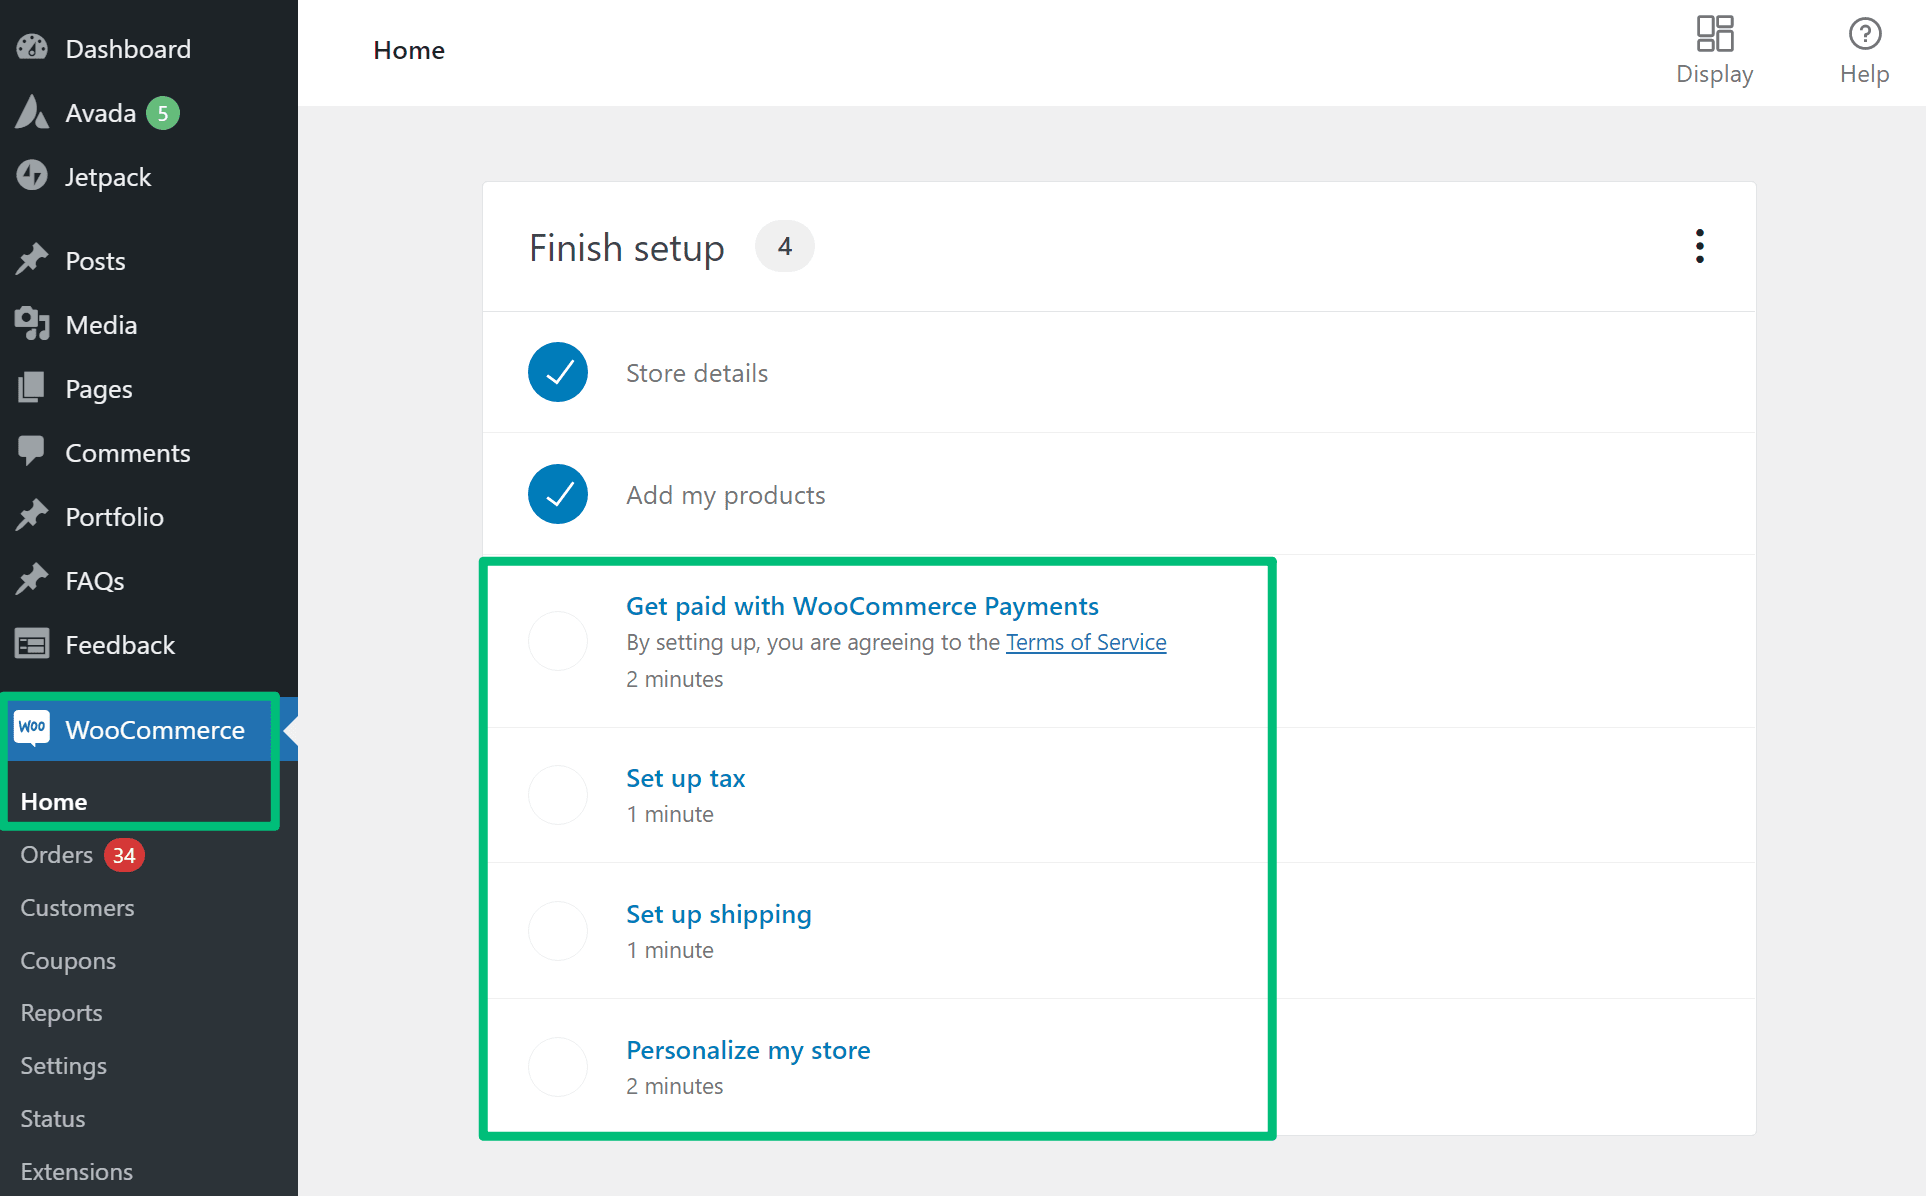
Once you finish the setup wizard, you can access your main WooCommerce dashboard by going to the WooCommerce menu in your WP admin area.
Here, WooCommerce will show a prompt to finish setting up your store because there are still some crucial details to take care of. You should see four tasks to configure:
How to Add a Product in WooCommerce
Some stores might just need simple products. But other stores, like clothing retailers, will require a lot of variable products. We’ll show you examples of each type of product below.
But first – a quick note. If you imported the demo products when you set up your Avada site in part one, you’ll probably want to delete those demo products before you start adding your real products.
Setting Up Basic Product Details
Basic product details will be the same whether you’re adding a simple product or a variable product. To get started, go to Products → Add New. Then, add the following details:
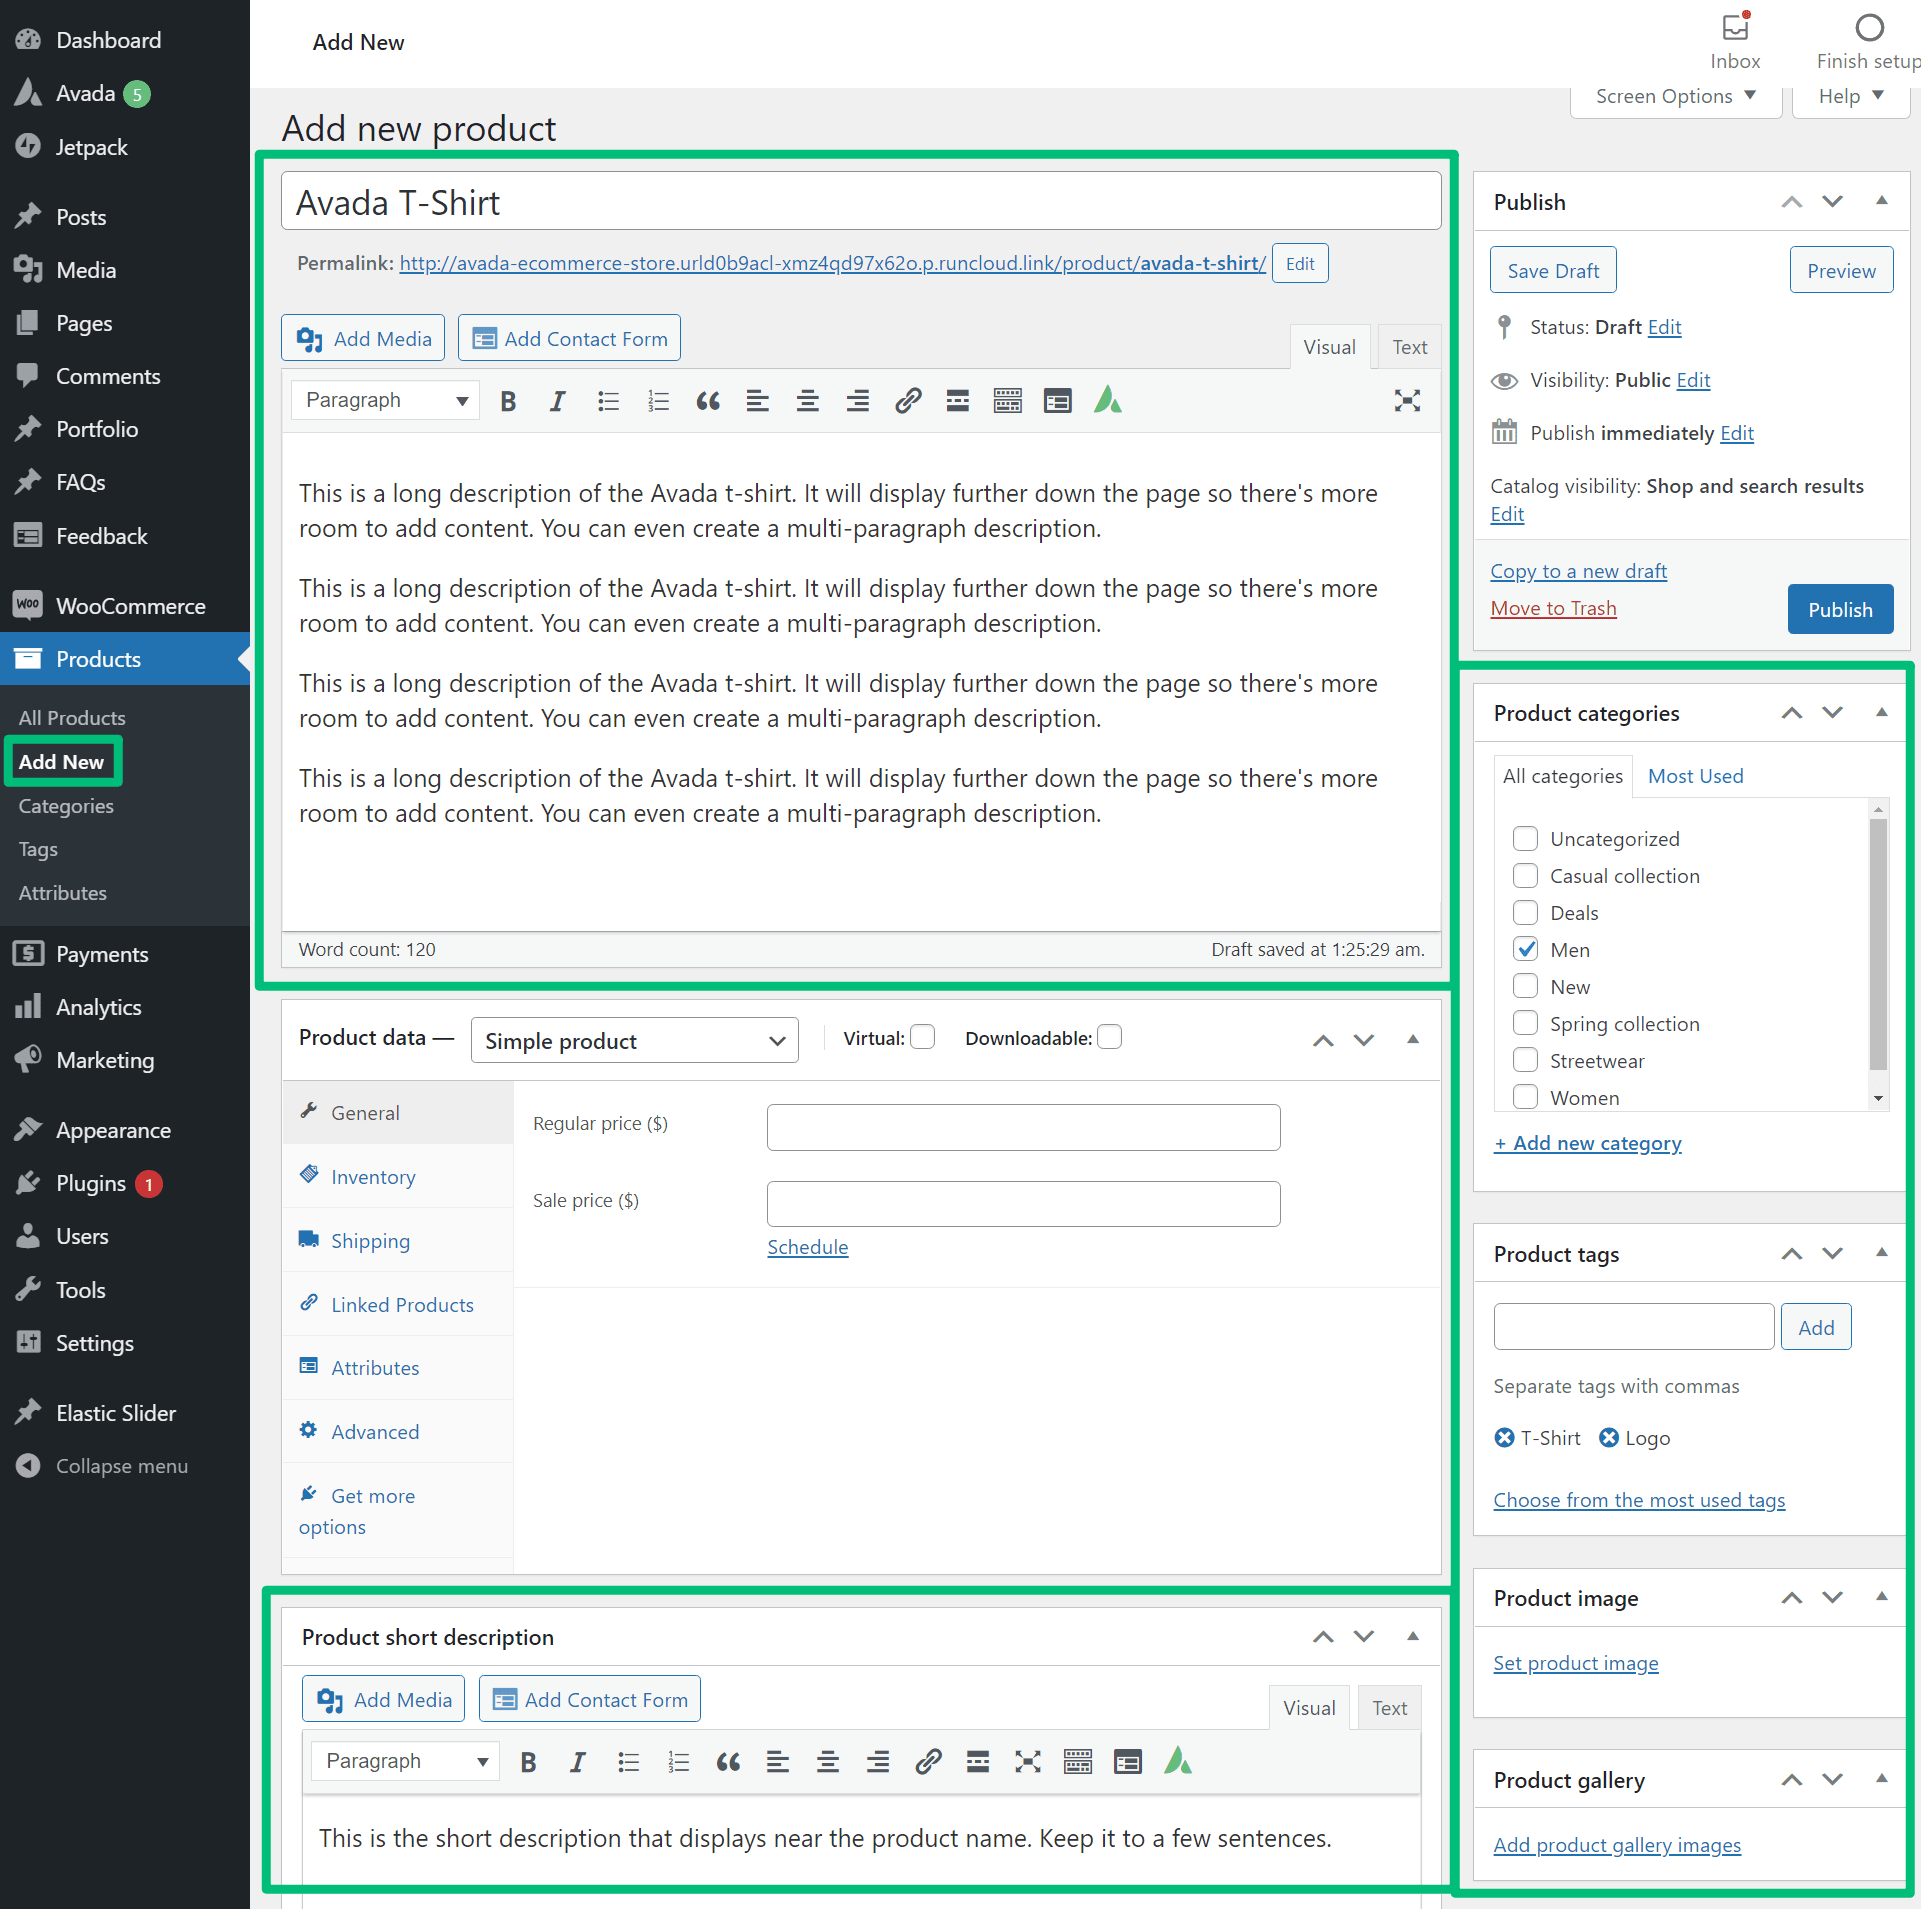
You’ll use the Product data box to configure the nitty-gritty details like price and stock status. This is where things can change based on the type of product, so let’s go through it.
Configuring Simple Products
Here’s an example of a simple product – you can see that there are no options for the visitor to choose from – it’s just a single item:
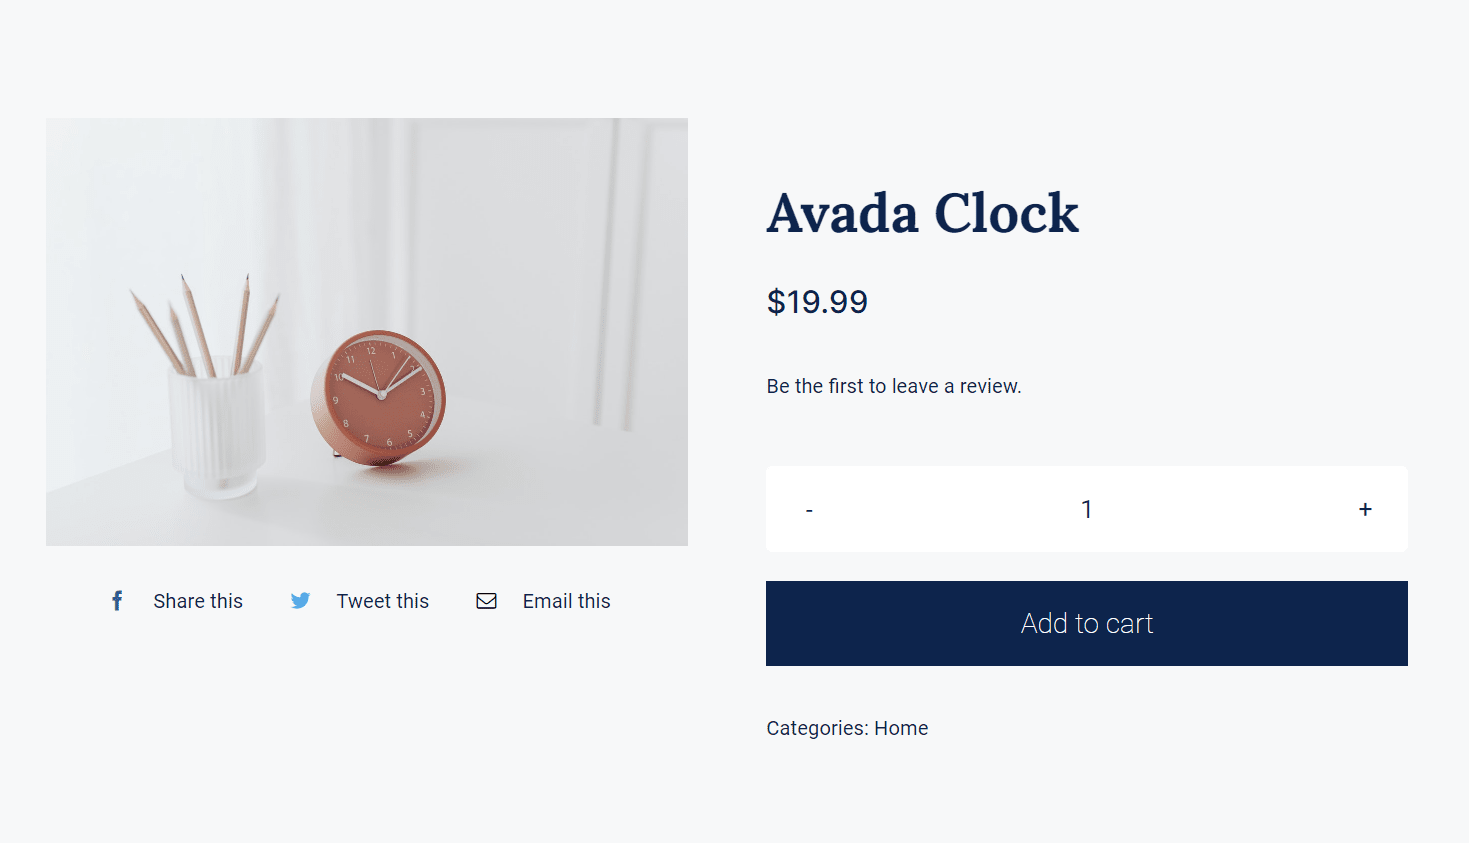
Creating a simple product is straightforward. To begin, set the Product data box drop-down equal to Simple product. Then, enter the price of the product in the General tab:
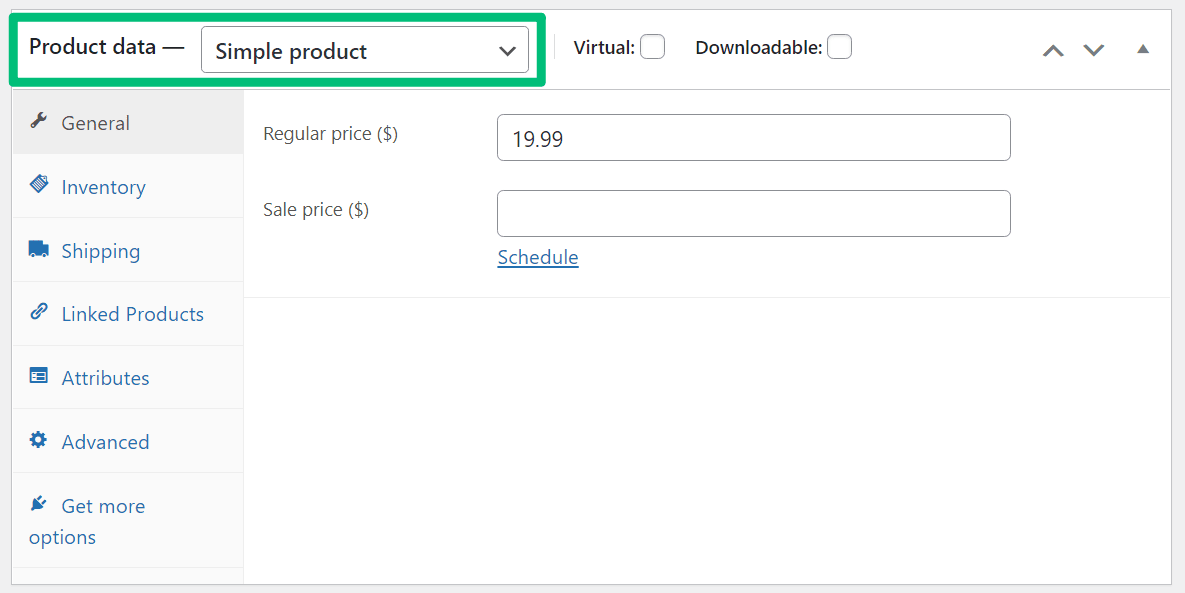
That’s all you really need to configure for an eCommerce store. If you want to manage stock for the product, you can go to the Inventory tab. You can also enter product dimensions in the Shipping tab and Linked Products if needed.
Configuring Variable Products
Here’s an example of a variable product – you can see that shoppers are able to choose both the color and size:
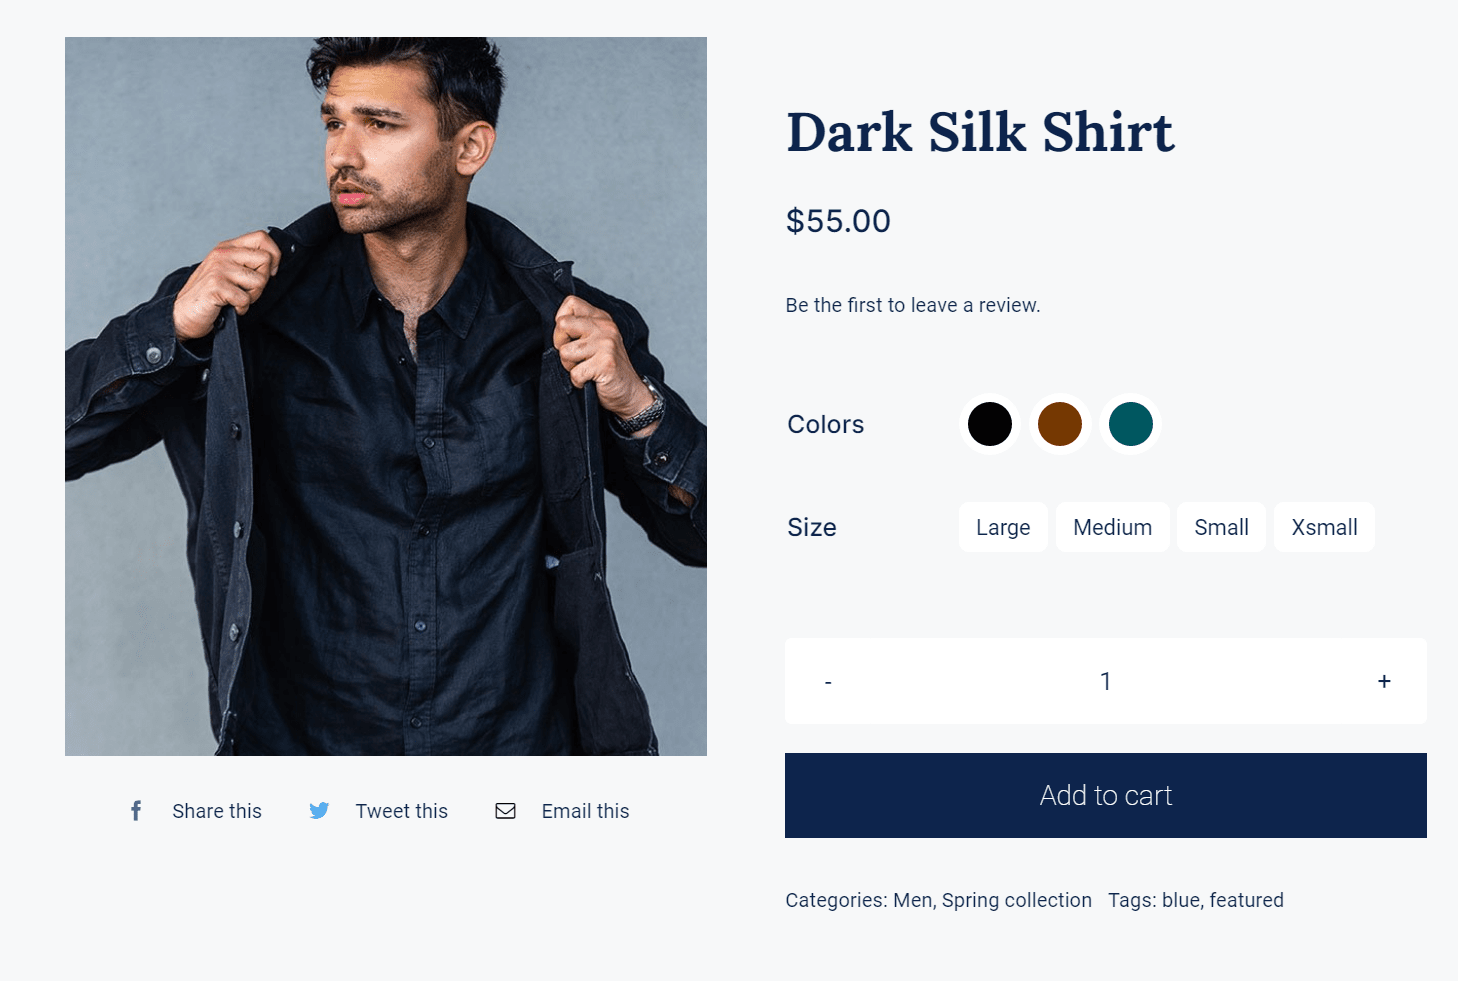
Each potential combination is one variant. For example:
You can change prices and set stock statuses for each variant if desired. To get started, you’ll first want to go to Products → Attributes to add the types of variants you want to create – e.g., size or color:
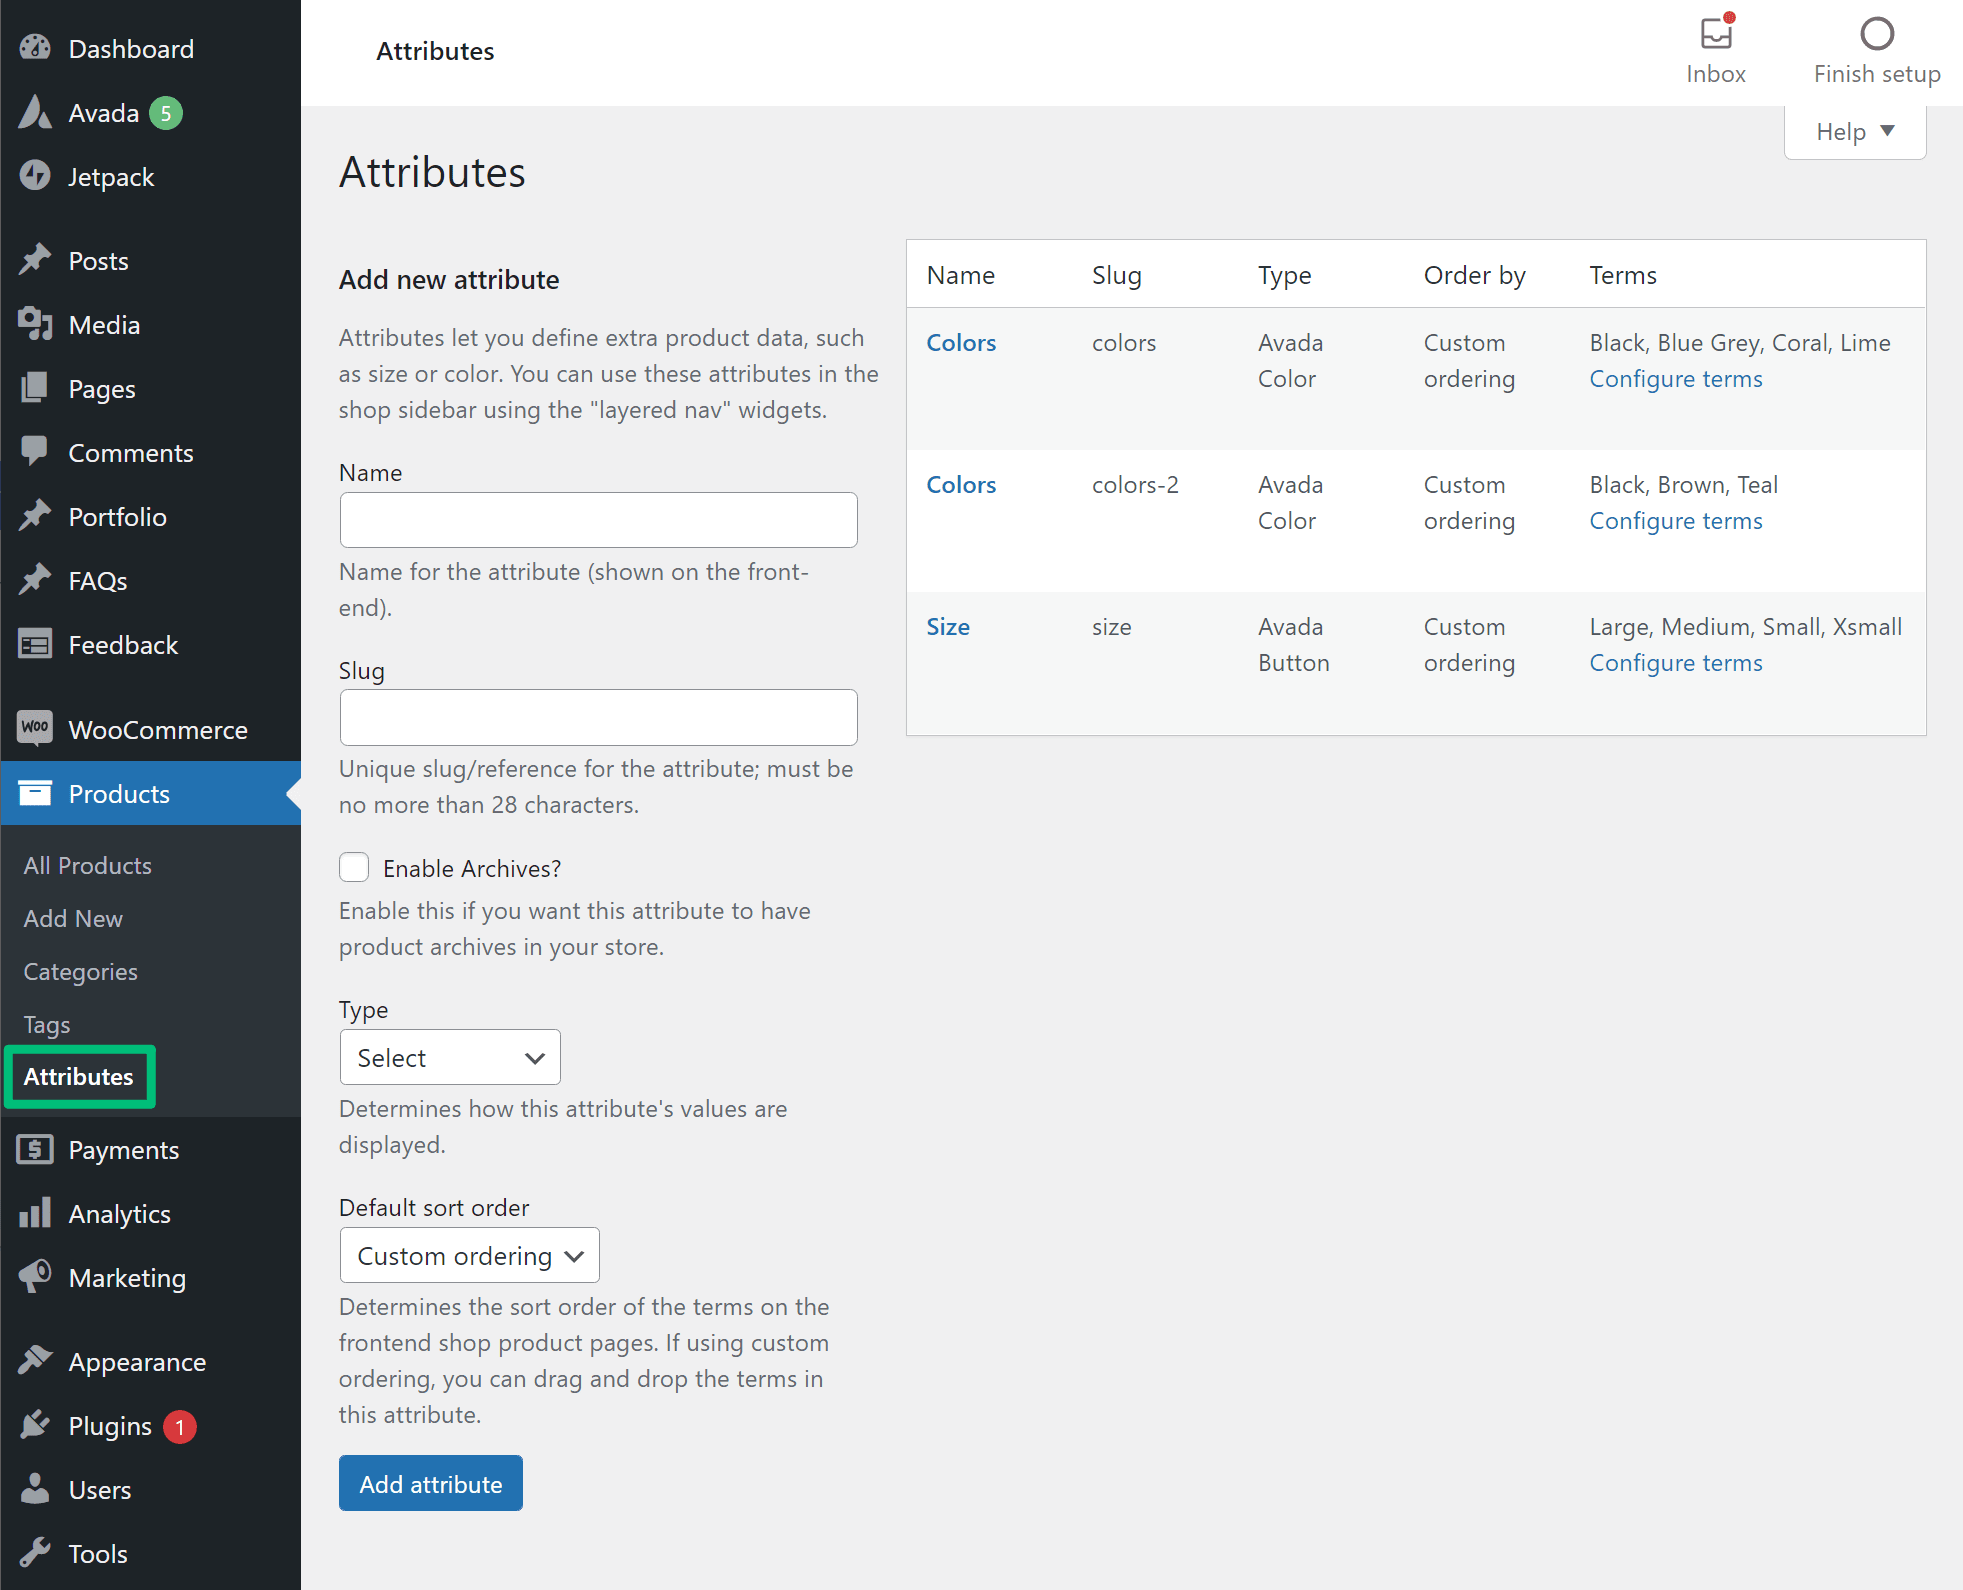
Then, go back to the product editor and set the Product data drop-down equal to Variable product. After that, go to the Attributes tab and choose the attributes that you just added (e.g. size or color):
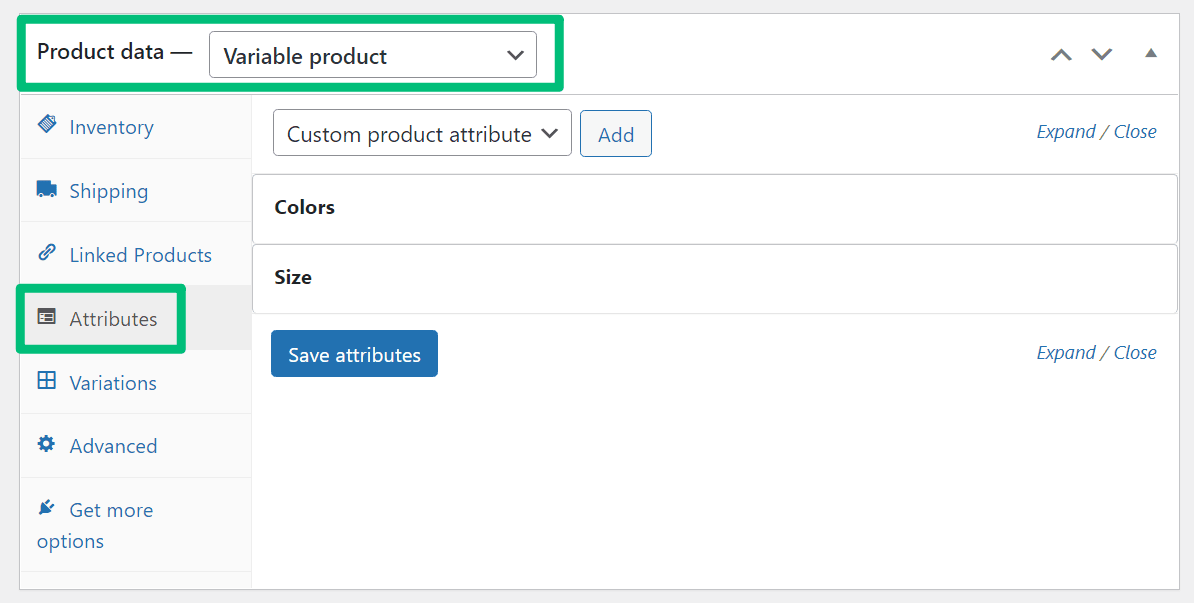
Next, head to the Variations tab and choose Create variations from all attributes:
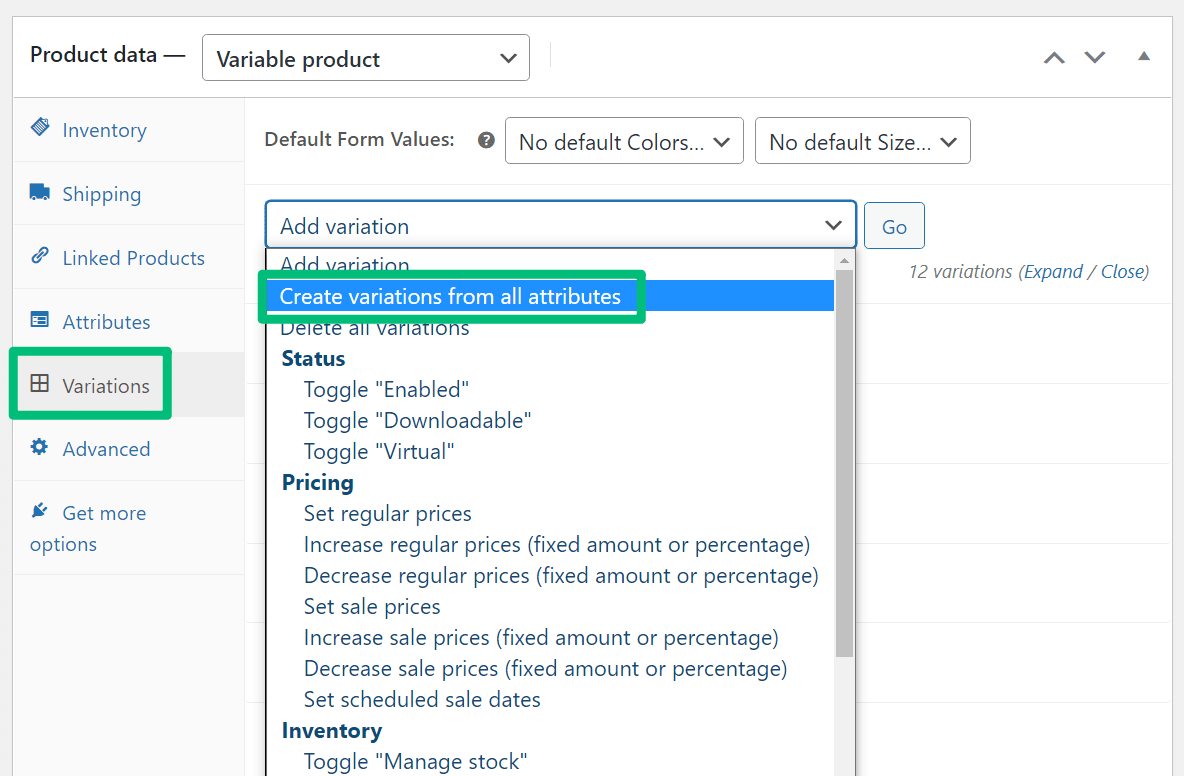
Then, you can manage each variant’s price, stock status, etc., as if it were a separate product.
How to Adjust Your WooCommerce Designs With Avada
In part one of this series, we already showed you how to control your store’s design using Avada. However, now that you’ve actually added some real products, you might want to go back and make some tweaks.
First, remember that you can always access the dedicated WooCommerce settings from the Avada settings area:
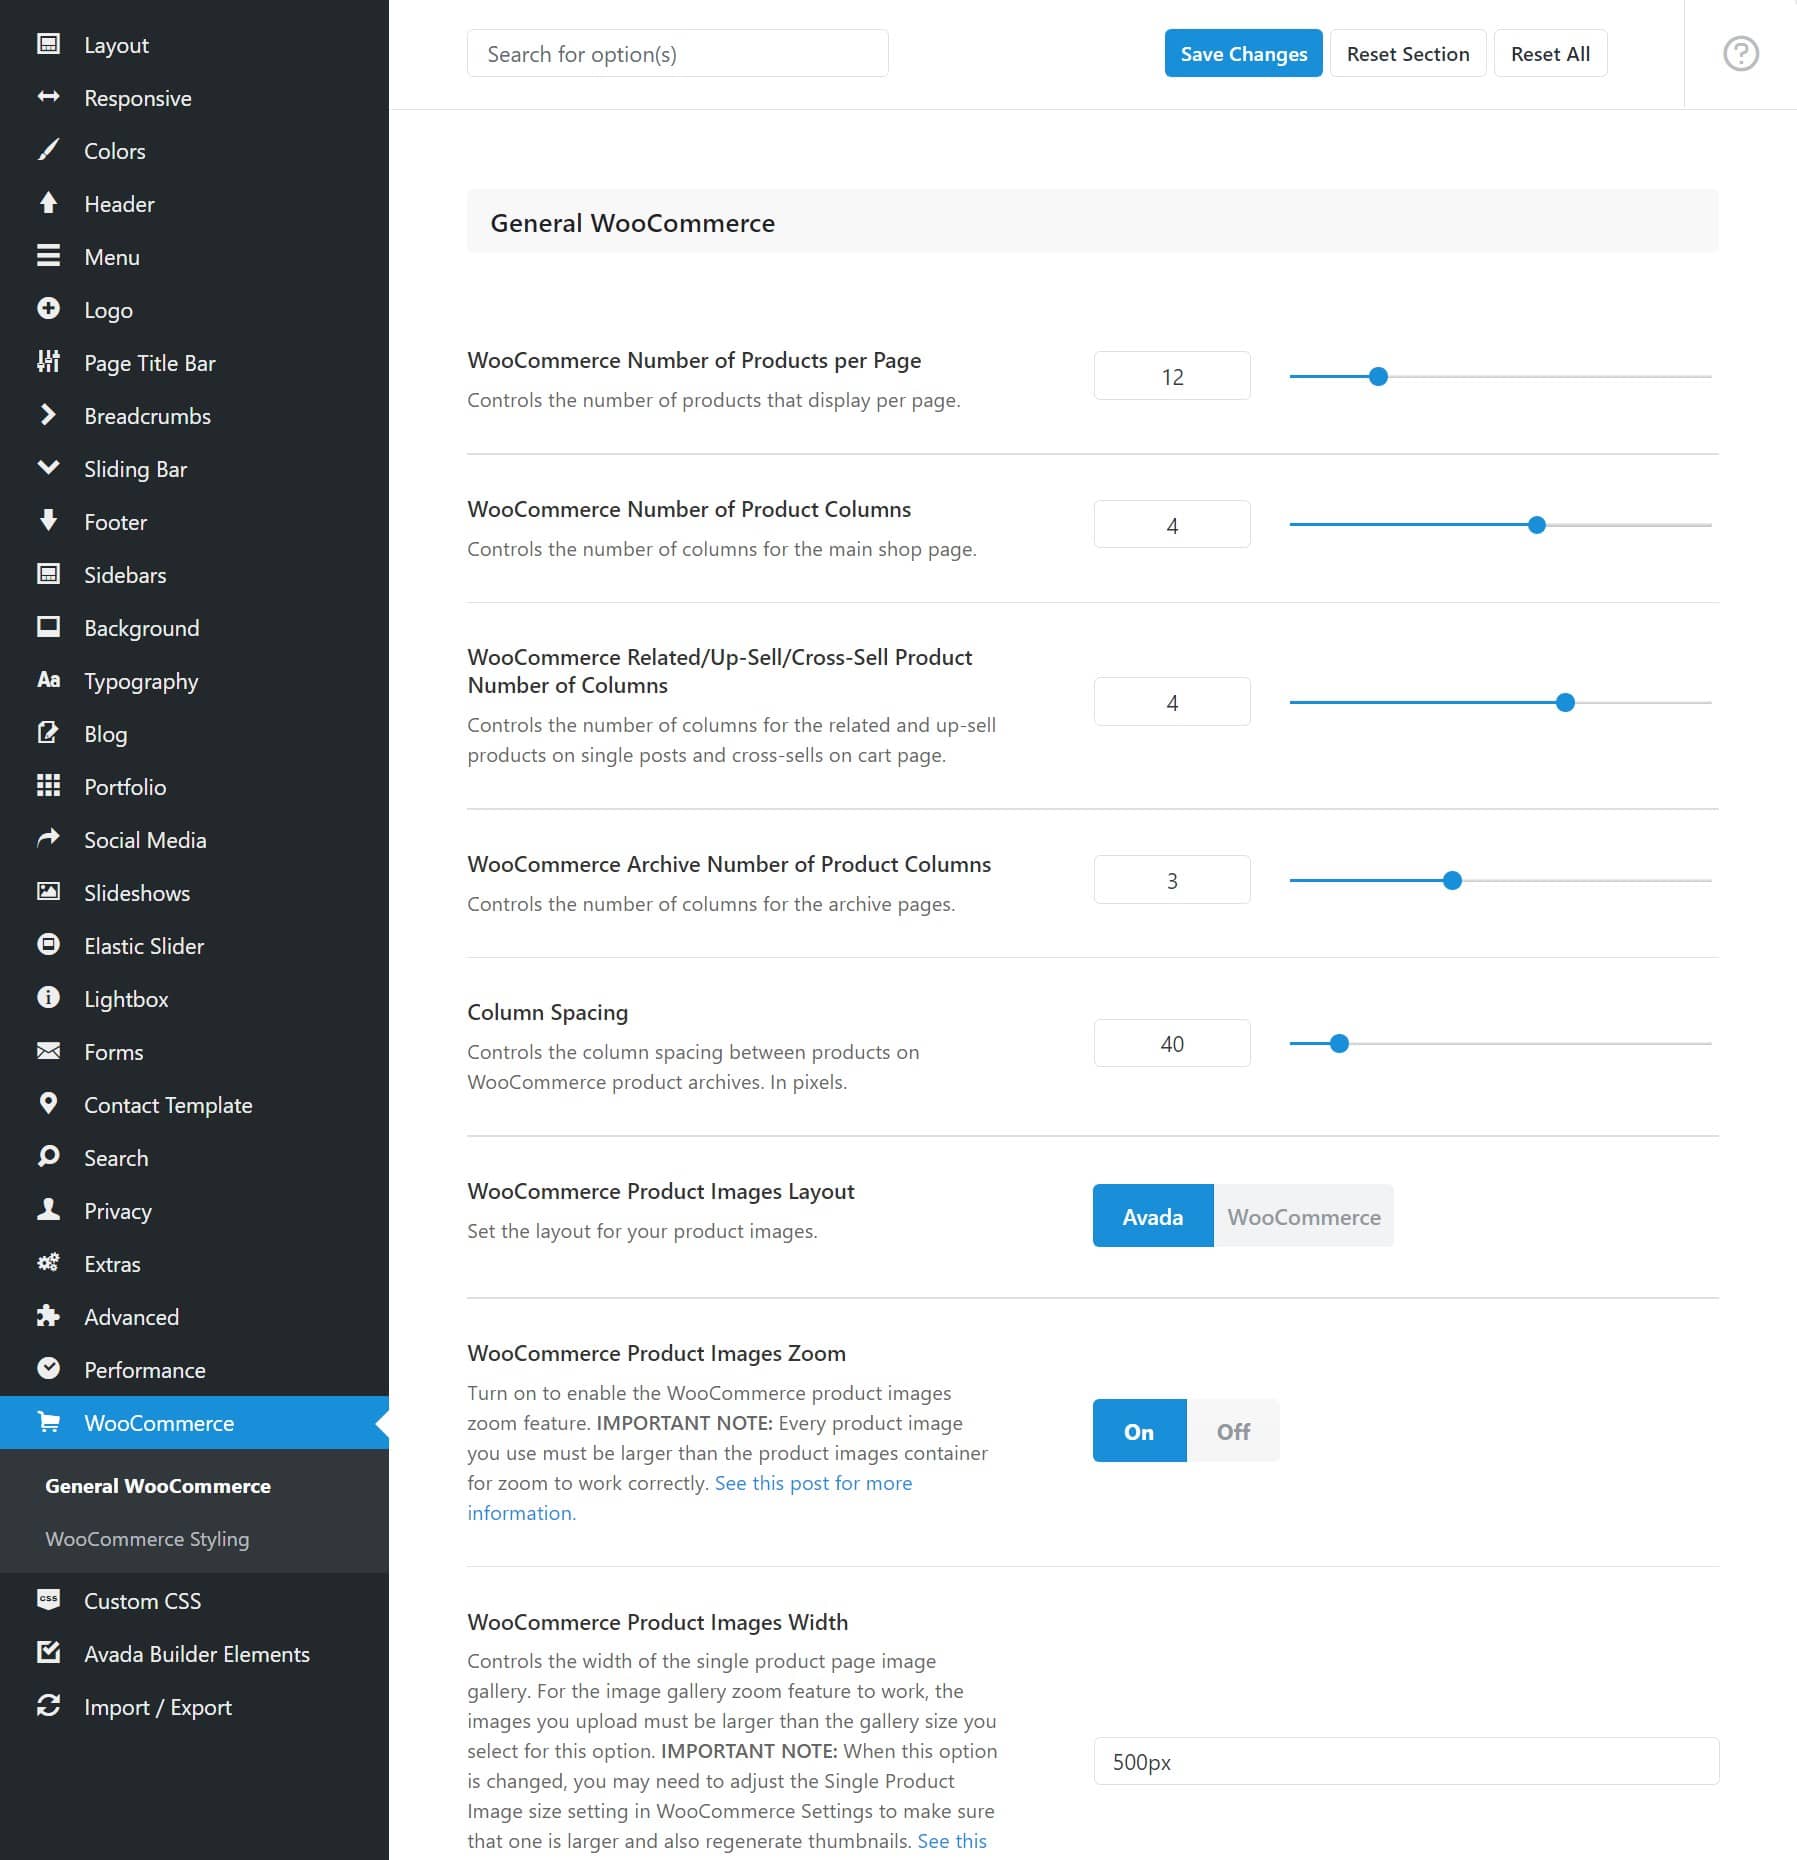
For more control, you can also customize the layouts for various parts of your store, such as your products, shop, cart, product categories, checkout, and more.
To learn more about how Avada layouts can give you more control over your WooCommerce store, check out this introduction to Avada layouts and the difference between layouts and layout sections.
Add WooCommerce Plugins for More Features
In part one, we talked about some general-purpose plugins that all e-commerce stores need, such as an SEO plugin, backup plugin, security plugin, etc.
However, you’ll probably also want to add some WooCommerce-specific plugins to extend the core WooCommerce plugin. In fact, you’ve probably already done this when you set up your payment gateways and tax collection.
WooCommerce plugins can be expensive. So to help you keep your store’s budget down, we created a roundup of 25+ of the best free WooCommerce plugins to get you started.
Learn How to Sell More Products With WooCommerce
If you’ve followed parts one and two in our series, you now have:
Summary
In part three, we’re going to build on those foundations and show you how you can start selling more products by implementing essential marketing strategies such as setting up a WooCommerce customer relationship management tool (CRM), offering support via live chat or chatbots to help customers make purchase decisions, sending abandoned cart reminders to boost revenue, and more.
The first two parts set you up with a store that can sell products, while part three will teach you how to sell as many products as possible.
