WooCommerce Single Product Gallery
Last Update: September 29, 2025
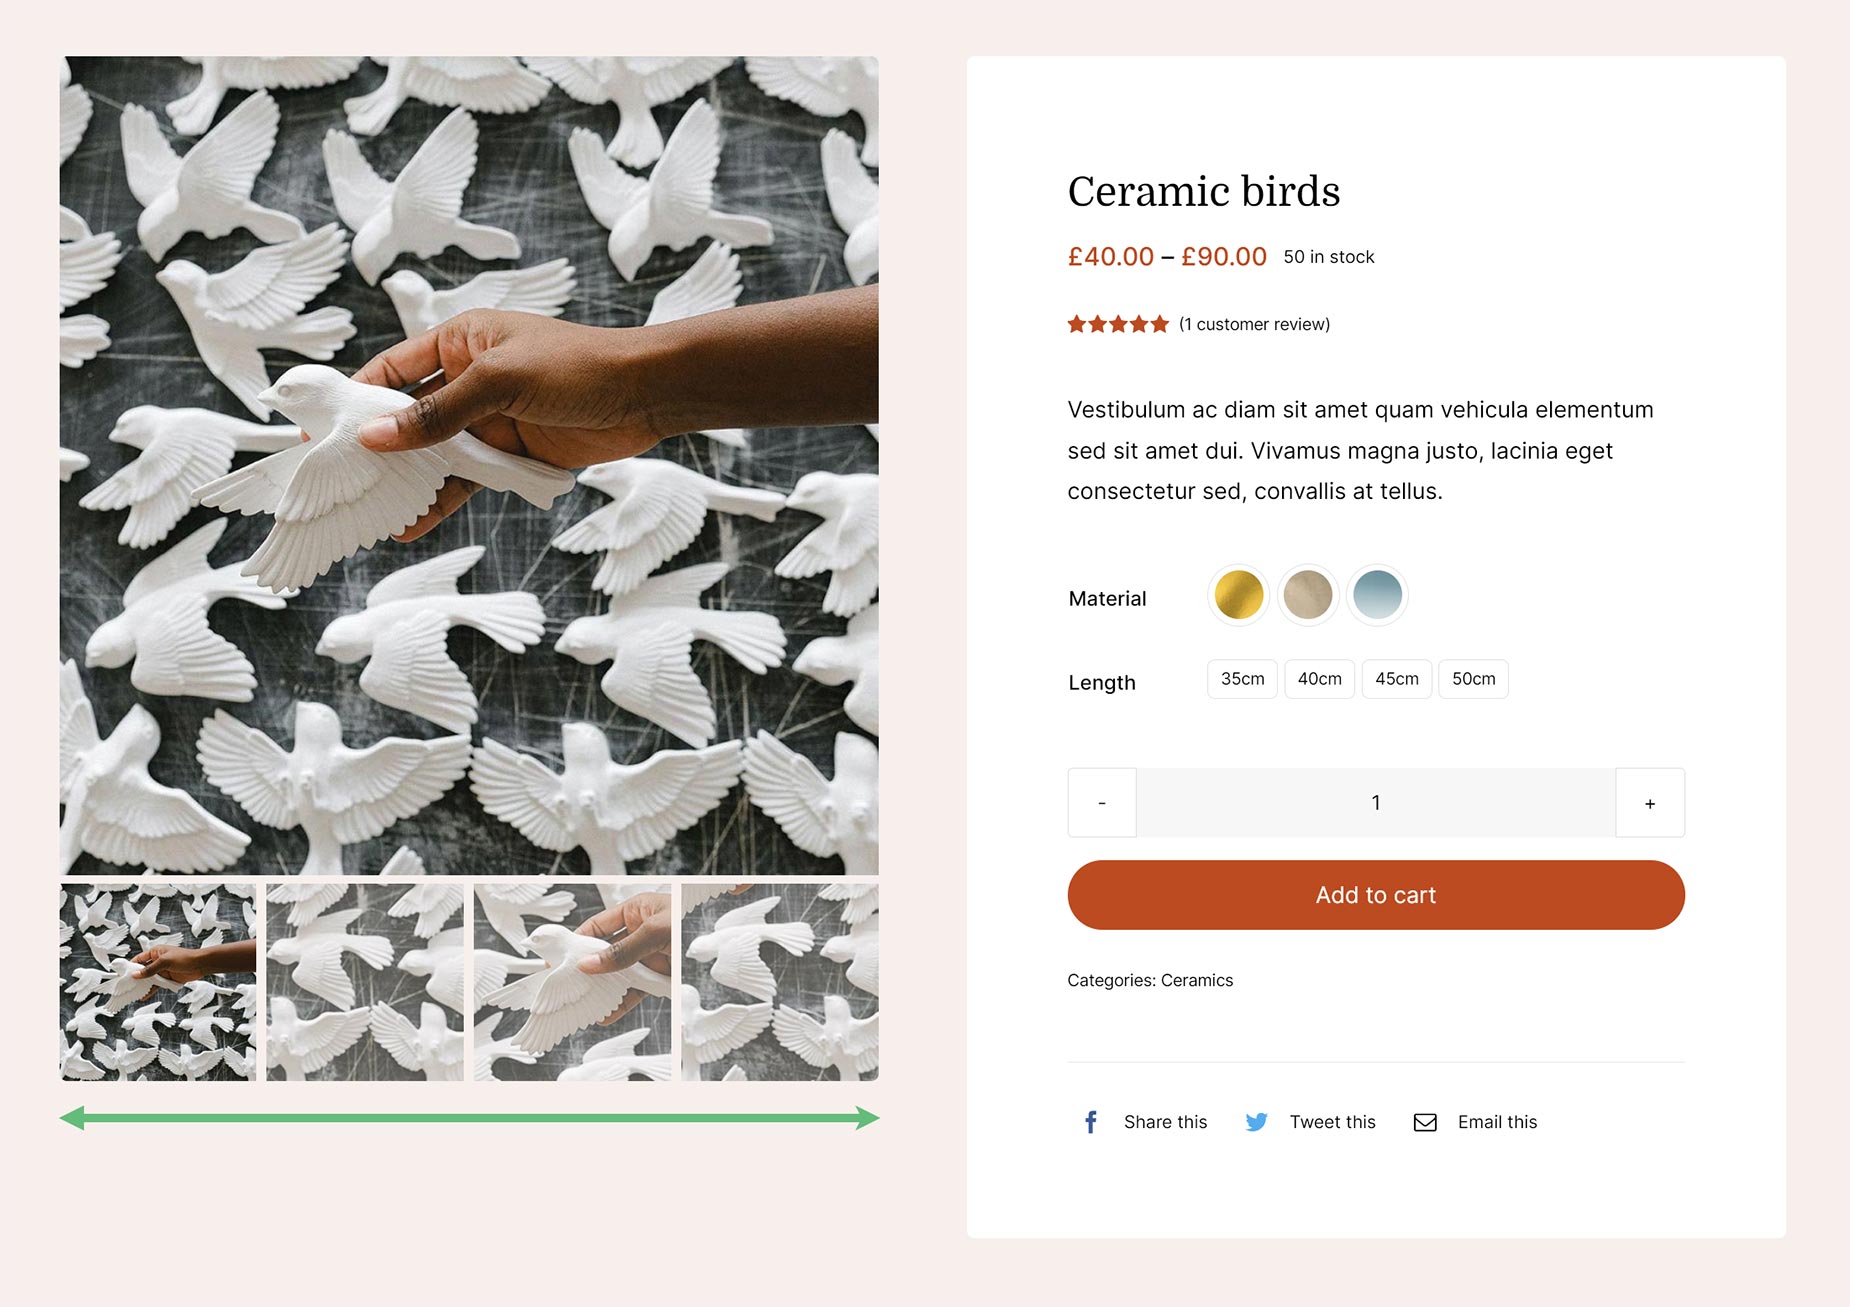
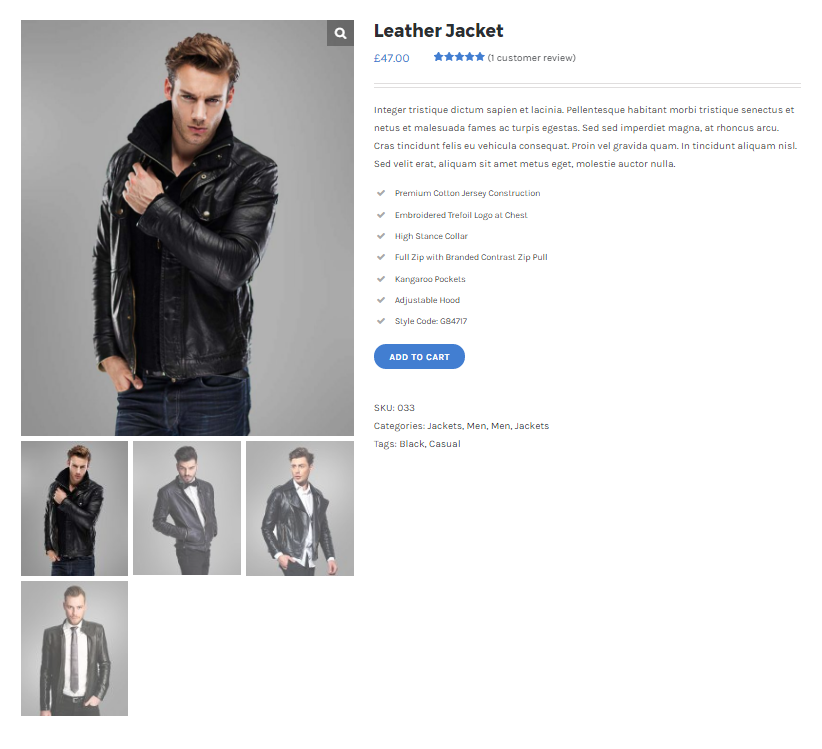
The Single Product Gallery refers to the Featured Image area on any WooCommerce Single Product page. This can be a single image, or if multiple gallery images are added into the product, they be cycled through in a slider. There are several features and options that you should know about if you’re setting up an online shop with Avada and WooCommerce.
The settings below are found at Avada > Options > WooCommerce > General WooCommerce, and apply when using the default WooCommerce templates. If, instead, you are using a Content Layout Section to design your single WooCommerce product pages layout, the Global Options apply as parent options, and you have the option to override them in the Woo Product Images Element.
WooCommerce Product Images Layout
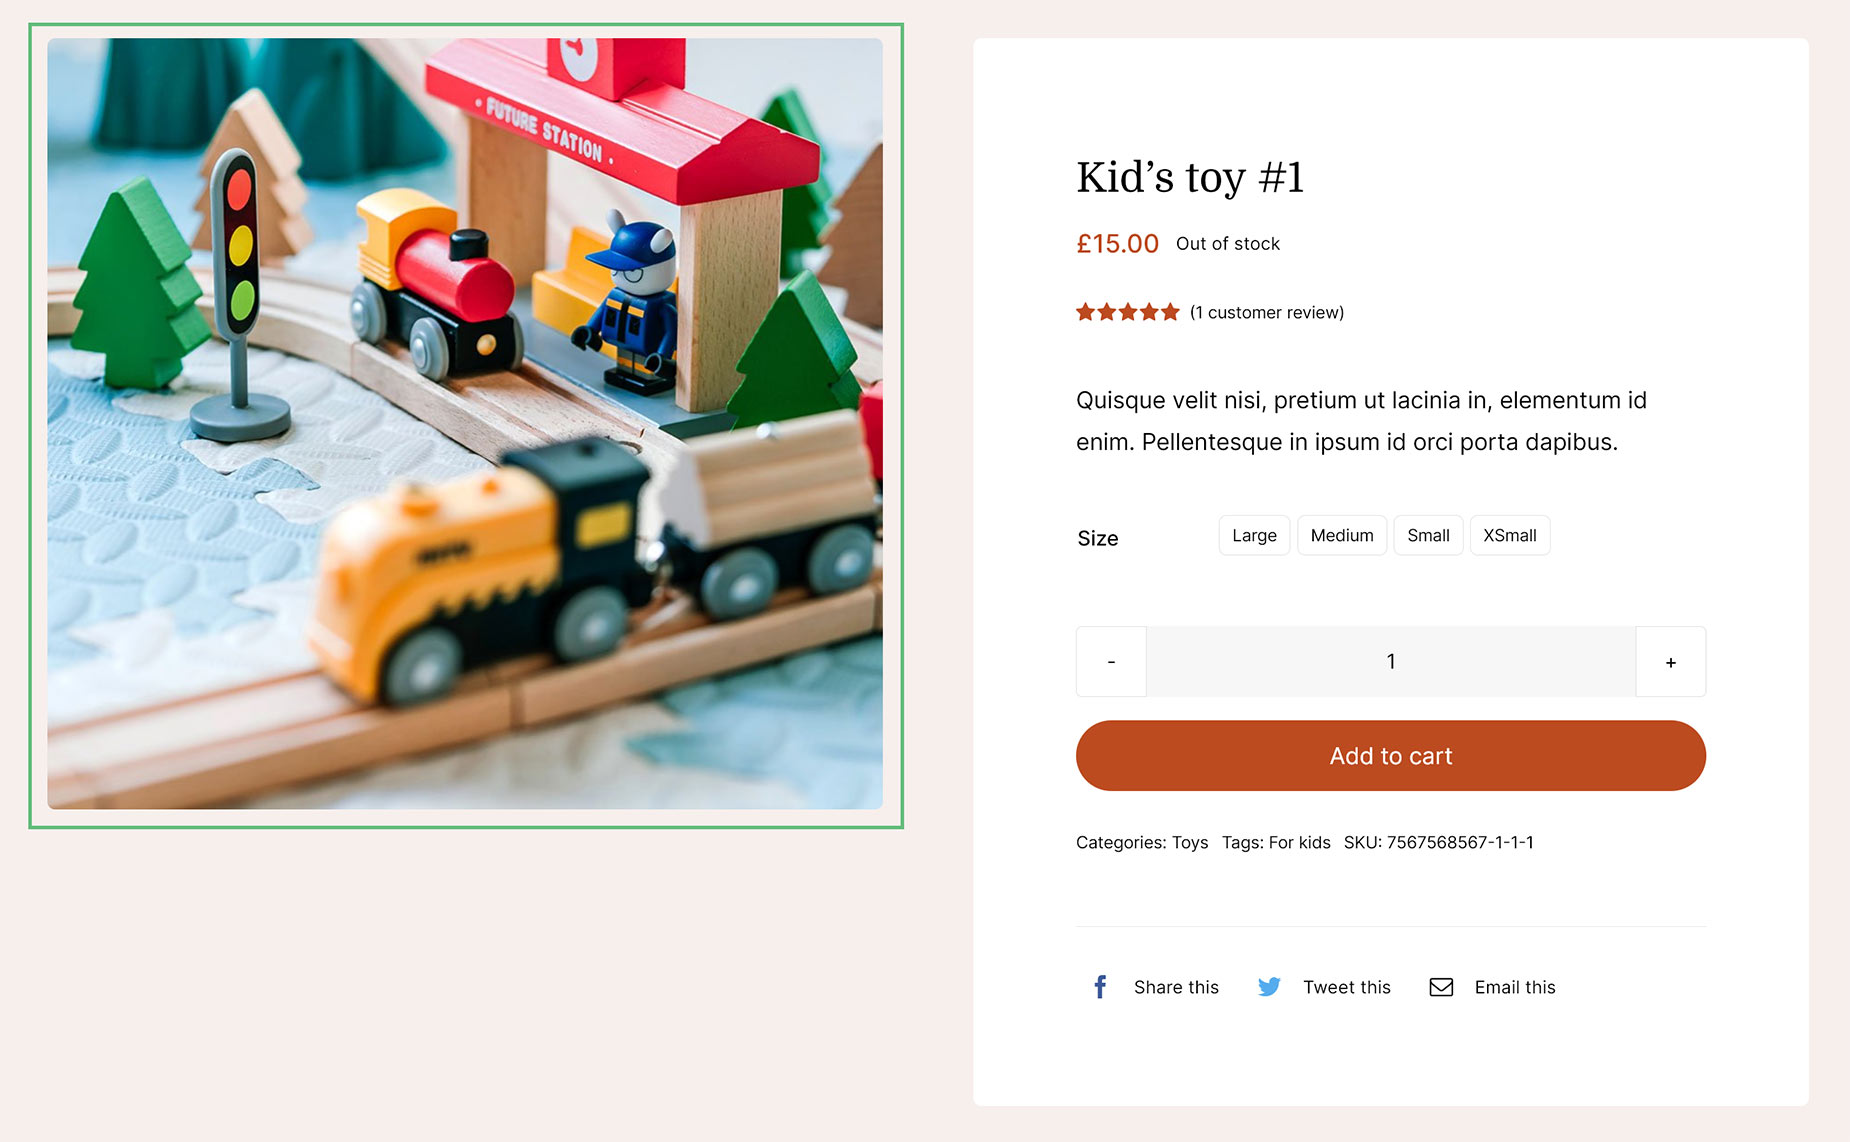
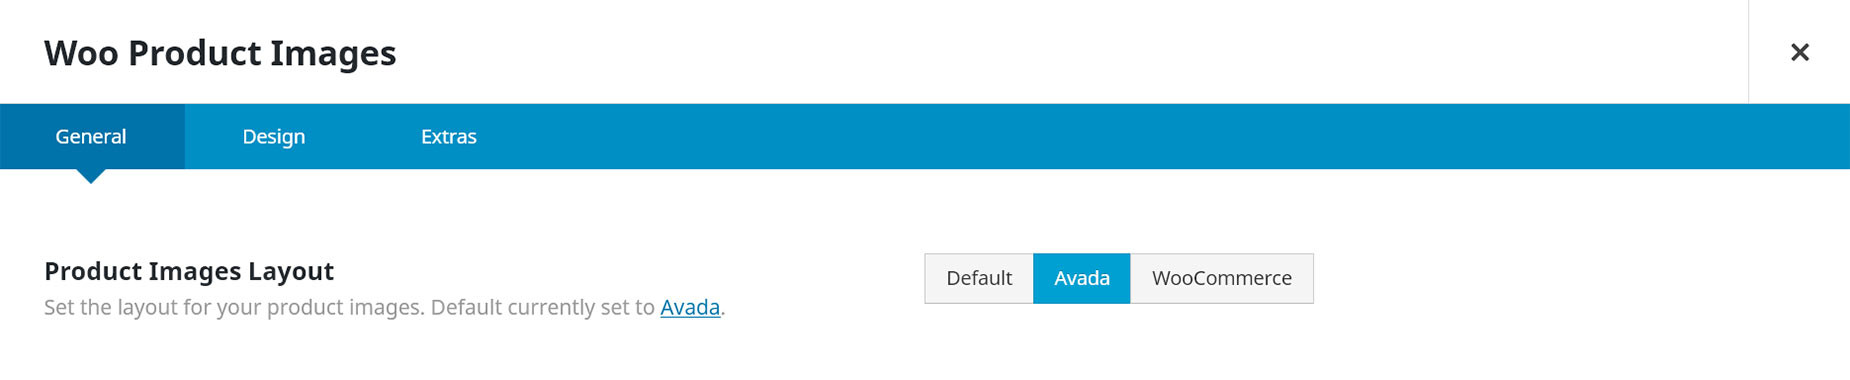
This option controls the Layout of the WooCommerce Product Images area. You’ll find this setting in Avada > Options > WooCommerce > General WooCommerce, and on the General tab of the Woo Product Images Element. There are two Product Gallery Slider styles to choose from; The default
WooCommerce style and the Avada style. See below for details on each of
these layouts.

WooCommerce Product Images Zoom
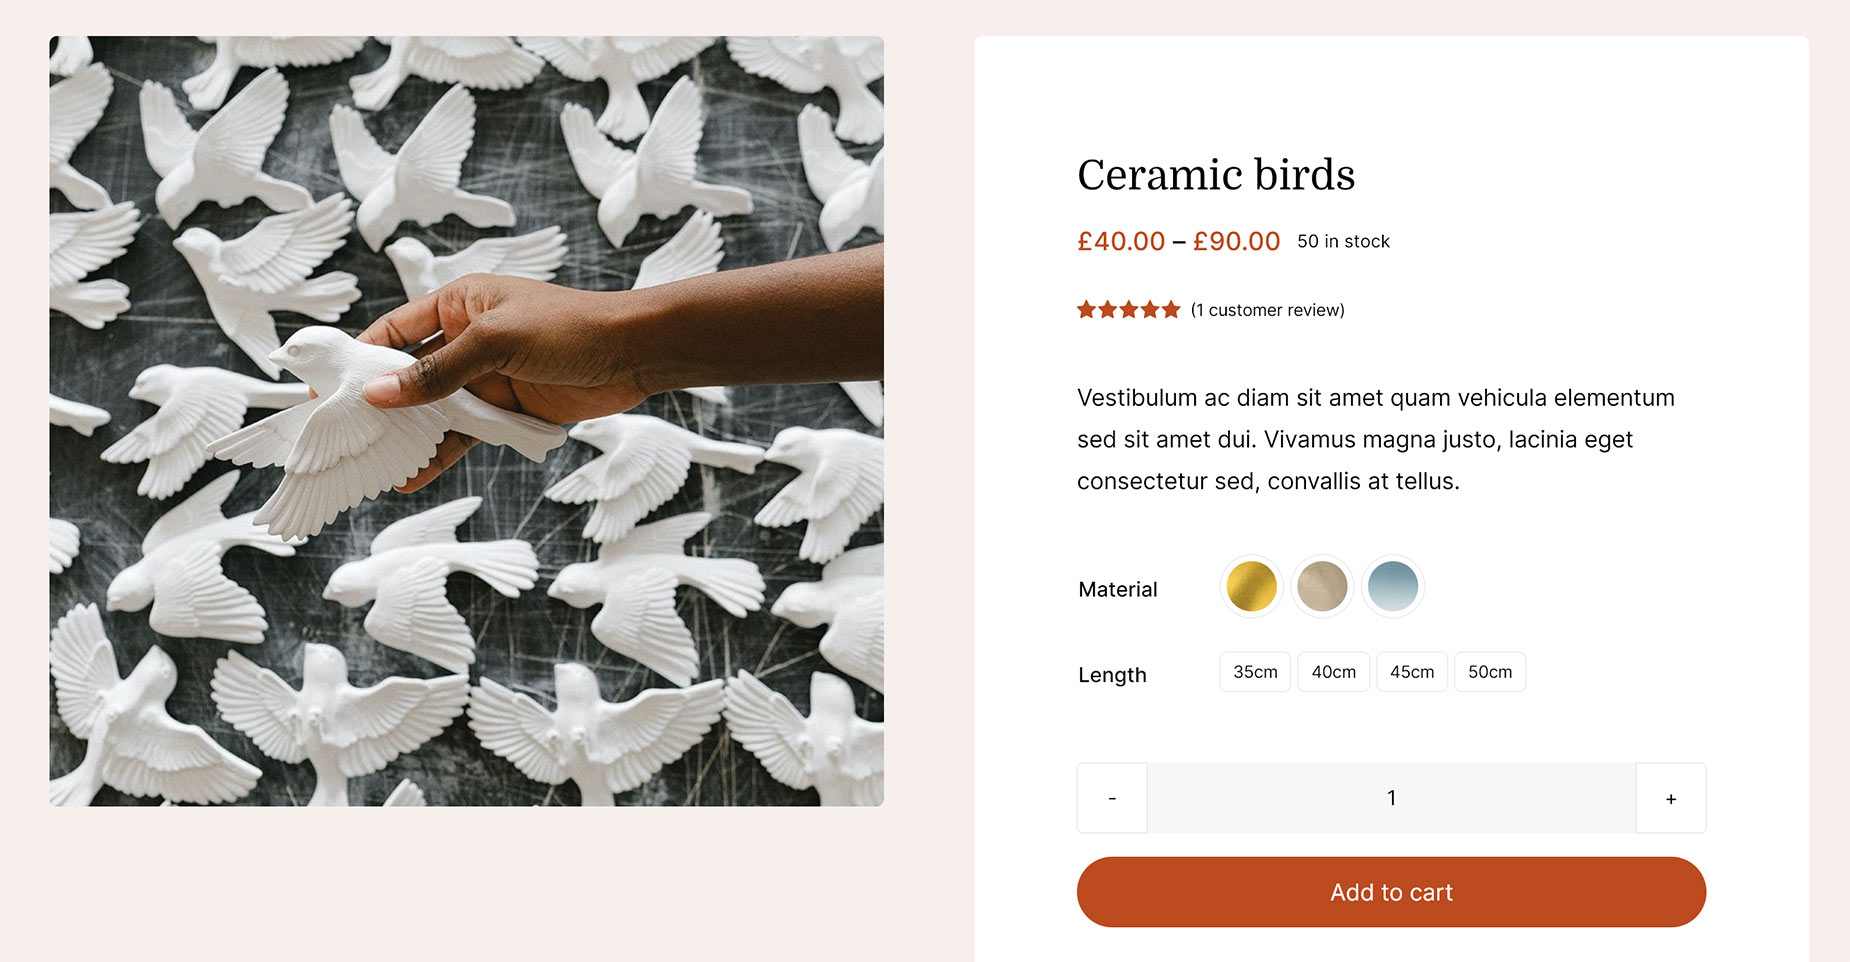
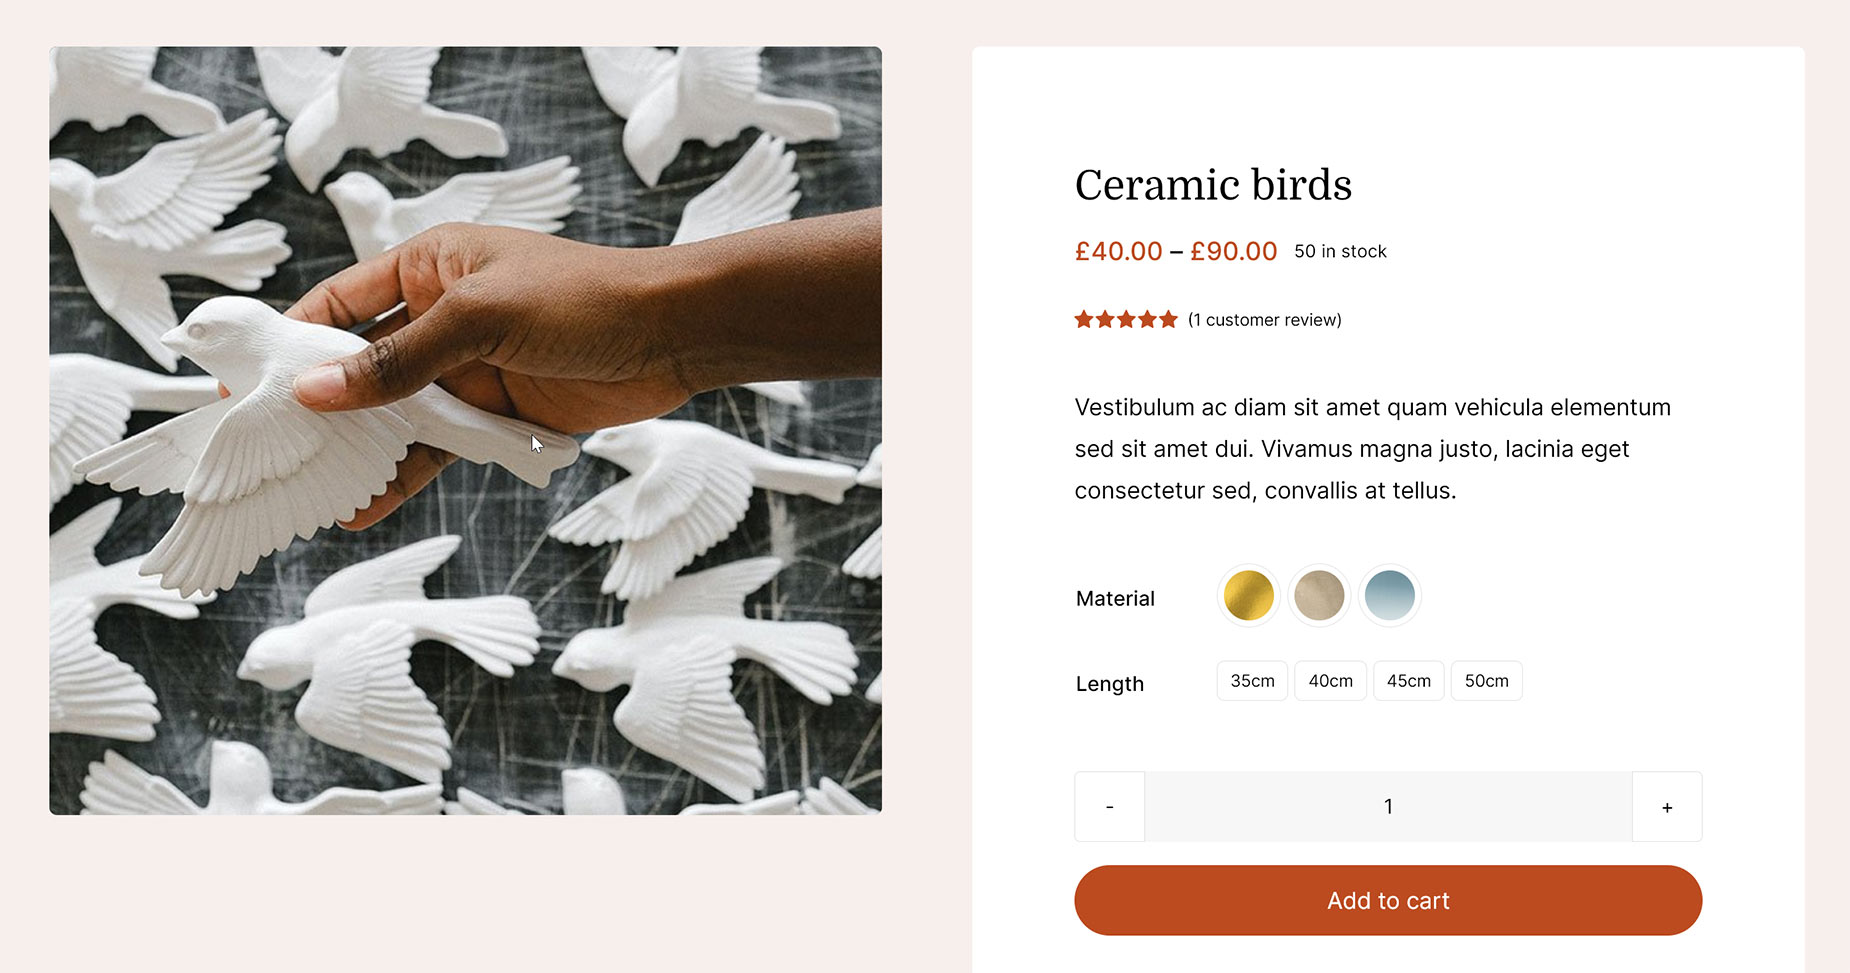
This effect can be turned on or off, and will allow your shoppers to get a close up view of your product simply by hovering over the product image on the single product page. Please check each point below for information on settings and options which will affect the product image zoom feature on your site.
Once the zoom effect is enabled and your image sizes are set correctly, you’ll be able to hover over the product image and it will zoom-in to show more detail. (compare the top example image to the bottom example image which is on hover) The point of focus will follow your mouse cursor. Just move your cursor over the area you would like to see more closely.
Special Notes on the Zoom Effect
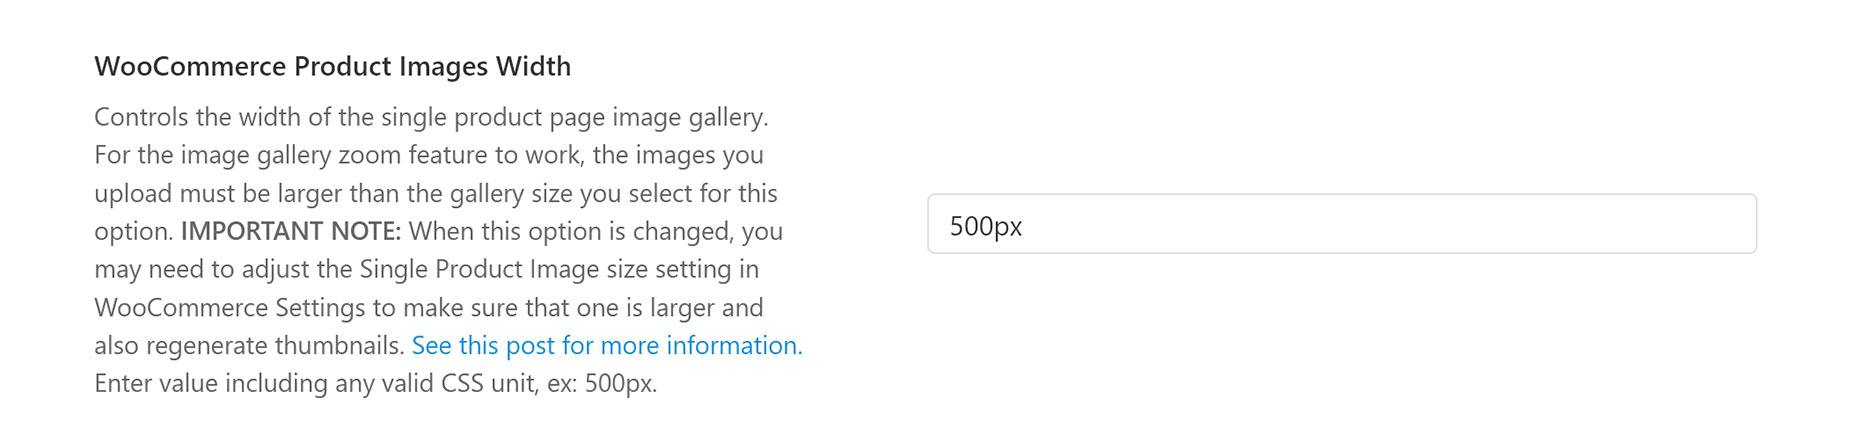
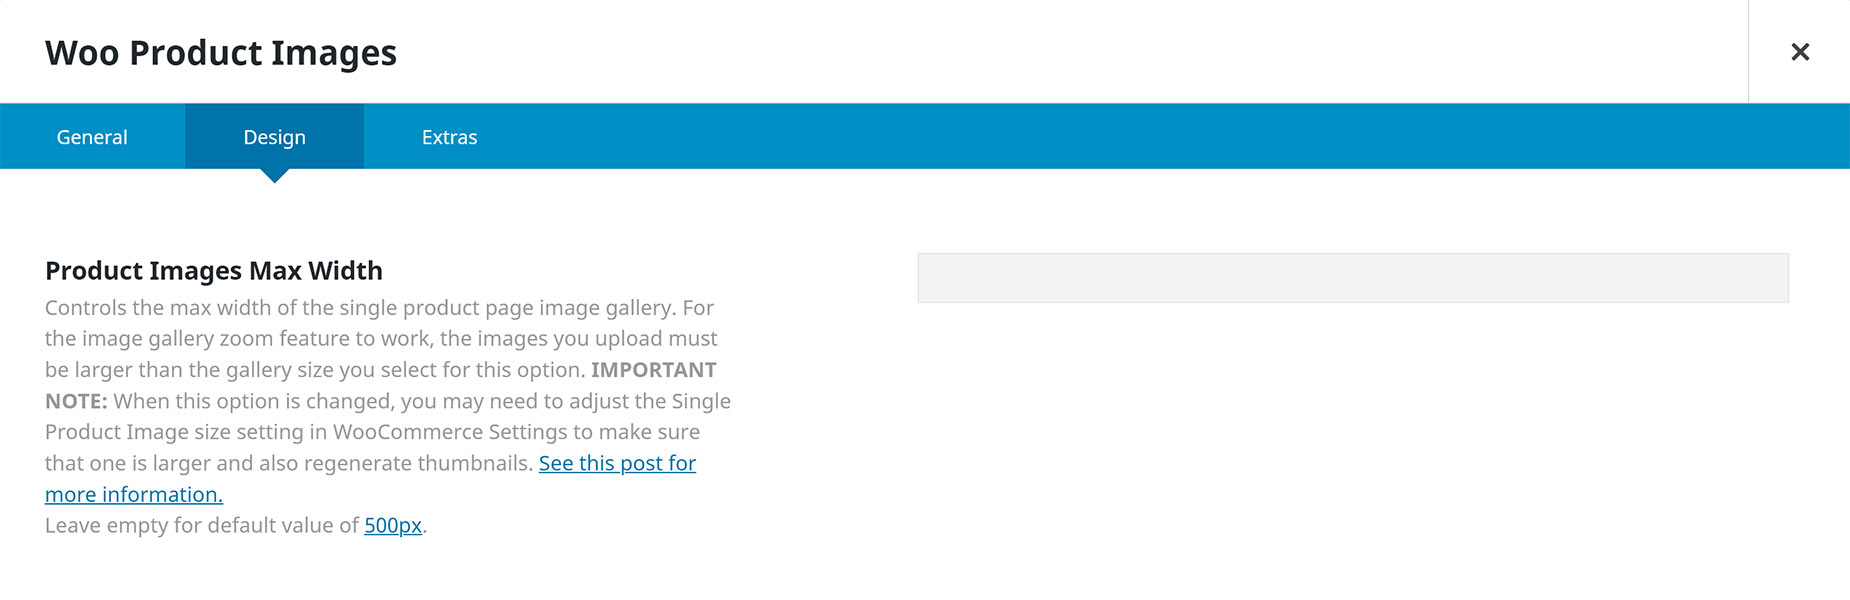
WooCommerce Product Images Width
This option controls the width of the product image area, as you can see in the screenshot below. You’ll find this setting in Avada > Options > WooCommerce > General WooCommerce. It’s also found in the Woo Product Images Element, under the Design tab, as Product Images Max Width.
This option will allow you to set the width of the actual product image container on the single product page (including any thumbnails). Your setting here will determine the image width needed for your products. It’s important to set this as desired, then configure your WooCommerce product image settings accordingly. This will default to 500px.
WooCommerce Thumbnail Options
There are three thumbnail settings in the Global Options that allow you to configure the thumbnails the Product Images Layout will use. You’ll find these setting in Avada > Options > WooCommerce > General WooCommerce. These are the WooCommerce Product Images Thumbnail Width, the WooCommerce Product Images Thumbnail Position and the WooCommerce Product Images Thumbnail Columns, or Columns Width options.
WooCommerce Product Images Thumbnail Width
This setting controls the natural image width of product image thumbnails. In order to avoid blurry thumbnails, make sure the Product Thumbnails size setting in WooCommerce Settings is large enough. It should be at least the number in your WooCommerce Product Images Layout setting divided by the number of columns. These sizes are in pixels. You can find more details on setting the image sizes in WooCommerce here.

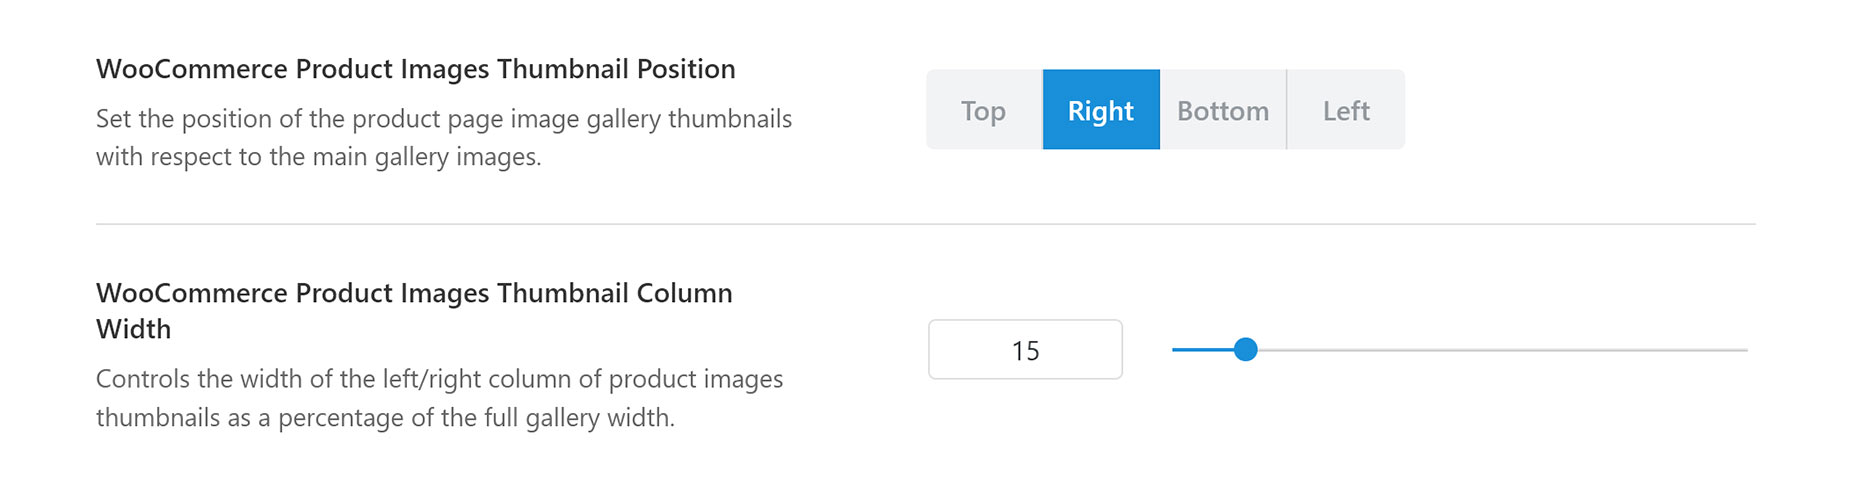
WooCommerce Product Images Thumbnail Position
This setting allows you to choose the position your thumbnails will be shown in the Product images layout. You’ll find this setting in Avada > Options > WooCommerce > General WooCommerce, and in the Design tab of the Woo Product Images Element. You can choose from Top, Right, Bottom or Left. Depending on your choice here, the next option will be either WooCommerce Product Images Thumbnail Column Width, or WooCommerce Product Images Thumbnails Columns.
Note. the Thumbnail Position setting is only available when using the Avada Product Images Layout.
WooCommerce Product Images Thumbnail Columns / Column Width
In the Left or Right Position, the option allows you to choose what percentage of the overall area (the WooCommerce Product Images Width) you want your thumbnails to fill.
In the Top or Bottom Position, the option allows you to choose how many columns of thumbnails to display. Your chosen layout will also affect this option. When using the Avada style layout, the Product Images Thumbnails Columns setting will control the max number of visible thumbnail images at one time in the row. Additional images will be scrollable through the thumbnail carousel.
When the default WooCommerce Layout is used, the Product Gallery Thumbnails Columns setting will control the max number of thumbnail columns as it does for the Avada Layout. The difference is any remaining images will break down to a new row since WooCommerce default doesn’t use a carousel for the thumbnails. This can be seen here.

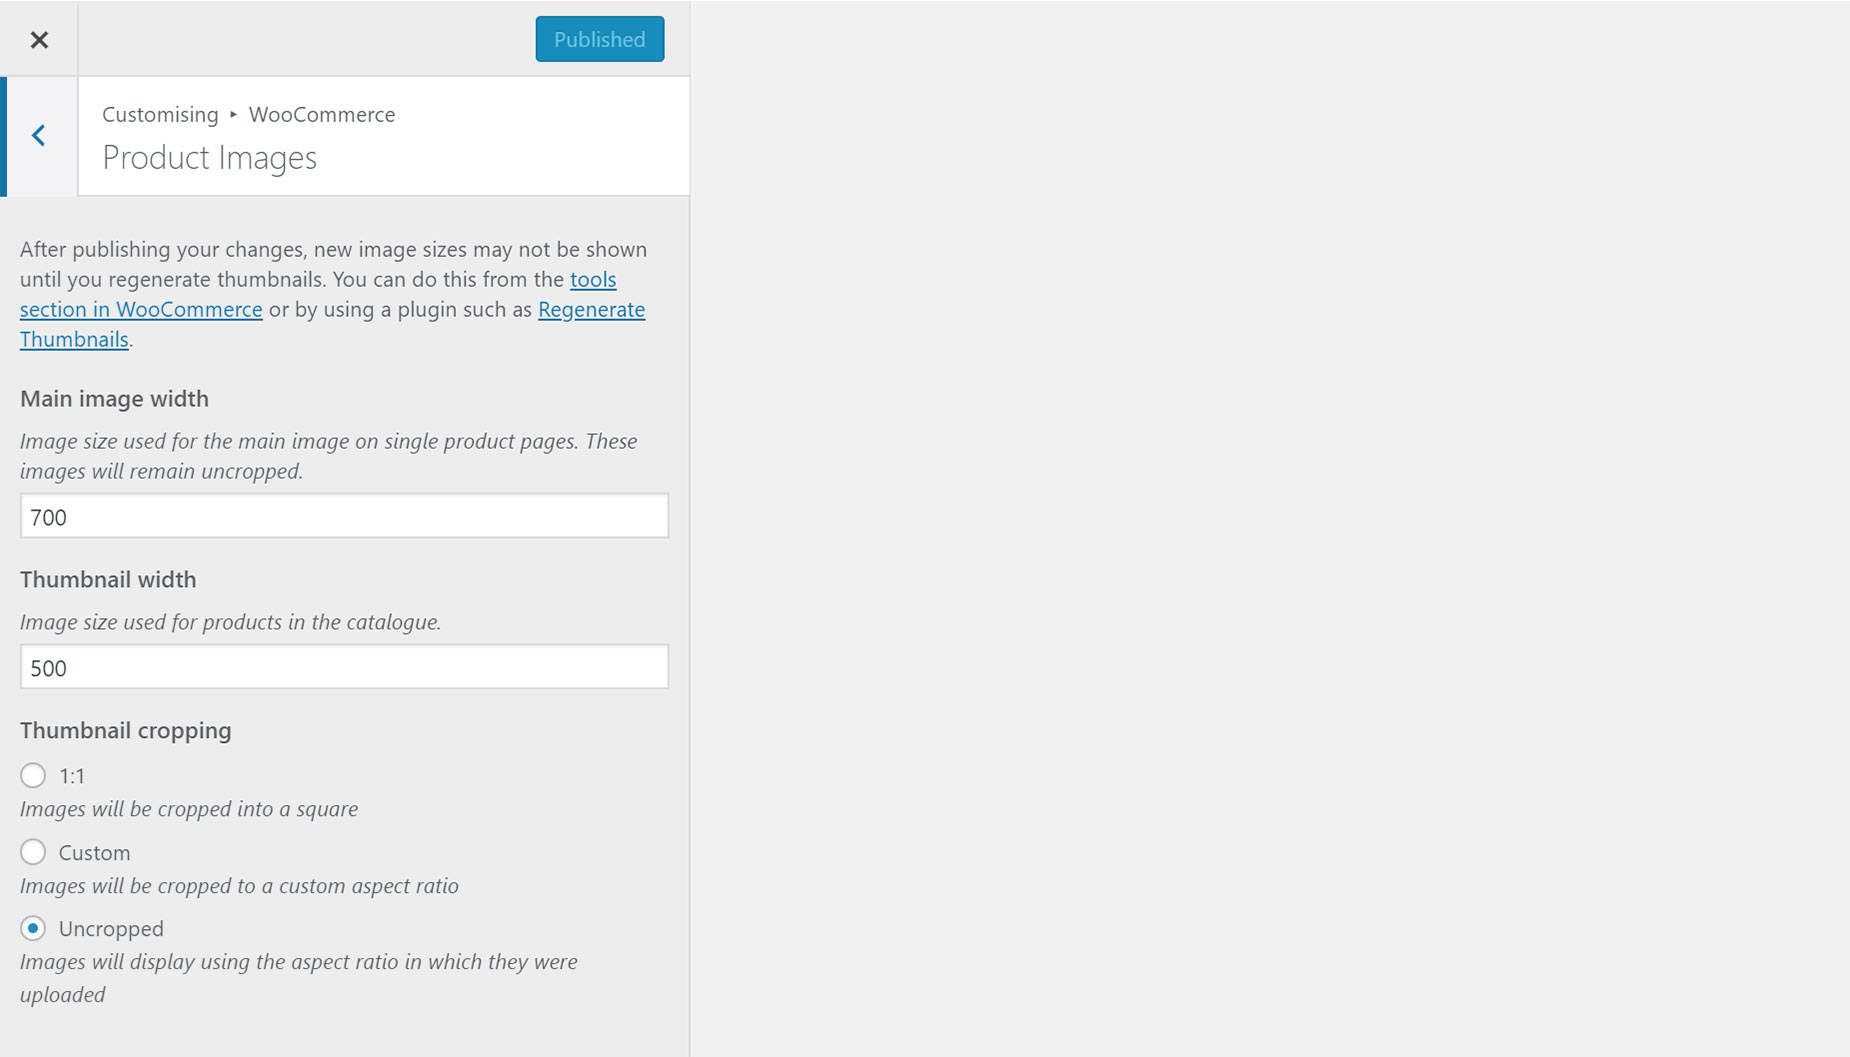
How To Adjust WooCommerce Product Image Size Settings
WooCommerce includes settings to change the width of product images for the Main Image and for Thumbnail images. There are specific Avada settings which work in conjunction with your WooCommerce images sizes. When configuring these image size settings, it’s important to take into account the Avada Global Options settings as well. We’ll touch on each of these settings in detail below.
Note: If the images you’re uploading for your products are smaller at the source than the image sizes set in your WooCommerce settings, you may see some visual layout discrepancies on the front end of the shop pages. This is not a bug. It is simply because your images were too small for WooCommerce settings to affect them. You can think of these settings as a max width and height for your images. Anything below the limit will not be resized.
While setting up your shop, be sure the WooCommerce image size settings and the actual size of your images are considered. In summary, your images should be equal to or larger than your WooCommerce image size settings.
After any changes to your image size settings, you’ll need to regenerate your thumbnails for it to affect images already uploaded to your site. We recommend using the Regenerate Thumbnails plugin. Please see the steps below for details on changing WooCommerce image sizes.


