Share
Cookie consent (the permission a website needs to store or access small tracking files (cookies) on your device) is one of those things you have to get right, but nobody actually enjoys setting it up. Regulations like the EU’s GDPR require sites to give you clear choices—like “Accept All,” “Reject,” or “Manage Preferences”—before tracking your online activity or showing personalized ads.
The good news? If you’re running Avada and WordPress, you’ve already got a proper tool for it baked in. The Avada Privacy and Consent Element lets your visitors decide for themselves which embeds and cookies they’ll allow, right on the page, no third-party plugin required. Here’s how to set it up and tune it to fit your site.
Overview
What This Element Actually Does
The Avada Privacy and Consent Element gives your visitors a list of the cookies your site uses, sorted into the familiar categories: necessary, functional, statistical, and marketing. They tick the ones they’re happy with, save their choice, and your Avada website remembers it.
It’s one piece of Avada’s wider privacy management toolkit, so it works hand in hand with your Avada Global Privacy Settings rather than replacing them.
Here’s the gotcha that trips people up: the Element won’t even show in your Elements list until you enable it.
Head to Global Options → Privacy and Consent and switch on the Privacy Consent option. Save your options, then refresh the page; the Element will now be available to configure in the Avada Builder.
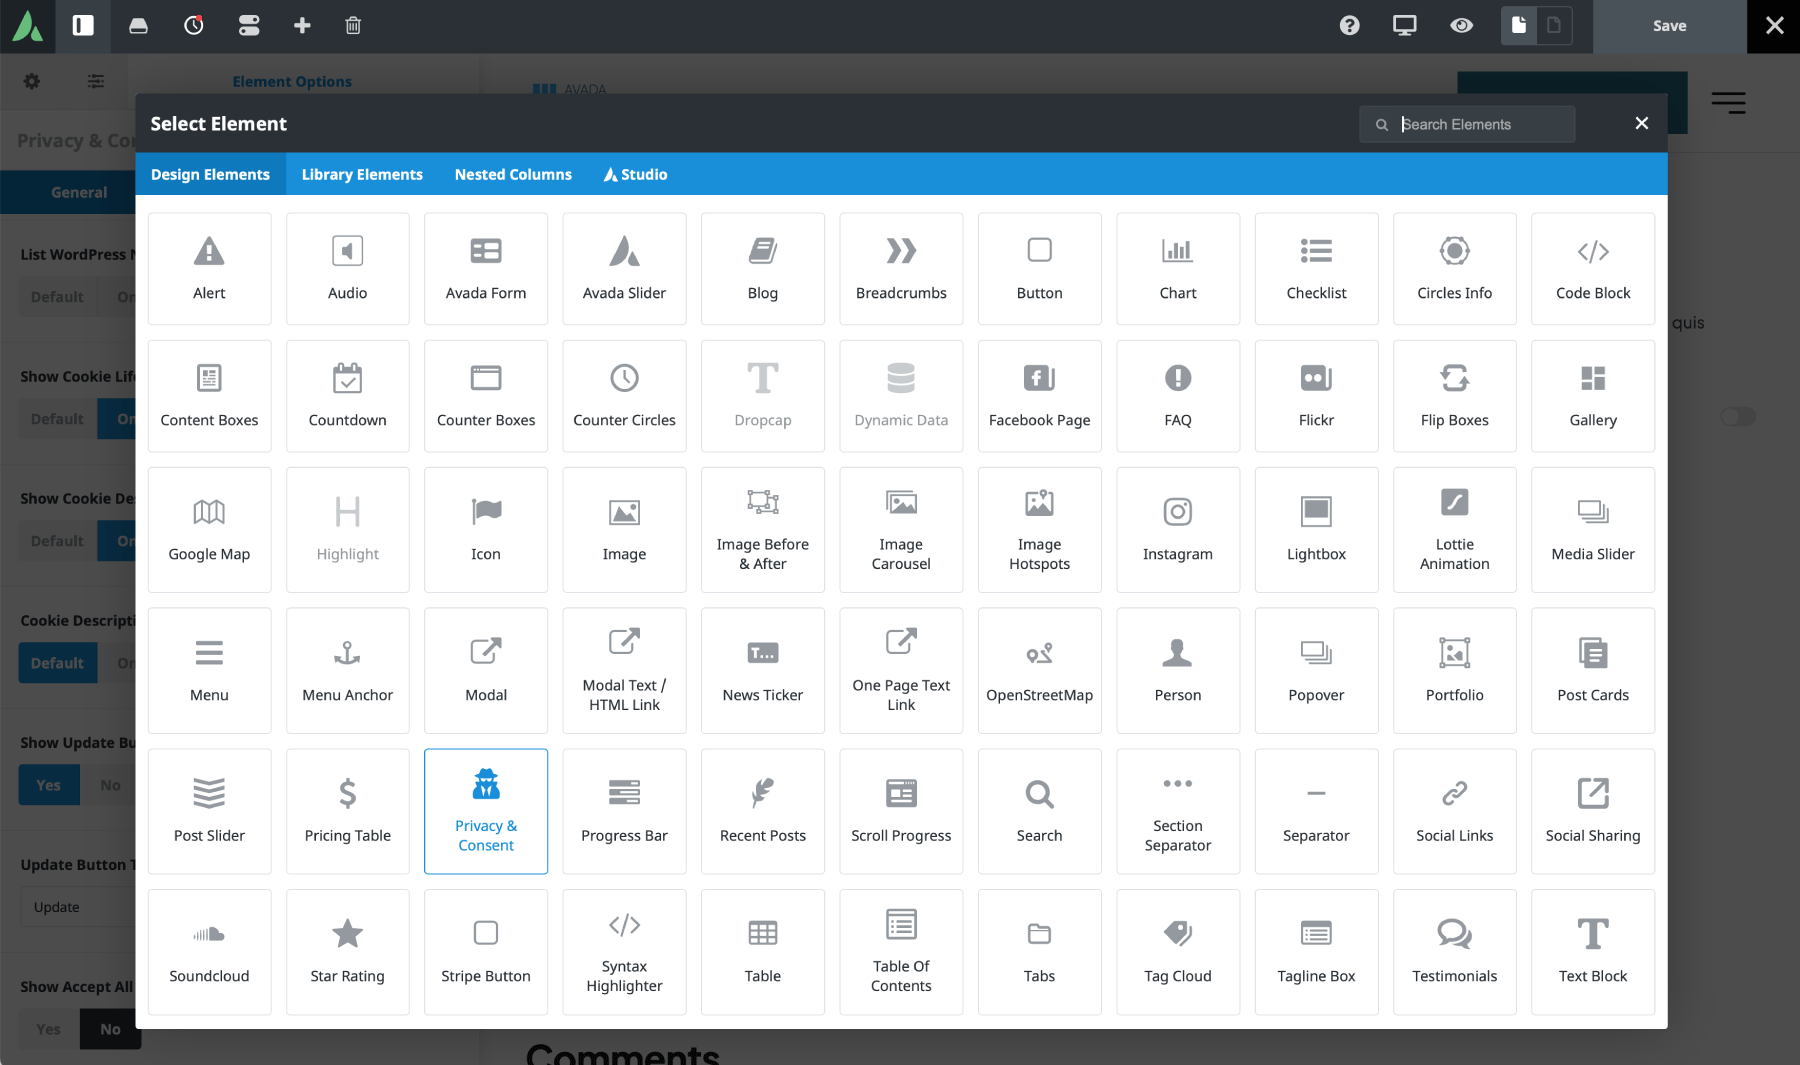
Everything the Element displays — your consent types, which categories are active, descriptions, lifespans — pulls from those Avada Global Options. So set those up the way you want first, then the Element just reflects them. You can place the Element anywhere on your site, including:
Either way, once it’s placed, visitors can manage their preferences from there.
The Element Options Overview
Add the Element to your website, and you’ll see it already populated with the global settings you set. Now let’s go ahead and configure it:
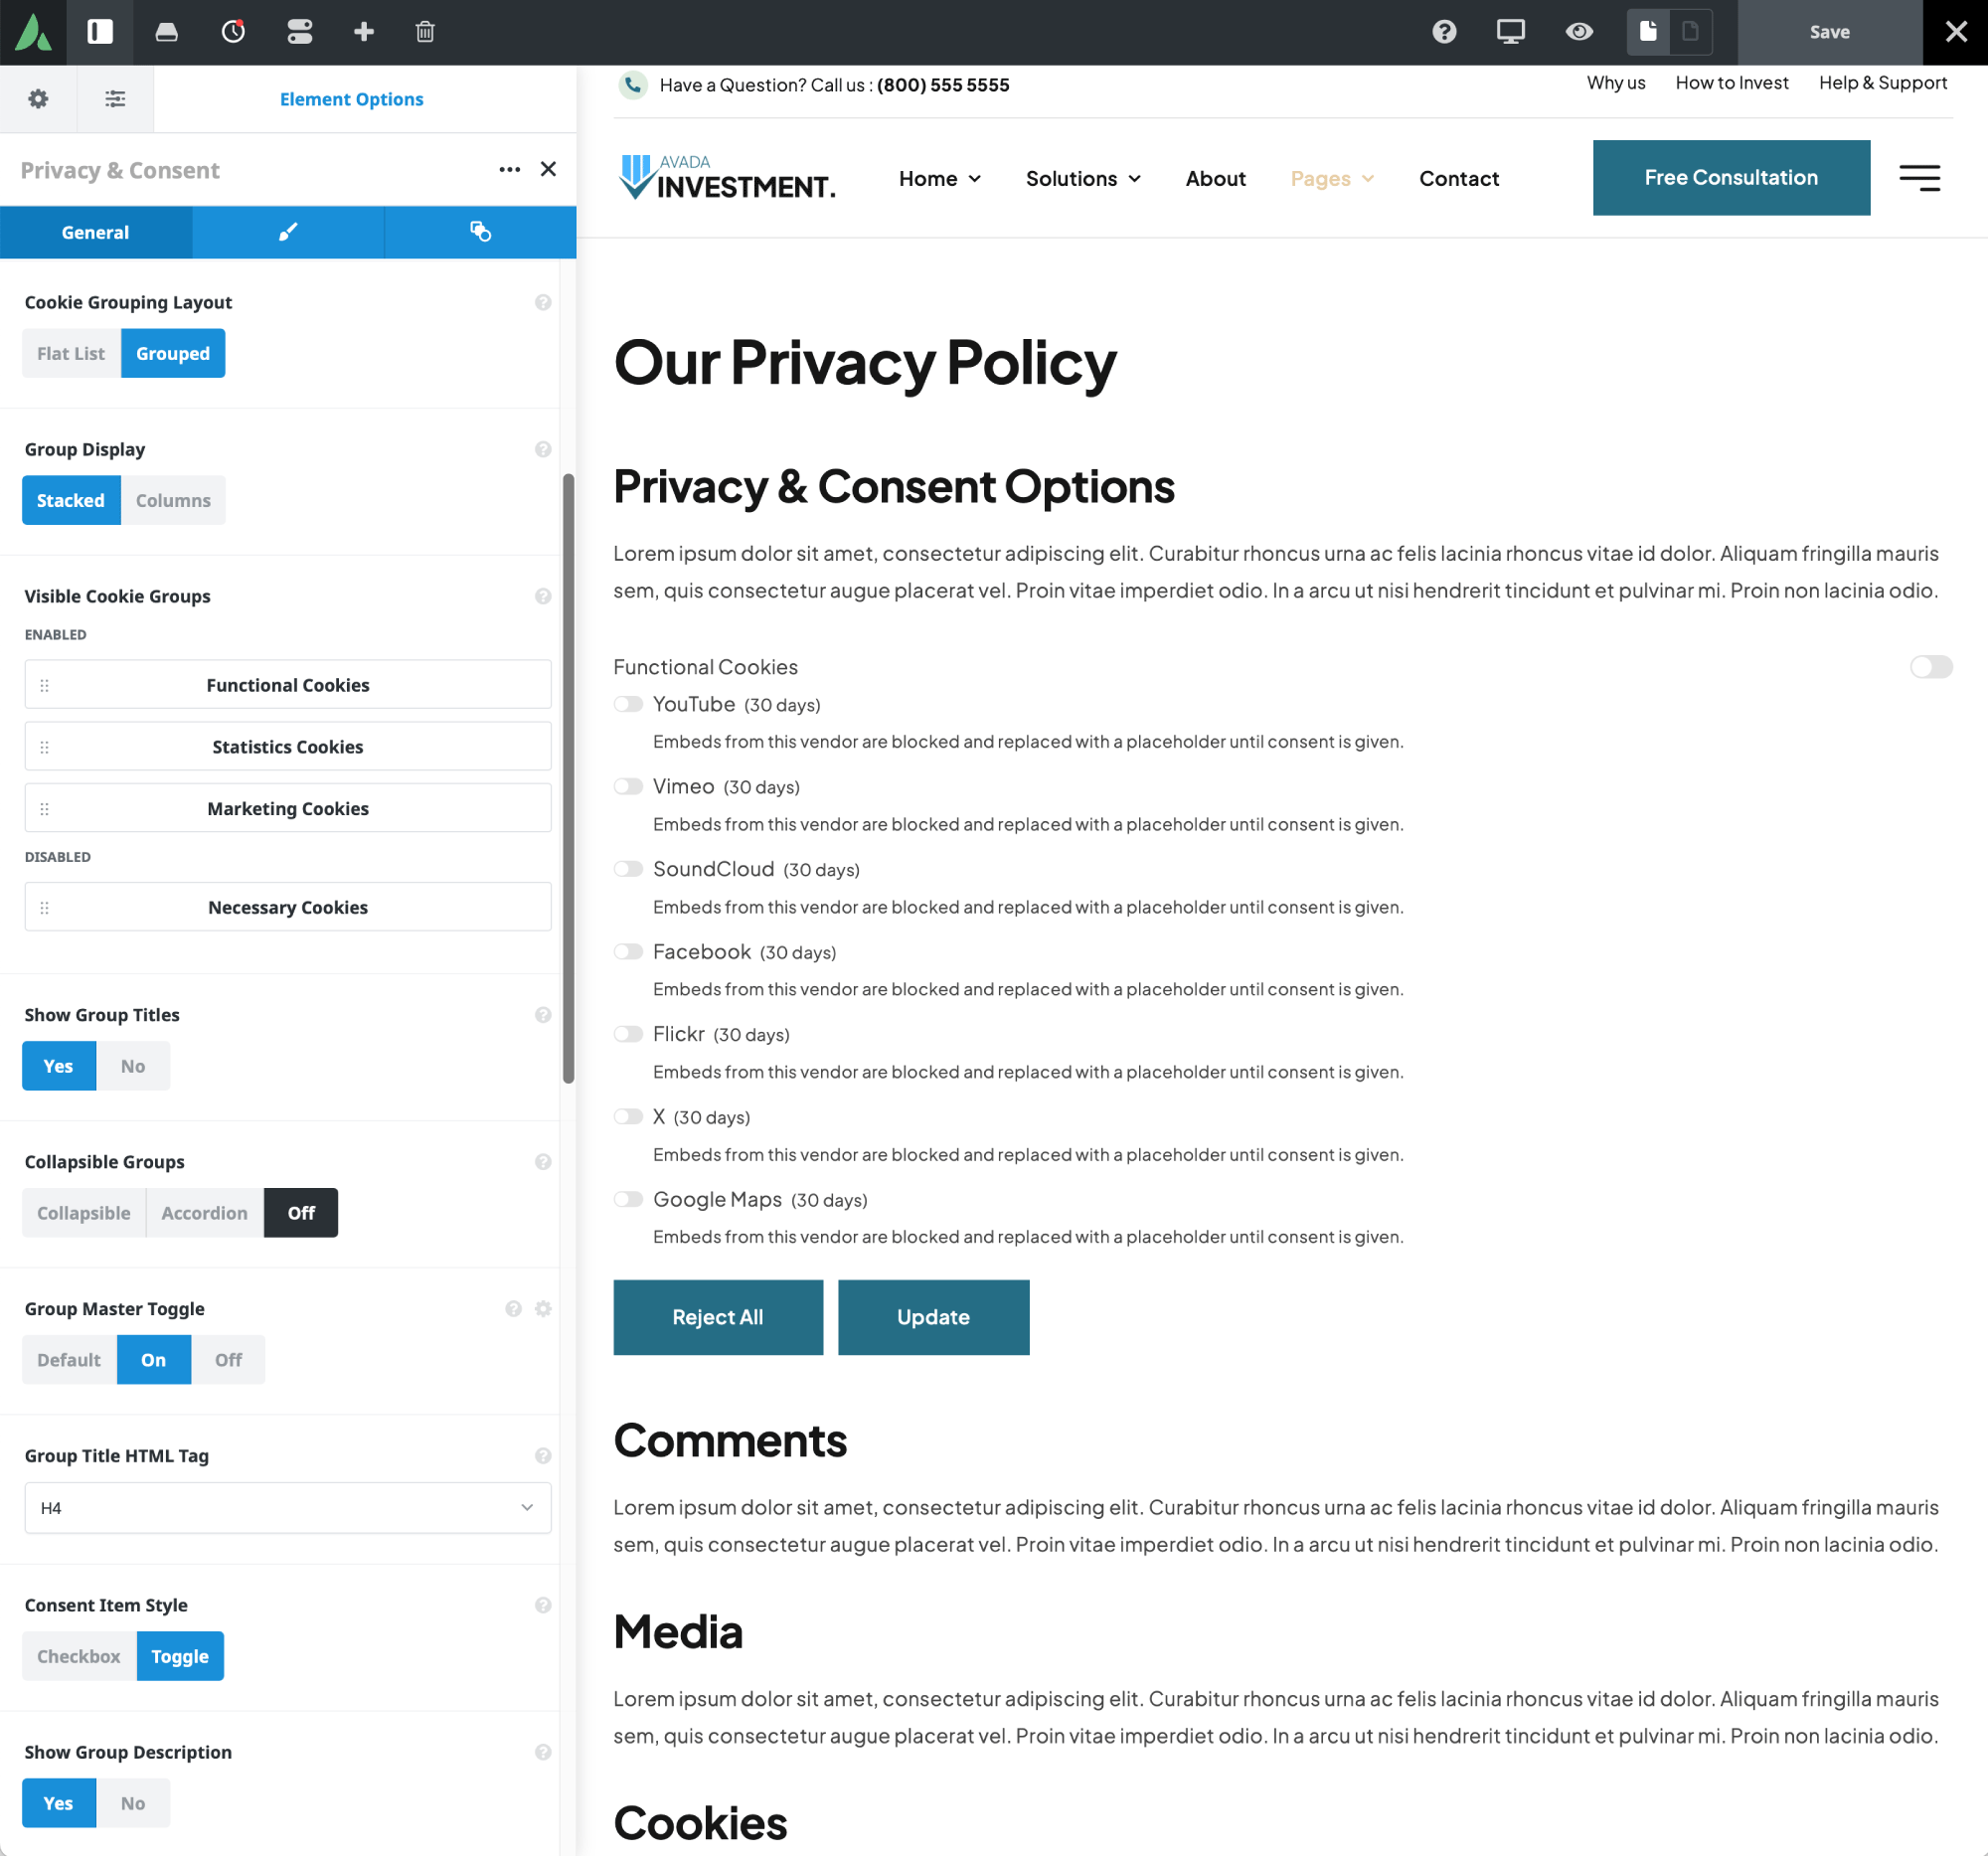
↳ Privacy text
This is your intro blurb. Write whatever you want here to explain how you handle third-party embeds and cookies. A short, plain sentence does the job.
↳ Cookie grouping layout
You can keep a flat list (the default) or switch to “Grouped,” which sorts cookies by category. After selecting “Grouped,” five more controls appear:
↳ Form field layout
Choose “Stacked” or “Floated”. You won’t notice much with the grouped layout, but on a flat list, floated lets shorter items (like your necessary cookies) sit neatly side by side instead of stacking.
↳ List WordPress necessary cookies
“On” by default. You can override it to “Off” here if you want.
↳ Lifespan and description toggles
If you’ve enabled cookie lifespan and cookie description in your website’s Avada Global Options, the Element displays them as well. But you can turn either off right here if you’d rather keep the consent area clean and simple.
↳ The buttons
This is where you control the action buttons at the bottom:
Then there’s the Save Action:
↳ Visibility and CSS
Here you’ll find the usual visibility controls (show or hide by screen size), plus CSS Class and CSS ID fields for further styling customization.
The Design Tab
This tab lets you style the Element to best suit your website’s aesthetic. Here you can:
A small example: set a bit of bottom margin, point the group title at your subheading typography set, nudge the font back to 18px, and color the lifespan text to match your brand. Little things, but they make the consent area feel like part of your site rather than a bolt-on.
And don’t forget the Extras Tab for conditional rendering and animation — you can fade the whole thing in from the side if you want a bit of polish.
What Visitors Actually See
On the website’s front end, a visitor chooses the cookies they’re comfortable with:
Say a visitor deselects YouTube and clicks “Update”. The page reloads, they get an update notice, and now any page with a YouTube embed won’t automatically load that video. Instead, the visitor gets full control over whether to load it, with a link back to your website privacy policy page (set under Settings → Privacy in the WordPress Dashboard).
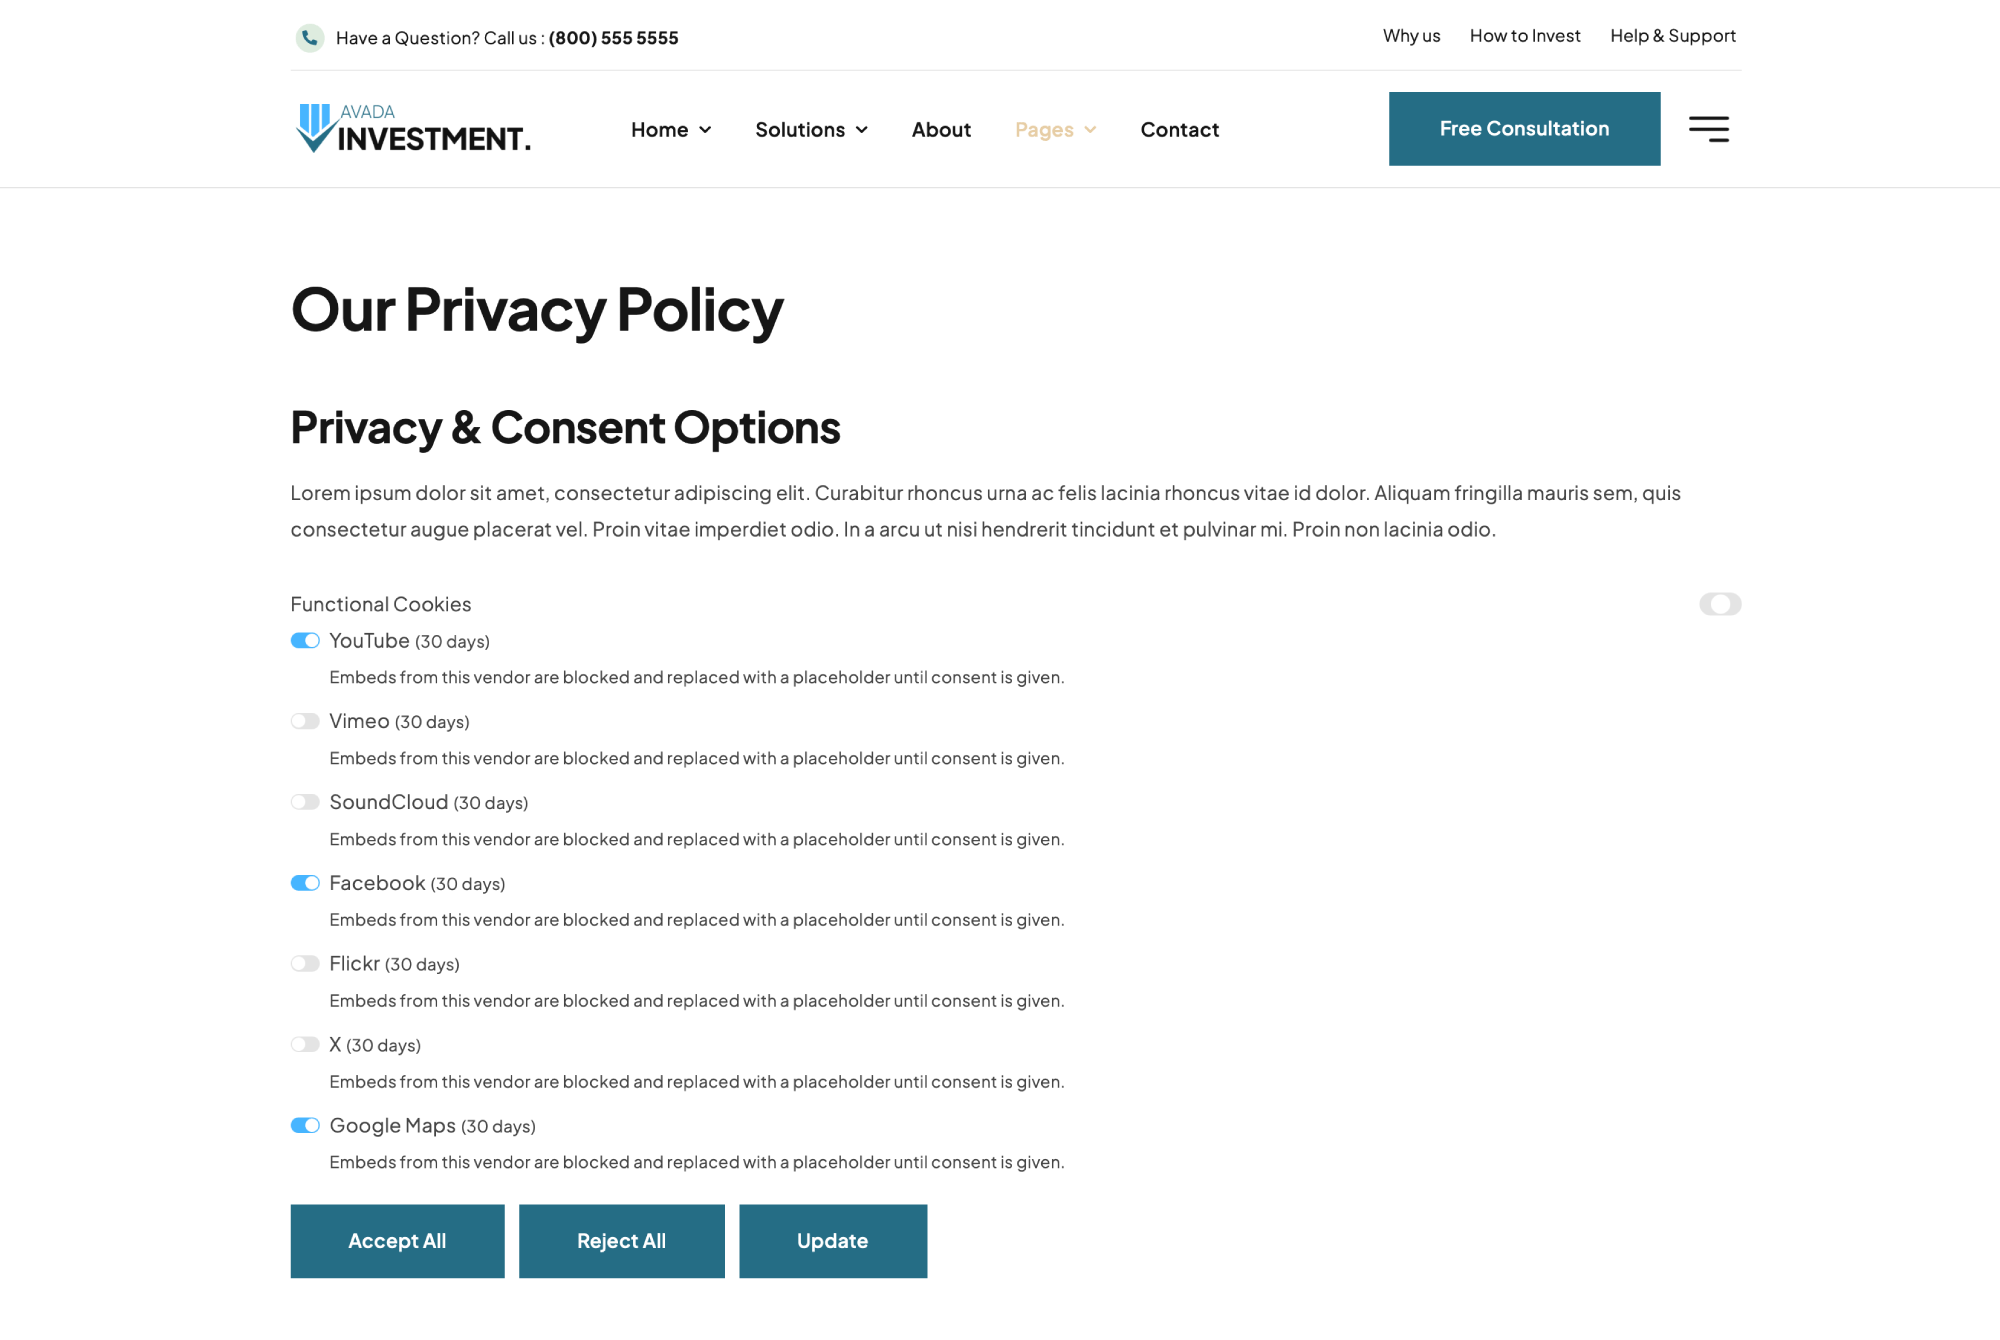
Meanwhile, an embed they did approve — a Google Map, say — loads normally, because permission’s already on file. It’s granular, and it respects exactly what each person chose.
Using it in an Avada Off-Canvas
If you’d rather have a slide-out consent panel than a section on a page, you can turn off the Privacy and Consent bar and put the Element inside an Avada Off-Canvas instead. Set it to load a few seconds after the page does, and it’ll show the same information in a panel.
The Avada Off-Canvas options have a Privacy and Consent interaction behavior setting in the rules section, with three choices:
That last option is the smoothest experience: the visitor consents, the panel quietly slides away, and they get on with their day.
Summary
The Privacy and Consent Element is one of those features that looks fiddly until you’ve clicked through it once; then it just makes sense. Set up your website’s Global Options, drop the Element where it fits, tune the layout, and you’ve got a consent system that actually respects your visitors’ choices instead of forcing them into clicking “Accept.”