How To Use The Avada Privacy Consent Tools

Last Update: June 5, 2026

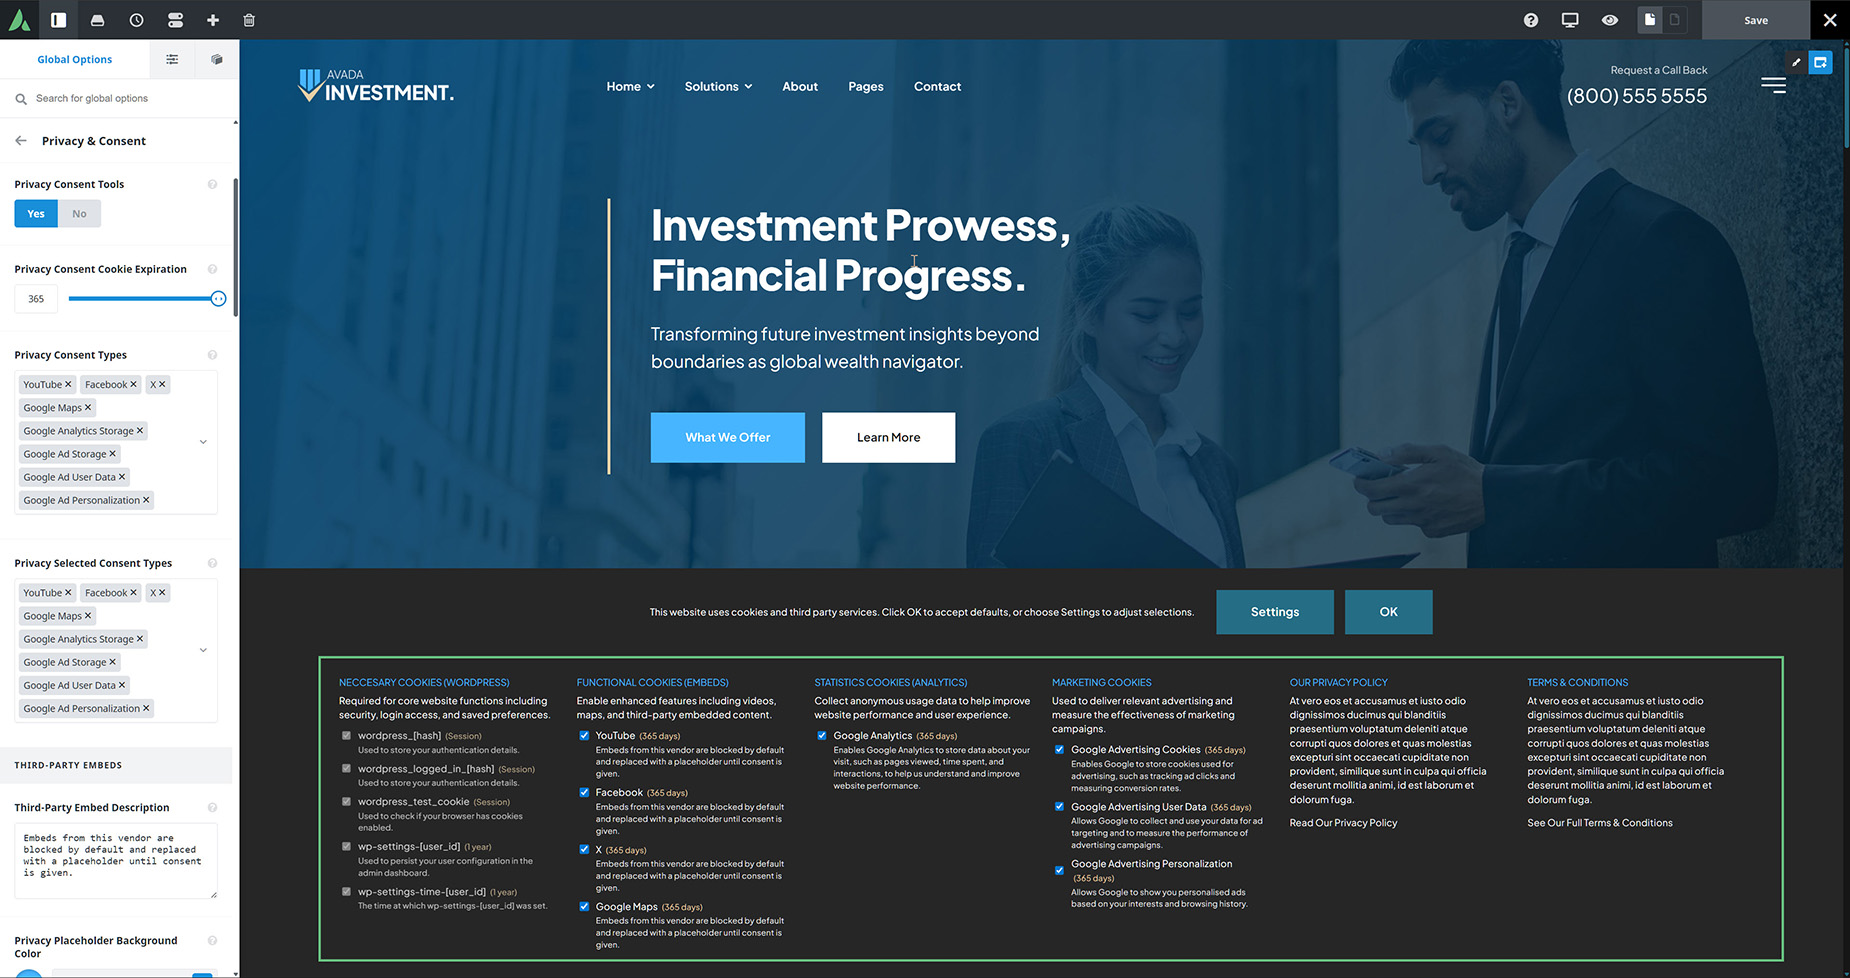
The second option in the Global Options > Privacy & Consent tab is “Privacy Consent Tools”. When this option is enabled, a whole range of dependent options are revealed. These options configure a variety of settings, from Cookie expiration and consent types to “Consent Category” descriptions.

In short, the options in this section inform and populate the content in the Privacy & Consent Element, as well as the Settings area of the Privacy & Consent Bar. For example, ALL the content in the Settings area of the Privacy & Consent Bar in the image below comes from the Avada Global Options in the Privacy Consent Tools section.

Privacy Consent Tools

Read on to see the Privacy Consent Tools options and watch from 2:46 in the below video to skip directly to the Privacy Consent Tools section.

For privacy reasons YouTube needs your permission to be loaded.

Privacy Consent Tools Global Options

  • Privacy Consent Tools – Turn on to prevent scripts and embeds from loading until user consent is given.
  • Privacy Consent Cookie Expiration – Controls how long the consent cookie should be stored for. In days.
  • Privacy Consent Types – Select the types of embeds which you would like to require consent. Custom Code Snippets with a privacy category are automatically included and do not need to be selected here.
  • Privacy Selected Consent Types – Select the types of embeds which you would like to have checked by default. This applies to both the privacy bar and the privacy element.
  • THIRD PARTY EMBEDS
  • Third-Party Embed Description – Controls the frontend description shown below each third-party embed consent checkbox (YouTube, Instagram, Google Maps, etc.).
  • Privacy Placeholder Background Color – Controls the background color for the privacy placeholders.
  • Privacy Placeholder Text Color – Controls the text color for the embed placeholders.
  • CONSENT CATEGORIES
  • Consent Categories – Defines the consent categories displayed in the Privacy & Consent Bar and the Privacy & Consent Element. Each entry sets the category type, title, and description shown to visitors when grouped layout is used. Click the “Add” button to add additional categories.

  • List WordPress Necessary Cookies – Enable to automatically list standard WordPress necessary cookies. If WooCommerce or The Events Calendar are active, their necessary cookies are included automatically. Note: This will only be displayed if a consent category with the “Necessary Cookies” type is present in the Consent Categories above.
  • Show Cookie Lifespan – Enable to display the cookie lifespan next to each consent item in the Consent Category content.
  • Show Cookie Description – Enable to display the cookie description below each consent item in the Consent Category content.

Next Step: Choose How To Display Cookie Information

Once you have configured your Privacy Consent Tools options, it’s up to you how you want to display that information to your visitors. You have two options. You can display the information in the Privacy & Consent Bar at the bottom of the page, or you can use the Privacy & Consent Element to display the information on a page, such as your website’s Privacy Policy page, or in an Avada Off-Canvas. You could of course use a combination of these two, and present the Element on as many pages as you want. You have full flexibility.

In this article