Share
There are two essential elements every online store must have – a compelling look and a user-friendly purchasing system. Using WordPress and WooCommerce to set up your website is a strong start, but you’ll need a few more tools if you want to design a truly effective storefront.
When it comes to improving the appearance of your WooCommerce site, you can’t go wrong with Avada. Our powerful, versatile theme features demos for a variety of popular e-commerce niches, including photography, fashion, health, and more. Alongside this theme, you can use the WooCommerce Product Table plugin to set up an order form that makes the buying process more efficient and user-friendly.
In this article, we’ll discuss the benefits of using both Avada and the WooCommerce Product Table plugin for your store. Then we’ll walk you through how to set both tools up. Let’s dive in!
Overview
eCommerce Benefits of Using Avada and the Woo Product Table
WooCommerce is an excellent platform for building just about any type of e-commerce store. It adds crucial functionality to WordPress, enabling you to turn your website into a fully functional storefront quickly. However, there are a few valuable features that WooCommerce lacks by default.
For instance, WooCommerce doesn’t offer much functionality in terms of design. If you’re not careful, your store and the rest of your website can look very different. However, this issue can easily be solved by choosing the suitable theme. Avada makes it simple to design your store and get it looking just right:
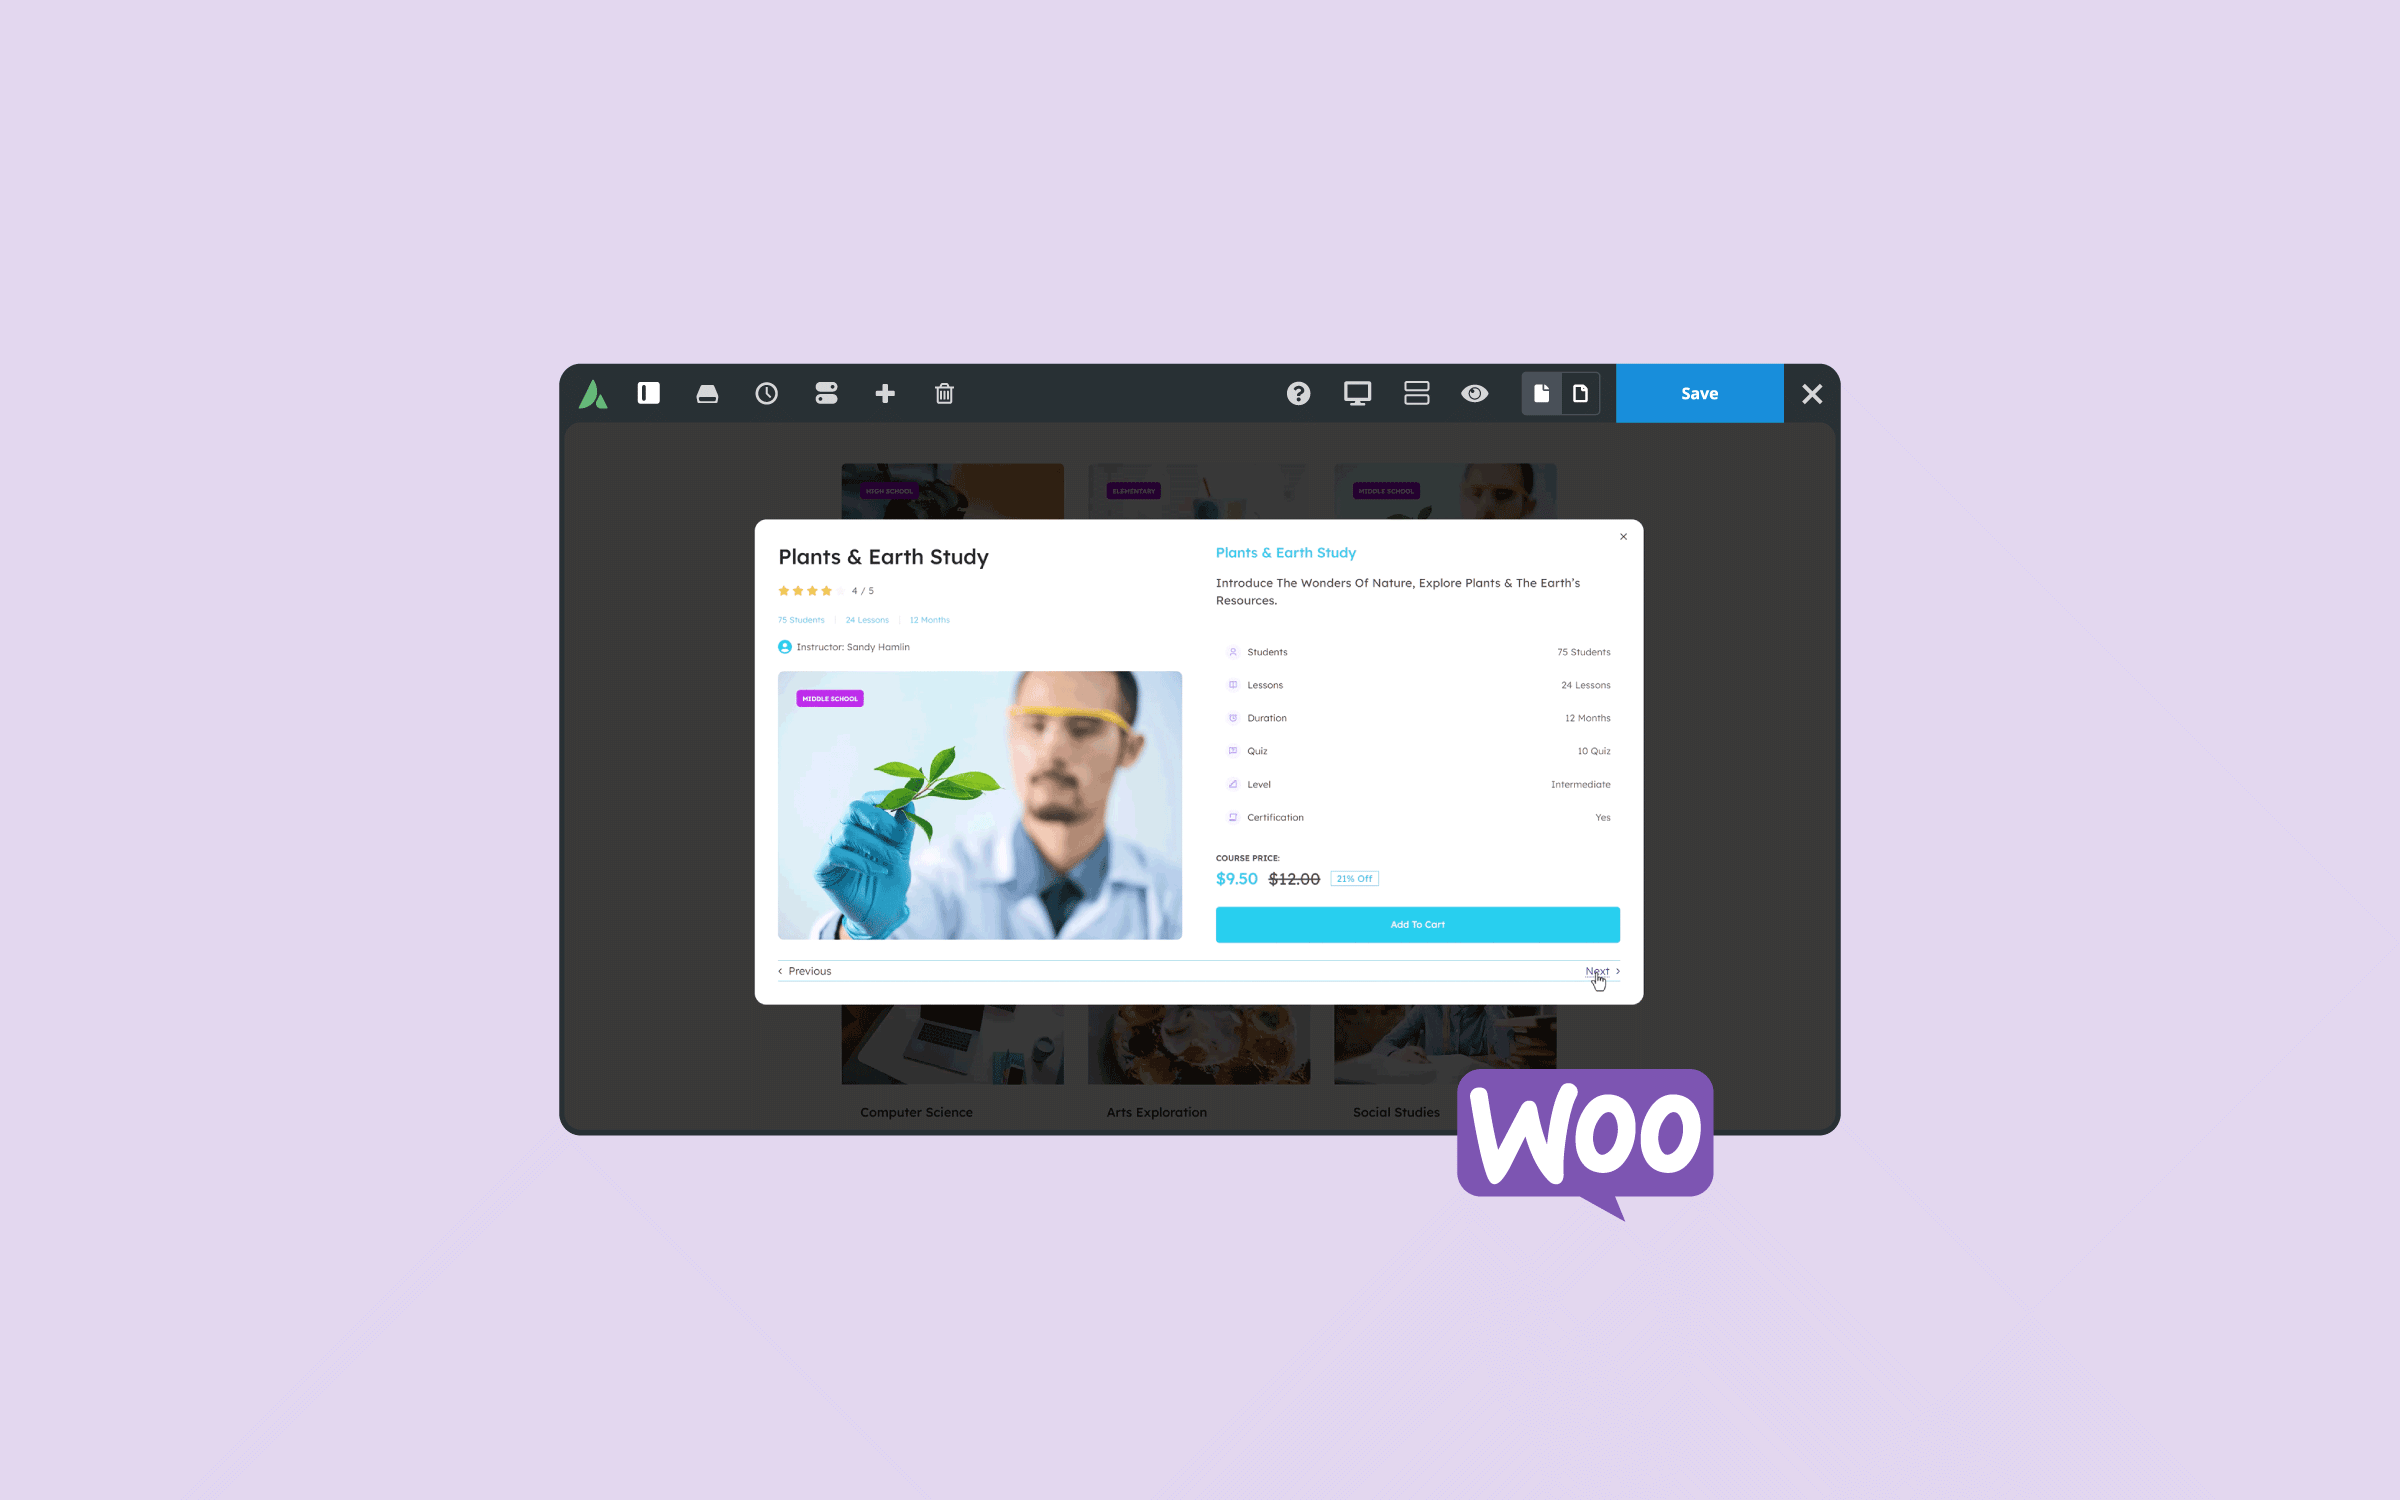
Avada provides full design integration with WooCommerce, including plenty of layout choices to get you started. Whether you’re running just a storefront or a combined shop and website, Avada can help you create a look that appeals to customers and encourages them to stick around longer.
Another potential downside to default WooCommerce is its reliance on a traditional store layout. Customers must visit each product page to add items to their carts and make purchases. If you have many offerings, especially if your customers regularly buy multiple items at once, this can slow them down and hurt the user experience. The WooCommerce Product Table plugin offers the perfect solution:

Using this tool, you can set up an order form that lets customers buy multiple items from one page. You can even enable them to select variations and quantities, all from the same location. This is an excellent way to encourage more purchases, by streamlining the buying process and showing off all your products side by side.
The best part is that this theme and plugin combination will work together seamlessly on your WordPress site. WooCommerce Product Table is fully tested and compatible with Avada, and many people are already using the two successfully. What’s more, the Avada theme styles will be carried over in your product table (colors and fonts, for example), so it will look attractive and fully integrated with the rest of your site.
How to Set Up Avada and the Woo Product Table Plugin
Now you understand what this theme and plugin combination can do for your store, all that’s left is to set them both up. You can do this on either an existing store or a brand-new site.
Just remember to make a backup first if your store is already online (just in case), and consider testing your changes on a staging site before implementing them fully. If you’re creating a new store, on the other hand, you’ll first need to set up a WordPress website and install WooCommerce. Then, you’ll be ready to go!
Step 1: Install Avada
You’ll first want to install the Avada theme on your WooCommerce site and set it up just right. You’ll need to purchase Avada, at which point you’ll be provided with a zipped file containing everything Avada needs to work.
In your WordPress dashboard, go to Appearance > Themes. Click on Add New, then select Upload Theme on the next page:

Find the zipped theme file, select it, and hit Install Now. When the theme is ready, you’ll see an Activate option. Click this, and your site will be set up with Avada:

To complete the setup, you must install the included plugins, Avada Core and Avada Builder. These are located on the WordPress > Avada > Plugins & Add-ons page. For additional resources and tips, please see the Avada Quick Start Guide.

For the next step, please follow these instructions to register for your Avada website using the purchase code you received from your purchase on Themeforest. You can locate the purchase code from the downloads page within your marketplace account.

You can choose to build a new Avada website from scratch, use the Avada Setup Wizard to help build one or import any of the 113 Avada Prebuilt websites to give you a head start in the design process. Prebuilt websites are infinitely customizable to suit your needs.

Step 2: Create an Order Form Using WooCommerce Product Table
Now you’re ready to set up an order form for your WooCommerce store. You’ll need to purchase, download, and install WooCommerce Product Table, following the instructions in the plugin’s documentation. Don’t forget to activate your license key as well:

Then, open up a page or create a new one for your order form. Select Toggle Toolbar in the editor tools, and click on Insert Product Table in the second row of icons:

This will add a shortcode to your page, which pulls information about your products from WooCommerce and organizes them into a searchable and sortable table. You can preview the page now to see what the default order form looks like:

Of course, you may want to customize exactly what information and features are included in this table. To do so, go to WooCommerce > Settings, click on the Products tab, and select Product tables near the top of the screen:

Here, you can tweak your order form in a wide variety of ways to encourage sales and improve your conversion rate. For instance, you can determine what columns will appear in the table. This will help you provide all the information customers might need to make a decision, so they never need to visit the individual product pages:

If some of your items have various options, such as colors and sizes, you can display those choices in your order form using the Product variations field:

You can also add quantity selectors to your order form, so customers can buy items in bulk. Then, if you select Button and checkbox in the Add to cart button menu, they’ll be able to check off everything they want to purchase and add it all to their cart with a single click:

What’s more, the Filter dropdowns setting lets you add filters to the top of your order form. This will enable customers to search for specific categories, variations, and so on:

By the time you’re finished customizing your product table settings, your order form might look something like this:

In the WooCommerce Product Table’s documentation, you’ll find a full list of the options available, as well as detailed instructions for using each one. Publish the page when your order form is ready, and customers can start using it to make purchases!
Conclusion
To improve your e-commerce site’s conversion rates, you’ll want to enhance both its visual appeal and user-friendliness. By using Avada and WooCommerce Product Table in combination, you can present your items in a compelling way and make the buying process simple and appealing.
Once you have a WordPress site set up and WooCommerce installed, all you’ll need to do is: