Inline Elements

Last Update: March 26, 2024

You might notice that some Elements are greyed out when you view them in the Elements window that appears when you add an Element. They are grey to show that they are Inline Elements. These elements are not meant to be used directly on their own, but rather in conjunction with text or other content. Please read below for links to our various Inline Elements, as well as information on how to insert them in both the Avada Builder and Avada Live.

How Inline Elements Work

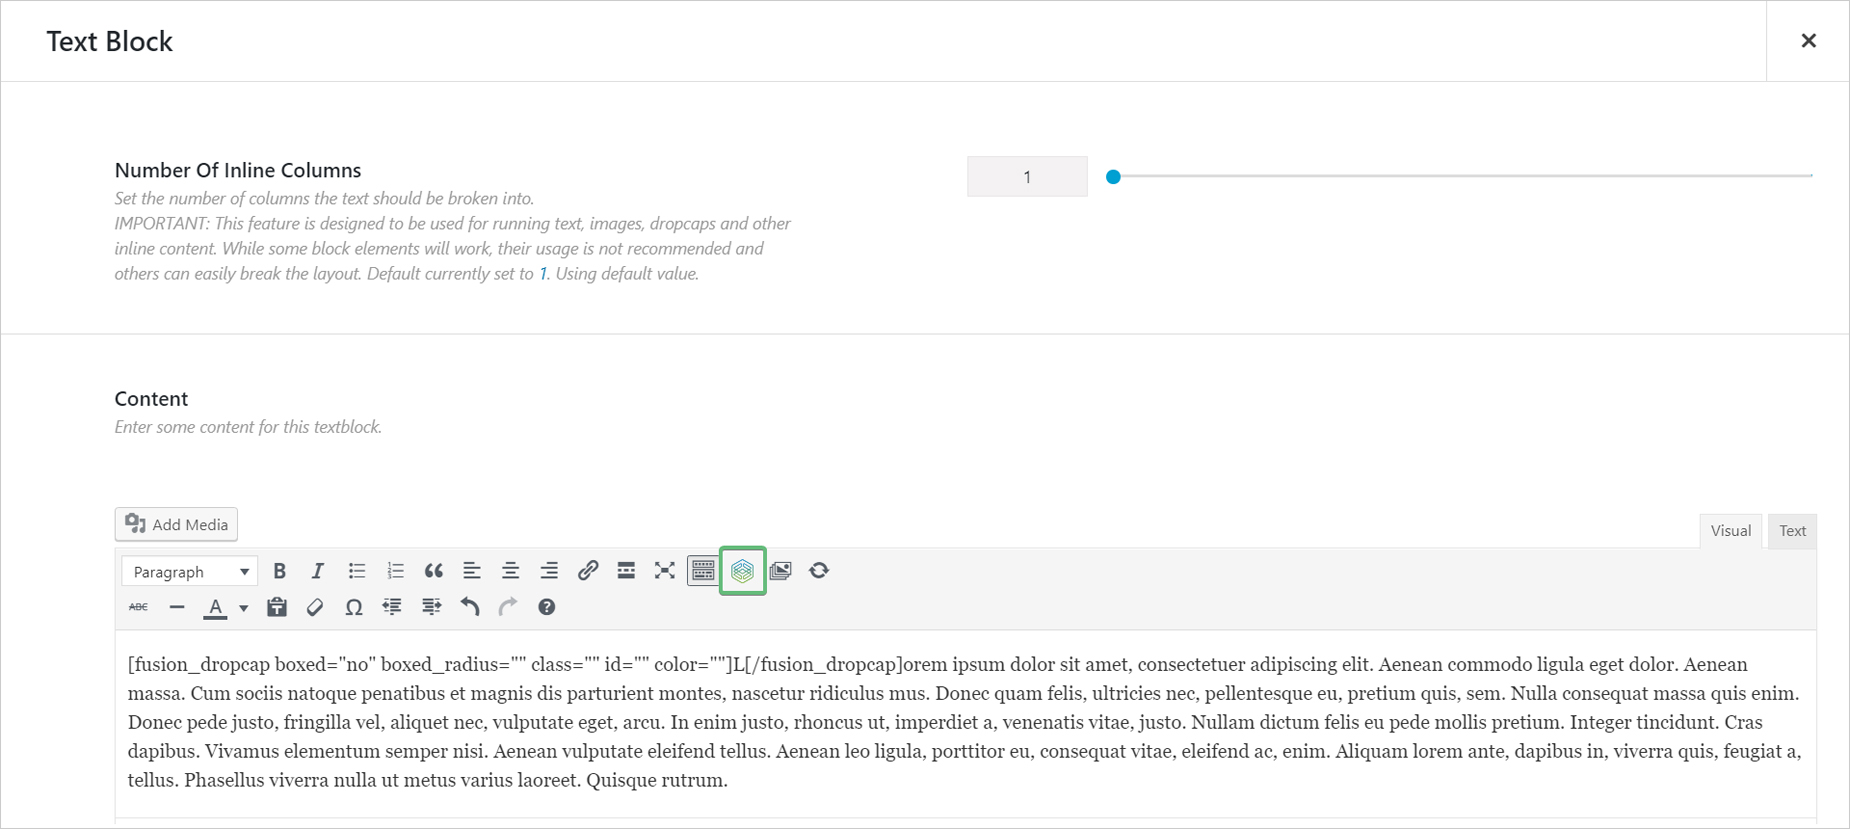
Inline Elements are not meant to be used directly, but rather in conjunction with other content. Let’s take a Dropcap as an example. Whenever you use a Dropcap, it has to go along with text or paragraph to fulfill its function. If not, it wouldn’t really make sense on the page. With that in mind, you have to insert text content first, then use the Element Generator to add a Dropcap element.

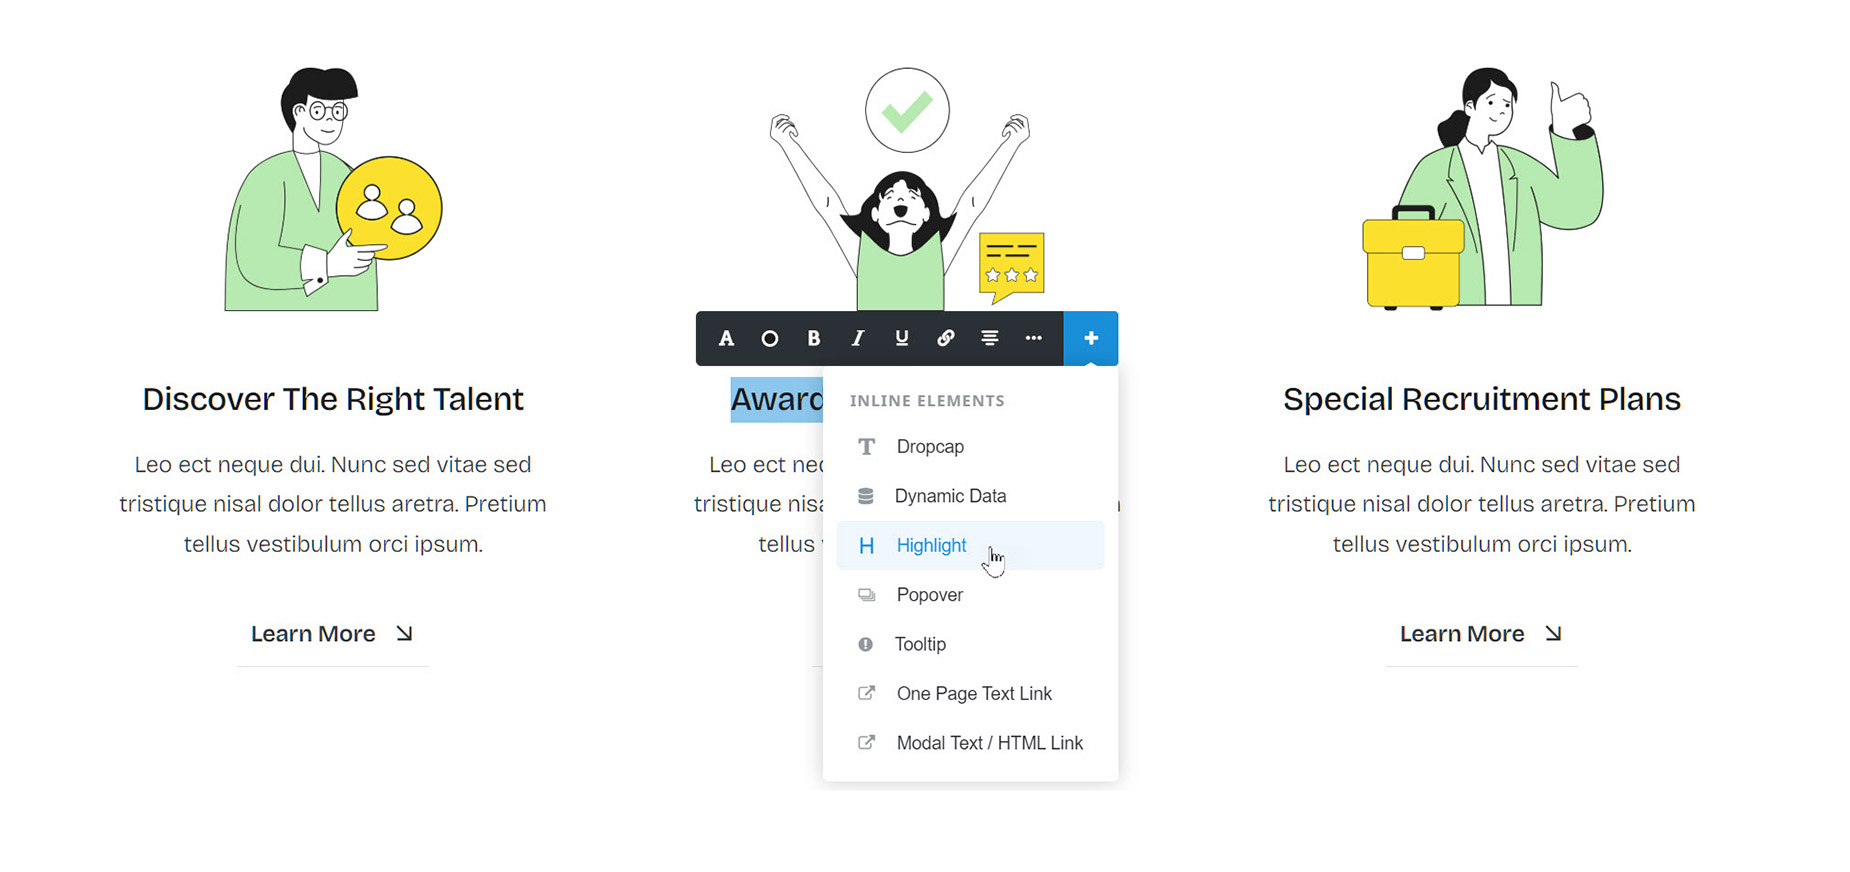
Alternatively, using Avada Live, you can now edit text inline, and as part of the Inline Editing menu that appears when you select some text, there is an Add Element Icon (a plus symbol) where you can access and add the Inline Elements, as well as being able to access the Avada Builder Element Generator when you edit the Element.

Inline Elements

There are currently 5 Inline Elements. Please follow the links below to go directly to the individual Inline Element pages to find out more about the specific elements, or read further for a general overview of how to use Inline Elements on the page, through both the Avada Builder and Avada Live.

NOTE: Two of these Elements, Popover and One Page Text Link, are a bit special in that they are both normal Elements, and Inline Elements (which is why they are not greyed out). They can be used in page content by themselves, but they still work in conjunction with other content, no matter which way you add them. See the respective Element pages for more details.

Avada Builder Inline Elements

Using Inline Elements in Avada Live

For privacy reasons YouTube needs your permission to be loaded.
I Accept

In Avada Live, there are two ways to use the Inline Elements. Firstly, with the Inline Editor, that appears whenever you make a text selection. And secondly, with the Avada Builder Generator, when you edit a relevant Element in the Sidebar. Let’s look at both methods.

Using The Inline Editor

Step 1 – Make a text selection directly on the page. The inline editor will appear.

Step 2 – On the far right, there is a Blue Add Element Icon. This opens a list of the inline Elements. Select the one you wish to apply. It will be based on your text selection, so if you want a Dropcap, just select the first letter of the word, whereas if you want a Tooltip, you might select a word or entire sentence.

Step 3 – Set your preferred options in the Element Settings that opens in the Sidebar. The changes are applied as you make them.

Step 4 – That’s it. If you want to save the changes, click the large blue Save button on the Toolbar.

Inline Editor > Inline Elements

Using The Avada Builder Element Generator

Step 1 – Add any Element that allows for plain text or HTML to be inserted via the WordPress Content Editor. For example, the Text Block Element.

Step 2 – Click the ‘Settings’ icon on the Element to bring up the Element’s options panel in the Sidebar.

Step 3 – Select the text you want the Inline Element to apply to in the WordPress Editor (not on the page).

Step 4 – On the WordPress Editor toolbar, you’ll find the Element Generator icon which looks like the Avada logo. Click the ‘Avada Builder Element Generator’ icon to bring up the Elements window.

Step 5 – On the ‘Builder Elements’ tab, find the Inline element you’d like to add. Once located, click on it to bring up the options dialog.

Step 6 – Make your changes in the options dialog, and once done, click ‘Insert’. You can save the changes by clicking on the blue Save button on the main Toolbar.

Fusion Builder Element Generator

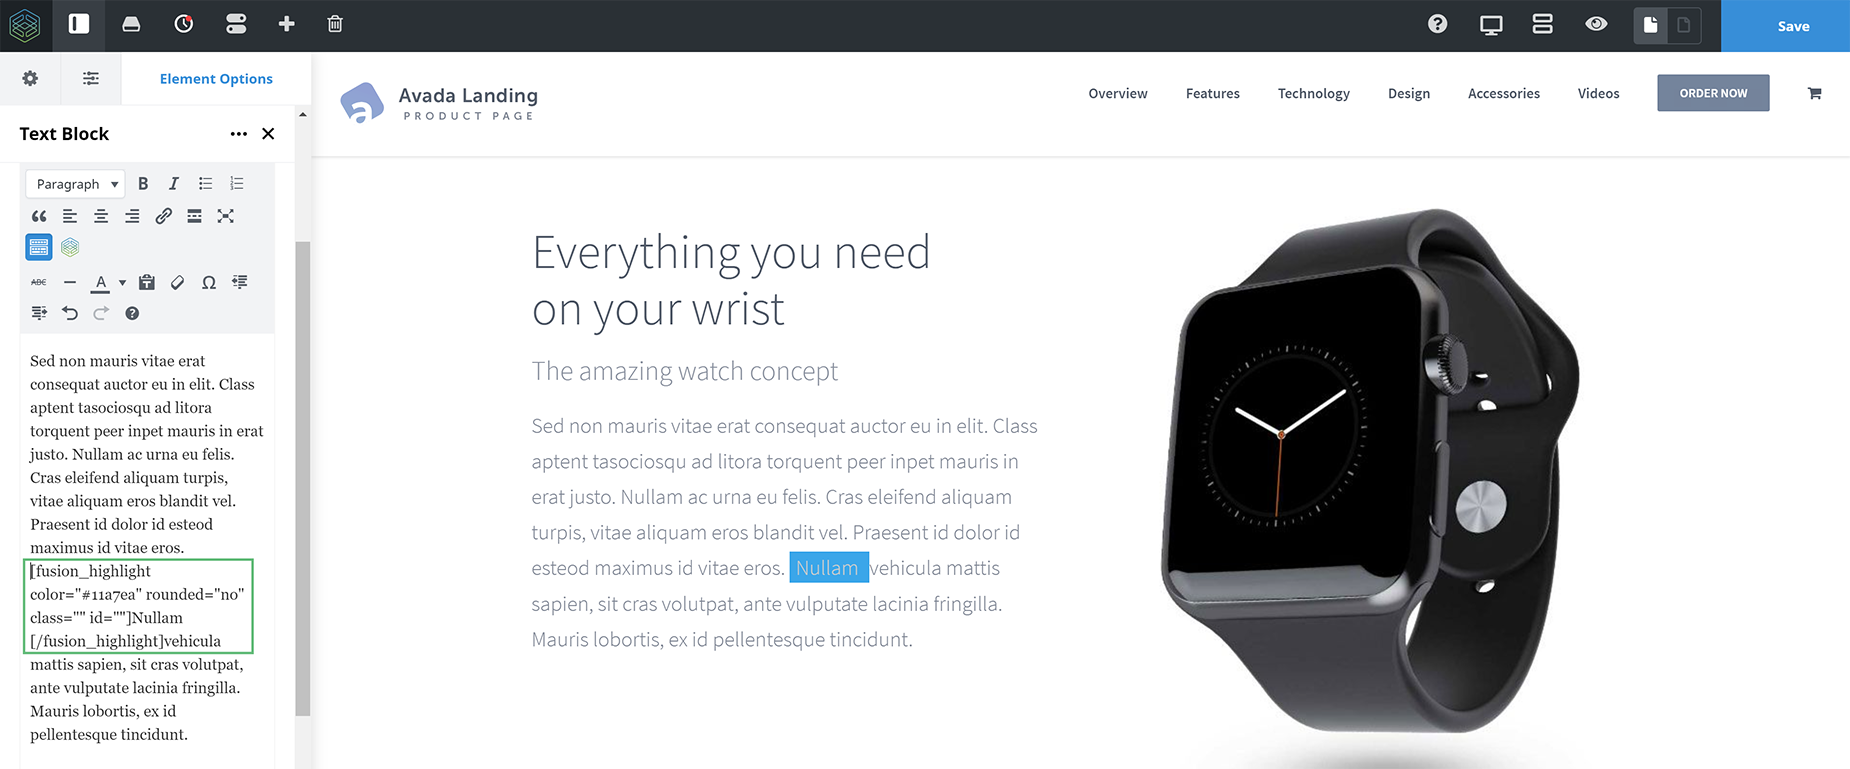
Using Inline Elements in the Avada Builder

In the back-end builder, the Inline Elements are designed to be added via the Element Generator within the WordPress Content Editor. Follow this short example to see how.

Step 1 – Add any element that allows for plain text or HTML to be inserted via the WordPress Content Editor. For example, the Text Block element.

Step 2 – Click the ‘Settings’ icon on the Text Block element to bring up the element’s options window.

Step 3 – Locate the WordPress content editor field. On the toolbar, you’ll find the Element Generator icon which looks like the Avada logo. Click the ‘Avada Builder Element Generator’ icon to bring up the Elements window.

Step 4 – On the ‘Builder Elements’ tab, find the Inline element you’d like to add. Once located, click on it to bring up the options window.

Step 5 – Once done, click ‘Insert’. You can then add content into the Text Block Element as needed. Once you’re done, click ‘Save’ to save your changes.