How To Import A Prebuilt Avada Website
Last Update: July 23, 2024
Before Importing Prebuilt Avada Websites
Before you import any of our available prebuilt websites, please make sure to check the items listed below. All of these are important and will ensure that your website import goes smoothly. In case something does go wrong with your prebuilt website import, please see the Troubleshooting section below.
How To Import Prebuilt Avada Websites
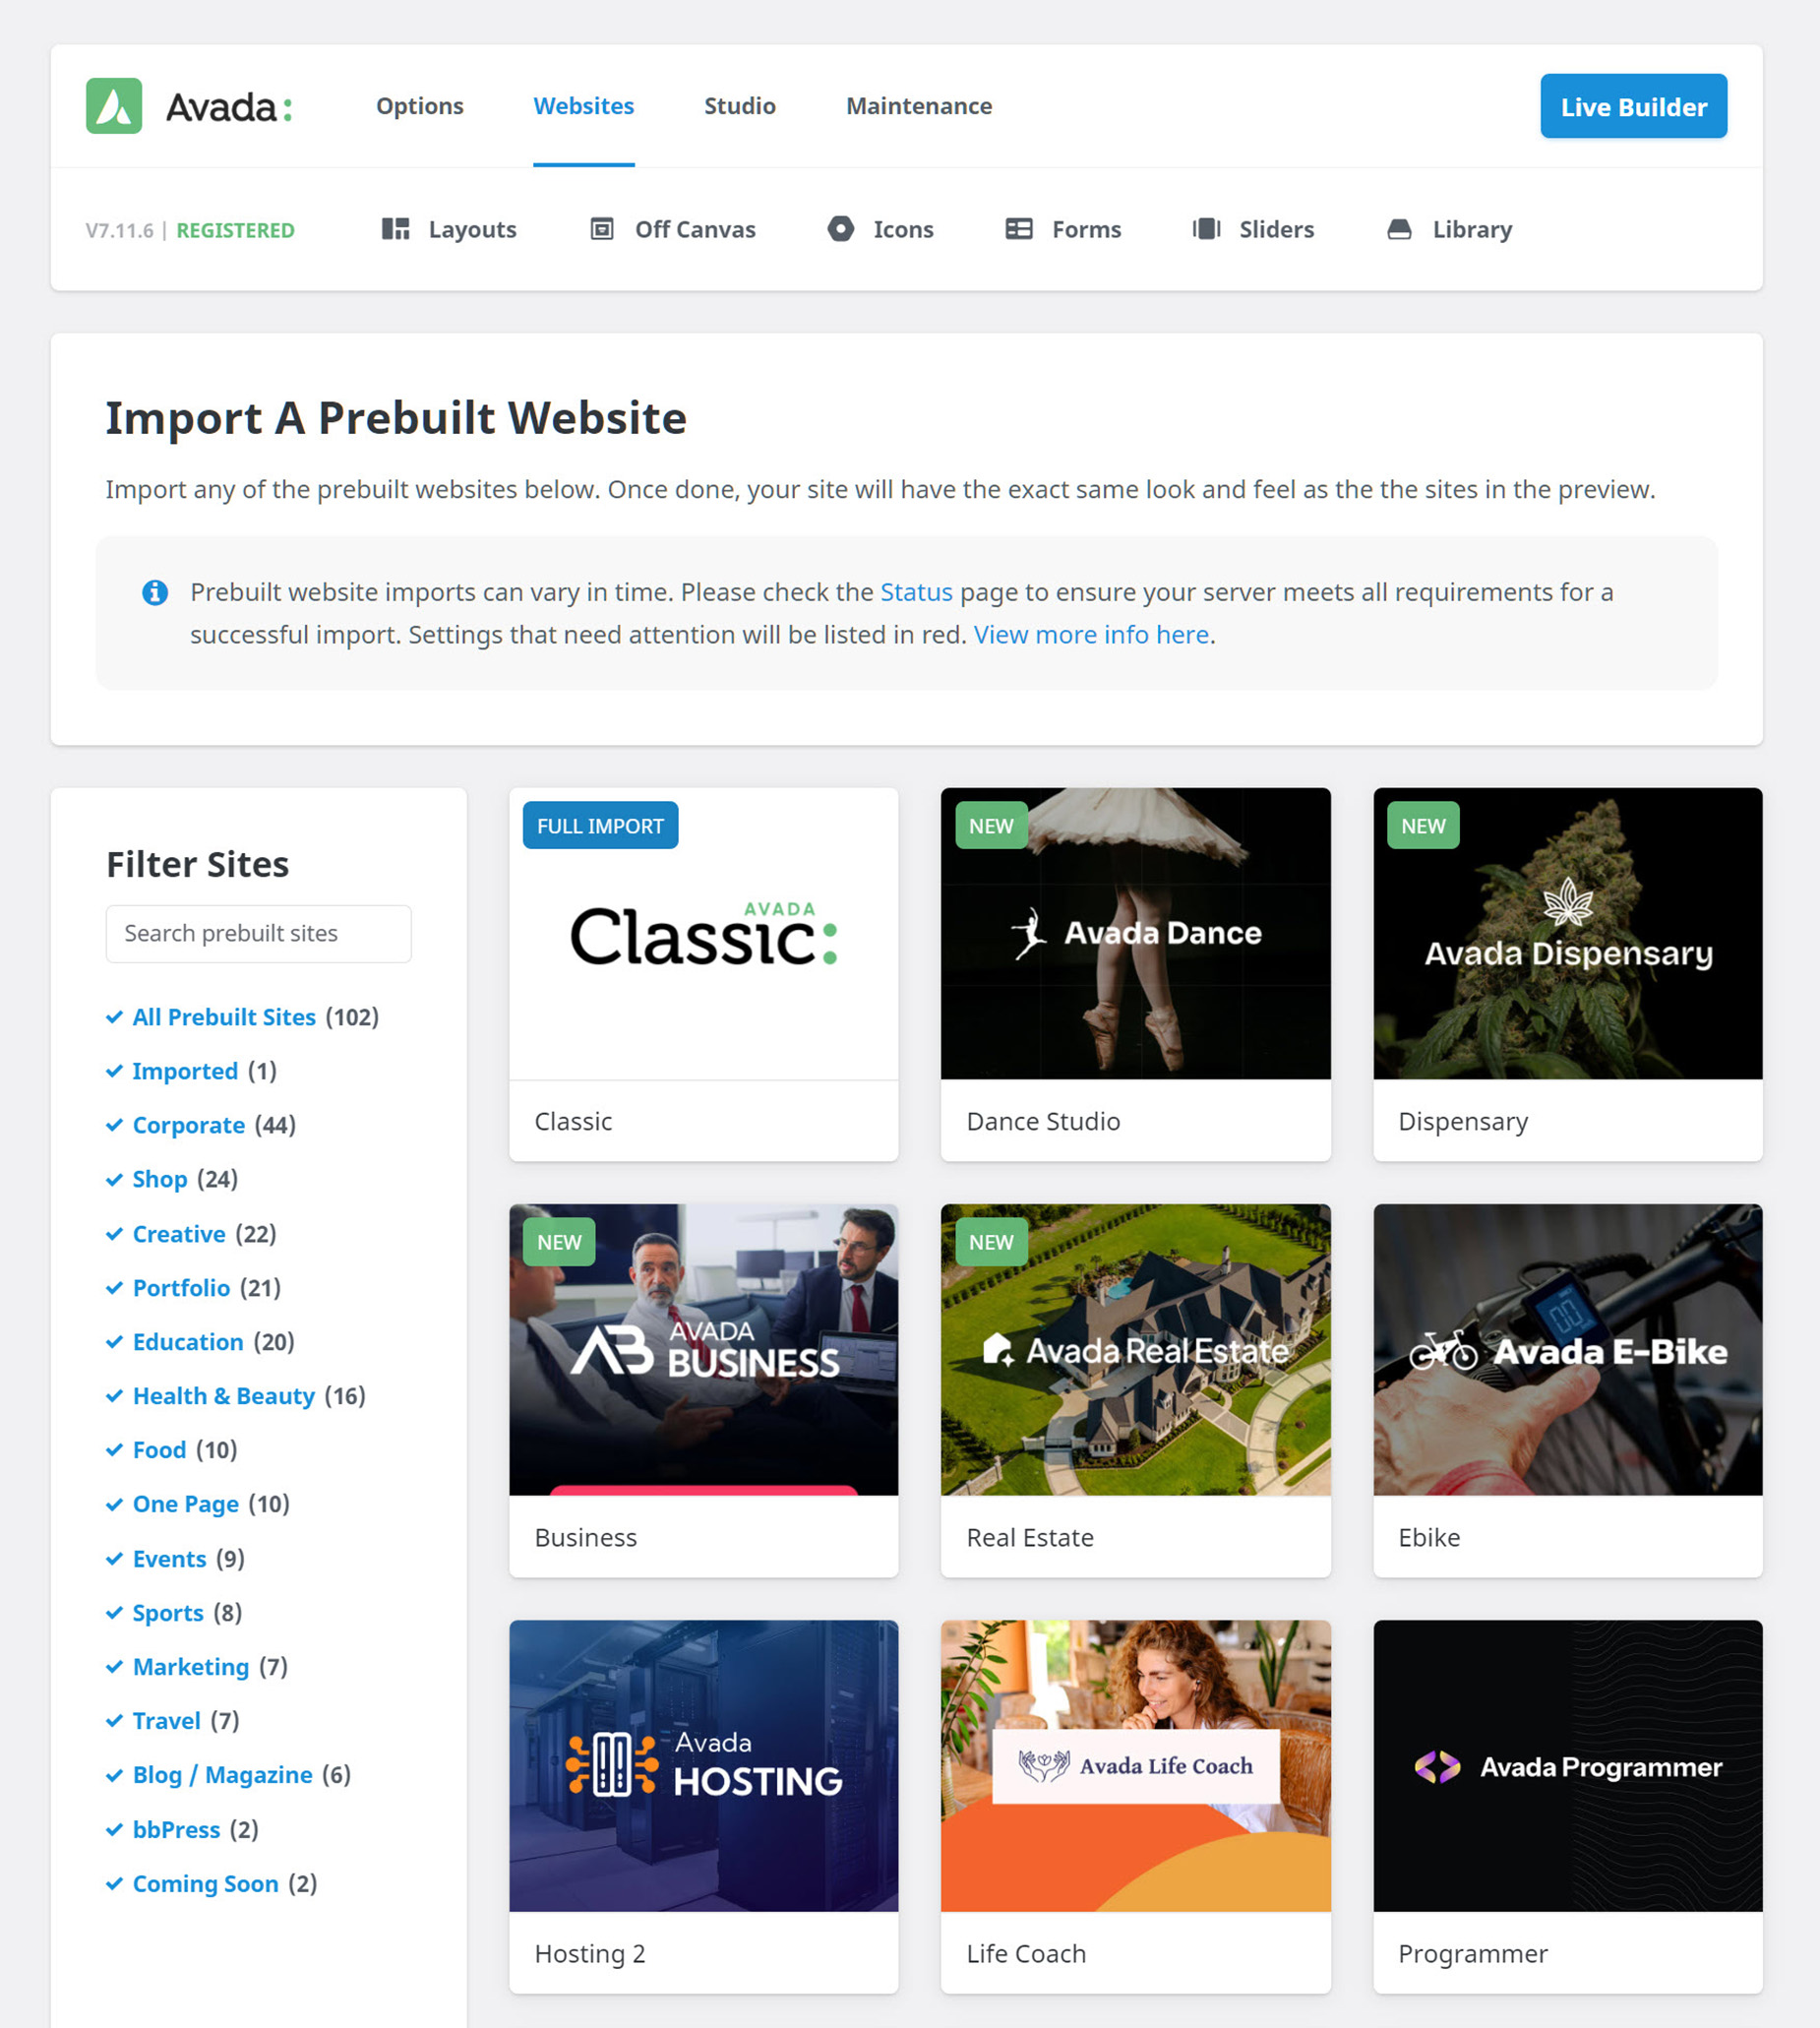
Step 1 – Navigate to Avada > Websites from the WordPress Sidebar or the Avada Dashboard.
Step 2 – Select the Avada prebuilt website you wish to import. You can also use the filter on the left to limit the shown websites to the category you choose. If you want to see the website before you import it, when you hover over the website’s image, you will see a Preview Button. This opens the website in another browser tab, so you can check it out in detail.
Step 3 – When you have made your choice, simply hover over the website and click the Import button. That will launch the Prebuilt Website Importer where you can make additional selections.
Step 4 – Take note of the middle section of the Prebuilt Website Importer. There you’ll see a list of required plugins for the full import to be successful. If all the plugins have “Active” beside them, then you’re ready to import. There will be a red notice of “Activate” or “Install” if either actions are needed. View screenshot here.
Step 5 – Choose what content to import. Your selection can range from “All”, which will be the full website content, to just pages, posts, FAQs, or any combination of those content options. Once you’ve made your selections, click “Import” to start the process. It can take a few minutes to import everything. Please be patient and wait for it to complete. Once complete, the loading bar will become a “Done” button. Click the button to close the dialog and complete the process.
There are two ways to import any one of our prebuilt websites, and for both, you need to register your purchase first. The first is to run the Avada Setup Wizard. This runs automatically on new installs, or you can also trigger it through the Status page (Avada > Maintainence > Status). See the How To Use The Avada Setup Wizard for more details on that process.
Alternatively, you can use the Prebuilt Website Importer. This can be found at Avada > Websites. Here, you will find all of our prebuilt websites, and you will also find a filter in the left hand column, to help you find exactly the style of website you want.
We recommend importing prebuilt websites on a fresh WordPress install. Importing a prebuilt website will not replace existing content like posts, pages, portfolios, etc. and it will not delete current menus or sliders. It will, however, import and set as active the prebuilt website menus, add sliders and replace current Avada Global Options with prebuilt website options. It will also replace WordPress Reading and Widget Settings. So for these reasons, it is strongly recommended you do not import a prebuilt website on a completed, or website under progress.
Read on to learn about importing an Avada prebuilt site, and watch the video below for a visual overview.
How To Remove Prebuilt Avada Websites
Step 1 – Navigate to Avada > Websites from the WordPress Sidebar or the Avada Dashboard.
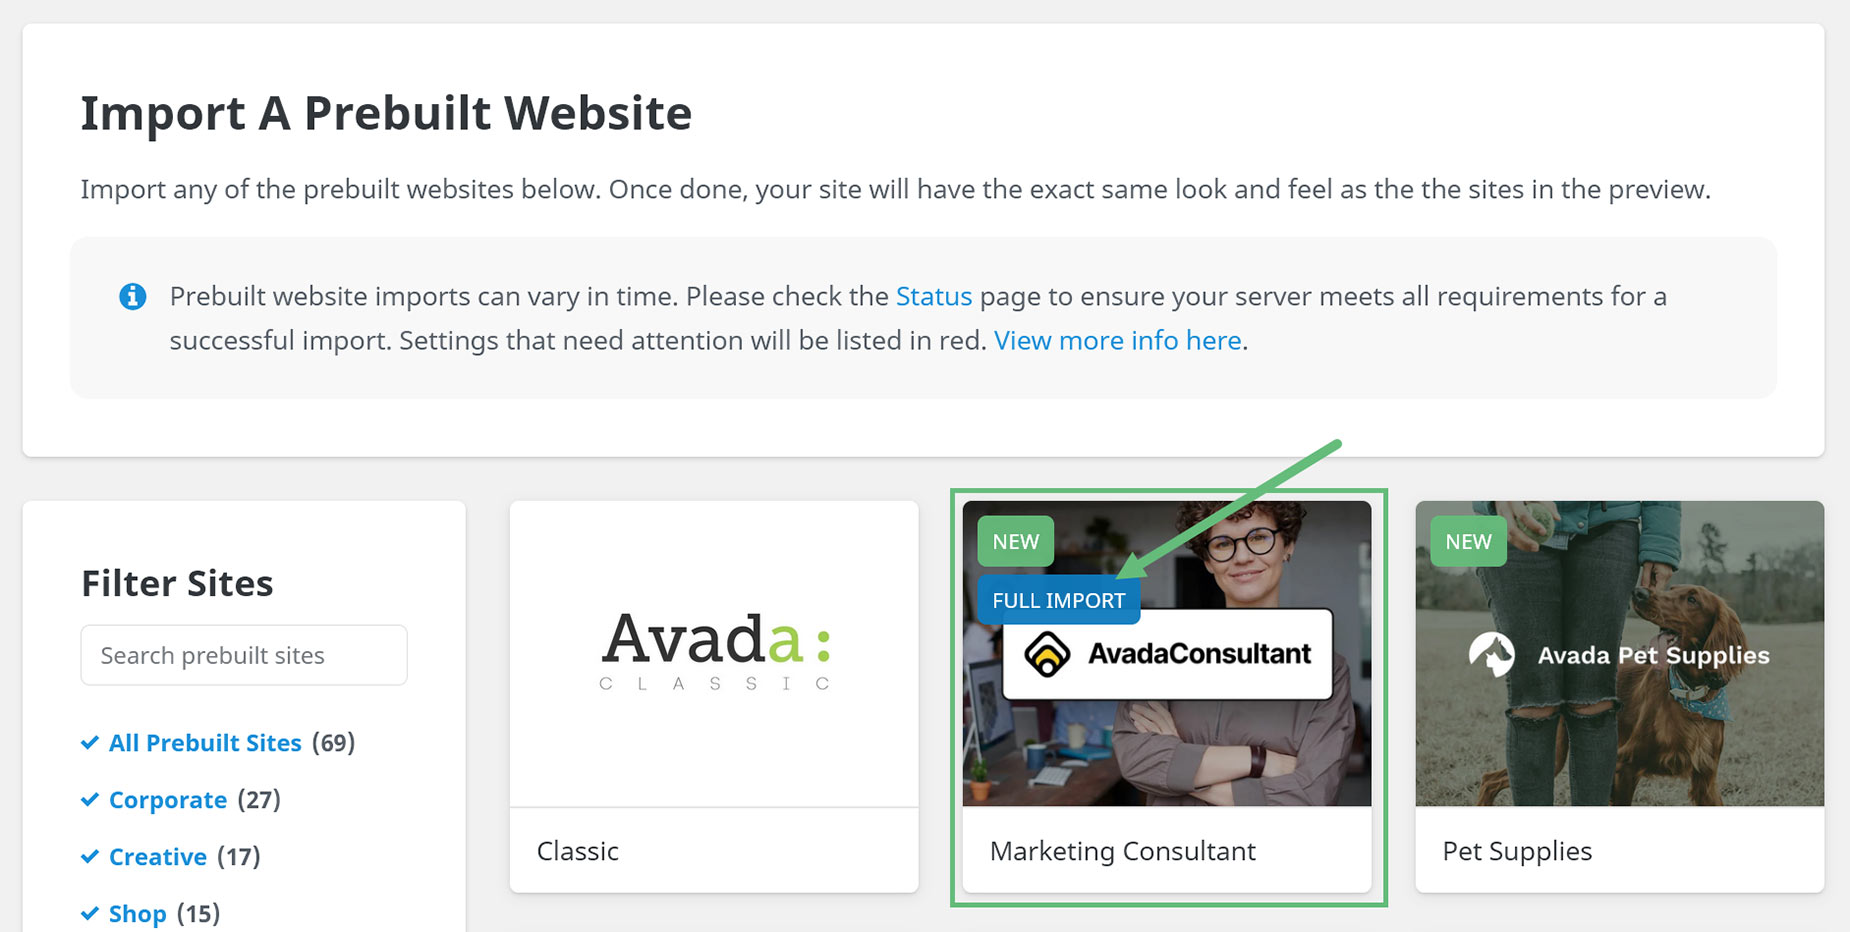
Step 2 – If you take a look at the thumbnail of the website you have imported, you will now see a label on it. If you have imported the full Demo, it will say Full Import (as seen below). If you have imported only parts of the website, it will say Partial Import. In any case, to remove the website content, the process is the same.
Step 3 – Simply mouse over the thumbnail, and choose Modify. This brings up the Prebuilt Website Importer dialog again, and this time, on the right hand side, you will see a section called Remove Content.
Step 4 – Select Remove, and then click the large Remove button at the bottom of the dialog, and say yes to the resulting notice. This Prebuilt Website importer will run, and will now remove everything that the importer installed, and leave any other content behind.
Step 5 – When it has completed, click the Done button at the bottom.
Troubleshooting
If you encounter errors during or after importing a prebuilt website, please see below for possible solutions. If you don’t find what you’re looking for below, please don’t hesitate to submit a support ticket to our support team.
Missing websites on the Websites’ page
If the websites aren’t appearing on the Avada > Websites page, then your purchase may not have been registered. Please register your product first to access the Prebuilt Avada Websites.
Slider Alias or ID Not Found For Layer or Revolution Slider
If you already have sliders made, or something unexpected occurs during the import due to low server memory, it’s possible that our website sliders may not be assigned to the pages. You may see an error such as Revolution Slider Error: Slider with alias Avada_Full_Width not found or LayerSlider cannot be found. Sliders are applied by the Slider ID. Each slider gets its own unique ID and they are given in numerical order. If you open up a page after importing the content and you see an error like that, you only need to edit the page and assign the slider to the page. To verify you have the sliders, go to the Layer or Revolution Slider section of your admin to see them listed. If you do not see them, then you can import the sliders separately.
Timeouts and Website import failures
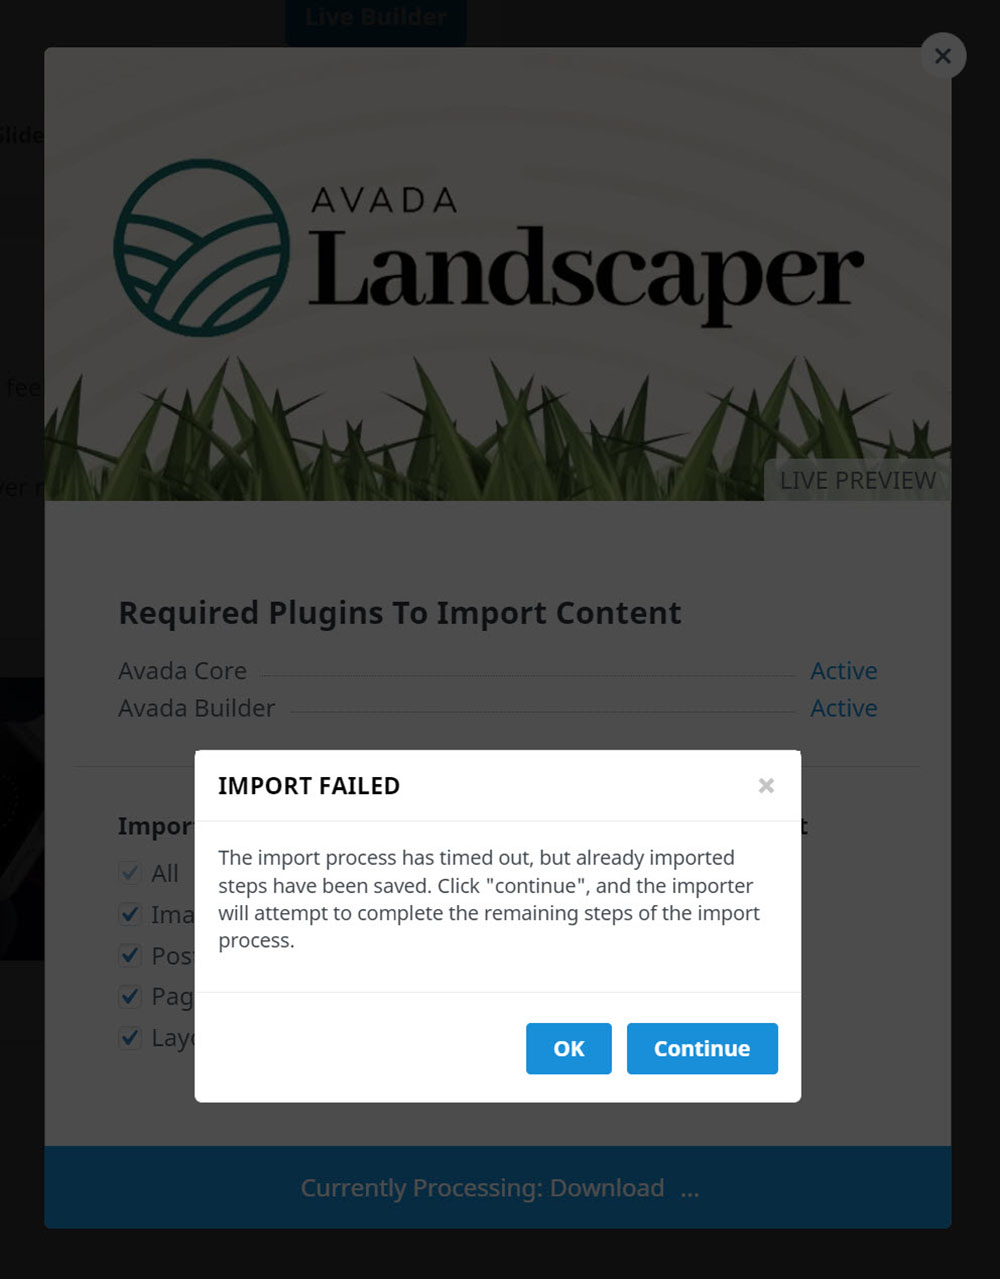
Timeouts are the most common issue, and can be fixed by increasing your system limits, as noted below. With Avada, if your prebuilt import times out, you may see a dialog as shown below. If the import has run for long enough to finish a particular step, you can now continue the import by clicking on the Continue button. For best results though, it’s always best to check your system limits and make sure they are high enough that you don’t run into issues in the first place.
If your prebuilt website import fails, there will be a notice and some info on what may have gone wrong in a popup. You’ll find some suggestions of what to check first in that same popup. For example Website import failed. Please check for PHP limits in red on the System Status page. Change those to the recommended values and try again. You’ll always want to check your System Status page first to see if there are any low limits in red. If you see that, increase them to the recommended limit and then try the import. Generally your web host will be able to take care of increasing low limits for you. More info on changing these specific server limits can be found here.
For details on Avada required minimums, please see our post here.
You may also find the below posts useful if you’re having any of the below errors:
Prebuilt Website Content Will Still Not Import – Try Alternative Methods
If your host will not make changes, or you cannot get the website content to import, then please try our Alternative Prebuilt Website Import Method.
Post Cards Not Displaying Content
Sometimes, you might import a site and find that the Post Card Element is not displaying the content that is in the prebuilt. Upon import of the prebuilt, WordPress assign IDs in its own way, and does not neccesarily assign the same IDs as we have on the prebuilts. Thus, for example, categories or tags selected in Post Card Elements might not have the same IDs, and so won’t display any content. In the Post Card Element, you say see just an X or Null where a tag or cetegory should be listed. A workaround is to clear the tags or categories and select them again. We are working on a solution for this.
Website Content Duplicated
Method 1: WP Reset Plugin – This plugin is the fastest way to get rid of content. However, it will remove all content from your database and leave the default theme activated. It does not remove plugins, but will deactivate them and remove all pages, posts, menus, sliders, widget data, Global Options, etc. It removes all the content from your database. Only do this if you are planning to start your site freshly from a new WordPress install/new Prebuilt Website import. Click here to download the WP Reset plugin.
Method 2: Manual Removal – This method will take longer and simply involves manually removing duplicate items. For example, go to the Appearance > Menu and delete any duplicate items one by one. It will be the same process for pages, post, sliders, images etc.
Prebuilt Website Blog Posts Show Up In Your Blog Feed
Most of our prebuilt websites contains published blog posts. If you import on a live site, plugins like JetPack will notice new posts and push them out into your blog feed. Please disable any plugin that may do that before you import. After the import, you can remove the posts or save them as drafts then turn your plugin back on.


