How To Use Conditional Logic In Avada Forms
Last Update: May 14, 2026
Conditional Logic in Avada Forms allows you to create smarter, more dynamic forms by showing or hiding fields based on user input. Instead of displaying every field at all times, you can tailor the form experience so visitors see only the questions or options that apply to them. This not only makes your forms easier to complete but also improves engagement and data accuracy. The guide below explains how to set up and use conditional logic within the Avada Form Builder to create flexible, user-friendly forms.
One of the many advantages of Conditional Logic in Forms is best seen in longer forms. With Conditional Logic, these forms can be shorter and more specific, as they are personalized to the user’s choices. Let’s look at how this works in Avada Forms.
What is Avada Conditional Logic?
Avada Conditional Logic is a functionality that lets you control when specific content, form fields, or layout elements appear based on conditions. Instead of displaying everything to every visitor, you can define rules that determine visibility depending on user input, device type, login status, user role, or other criteria.
In Avada Forms, conditional logic is commonly used to show or hide fields dynamically based on previous selections, creating cleaner and more personalized form experiences. More broadly within Avada, conditional logic helps you tailor content to different audiences, streamline layouts, and create smarter, more responsive websites. By displaying only what’s relevant, you improve usability, reduce clutter, and deliver a more targeted user experience.
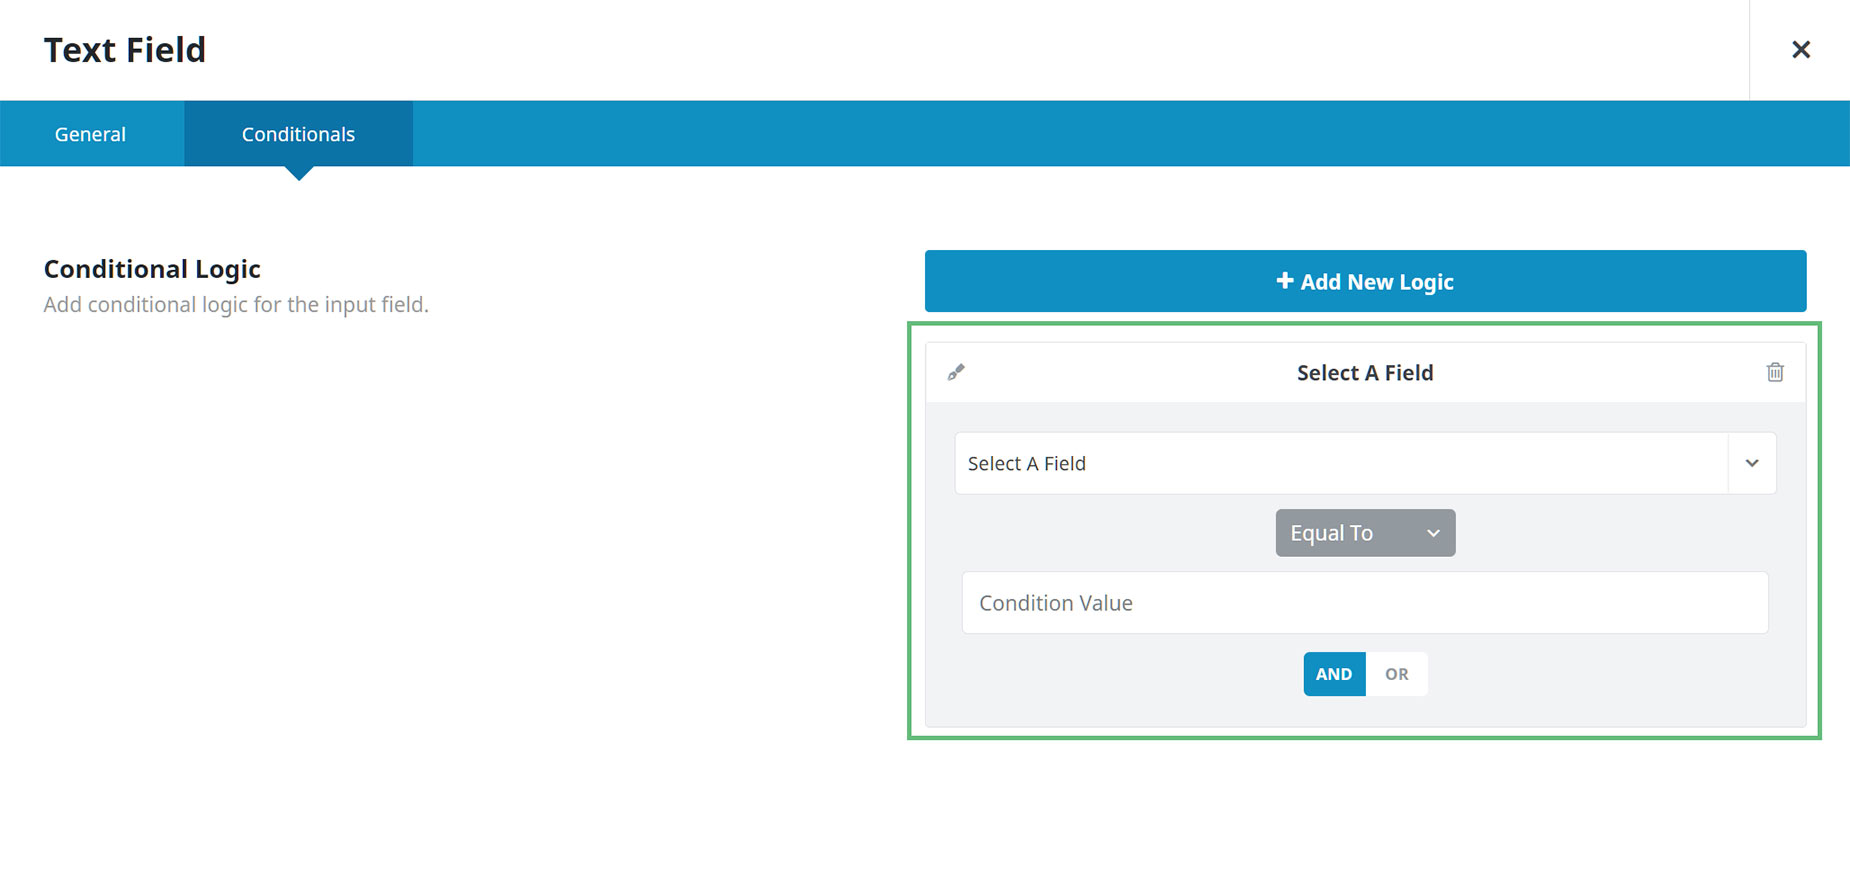
You will find Conditional Logic under the Conditionals Tab on almost all Form Builder Elements, with the exception of the Hidden Field, Honeypot Field, reCAPTCHA Field, and Turnstile Field Elements. As you can see in the screenshot below, when you click on the “Add New Logic” button, you are presented with a Conditional Statement dialog that has a Field option, a Relational Operator selector (Equal To/Not Equal To/Greater Than/Less Than/Contains/Does Not Contain), and a Value field beneath this. Under the Conditional Statement is an AND/OR connective, which you can use to combine further Conditional Statements.
Conditional Logic Determinants
Conditional display of Avada Form Elements is determined by the logic entered through the Field, Relational Operators, the Value entered, as well as the AND/OR connective. Before we look at a specific example of how to use Conditional Logic in a Form, let’s first look at the conditional logic determinants individually.
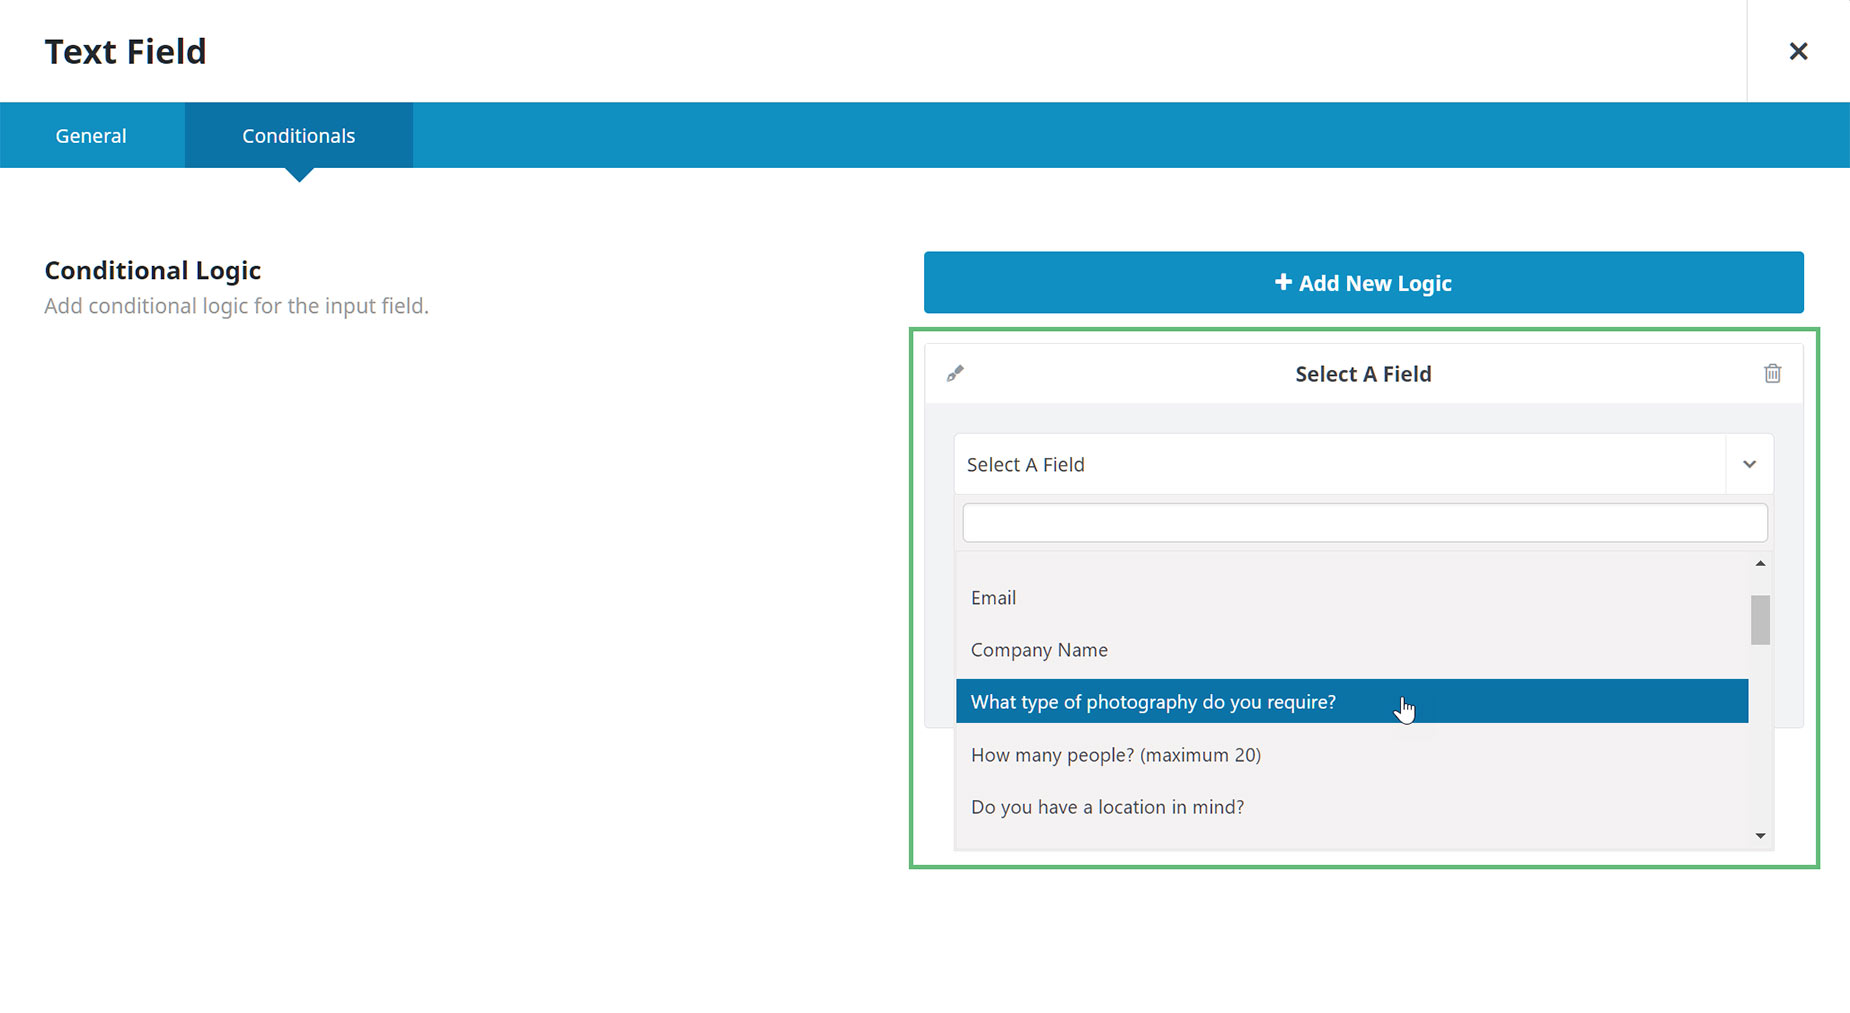
Field
Under the “Select A Field” dropdown menu is a list of all Form Element fields in the current form. These labels are pulled from the Field Label option in the other Form Elements (or Field Name if that is empty). With the Field option, you choose a Field from another Form Element, from which you will determine the logic that will affect the current field. In our example below, this will be the ‘What type of photography do you require‘ field.
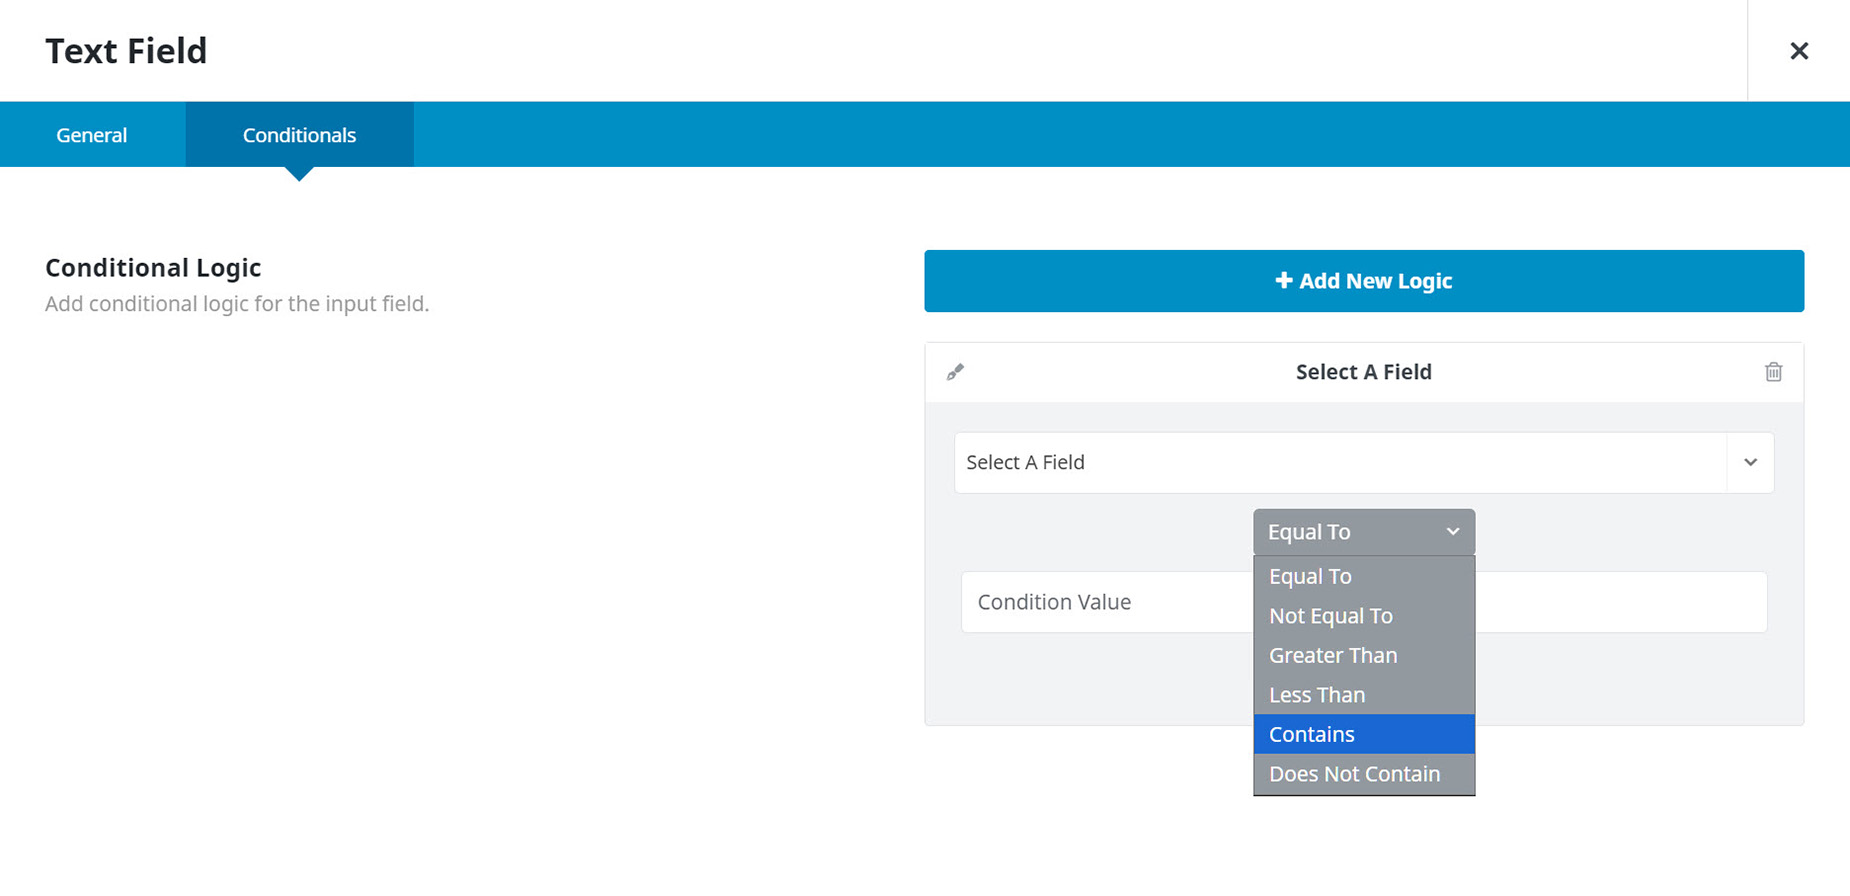
Relational Operators
You will find the Relational Operators directly under the Field option. These six operators determine how the Field and the Value are connected logically. The choices are (Equal To/Not Equal To/Greater Than/Less Than/Contains/Does Not Contain).
There are many possible relational operators you can apply to your forms, depending on your circumstances. In the simple example below, we use the Equal To operator, so the Conditional Element will display if the selected Field is EQUAL TO the input value.
Condition Value
The Condition Value option is an input field. Here, you enter the value you want the selected Field to have for the logic to work. In our example below, the values entered correspond to one of the available choices in the dropdown list for the Select Fields Option in our chosen “What type of photography do you require” field.
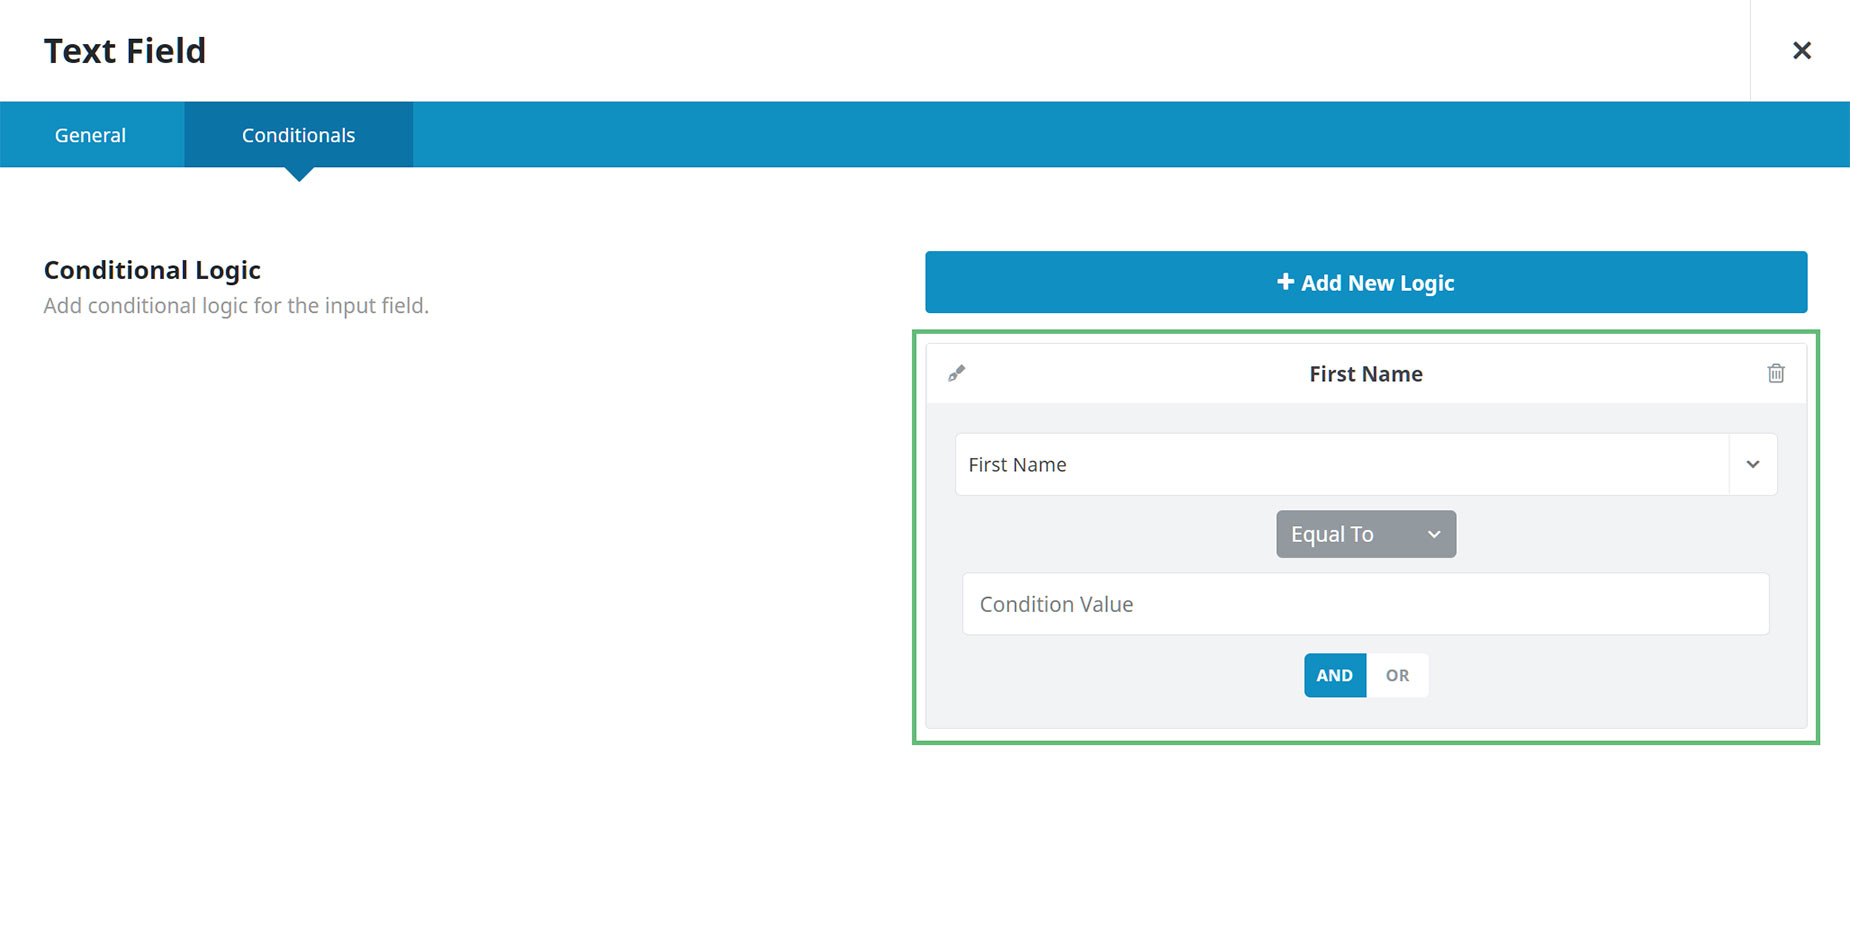
But it can be as simple as a text value. So if you want a new Form Element to appear if the First Name Field gets a value of Bob, then you’d simply enter Bob as the Value, and when someone types Bob (or bob) into the First Name Field, the conditional field would instantly appear. The value is simply the output contents of the field that triggers the logic.
AND/OR Connective
You can create more complex conditional forms using the AND/OR connective. Click on “+ Add New Logic” again for a new Conditional Statement to appear under the first, and you can connect them by using the AND/OR selection.
A simple, yet slightly silly example of this would be that if the First Name value is EQUAL TO Will, AND the Last Name value is EQUAL TO Smith, then a new Text Field Form Element could appear, asking “Are you THAT Will Smith??’ I’m sure you get the idea…

How To Add Conditional Logic To An Avada Form
Let’s look at a specific example. As discussed above, the basic idea of conditional logic with forms is to add conditional logic to a form field so it displays or hides based on the value of another field.
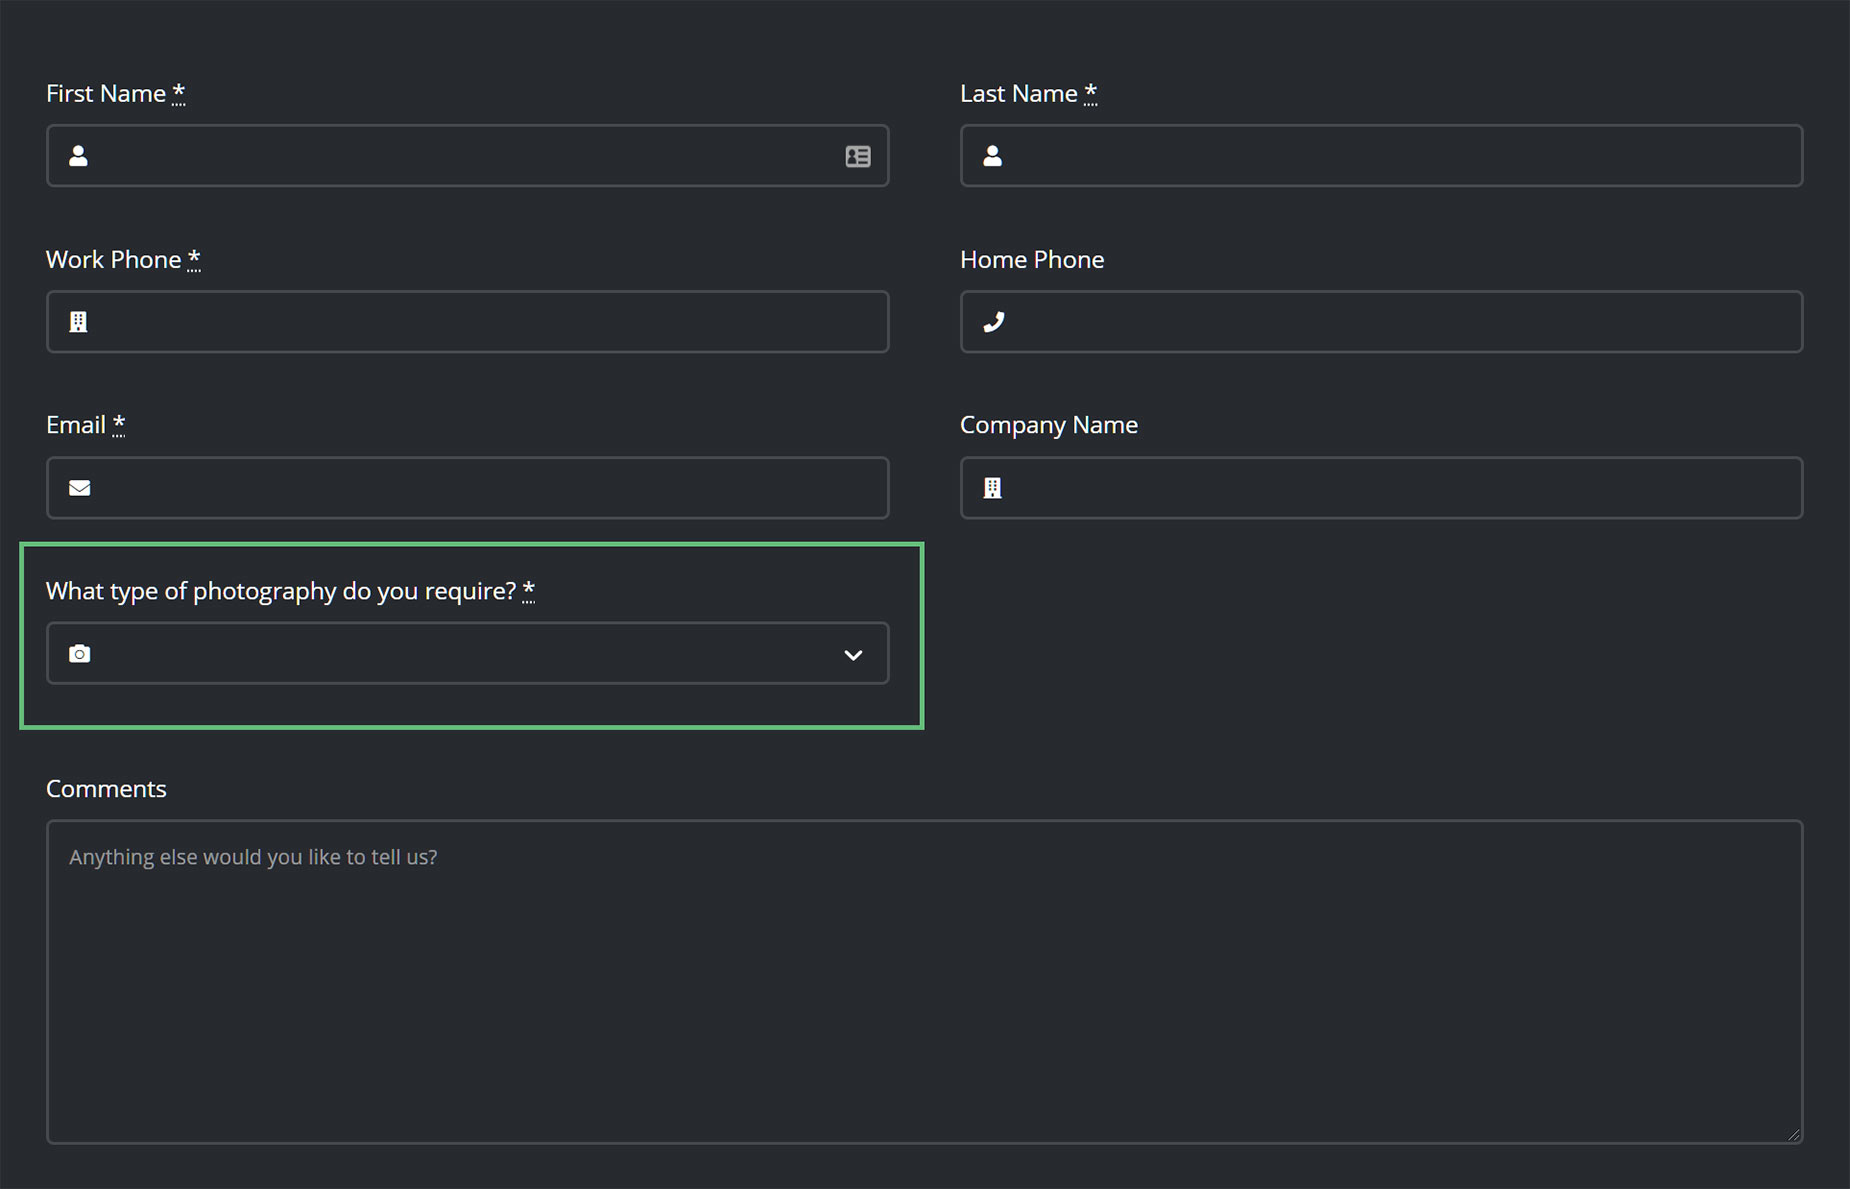
In the photographer’s contact form example, there is a section that asks the user to select the type of photography they require. Depending on the choice the user makes here, a range of new fields then appear. This personalizes the form and makes completions more likely.
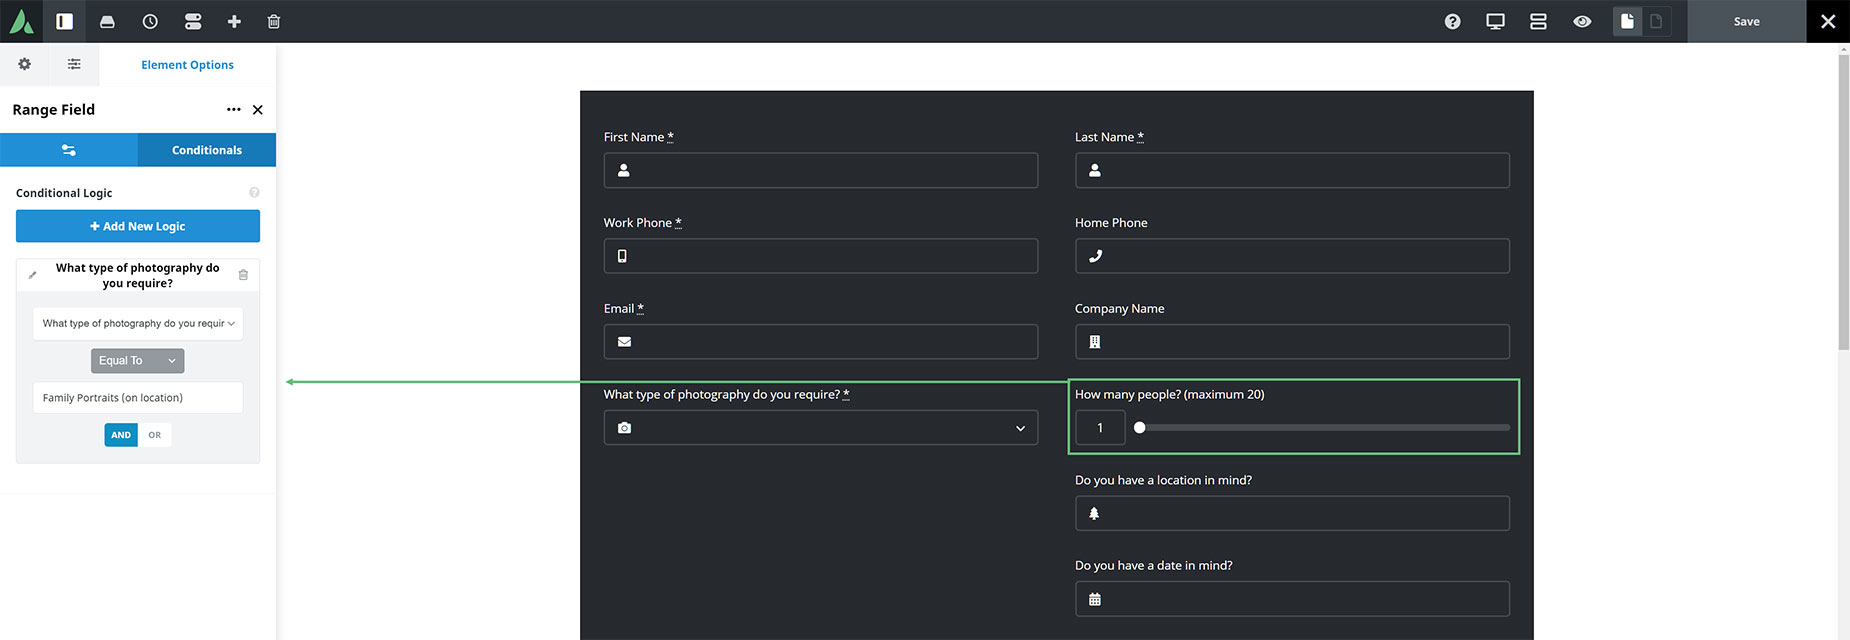
As we can see in the Avada Live Visual Builder screenshot below, the first Element with Conditional Logic is the Avada Range Field Element.
Under the Conditionals tab, we can see that the logic is expressing that IF the “What type of photography do you require” field is EQUAL TO the Value of Family Portrait (on location) then the Range Field Element displays.
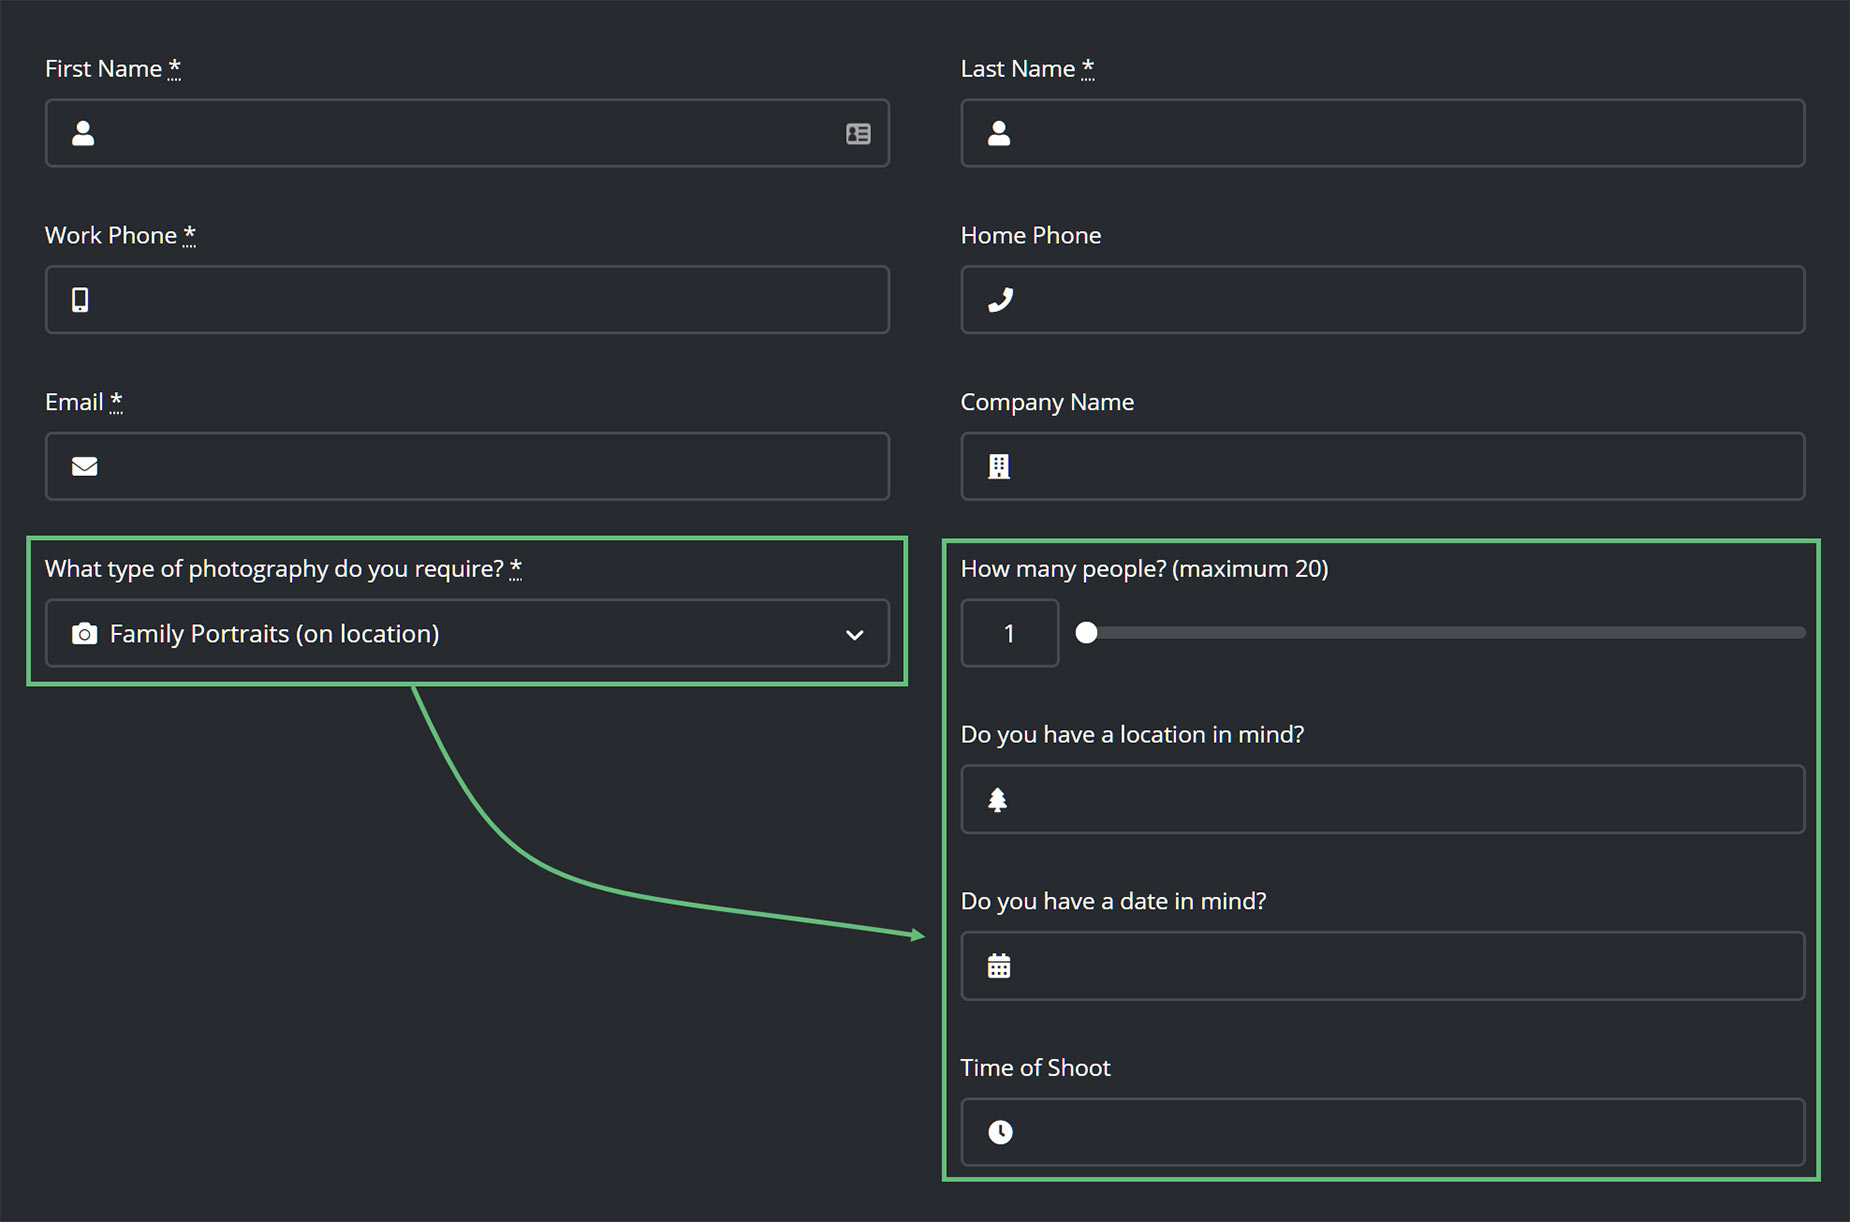
In this example, the three Field Elements beneath this one also share the same logic, so when a user selects “Family Portrait (on location)” on the front end, the four Conditional Elements display immediately, as shown in the screenshot below.
If the logic is not true, then the Field Elements will not display. In this Conditional Form Example, different groups of Field Elements (all in the same Column) are set to display based on the selection of the Photography Type Field.
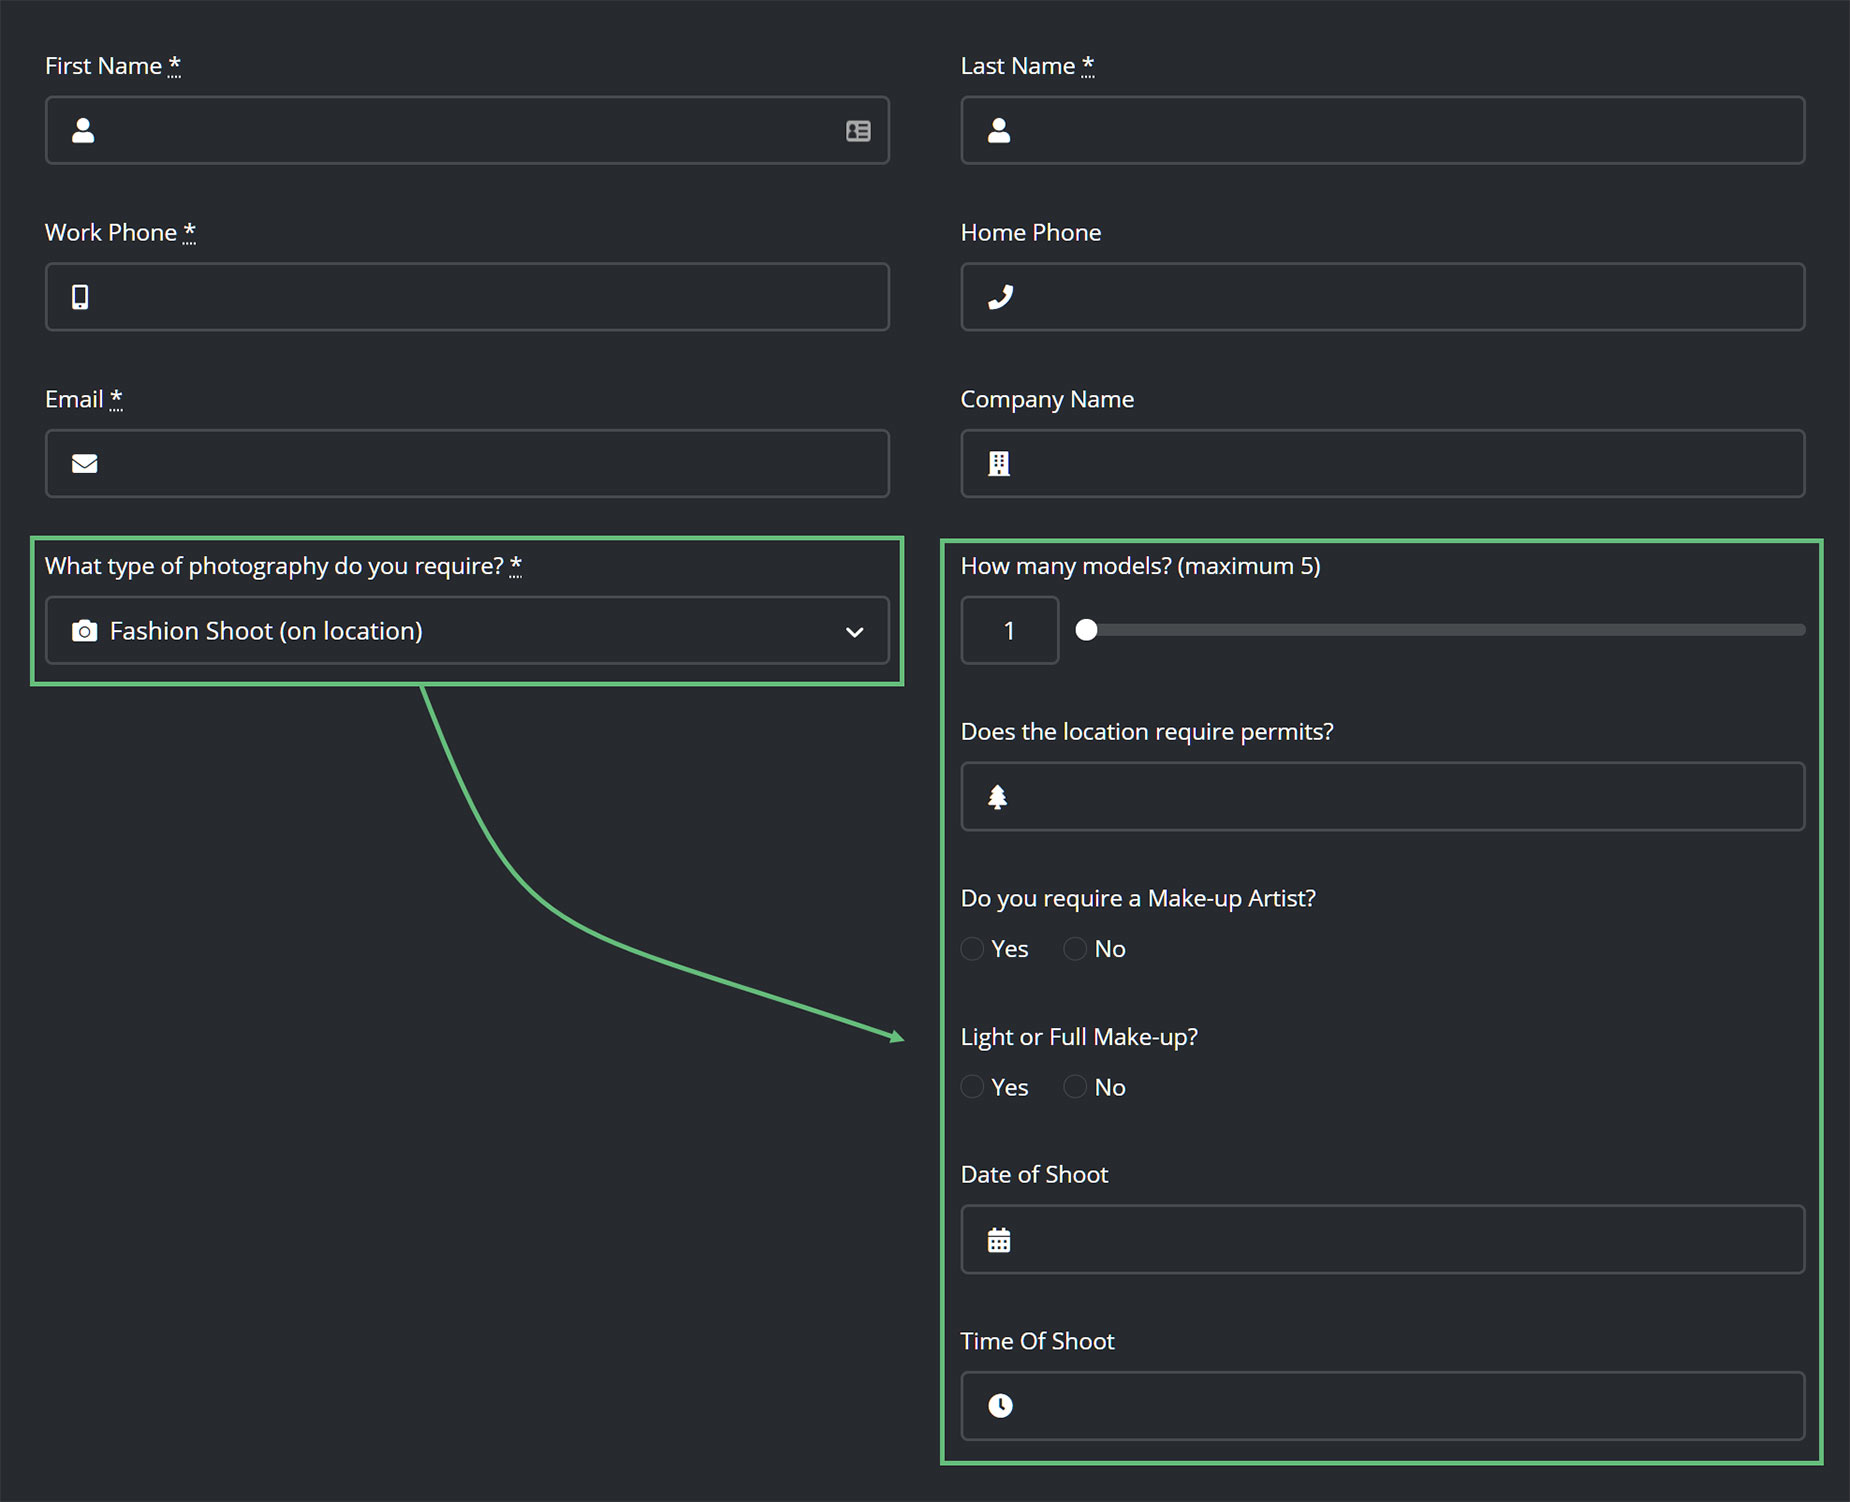
So if the user selects “Fashion Shoot (on location)”, another range of Field Elements will appear, as shown in the screenshot below, and the previously displayed Field Elements will no longer appear, as their logic is no longer true. In this way, you can present a range of conditional fields to the form based on the user’s input.
This was just one simple example of using Conditional Logic in Avada Forms. Using the various other Relational Operators and the AND/OR connective to combine Conditional Statements, the possibilities of Conditional Forms indeed expand to meet a wide range of situations.


