How To Integrate MailChimp With Avada Forms
Last Update: March 18, 2026
A very useful feature of Avada Forms, is the ability to connect your Mailchimp account to Avada Forms, and then configure a form to automatically add any form submissions directly into your Contacts in your Mailchimp account. Read below for specific details of how this works, and watch the video below for a visual overview.
Connecting Your Account
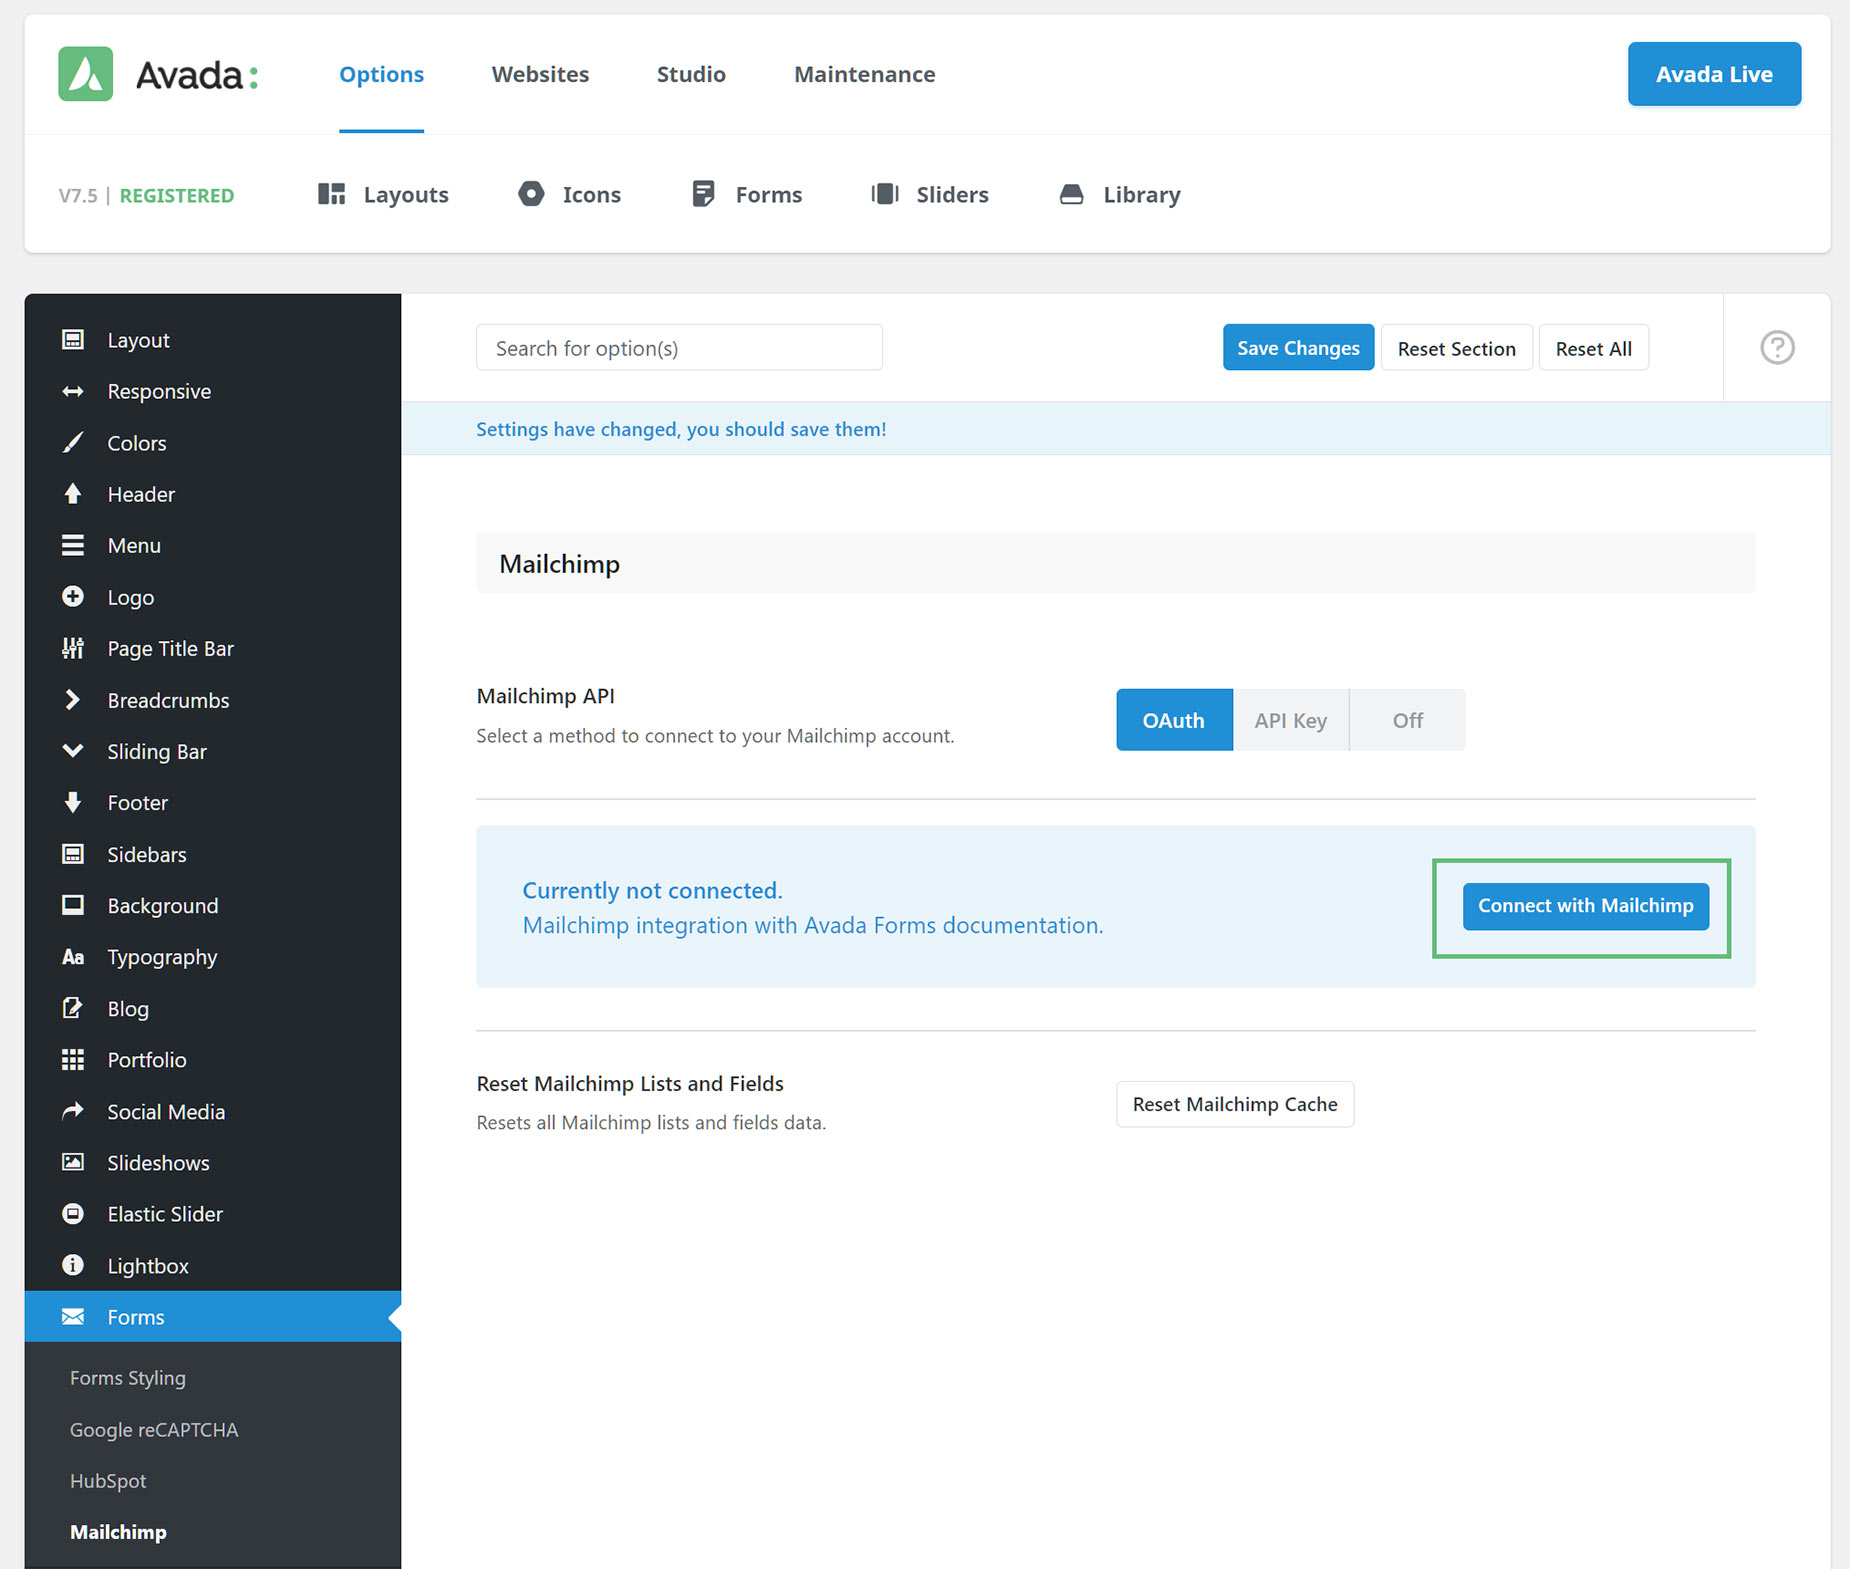
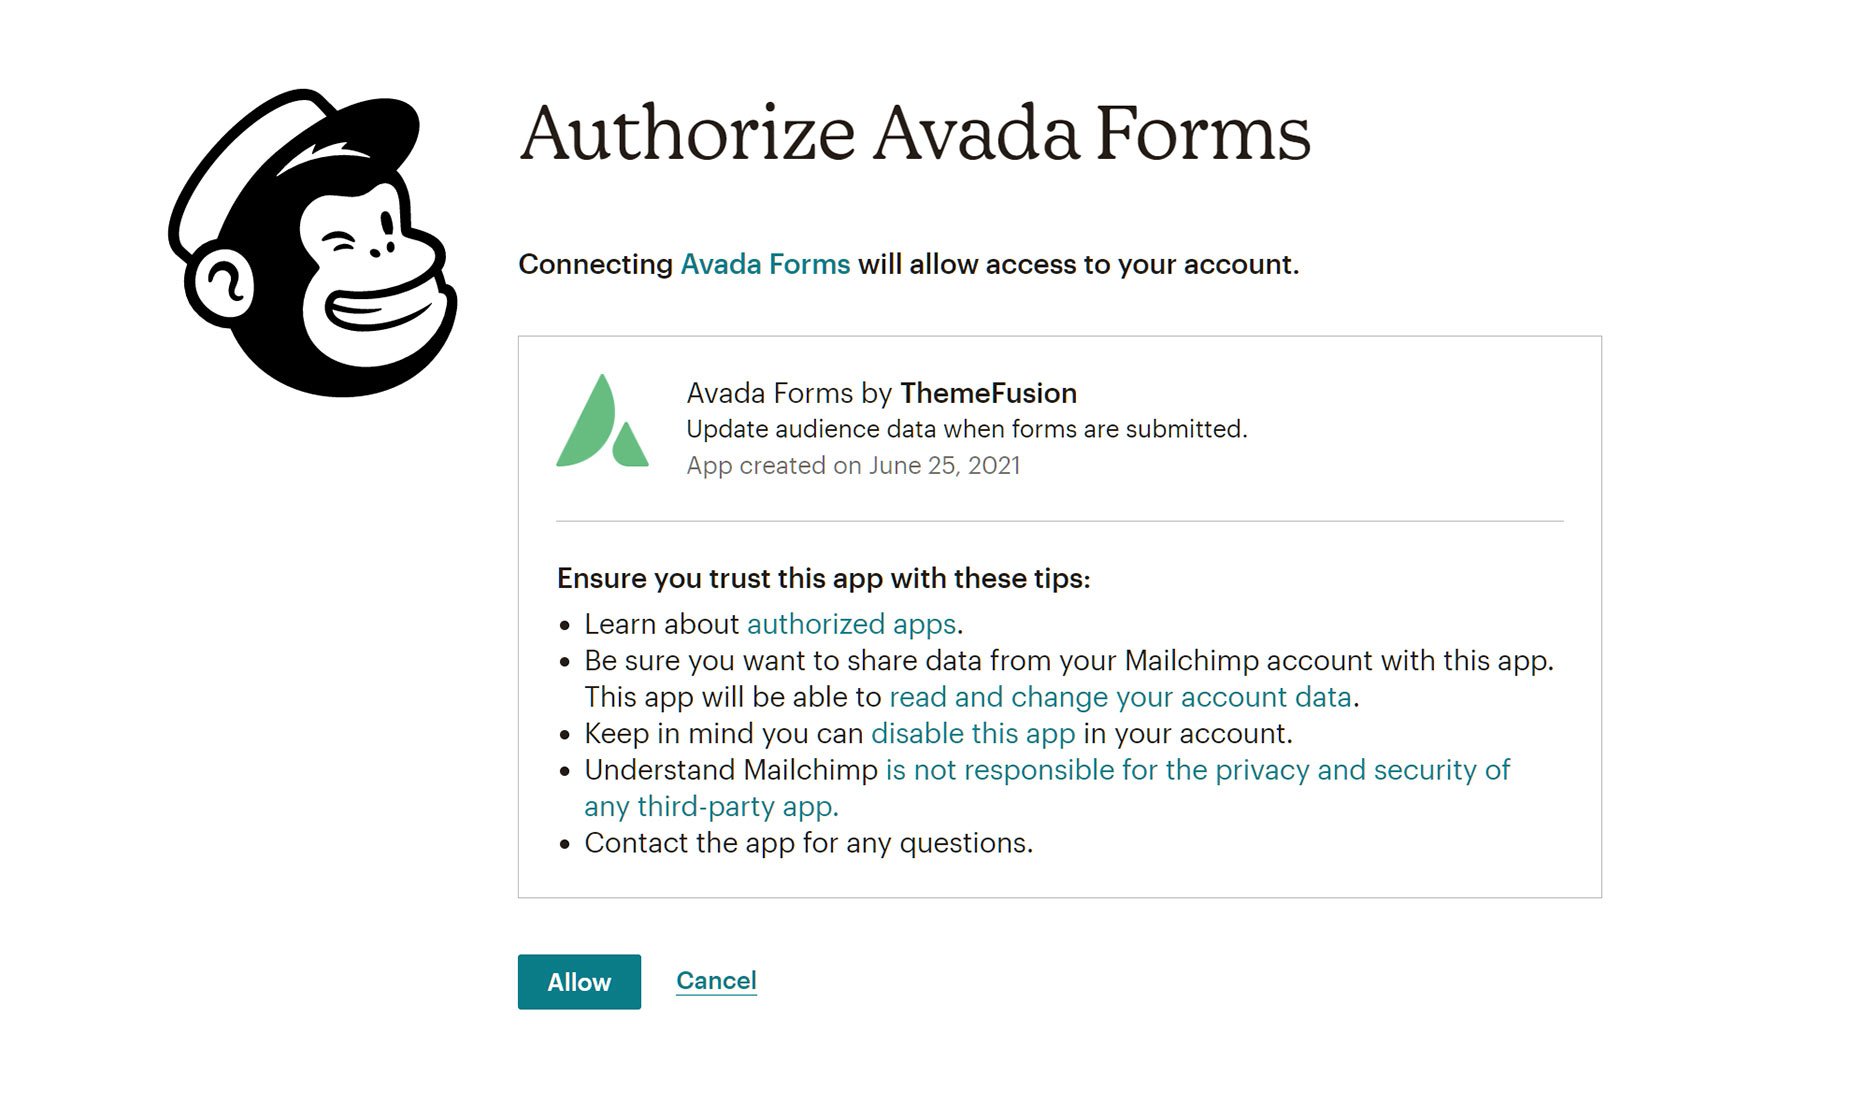
The first step is to connect Avada Forms to your Mailchimp account. To do this, head to Forms > Mailchimp in the Avada Global Options. Here you will find the Mailchimp API options, where you can select a method to connect to your Mailchimp account. You can choose from OAuth, or API Key. OAuth is our recommended option, but you can choose either method. If you choose OAuth, a “Connect with Mailchimp” button will appear. Just click on this, and a page will open in another tab in your browser, where you can sign into your Mailchimp account, and you can then choose the account you wish to connect Avada Forms to.
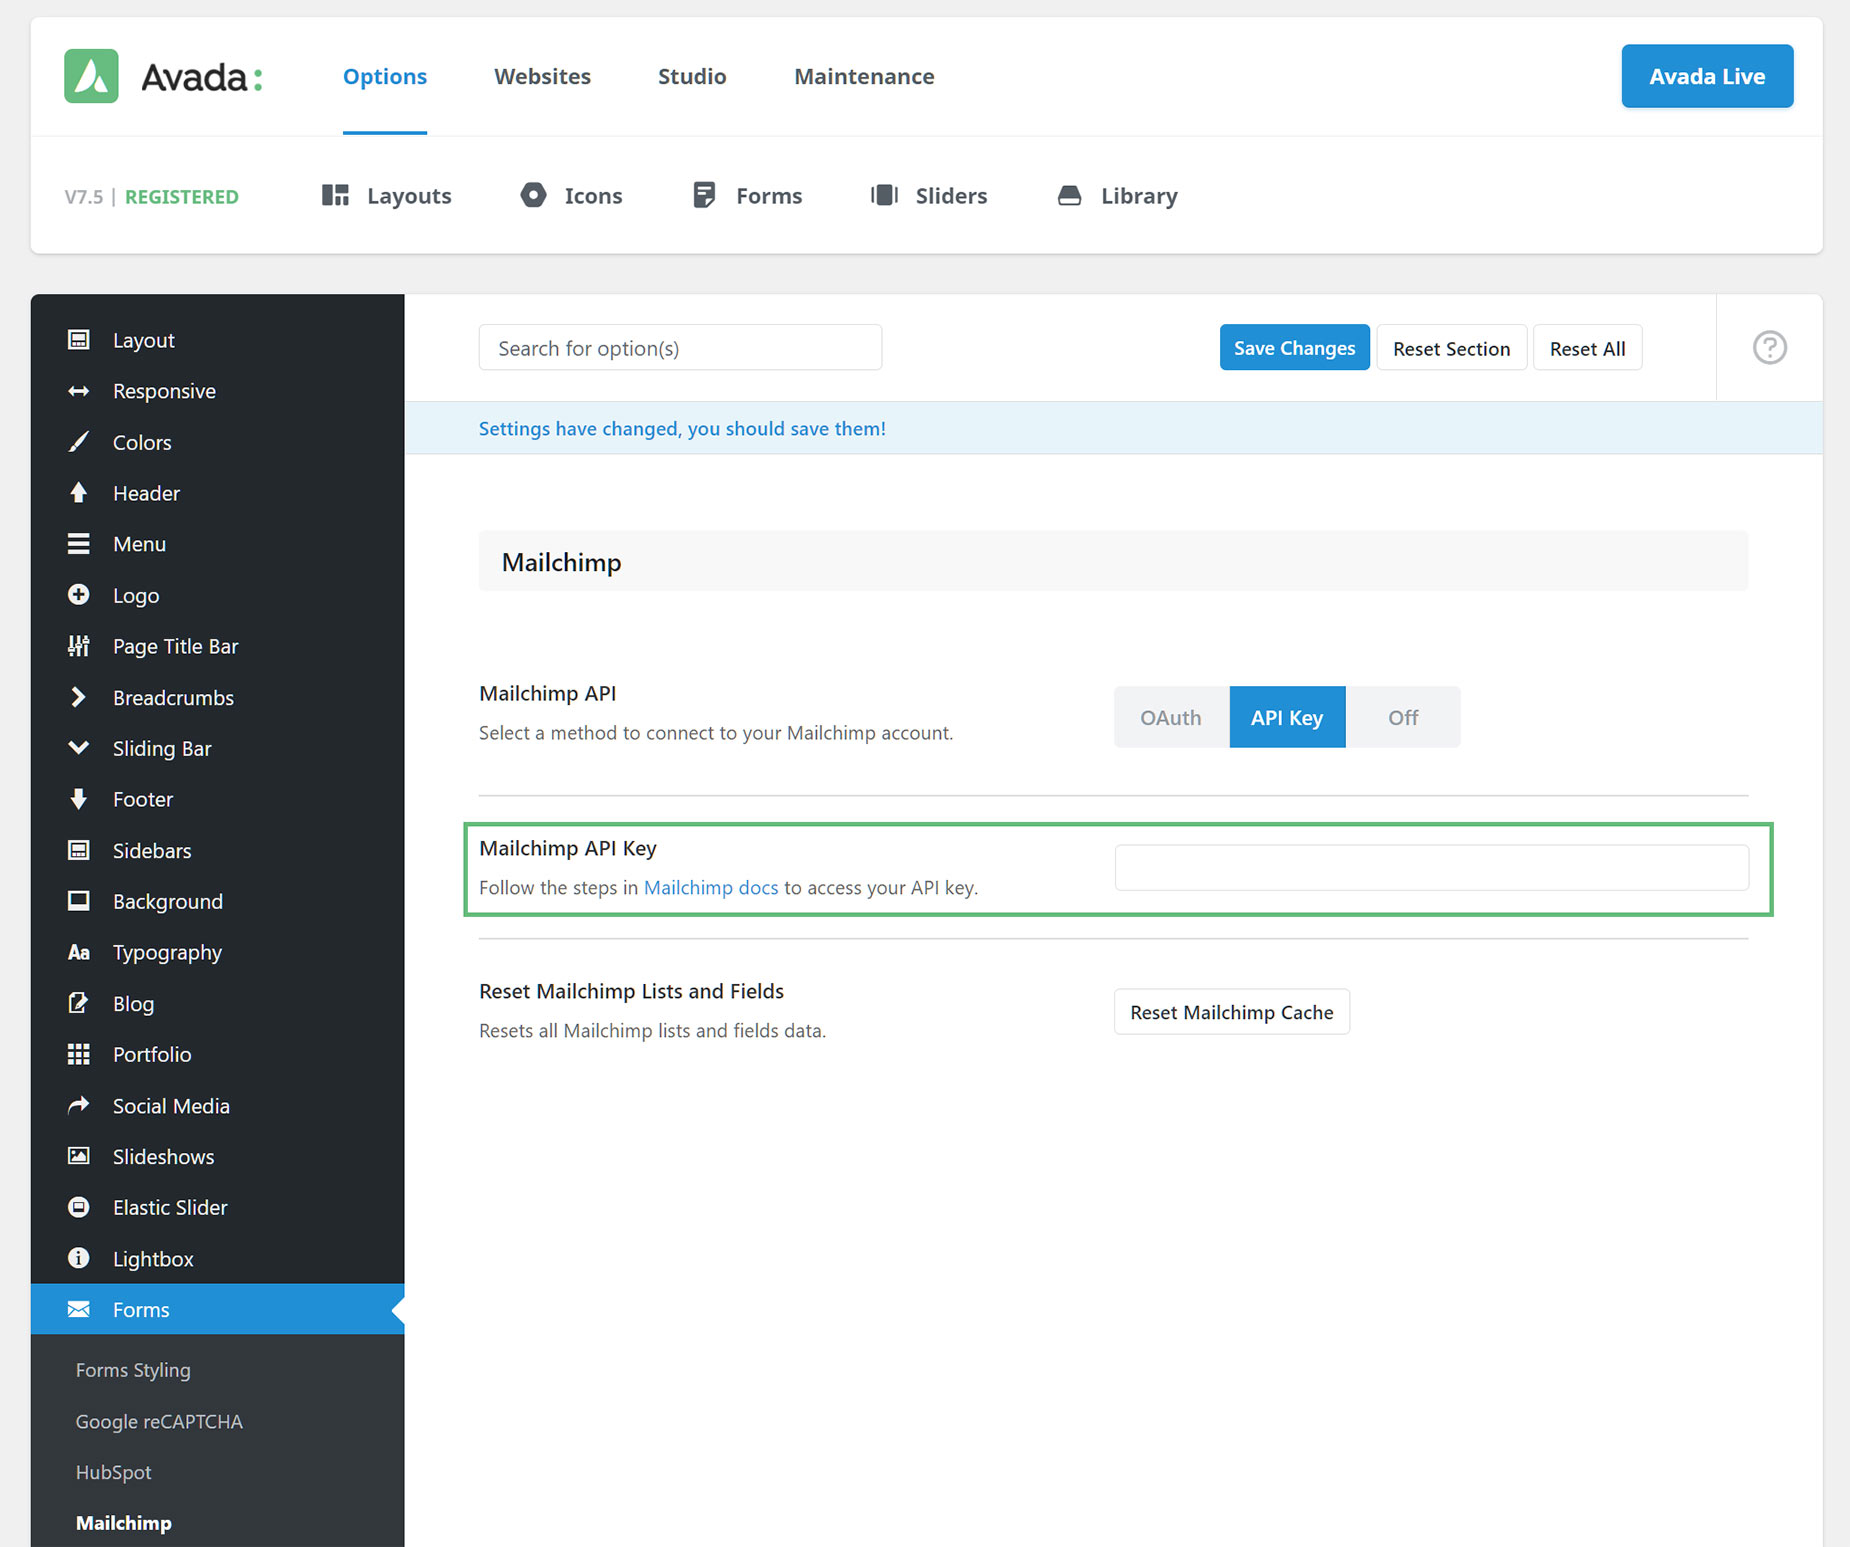
If you choose API Key instead a Mailchimp API Key field will appear, where you can enter your Mailchimp API Key. There is also a link to the Mailchimp Knowledge Base that shows you the steps to find your API Key.
In both cases, once you authorize the connection, Avada will connect to your Mailchimp account, and you will find yourself back in the Global Options with a message confirming the connection. Make sure to save your changes.
Mailchimp Submission Options
Once you are connected to Mailchimp, you will then find a Mailchimp Action field in the Submission area in the Form Options panel of an individual form.
To get your form submission contacts to be automatically added to Mailchimp, you need to do a few things.
1. Choose the Create/Update Contact Action.
2. Choose a List to send them to.
3. Optionally, enable the Double Opt-In option.
4. Map the fields in your form to the fields in your Mailing List.
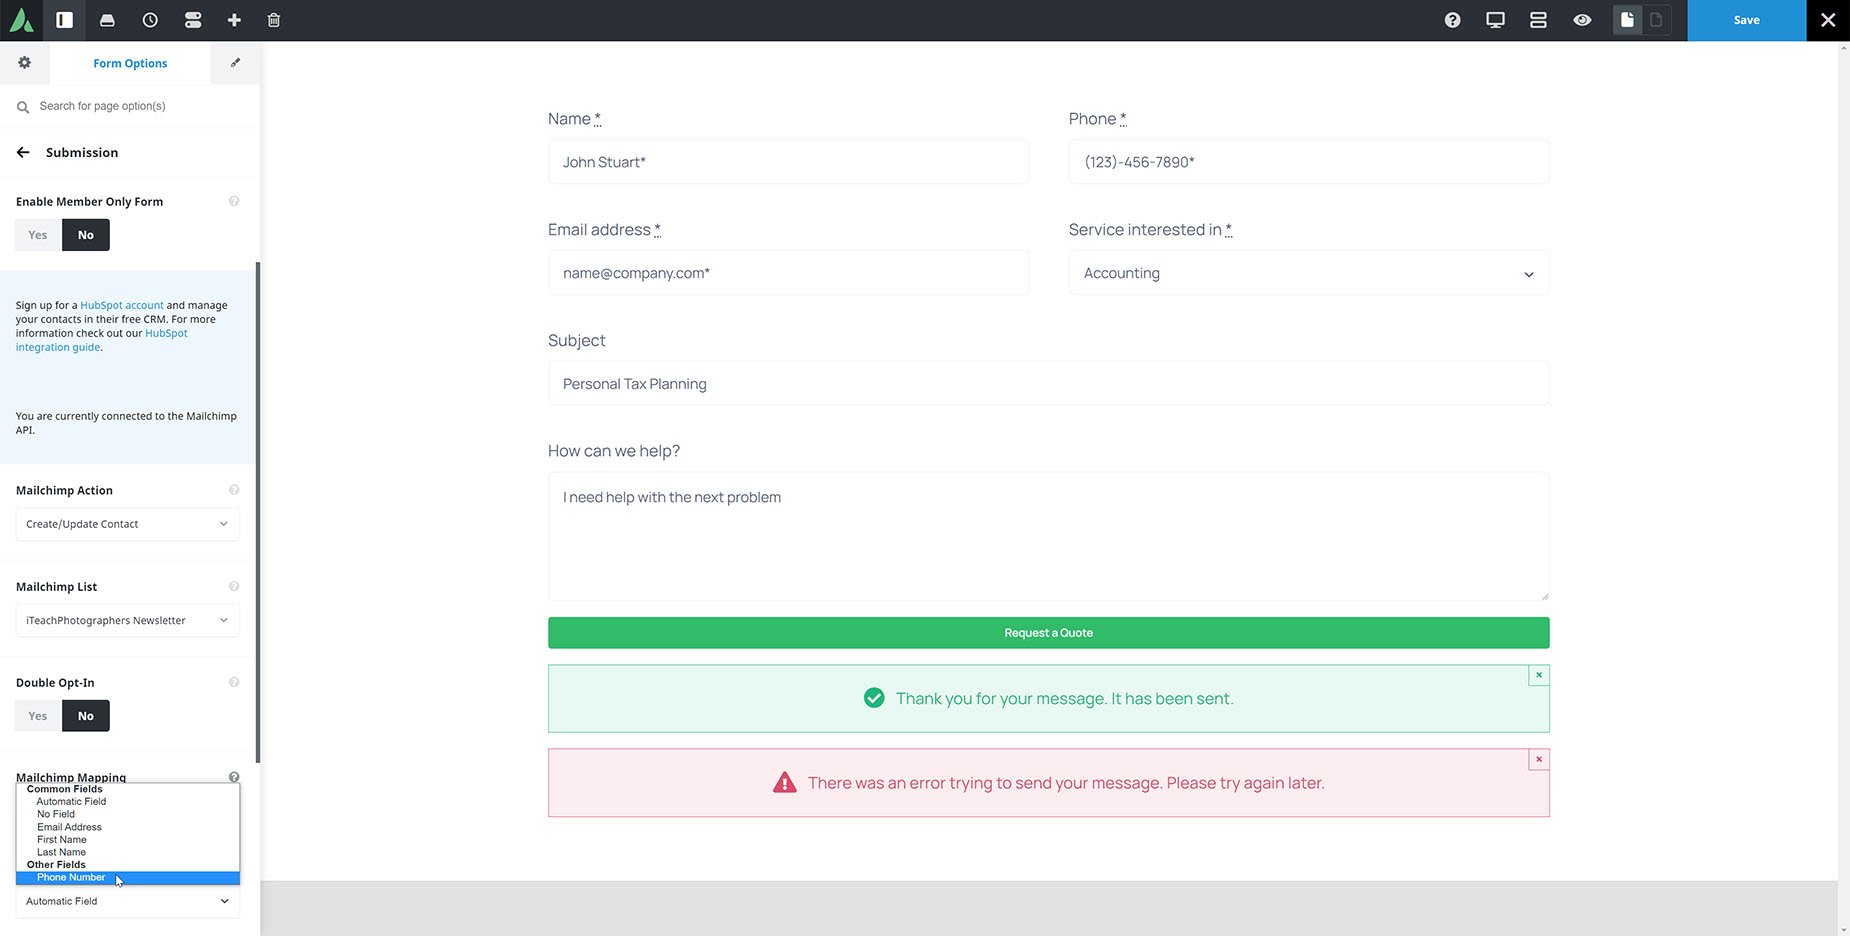
Towards the bottom of the Submission Panel, you will see a notice that you are connected to Mailchimp. Directly under this, is the Mailchimp Action option, which has two options – None, and Create / Update Contact. If you select that second option, a Mailchimp List option will appear below. Here, choose the Mailing List you want to add the contacts to.
Under this, there is a Double Opt-in option, which if enabled, will mean that everyone who submits the form will receive a follow-up email with a confirmation link to verify their subscription.
Finally, under this, you will see a range of Mailchimp mapping options. There will be one for each Form Field, with a mapping option beneath it. For this to work, you must have an Email field in your form.
In each field you want to map, select the corresponding Field in your Mailchimp account for it to be mapped to. By default, fields will show Automatic Field, and will attempt to map fields automatically by matching labels, but clicking on this will reveal a dropdown list of both common and other Mailchimp fields, and here you can specifically map each email form field to the specific Mailchimp field, as seen below.
Once you are done mapping fields, just save your changes, and the next time someone submits the form, their contact details will be added (or updated if their email address is already listed in the Contacts) in your Mailchimp account. The advantage of this, is that you then have access to the full range of marketing actions for each contact in your Mailchimp account. This is a powerful feature for users of Avada and Mailchimp, so check it out.
Troubleshooting
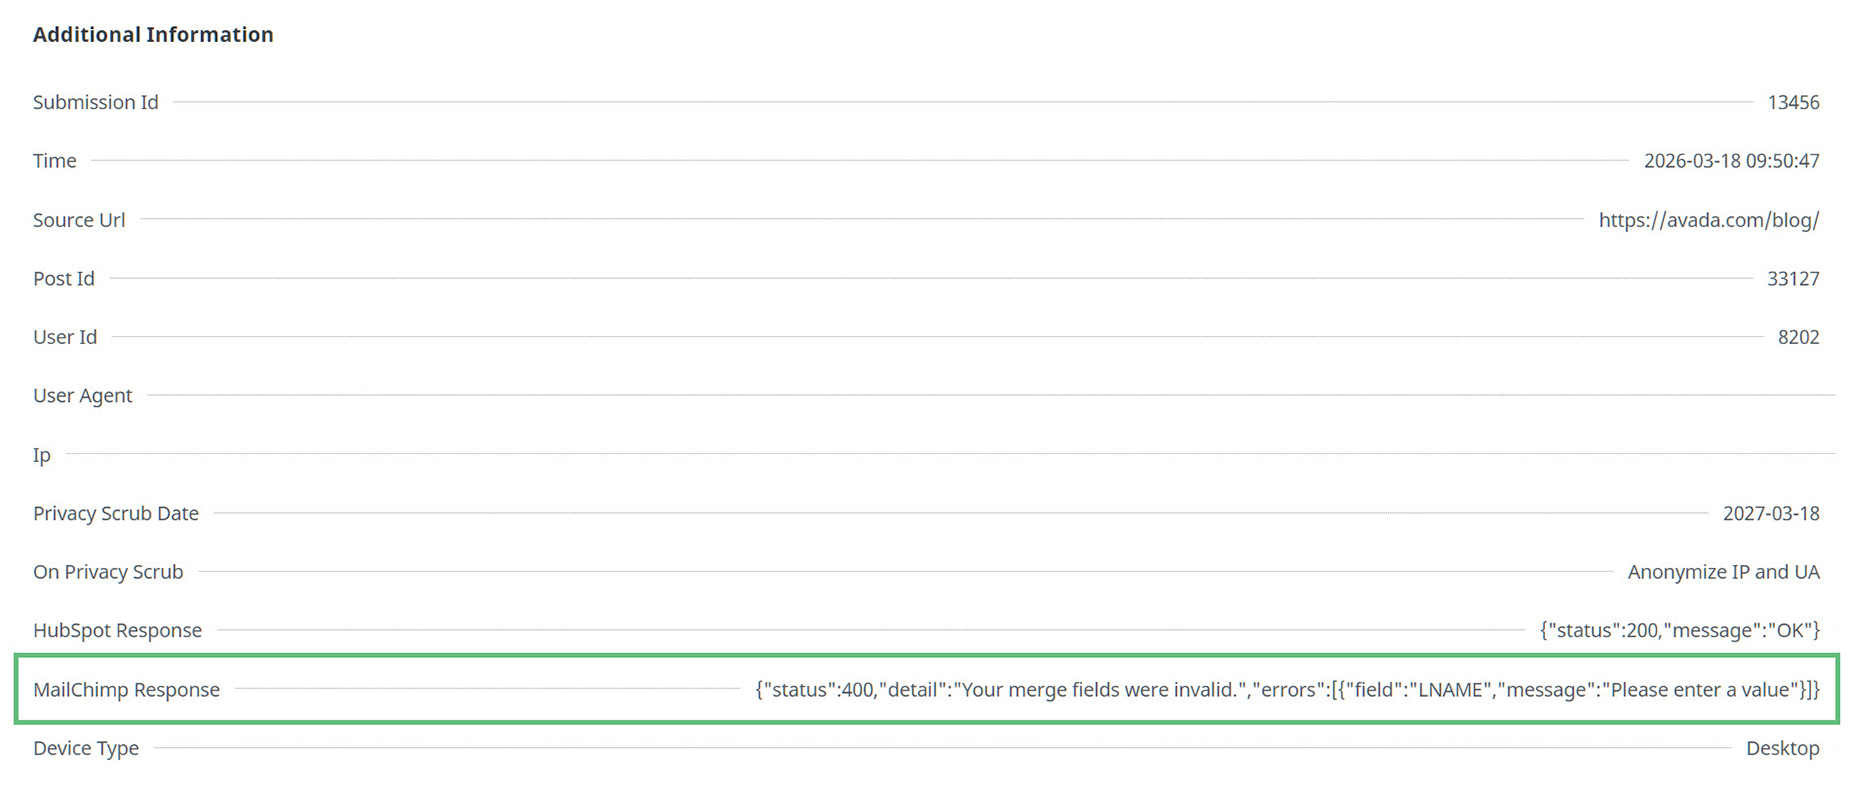
To check everything is working as it should, if you have database saving enabled for the form, you can check the form entries for information about the MailChimp action.
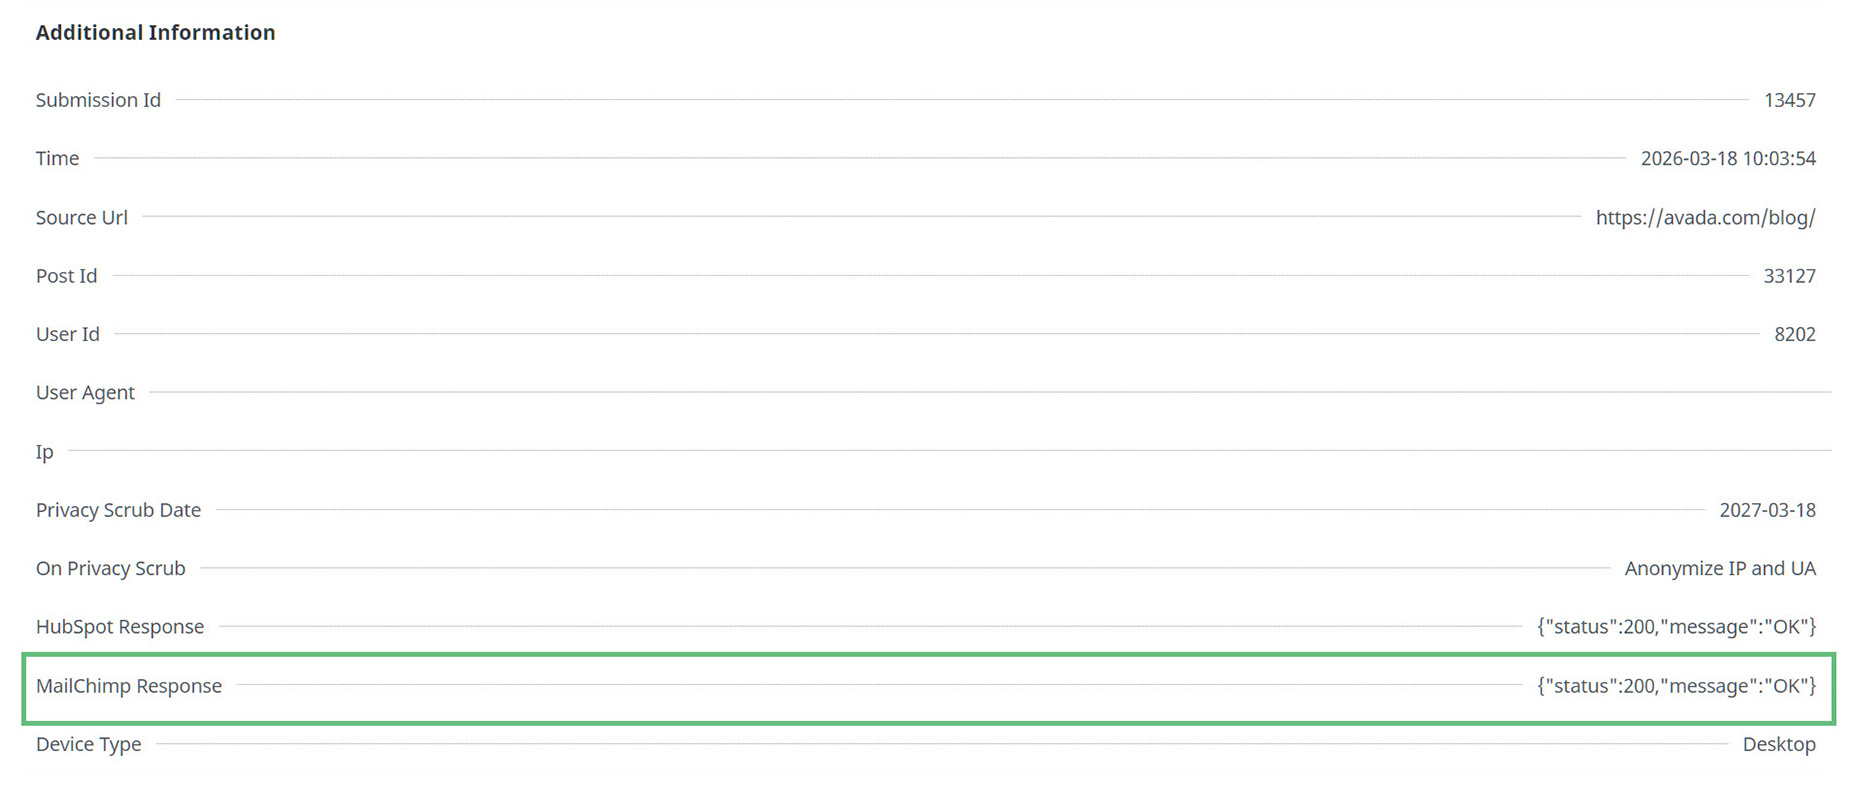
You will either get an OK message, or as shown below, a specific message with the errors found.