WordPress Menu Settings
Last Update: October 29, 2025
To make the most of your menus in WordPress when using Avada, you should be familiar with the various settings and options available when initially creating your menus, at Appearance > Menus, from the WordPress dashboard. These are a mixture of WordPress core menu functions, and third-party and Avada added settings. For an introduction to the core WordPress functionality of Menus, please see the WordPress.org Appearance > Menus Screen documentation.
General Menu Options
There are many types of menu items that can be added to a menu. Some of these are core WordPress options, such as Pages, Posts, Custom Links & Categories. Others are added with third-party plugins, such as WooCommerce or The Events Calendar. Yet others are added by Avada, such as the Avada Special Menu Items and the Avada Menu Options.
There are also multiple levels of possible menu items; the Parent Level (or the First Level menu items) and any Child Levels (or sub-level menu items below the Parent Level menu item). There can be up to 4 child levels with Avada.
In each Menu item, you will also find the Avada Menu Options button. See the linked doc for a full rundown, but basically, you can use these options to configure your menu item’s appearance in your menu.
There are also five menu positions available with Avada – Main Navigation, Top Navigation, Mobile Navigation, 404 Useful Pages, and Sticky Header Navigation. See the Setting Up A Menu doc for more details on this, and other menu related items.
To read more about Mega Menus, please see our Using The Mega Menu document. Read below for more information on Menu Settings in Avada.
Menu Settings
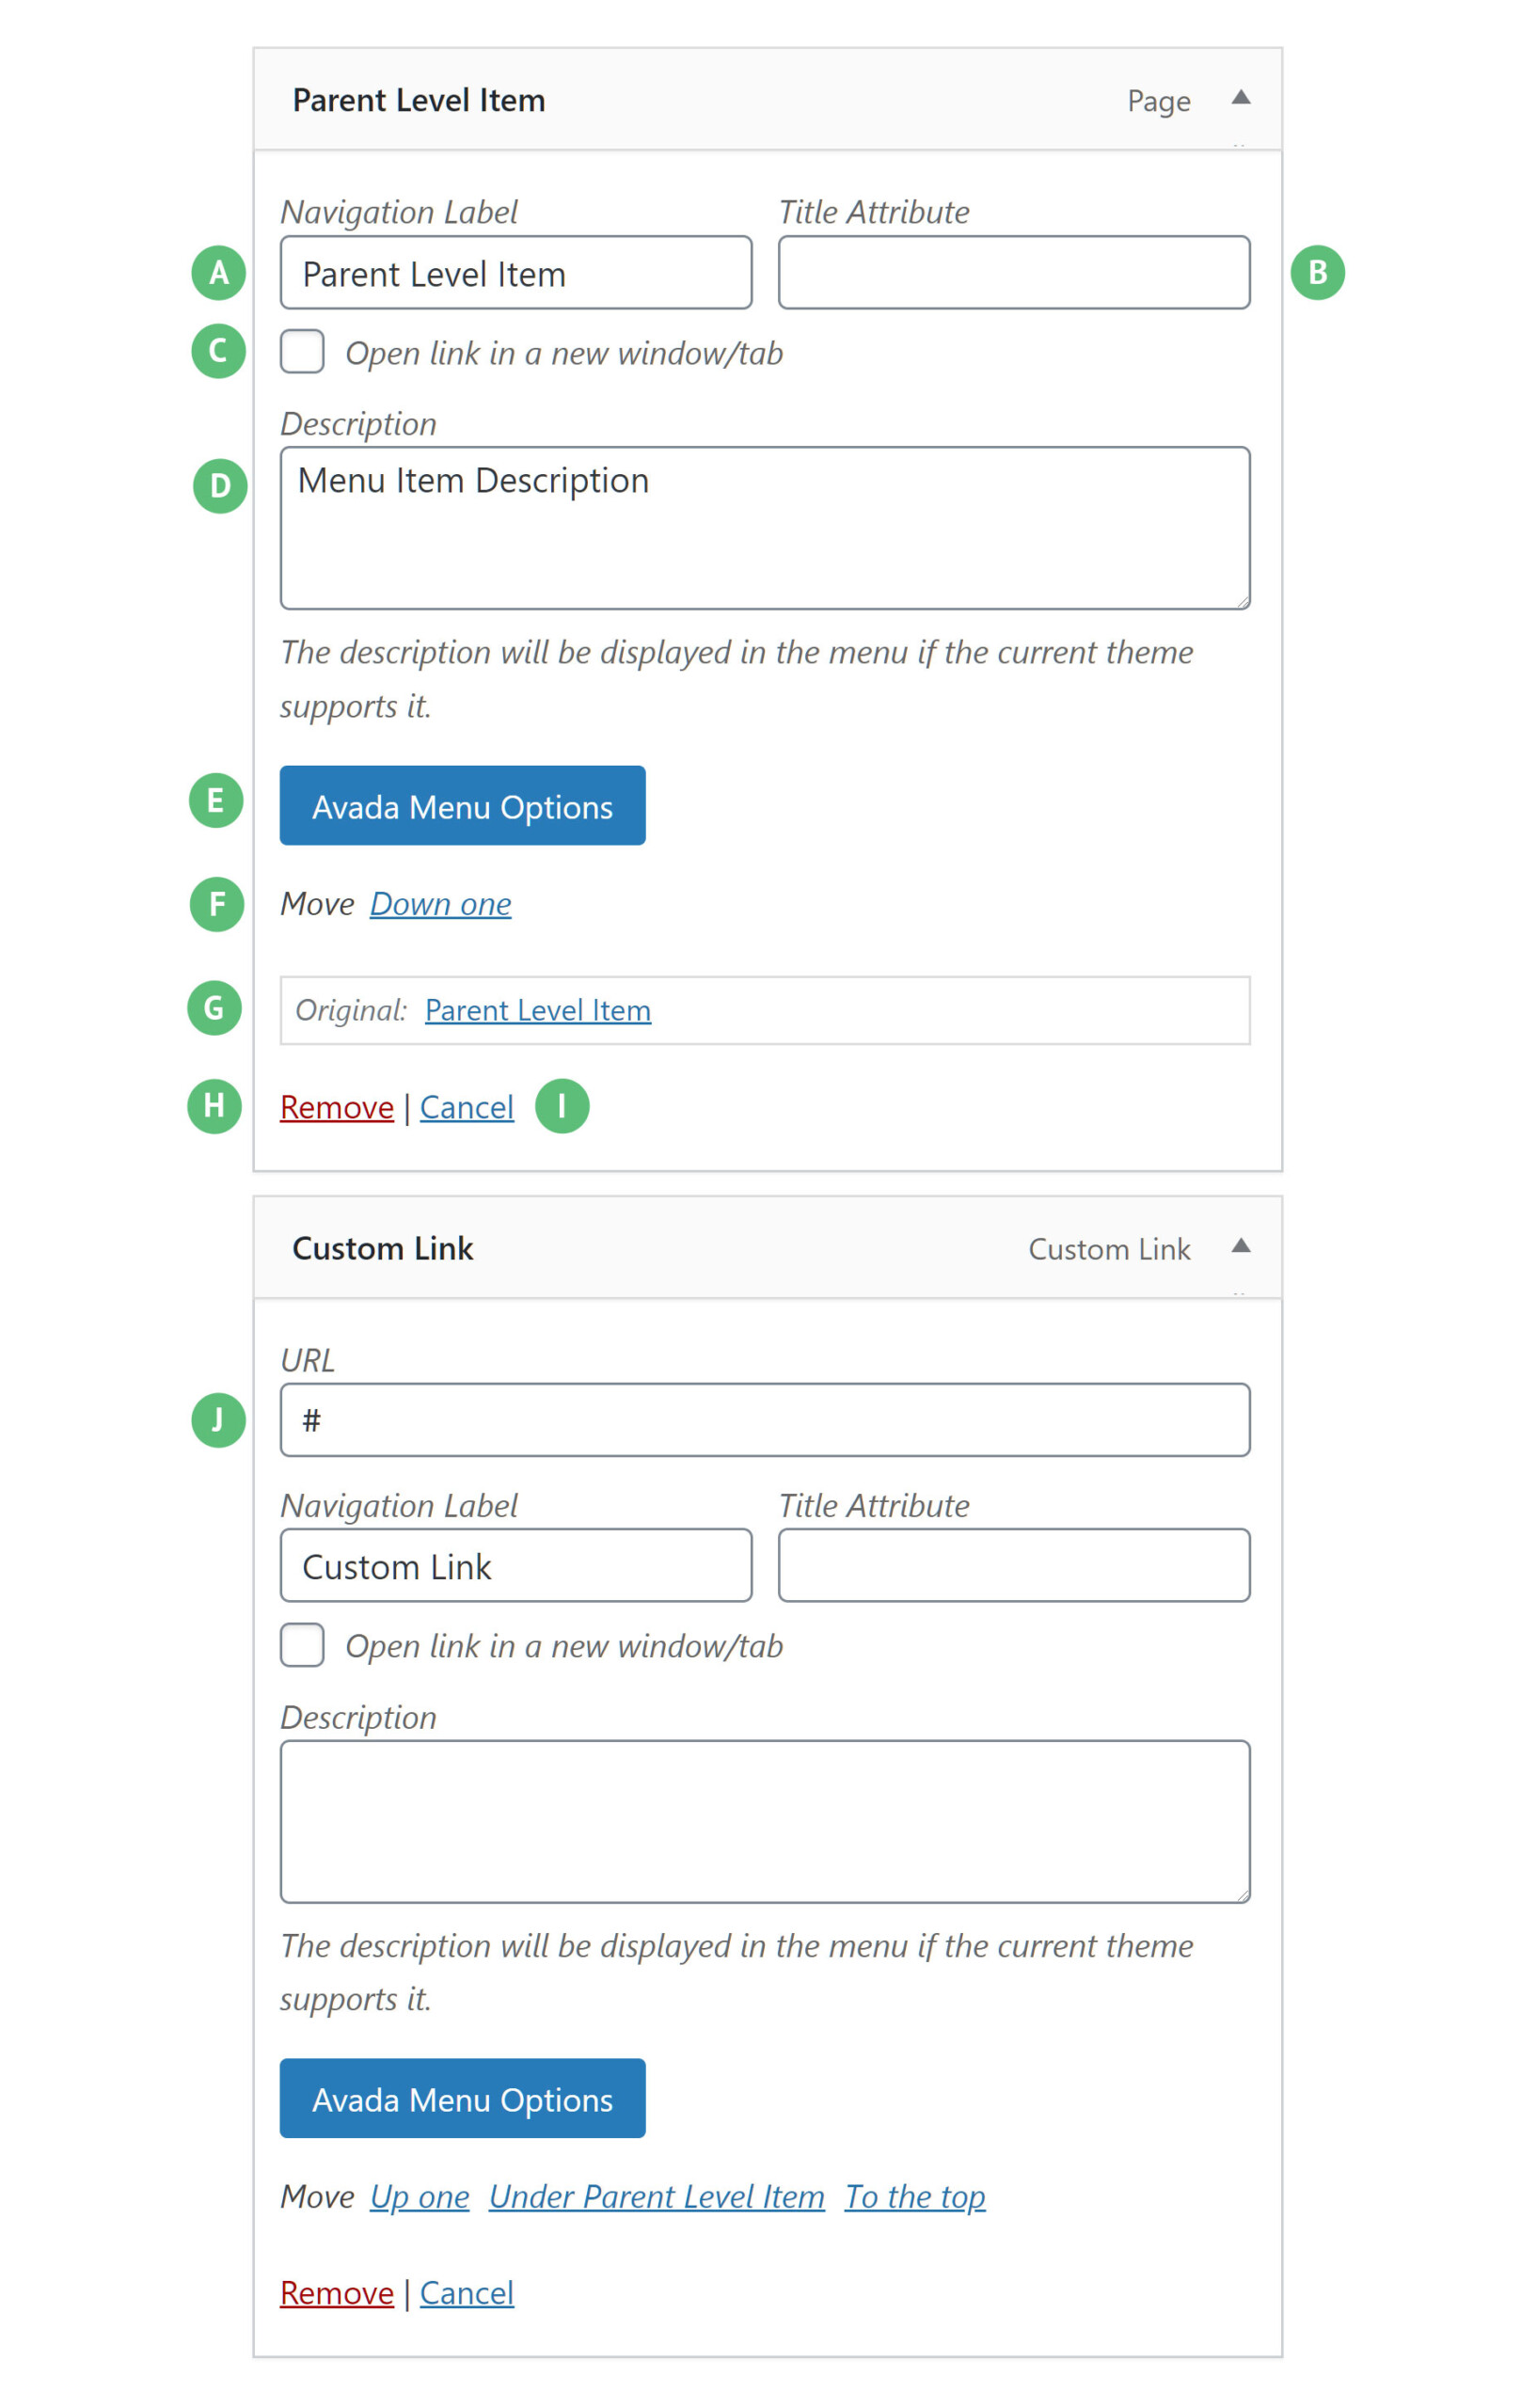
Navigation Label – Illustrated as A. Allows you to add a name to your menu item. In this way, you can change the display name of a menu item.
Title Attribute – Illustrated as B. This will specifies the value for the title attribute of the menu item. This text will only be displayed when a user’s mouse hovers over the menu item.
Link Target – Illustrated as C. Allows you to set the link target to _blank.
Description – Illustrated as D. You can add a description under the Menu item. See the Spa Demo Menu for an example of this.
Avada Options – Illustrated as E. This will open additional menu item settings which are proprietary to Avada. Click the button and you’ll gain access to the additional options listed below, in the next section.
Move – Illustrated as F. Allows you to easily move the menu item to various positions in the Menu Structure.
Original – Illustrated as G. Allows you to view the original page name, which the menu item links to.
Remove – Illustrated as H. Allows you to remove the menu item from the Menu Structure.
Cancel – Illustrated as I. Allows you to cancel or remove the changes made to the menu item and collapse the panel.
Custom Link URL Setting – Illustrated as J. The Custom Link menu item has the additional option of a URL setting. This setting allows you to add a custom link as a menu item.
Under the Screen Options at the top of the screen, there are several options you can turn on or off that will display on the Menu items, such as Link Target & Description.


