How To Use Mailchimp Tags With Avada Forms
Last Update: November 30, 2025
Tags are are labels you create to help organize your contacts in Mailchimp. Tagging lets you bring your own contact structure into Mailchimp and label contacts based on data you know about them. Tags are highly customizable, so you can create and assign them as you see fit.
The main difference between Mailchimp Tags and Groups, is that Groups are intended to be contact selected, and Tags are applied to contacts by you. See the How To Use Mailchimp Groups With Avada Forms for more information on that feature. You can also add custom data to your contacts in Mailchimp. See the How To Create And Map Custom Data In Mailchimp document on how to do that.
Using Avada Forms, you can capture information and add it to your contacts as they submit a form. Tags can then be the basis for building audience segments for sending emails to targeted audiences. Let’s have a deeper look at what’s involved.
Setting Up Your Tags in Mailchimp
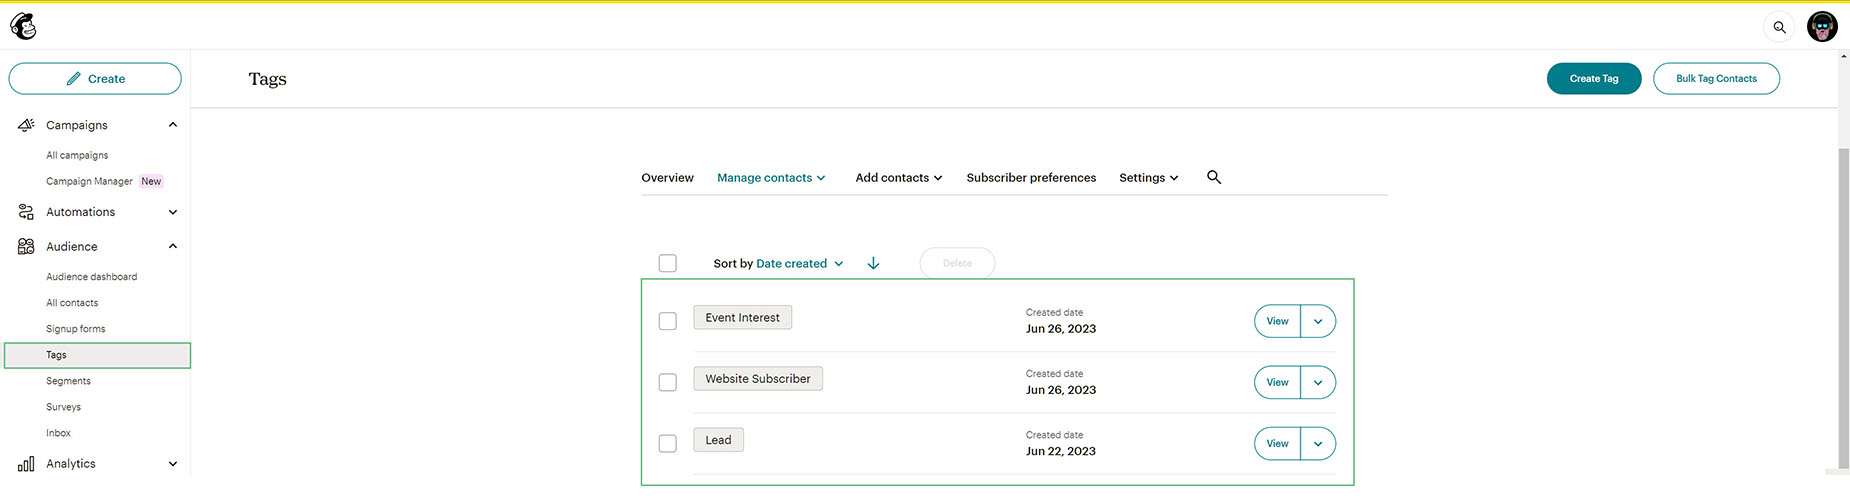
Mailchimp Tags are completely customizable, so you can use them however you need to. You might want to create a comprehensive tag structure to organize all your contacts, or you might need a few tags as a lightweight way to identify some key contacts. There are several ways to add Tags in Mailchimp. You can create and add tags from the contact table, a contact’s profile, or from the Tags page in your audience.
For our example, let’s say you have three forms on your website – a standard Contact Form, a Newsletter Subscription Form, and a Register for Upcoming Events Form. You might then set up tags in Mailchimp for Lead, Website Subscriber, and Event Interest.
Assigning Tags in Avada Forms
Once you have set up your tags in Mailchimp, you can add them to your Avada Forms. In Avada Forms, specific tags are then selected for specific forms. For the Contact Form, you would add the ‘Lead’ tag, for the Newsletter Subscription Form, you would add the ‘Website Subscriber’ tag, and for the Register For Upcoming Events form, you would add the ‘Event Interest’ tag. In this way, anyone who submits one of those forms will get a tag added to their contact in Mailchimp.
The first step with this is to make sure Avada Forms is connected with your Mailchimp account. See the How To Integrate Mailchimp With Avada Forms document for more information on how to do that.
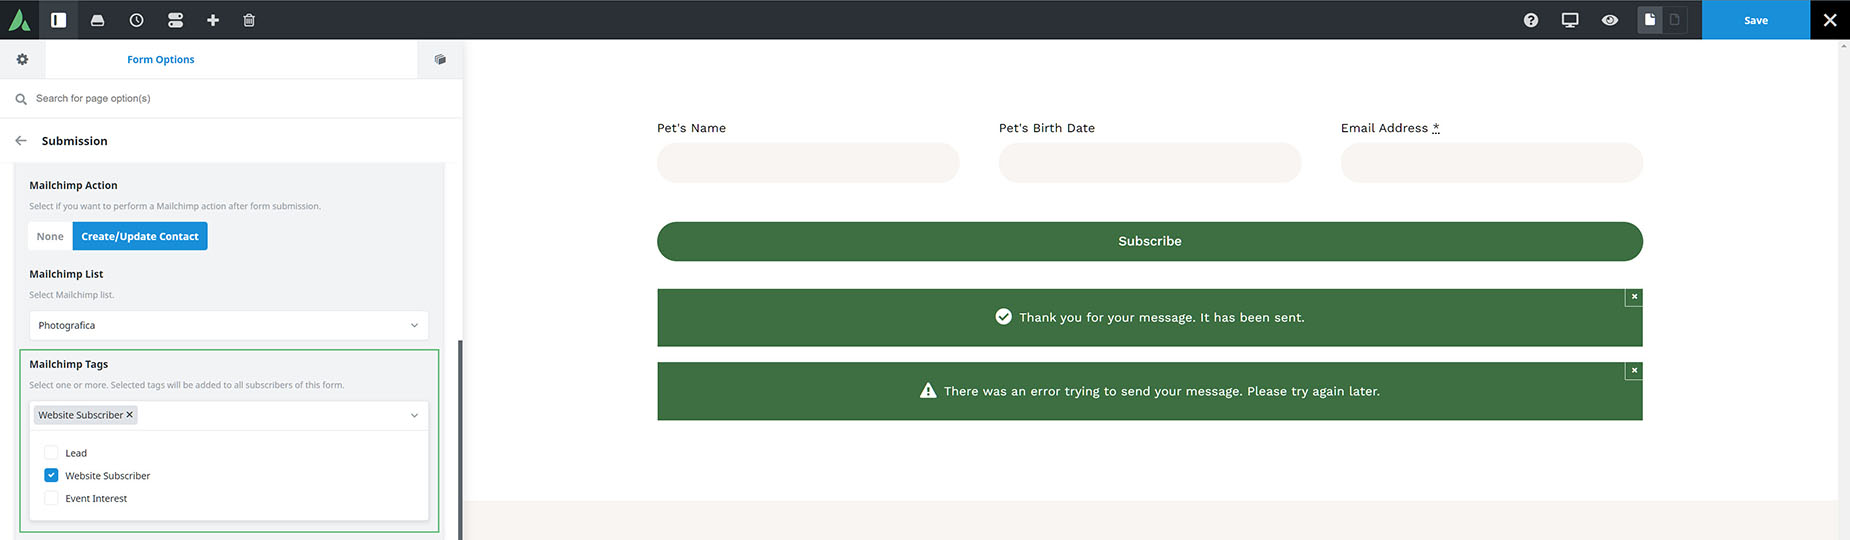
Once your account is connected, head to the Form Options tab of the form you are interested in. Here, under Submission, your will see an Actions option. Select Mailchimp from the dropdown list.
You should then see a Mailchimp option set below this. If you edit this options set, you will see a Mailchimp Action option. Click on Create / Update Contact to continue.
Now, select the Mailchimp list you want to connect to. There are options for Opt-In preferences, Form Consent, and Mailchimp Mapping, but the one we want for this document is in the Mailchimp Tags option.
Here you can select from any of the Tags you have added to your connected Mailchimp account. In the screenshot below, we have selected the Website Subscriber tag for those users who submit the Newsletter Form.
And that’s it! Now, when a user submits the form, they will have that specific tag added to their contact, enabling them to easily segment your list for specific marketing actions.