How To Use Mailchimp Groups With Avada Forms
Last Update: November 30, 2025
Mailchimp Groups are a way to sort your subscribed contacts based on their interests and preferences. In Mailchimp, a Group is defined as “A collection of contacts, categorized by their interests or preferences.” They differ slightly from Mailchimp Tags.
Using Avada Forms, you can capture these preferences and add this information directly to your contacts as they submit a form. Groups can then be the basis for building audience segments for sending emails to targeted audiences. Let’s have a deeper look at what’s involved.
Setting Up Your Groups in Mailchimp
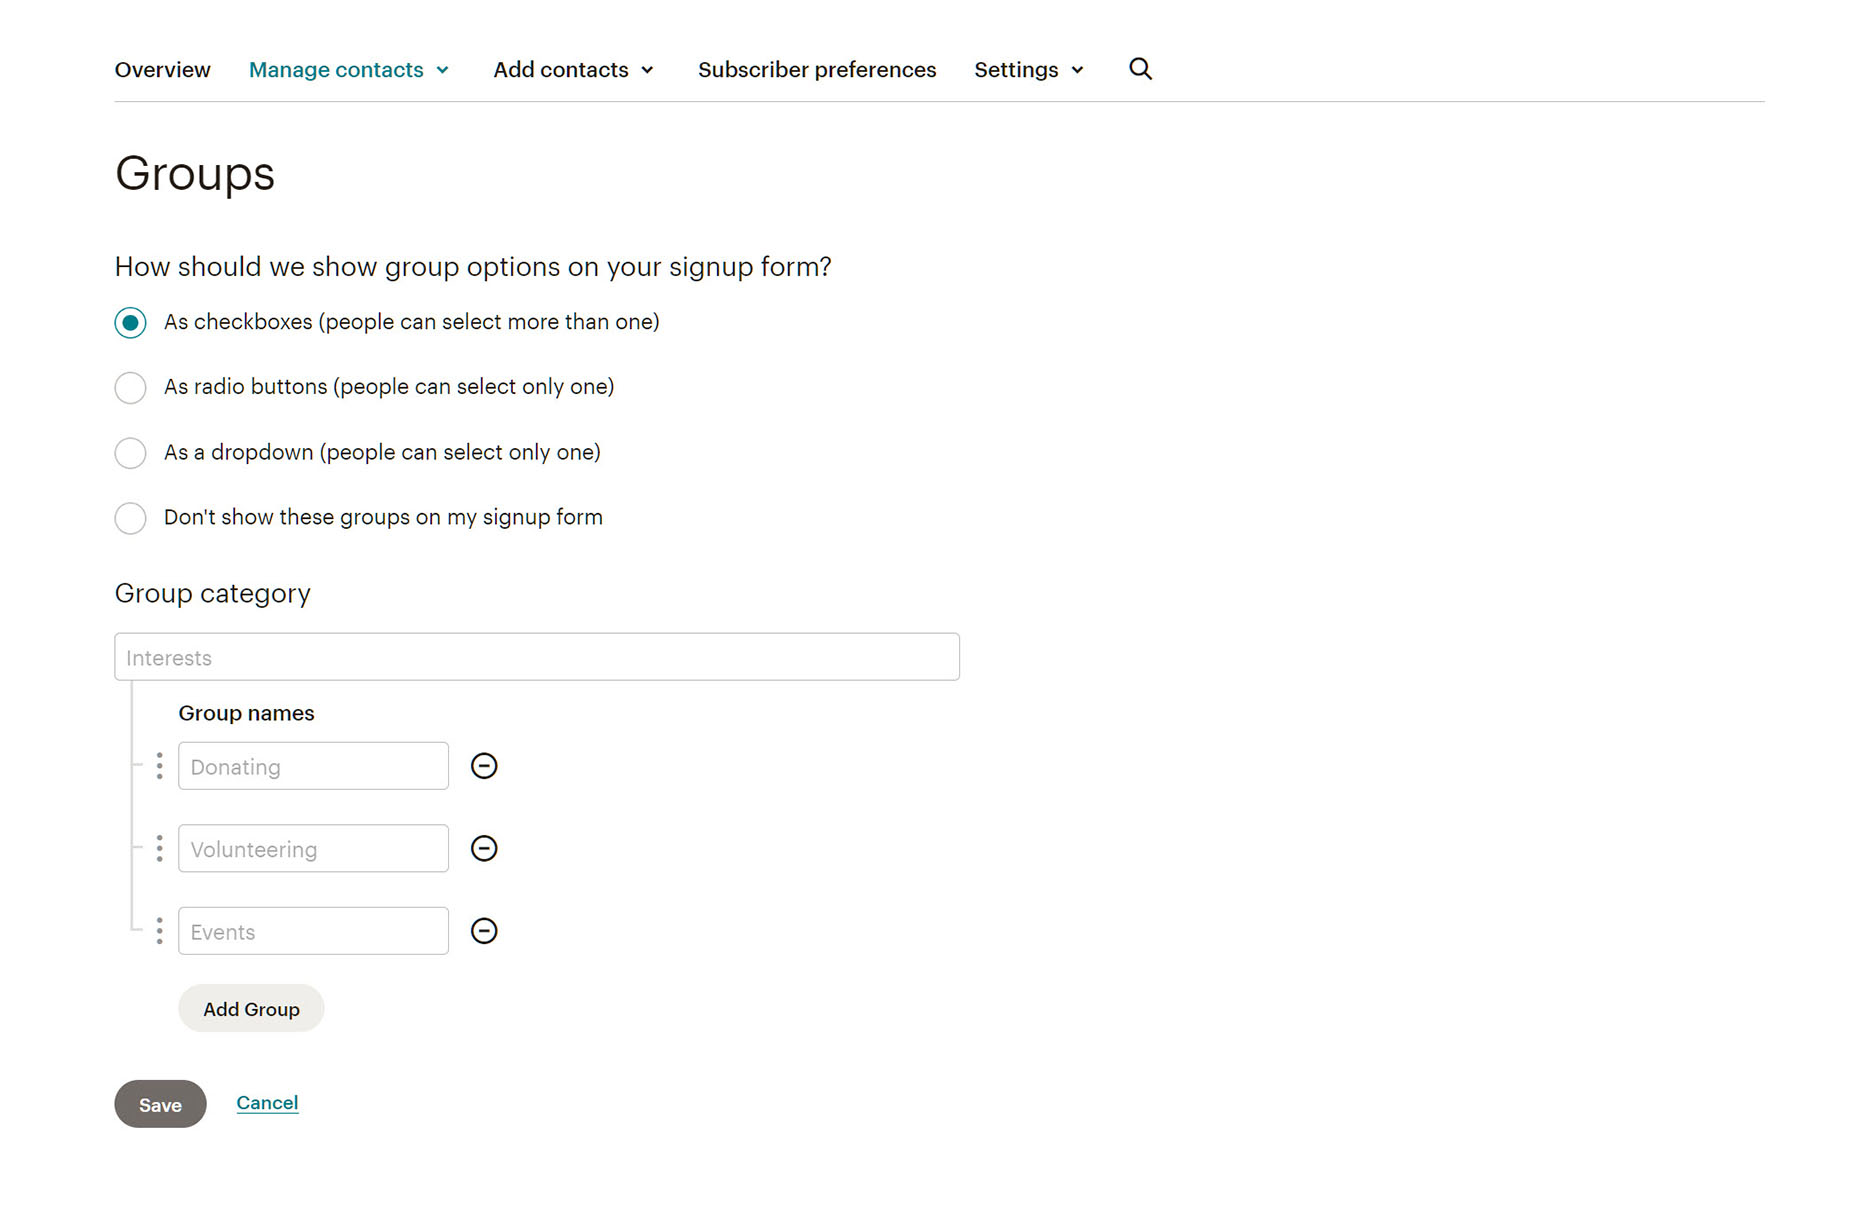
A group consists of a group category and group names. So, the initial steps are in Mailchimp, and involve setting up a Group category, and the individual Group names. For example, your Group Category might be Gardening Experience, and your Group Names, Beginner, Intermediate and Advanced.
In Mailchimp, you find Groups under Audience > All Contacts > Manage Contacts. Here, you will find a Create Group button, which brings up the following dialog.
Setting Up Your Groups In Avada Forms
So now you have a group set up in Mailchimp, you need to get information from your users to mark them as members of that group. Let’s start with the same group information in Avada Forms, so your users can select their preference, and then that can be mapped to the corresponding group in Mailchimp.
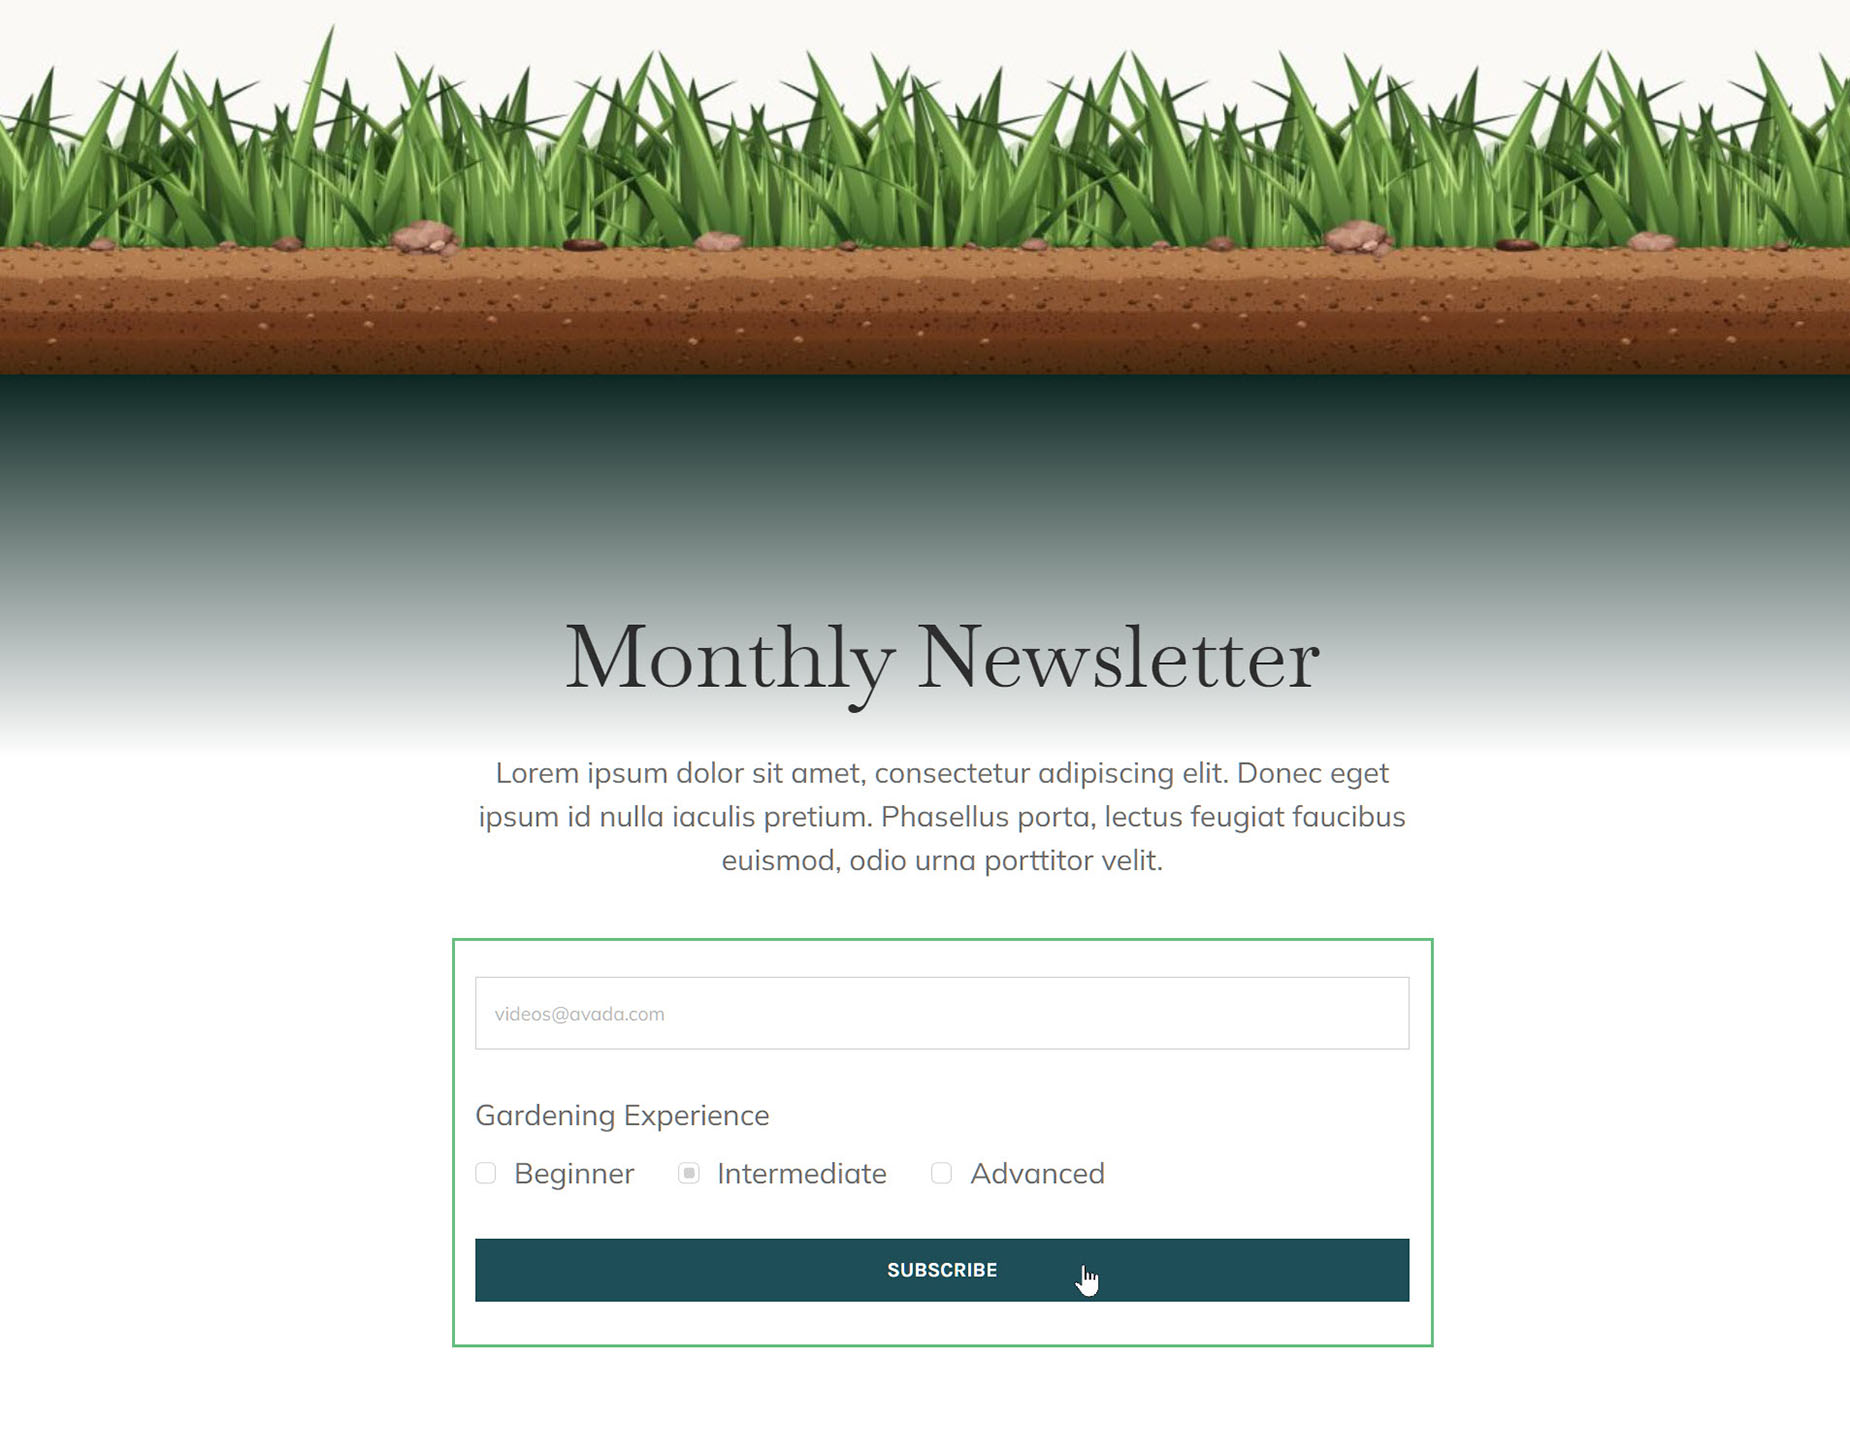
To do this, we can start by adding a Checkbox Field Element to a form with the corresponding group names as Checkbox options. In the example below, we have added a Gardening Experience Checkbox to a Newsletter Form. In this way, we could determine the user’s level and send them an appropriately curated Newsletter.

Mapping the Group information to Mailchimp
The first step is to make sure Avada Forms is connected with your Mailchimp account. See the How To Integrate Mailchimp With Avada Forms document for more information on how to do that.
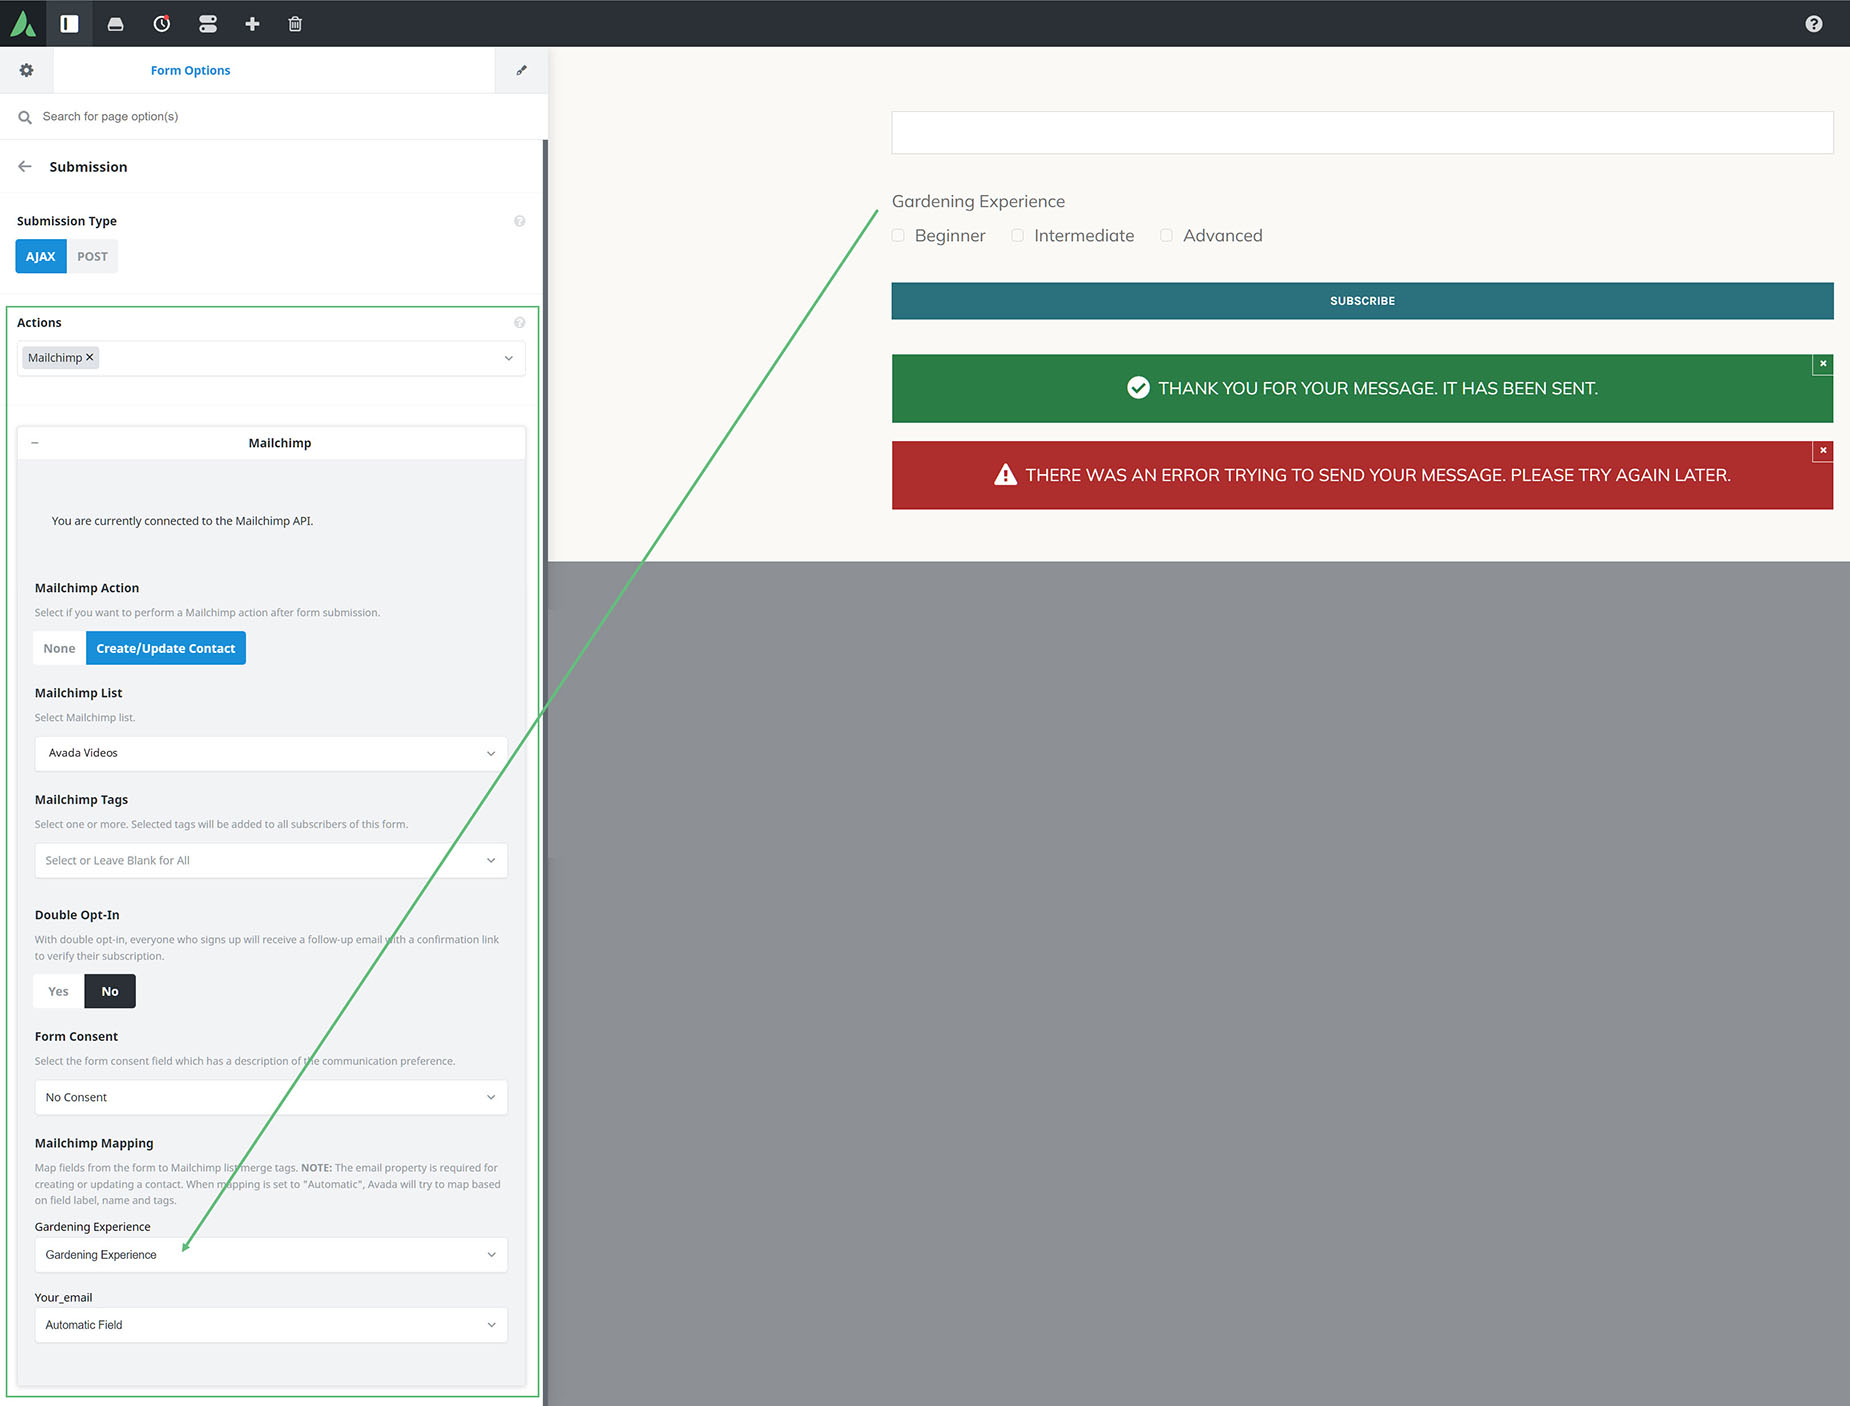
Once your account is connected, head to the Form Options tab of the form you added your checklist to. Here, under Submission, your will see an Actions option. Select Mailchimp from the dropdown list.
You should then see a Mailchimp option set below this. If you edit this options set, you will see a Mailchimp Action option. Click on Create / Update Contact to continue.
Now, select the Mailchimp list you want to connect to. There are options for Mailchimp Tags, Opt-In preferences, and Form Consent, but the one we want for this document is in the Mailchimp Mapping section. Note how there is a Gardening Experience field. This is the Mailchimp Group we set up on Mailchimp. Click on the dropdown here, and select from the Group Category. In our example, there is onl one, Gardening Experience. This is the Checklist Field we added to the Form.
Now the Checklist on the form will map to the Mailchimp Group of the same name.
Form On The Front End
When the form is filled out on the front end, the user selects which Newsletter preference they have, and on submission, this is added to their contact in Mailchimp. You could then use this informnation to segment your mail deliveries.