How To Use The Avada Custom Branding Plugin

Last Update: May 20, 2024

Avada Custom Branding

Avada Custom Branding is our free premium custom branding plugin, included with your purchase of Avada. With Avada Custom Branding Branding, you are able to totally rebrand different areas of your website, like the WordPress Admin area, the WordPress Login Screen, and Avada itself. This is an ideal way for you to present your clients with your own unique look and feel. Read on to discover all you need to know about this awesome free premium plugin, or watch the video below for a visual overview.

For privacy reasons YouTube needs your permission to be loaded.

Installation and Activation

Like the other required, premium, and recommended plugins, you can install and activate Avada Custom Branding via the Avada > Plugins / Add-ons section. Once installed and activated, Avada Custom Branding will appear on your admin dashboard’s sidebar, directly under the Avada link.

Plugin Updates

The Avada Custom Branding plugin is an Avada bundled premium plugin, and can be updated independently outside of an Avada update. The update notification will be visible when an update is available, and can be accessed via the Avada > Plugins / Add-ons section.

Welcome

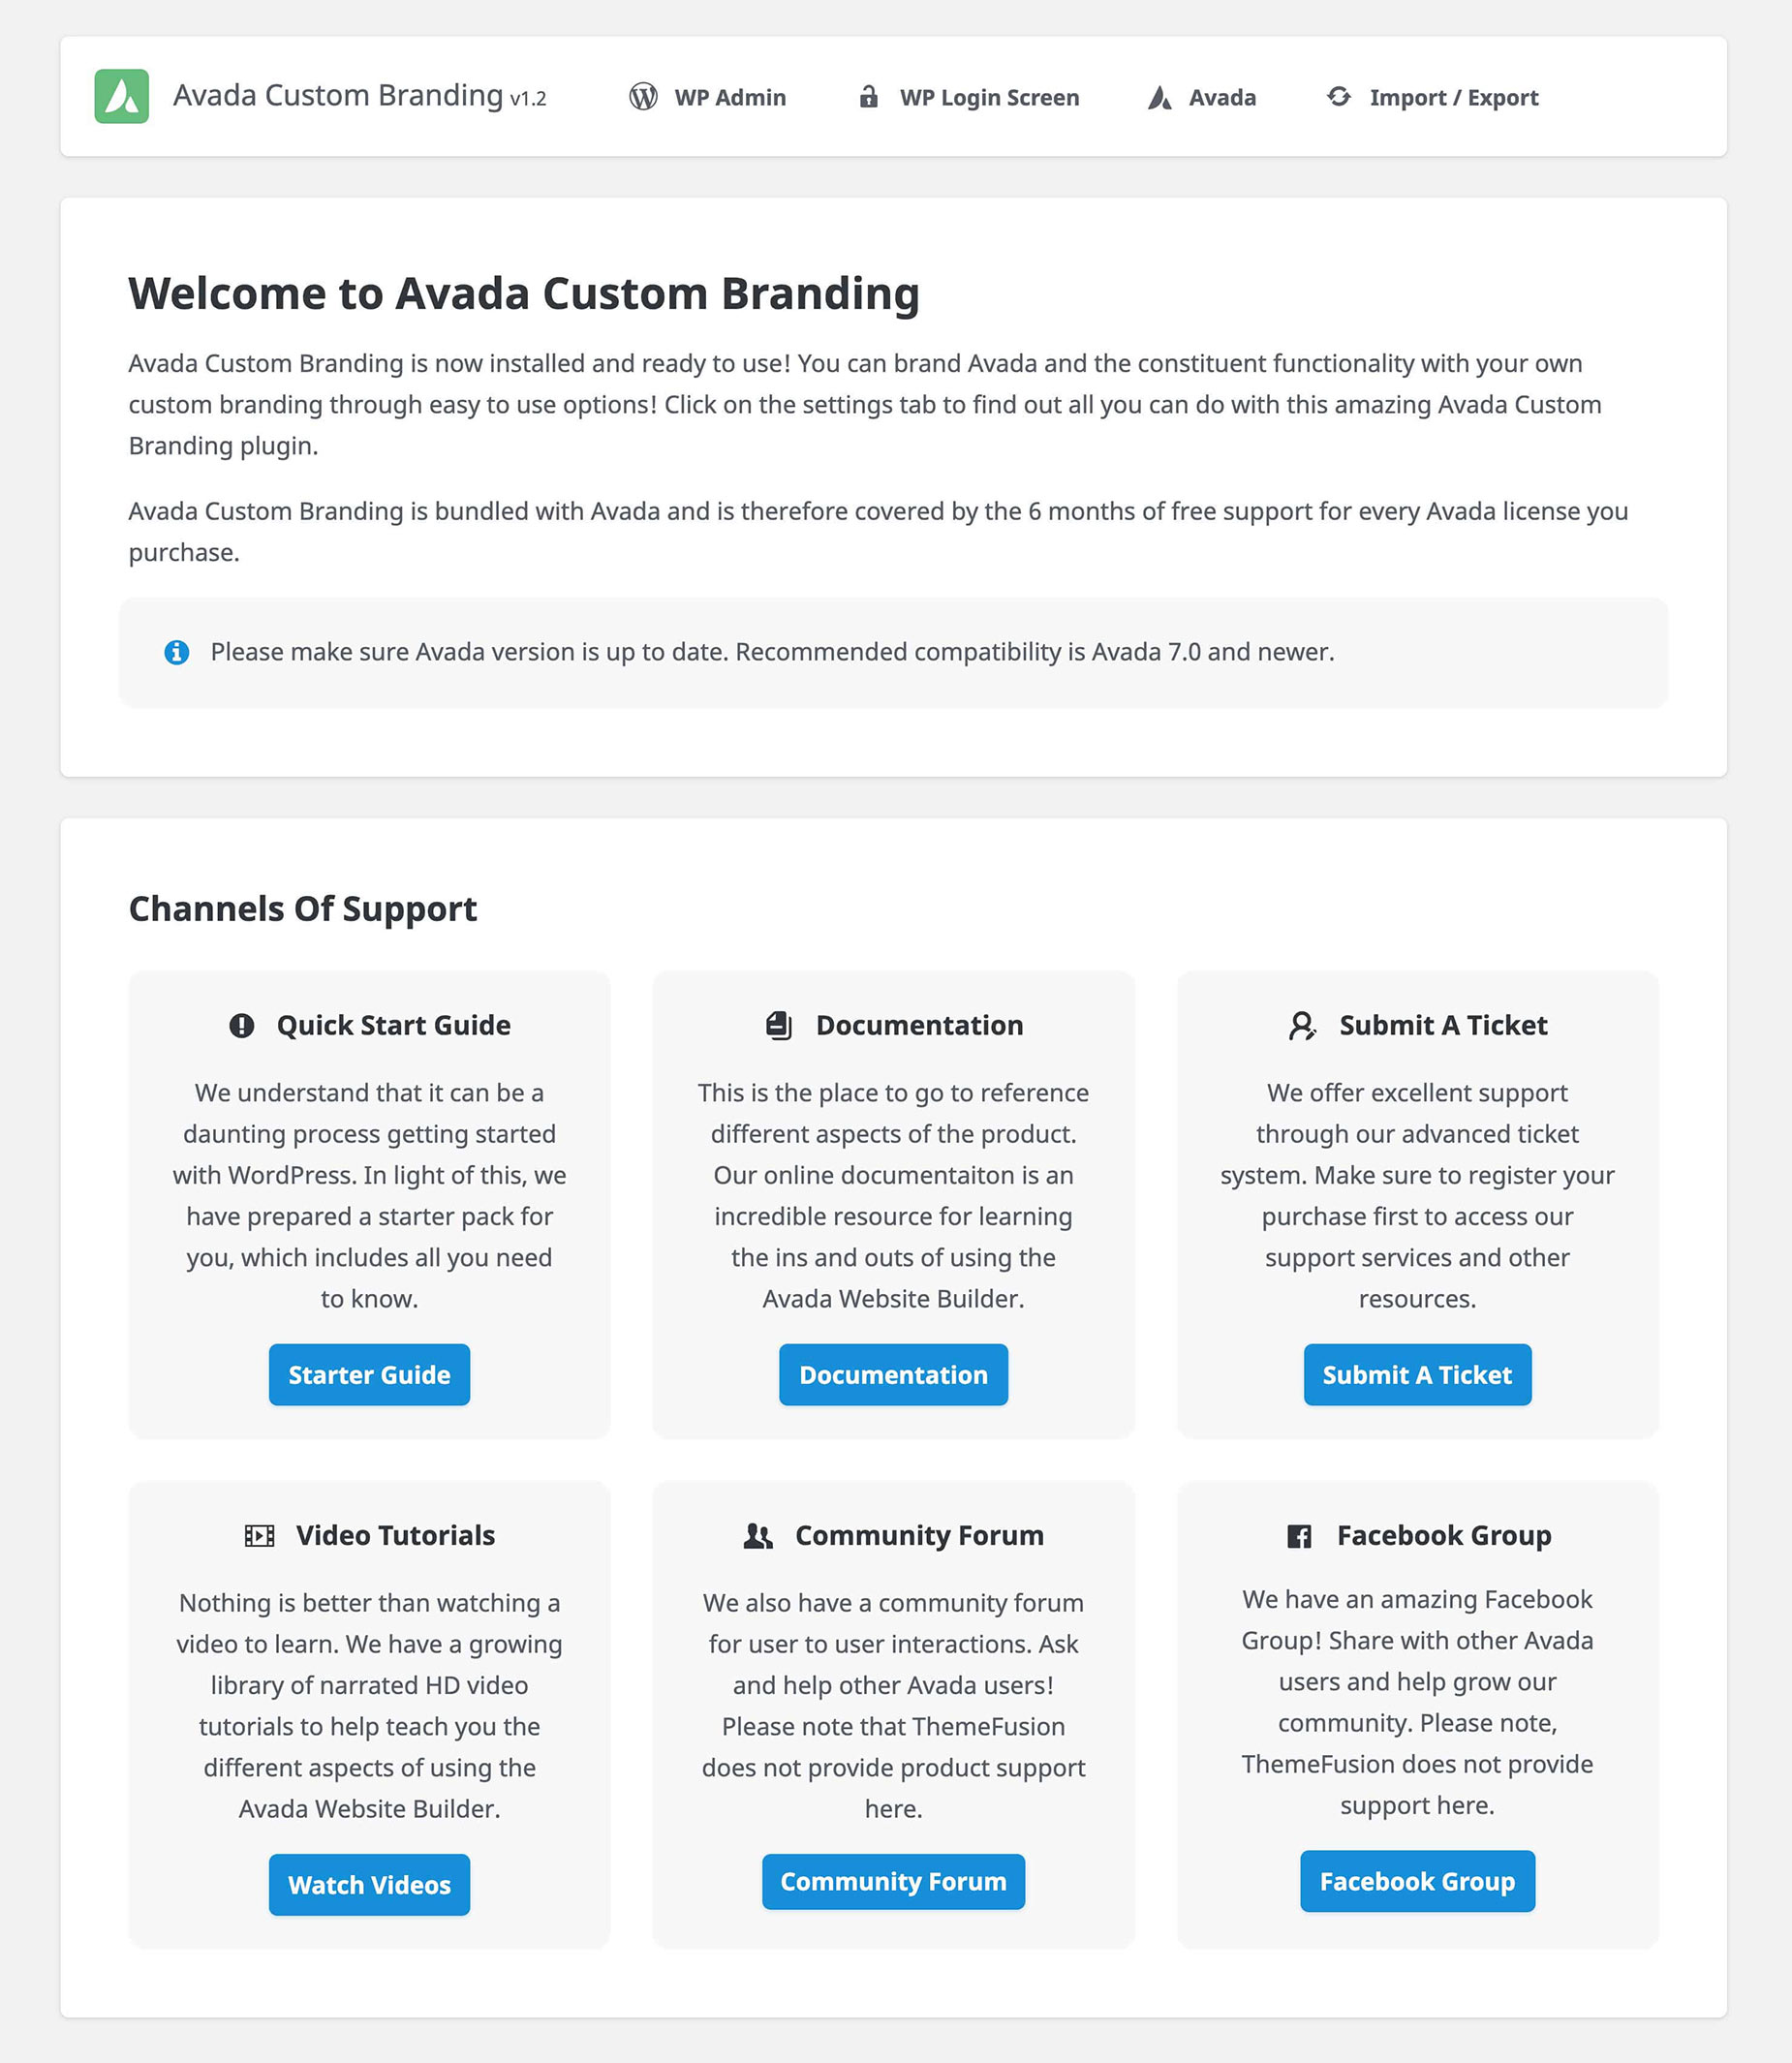
This is the Welcome Screen for Avada Custom Branding. It provides an introduction to the plugin, plus links to the various channel of support we provide.

As Avada Custom Branding is bundled with Avada, it is covered by the 6 months of free support for every Avada license you purchase. Support can be extended through subscriptions via ThemeForest. All support for Avada Custom Branding is handled via the the support center on our company site. To access it, you must first setup an account by following these steps. If you purchased using Envato’s guest checkout please view this link to create an Envato account before receiving item support.

Avada Custom Branding > Welcome

Save / Reset Settings

At the bottom of every custom branding section, you will find a Save Settings button, and two Reset Settings options. With these, you can reset all Avada Custom Branding settings, or reset each section independently. This works well in conjunction with the Import / Export feature, so you can back your settings up before resetting.

Save - Reset Settings

WordPress Admin Branding Settings

This tab is where you can find the settings to change WordPress admin area info, WordPress Dashboard Page info, and the settings that will allow you to control which user roles are allowed to access and use the custom branding options.

  • Remove WordPress Logo – Choose from yes or no. Set to yes to remove the WordPress logo from admin bar.
  • Remove Screen Options – Choose from yes or no. Set to yes to remove the Screen Options tab.
  • Remove Help Tab – Choose from yes or no. Set to yes to remove the Help tab.
  • Hide Admin Menus – Choose from Dashboard, Posts, Media, Pages, Comments, Appearance, Plugins, Users, Tools, and Settings. Selected menu item/s will be removed from admin menu.
  • Rename Admin Menus – Set your own text to rename the admin menu labels for Dashboard, Posts, Media, Pages, Comments, Appearance, Plugins, Users, Tools, and Settings.
  • Admin Footer Text – Set your own text to be displayed in footer text area on the left and footer text area on the right which controls the version number text.

Dashboard Panels

  • Hide Dashboard Widgets – Choose from Quick Draft, At a Glance, Activity, WordPress Events and News, and ThemeFusion News. Selected dashboard widget/s will be hidden on the WordPress Dashboard Page.
  • Custom Welcome Panel – Set your own custom welcome panel title and content on the WordPress Dashboard Page. HTML markup along with core WP classes can be used to customize the layout further.

Visibility Settings

  • User Role Visibility – Choose from Author, Contributor, Customer, Editor, Shop Manager, and Subscriber. Selected user role/s will have capability to see the white label options.

  • Custom CSS for Admin Pages – Insert your own custom CSS that will be applied on all admin pages.

  • Apply Changes to Administrators – Choose from yes or no. Controls whether to apply branding changes for administrator user role or not.

Avada Custom Branding > WP Admin Panel Panel

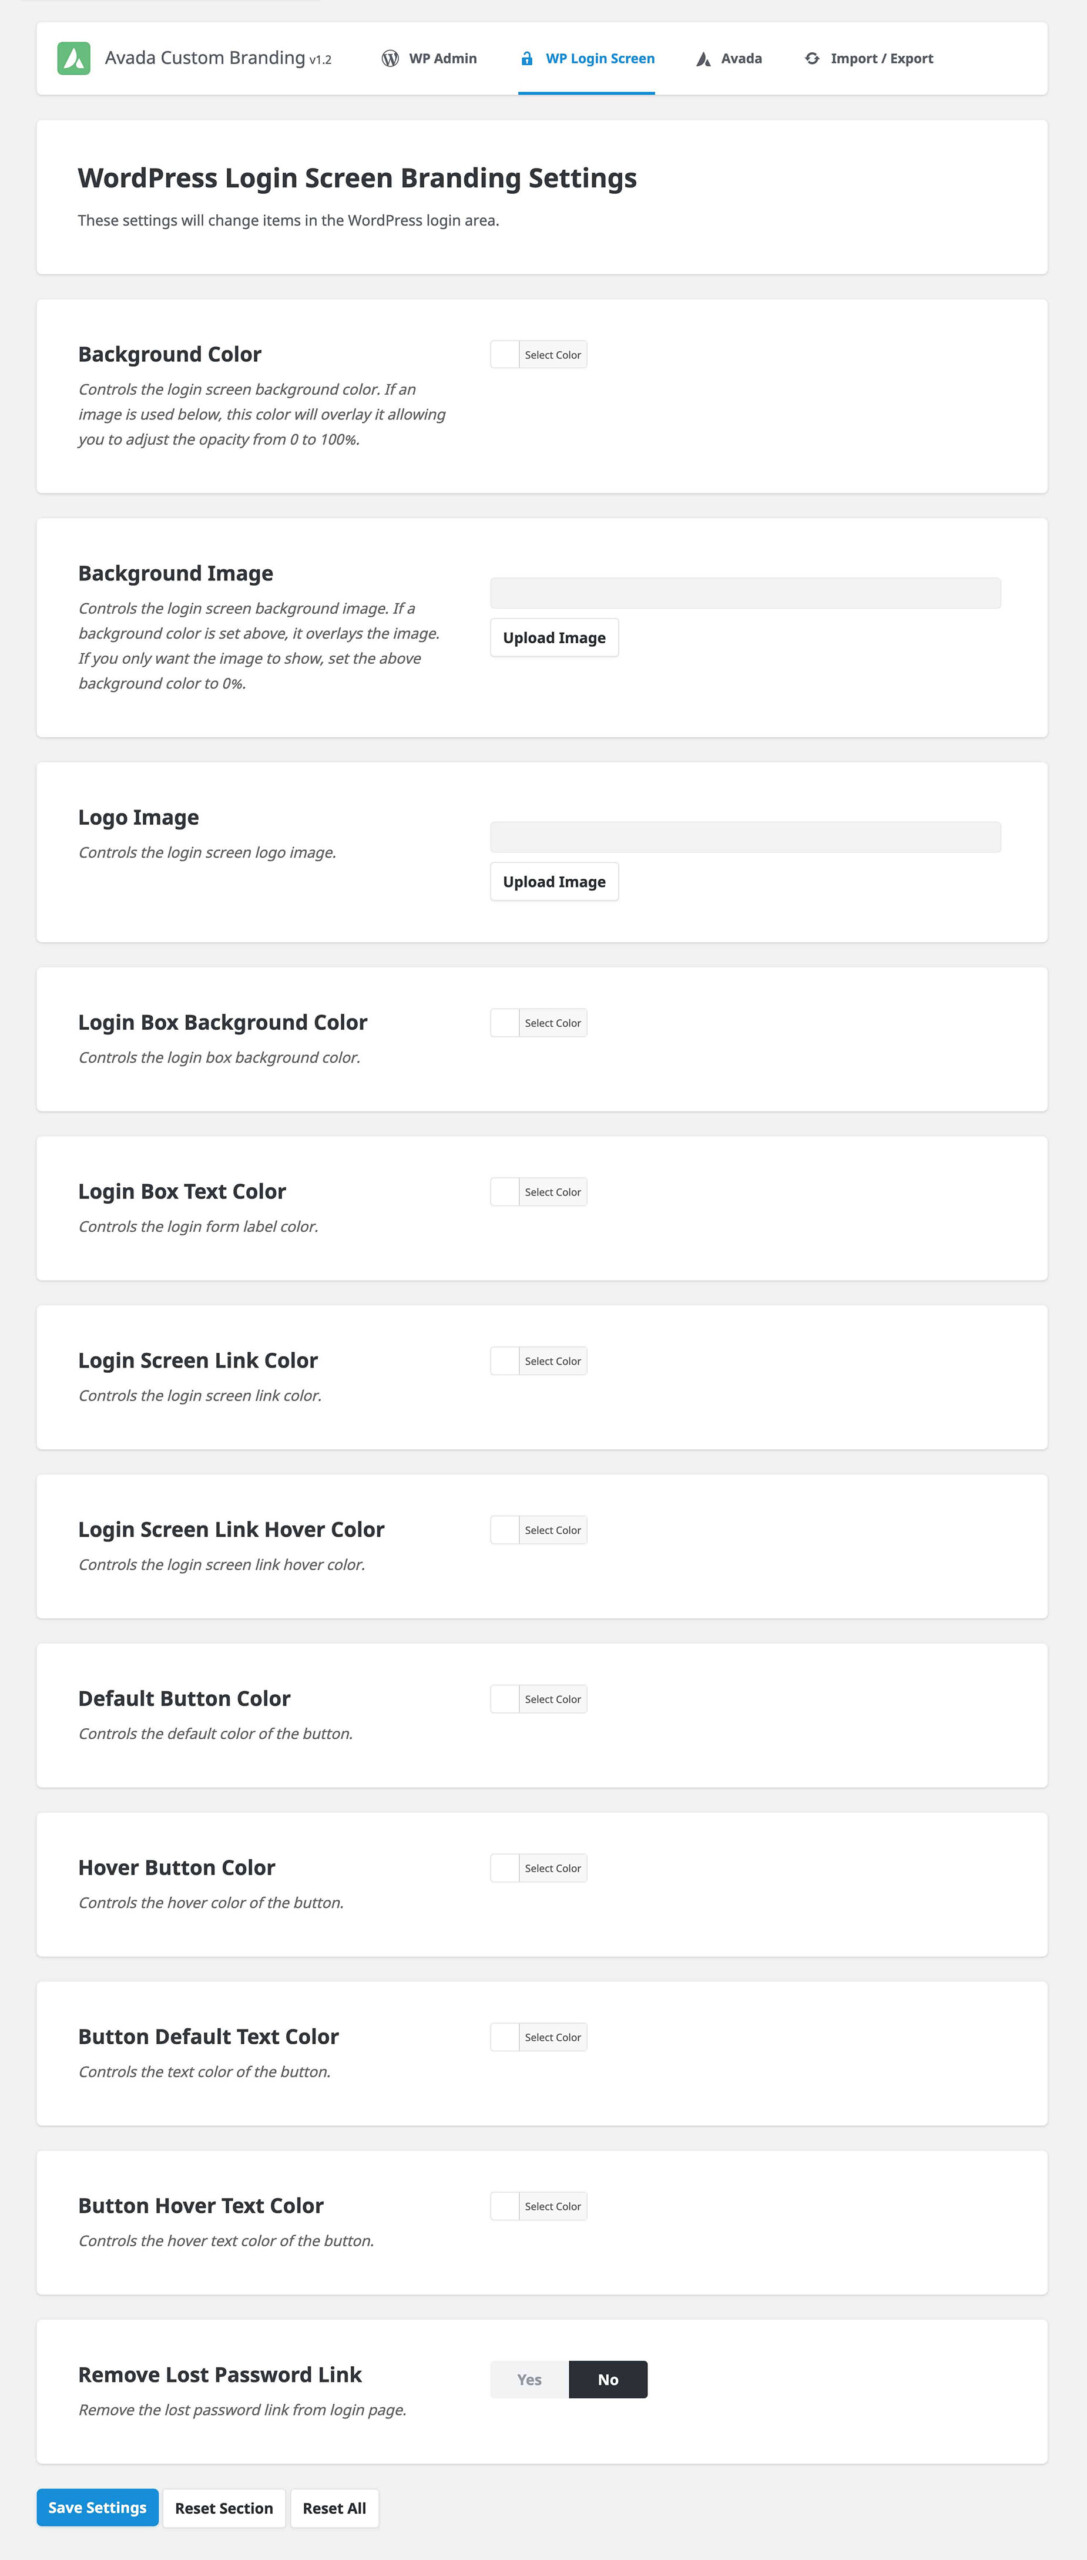
WordPress Login Screen Branding Settings

This tab is where you can find the settings that will change the WordPress login area info.

  • Background Color – Accepts a hexadecimal code ( var(–awb-color8) ). Sets the login screen background color. If an image is used below, this color will overlay it allowing you to adjust the opacity from 0 to 100%.
  • Background Image – Upload your own background image to change the login screen background image. If a background color is set above, it overlays the image. If you only want the image to show, set the above background color to 0%.
  • Logo Image – Upload your own logo image to change the login screen logo image.
  • Login Box Background Color – Accepts a hexadecimal code ( var(–awb-color8) ). Sets the login box background color.
  • Login Box Text Color – Accepts a hexadecimal code( var(–awb-color8) ). Sets the login form label color.
  • Login Screen Link Color – Accepts a hexadecimal code ( var(–awb-color8) ). Sets the login screen link color.
  • Login Screen Link Hover Color – Accepts a hexadecimal code ( var(–awb-color8) ). Sets the login screen link hover color.
  • Default Button Color – Accepts a hexadecimal code ( var(–awb-color8) ). Sets the default color of the button.
  • Hover Button Color – Accepts a hexadecimal code ( var(–awb-color8) ). Sets the hover color of the button.
  • Button Default Text Color – Accepts a hexadecimal code ( var(–awb-color8) ). Sets the text color of the button.
  • Button Hover Text Color – Accepts a hexadecimal code ( var(–awb-color8) ). Sets the hover text color of the button.
  • Remove Lost Password Link – Choose from yes or no. Set to yes to remove the lost password link from login page.
Avada Custom Branding > WP Login Screen Panel

Avada Custom Branding Settings

This tab is where you can find the settings that will change all areas of the Avada interface.

  • Avada Label – Set your own text to replace all instances of “Avada” label.
  • Remove Avada Admin Bar Menu – Choose from yes or no. Set to yes to remove the Avada menu item from admin bar on front-end.
  • Remove Dashboard Main Menu Items – Removes the selected menu items from the dashboard menu and the Avada WP admin menu. Choose from Dashboard, Options, Websites, Patcher, Plugins, Changelog, Support, and Status.
  • Remove Dashboard Sticky Menu Items – Removes the selected menu items from the dashboard sticky menu and the Avada WP admin menu. Choose from Layouts, Layout Sections, Icons, Library, Sliders, Slides, and Export / Import.
  • Rename Avada Post Type Menus – Set your own text to rename the admin menu labels for Avada post types which are FAQs, Portfolio, Skills, and Tags.
  • Remove Avada Post Type Menus – Choose to remove any or all of the selected admin menus for post types registered for “Avada”.
  • Avada Logo Image – Upload your own logo to replace the Avada logo on Avada admin pages. Recommended size of the logo: 75px wide x 75px high.
  • Version Number Text – Set your own text to replace text in version number box under logo on Avada admin screens.
  • Avada Menu Icon Image – Upload your own menu icon to replace the menu icon image on Avada admin menu. Recommended size: 20px wide x 20px high.
  • Dashicon Name for Avada Menu Icon – Replaces image icon and default icon for Avada logo in admin menu.
  • Avada Dashboard Welcome Screen – Controls the content of the Avada Dashboard welcome section.
  • Remove Avada Dashboard Additional Resources Links – Removes the additional resources sections from the Avada dashboard.
  • Remove Avada Admin Dashboard Footer – Removes the Avada admin dashboard footer.
  • Avada Custom Branding Menu Icon Image – Controls the menu icon image on Avada Custom Branding admin menu and replaces the Avada logo. Recommended size: 20px wide x 20px high.
  • Dashicon Name for Avada Custom Branding Menu Icon – Replaces the image icon and default icon of the Avada Custom Branding logo in admin menu. Click Here to see all Dashicons.
Avada Custom Branding Settings

Import / Export

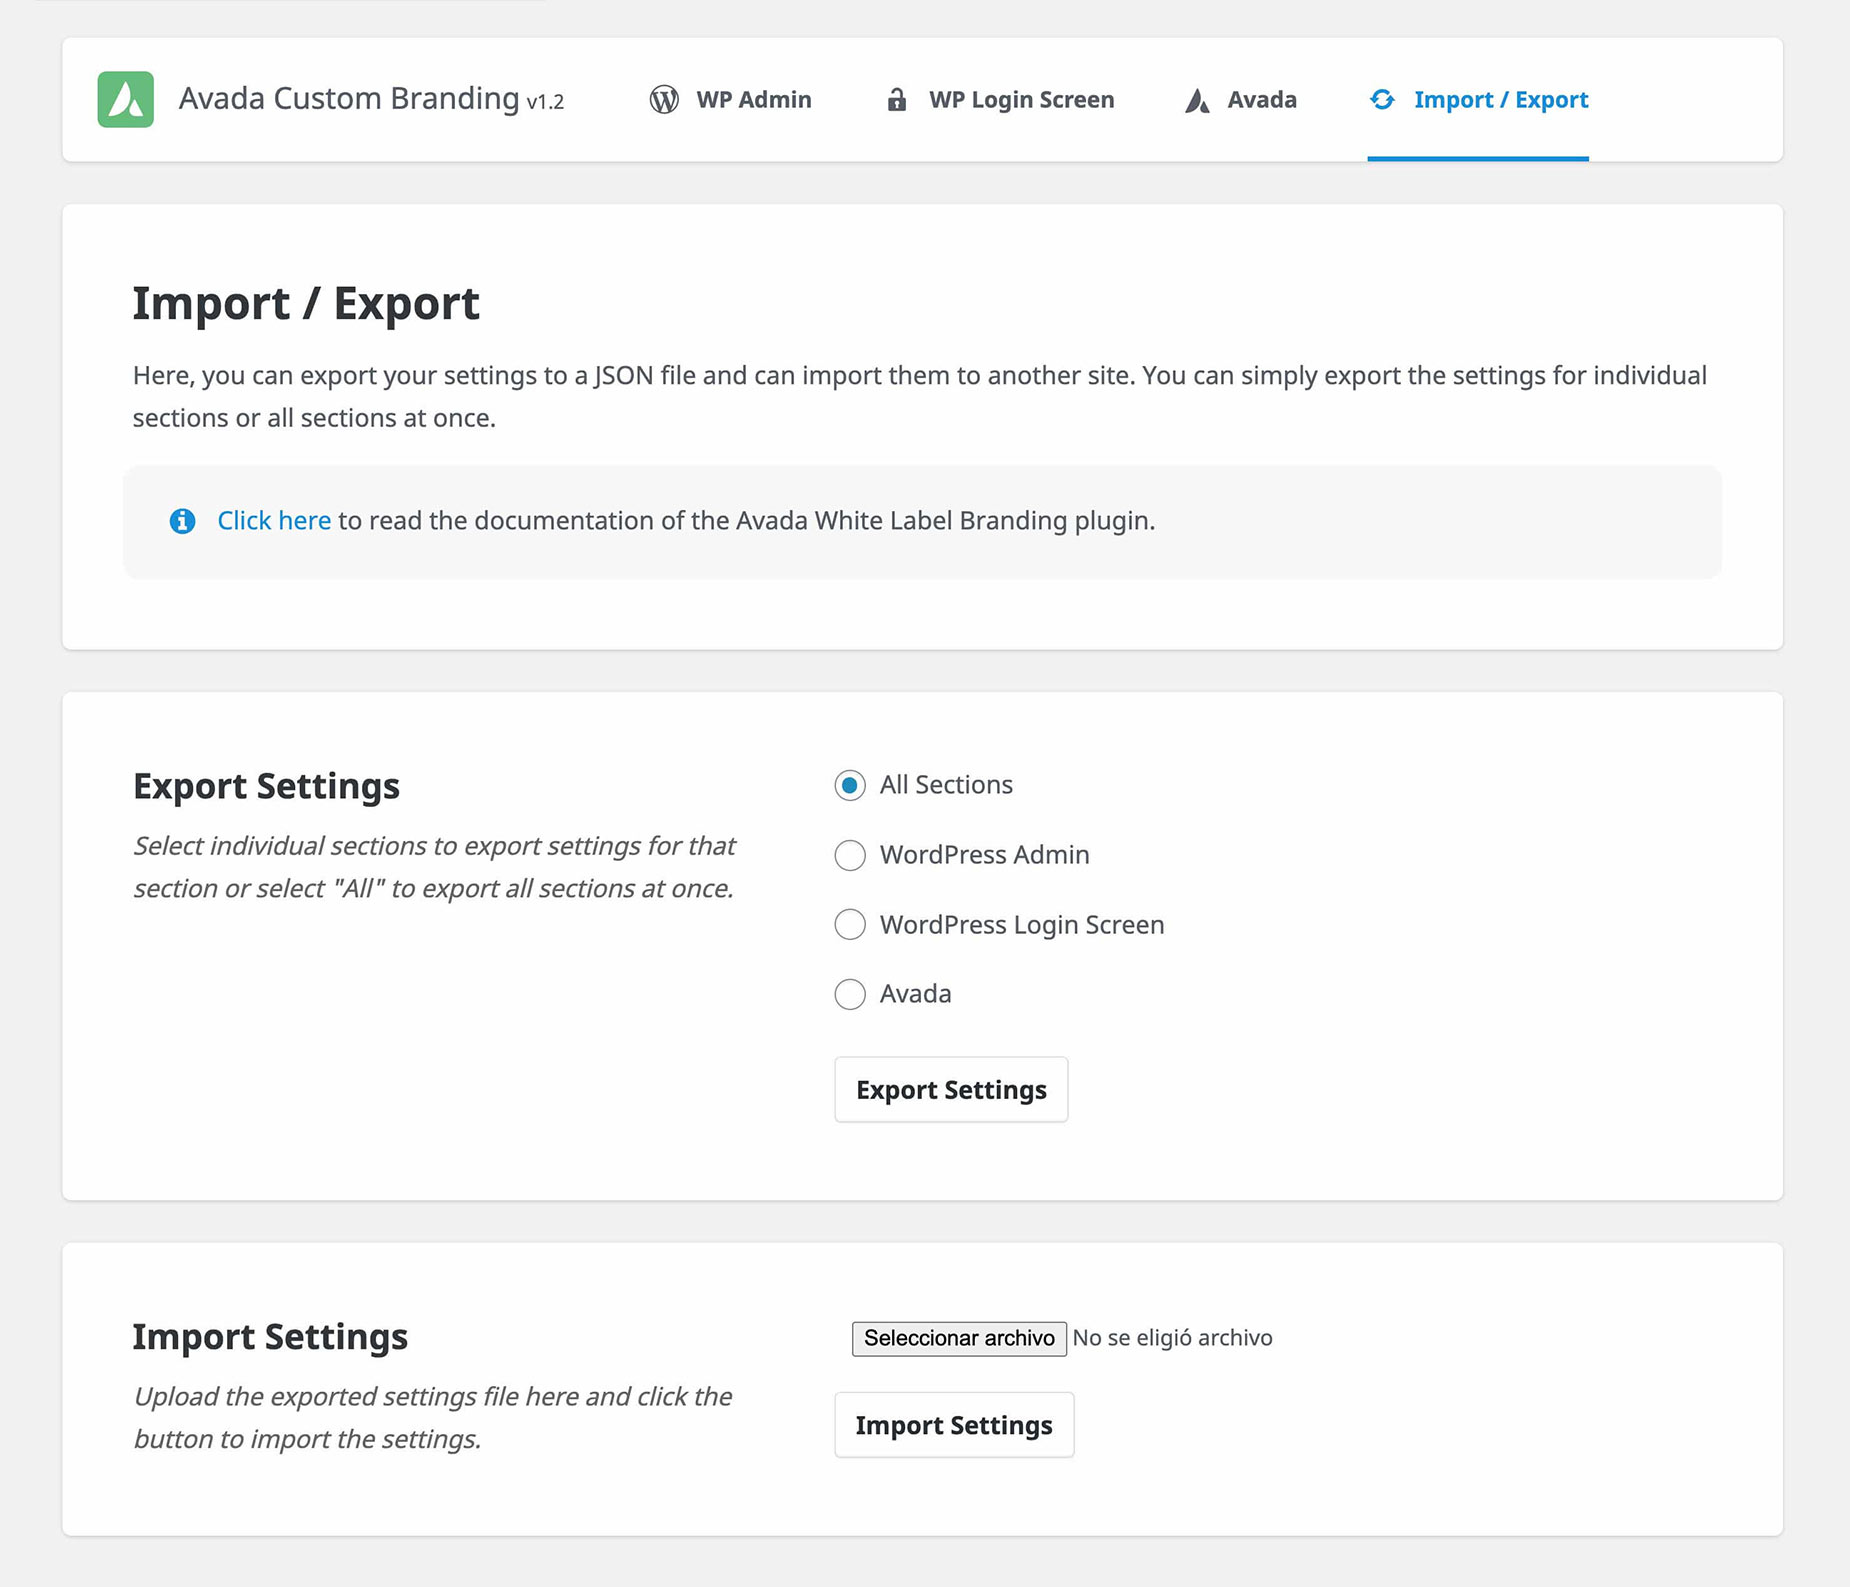
Here, once you have fine tuned your settings, you can export your Fusion White Label Branding settings to a JSON file, for backup, or to import into another site. You can export settings from an individual section, or you can export them all at once.

  • Export Settings – Here you can select the settings of individual sections to export, or you can choose All Sections to export all section settings at once. Settings will be exported as a JSON file to your computer.

  • Import Settings – Here you can select a previously exported JSON settings file to import. This feature will be greatly beneficial if you want to transfer Fusion White Label Branding settings into multiple websites.

Avada Custom Branding > Import / Export Settings

Changelog