How To Manage Your Licenses On My Avada
Last Update: February 19, 2026
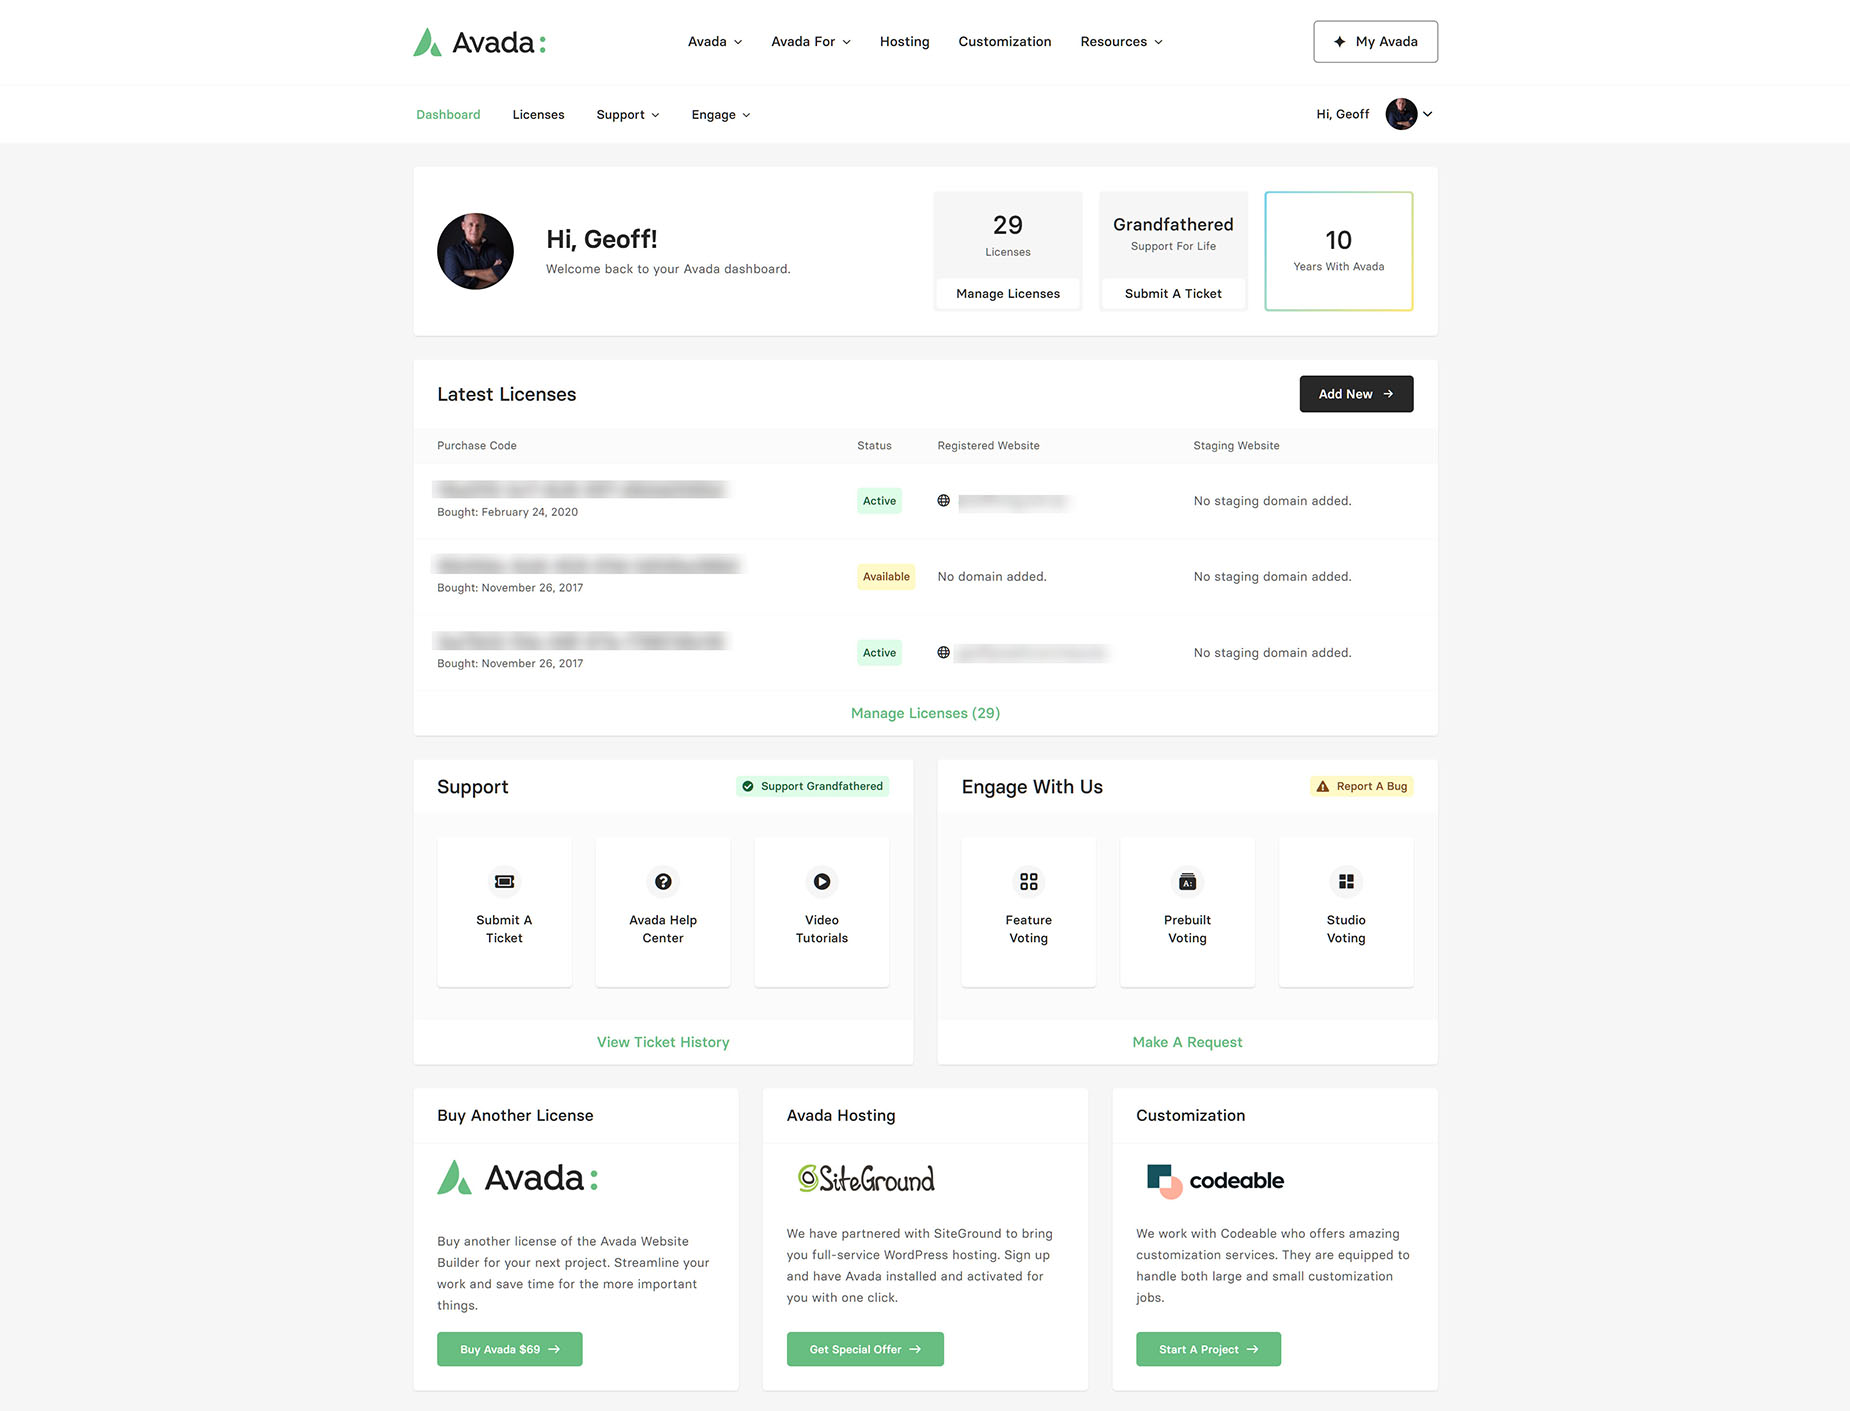
The My Avada Dashboard is a centralized hub that lets you manage every aspect of your Avada experience in one place. From this Dashboard, you can register and manage your Avada licenses, access downloads, track your support history, vote for features, and more. It connects your ThemeForest marketplace purchase directly to your account, making it easy to stay organized and keep your Avada-powered websites under control.
Overview: My Avada Dashboard
Whether you’re managing a single website or multiple websites, the My Avada Dashboard streamlines your workflow and gives you a clear overview of everything related to your account. Beyond license management, you have direct access to a wide range of options, for example:
How To Manage Avada Licenses
Managing your Avada licenses ensures that your websites remain properly registered, supported, and eligible for updates. Whether you’re working on a single project or handling multiple client sites, understanding how to assign, transfer, or deactivate licenses helps you stay organized.
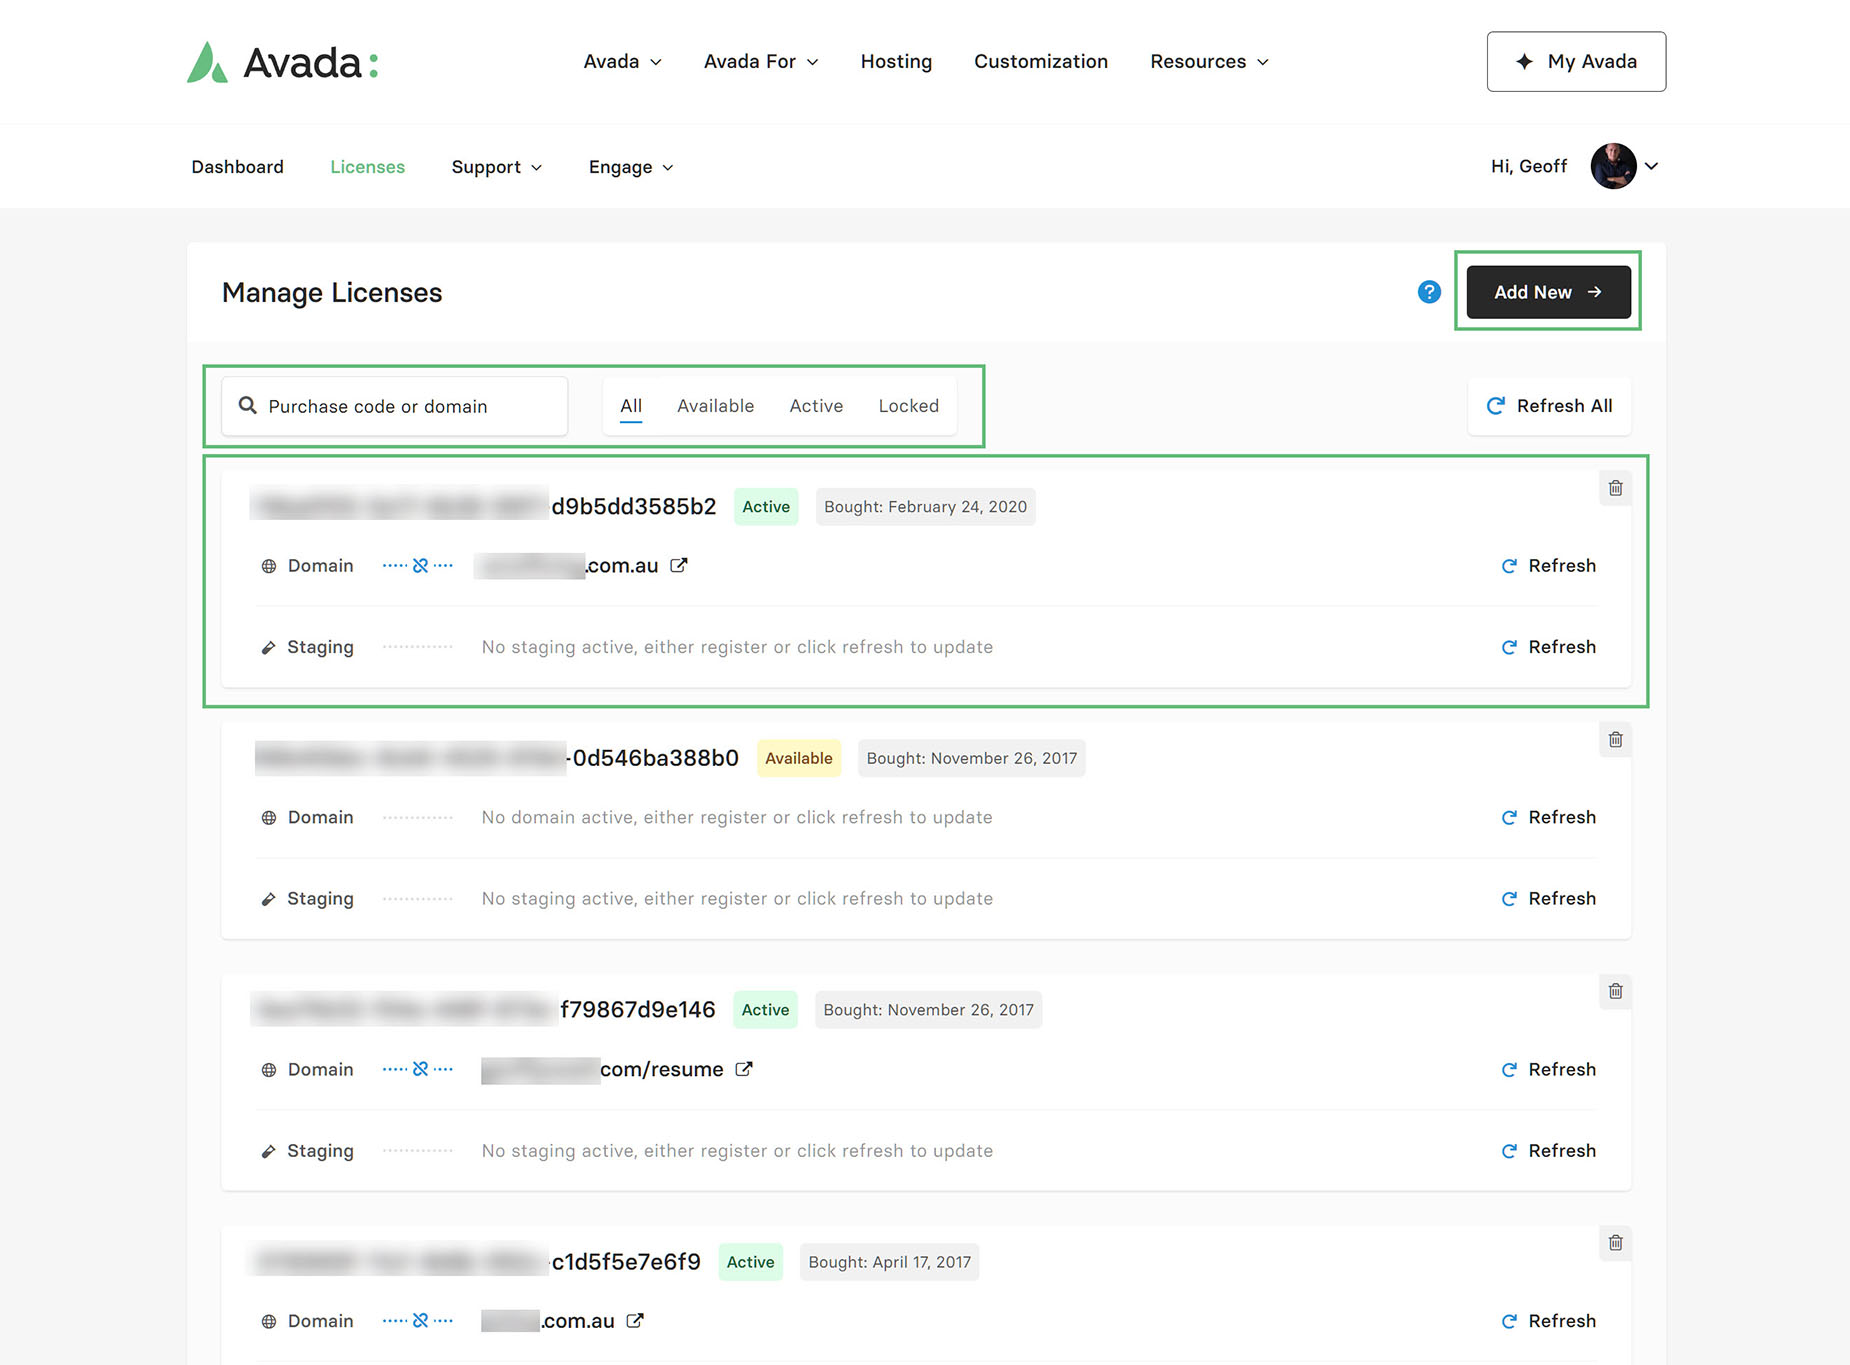
Search & Filter Functionality
Let’s start by looking at the License page and the functionality at the top, as well as in each individual license. As you can see in the screenshot below, under the “Manage Licenses” heading, there is search and filter functionality.
You can search for an individual license by purchase code or by domain name. Next to this, you can also filter by License status (All, Available, Active, Locked). If you have many Avada licences, this search-and-filter functionality will help you quickly find the licence (s) you want to manage.
Individual Licenses
Under this are the individual licenses. First, you can see the purchase code, the license status, and the purchase date.
Below this, you can see whether the purchase code is associated with a domain, and, if so, a link and the domain name are listed. The link, as is made clear if you mouse over it, allows you to unregister the license on the domain. You would do this if you were shutting the site down and wanted to reuse the license on another site.
There is also a small “Delete” icon at the far right for each license. This is to remove the license from My Avada. You would do this if you wanted to add that license to another My Avada account, for example, if you were a developer and were transferring the license to the end user.
Above and below this “Delete” icon are “Refresh” links. There is a “Refresh All” link at the top to refresh all licenses, or you can refresh each license individually, as well as the main domain or a staging domain.
If you have added a purchase code to My Avada, and it shows as “Available” as the second one does in the screenshot below, and then you use that purchase code on a website to register Avada, and then come back here and click “Refresh”, you would then see that the license is connected to the domain, and the License showing as Active. The same is possible for a Staging domain. Please see the How To Set Up An Avada Staging Site help file for more information.
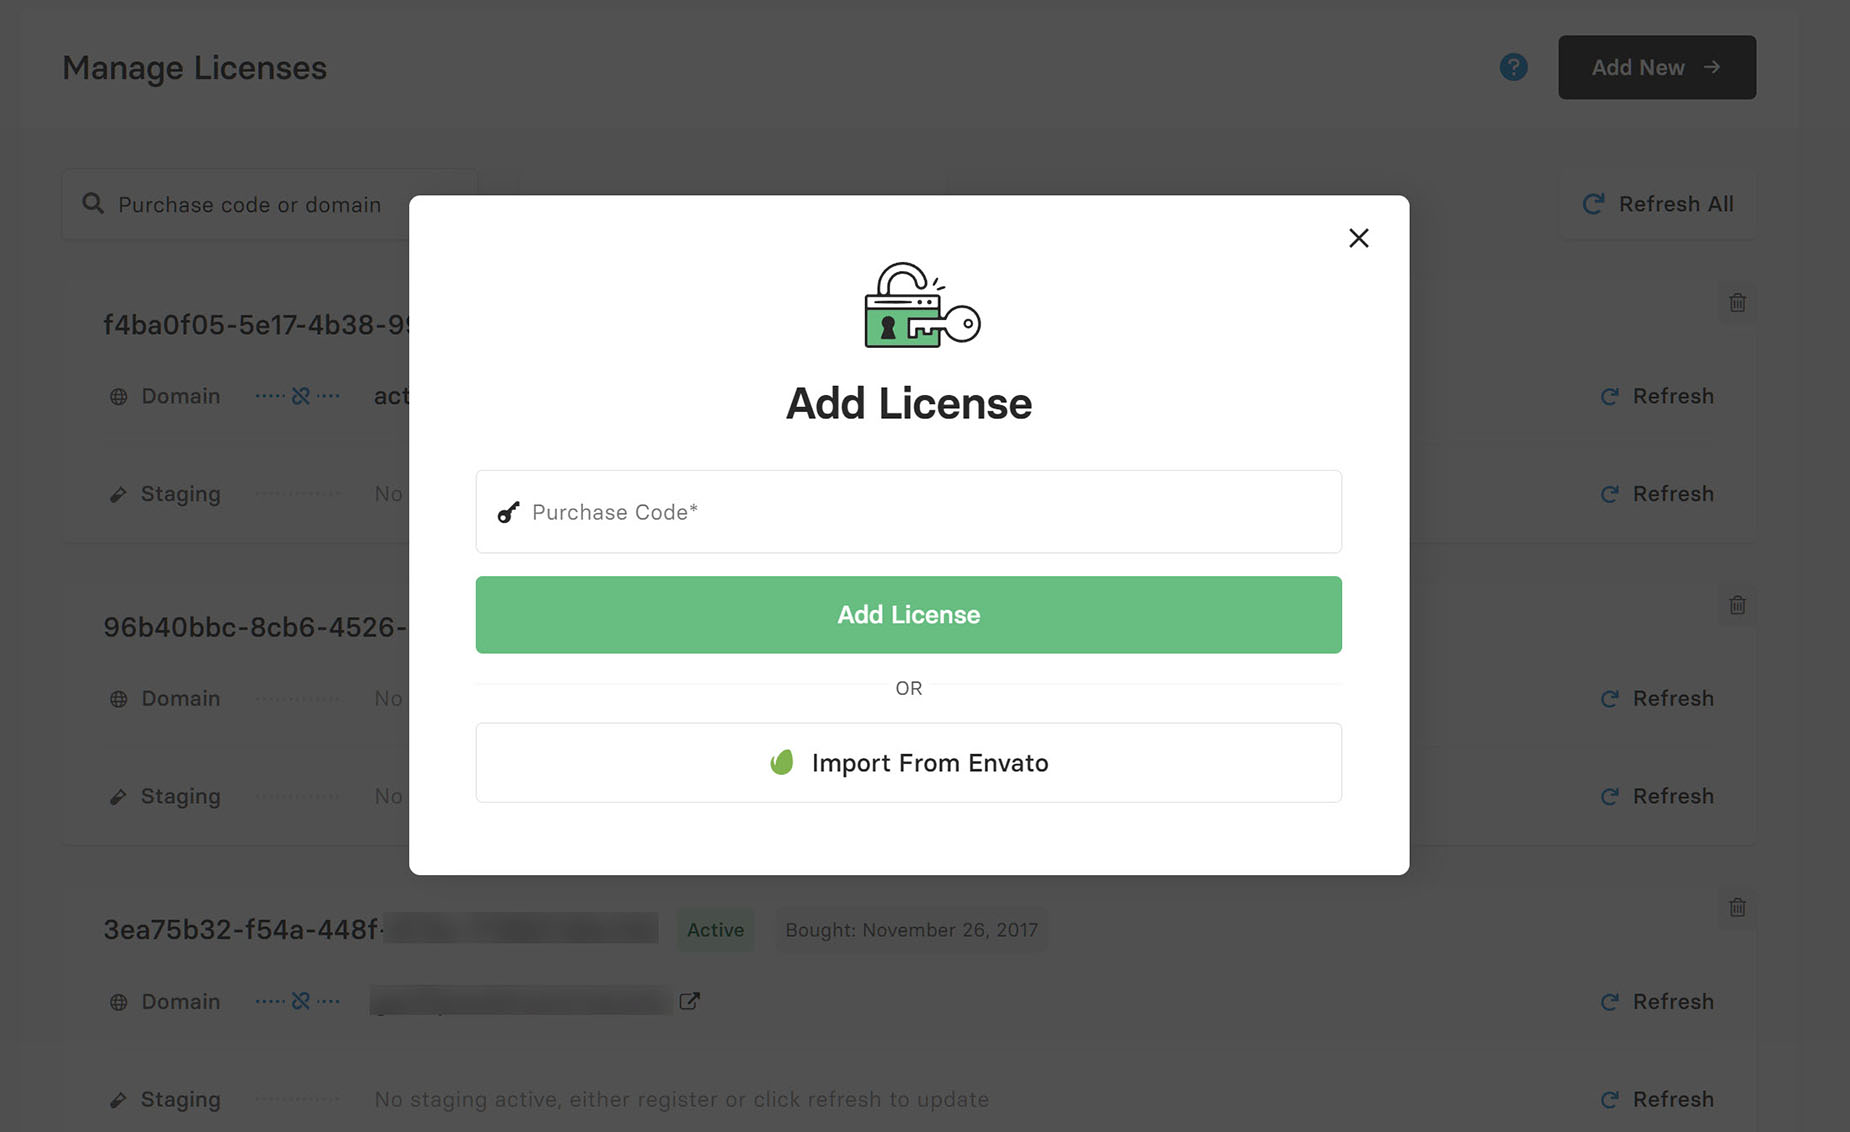
How To Add A New License
At the top of the page is the “Add New” button. This is for adding new licenses to your account. Clicking on this brings up an Add License window, where, just like at the registration stage, you can add an individual license, or you can bulk import your licenses from your Envato (Themeforest) account.
See the Create A User Account section of the how to register for My Avada help file for details on how this works.
Avada License Information
Make sure you familiarize yourself with Avada’s full license terms. This document outlines the terms of the license and explains exactly how to use it for development installations, such as localhost and staging sites.
Avada License/Registration FAQ
Please see the Avada License/Registration FAQ’s for answers to many commonly asked questions about Avada licensing and registration.


