How To Build A Custom 404 Layout
Last Update: November 16, 2025
As part of Avada Layouts, you can now create a fully customized 404 Layout on your website, using the full design power of Avada Builder. No longer do your users have to see boring 404 pages, as now you can create something that matches the visual style of your site.
Wait.. What is this 404, you might ask? Put simply, a 404 page is just an error page that is displayed when the URL you enter does not lead to an existing page. Read on to learn how to build a Custom 404 Layout in Avada, and watch the video for a visual overview.
The Avada Layouts Interface
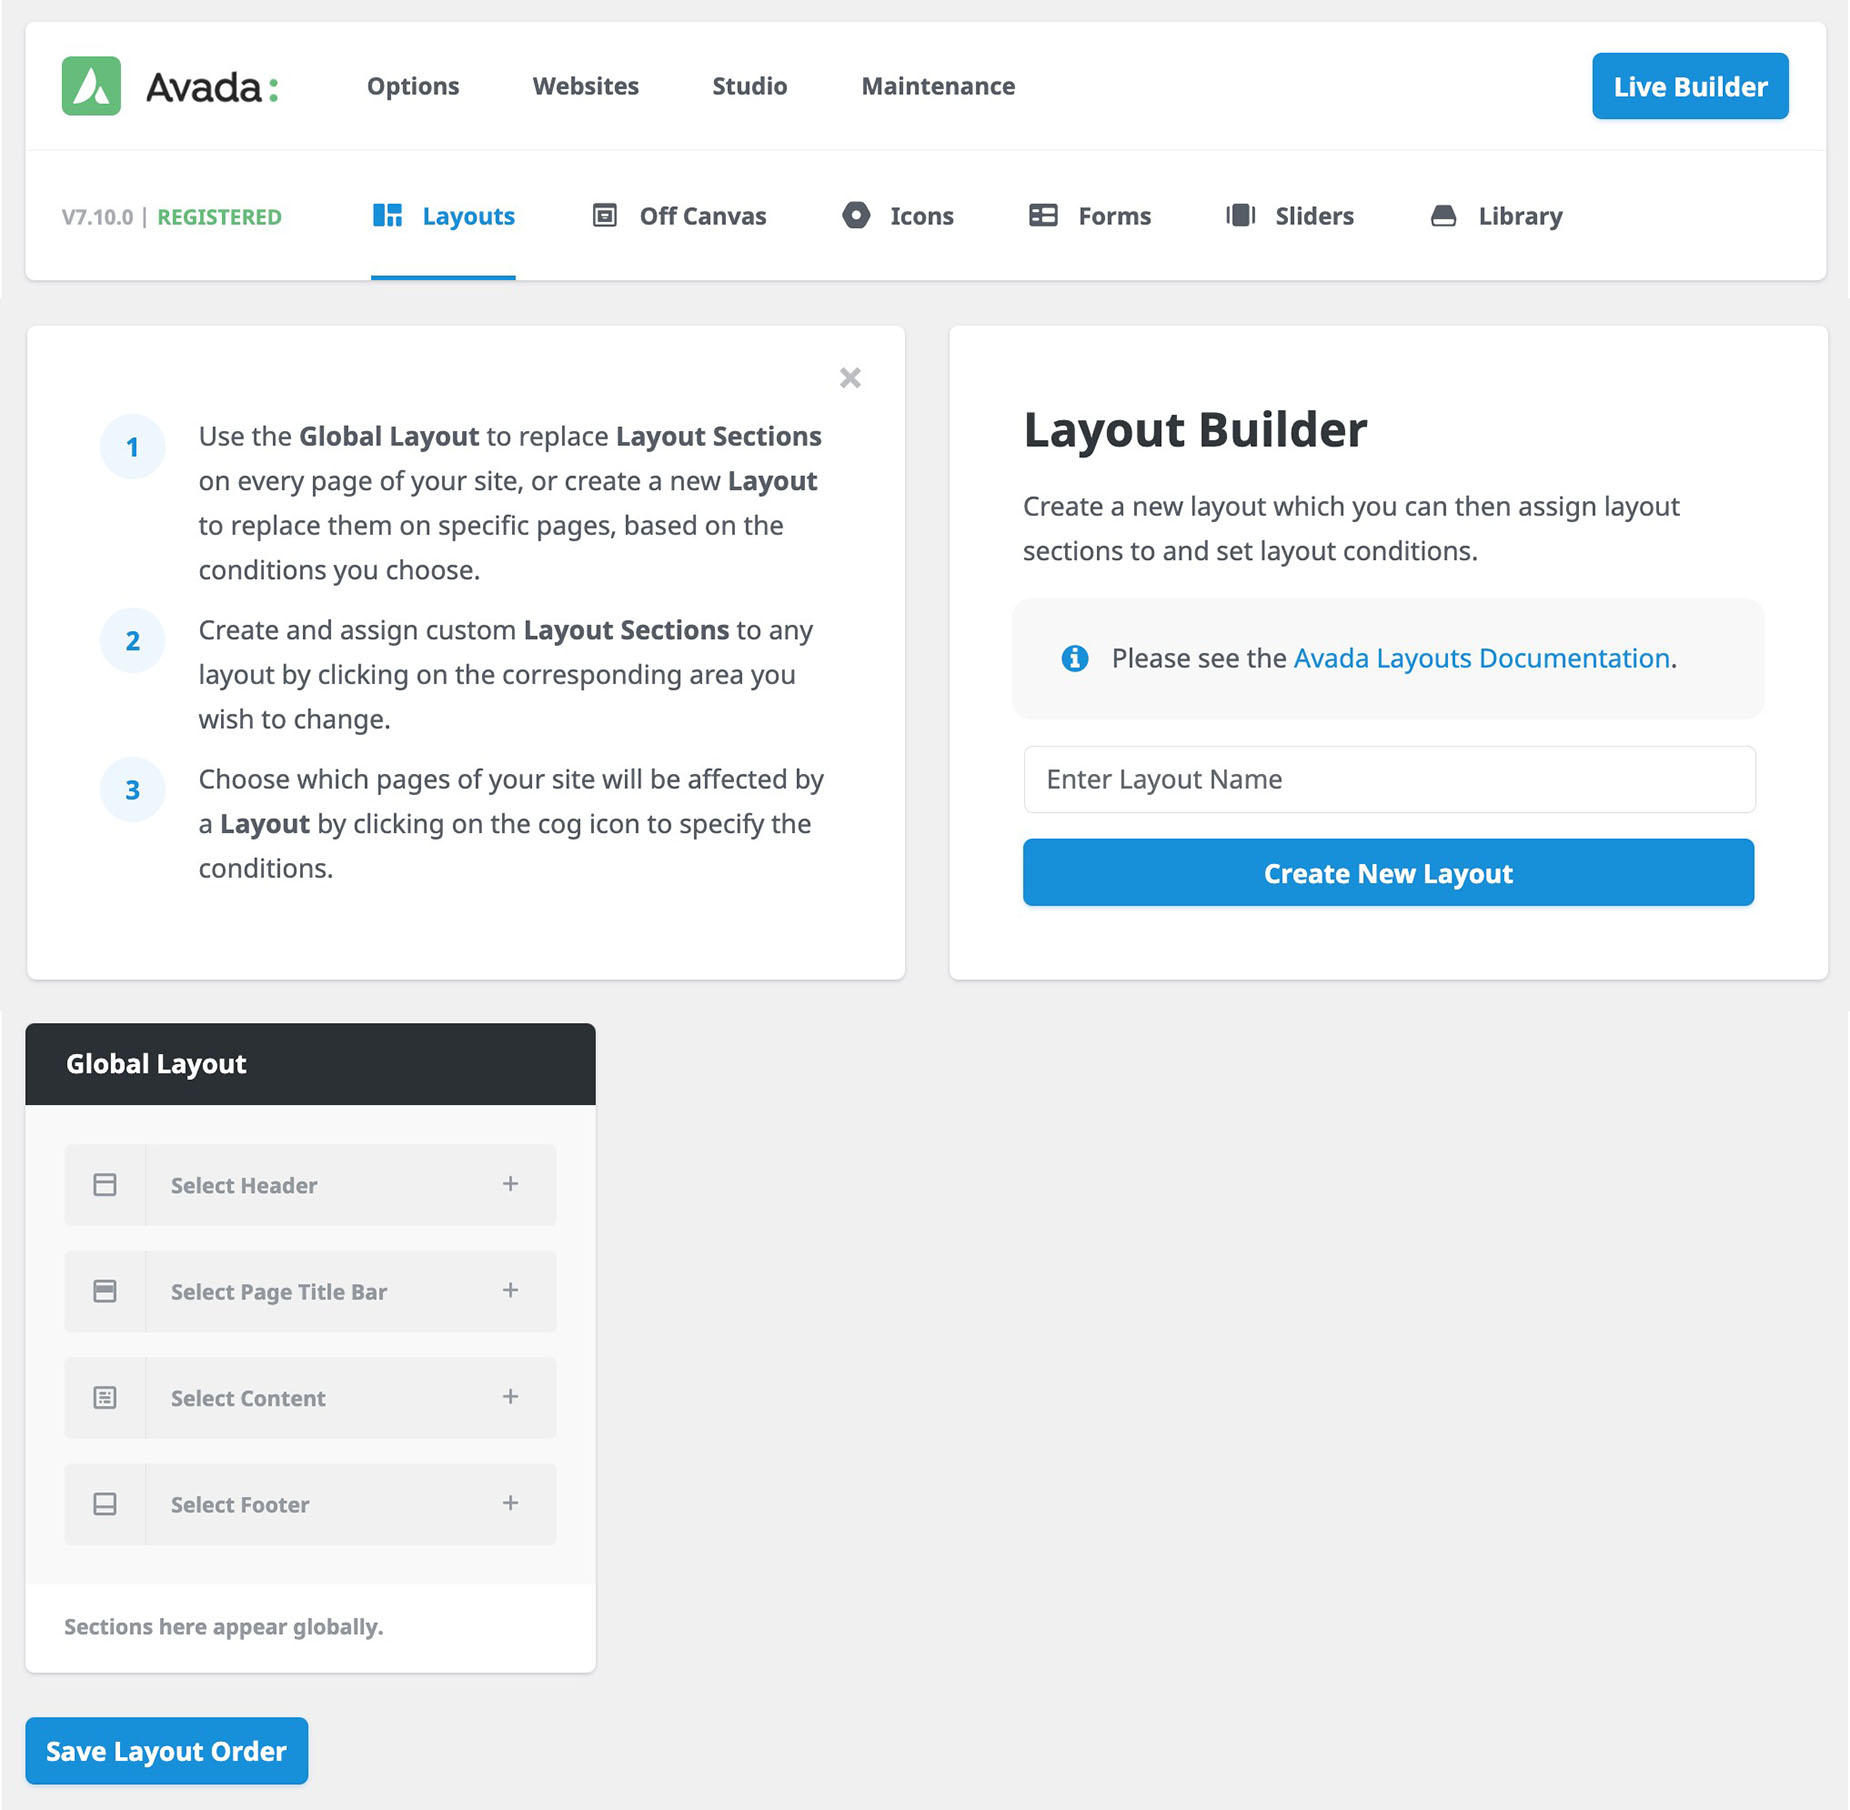
You find Avada Layouts at Avada > Layouts, directly from the WordPress Sidebar, or from Layouts on the Avada Dashboard. This interface is where you both create and manage your Layouts and Layout Sections. Initially, there is just a Global Layout, and by default this is empty, with no attached Layout Sections, as you can see below.
To create a Custom 404 Page, the first thing to do is to create a Custom Layout. See the Introducing Avada Layouts doc for a general overview of the Theme Builder, and Understanding Layout and Layout Sections for more information on the difference between these two parts of Avada Layouts, but for now, let’s now look at creating the Custom 404 Layout.
Creating A Custom Layout
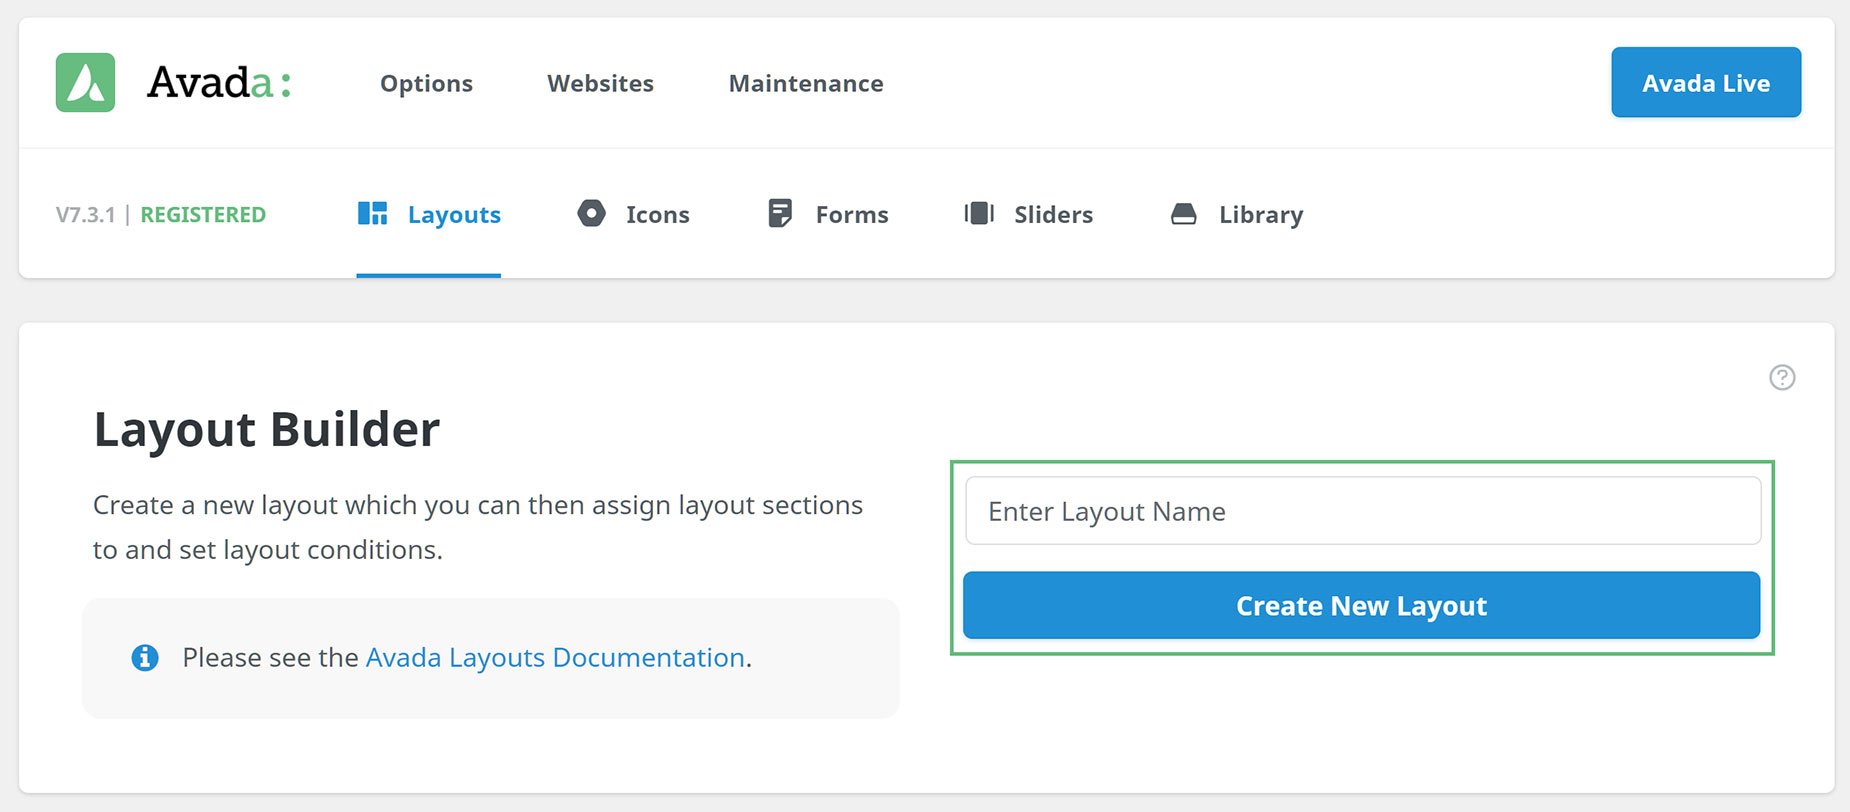
The first step in creating a Custom 404 Layout, is to create the actual conditional layout itself. This is done on the Layouts page, by simply adding a name (in this case, perhaps 404 Layout would be most appropriate) and then clicking on Create New Layout in the Layout Builder, as can be seen below.
Creating Custom Layout Sections
The page reloads and the Layout is added to Avada Layouts. At this point is has no conditions set, and no Custom Layout Sections added. Now we have a 404 Layout, we can begin to create the Layout Sections that we will add to it. In this example, we will add both a Custom page Title Bar and a Content Layout Section.
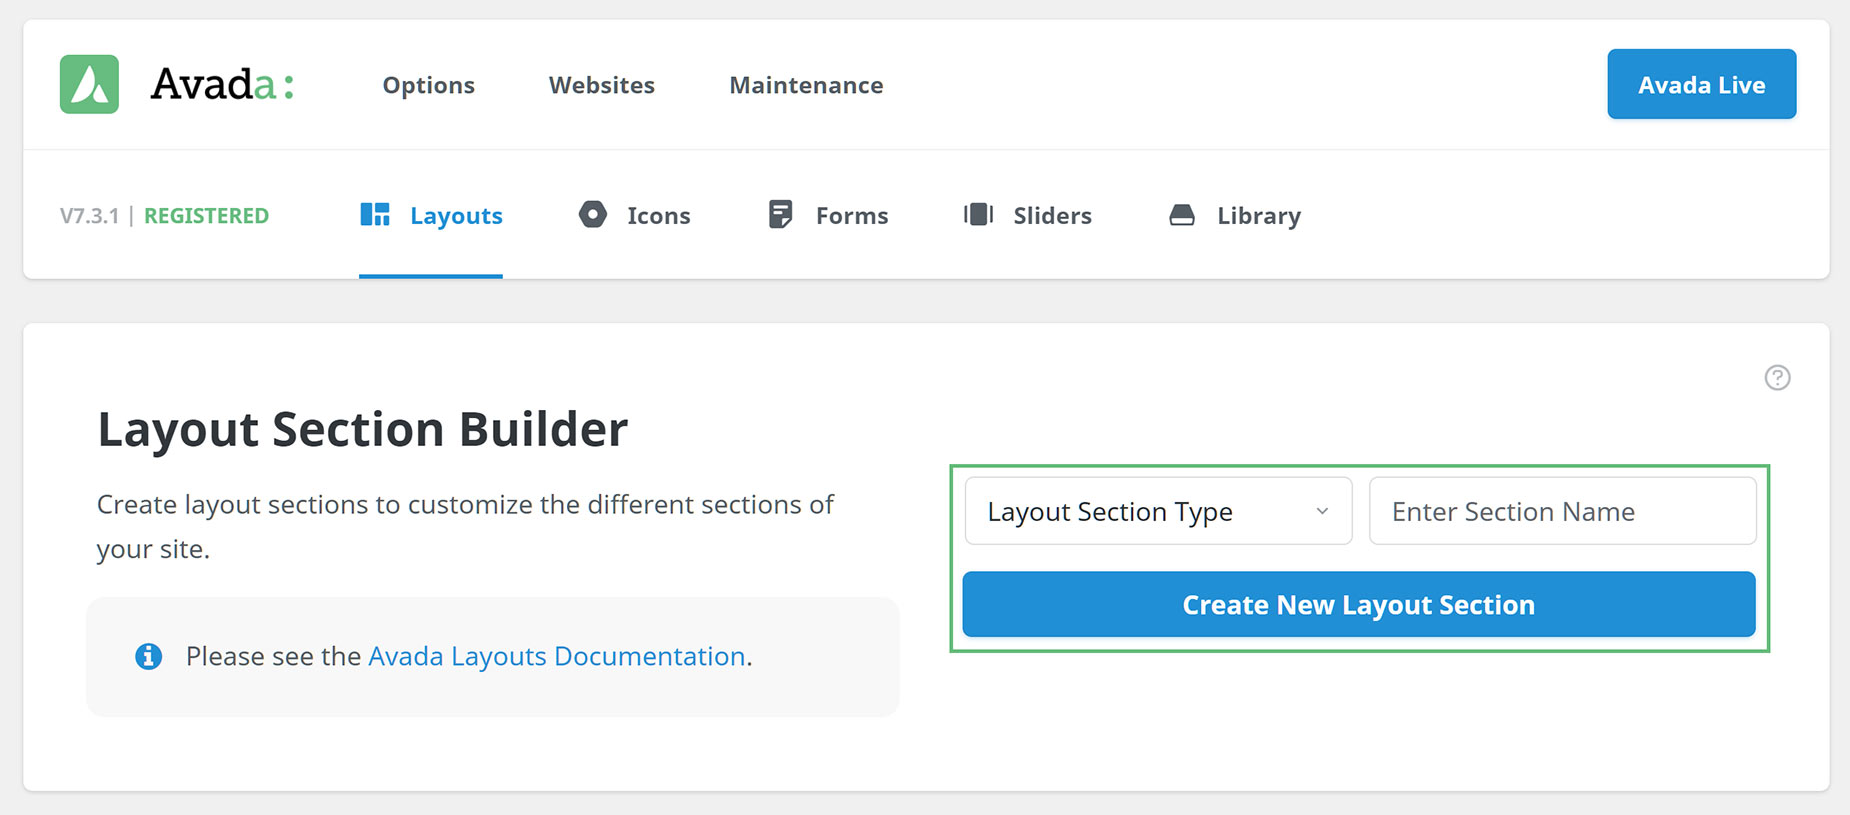
You can create a Custom Layout Section for your 404 Layout in one of two ways. You can head to the Layout Sections page at Layouts > Layout Sections from the Avada Dashboard, and create one from there, as seen below.
Alternatively, you can create one by clicking on the corresponding Layout Section in the existing Layout, and create one from there. The first method just creates a Layout Section, while the second method attaches it to a Layout at the same time. There’s no wrong way to do this, but it’s important to know the differences.
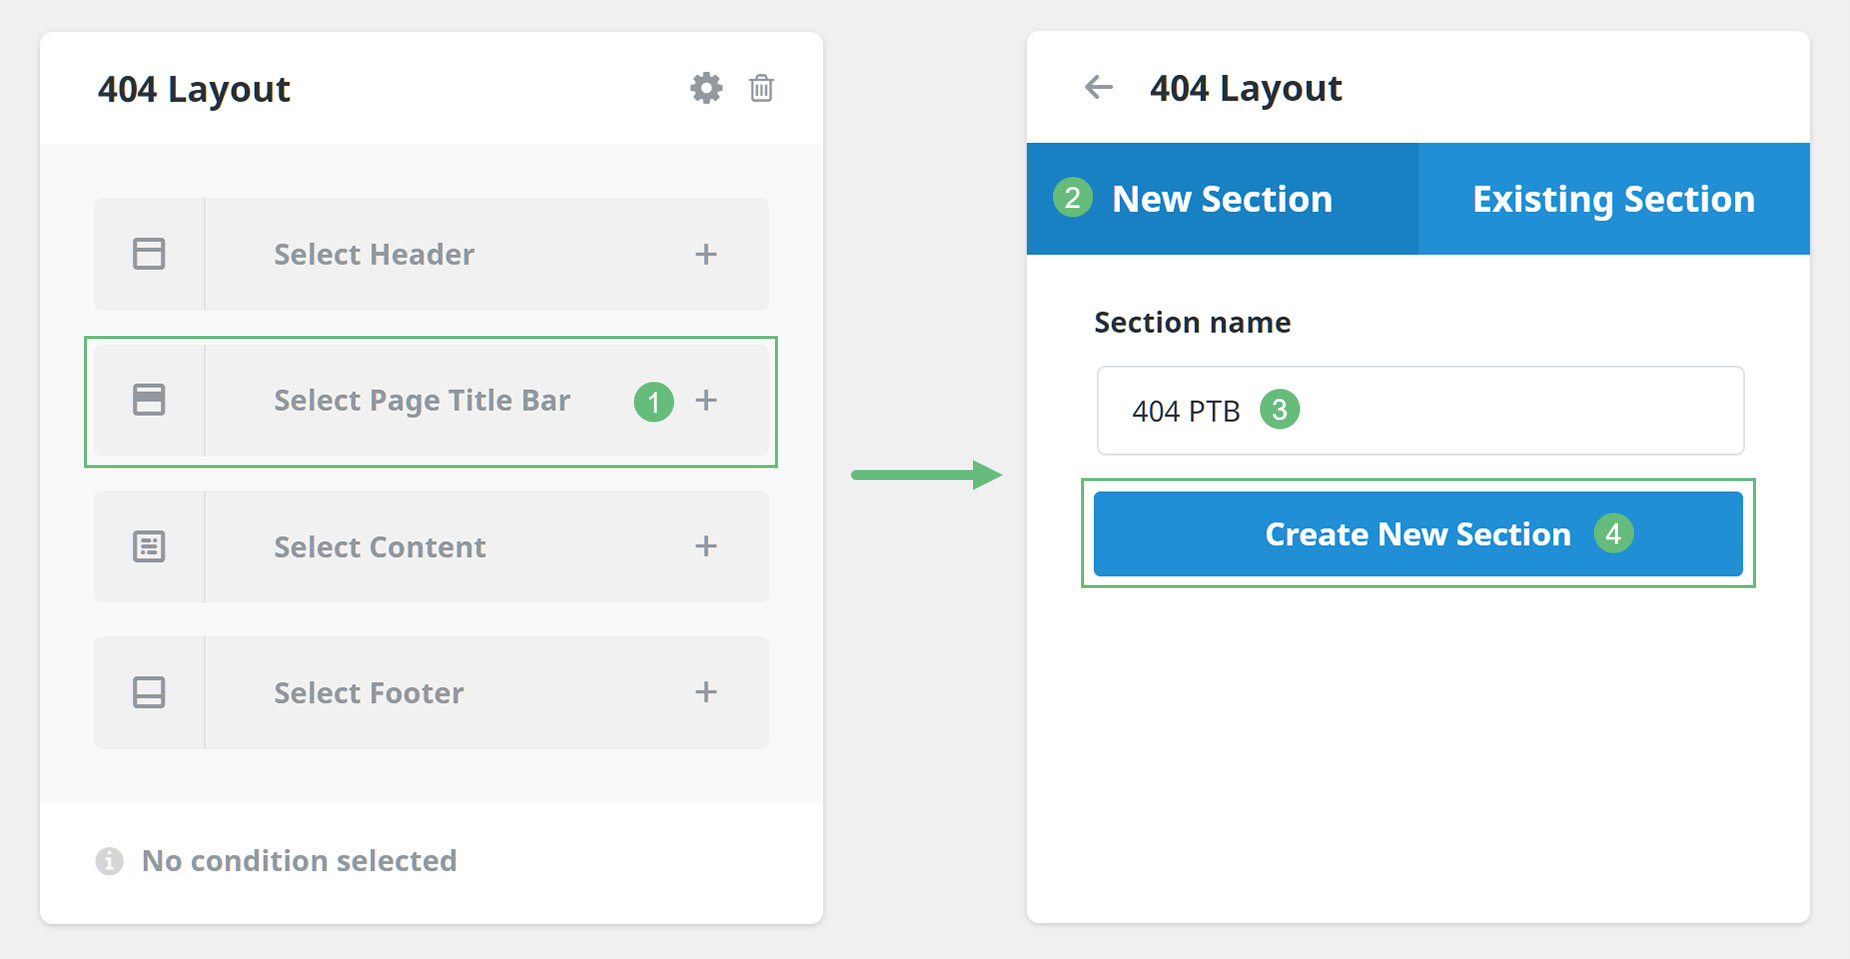
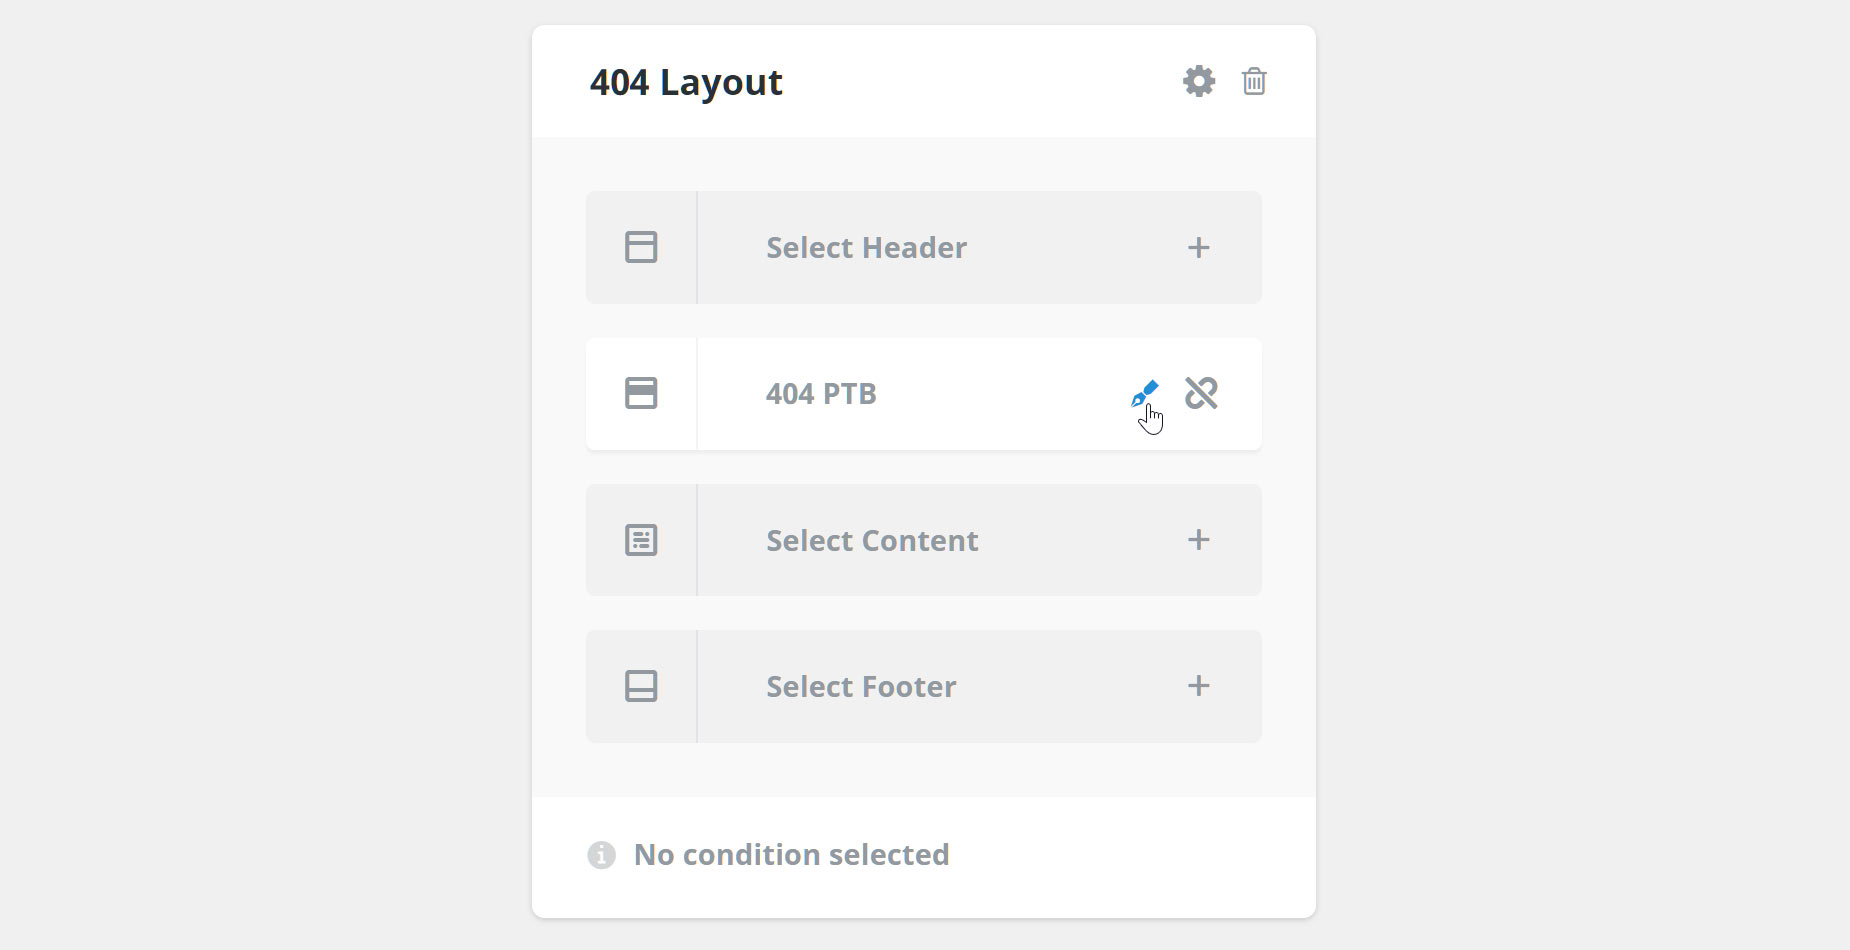
So to create and add the Page Title Bar Layout Section, I would click on the Select Page Title Bar section of the Layout, and in the following dialog, under the New Section tab, I would give it a name (404 PTB would be appropriate) and click on Create New Section. I would then repeat this process for the Content Layout section (404 Content).
This creates and connects the two Layout Sections to the Layout, but at this point, they are still empty. If we mouse over the Layout Section on the Layout, as shown below, we can click on the edit icon to design and build our two Layout Sections.
Editing a Custom Layout Section
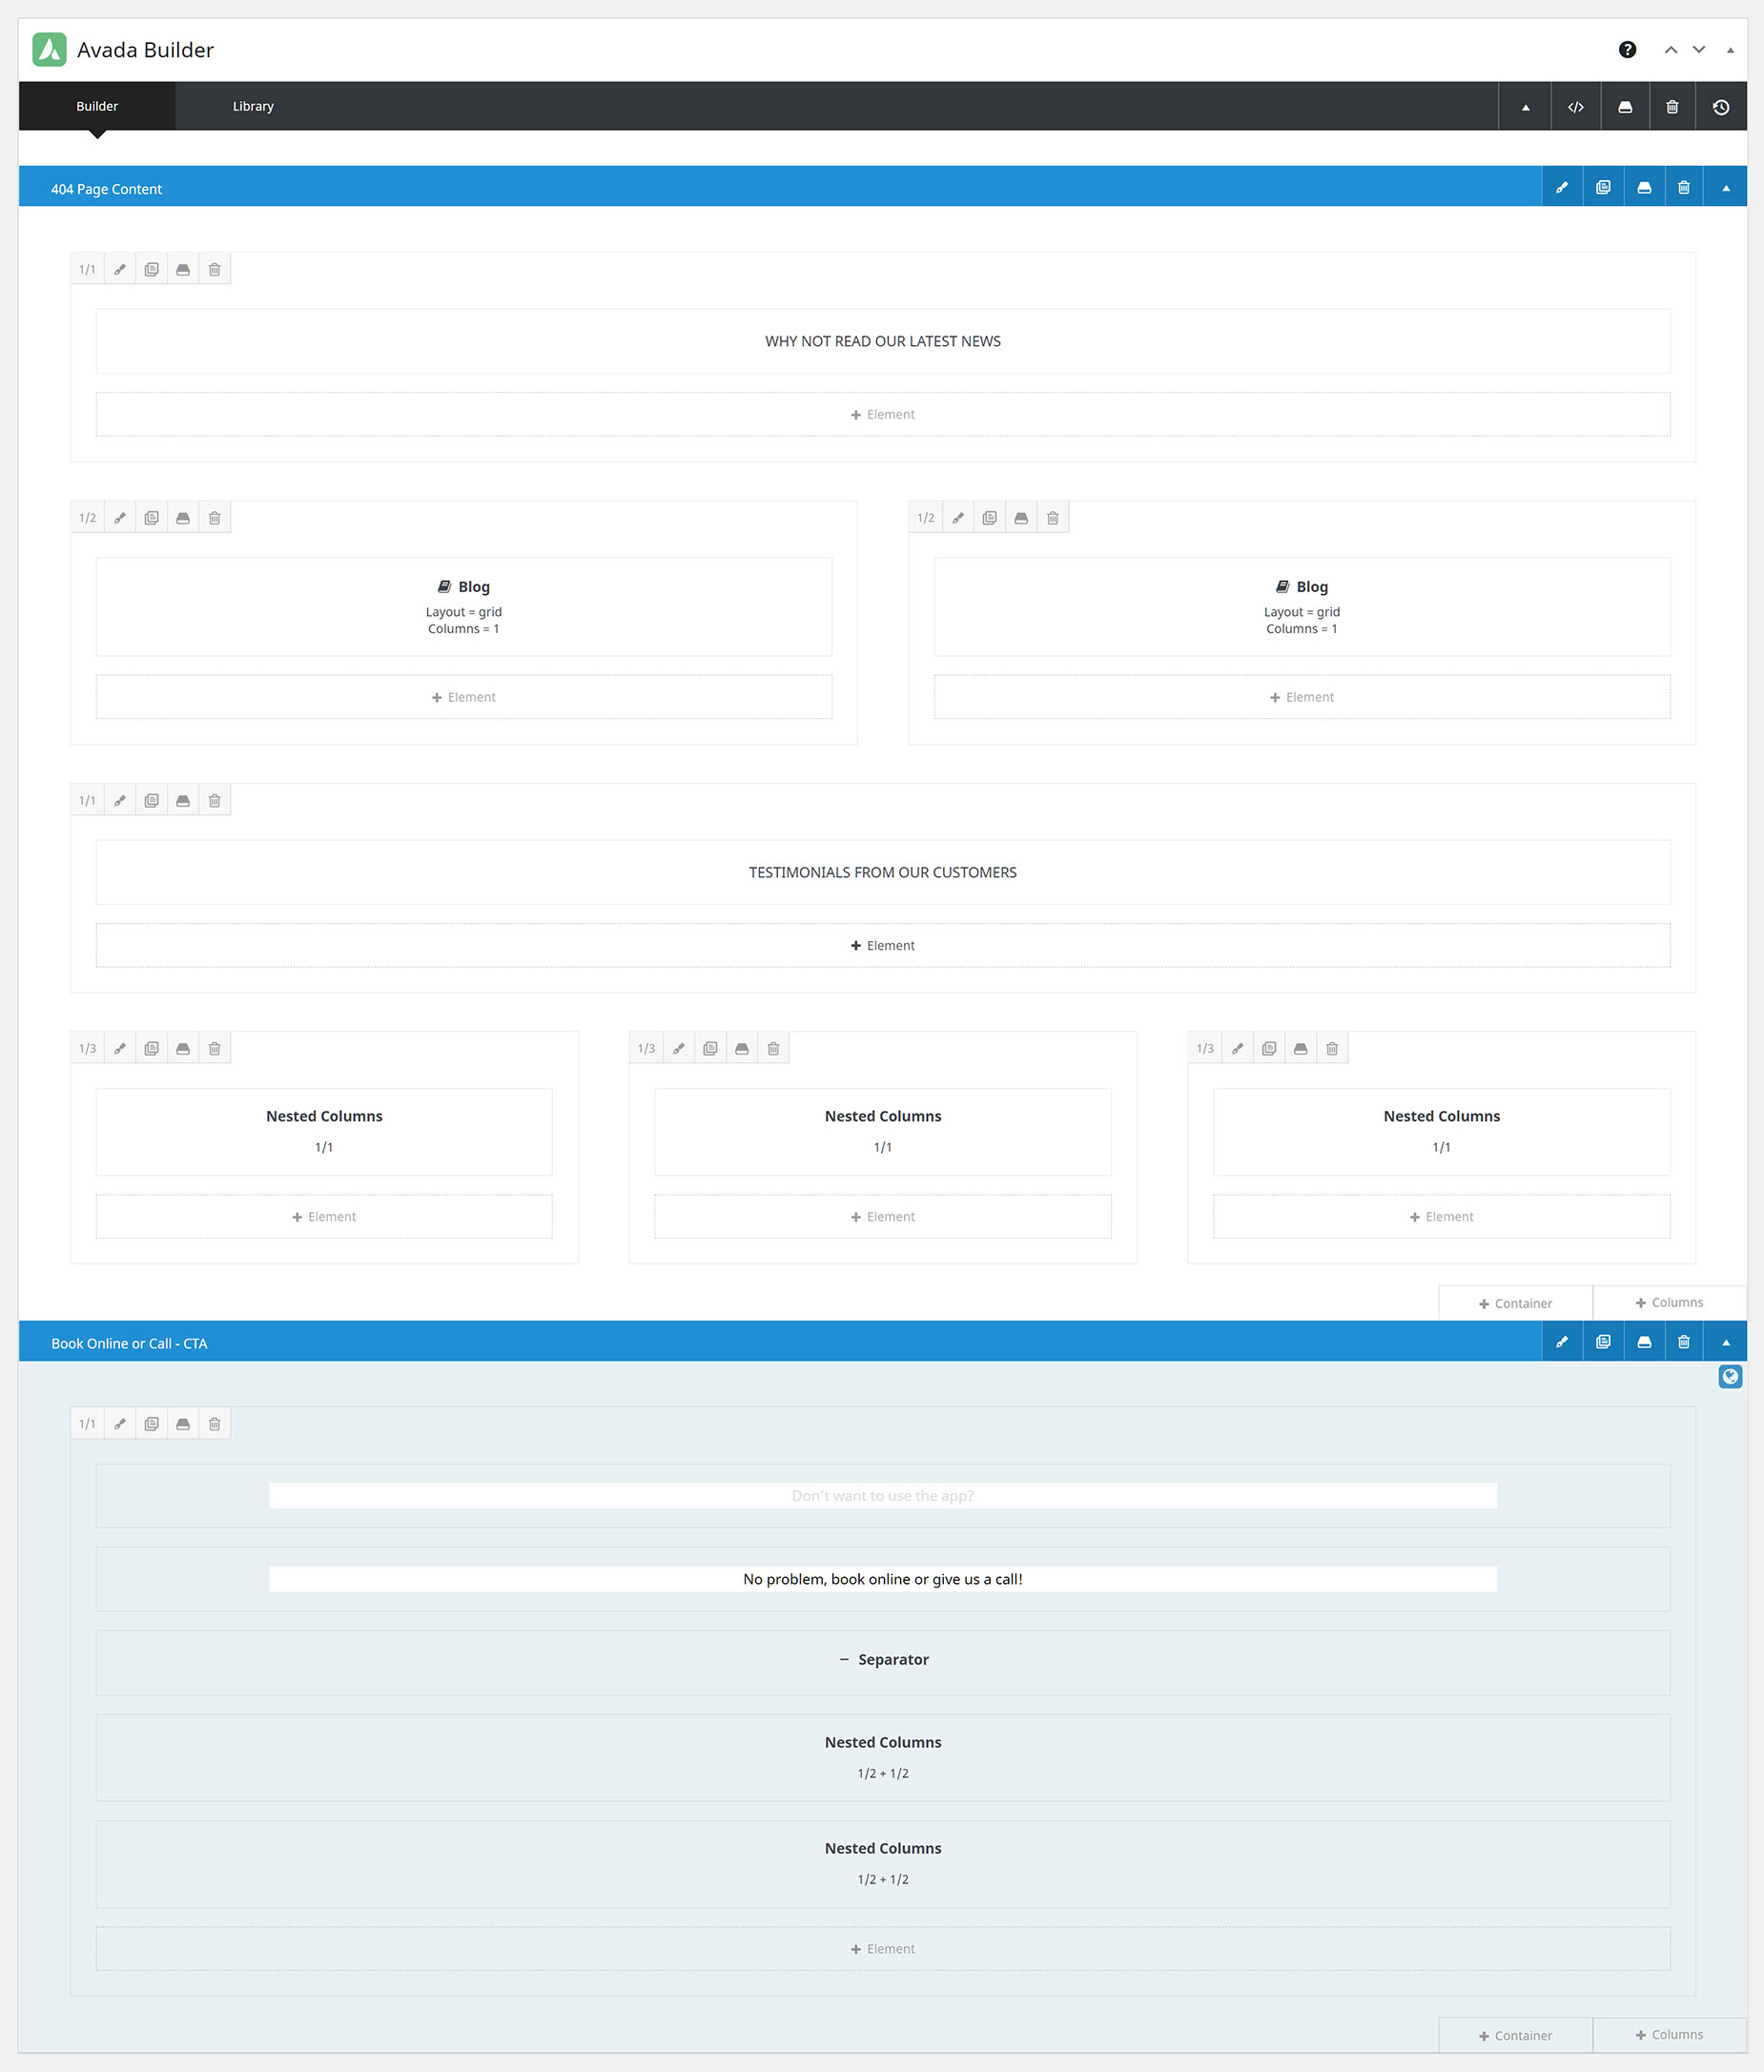
Now we come to the Avada Builder, and here we can create our Custom Layout Sections. You can do this in either the Avada Builder or Avada Live. Please refer to Creating Layout Section Content for more information on this, but in short, you can build anything you want here.
Anything you can build in the Avada Builder can constitute the content of your Custom Page Title Bar and Content Layout Sections. You can have multiple columns, background images, anything. The freedom this gives is enormous. The Layout Section is literally that – a section where the content will show. The content itself comes from the Builder, and what you can do is only limited by your imagination. See below for an example of the Content Layout Section of the 404 Layout on the Taxi Demo.
Setting Conditions For The Layout
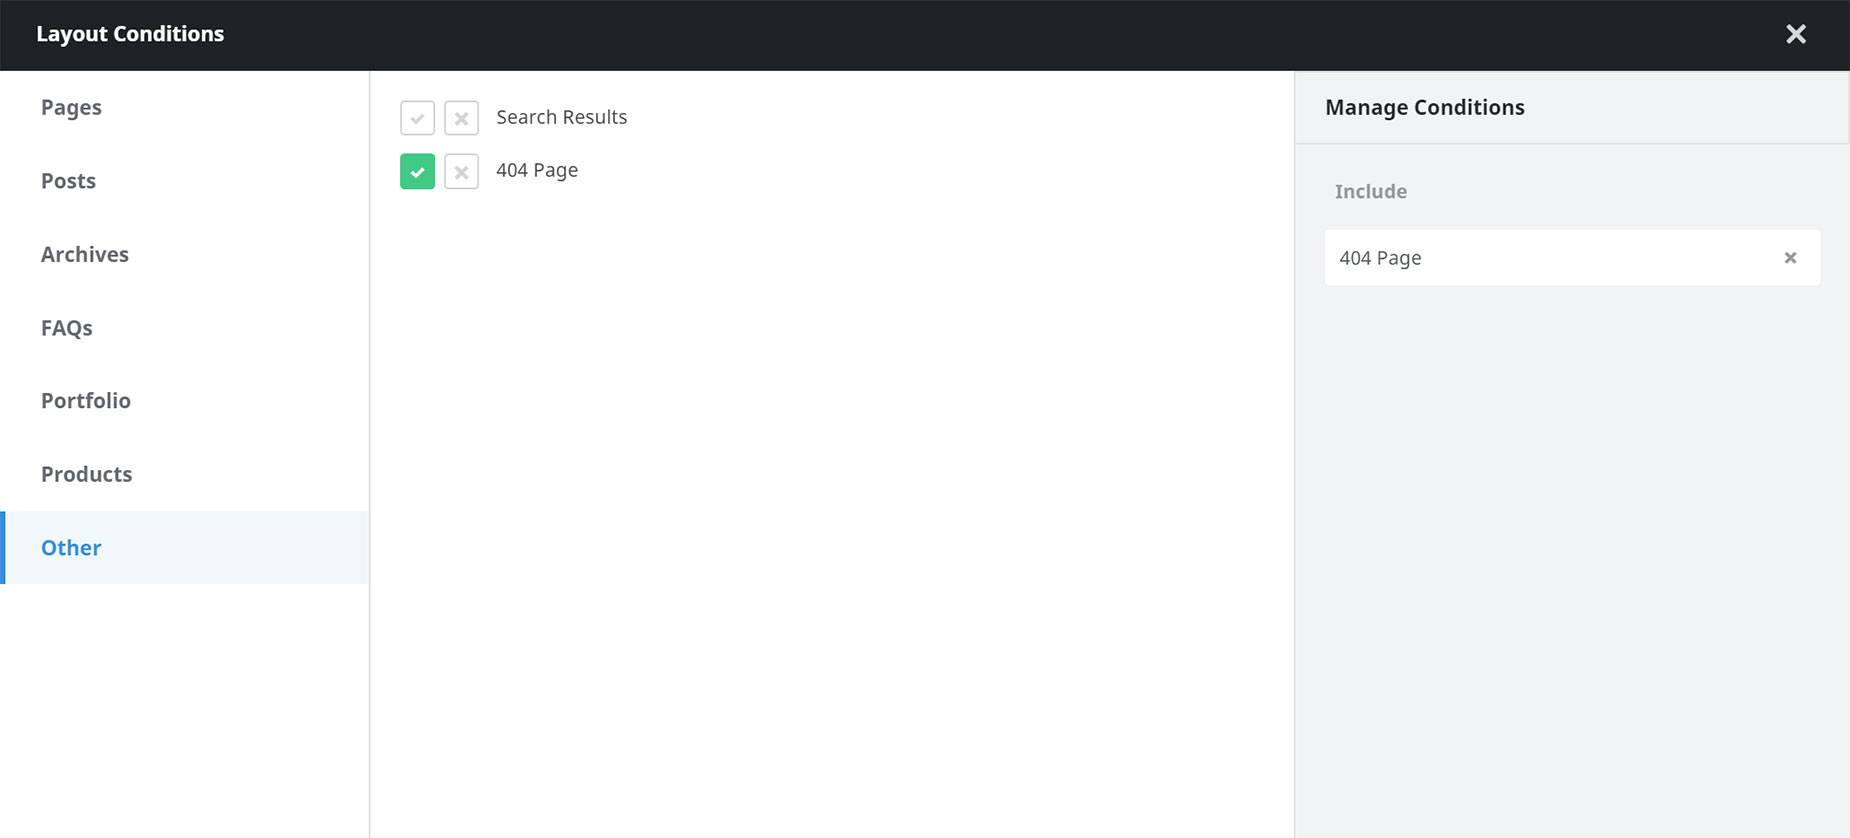
With a Conditional Layout, the last thing you need to do is to set the conditions of the layout. This is best done last, because as soon as you set the conditions, the layout is active, and if you do this after creating the Layout Sections, but before editing them, the pages displayed that fit the conditions would be empty in those sections.
To add a condition, or conditions, simply mouse over the bottom of the Layout, and choose Add A Condition. This brings up the Layout Conditions Dialog, as seen below. Please see Understanding Conditional Layouts for more information on Conditional Layouts, but for this example, all we need to do is set the conditions for a 404 page.
Example Of A Layout
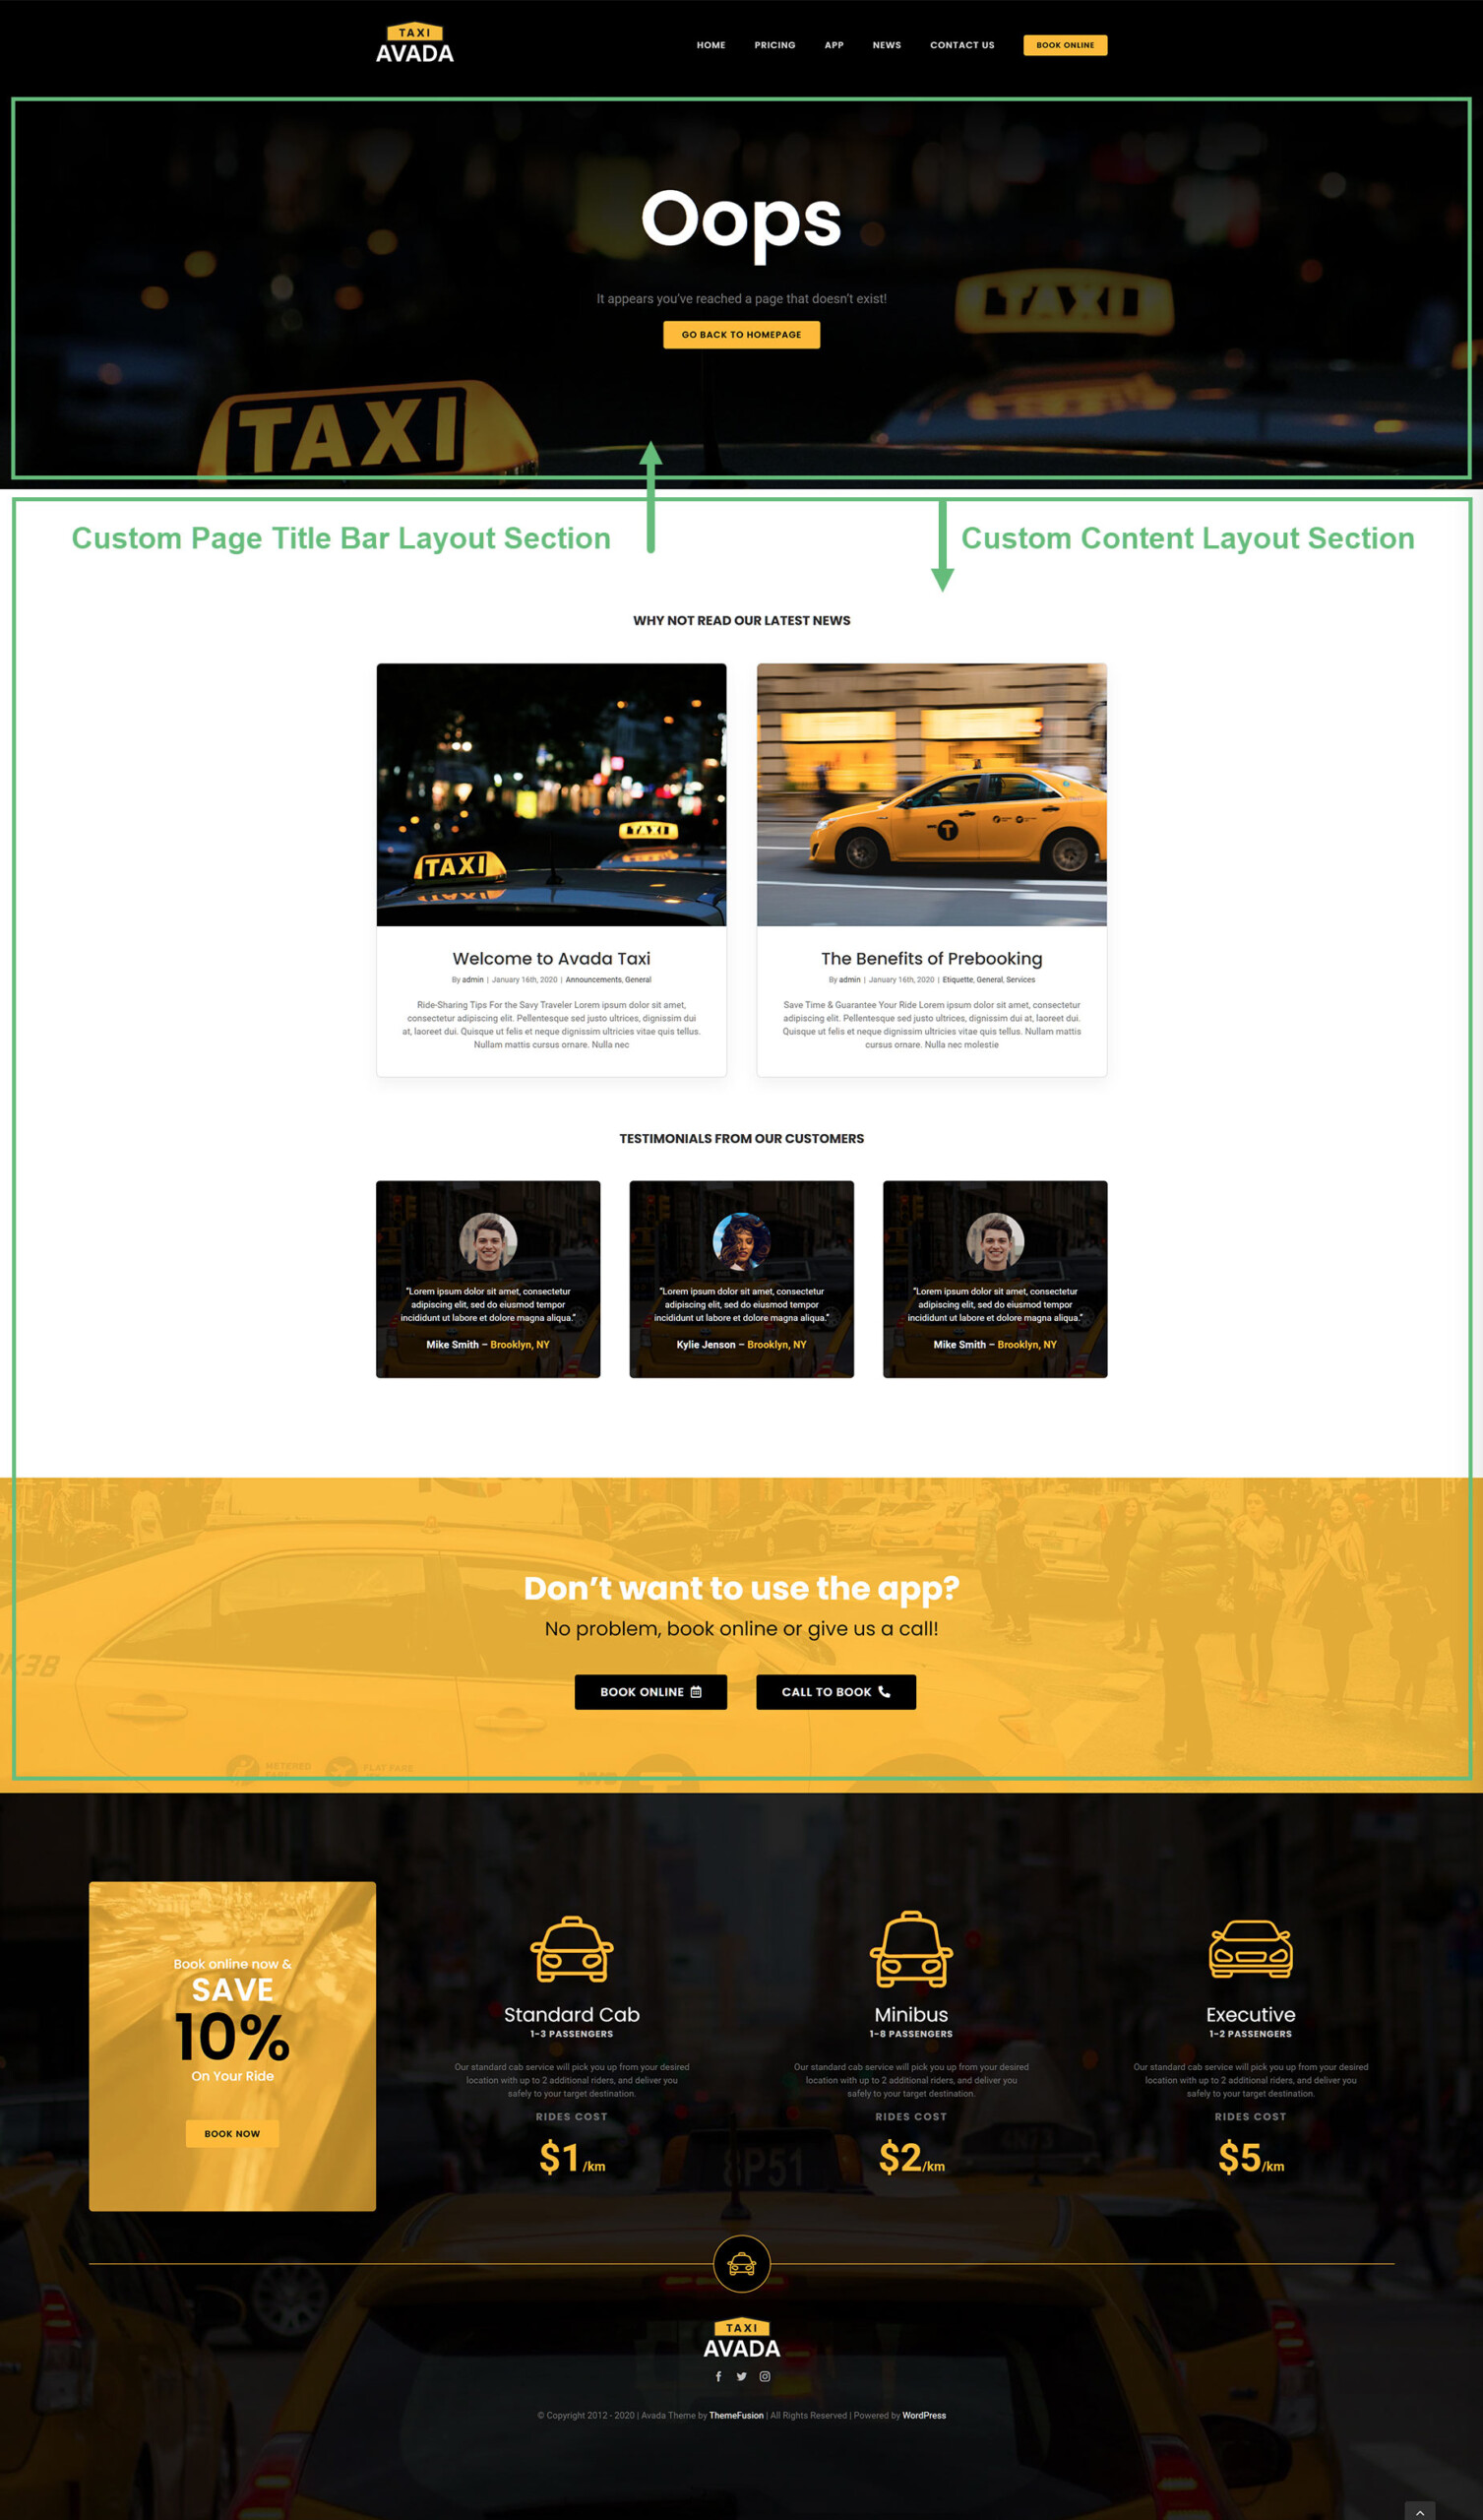
As an example, see below the Page Title Bar and the Content Layout Sections created for the Taxi Prebuilt Website 404 Layout. To see a live example of the 404 Layout, just follow this misspelt link.
Conclusion
With Avada Layouts, creating a Custom 404 Layout is not only now a reality, but rather, an unlimited possibility. You can use the power of Avada Builder to create almost any 404 Page you can conceive of.
Avada Layouts is a game changer in the true sense of the word. It enables such freedom of design, and gives such flexibility in deployment, that building your website layout will simply never be the same again.


