Assigning Menus To A One Page Website
Last Update: March 26, 2024
In the How To Build A One Page Website With Avada document, we go through the process of creating the content for a one page website. But there are different methods of assigning menus, depending on what sort of header you are using. In this document, we show you the methods for assigning menus for one page websites when using Legacy Headers.
Assigning The Menu To A Legacy Header
If you’re not yet using Avada Layouts, you assign the menu for your site directly to the menu itself. Go to the Custom One Page Menu you created from the Appearance > Menus tab.
Once you’ve loaded your custom menu, go to the ‘Menu Settings’ section at the bottom of the menu, and check the ‘Main Navigation’ checkbox. This will assign the custom one-page menu as your One Page site’s main menu, using the Header layout you have selected in the Global Options.
As we mention in the How To Build A One Page Site With Avada document, you can also apply a one-page menu to a multi-page site. See that document for more details on how to create the different menus for that, but read below for how to assign this extra menu to your site when using Legacy Headers.
Step 1 – As before, if you’re not using Avada Layouts, you assign the main menu for your site directly to the menu itself.
Step 2 – Go to the Appearance > Menus tab and load the Absolute Links Menu you have created.
Step 3 – Once you’ve loaded your menu, go to the ‘Menu Settings’ section at the bottom of the menu, and check the ‘Main Navigation’ checkbox. This will assign the menu as your site’s main menu, using the Header design selected in the Global Options.
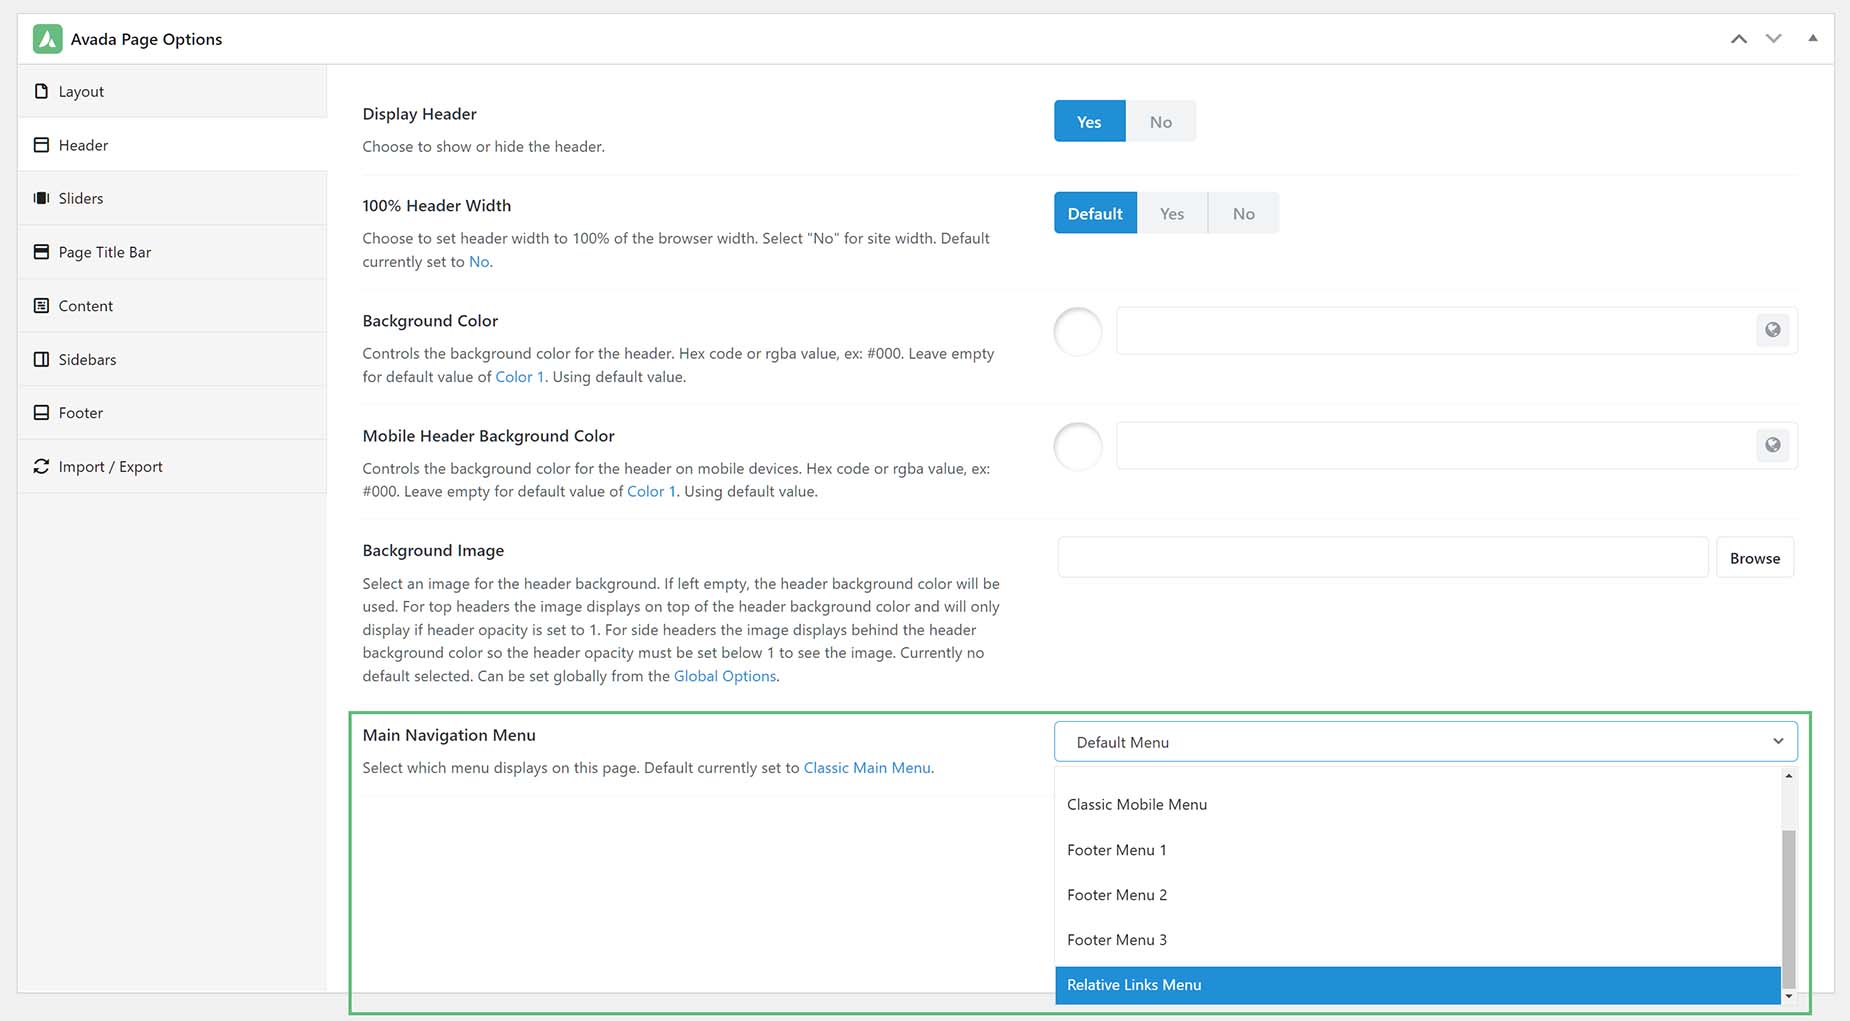
Step 4 – Now you want to assign your Relative Links Menu to the one Pager page. To do this, head to the Avada Page Options, on the One Pager page. You will find this in the sidebar in Avada Live, or underneath the editor field in the backend builder.
Step 5 – Switch to the ‘Header’ tab and locate the ‘Main Navigation Menu’ option. In the dropdown field, select the Relative Links Menu, as can be seen in the screenshot below. This will assign this particular custom menu to just this particular single page.
That’s it. Make sure to save your changes.


