Share
Updating your WordPress theme is a crucial task beyond just keeping your site looking fresh and modern. It’s about ensuring compatibility with the latest WordPress features, compatibility with 3rd party plugins, maintaining security, and maintaining site performance. However, the update process does not need to be daunting even you are new to WordPress or you’re unsure where to start.
In this beginners guide, we’ll walk you through each step of updating your WordPress theme safely and effectively, using Avada as a premium example so that you can enjoy all the benefits of a stable site without any headaches. Whether you’re a seasoned developer or a WordPress novice, this guide is designed to help you confidently navigate theme updates.
Overview
Why Should You Update Your Theme?
Updating any form of software is not only important, but it is also essential for peace of mind and confidence. In a world of smartphones and digital devices, the need to update is common knowledge for most people. Likewise, ensuring that WordPress, plugins, and your theme are kept up-to-date is vital for several reasons:

Preparation Is Key
Preparation is essential for WordPress theme updates to ensure a smooth and trouble-free process. You can avoid common pitfalls such as compatibility issues, data loss, and site downtime. A thorough preparation involves backing up your site, checking plugin compatibility, and reviewing the update changelog thoroughly.
This proactive approach allows you to address potential conflicts and ensure your site remains secure, functional, and optimized after the update.
1: Understand The Features, Changes And Improvements
If you have a website, whether for business purposes or personal, we encourage you to invest in maintaining it continually. Understanding the features, changes, and improvements in updates is essential because it allows you to ensure compatibility, security, and optimization for your site.
By knowing the specifics of each update, you can better prepare for potential conflicts, leverage new functionalities, and address any issues that may arise. And ultimately this ensures a seamless user experience for your website audience. Some pre-checks are:
Review What’s New
If you have chosen Avada as your website builder for WordPress, the “What’s New” page should be your go-to resource for all things new in Avada for the latest update.
Review The Release Notes
Each time a new version of Avada is released, an accompanying important update information help file details all items to take particular note of.
Review The Changelog
You should also always check the changelog for each Avada new release and provides a detailed overview of features, fixes, and improvements included with each theme update.
2: Test The Updates on a Staging Site First
Testing a WordPress and theme update on a staging site first is essential to ensure the stability and functionality of your production (live) website. By using a staging environment, you can safely apply updates and observe their effects without risking downtime or disruption to your users. This process helps identify and resolve potential conflicts with plugins, custom code, or other site components before they impact the production site.
Many hosting companies offer staging services and can be set up automatically as part of your hosting plan. SiteGround offers a Staging setup as a part of their full-service WordPress hosting.
For all Avada users, and as part of your purchase, you can install Avada on a staging site without needing an additional license. For detailed information and allowed subdomain patterns, please check the licensing FAQs.
3: Make Sure You Have A Backup Strategy
Assuming you’ve done your basic due diligence in assessing the update, the next step is to back up your production site. It’s unlikely that anything disastrous will happen when updating your theme, but making a backup remains a good idea. It gives you peace of mind going into the update and a fixed point to revert if anything gets messy.
We’ve already covered the subject of backups in a little more detail, including info on robust solutions such as UpdraftPlus and VaultPress. The BlogVault plugin is another option that, as its name suggests, could be a good solution for those on a budget.
Once you have reviewed the list of changes and ensured your current setup is adequately backed up, the next consideration is child themes if you are using one before we get into the specifics of updating.
A Note on Child Themes
For those new to the subject, child themes are the recommended WordPress way of keeping your local theme modifications manageable and in one place. There’s a great overview of how to create a child theme in the WordPress Codex if you want a refresher on the basics.
Depending on how customized your site needs to be, a child theme may or may not be overkill, but it’s a useful option to be aware of. If you already have one in place, remember that you may need to adjust your child theme files as part of your update.
Avada also ships with a sample child theme to give you an example to work from – Avada-Child-Theme.zip. Note: You’ll need to download the Main Files option from ThemeForest.
Various Update Methods
Option 1: Update via The WordPress Dashboard
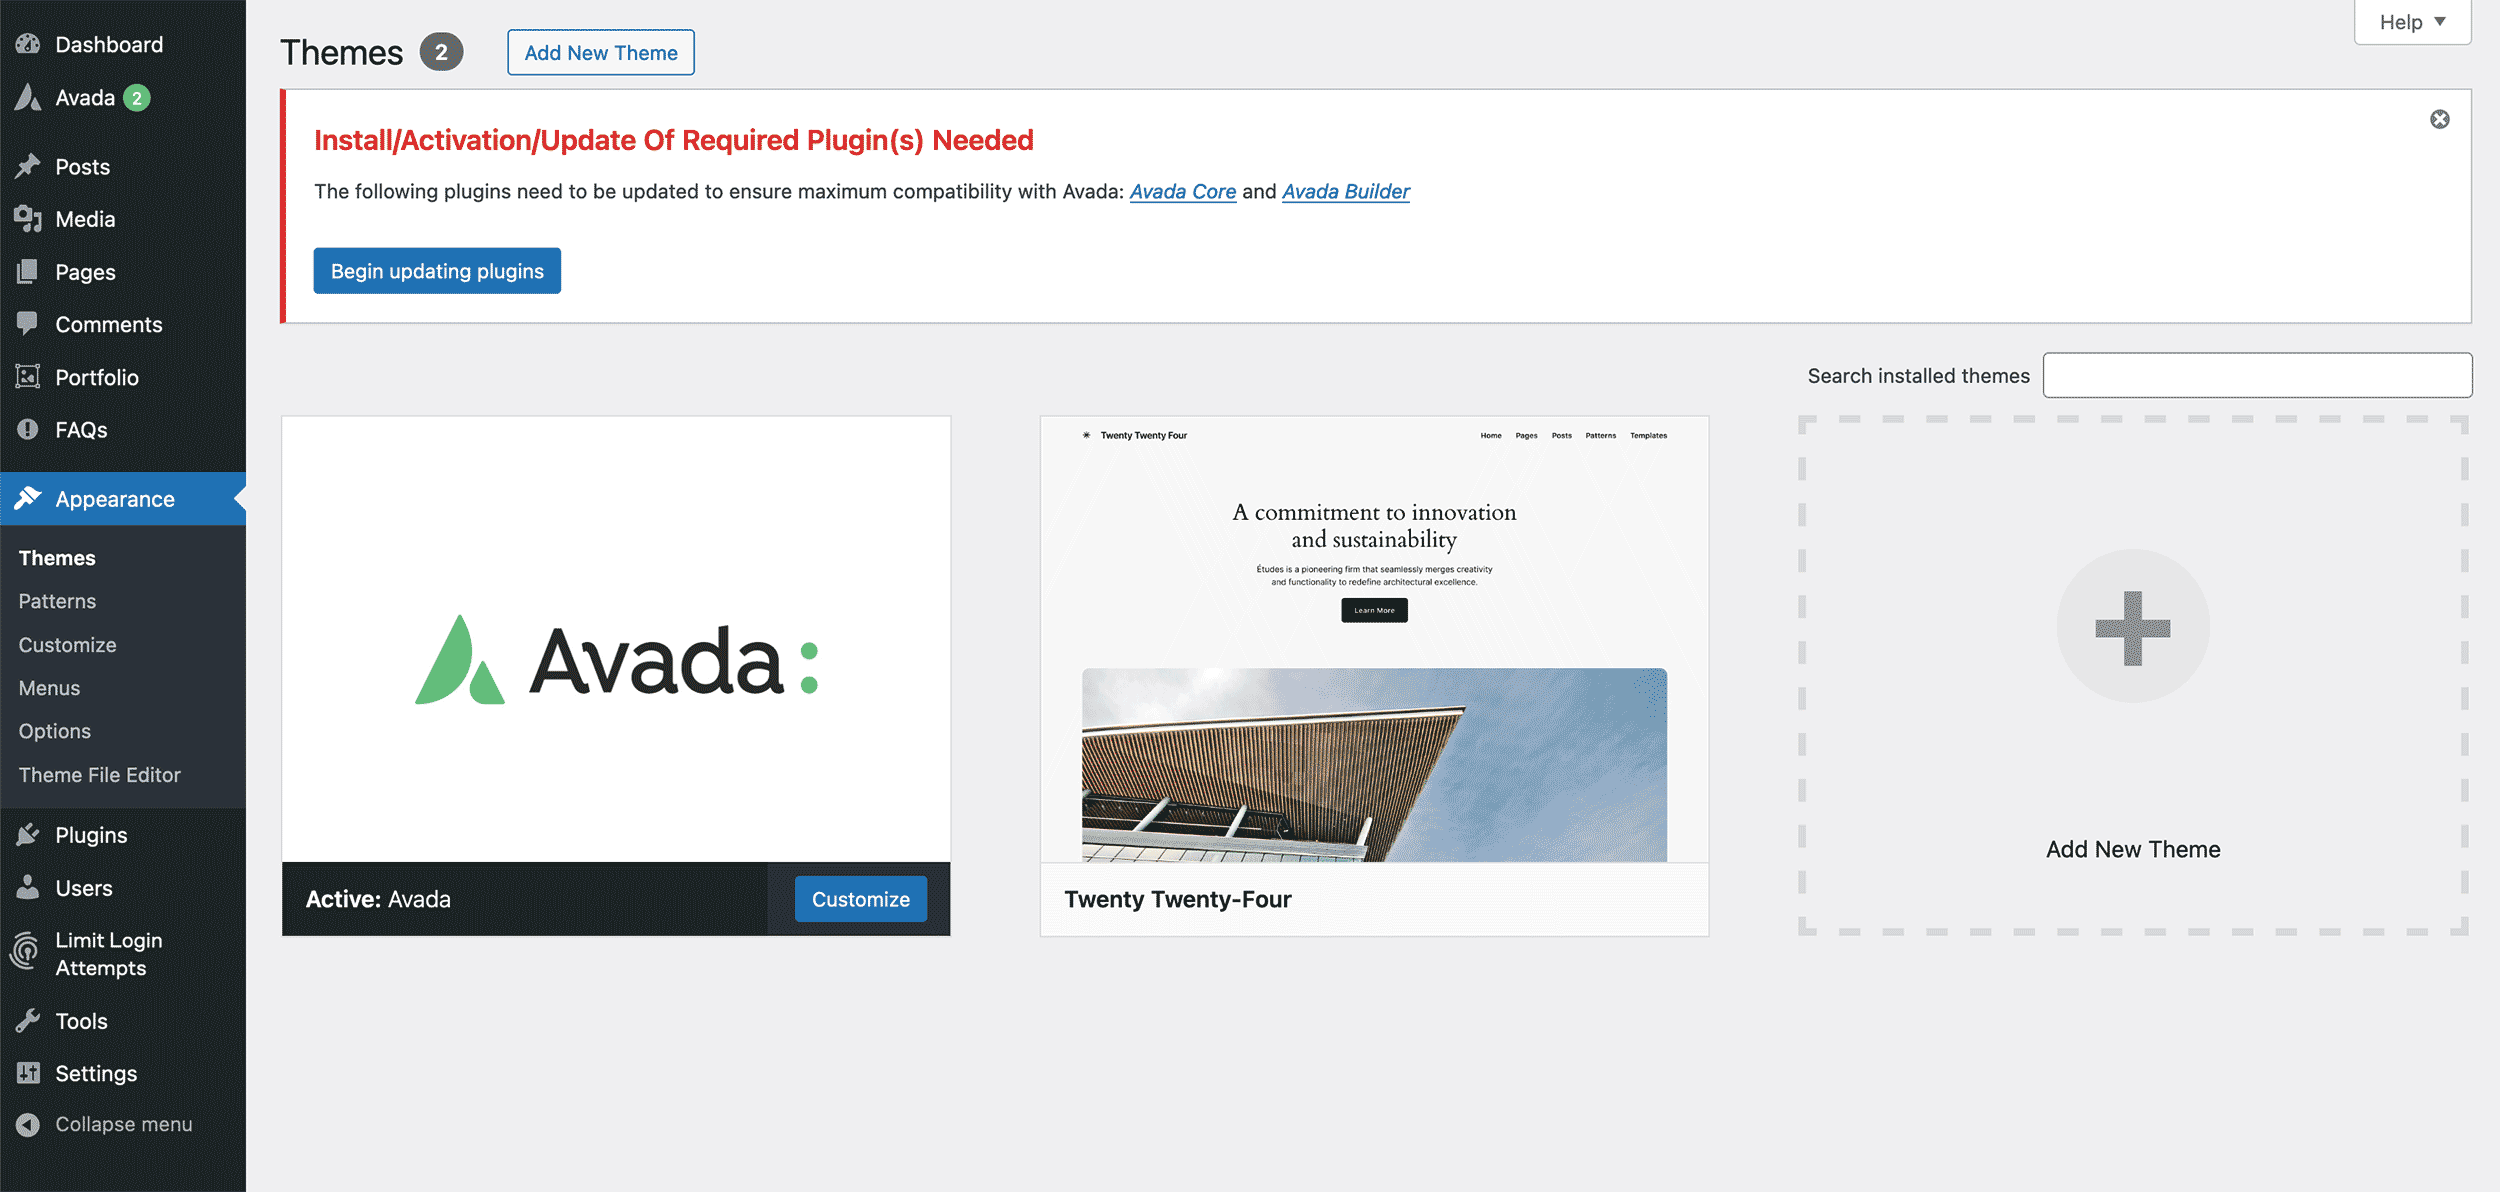
Standard WordPress updates work by periodically checking for new versions of the WordPress core, themes, and plugins. When updates are available, notifications appear in the WordPress Dashboard. Users can manually initiate updates by clicking on these notifications or navigating to the Updates section under the Dashboard menu.

When an update is initiated, WordPress downloads the necessary files (for the WordPress core) from the official WordPress repository, installs them, and applies the updates. WordPress briefly puts the site in maintenance mode during this process to prevent access issues. After the update is completed, the site returns to normal operation.
As you will see in the image above, when it comes to plugins or theme updates, the update notification alerts you to start the process when you are ready. For this example, we will update the theme (in our case, Avada) and illustrate the process. Updating Avada requires a two-step process: First, you will update the theme files and then update the two Avada required plugins (Avada Core and Avada Builder).
To start the update, follow these steps:
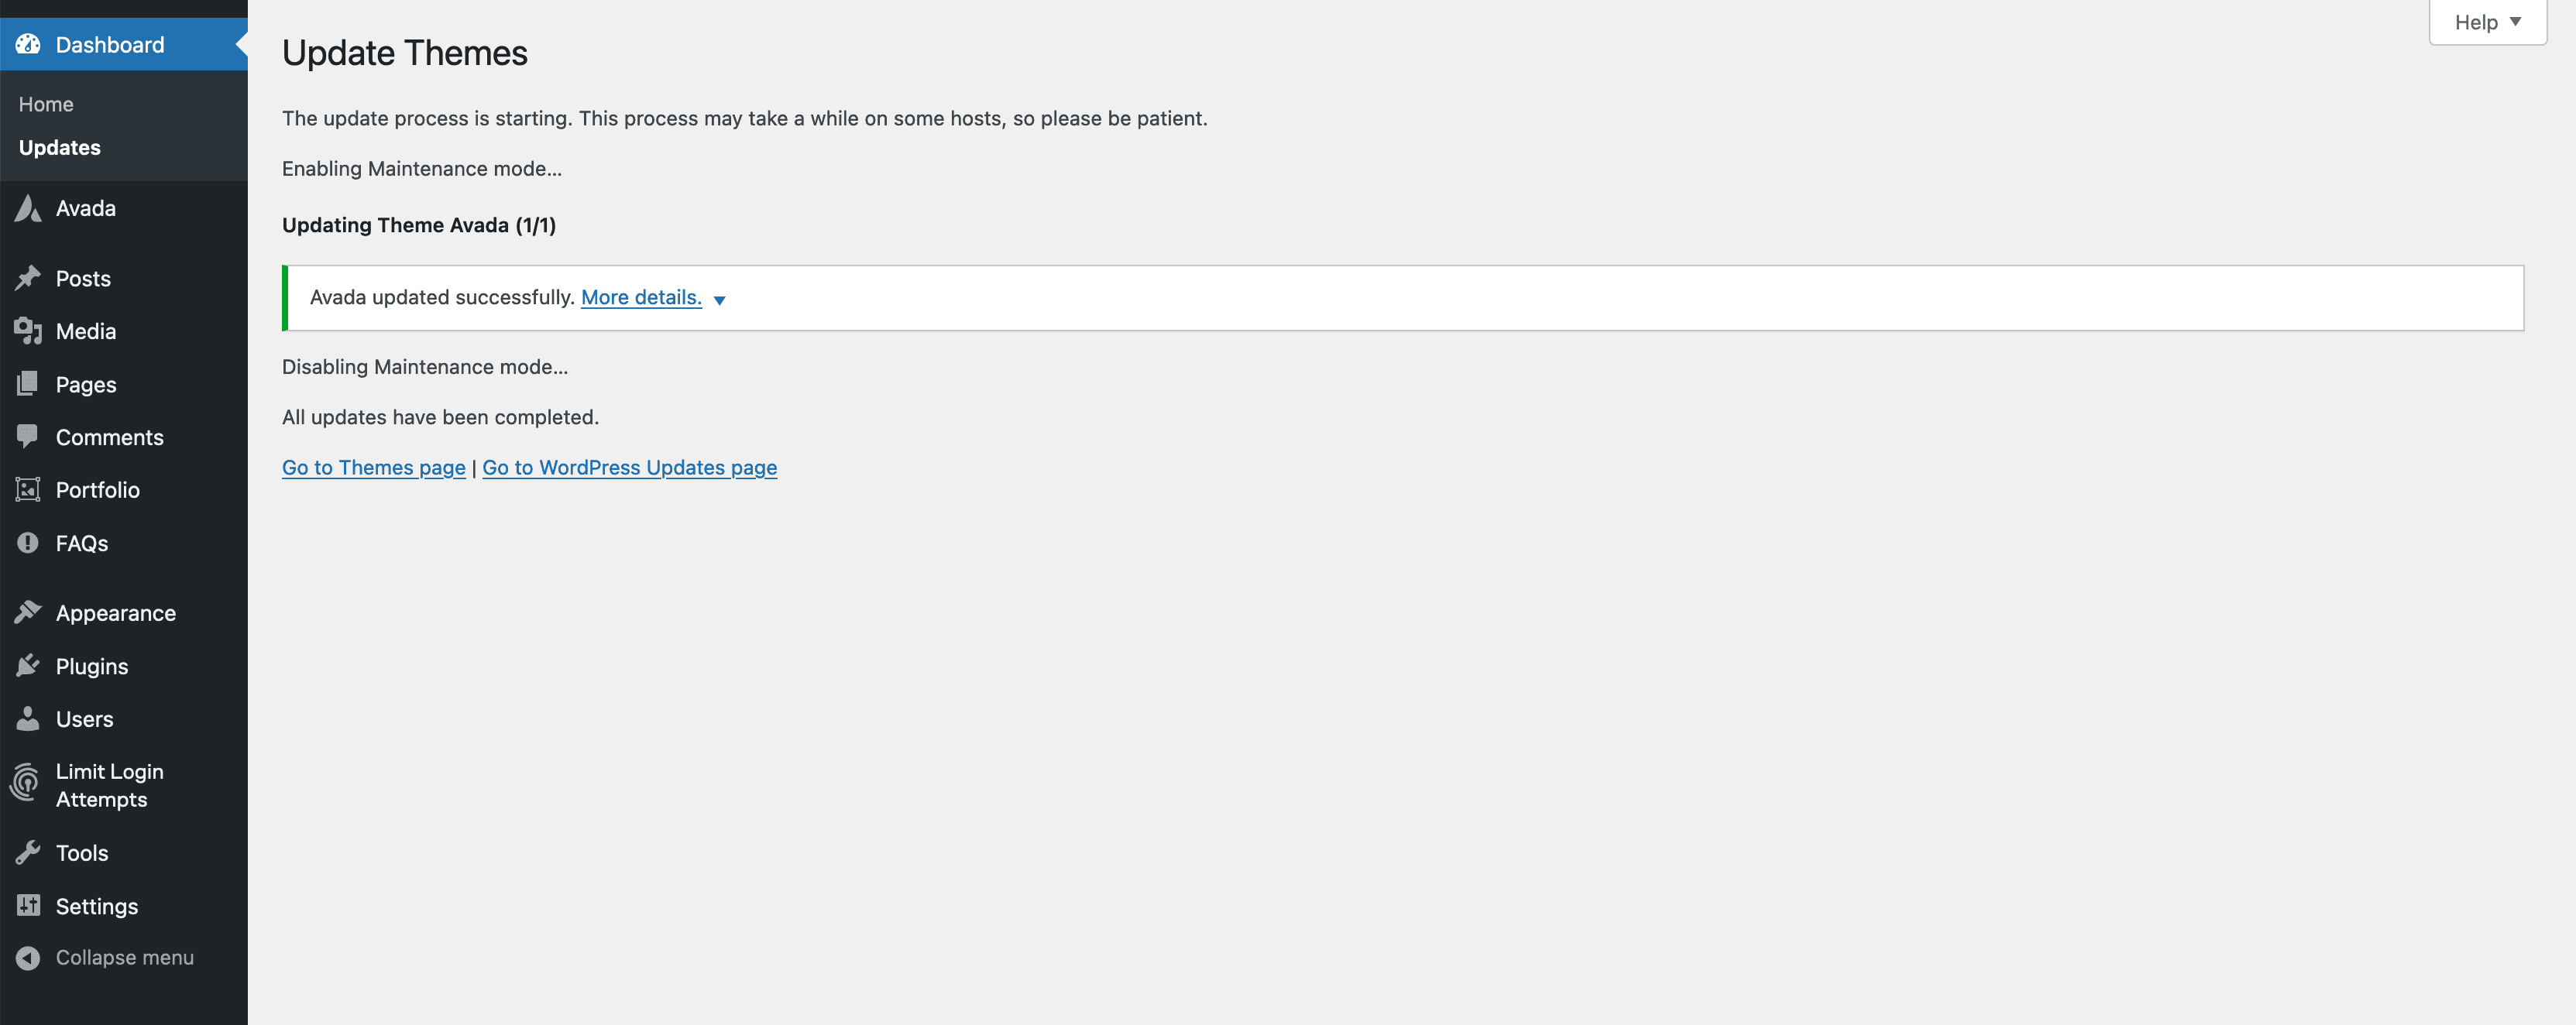
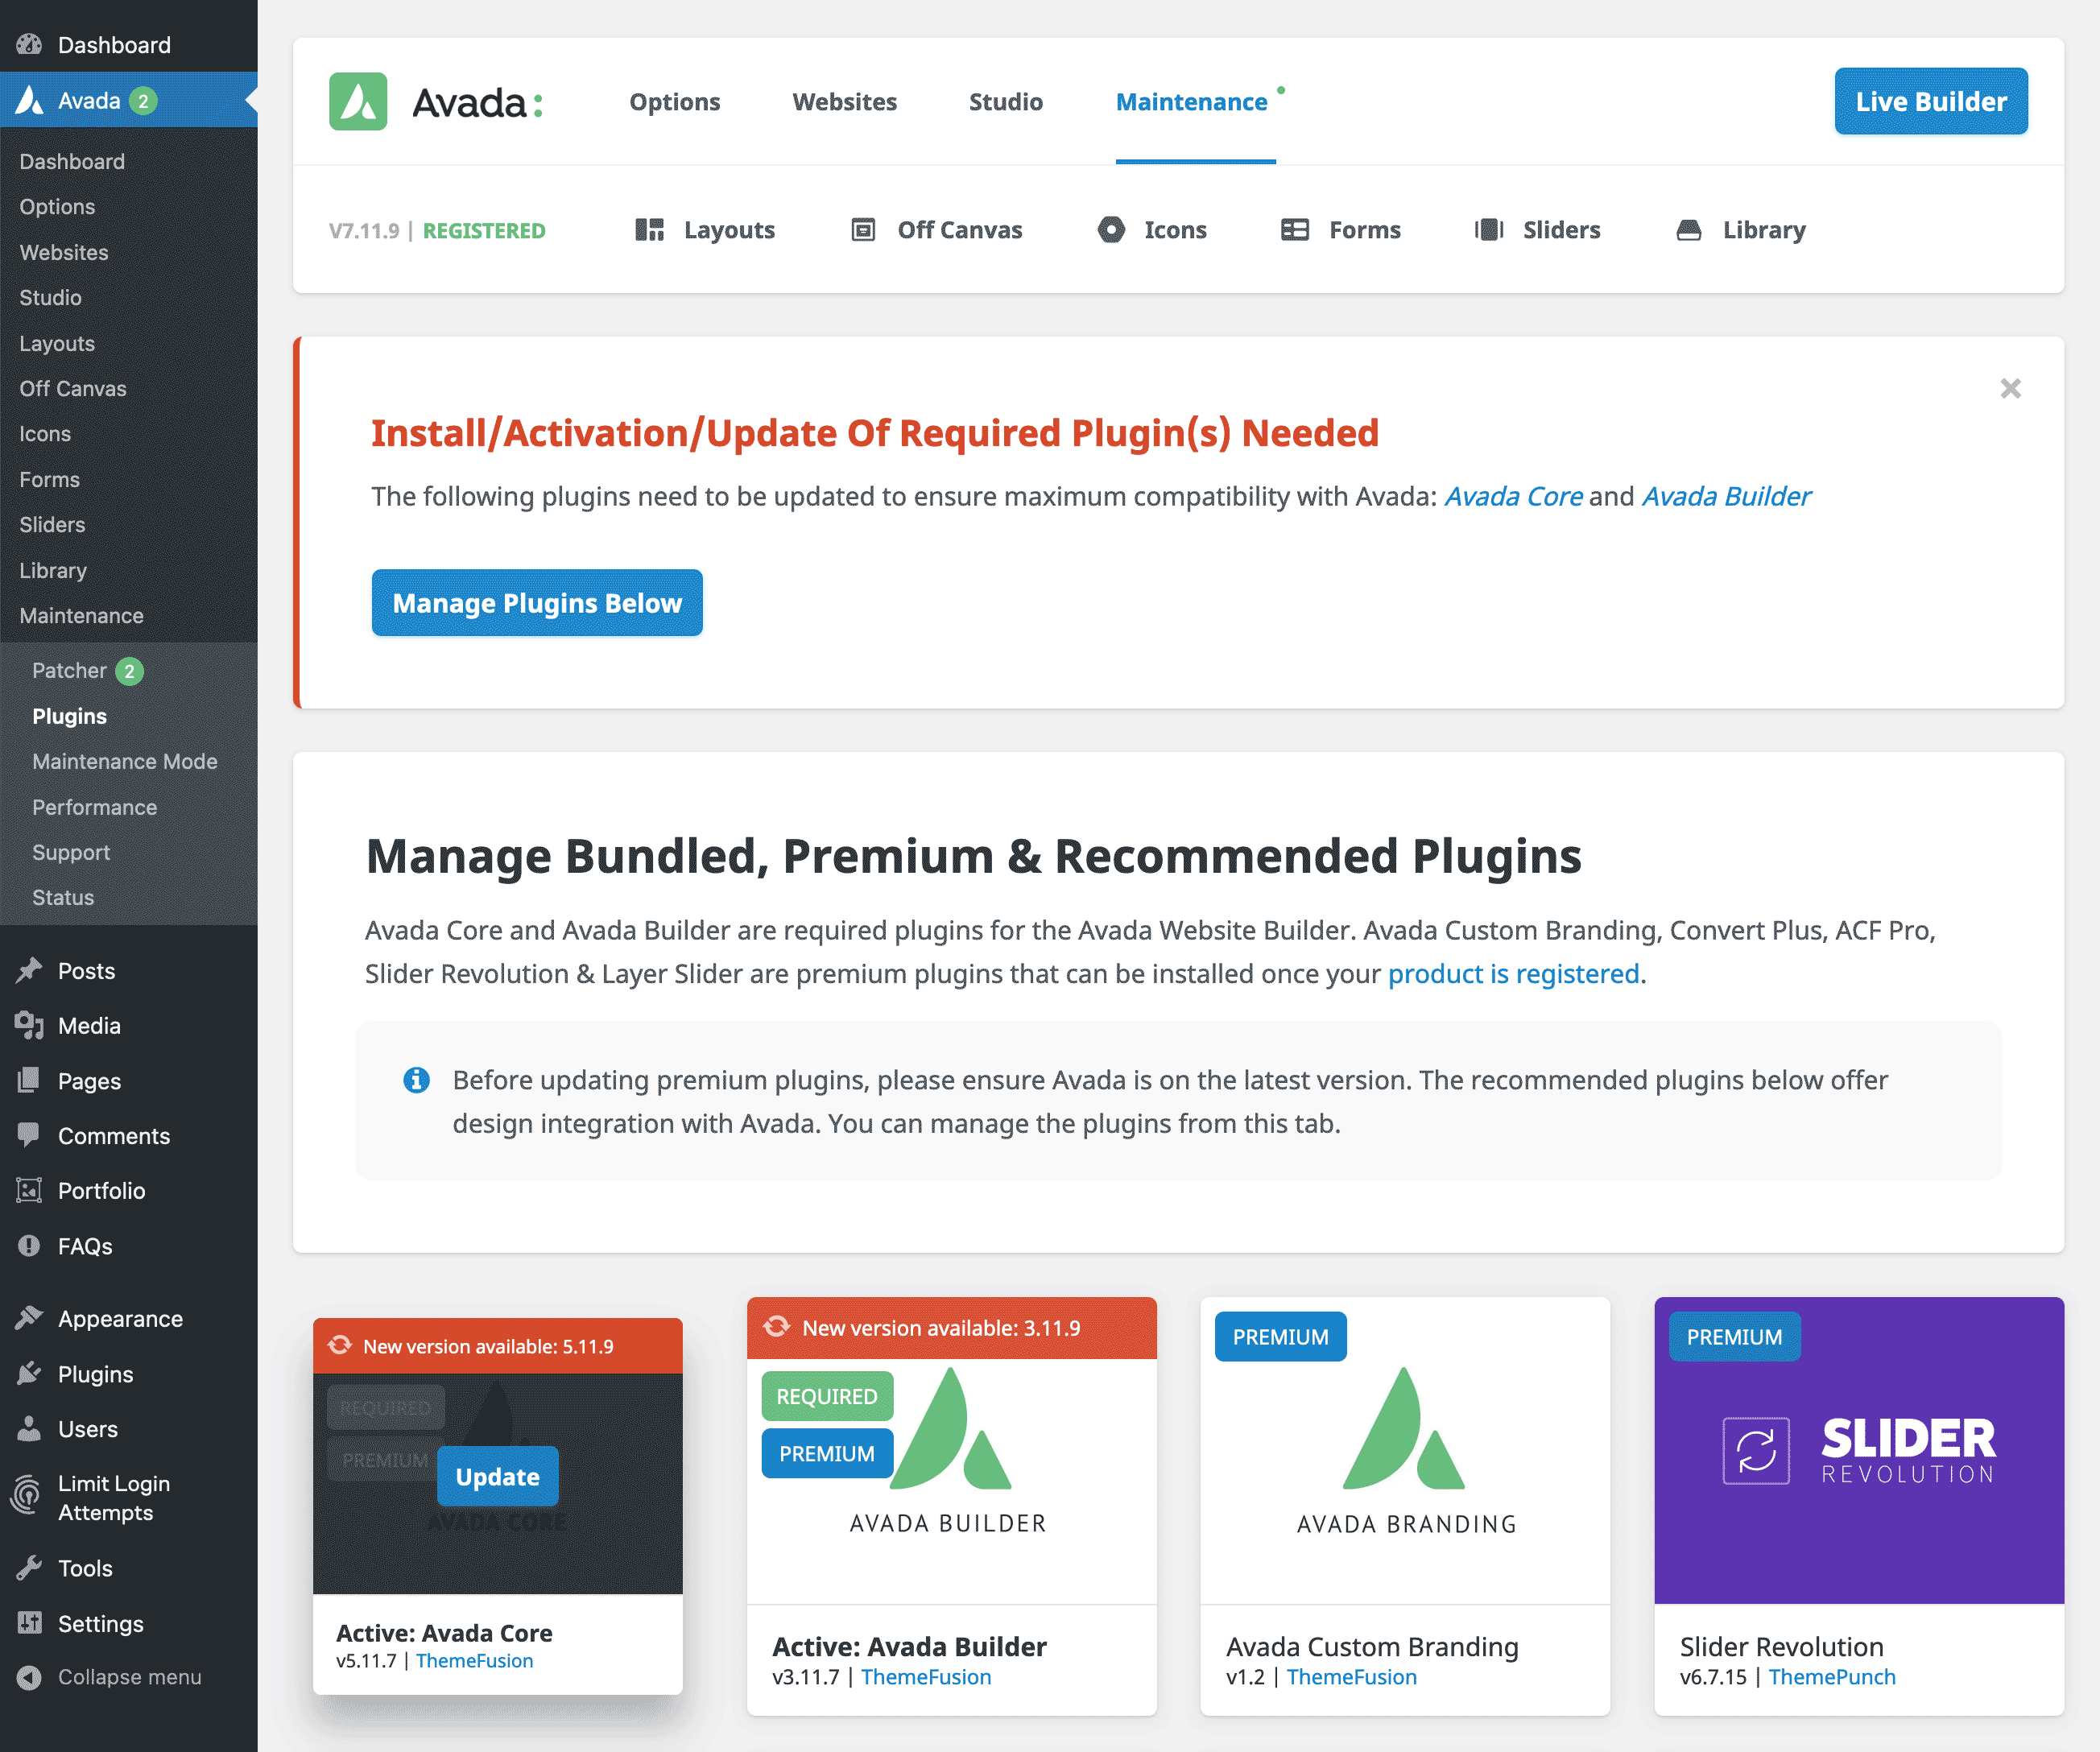
Updating the theme files takes a few seconds at most. Once completed (as shown in the image above), click “Go to Themes page” to update the Avada Core and Avada Builder plugins. To finalize the update process, follow these steps:
This is the final step to complete the full update, the two Avada required plugins.
A Side Note About Maintenance
The Avada Patcher is an innovative maintenance tool that allows you to apply fixes and maintenance patches to your website without the need for a full update to the site allowing you to keep your Avada website fully maintained at all times. Patches can be applied individually or in bulk.
Option 2: The Easy Updates Manager Plugin
The Easy Updates Manager plugin is a tool that allows users to manage all updates with confidence. It provides comprehensive control over handling updates for core WordPress files, themes, and plugins.
This plugin is helpful because it helps ensure your site stays updated and secure by automating updates and allowing you to customize and schedule them according to your preferences. Additionally, it includes features to selectively turn updates on or off, keeping your site stable and reducing the risk of update-related issues.

With a vast array of settings allowing for endless configuration, the Easy Updates Manager plugin is an excellent choice for anyone who wants granular control over the update process. Here is an overview of the features included with the free version of the plugin:
In addition to the features provided by the free version of the plugin, you can upgrade Easy Updates Manager to premium, offering users a range of additional enhancements and extended features. There are four plans to choose from, starting with “Basic” (2 Site licenses – $29/year) and going up to “Unlimited” (Unlimited Site licenses – $89/year).
Option 3: Update Manually Via FTP
The third option for updating your WordPress website is manually using FTP (File Transfer Protocol). This is typically suitable for those who prefer a hands-on approach during the update process. There are a large number of reliable free and commercial FTP clients to choose from these days, and you can find a useful breakdown of options for various platforms in this article.

To start the update you’ll need to download the Main Files option from ThemeForest. Note that there are two download options: “All files & documentation” or “Installable WordPress file only.” To update, choose “Installable WordPress file only” as this will only download the latest version of Avada > Avada.zip

Before you continue make sure you have performed a backup of WordPress, the theme files, and the database as highlighted earlier in this guide. To get started:
FAQs
Summary
As we’ve hopefully made clear, updating your theme is not a process to be feared. It’s simply a question of taking sensible precautionary steps and selecting the update option that suits you best. You’ll have access to full support regardless of which option you take.
Check the following before updating: