Share
In this article, we’re going to look at the option to upload and use custom icons throughout your Avada website. Custom icons add a visual appeal to your website’s content that will engage your audience.
Let’s examine this process in more detail. You can also watch a video of it below.
Overview
How To Generate Icon Packs via Icomoon
To generate your custom icon sets, we suggest using Icomoon. it is a great resource, with a large library of free and premium icon setsset to choose from.
With over 5,500+ free vector icons to choose from, the variety is seemingly endless. You can also upload your own SVGs to make fonts and convert icons to SVG, PDF, Polymer, XAML, or CSH.
Selecting icons for your icon set, as many as you may need, is straightforward in the Icomoon App.
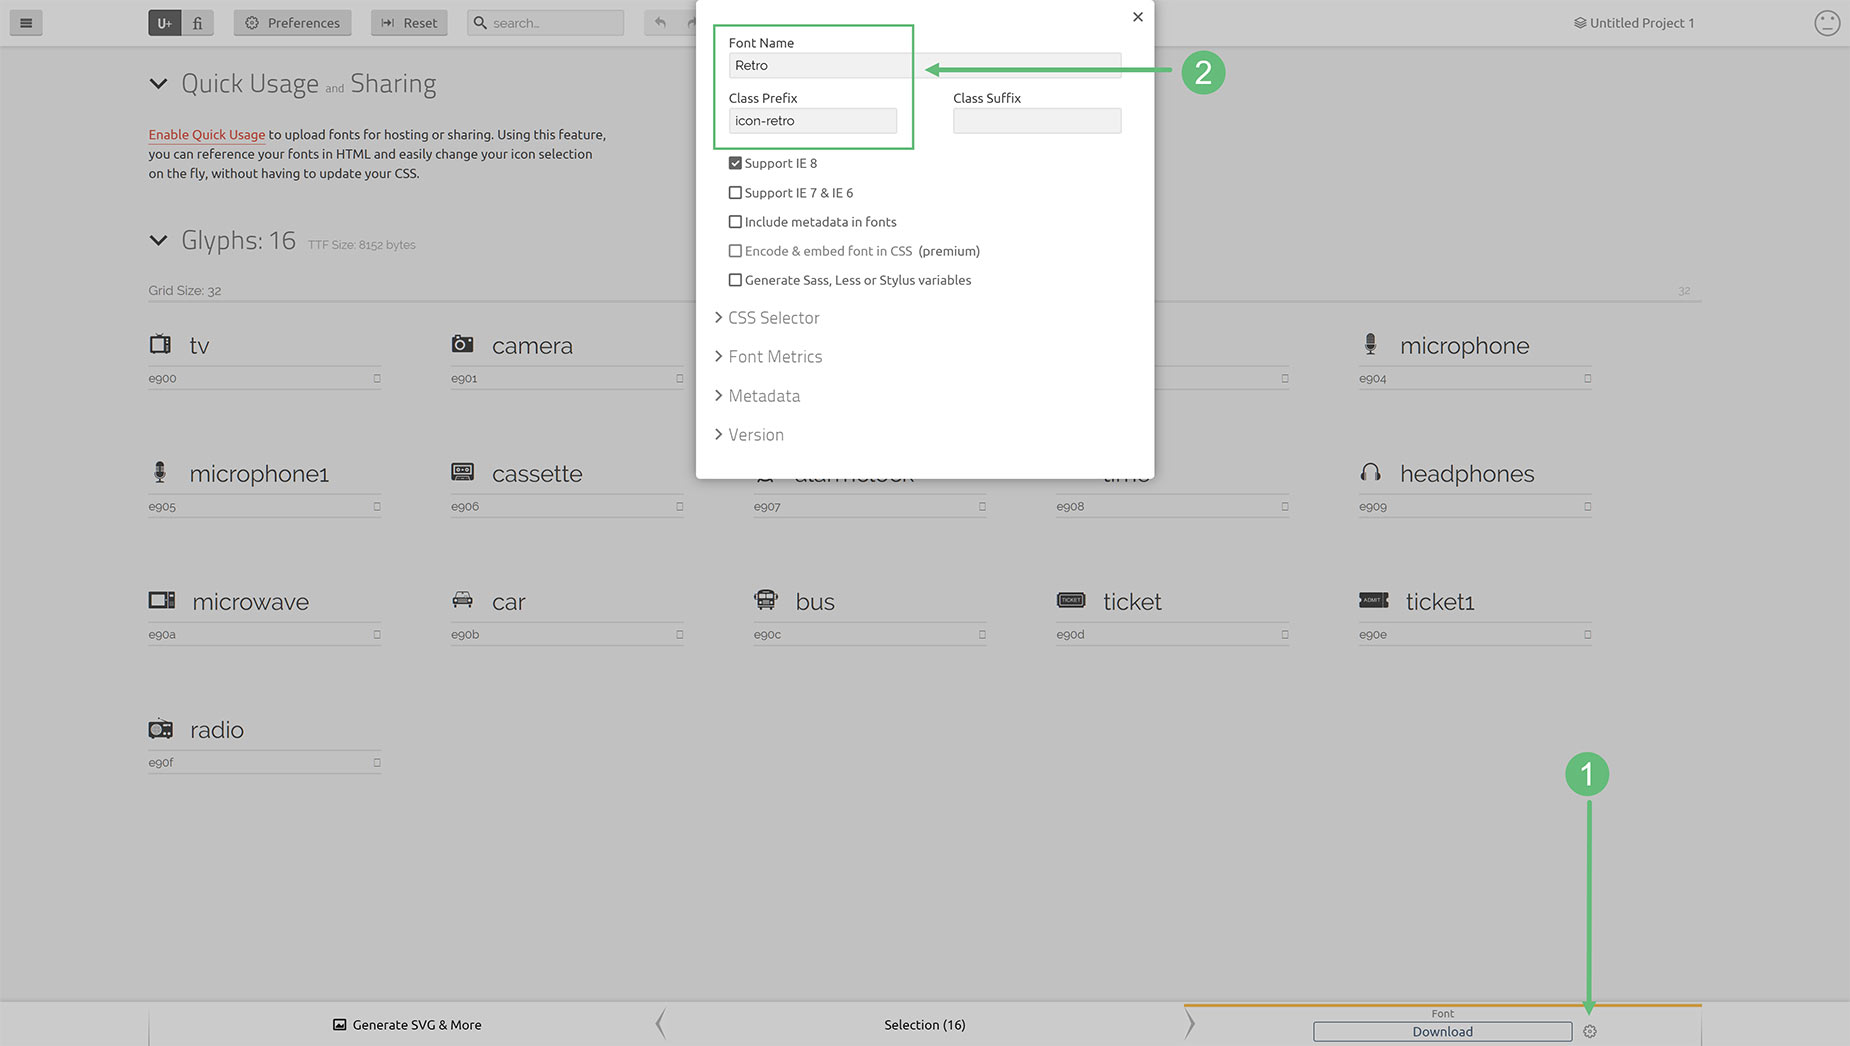
Once you have selected your desired icons, you must generate the icon set for import and use with Avada. Each generated icon set must have a unique Font Name and CSS Class Prefix.
As seen below, decide on the Icomoon defaults in the preferences section before downloading your custom icon set. Clicking download will download the Custom Icon Set as a zip file to your computer.
How To Upload And Manage Your Icon Sets in Avada
Uploading your newly generated icon sets for use in your Avada website is straightforward and fast. All custom icons are uploaded, saved, and managed via the Avada > Icons section of the WordPress Dashboard.
To create a new Icon Set, give your set a name and click on Create New Icon Set. This will take you to the Edit Icon Set page. From here, you can access the supported icon tool, Icomoon.
This link will open in a new tab. To upload the Custom Icon Set, give it a name and click the Select Files button. Then, navigate to your icon set (as a ZIP file) on your computer and upload it.
The ZIP file is uploaded to the WordPress Media Library, and all icons will load on the Edit Icon Set page. If you ever decide to update an existing icon set, you can re-upload the set in this edit screen by selecting Update Custom Icon Set. The icons will now be available through the Icon Picker located in various Avada Design Elements.
Your Custom Icons Are Ready To Use
Uploaded and ready to go! You can now add custom icons to your content, anywhere, and often as you wish using the Avada Icon Element. Also, any Avada Element with an icon picker will give you full access to all icon sets in a dedicated tab alongside the free Font Awesome icons.
And that’s it. You can upload as many Custom Icon Sets as you need; if you need to update them, edit the collection and reupload the icons. With this fantastic tool, you will be able to add a bespoke signature to any website you design and build with Avada.


Video above is “private”??
Thanks for alerting us. It looks like that was an old video that has since been updated. I added the new video to the post.