How To Upload And Use Custom Icons In Avada
Last Update: January 30, 2026
With Avada, not only do you have access to the thousands of free Font Awesome icons, but you can also upload custom icon sets to use in Avada. Read on to see how this works, and watch the video for a visual overview.
Managing Custom Icon Sets
Custom icon sets are created and managed via the Avada > Icons section in the WordPress Dashboard.
Here, you can both create and manage custom icon sets. To make a new Custom Icon Set, give your set a name and click on Create New Icon Set. This will take you to the Edit Icon Set page. From here, there is a link to the supported icon tool – Icomoon. This link will open in a new tab, and you can create your icon set. If you already have an icon set downloaded, you could just select the file, but let’s go through the process of creating one.
Generating A Custom Icon Set
Here in the Icomoon App, you can generate a custom icon set to upload. The first step is to select which icons you want in your Custom Icon set. There are a range of both free and paid icon packs you can import into the Icomoon App, and you can even import your own icons.
Once you have selected which icons you want in your set, you then generate the icon set, which you can then import into Avada. For a full rundown of what’s possible with the Icomoon App, please see their documentation.
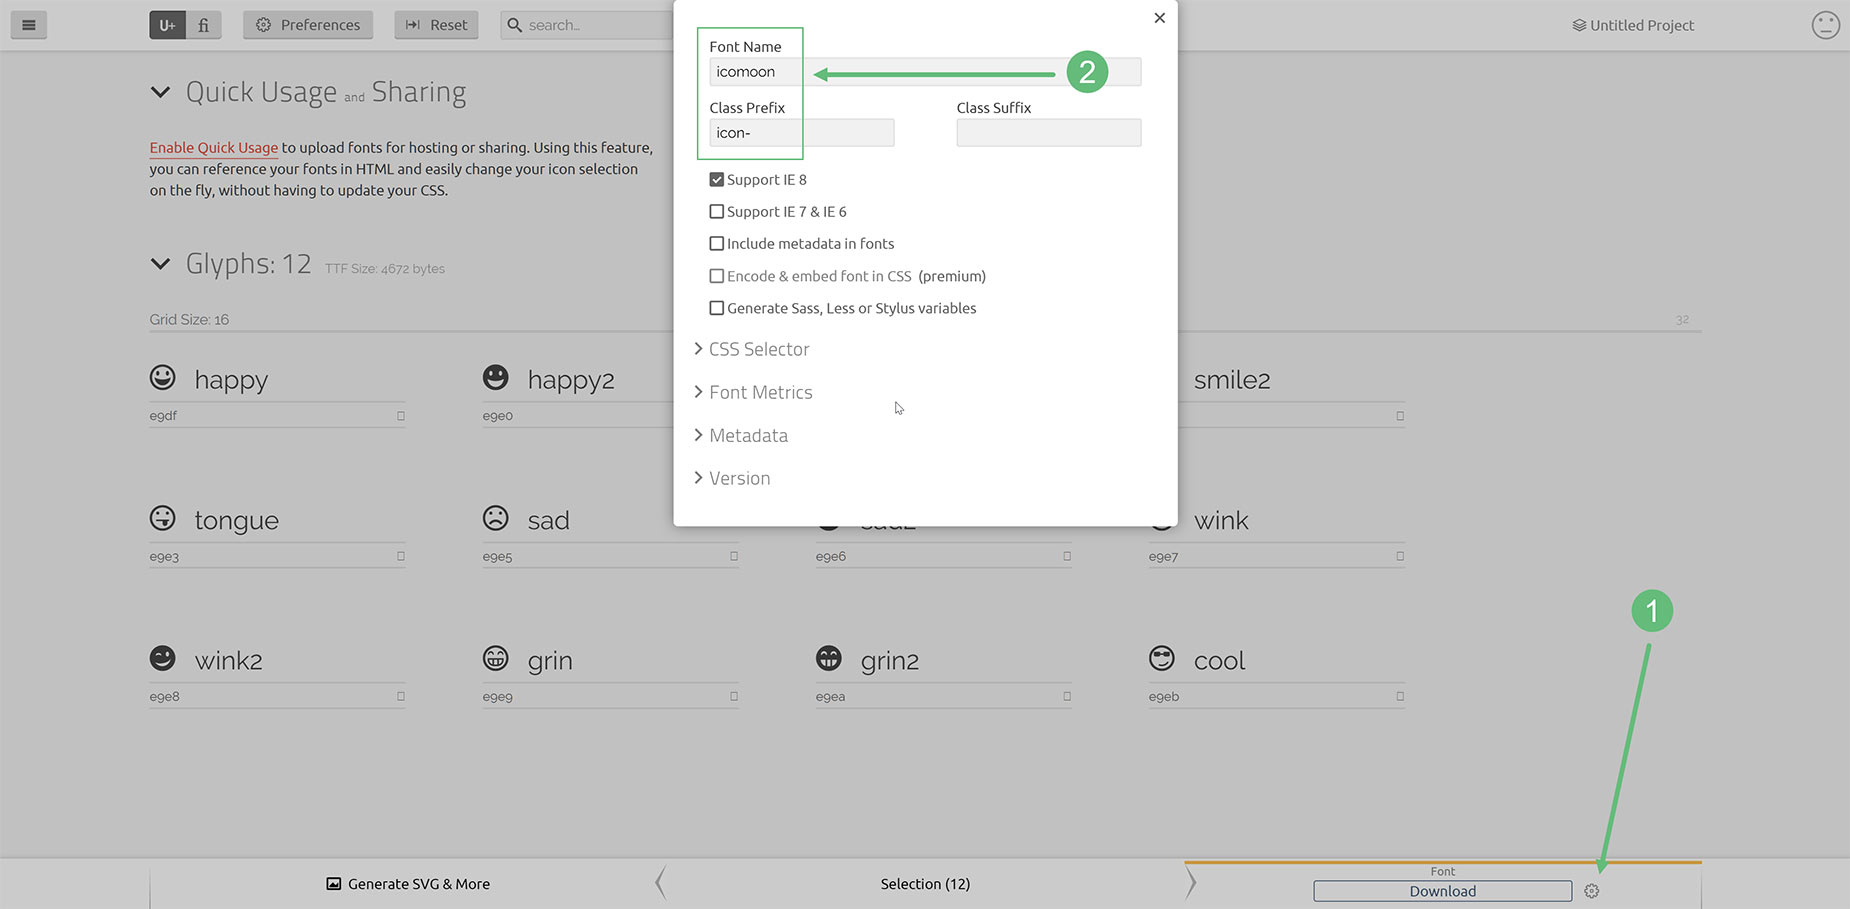
Important Note: Every icon pack you upload must have a unique Font Name and CSS Class Prefix before importing into Avada. Do not leave the name as icomoon! You can change the Icomoon defaults in the preferences section before downloading your custom icon set, as seen below.
Uploading Your Custom Icon Set
Once you have generated and downloaded your custom font set, you now need to upload it to your site.
Back on the Edit Icon Set page, you will find a simple upload interface to upload your custom font set. (There is also a shortcut to this page in any element that has the Icon Picker. Here you will find a Plus button in the top right corner of the Icon Picker, which takes you straight to the Custom Icon page.)
To upload a Custom Font Set, simply give the Icon Set a name, and then click on the Select Files button. Navigate to your icon set (as a zip file) and select it.
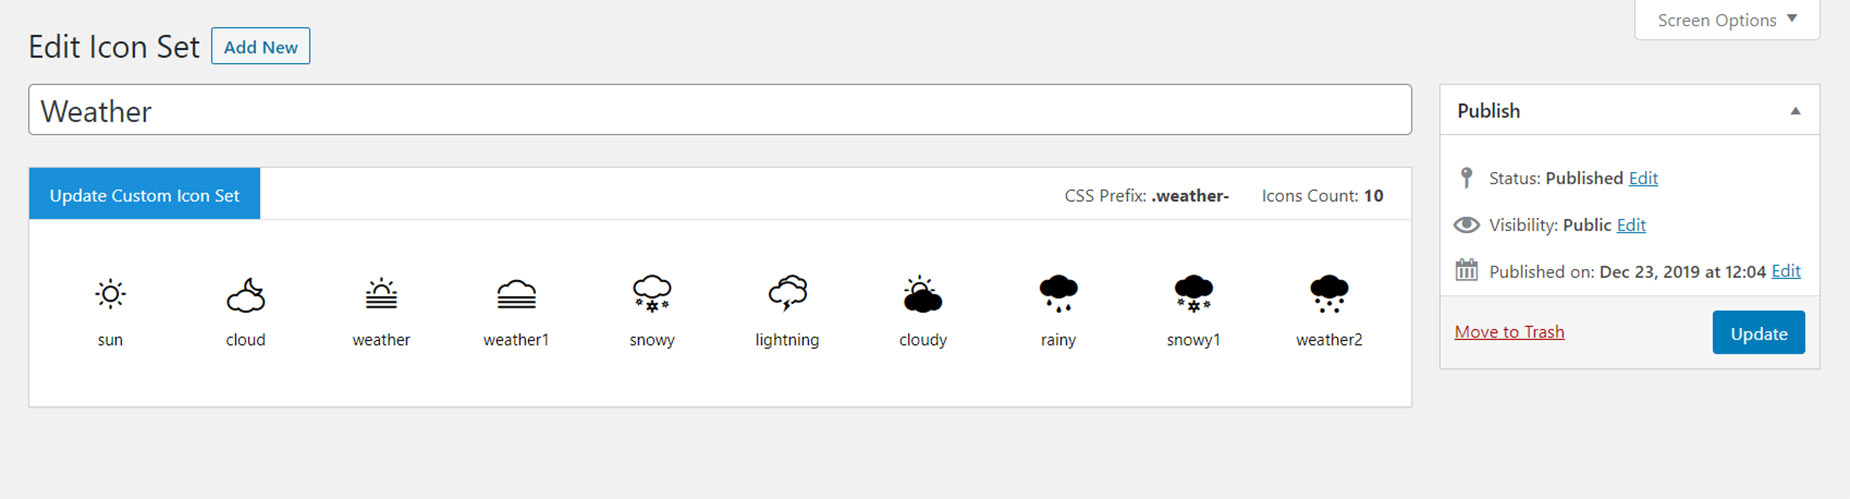
Then just click Publish in the right hand side. This will load the Custom Icon set. If you need to update the set later on, there is an Update Custom Icon Set button you can use to reupload the set, as seen below. The icons will now be available through the Icon Picker, in their own tab.
OK, that’s it. Your custom icon set is now installed. To use it, head to any element that uses an icon, including the Icon Element. There, you will see any custom icon sets at the top of the icon picker, and you can now just choose the set and select icons from that.


