Share
Avada Conditional Rendering is a powerful feature. For beginners, this opens up a whole new way of designing smarter, more personalised websites without writing a single line of code. At its core, Avada Conditional Rendering allows designers to control when specific content appears.
Instead of showing the same Elements to every visitor, content can respond dynamically based on factors such as screen size, login status, user role, and other conditions. This makes it possible to design layouts that feel more intentional, responsive, and user-focused.
Overview
What is Avada Conditional Rendering?
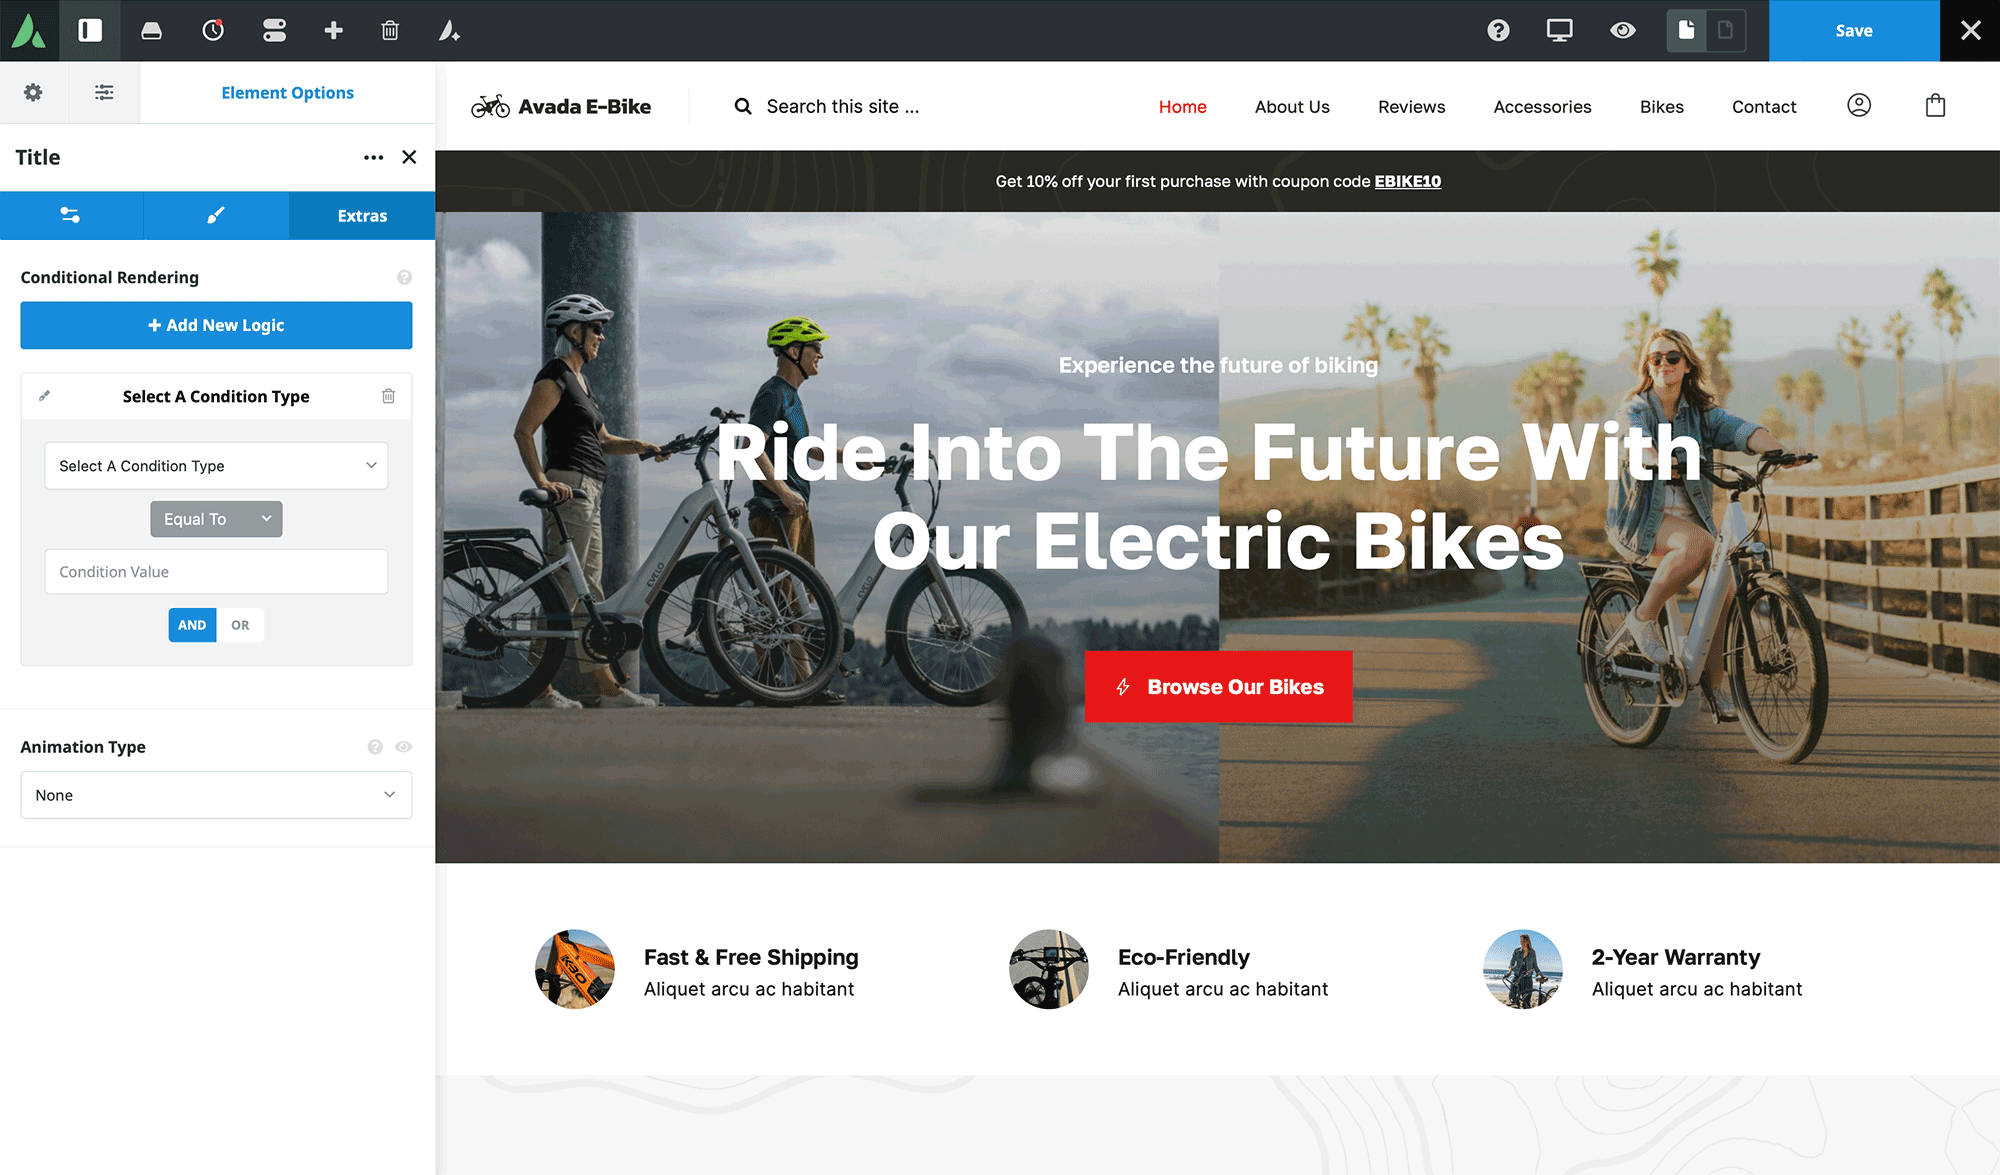
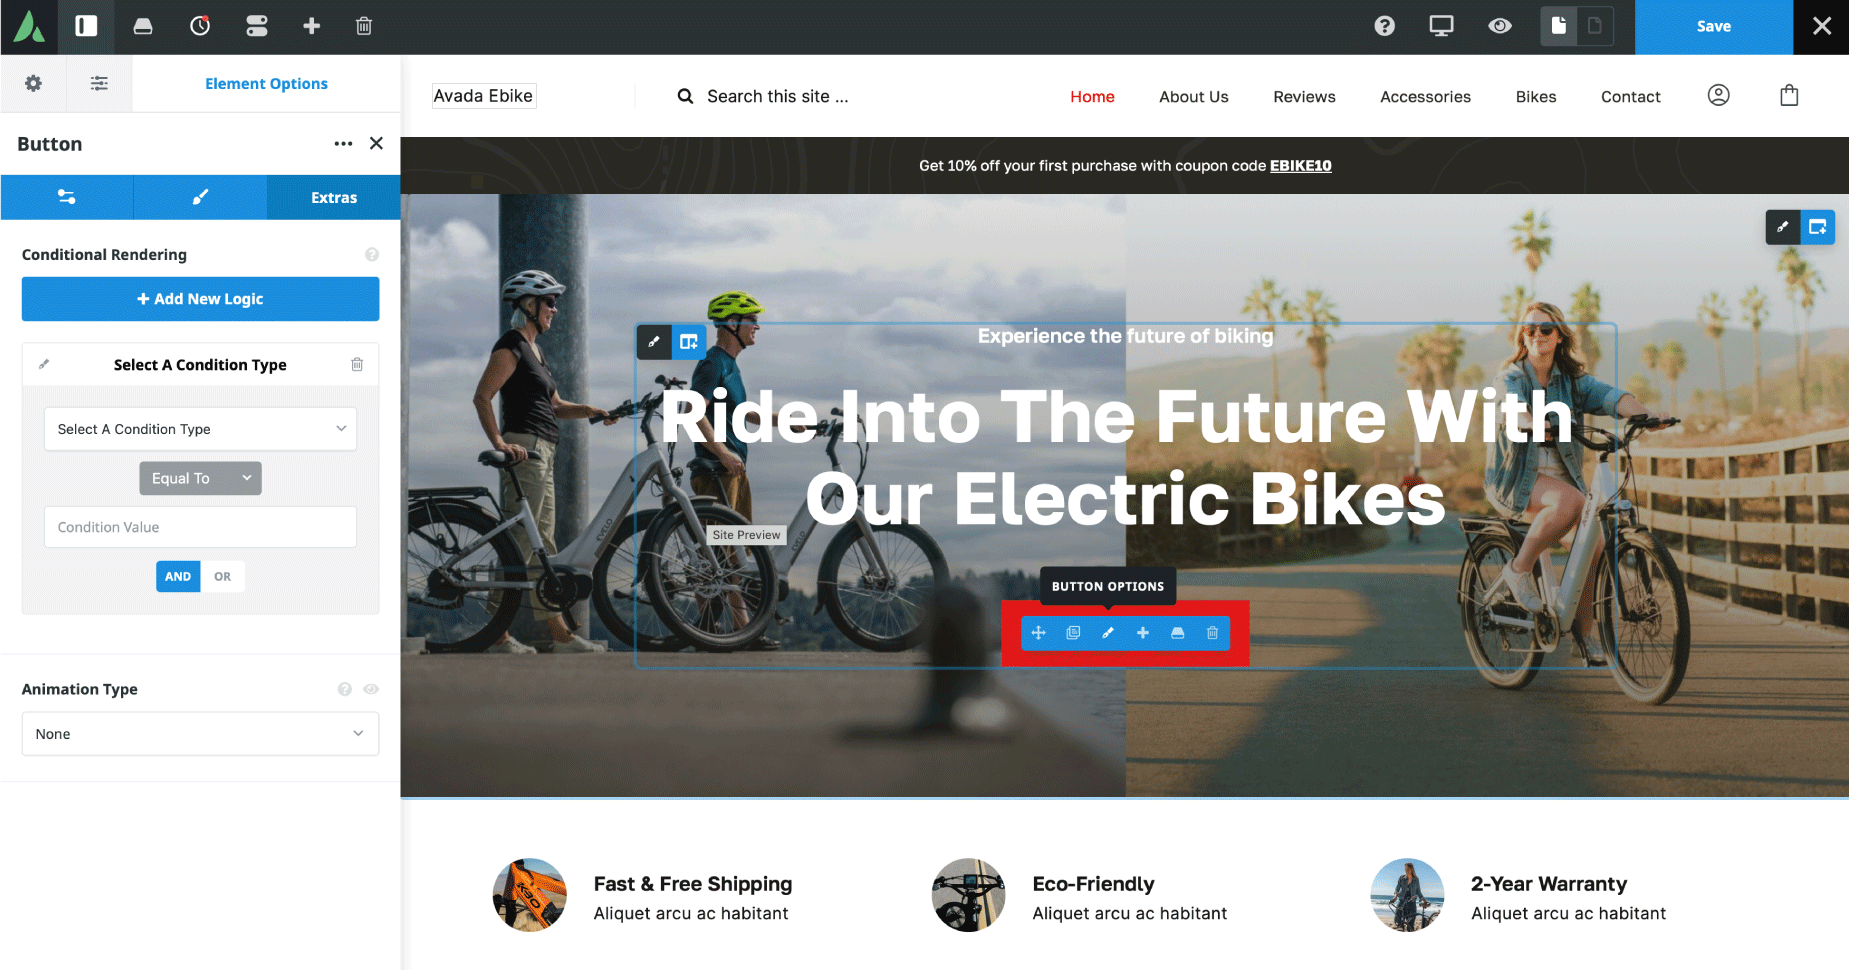
The option is located in the “Extras” tab of all Avada Design & Layout Elements in the Avada Live Visual Builder. Conditional Rendering allows you to set specific rules for when an Element should appear.
It is important to note that this is quite different from the standard Element Visibility options you might be used to.
This distinction can be crucial because it means your WordPress website isn’t just hiding content; it is ignoring it completely when it’s not needed, making for a much leaner and faster codebase.
Using Avada Conditional Rendering in Headers
A simple and very practical place to start with conditional rendering is the website header. Headers often need to behave differently across devices, and conditional rendering makes this easy to manage.
In this tutorial example (Avada eBike prebuilt website), a header layout contains three separate containers. Each container uses conditional rendering, so it only appears under certain conditions. Two of the containers are set to display on desktop devices, while the third is configured to display only on tablets and mobiles.
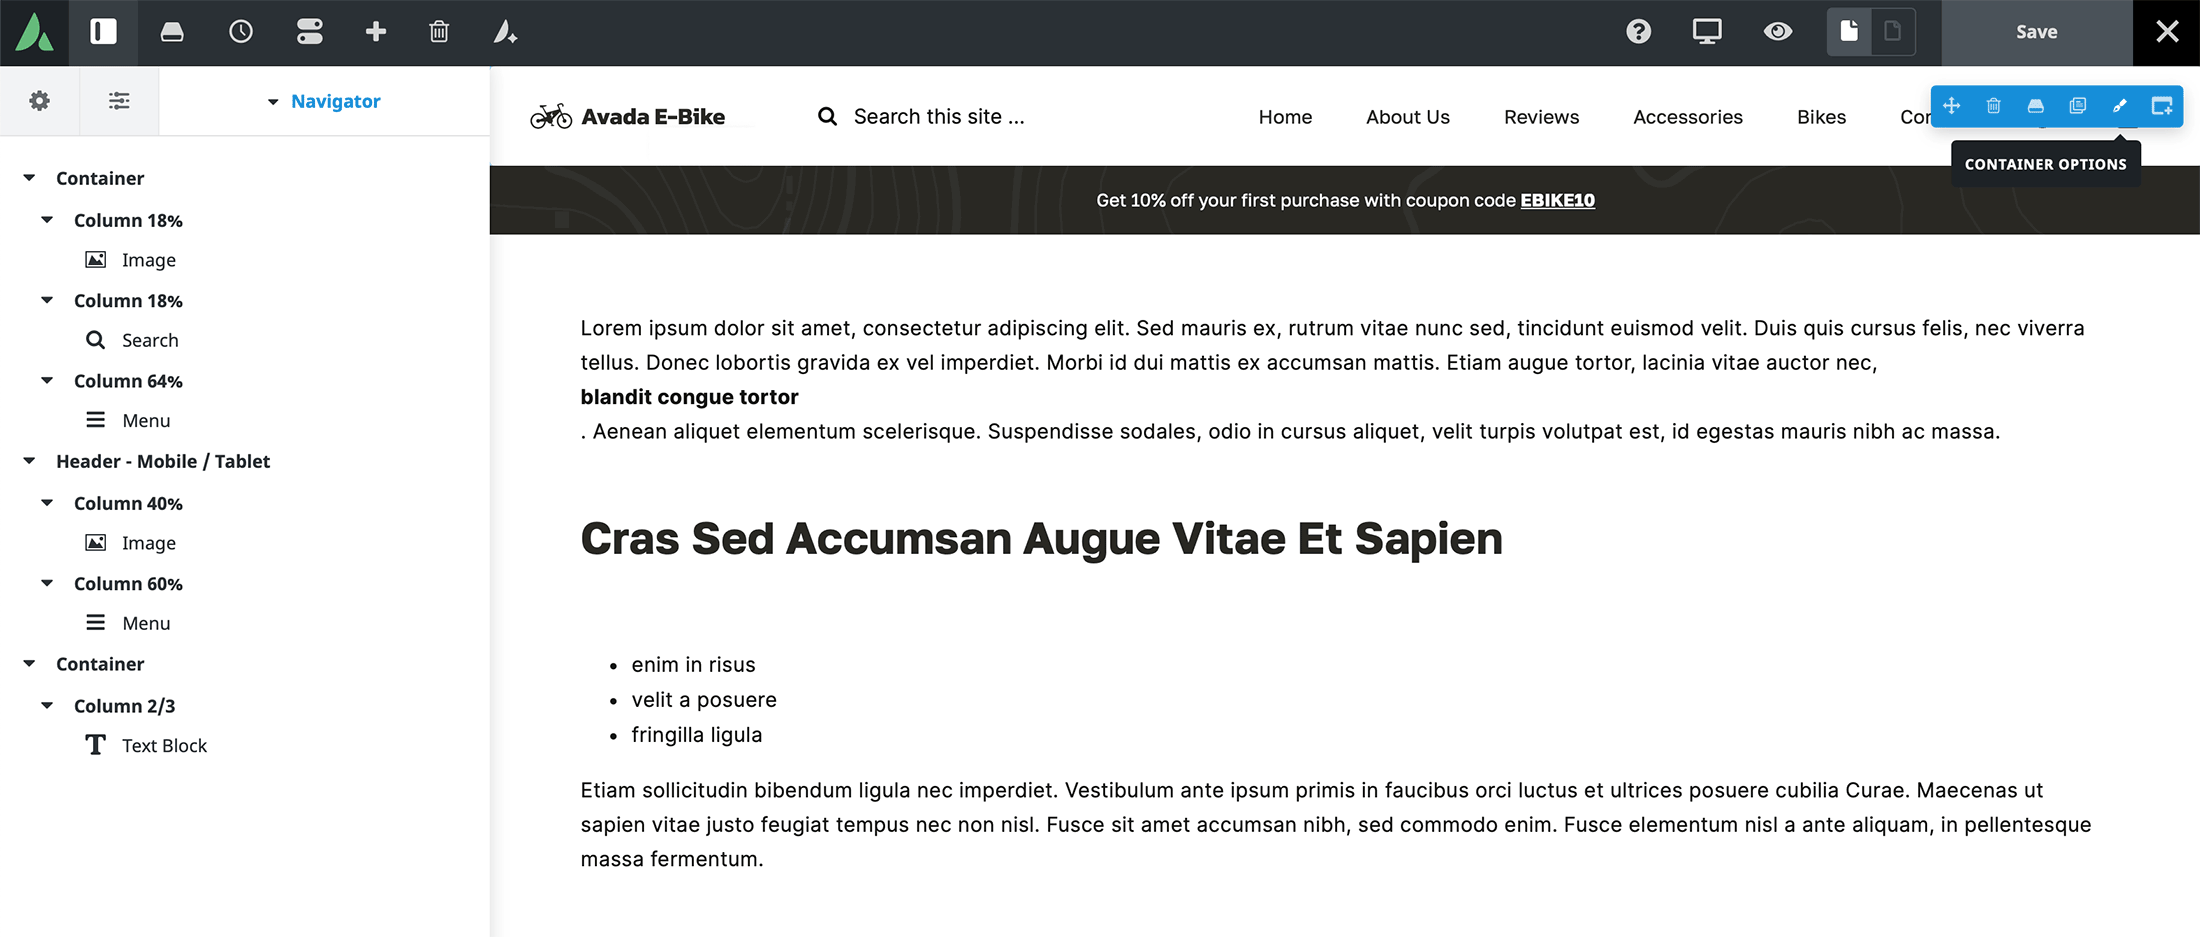
This means desktop visitors see a more complex header layout, while mobile and tablet users see a simplified version tailored for smaller screens. By toggling Avada’s conditional rendering preview setting, it becomes easy to see exactly which containers are active on each device size while editing.
This approach is an elegant way to build responsive headers without relying on complicated CSS or multiple header layouts. Instead, everything lives in one place and responds intelligently to the visitor’s device.
Applying Conditional Rendering to Content
Avada Conditional Rendering becomes even more powerful when applied to individual Elements within page content. This allows a single page layout to serve different users in different ways.
In the tutorial example, a page section contains one container with two Columns. The left column displays a static background image, while the right Column displays content that changes based on whether the visitor is logged in and their user type.
When a visitor is logged out, they see a title and a login form encouraging them to sign in. Once logged in, the content changes automatically. Logged-in users are greeted by name with dynamic data from their user profile, along with a button that displays a coupon code.
For users who are logged in and also recognised as customers, the content changes again. In this case, additional messaging appears along with a different coupon code. All of this happens within the same Column, using Conditional Rendering rules applied to each individual Element.
How Conditional Rules Work in Avada
All Avada Elements that use conditional rendering are controlled from the “Extras” tab in the Element settings. Here, conditions are built using a combination of condition types, relational operators, and values.
For example, an Element can be set to display only when the user is logged out, or only when the user’s role is customer. Multiple conditions can also be combined using “and” or “or” logic, allowing for very precise control over when content appears.
Dynamic data can be layered on top of this logic as well. In the tutorial, user metadata is used to display the visitor’s first name, making the experience feel more personal and interactive without adding complexity to the layout.
Designing Smarter User Experiences
What makes Avada Conditional Rendering so valuable is its ability to adapt content to real-world user scenarios. A single page can now serve new visitors, registered users, and paying customers, all with tailored messaging and calls to action.
This approach reduces the need for duplicate pages or complex workflows while improving clarity and relevance for the visitor. Whether it’s encouraging users to log in, rewarding loyal customers, or simplifying layouts for mobile devices, Conditional Rendering helps designers deliver the right content at the right time.
Summary
The examples shown in the tutorial are just the beginning. Conditional Rendering in Avada can also be used with posts, WooCommerce products, events, and even custom fields created with the Advanced Custom Fields plugin. With a bit of planning, entire sections of a website can adapt dynamically based on context, user behaviour, or content data.
For beginner Avada users, conditional rendering is a feature worth exploring early. It not only simplifies responsive design and personalisation but also encourages a more thoughtful approach to content structure. With creativity and experimentation, it becomes a powerful tool for building modern, flexible WordPress websites using Avada.