Share
The Avada Form Builder is a vital component of Avada. It is a versatile tool that allows users to create various forms for their websites easily. Whether it’s a simple contact form, a multi-step process form, or an advanced form with conditional logic, Avada Forms provides flexibility and intuitive control through the Avada Live Visual Builder interface. This step-by-step guide will walk you through building and integrating stylish Avada Forms into your WordPress website. Let’s get started!
Overview
What Is The Avada Form Builder?
The Avada Form Builder is an intuitive tool with a drag-and-drop visual interface, making it easy to build forms without code. It offers a range of possibilities, from basic contact forms to more complex forms that can include multiple steps and conditional logic. Users can start with pre-designed templates or create forms from scratch and style them perfectly to match their branding.

Another essential feature is the ability to set up email notifications, both for the site owner and the user submitting the form. This ensures that submissions are correctly tracked and responses are automated when needed.
Why Do You Need Forms On Your Website?
Web forms are essential for websites because they serve as a direct communication channel between your website and customers, enabling various functions crucial for business, engagement, and user experience. Here are some of the primary reasons forms are needed on a website:
How To Use Avada Forms Effectively
It’s essential to focus on creating forms that serve a clear purpose while ensuring they provide a seamless user experience. Start by defining the form’s goal, whether it’s to capture leads, collect feedback, or process inquiries. Having a clear objective helps you design a form that asks for the right amount of information, avoiding unnecessary fields that may discourage users from completing the form.
Next, take advantage of Avada’s conditional logic feature, which allows you to personalize the form based on user input. This ensures that each visitor only sees fields relevant to their situation, creating a more streamlined and engaging experience. Simplicity is key—keeping the form concise and easy to navigate will lead to higher completion rates.
Visual design plays a crucial role as well. Use Avada’s styling tools to ensure that your forms are visually aligned with your website’s overall branding. Customizing colors, fonts, and buttons allows you to maintain consistency across your site while making the form visually appealing. Furthermore, responsive design is critical, so always test your forms on mobile devices to ensure they’re user-friendly across different screen sizes.

Incorporating email notifications and auto-replies is another way to use Avada Forms effectively. Setting up notifications ensures that form submissions promptly reach the right person or team. Auto-replies reassure users that their submission was successful, enhancing their overall experience. It’s also paramount to add spam protection, such as reCAPTCHA, to prevent unwanted submissions and ensure the integrity of your data.
Finally, continuously analyze the performance of your forms by reviewing submission data and feedback. Consider simplifying or improving those sections if you notice high drop-off rates in certain fields. Testing different post-submission actions, such as redirecting users to a thank-you page or displaying a success message, can also help optimize the user journey after they’ve completed the form.
Using the Avada Podcasts pre-built website, we’ll take a closer look at building a custom Avada form in a few easy steps. Let’s get started:
Step 1: Accessing Avada Forms
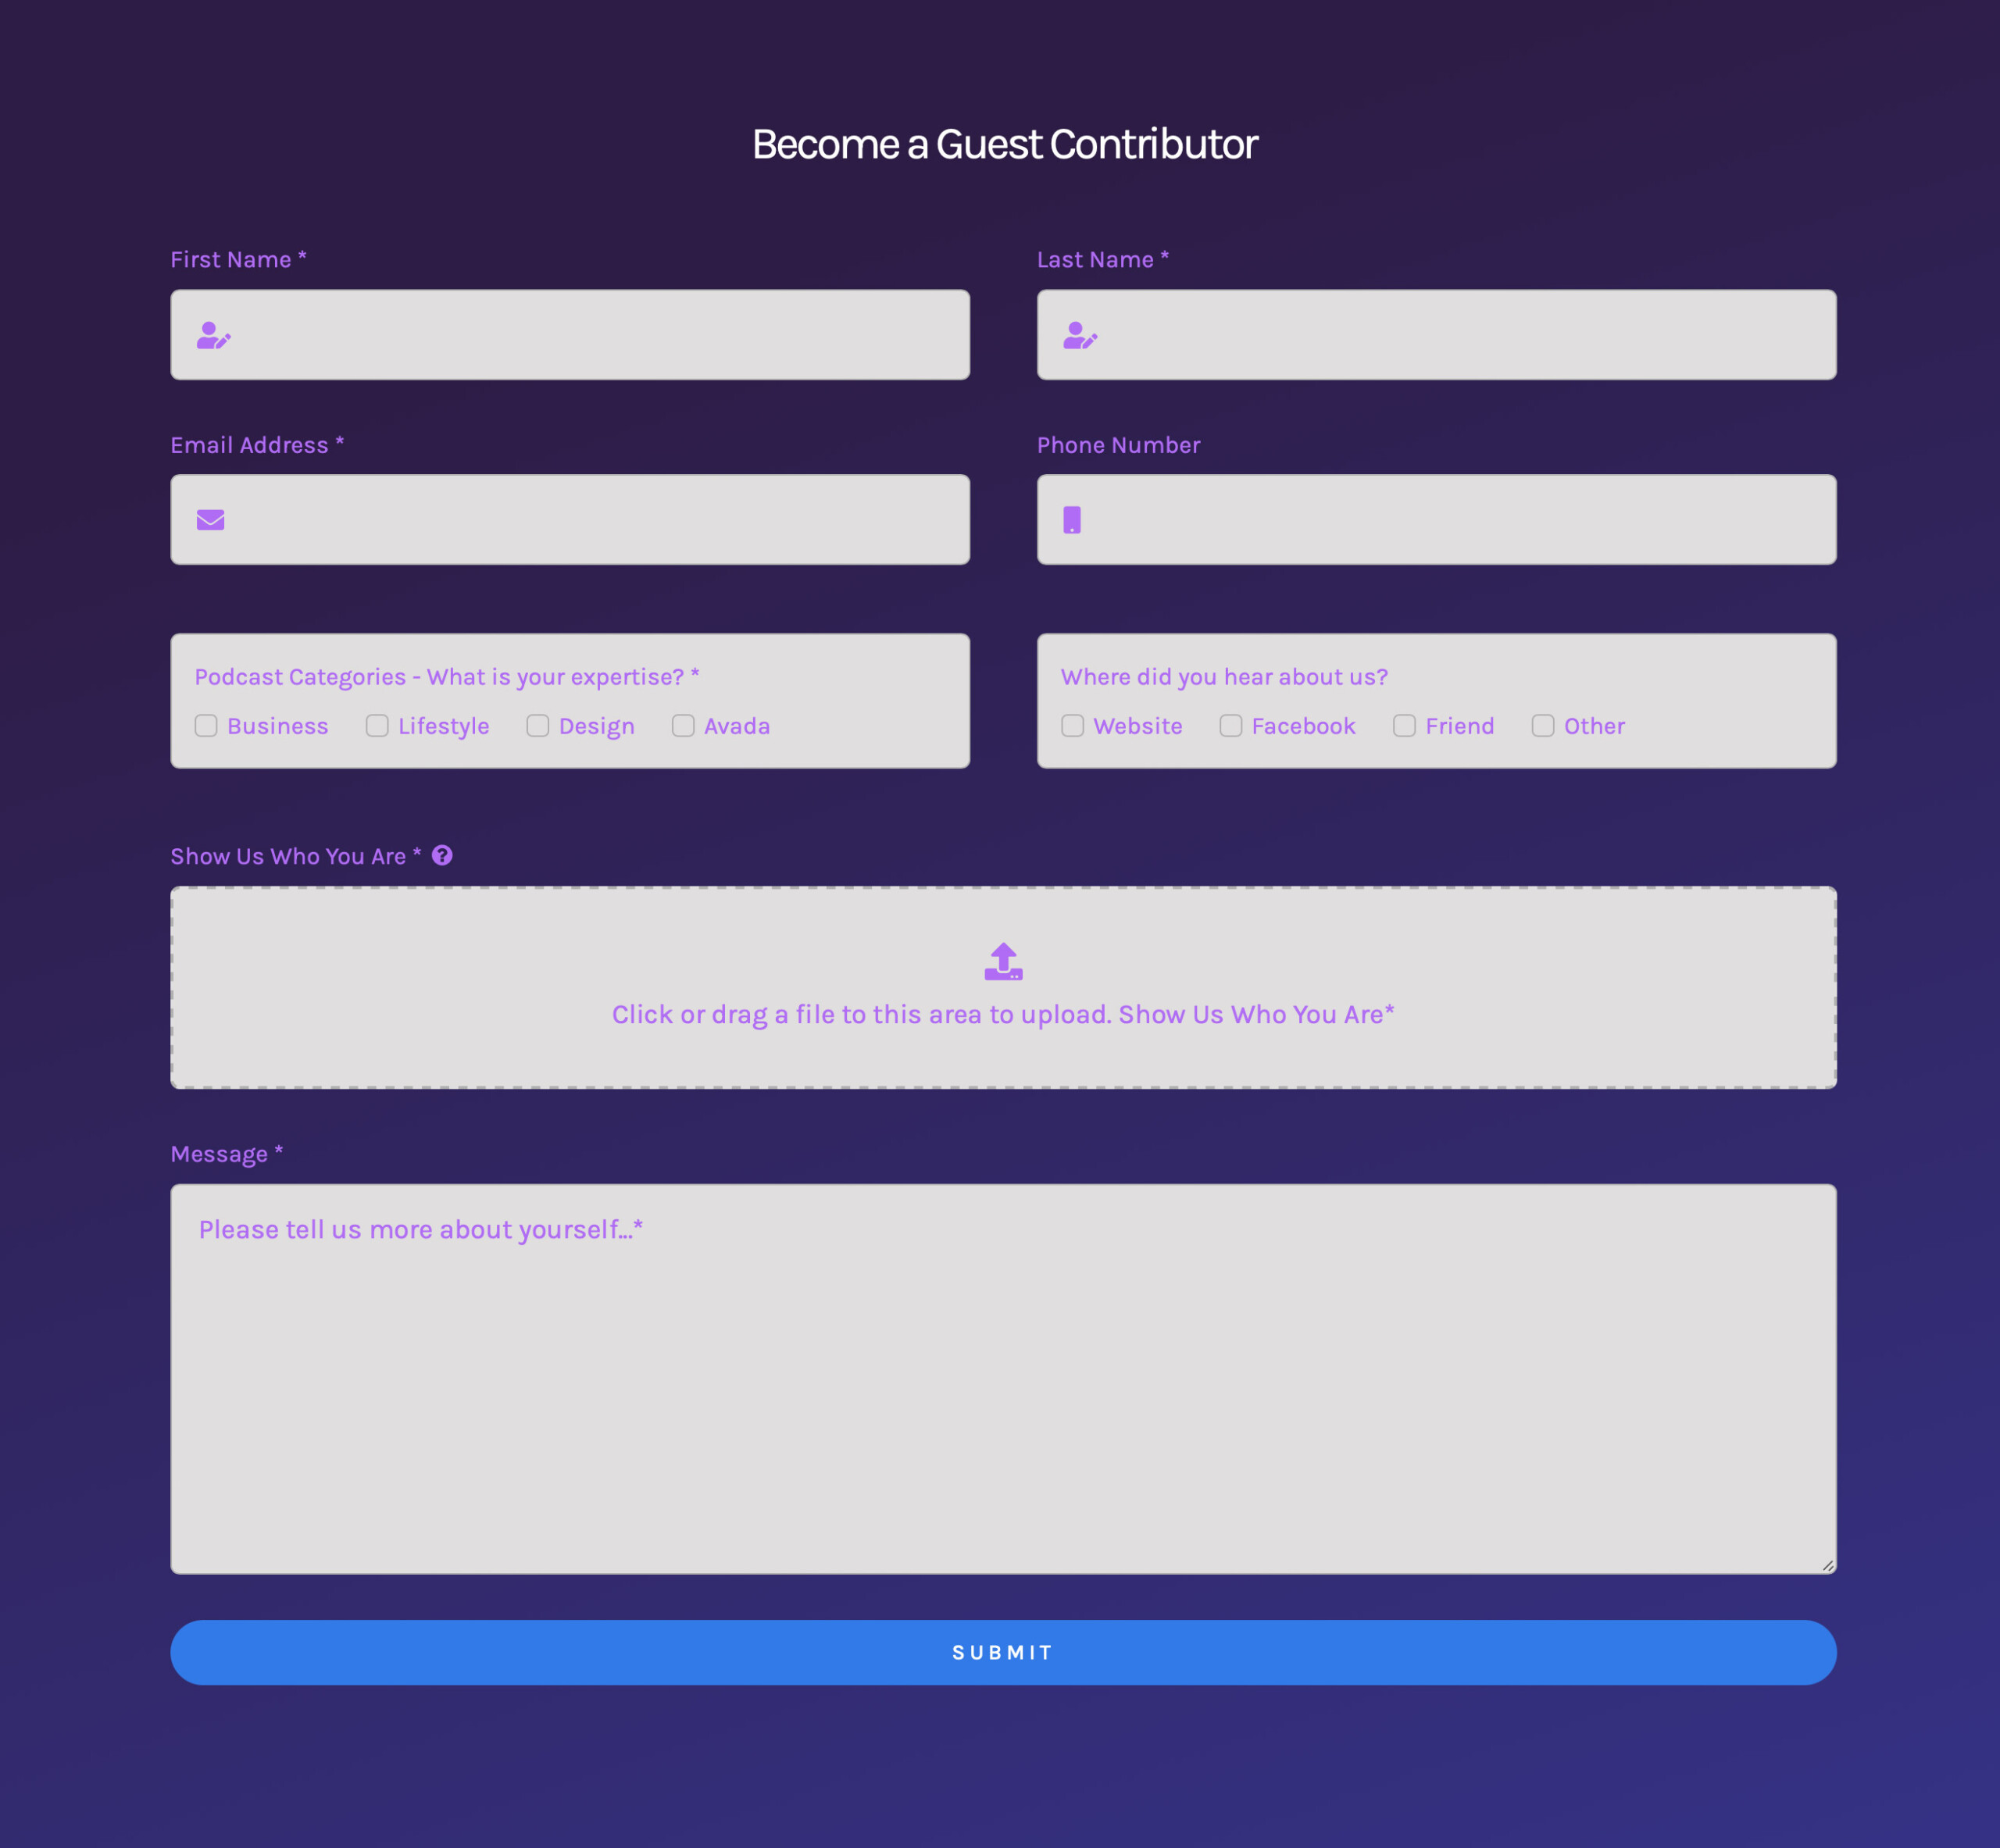
To begin building a form, log into the website’s WordPress Dashboard and navigate to Avada > Forms. Start by clicking “Create New Form,” which opens the Avada Form Builder interface. In this example, we’re creating a form for potential guest contributors called “Guest Contributor.”
Step 2: Choosing The Form Layout
When you create a form, you have two options: (A) start from scratch or (B) use pre-built templates available in Avada Studio. Avada Studio provides many templates for primary contact forms, multi-step forms, and more. For this guide, we’ll build the form from scratch.
To begin, add a Container to structure your form. For this example, a Container with two half Columns is used. Then, add Elements to the form, such as text fields, by clicking the “Add Element” button.
Step 3: Adding Form Elements
Avada Forms offers a wide variety of Form Elements you can add and configure to build the form that best suits your needs. Here’s an overview of the Elements used for the guest contributor form we set up in the video tutorial:
Step 4: Styling the Form
Avada Forms and Elements can be customized extensively to create stylish and engaging forms. In the tutorial video example, the form fields were customized by adding icons, changing background colors, and adjusting padding and margins. The goal is to ensure the form looks cohesive and matches the website’s design (example above).
For instance, a purple background was chosen for the form, and the field background colors were adjusted accordingly. Styling options such as “Border Colors” and “Border Radius” were applied to maintain consistency with other Elements on the page.
Step 5: Configuring Form Behavior
Once the form is built, it’s time to configure how it behaves upon submission. The submission options allow you to define what happens when a user submits the form. Some of the available options include:
Step 6: Setting Up Notifications
Notifications allow you to receive form submissions via email. You can also configure auto-replies for users to confirm that their submission was successful. For example:
Step 7: Finalizing the Form
Once the form is ready, finalize it by configuring confirmation settings. You can display a message upon form submission or redirect users to a specific page, such as a thank-you page. In this case, a simple success message is displayed using the “Notice” element within the form. Colors for success and error messages were adjusted to match the overall design of the form.
Step 8: Embedding the Form on the Website
After completing the form, it’s time to embed it on the desired webpage. For our example, the form is added to the “Guest Contributor” page. Using the Avada Form Element, the form can be selected from a drop-down list and inserted into the page. The form is fully responsive and fits seamlessly into the page’s design.
Summary
Avada Forms provides a flexible, powerful way to create forms tailored to your website’s needs. From simple contact forms to more complex multi-step processes, you can fully customize the look and functionality of your forms. If you want to learn more about creating multi-step forms or using conditional logic, check out the entire Avada Forms playlist.


