Using Modern Image Formats in Avada
Last Update: December 8, 2025
WebP and AVIF are modern image formats designed to deliver high-quality visuals while keeping image file sizes much smaller than those of traditional formats like JPG or PNG. Both are widely used on modern websites because they help pages load faster, improve performance scores, and reduce bandwidth.
In everyday terms, WebP = great quality with much smaller files, and AVIF = even better compression and quality, especially for detailed or high-contrast images. Using either format helps your site load faster, look better, and score higher on performance metrics like Google’s Core Web Vitals.
Step 1: Avada Global Options
It all starts in the Avada Global Options. You will need to decide on the image format you prefer for your website going forward. Navigate to the WP Dashboard > Avada > Options > Global Options > Performance page, and look for the “Upload Image Format” option in the “Images” section. Here you are presented with the following options:

There are three option states: “Default”, “WebP”, and “AVIF”. If you have not previously converted the image formats, your Avada website’s default image format state will be set to “Default”.
Select a modern format for uploading new images to the website’s media library. Regardless of whether you choose “WebP” or “AVIF”, this new format is applied to all newly uploaded images.
Before making this change, all previously uploaded images will be stored in the “Default” format → (*.jpeg, *.jpg, *.gif, *.png). And, for both the “WebP” and “AVIF” formats, when selected, if you “Enable” the Keep Original Upload Images option, the image in its original upload format and the thumbnails will be kept.

Option: Keep Original Upload Images
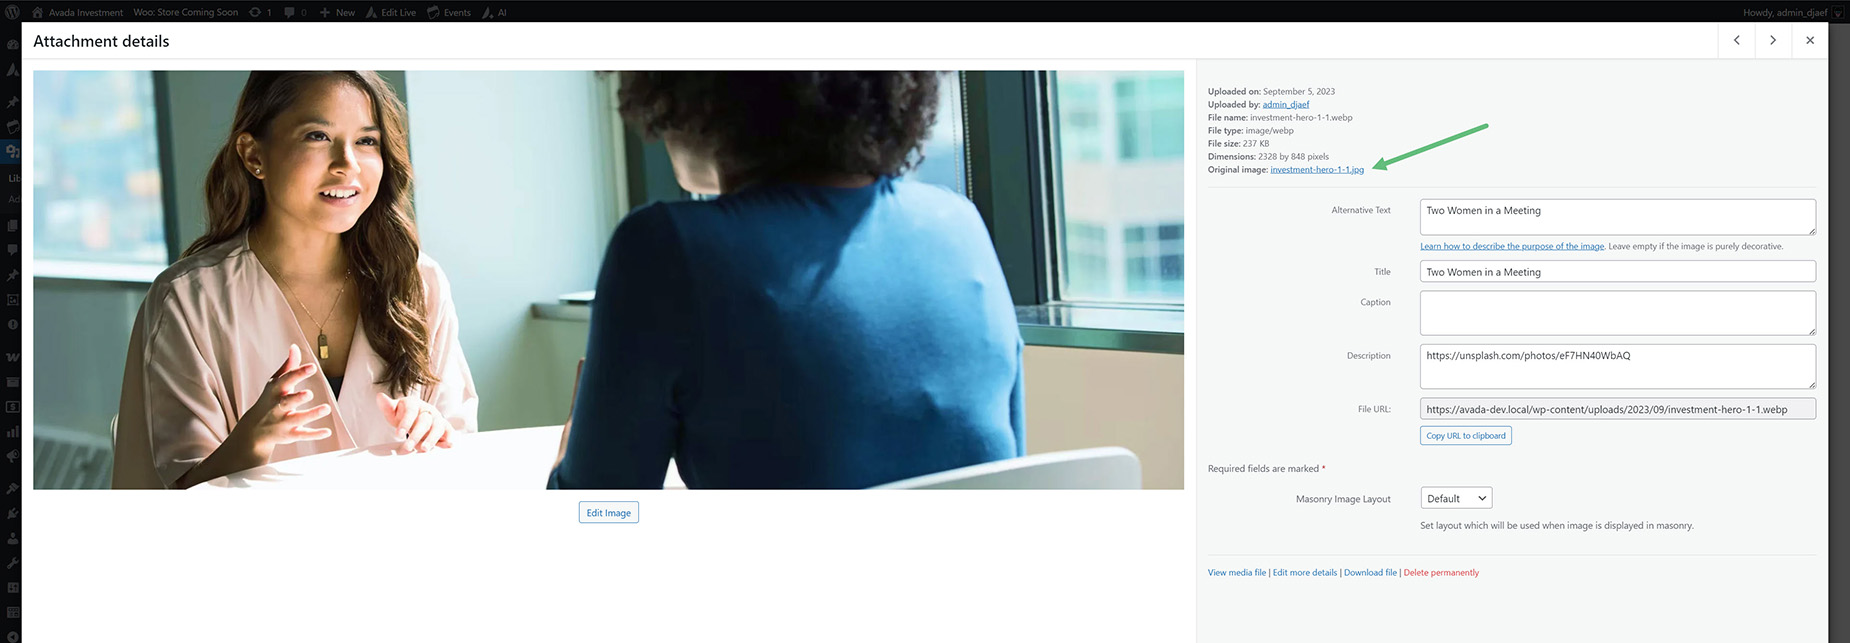
(Enable/Disable) – If enabled, the image with its original upload format and the thumbnails will be kept. This will increase the filesystem storage use of your images. The original image is available from the image meta data panel in the Media Library, as seen below. This is relevant to single image uploads, as well as the entire media library if you convert all images from the Avada System Status page (WP Dashboard > Avada > Maintenance > System Status).
Option: Display Image Format
(Modern/Original) – If set to “Original”, Avada will try to load the images in their original upload format. If set to “Modern”, it will try to load the images in the upload image format you set above.
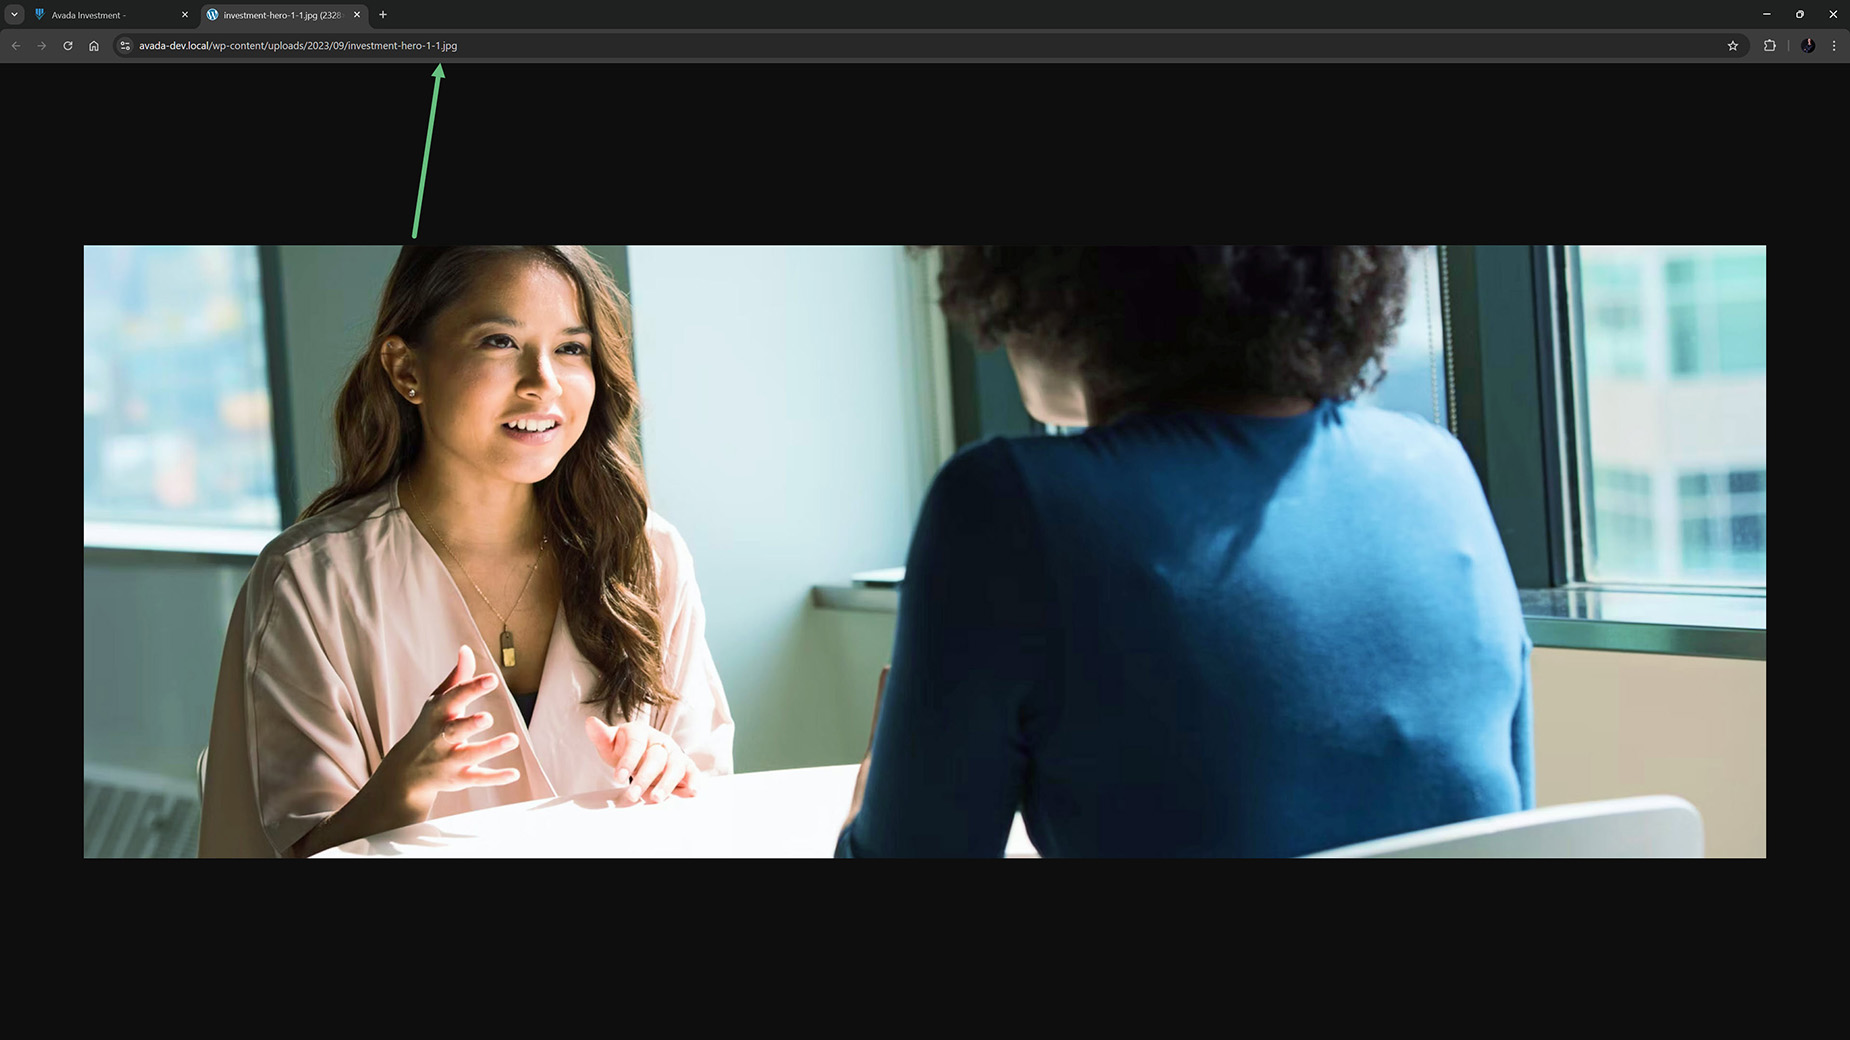
If you have converted your media library images and enabled the “Keep Original Upload Images” option, a final option appears: “Display Image Format”. With this option, it’s set to Modern by default, but if you set it to Original, Avada will try to load images in their original format. So, this option basically lets you revert to the original set of images after they have been converted.
With this option enabled, if you view the site on the front end and open an image in a new tab, you will see in the URL that it’s the original format being loaded.
Step 2: Convert Image Formats
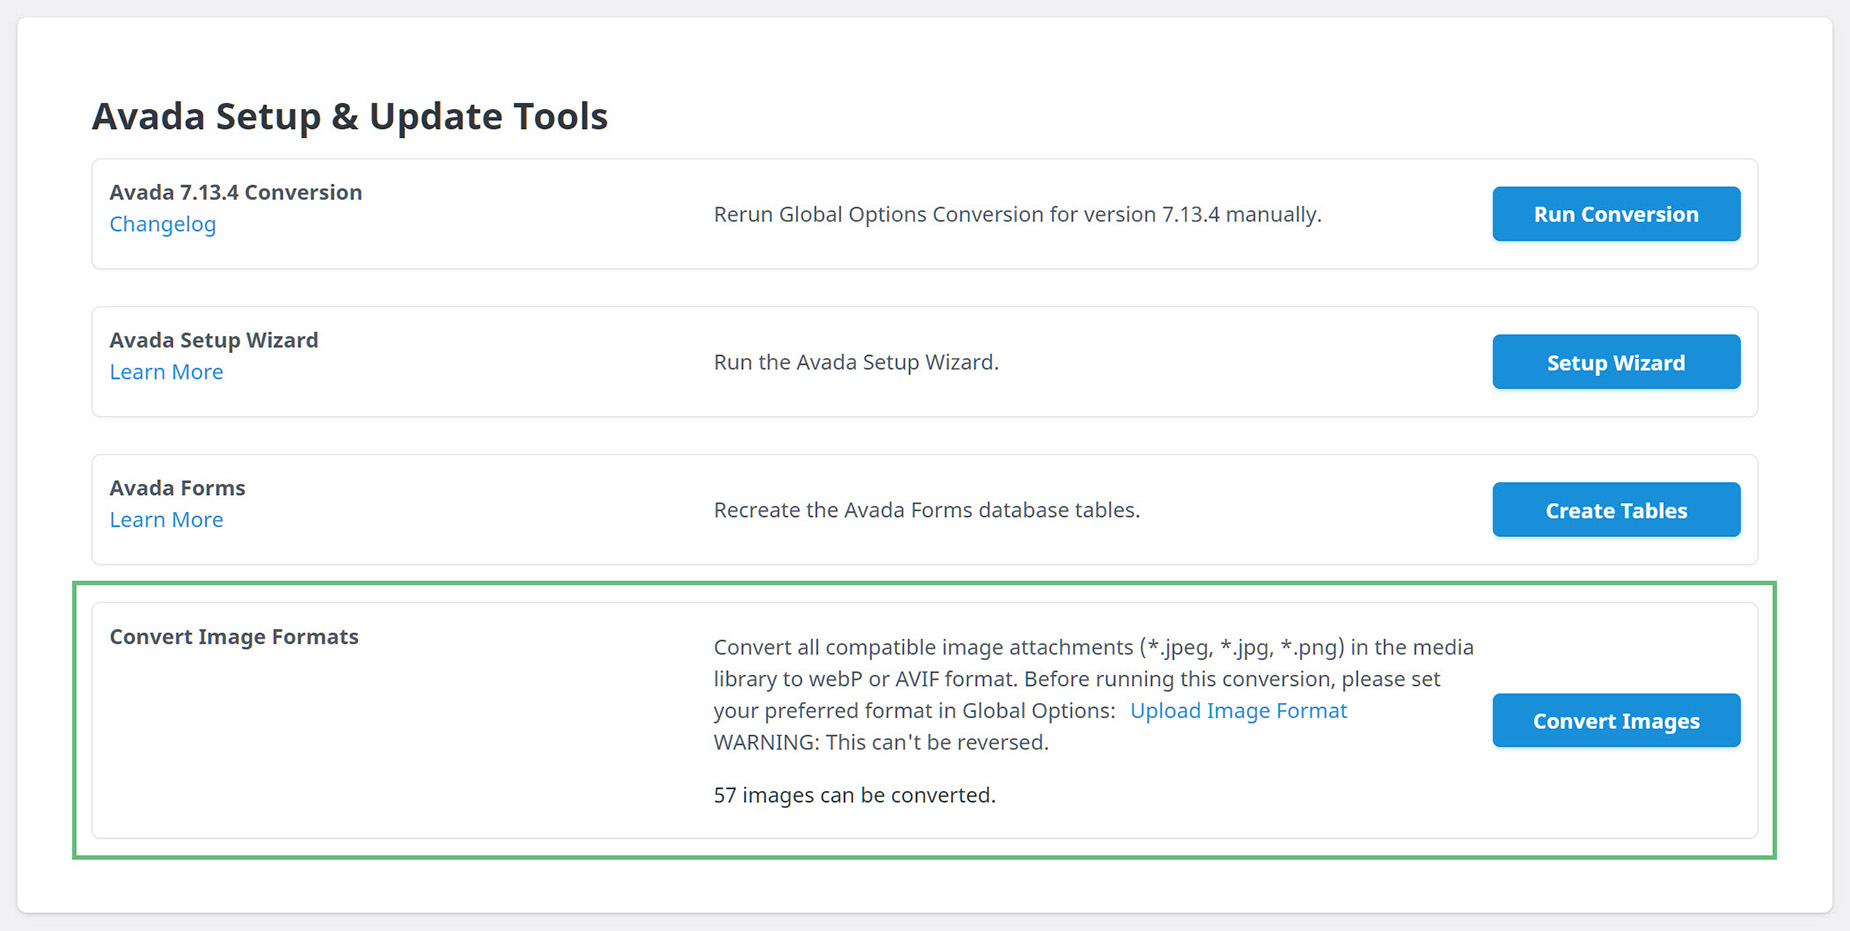
Once you have completed Step 1, navigate to the image converter located in WP Dashboard > Avada > Maintenance > System Status. In the “Avada Setup & Update Tools”, you will find a “Convert Image Formats” option.
This will convert all compatible image attachments (*.jpeg, *.jpg, *.gif, *.png) in the media library to the WebP or AVIF format you selected in the Global Option mentioned above. Note that this process cannot be reversed.
Click “Convert Images”, and the images in the `WordPress Media Library will be converted. This will take some time, depending on your server resources and the number of images in the library.