How To Use The Woo Filter Elements
Last Update: March 20, 2026
The Woo Filter Elements allow the user to filter the products of a shop by way of their various product attributes. If you have a shop with lots of products, this is a great way to let your users find what they are looking for. Let’s look at how this works.
Read on for more details on how to set up and use the Woo Filter Elements, and watch the video below for a visual overview.
Shop Structure
The Woo Filter Elements replace the equivalent WooCommerce Widgets. The first thing to understand with these Elements is that they are layout elements, so you can’t use them directly on a shop page, and the second thing is that they only work with product archives.
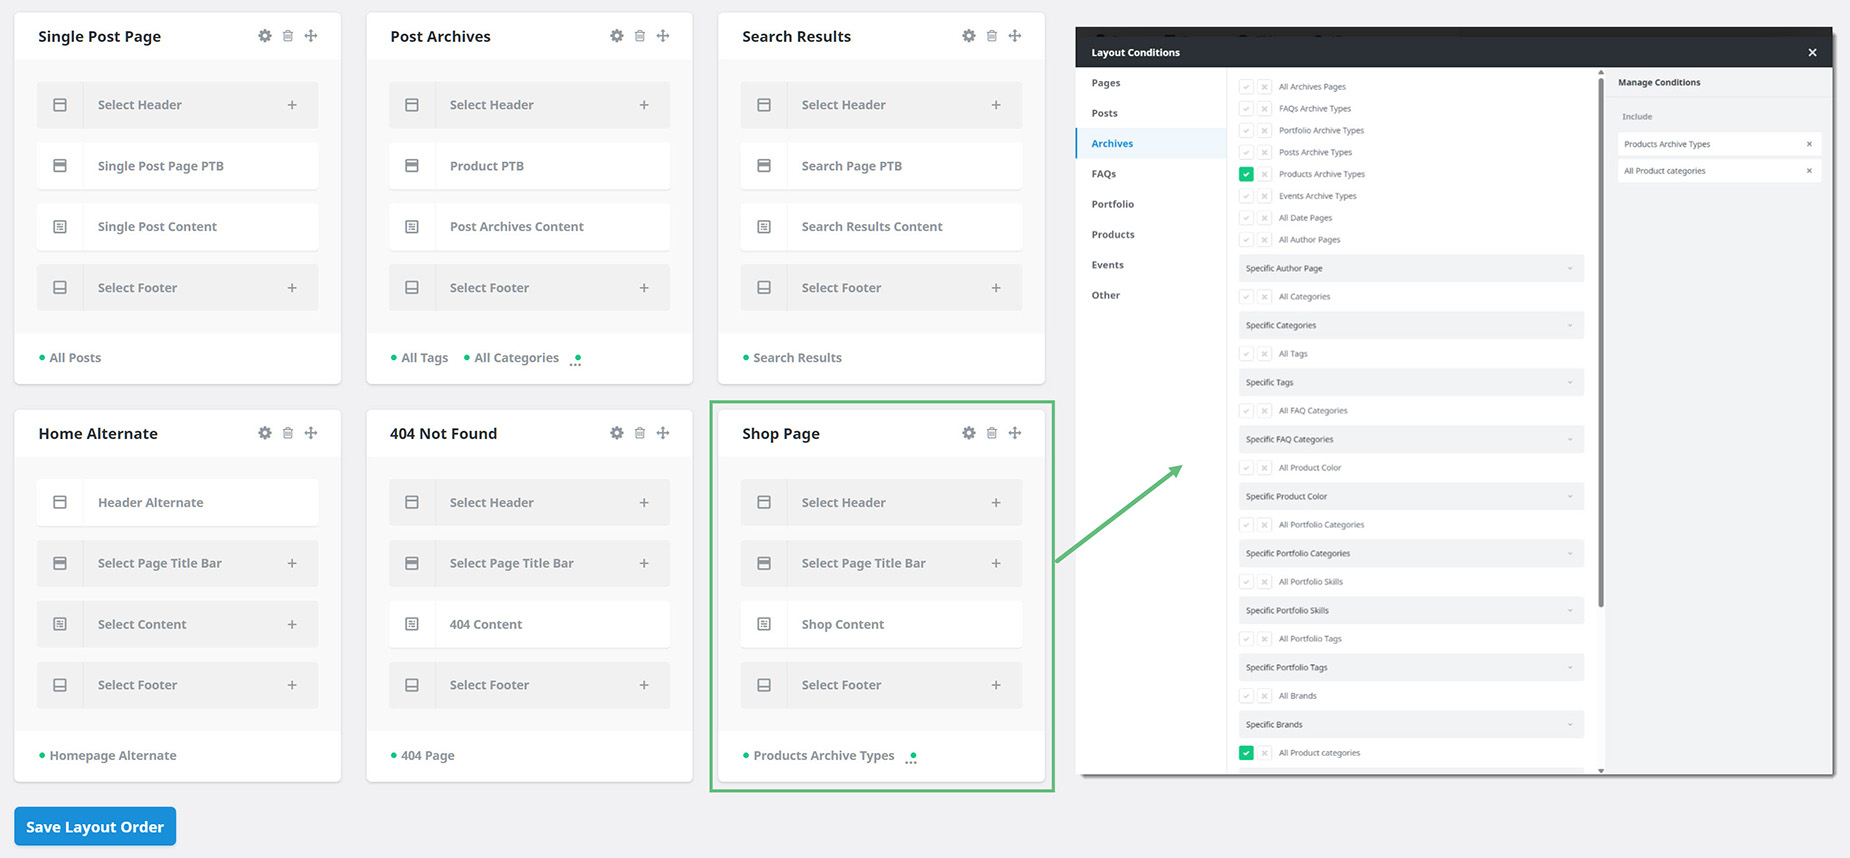
So, the way you have to build your shop page to take advantage of Woo Filter Elements is to use the Post Card Archives Element in a Layout Section, on a conditional layout set to display on Archives > Product Archives Type and optionally Archives > All Product categories. This would then work on the shop page and the product category pages.
Below you can see a Shop Page Layout, that has a Shop Content Layout Section. The Conditions of the layout are set to the Product Archived Types, and the All Product Categories.
Adding The Filter Elements
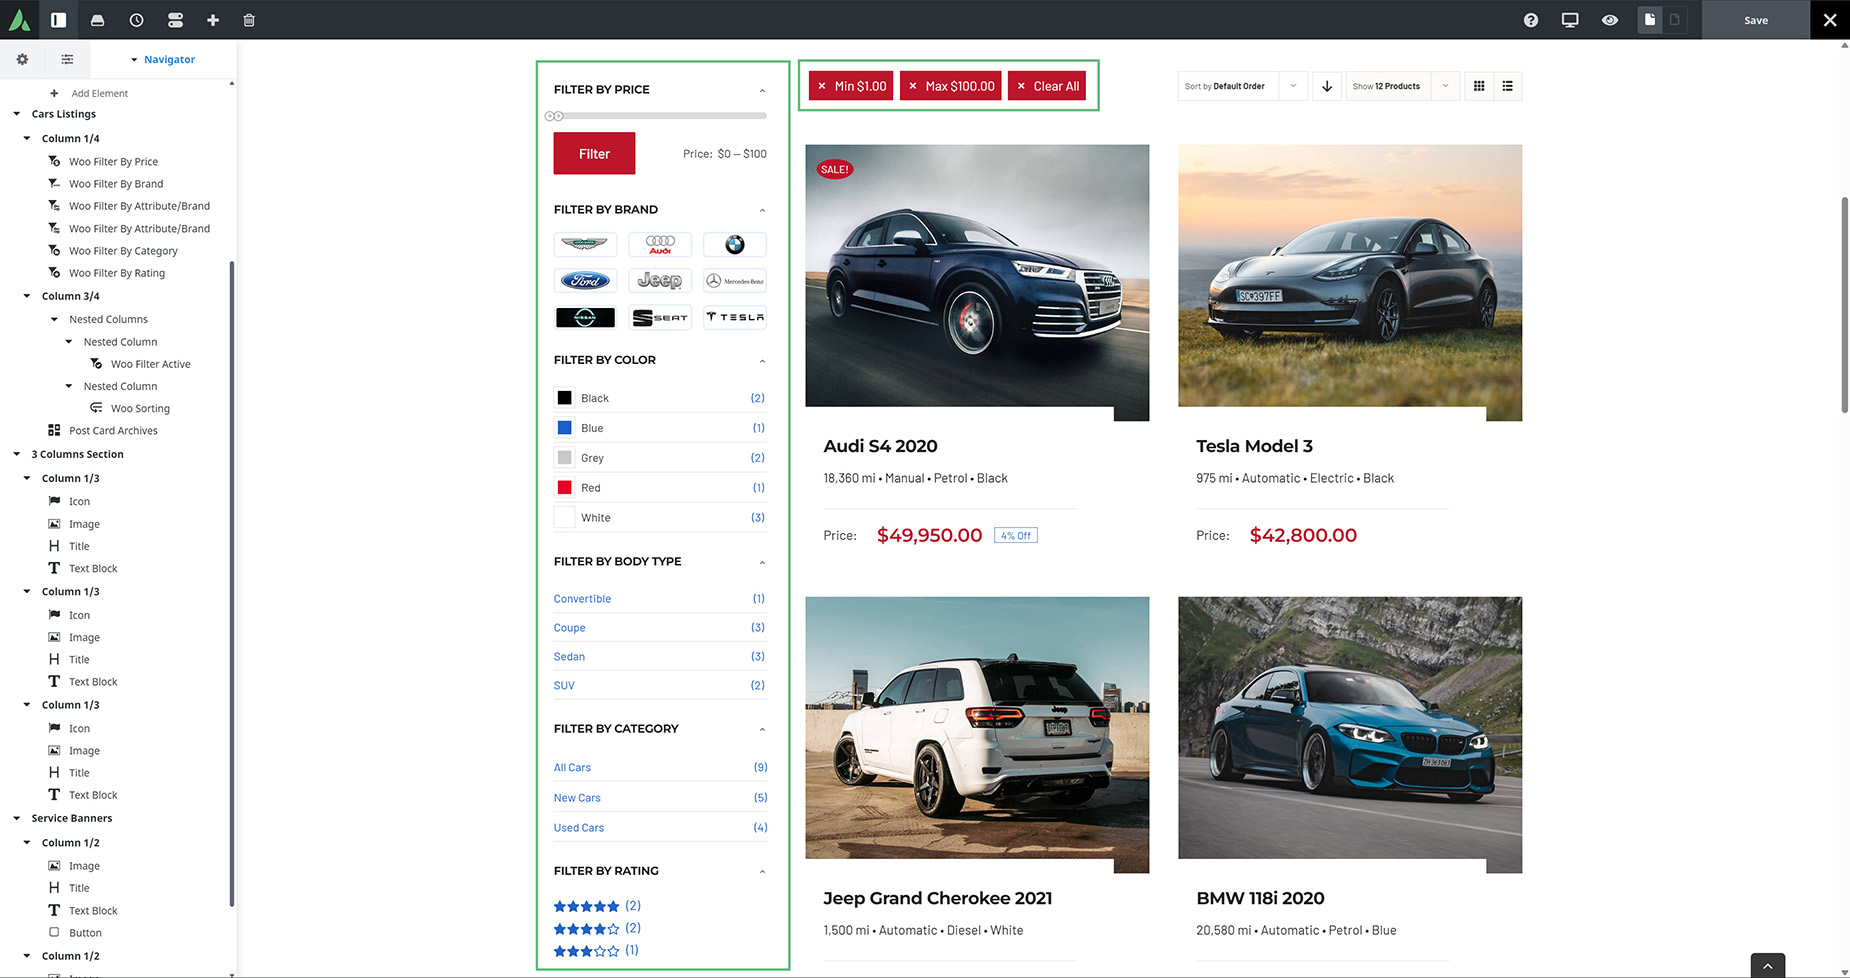
There are six Woo Filter Elements in all. The Woo Filter Active Element, the Woo Filter By Attribute/Brand Element, the Woo Filter By Brand Element, the Woo Filter By Category Element, the Woo Filter By Price Element, and the Woo Filter By Rating Element. The Woo Filter By Attribute/Brand Element can be used multiple times, as you can select any product attribute with each instance.
These must be added to a content layout section active on the Shop page, and/or on the Product category pages, depending on where you want filtering to be active. See the Avada Layouts documentation if you are not familiar with this must-use aspect of Avada.
Previewing The Filter Elements
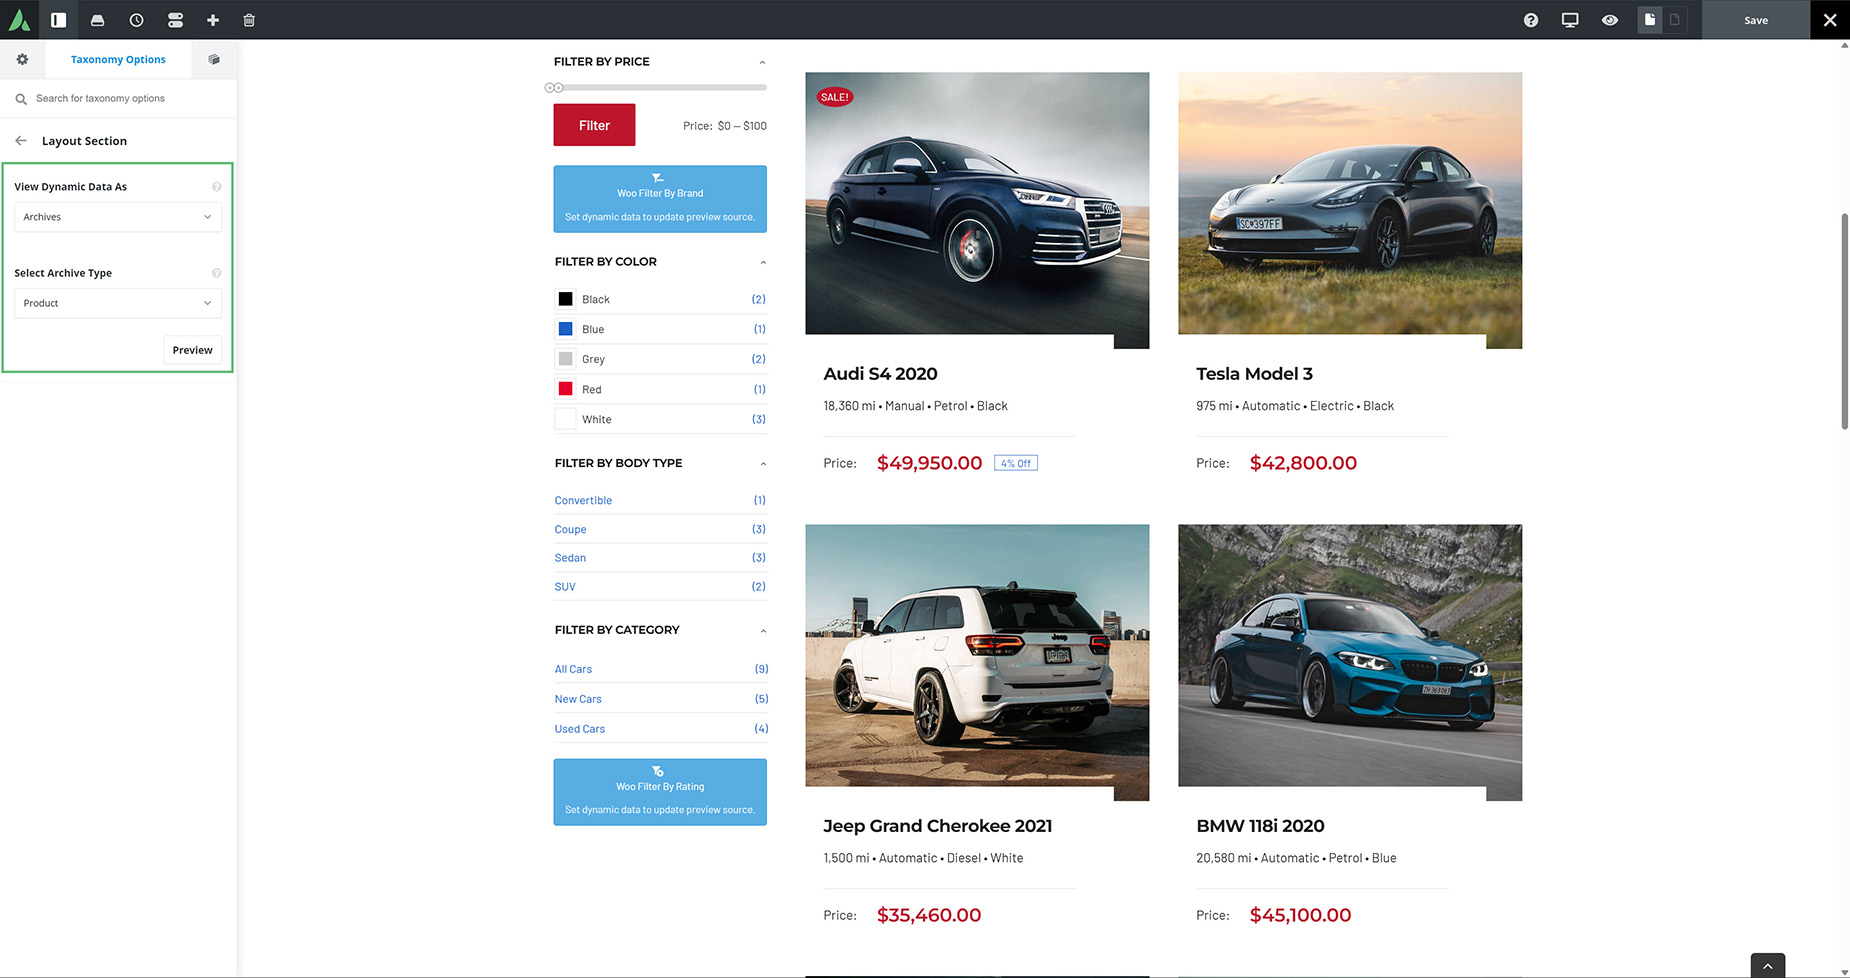
If you can’t see a live version of the filter elements when you add them, go to the Taxonomy Options tab (where the Page Options usually are) and then the Layout Section tab.
Here, set the View Dynamic Data As option to Archives, and the Select Archive Type option to Product. Then click preview. You should then see a live preview of the elements. If some are still not displaying, this will be because your products do not have any attributes, or you have not added any Brands or Reviews to them. In the image below, no Brands or Reviews have been added to the products, and so the elements can not preview. Woo Filtering can of course be used on basic products, but in that scenario, it’s mainly the price and perhaps the categories that you can filter.
Ajax Global Options
There are also a couple of global options that affect the way Woo Filters behave on the front end. These are found under Global Options > WooCommerce > General WooCommerce. Towards the bottom of the options you will find these two relevant options for filtering.
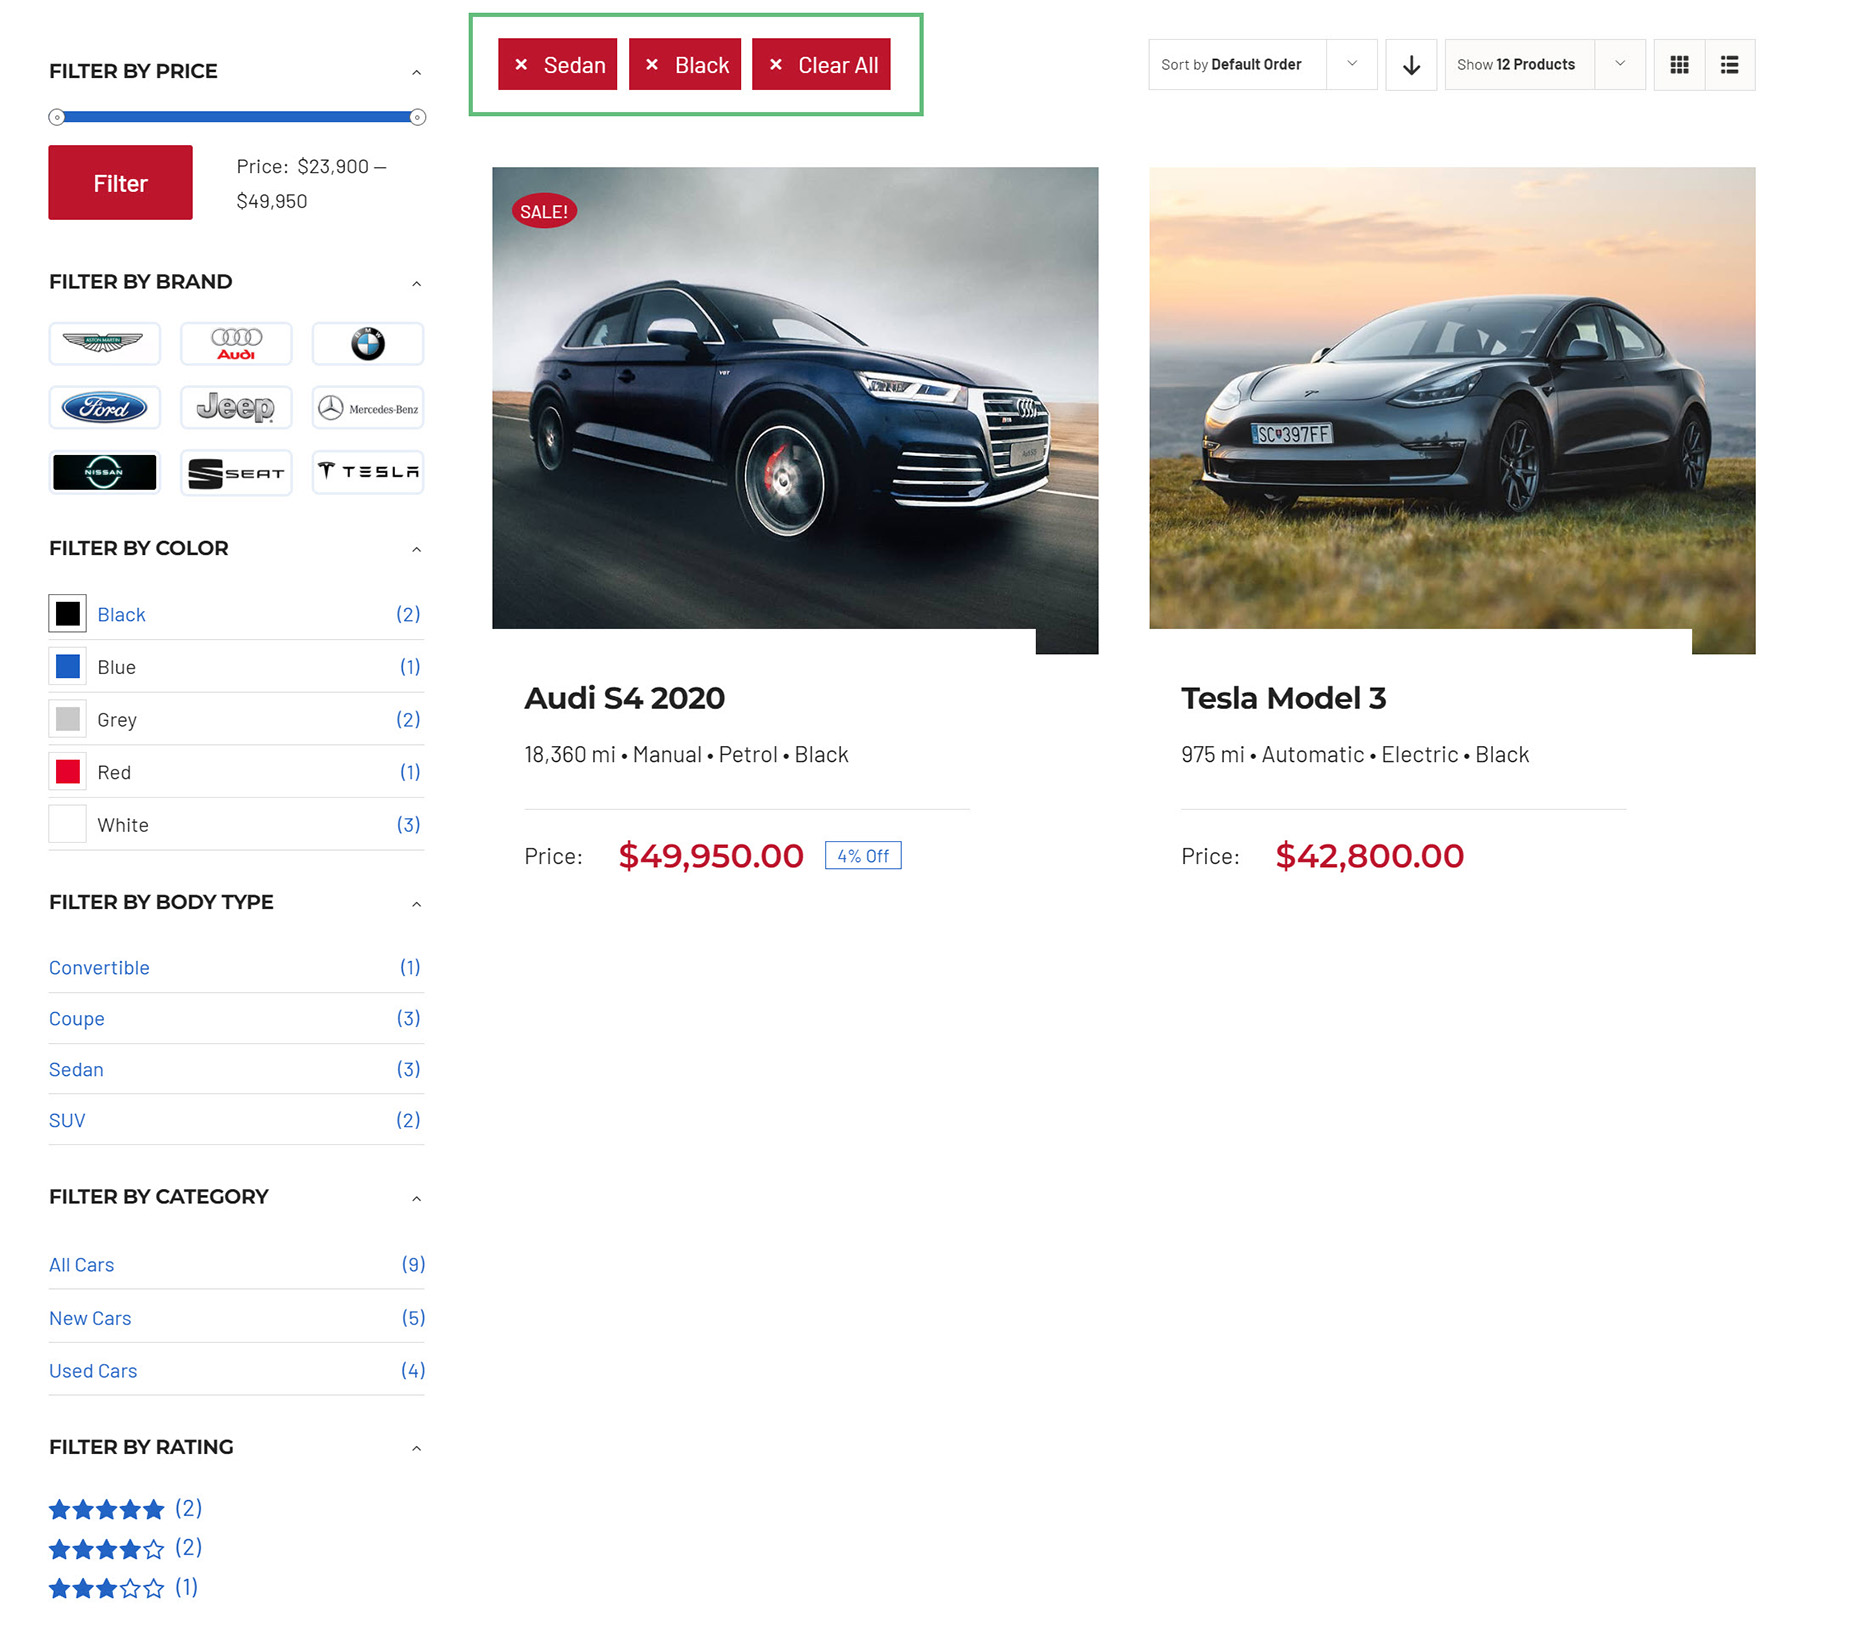
Filtering on the Front End
Filtering behavior on the front end can differ slightly, depending on the options chosen regarding AJAX, and the Filter Elements used. As you can see below from the Active Filter element above the car grid, the filters are showing any Black cars, that are also Sedans.