How To Use Avada Layouts
Last Update: November 4, 2025
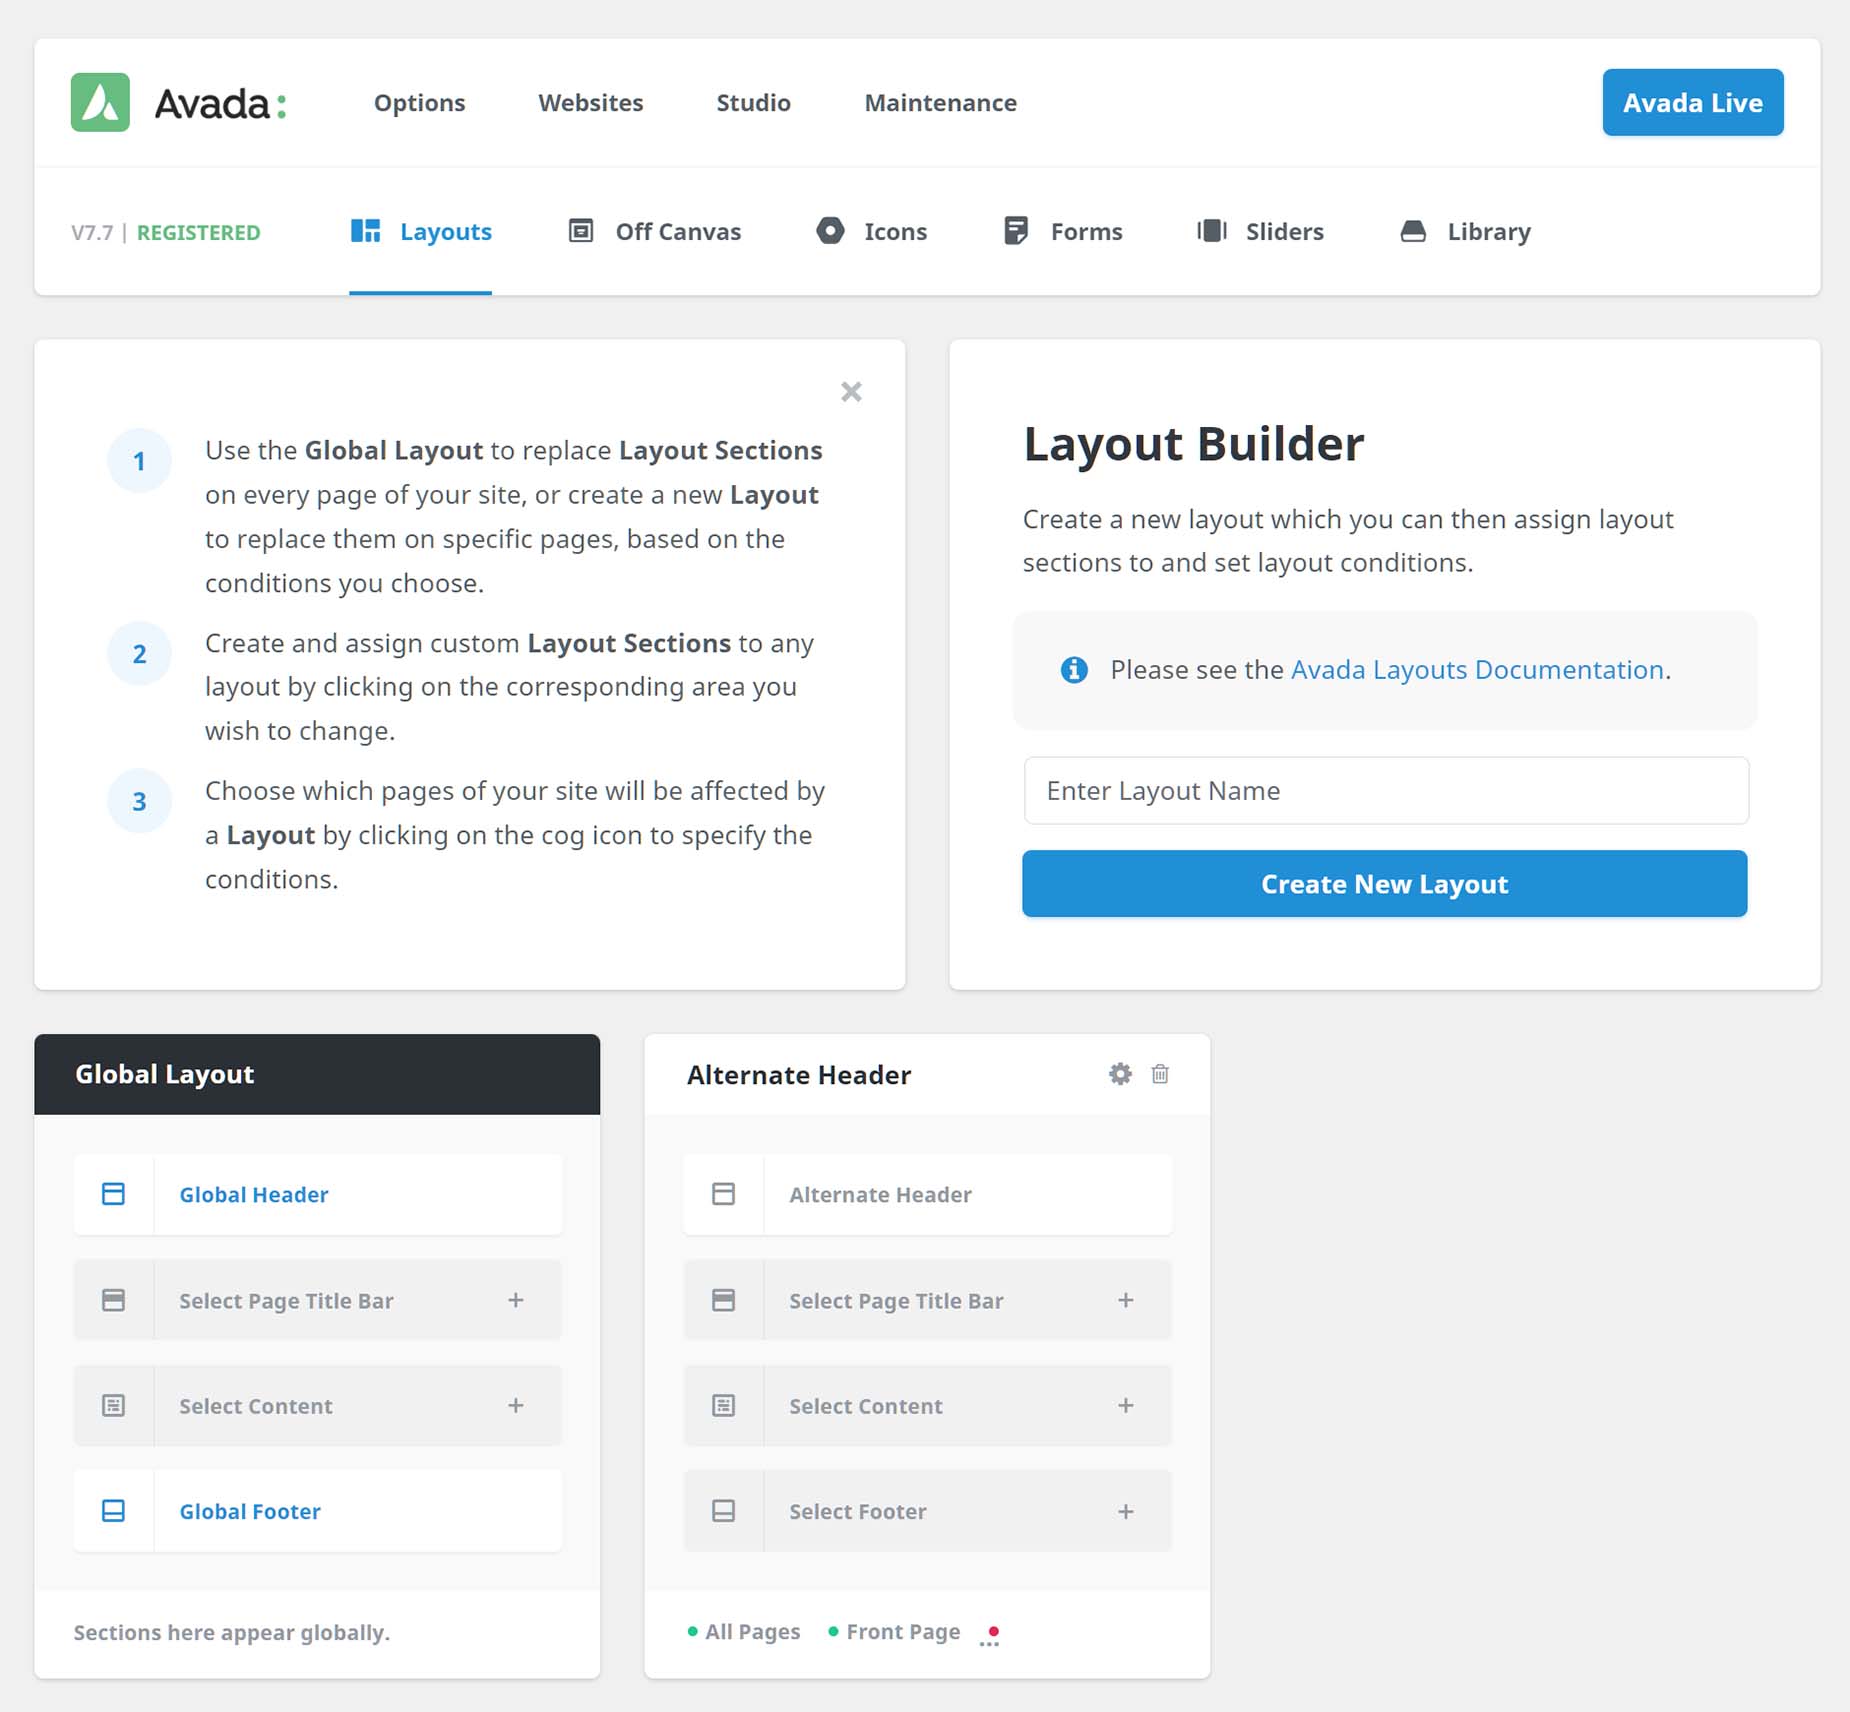
Avada Layouts is a templating system that uses the Avada Builder to create fully customized Layouts for all sections of your website, including both Global and Conditional Layouts. This game-changing feature can be found at Avada > Layouts.
The main advantages of using Avada Layouts are twofold. Not only does it allow you to have Custom Layouts, both Global or Conditional, on various sections of your website, but also that the Layouts themselves can be created using the full design power of the Avada Builder.
The flexibility this bestows is unparalleled and allows you to unleash your full creativity on all sections of your website. Read on to discover more about the awesome Avada Layouts, and watch the video for a visual overview.
Layouts and Layout Sections
A good place to get started is to understand Layouts and Layout Sections and how they work together.
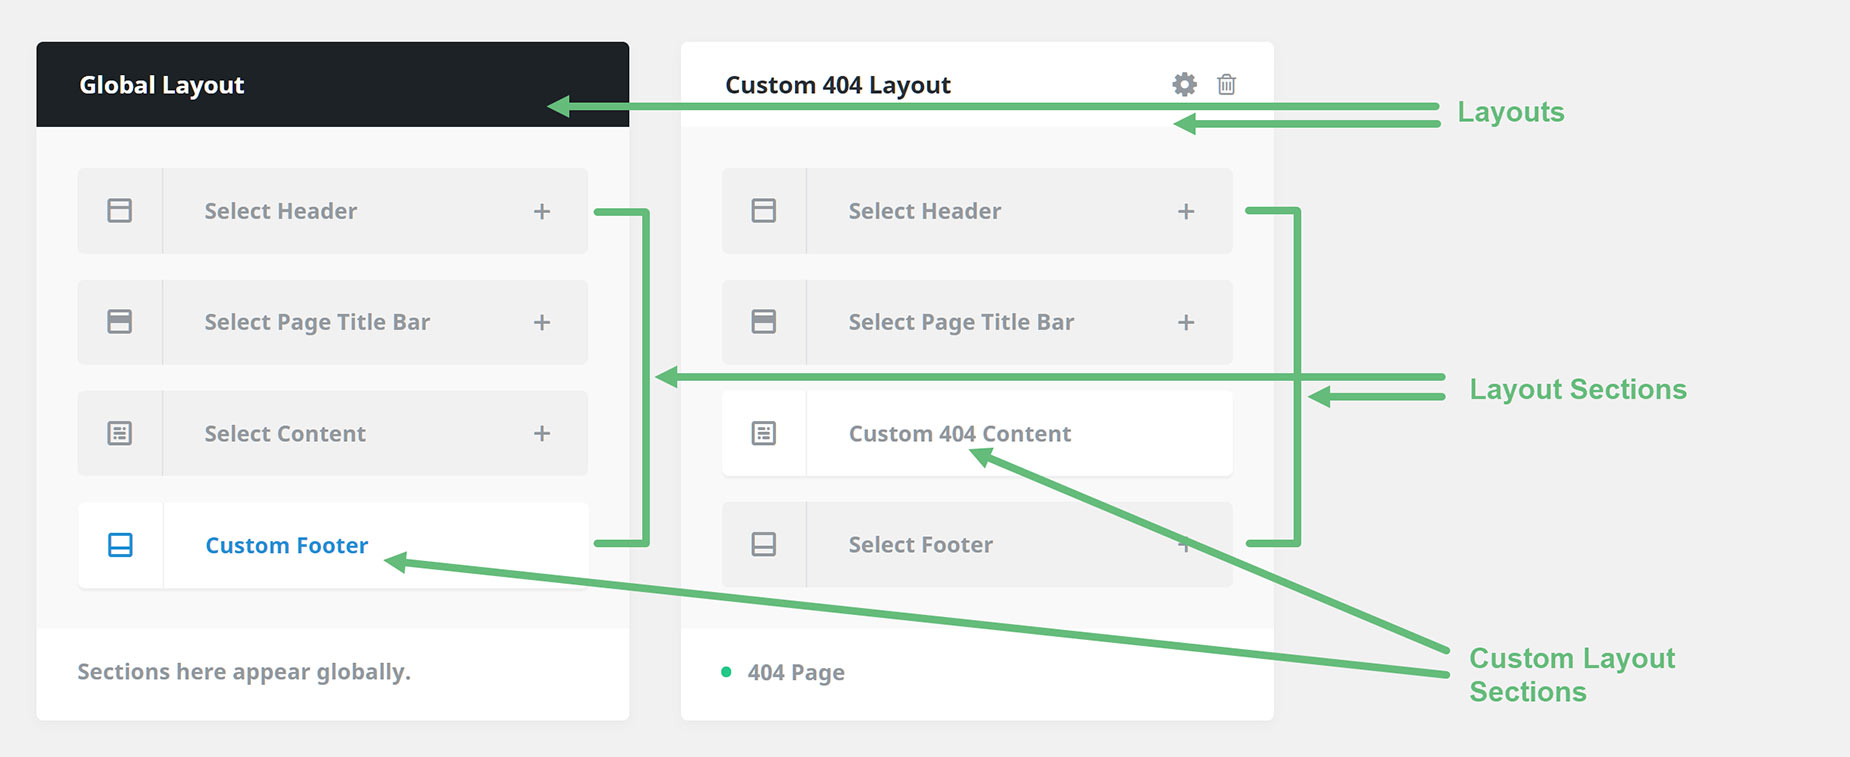
For full details, please see Understanding Layouts & Layout Sections, to learn more, but it is perhaps easiest to think of a Layout as simply a box that holds the various sections of the page. A page layout consists of content coming from four sections: a header section, a page title bar section, a content section, and a footer section.
The Layout Sections then, are templates for those specific areas of the page. So what Avada Layouts allows you to do, is to create and assign your own custom layout sections to layouts throughout your website. This can be done globally, by assigning Layout Sections to the Global Layout, or you can create your own conditional Layouts that are only used on various pages or post types etc, and then populate that layout with various Layout Sections. Together, you can consider them a template for how the page layout should look.
Understanding Conditional Layouts
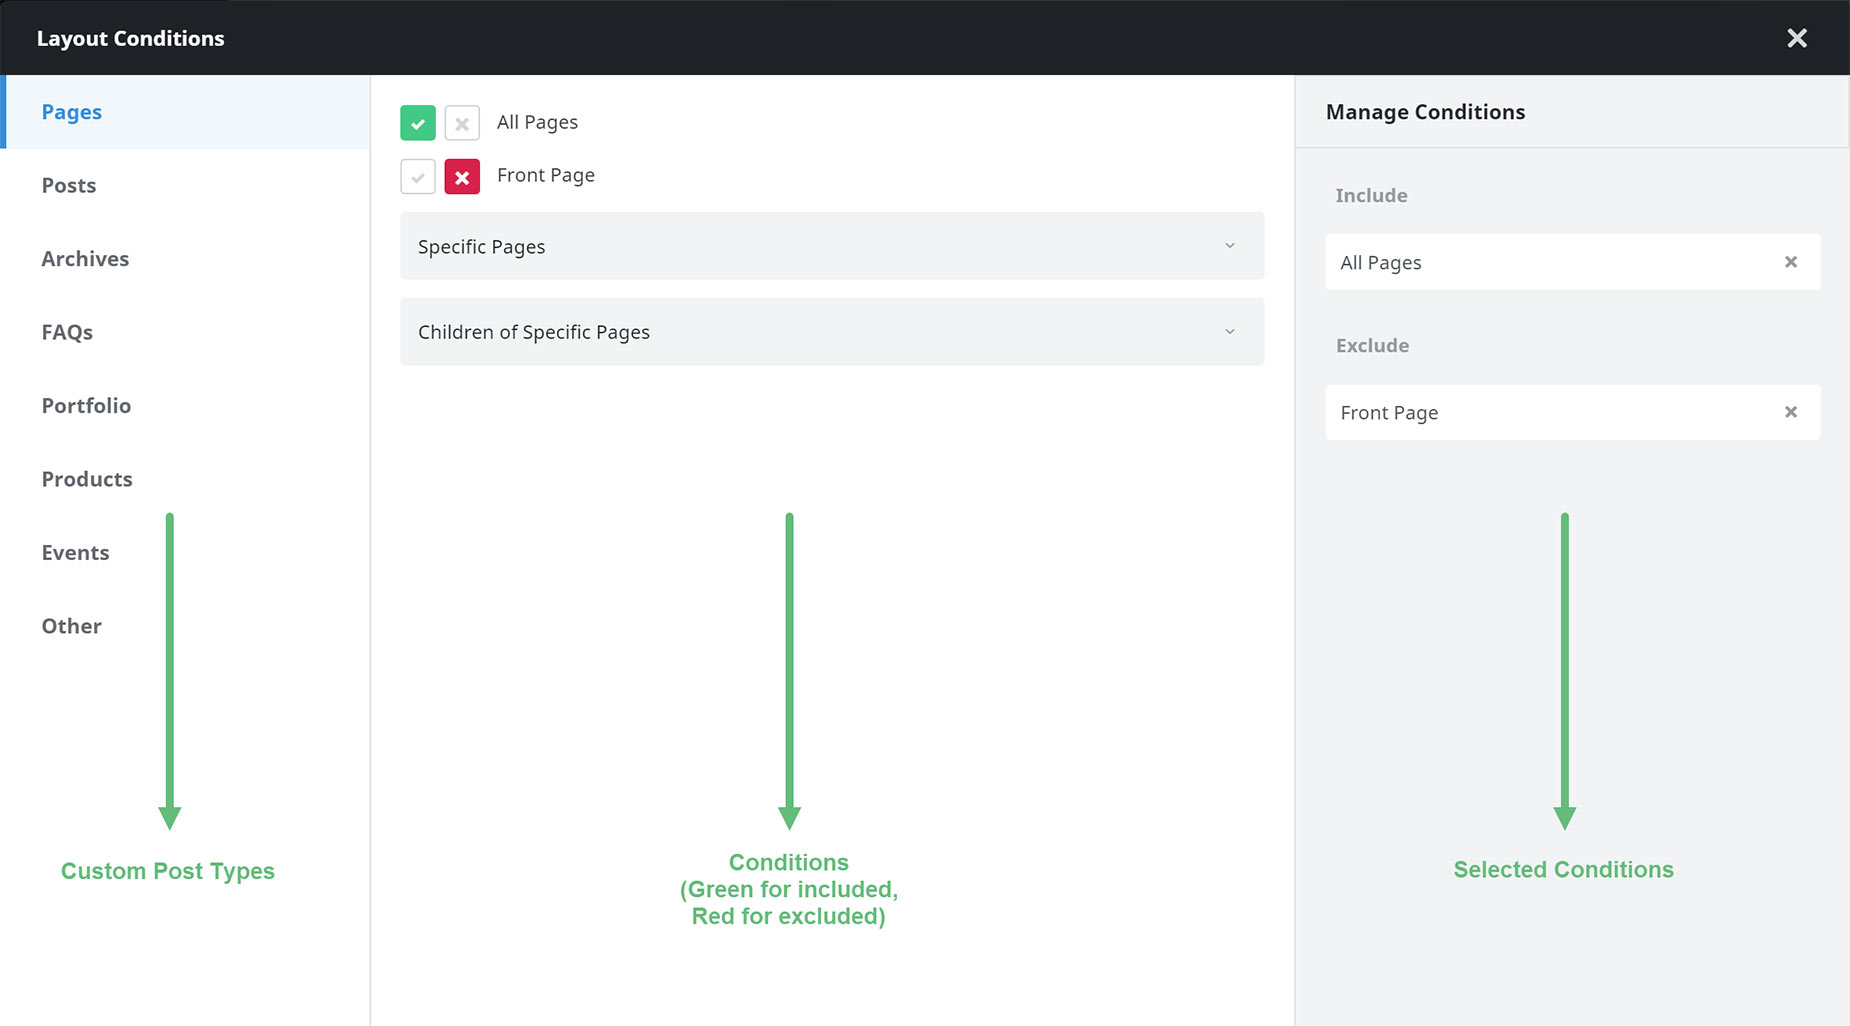
Apart from the Global Layout, you can also create your own Layouts, and these are displayed based on conditions you set for them. At the top and bottom of each Layout is a link to the Layout Conditions, and here you can specify in which situations the Layout should display.
It can be as simple as on a particular page, or on all single posts, right down to multiple conditions and exclusions on all custom post types. Layout Conditions are as simple or as complex as you need them to be, with a well designed interface that allows you to quickly and intuitively decide when the Layouts should show. For more information on Conditional Layouts, please see Understanding Conditional Layouts.
Creating Layout Section Content
One you have created a Layout and set conditions for when it will be used, you can create new or add any existing Layout Sections to your Layout. To assign a Layout Section to a Layout, you simply click on the + symbol on the relevant default Layout section, and add one from there. For more details on creating Layout Sections, see the Layout Sections area of the Understanding Layouts and Layout Sections doc.
Once you have made your Layout Section, it’s time to populate it with content. This is done in the Avada Builder (back end or front end interface, your choice entirely) using the full range of Avada Builder Elements at your disposal. You can use multiple Containers and Columns and Elements – in fact, anything you can build in Avada Builder can be a Layout Section.
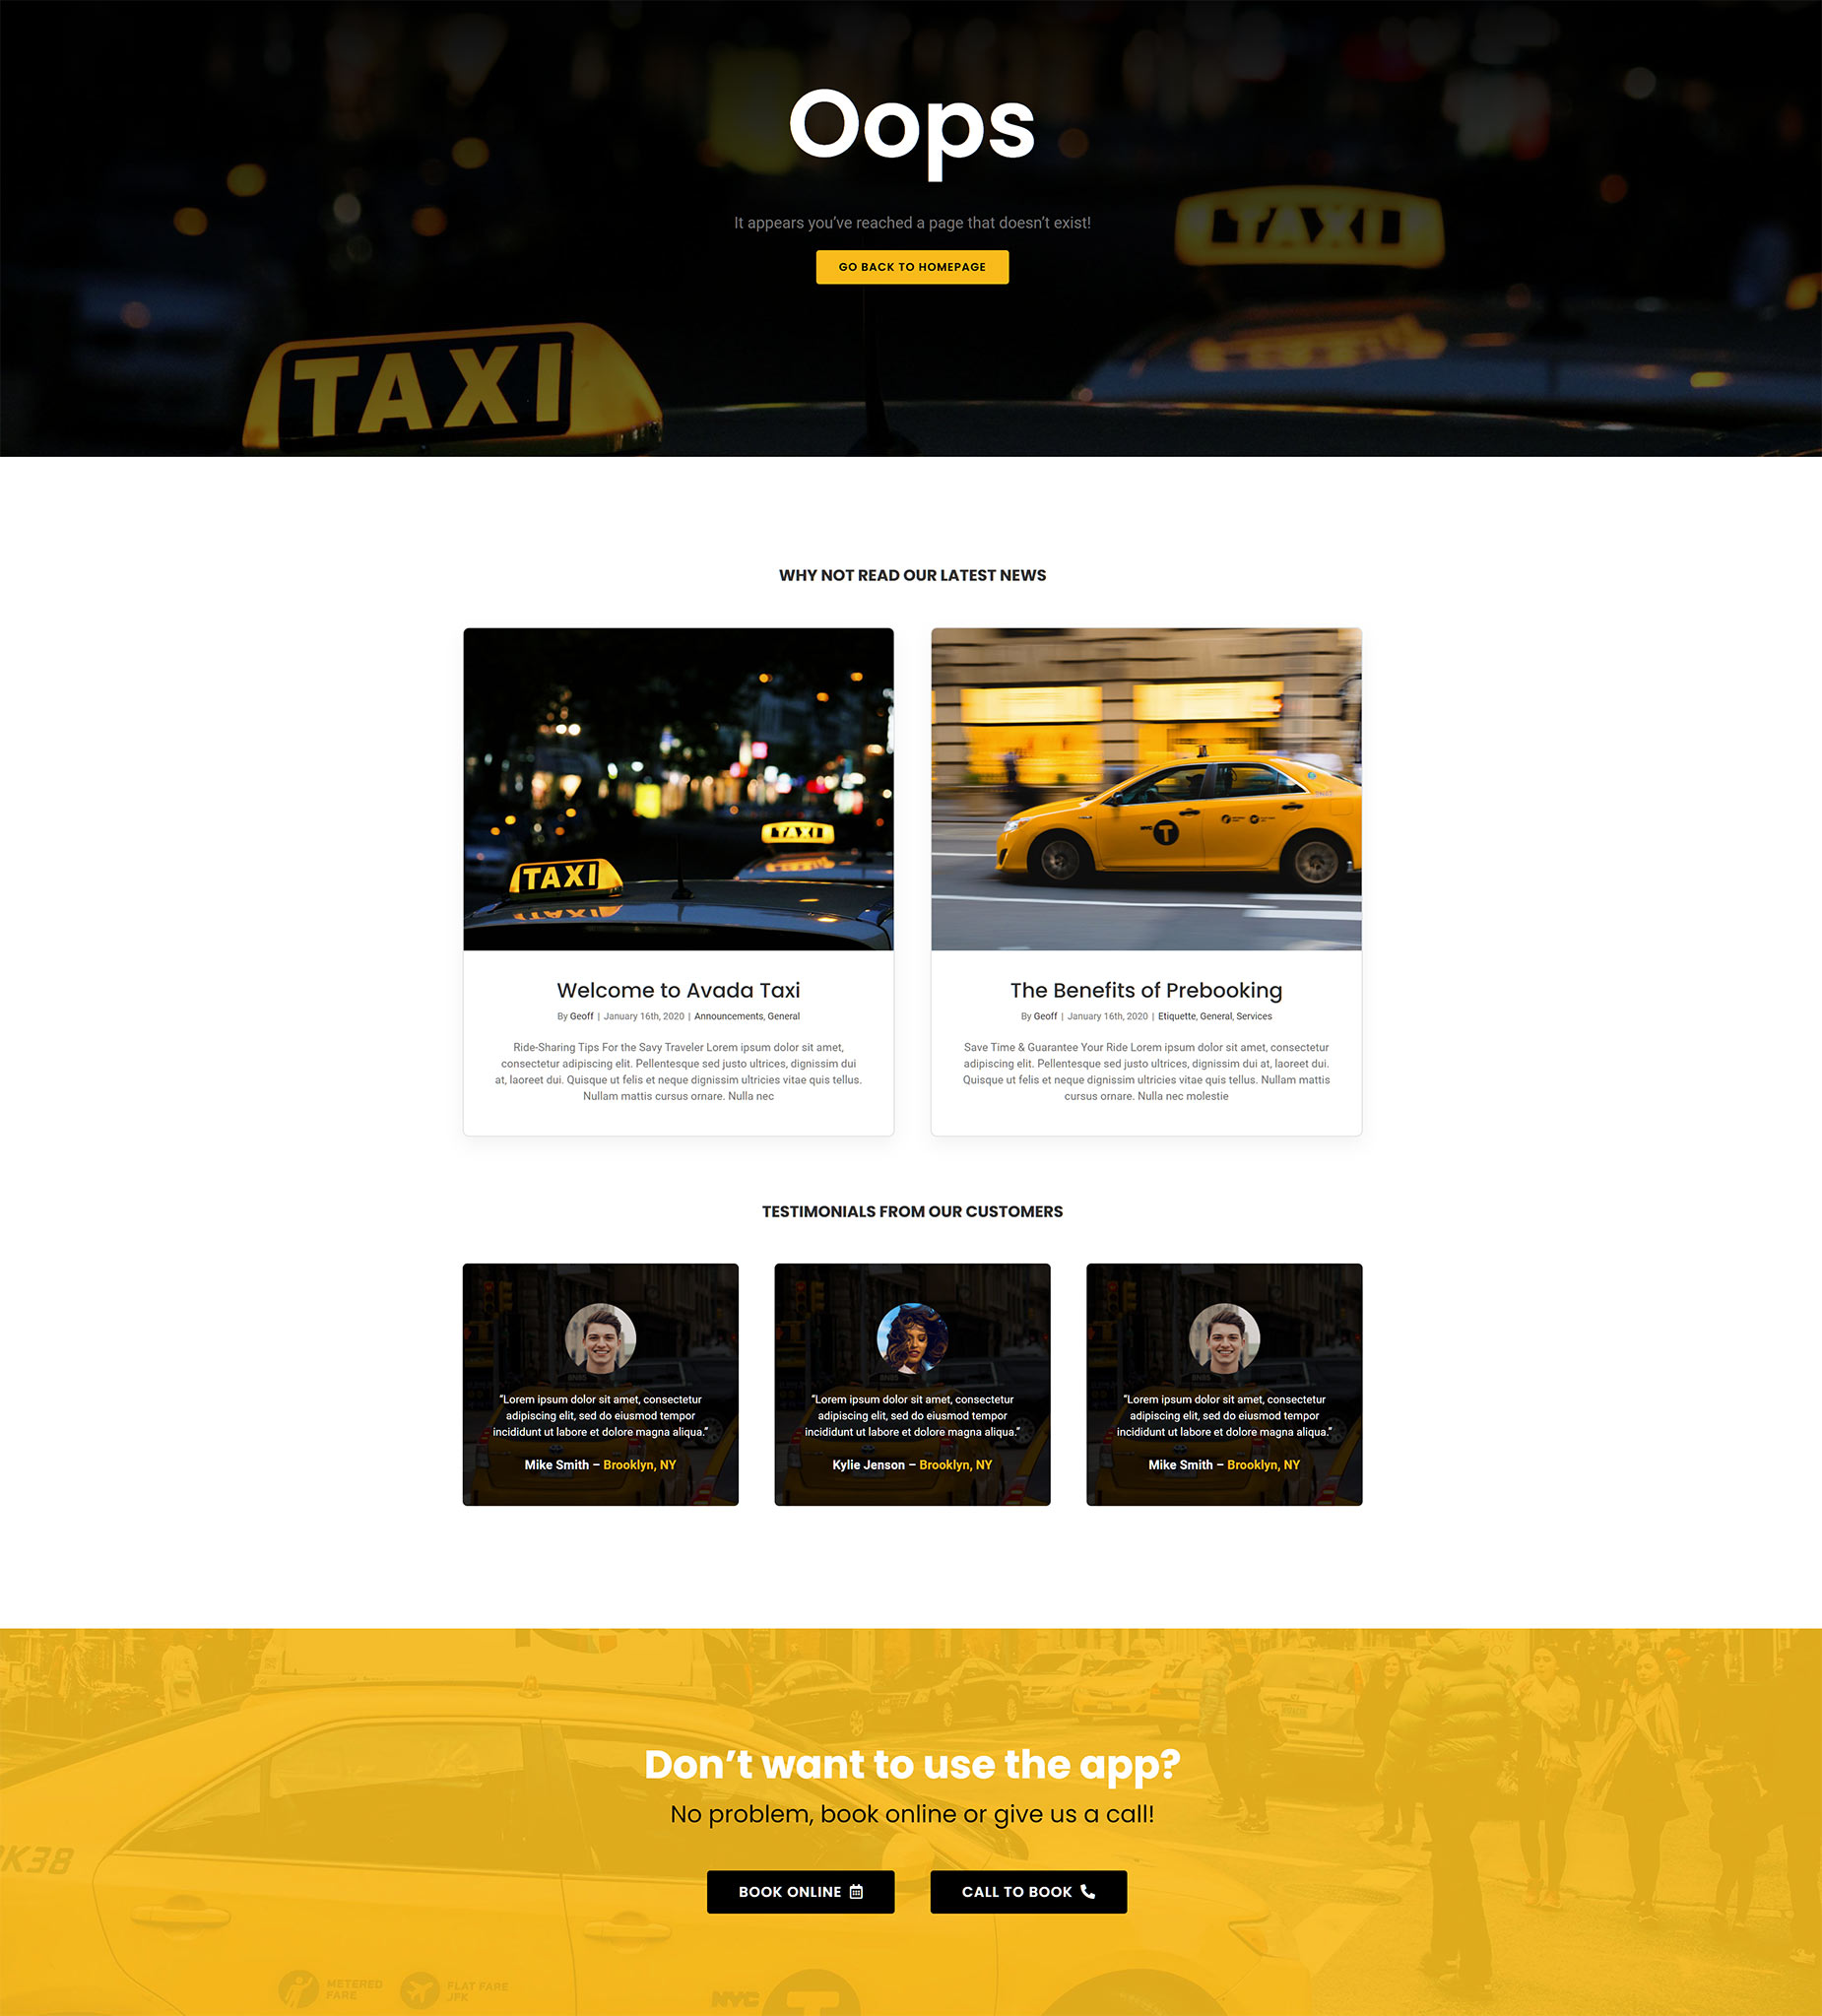
Below is an example of a Custom 404 layout, using a Custom Page Title Bar Layout Section, as well as a Custom Content Layout Section.
Design Elements vs Layout Elements
With Footer and Page Title Bar Layout Sections, you will find the full range of Design Elements, with which to design your content. But with Content Layout Sections, you will find a range of new Elements, in their own tab, called Layout Section Elements. For full details on this please see Avada Design Elements vs. Layout Elements, but in short, these Elements allow you to add dynamic content in the Content Layout Section, such as blog posts, portfolio items, author information, related posts, and more. You can also use the normal Design Elements when designing your Content Layout Sections, and as mentioned, these Layout Elements are only found in the Content Layout Section, where you need to display content from blog posts, archives, portfolio posts etc.
Layout Order
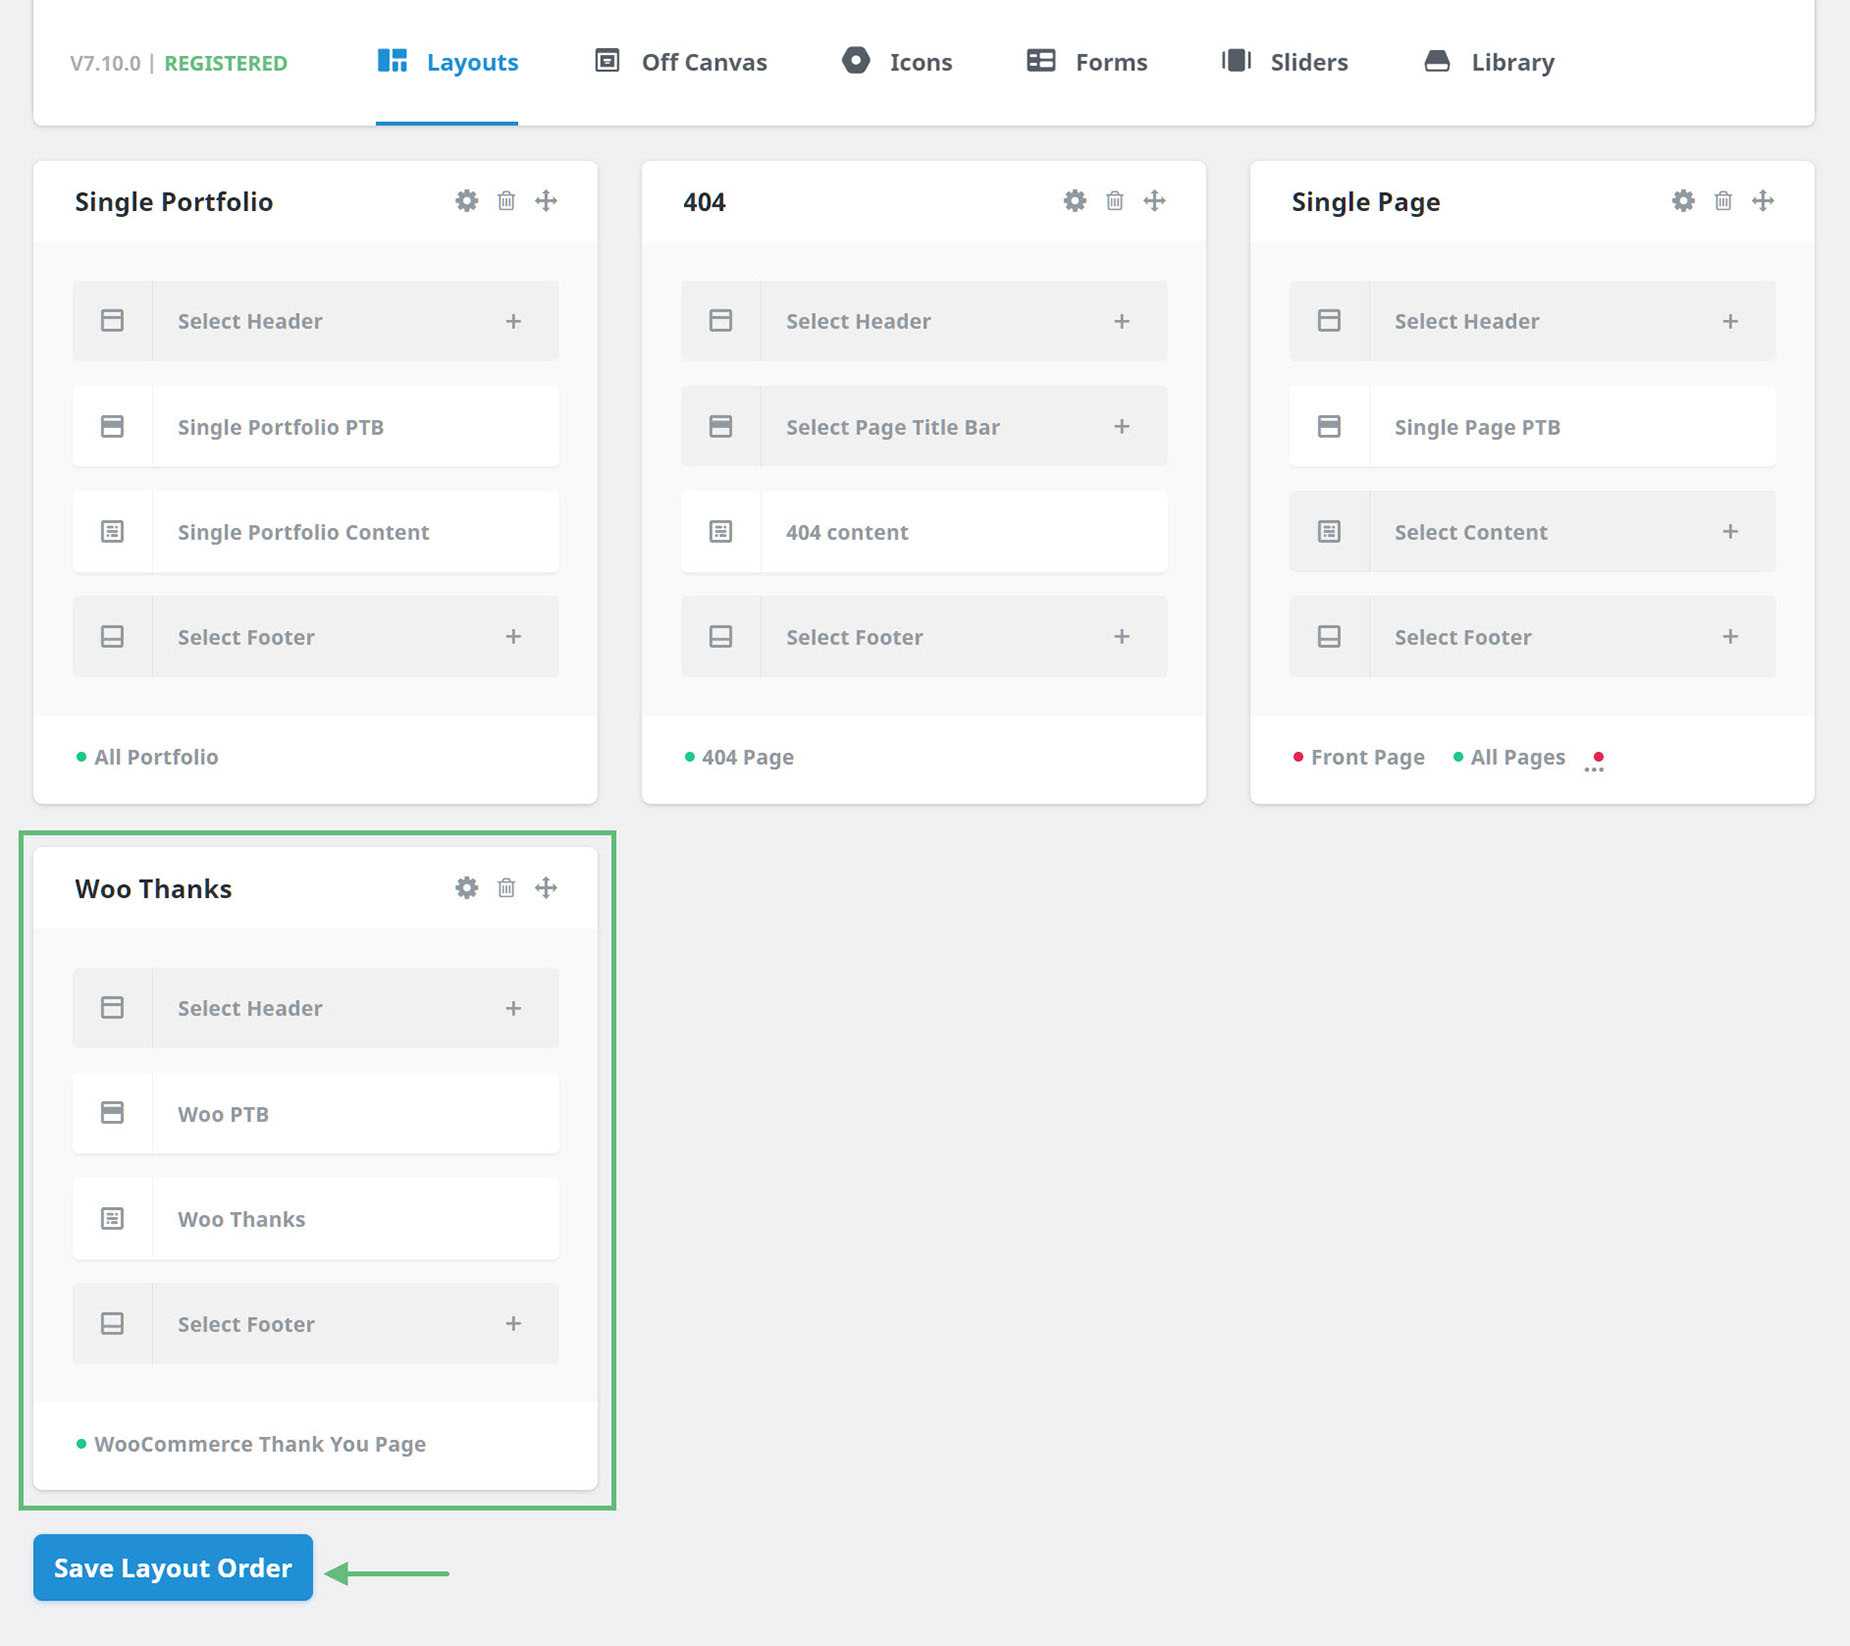
The order of the Layouts on the Layouts page has an effect, in that the Layouts further down the page (apart from the Global Layout) take precedence over ones higher up. So in that way, layouts with conflicting conditions can be easily organised.
Just move a layout around in the Layouts with the drag icon, then click the Save Layout Order. Below is an example of a WooCommerce Thank You page at the bottom of the Layouts, as there is one higher up using the Checkout condition, which would intefere with this Layout.
Conclusion
Avada Layouts is a real game changer when it comes to flexibility of design. Now you can create fully custom Layouts for any area of your website, using the full design power of Avada Builder, and additionally, using the power of conditional layouts, use them wherever you want. This gives you unparalleled power to create exactly the website you want.
