How To Create A WooCommerce Thank You Page
Last Update: June 18, 2026
As an addition to the WooCommerce Builder, Avada now offers the ability to create a custom WooCommerce Thank You page. You can add any content you want to this page, but there are five Woo Layout Elements to help you display the necessary Checkout information. These are the Woo Order Additional Info Element, the Woo Order Customer Details Element, the Woo Order Details Element, the Woo Order Downloads Element, and the Woo Order Table Element. See the indvidual Element docs for the specifics of these Elements.
Read on to see how easy it is to create a personalized thank you page for your customers with Avada and WooCommerce, and watch the video for a visual overview.
Create A Layout
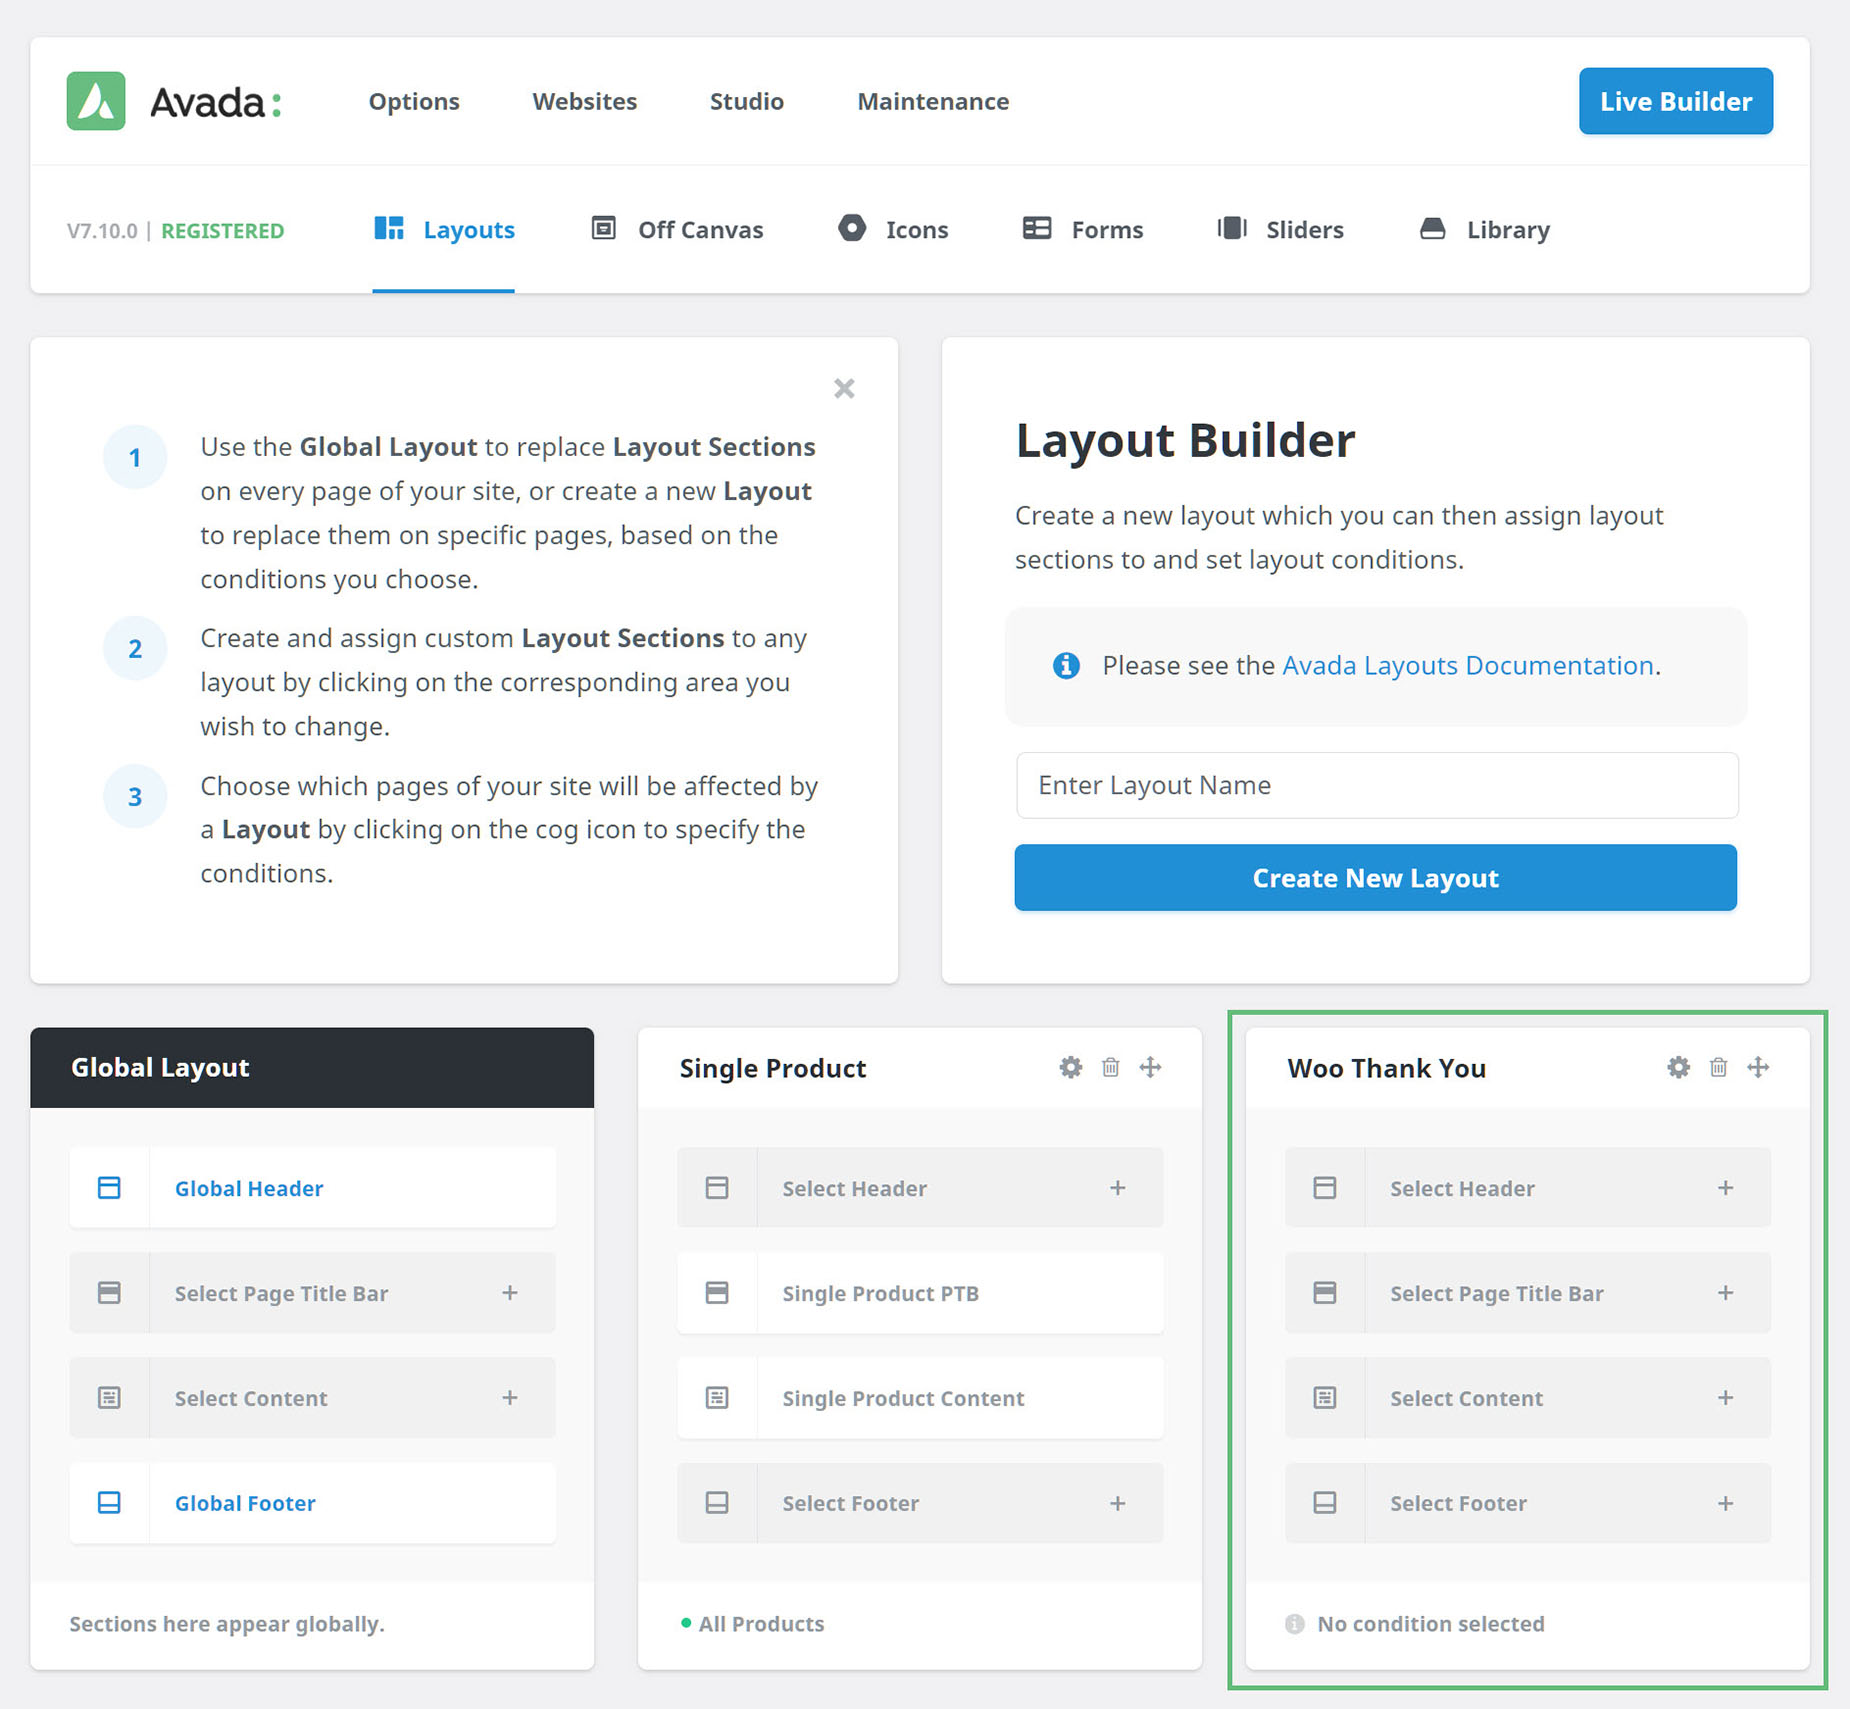
The first thing you need to do is to create a new Layout for your Thank You page. To do this, head to the Layout Builder at Avada > Layouts and add a new Layout. You might call it Woo Thank You, or whatever else makes sense to you. At this point, the Layout will be empty.
Set The Layout Conditions
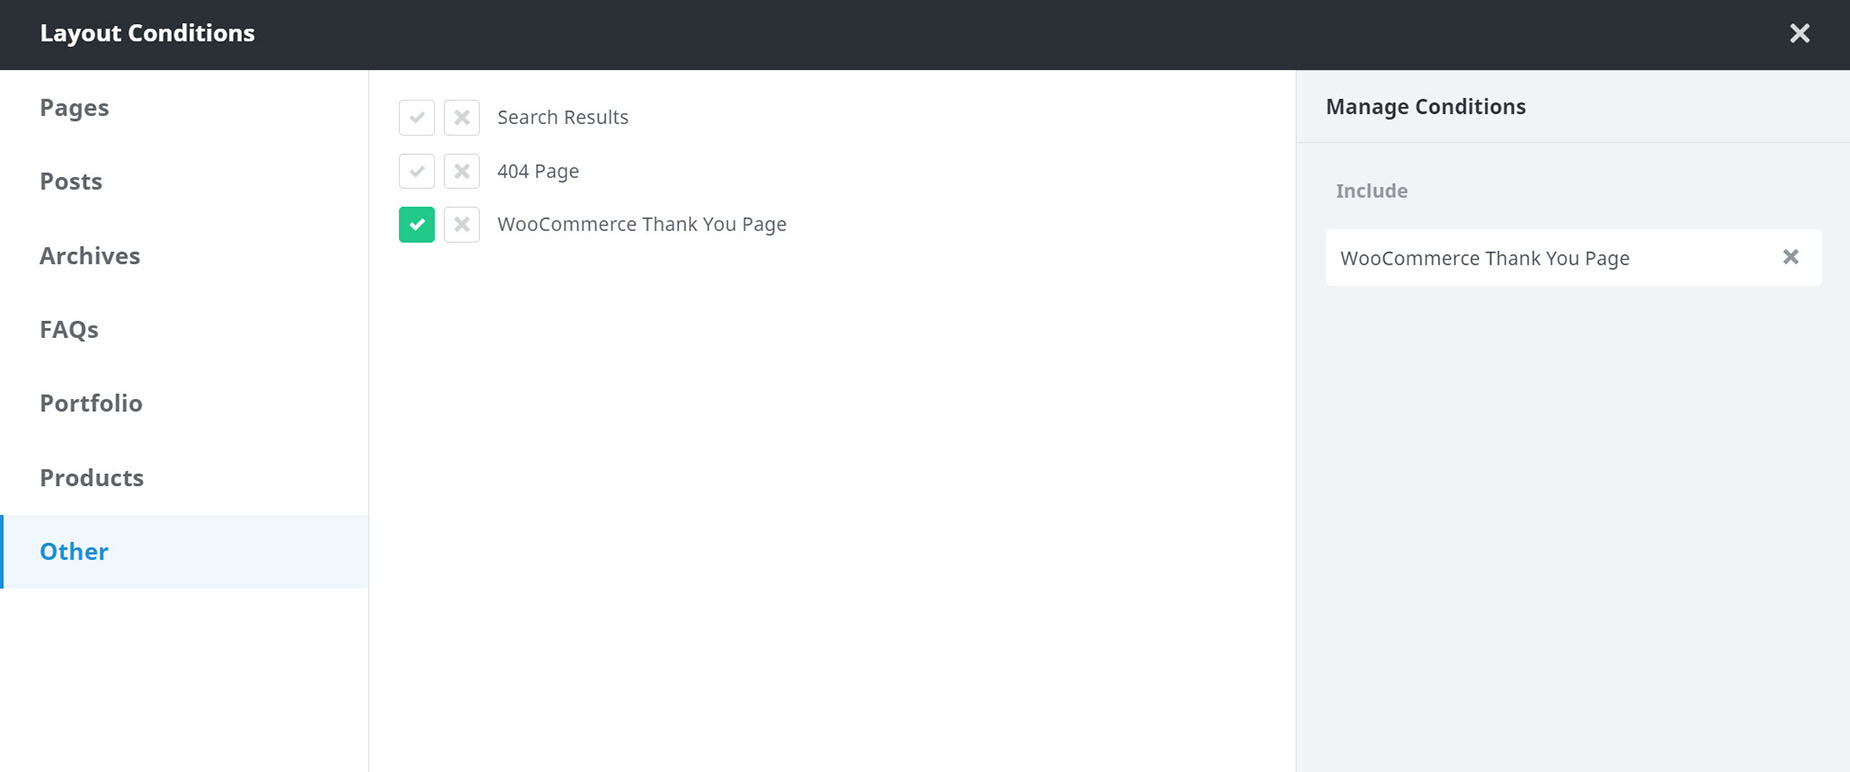
Now you need to set the conditions for which the Layout will be used. To do this, click on Manage Conditions at the bottom of your newly made Layout, and on the Other page, select WooCommerce Thank You Page as the single condition.
Create a Content Layout Section
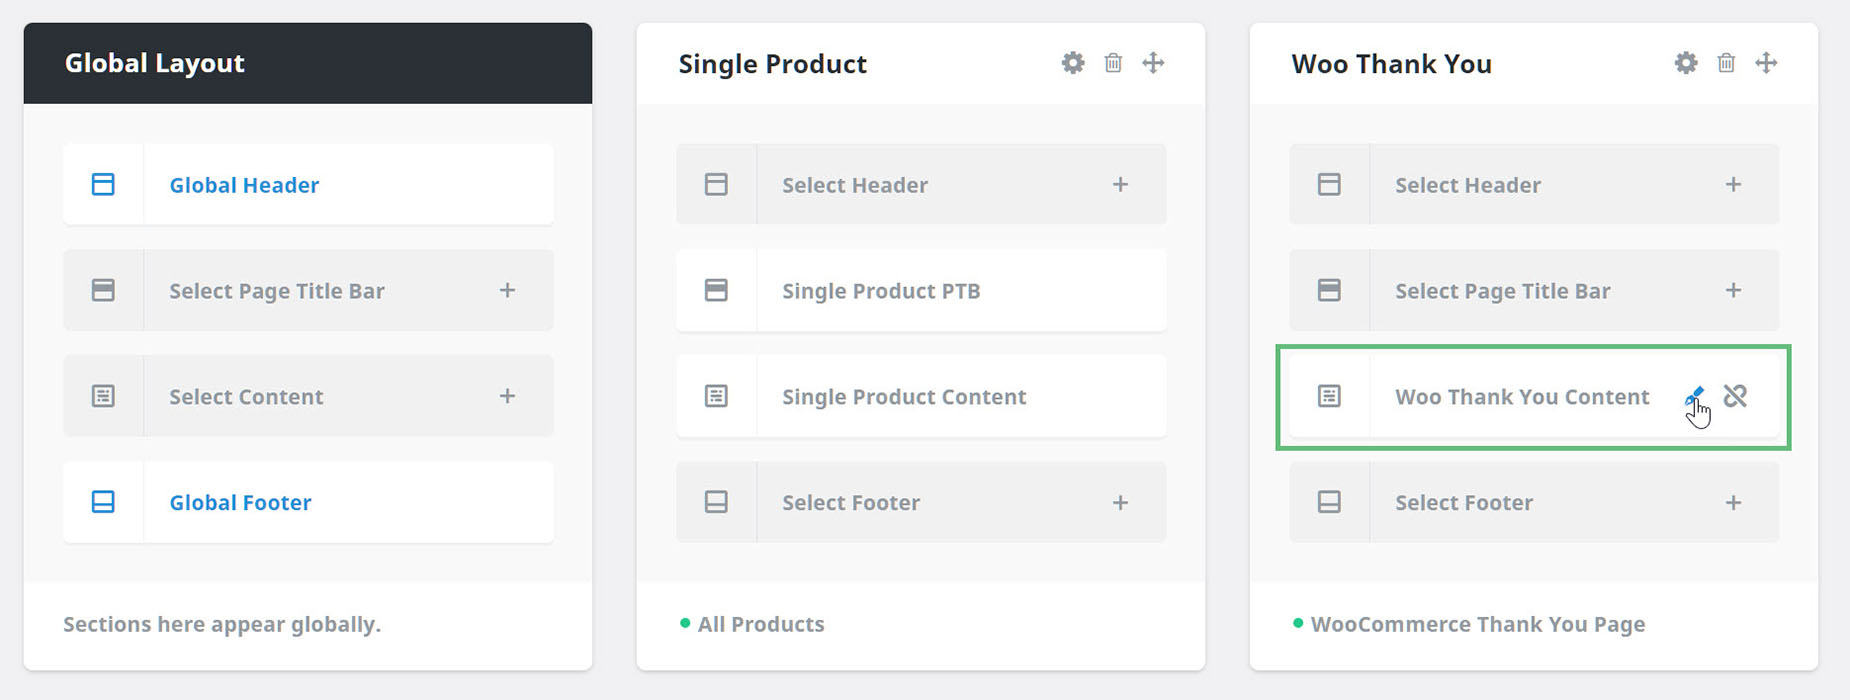
Now it’s time for the content. You can add any Layout Sections you want to this Layout, but the most important one is the Content Layout Section. This is where you will add the Woo Order Elements. So, click on ‘Select Content’ on the Layout and create a new Layout section. Give it a name, and click on Create New Section, and then you can click on the Edit icon to edit the Layout Section. Choose your Avada Builder of choice.
Design Your Thank You page
Now comes the fun part – designing your page. Depending on your other Layout Sections and site design, you might want to add a Title Element at the top or not. You can, in fact add any Elements in this Content Layout Section. But the most important Elements to add are the Woo Order Elements, as listed below.
Once you have completed the design of your thank you page, just save your Layout Section, and you’re done. Now just sit back and relax and wait for those orders to come in.
The next time a user purchases something from your store, when they complete checkout, they will be directed to your custom Thank You Page. How’s that for personal service!

Troubleshooting
If your custom Thank You page does not display when you test it, it’s likely that another layout is interfering. Any other layouts using All Pages or Checkout in the Conditions could potentially do this.
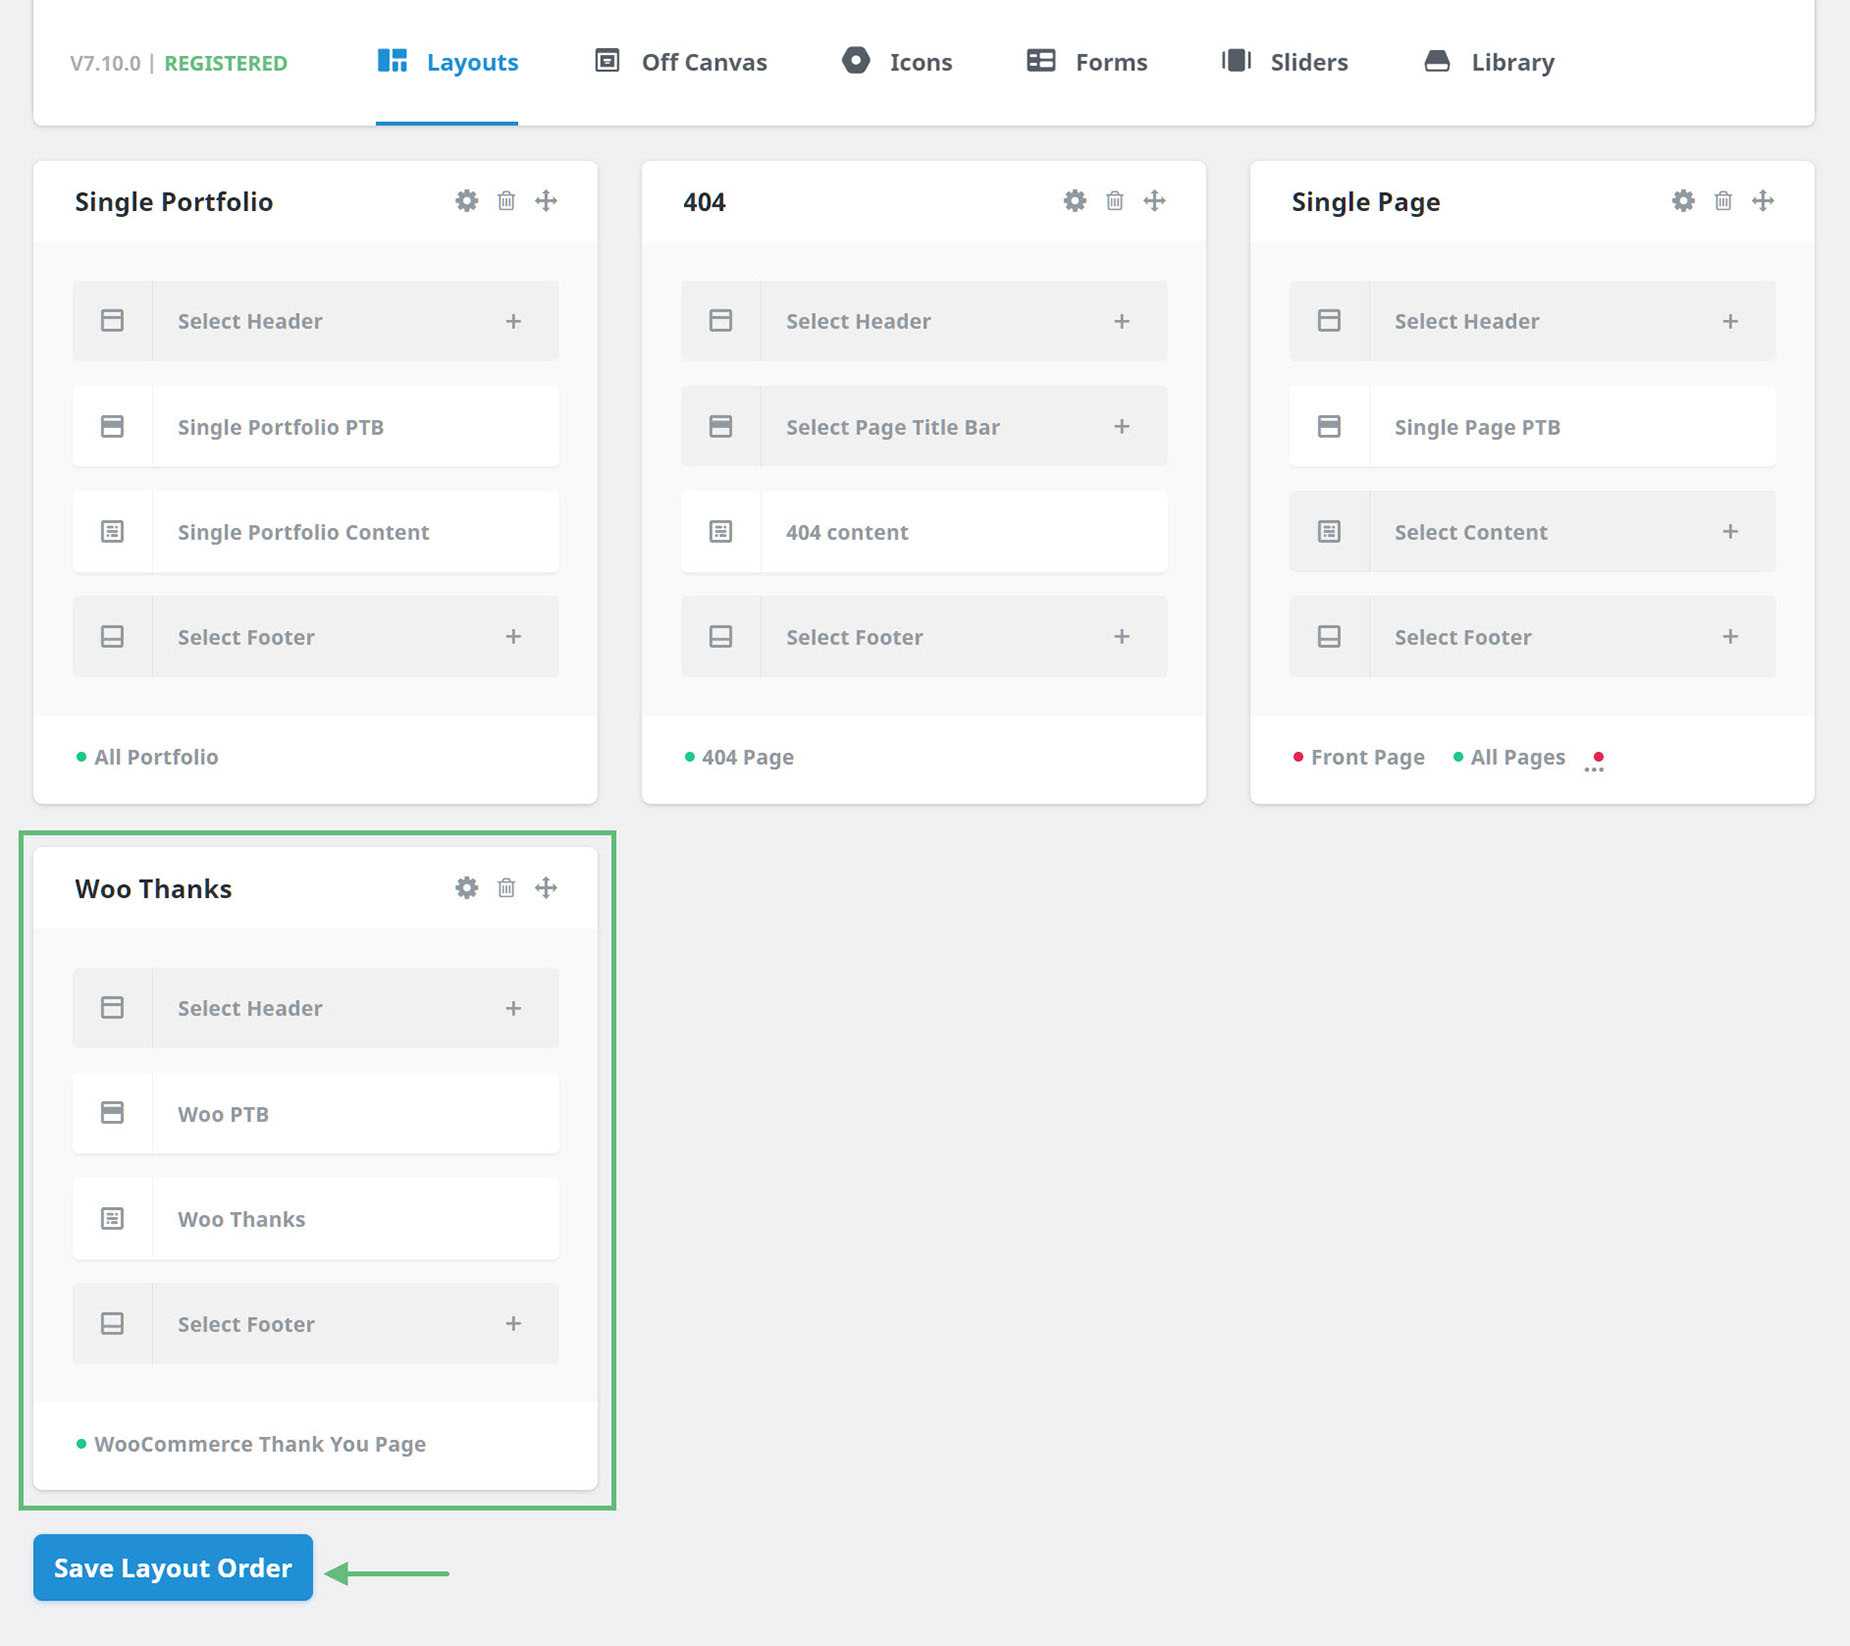
You could go in and exclude the WooCommerce Thank You page from any other layouts using All Pages or checkout, but the easiest way to deal with this is just to move the Thank You Page Layout to the end of the layouts. Apart from the global layout, layouts further down the list take precedence over ones higher up.
So just make sure the Thank You Page layout is further down than any other layouts using All Pages or Checkout in the Conditions, and Save the Layout Order, and there should be no conflict.