How To Control Spacing in Avada
Last Update: October 31, 2025
Controlling spacing in websites has traditionally been very difficult for non developers. Custom CSS has long been used to style pages, including margins and padding. But Avada Builder goes a long way towards making spacing a breeze, even if you have no coding knowledge whatsoever. Read below to find out where and how to take control of your site spacing using Avada Builder, and watch the video for a visual overview.
The Difference Between Margins and Padding
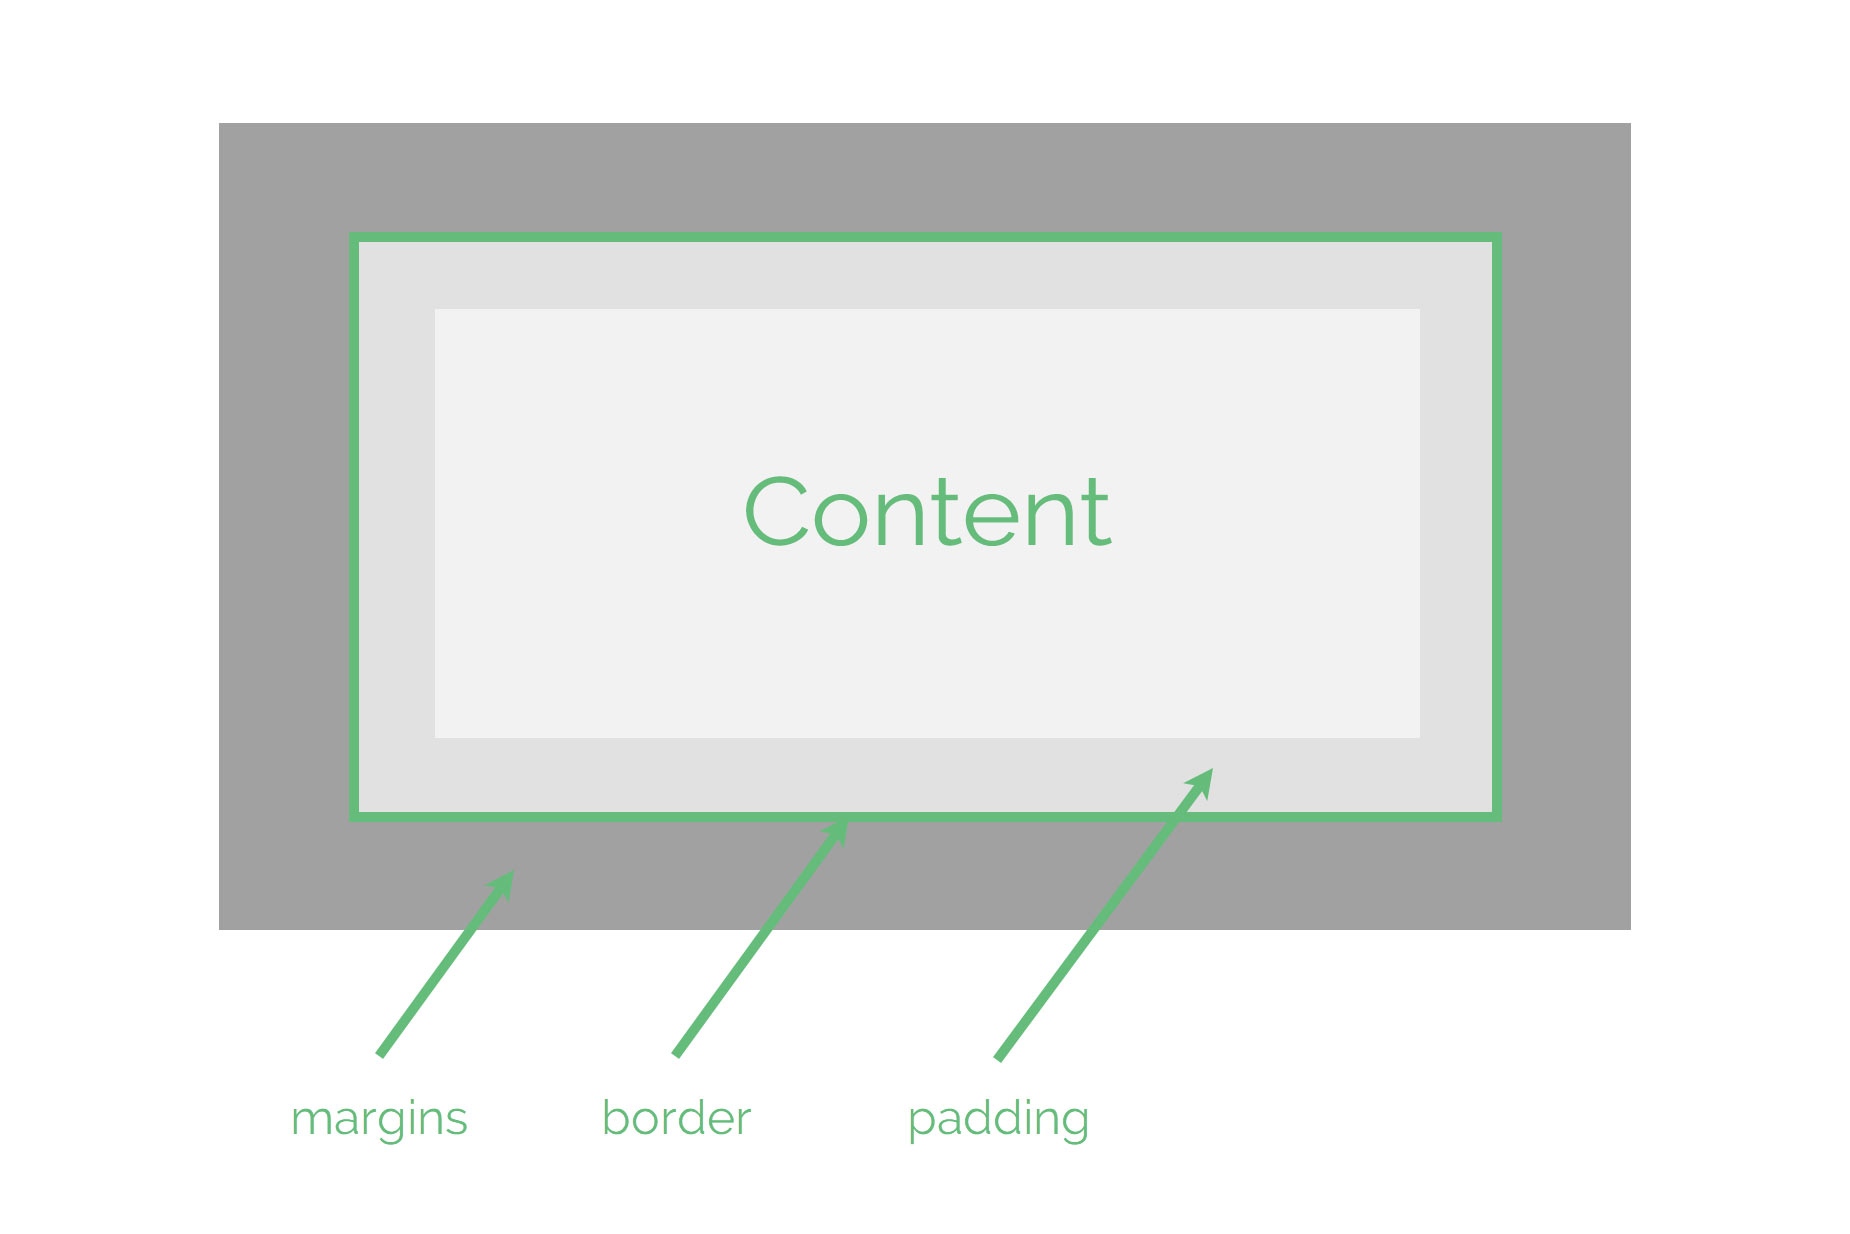
One of the first things to understand when trying to take control of spacing, is the difference between margins and padding. Simply put, margins are the space around the outside of elements, between one container, column or element and the next. Padding, on the other hand, is the space around the internal content of a container or column. The following diagram is very simple, but it should illustrate the concept clearly enough. If you want further information, try this article.
There are other types of spacing we can control throughout the theme, like column spacing, letter spacing and line heights etc, but in this post we will mostly be focusing on the main ones of margins and padding.
Where To Control Spacing
There is no one place to control margins, padding or column spacing; there are many. Let’s start at the highest level and work our way down. At each level, there are options that control spacing, either globally or locally, so let’s start by looking at the Global Options, then the Page Options, and then down into the Containers, Columns and Elements, and finally to Custom CSS.
Global Options
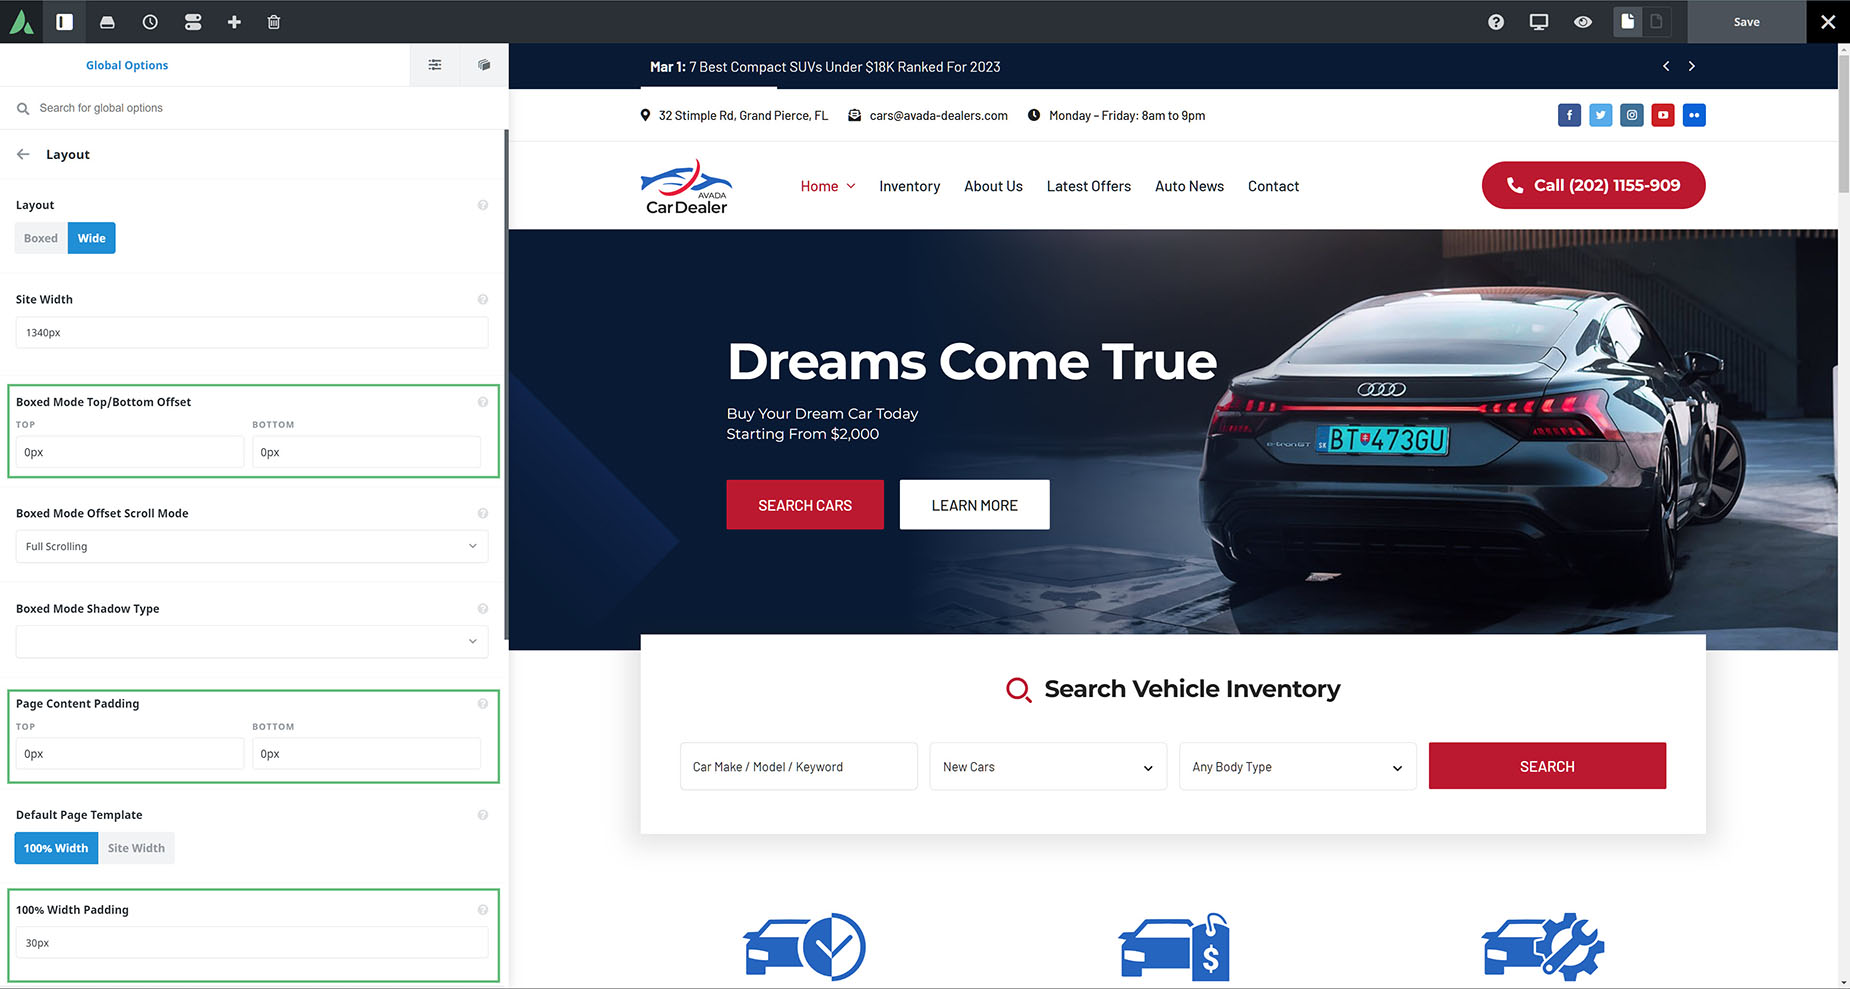
In the Avada Global Options, there are several settings that directly affect spacing throughout your site. If you use the Boxed Mode layout, for example, the Boxed Mode Top/Bottom Offset setting will control how much margin there is above and below the box. If you use the Wide layout, the Page Content Padding option will control how much padding there is above and below your body content (under the Header and the Page Title Bar and above the Footer). Finally, when you use the 100% Width page template, there is a setting called 100% Width Padding to specify how much left and right padding there will be on content that goes full width.
All of these options can be found in the Global Options at Avada > Global Options > Layout. These options affect every page, but they can also be overridden on a page by page basis via the Avada Page Options.
Element Global Options
Still in the Global Options, there are some Elements which have global options for margins and padding. These are found under Avada > Global Options > Avada Builder Elements > and the individual elements.
The following Elements have the option to set either global margins, padding, or column spacing: Blog, Column, Container, Content Box, Events, Gallery, Portfolio, Syntax Highlighter, Tagline Box, Text Block, and the Title Element. These can also be overridden in the actual Element options, when adding the Element.
Page Options
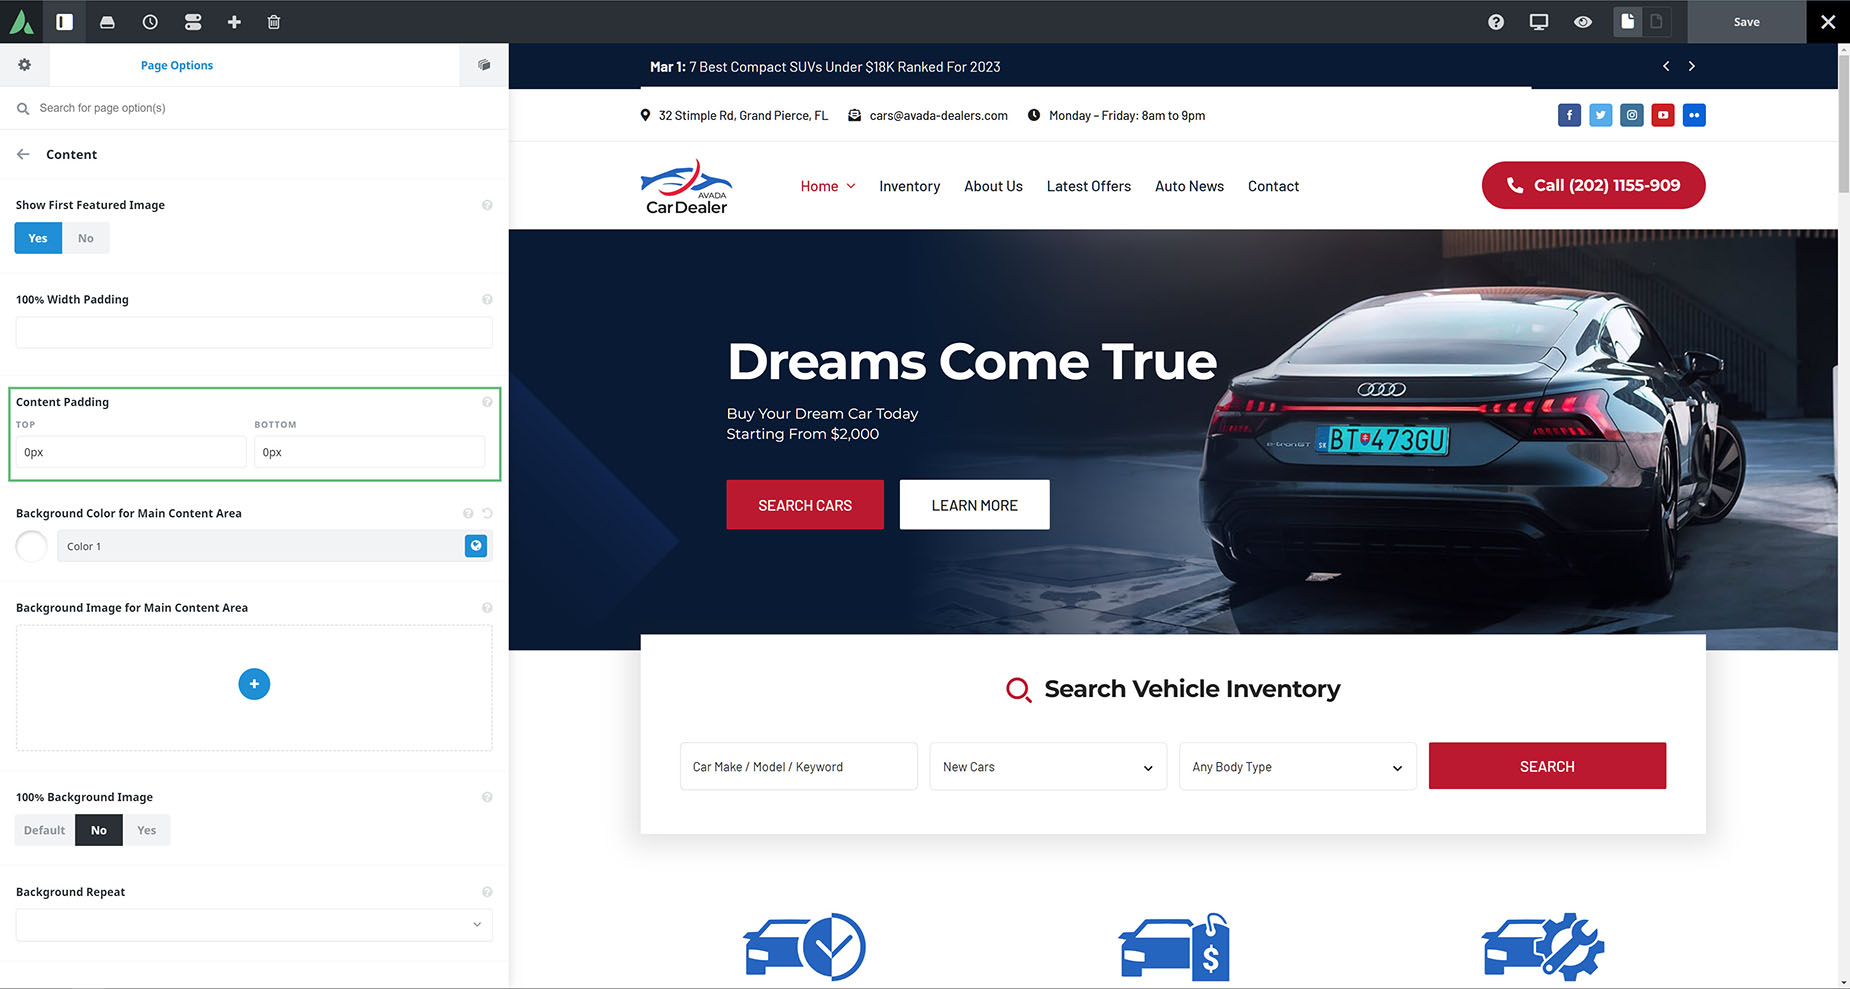
The next level down is to control spacing on a page by page basis. These are overrides for the option we have set in the Global Options, but only apply to one page at a time. Settings that can override global spacing are found in the Content Tab.
These may seem minor, but, as an example in the image below, if you have 55px global Page Top Content Padding, and on a specific page you want it to be 0px, you will be very grateful to find the override setting right there on the page in question.
Containers
Now we find ourselves in the Avada Builder. As we are building our pages, we have the opportunity to control the various spacing through the elements we use, starting with the very Containers that make up our page.
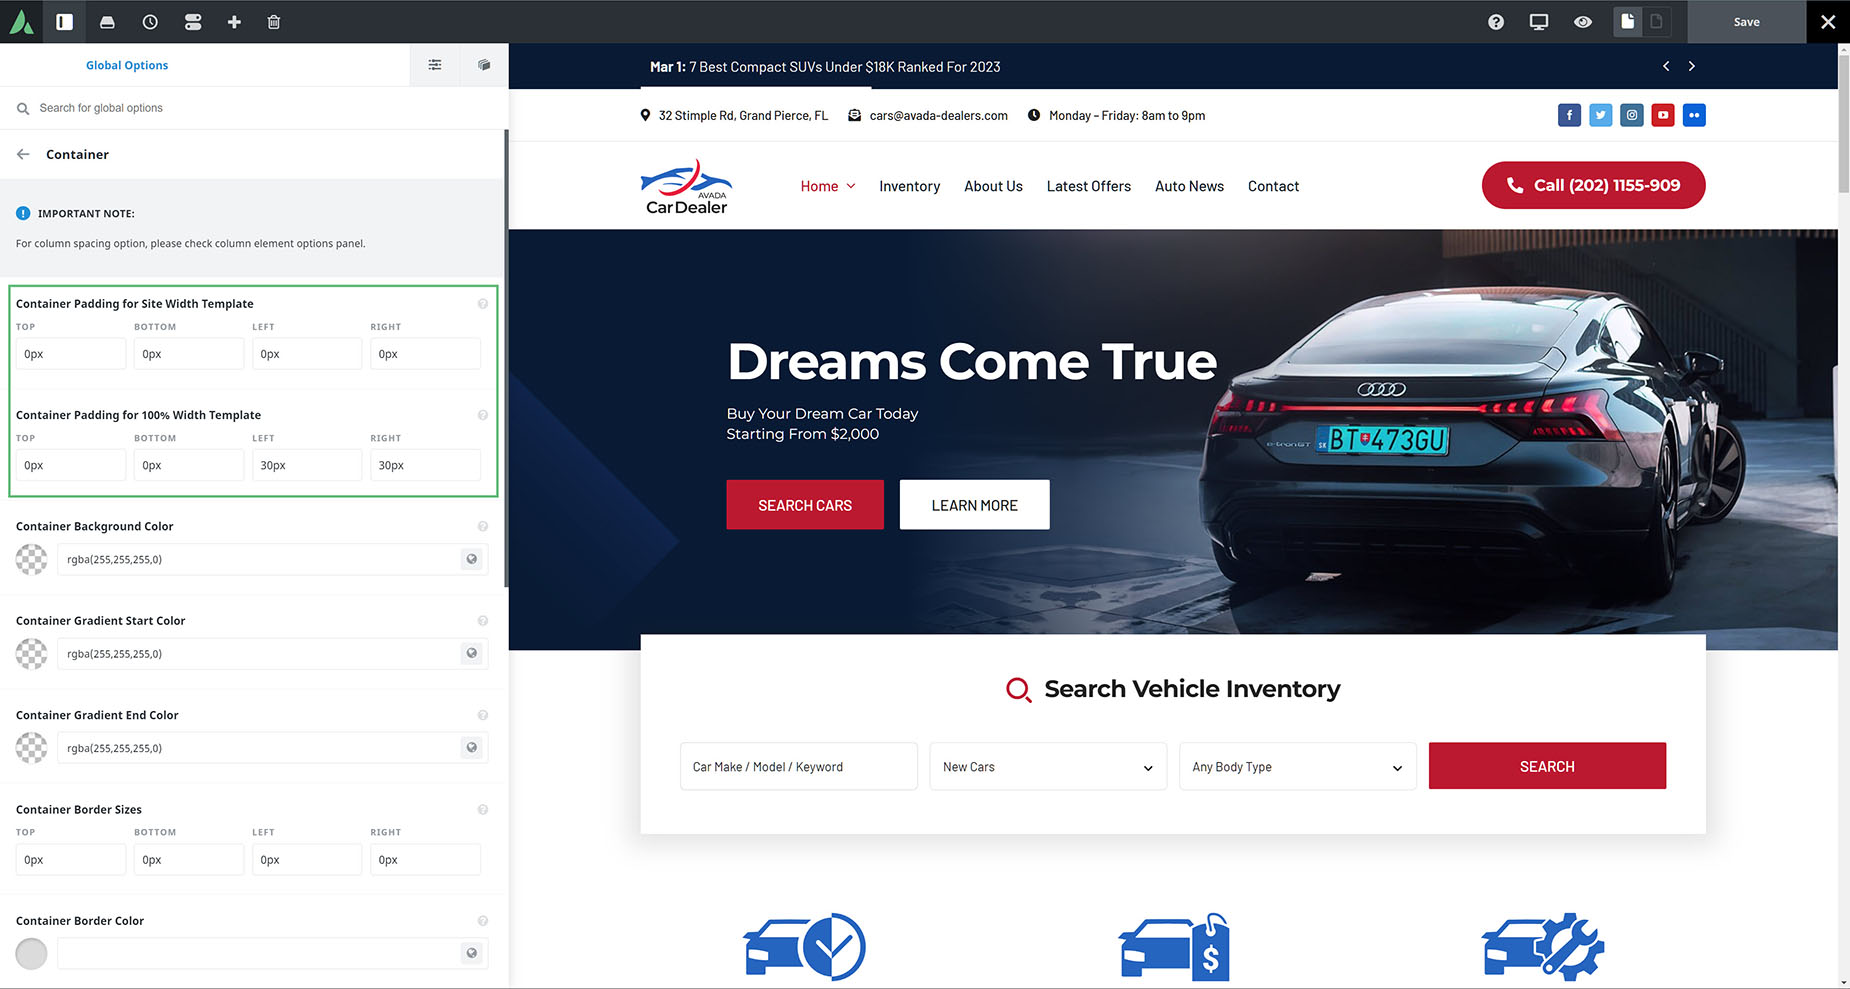
By default, pages use the 100% width template, and so Containers have the default padding of 30px left and right. When using the Site Width template, Containers have no margins or padding set, but of course, you can adjust these settings, either in the Container Settings in the Global Options (Avada > Global Options > Avada Builder Elements > Container) as seen below, or on a Container by Container basis on your individual pages.
Columns
Columns, by default, have 20px bottom margin, and 0px padding. Generally, it is most appropriate to set margins and padding on columns and containers, or in the individual elements. Column Spacing (the space between columns) is another matter. See the linked doc for more information on that.
Between Elements
Many Elements now have some form of margin and padding control. This makes it very simple to space your Elements using the Element Margin options. But if they don’t, you can always use the Separator Element to control the spacing between Elements in a column.
Custom CSS
Finally, there are times when you will have no choice but to revert to Custom CSS to control your site completely. Some elements have built in margins that have no override, and certain designs and advanced layouts can only be achieved by the clever use of Custom CSS. This is beyond the scope of this document, and quite often, this sort of customization is even beyond the scope of Official Support, but there are links below to our docs on CSS, and our awesome Community Forum and the very active Facebook Avada User’s Group.
So, as you can see, there are a lot of places and ways to control the spacing on your website, but getting familiar with the various places to control it will help you make beautiful designs in no time at all, using nothing but your imagination, and Avada.


