How To Build A Custom Archives Layout
Last Update: November 16, 2025
As part of Avada Layouts, you can create fully Custom Archives Layouts on your Avada website, using the full design power of the Avada Builder. The changes you make to a Custom Archives Layout could be as little as adding a Custom Page Title Bar section, or it might be a reworked Content Section, Header or Footer, or any combination of the above.
Read on to learn how to build a Custom Archives Layout in Avada, and watch the video for a visual overview.
The Avada Layouts Interface
You can find Avada layouts at Avada > Layouts. This interface is where you both create and manage your Layouts and assign Layout Sections in Avada. Initially, there is just a Global Layout, and by default this is empty, with no attached Layout Sections, as you can see below.
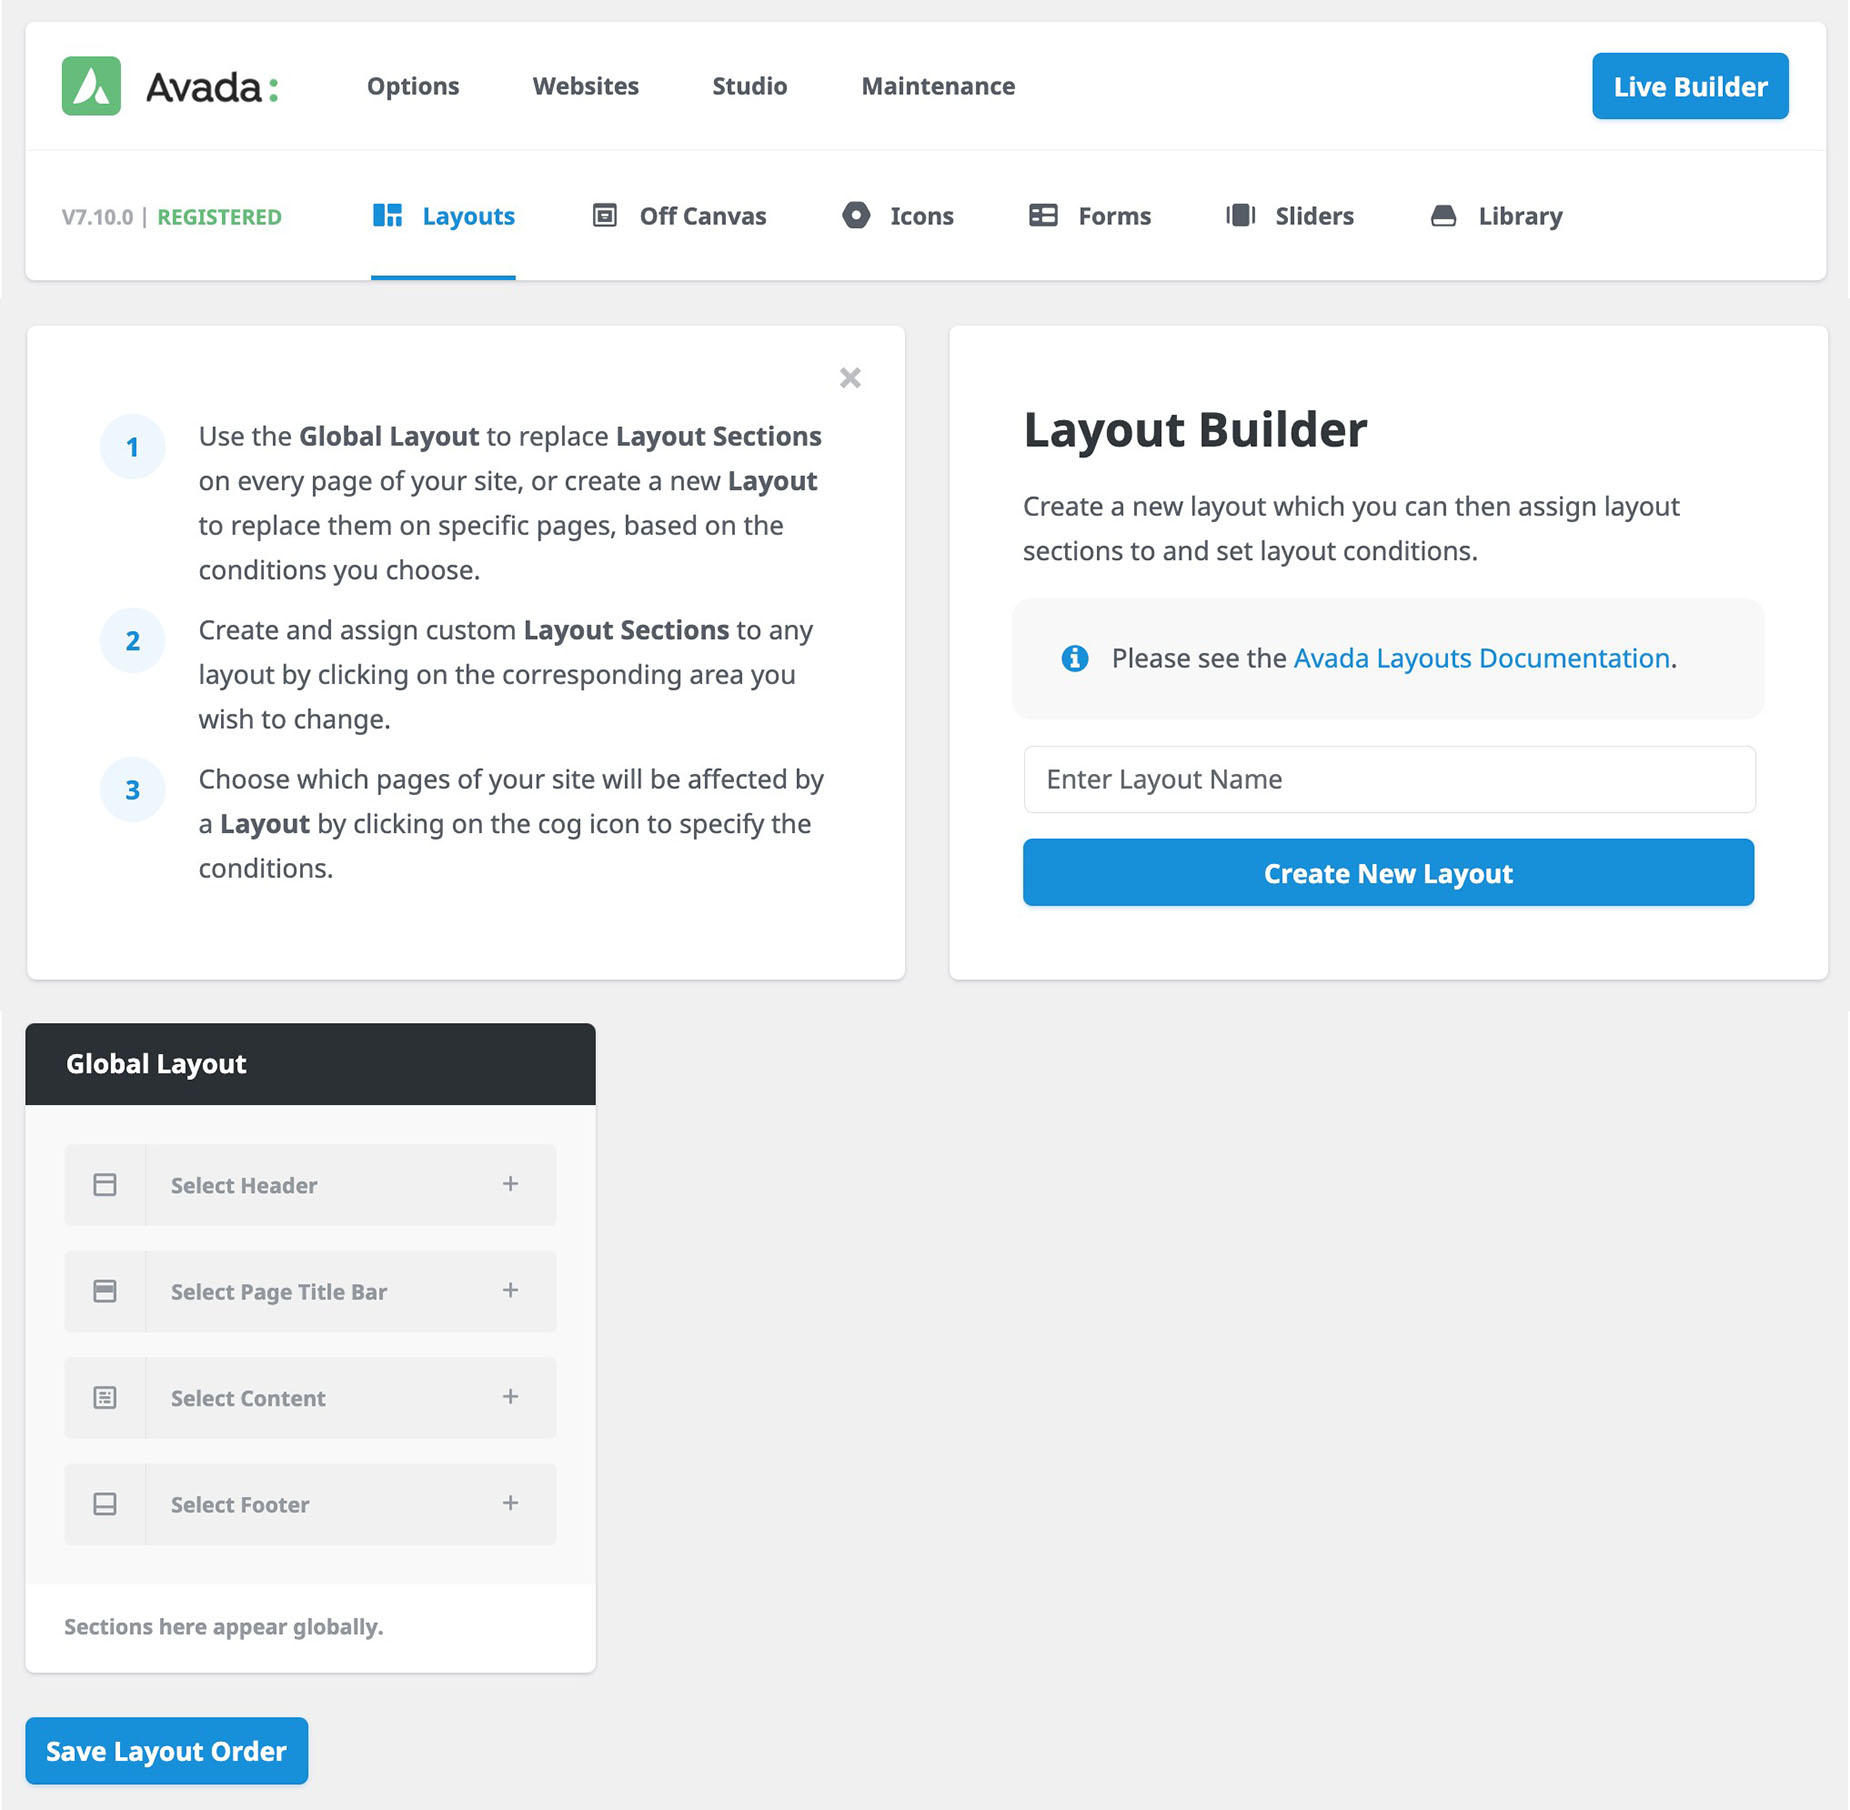
A Custom Archives Layout is a Conditional Layout that only shows on Archives Pages. So the first step is to create a Layout, and then decide which Layout Sections you want to customize on your Custom Archives Layout, and finally, set the conditions in which the layout is used…
See the Introducing Avada Layouts doc for a general overview of Avada Layouts, and Understanding Layout and Layout Sections for more information on the difference between Layouts and Layout Sections.
Creating A Custom Layout
For this document, we will recreate the Custom Archives Layout from the Avada Restaurant prebuilt website, as seen in the video above.
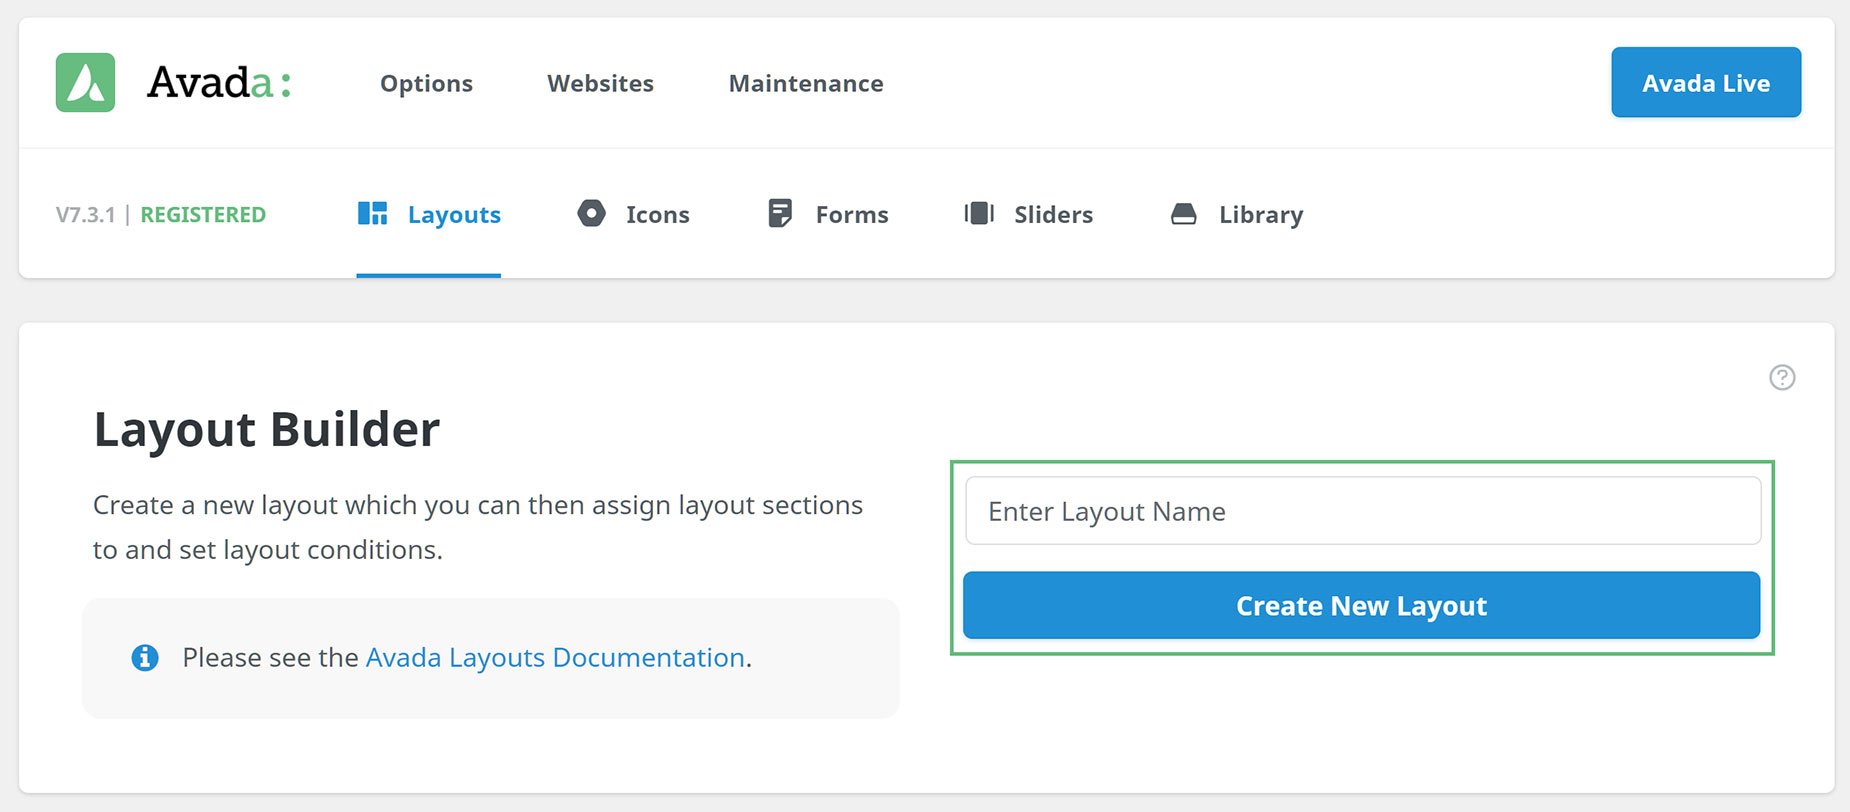
Creating the Layout is done on the Layout Builder page, by simply adding a name (in this case, we will call it Archives) and then clicking on Create New Layout, as can be seen below.
Creating Custom Layout Sections
The page reloads and the layout is added to the Layouts. At this point is has no conditions set, and no Custom Layout Sections added. Now we have the Layout, we can begin to create any Layout Sections that we will add to it. In this example, we will just add a Page Title Bar Layout Section.
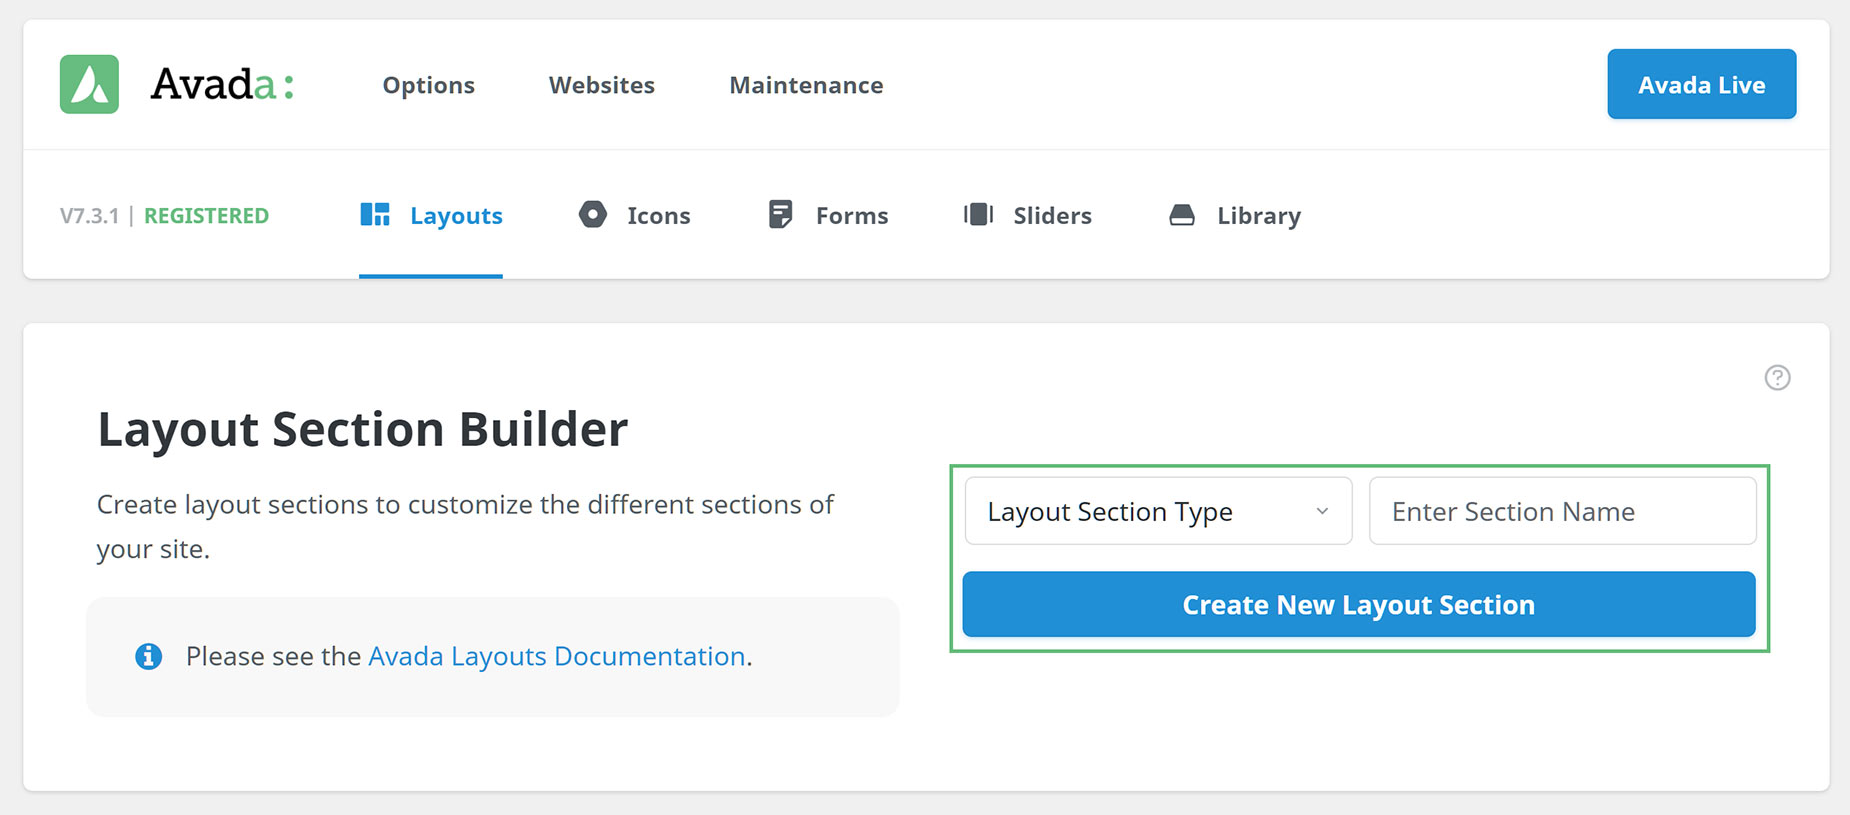
You can create Custom Layout Sections in one of two ways. You can head to the Layout Section builder page (Avada Dashboard > Layouts > Layout Section Builder) and create one from there, as seen below.
Alternatively, you can create one by clicking on the corresponding Layout Section in the existing Layout, and create one from there. The first method just creates a Layout Section, while the second method attaches it to a Layout at the same time.
There’s no wrong way to do this, it just depends on your preferences. As you can see in the screenshot below, to create and add the Page Title Bar Layout Section using the second method, you would click on the Select Page Title Bar section of the Single Post Layout, and in the following dialog, under the New Section tab, give it a name (Archives PTB) and click on Create New Section.

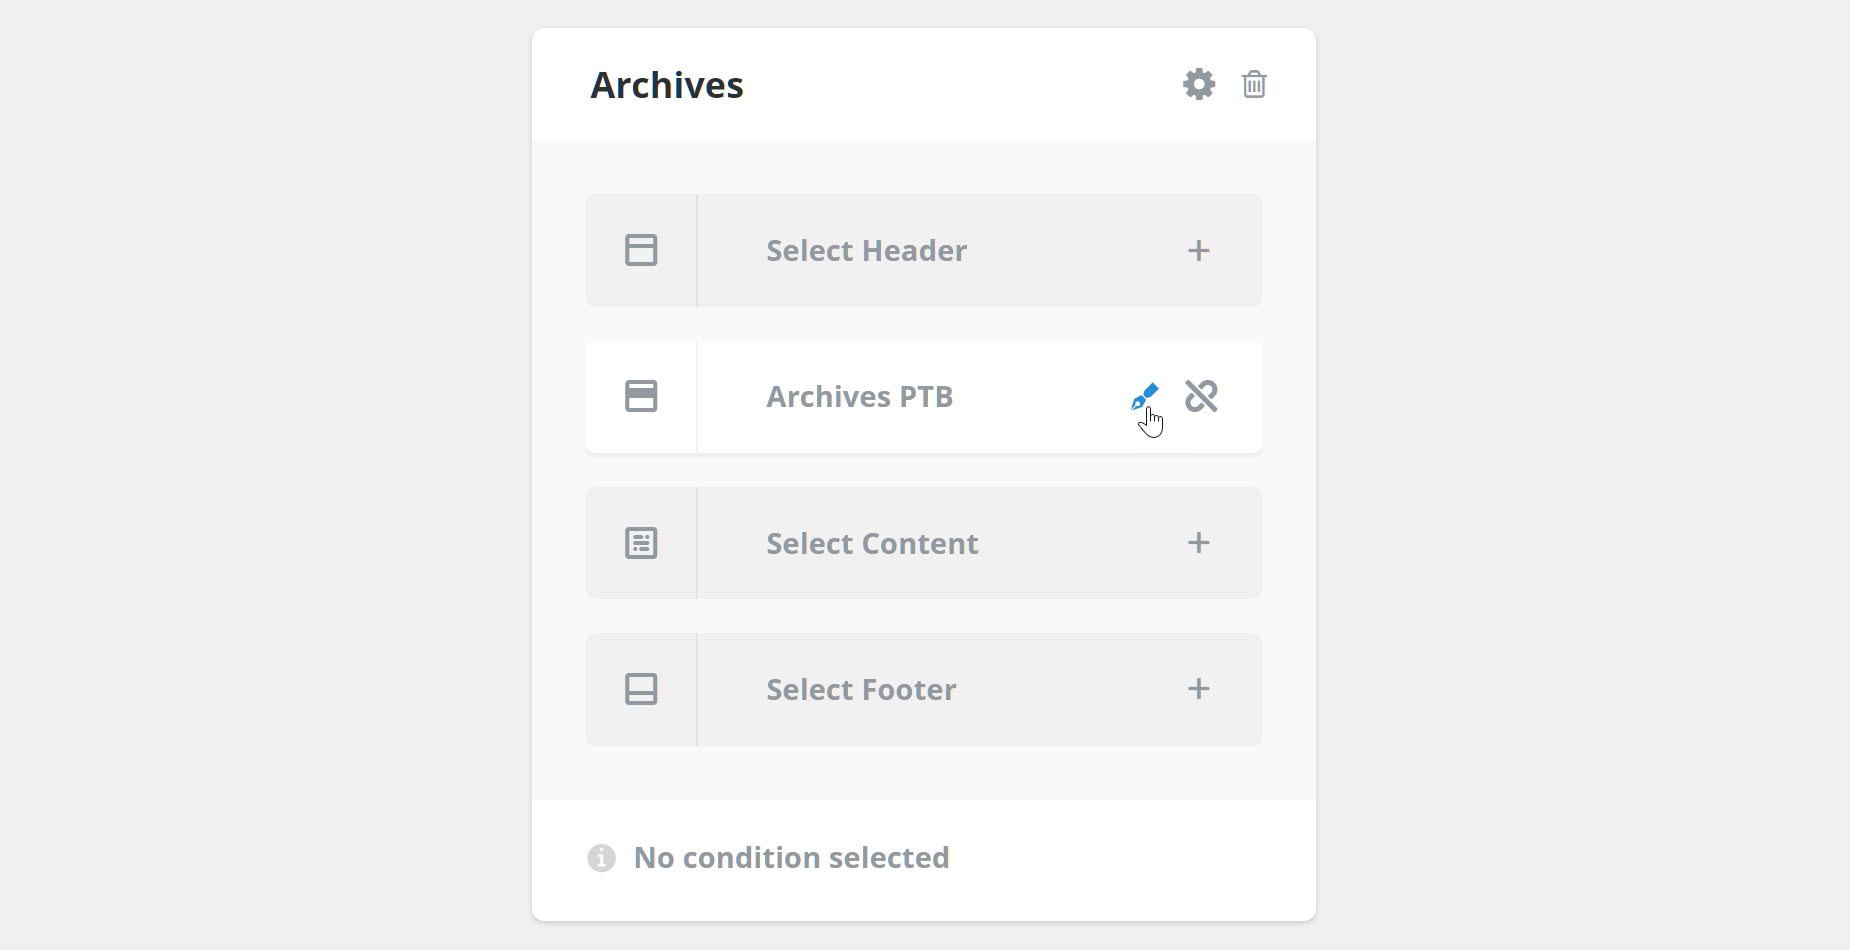
This creates and connects the Layout Section to the Layout, but at this point, it is still empty. If we mouse over the Layout Section on the Layout, as shown below, we can click on the edit icon to design and build our Layout Section.
Editing a Custom Layout Section
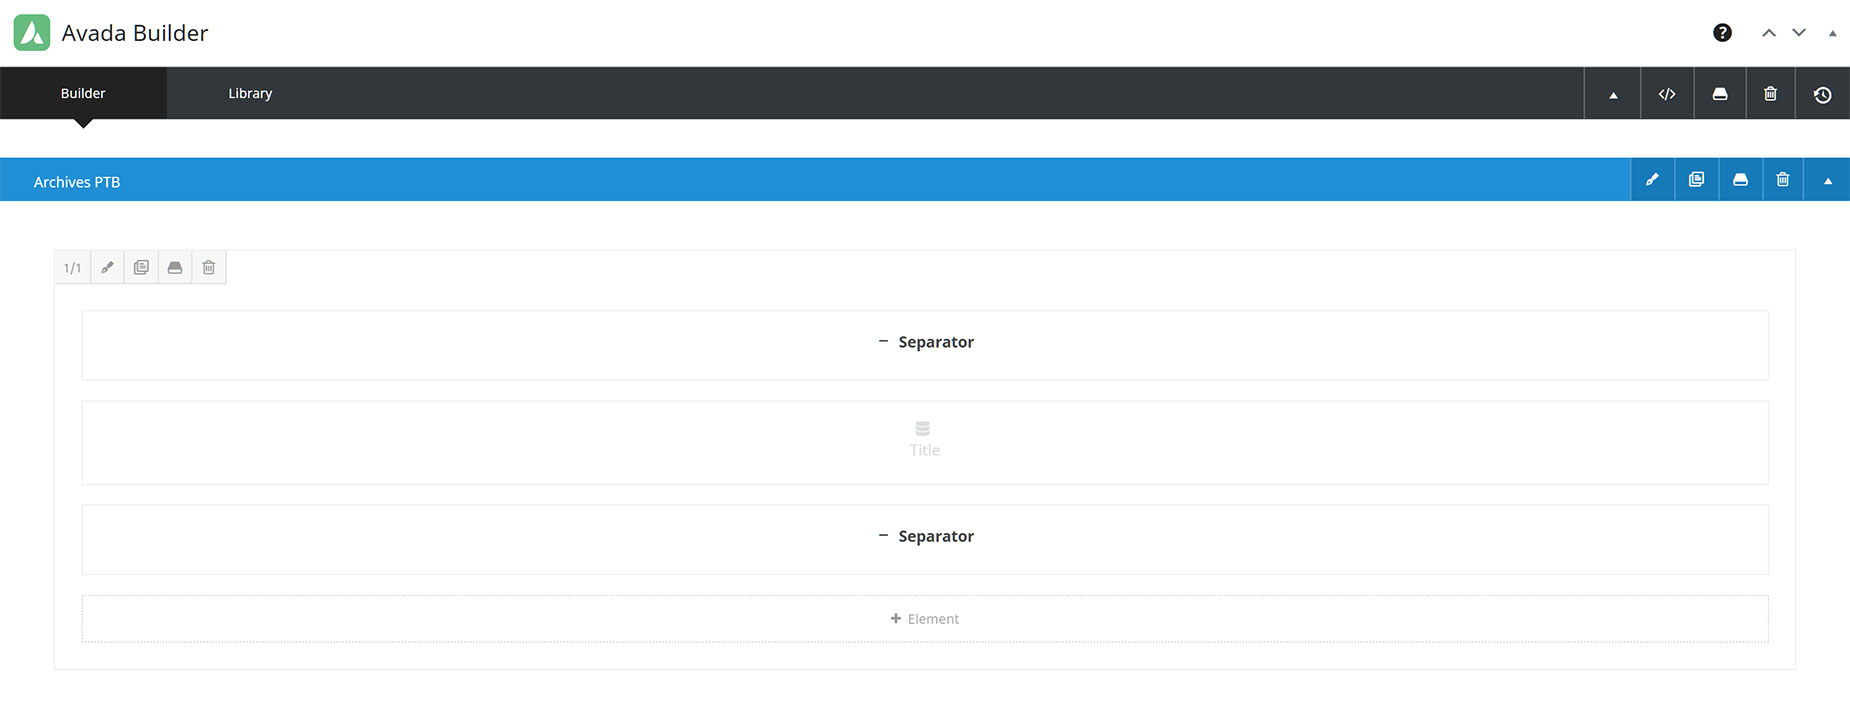
Now we come to the Avada Builder, and here we can create our Custom Layout Sections. You can do this in either Avada Builder or Avada Live. Please refer to Creating Layout Section Content for more information on this, but in short, you can build anything you want here.
Anything you can build in the Avada Builder can constitute the content of your Layout Sections. You can have multiple columns, background images, dynamic data… anything. The freedom this gives is enormous. The Layout Section is literally that – a section where can create the Layout. The content itself comes from the Builder, and what you can do is only limited by your imagination.
The Page Title Bar Layout Section example below could hardly be simpler. The end result just shows a dynamic Title that pulls the Archives Page name, and the container itself has a background gradient and a background image, as well as a couple of Separators for control over various screen sizes. For more information on how this specific Page Title Bar was constructed, please watch the video at the top of the page.
Adding Other Layout Sections
If we wanted to, we could, of course, add further Layout Sections to this Layout. For example, we could add a Content Layout section to redesign the content section, using a combination of Design Elements and Layout Section Elements, such as the Archives Element, or a Custom Footer Section.
Without a Custom Content Layout Section, the layout of the actual Archives Content is coming from their respective options in the Global Options. For Blog posts, there is the Blog Archive Layout Option, found under the Options > General Blog page, and for Portfolio Posts, the Portfolio Archive Layout Option, found under the Options > General Portfolio page.
Setting Conditions For The Layout
With any Conditional Layout, the last thing you need to do is to set the conditions of the layout. This is best done last, because as soon as you set the conditions, the layout is active, and if you do this after creating the Layout Sections, but before editing them, the pages displayed that fit the conditions would be empty in those sections.
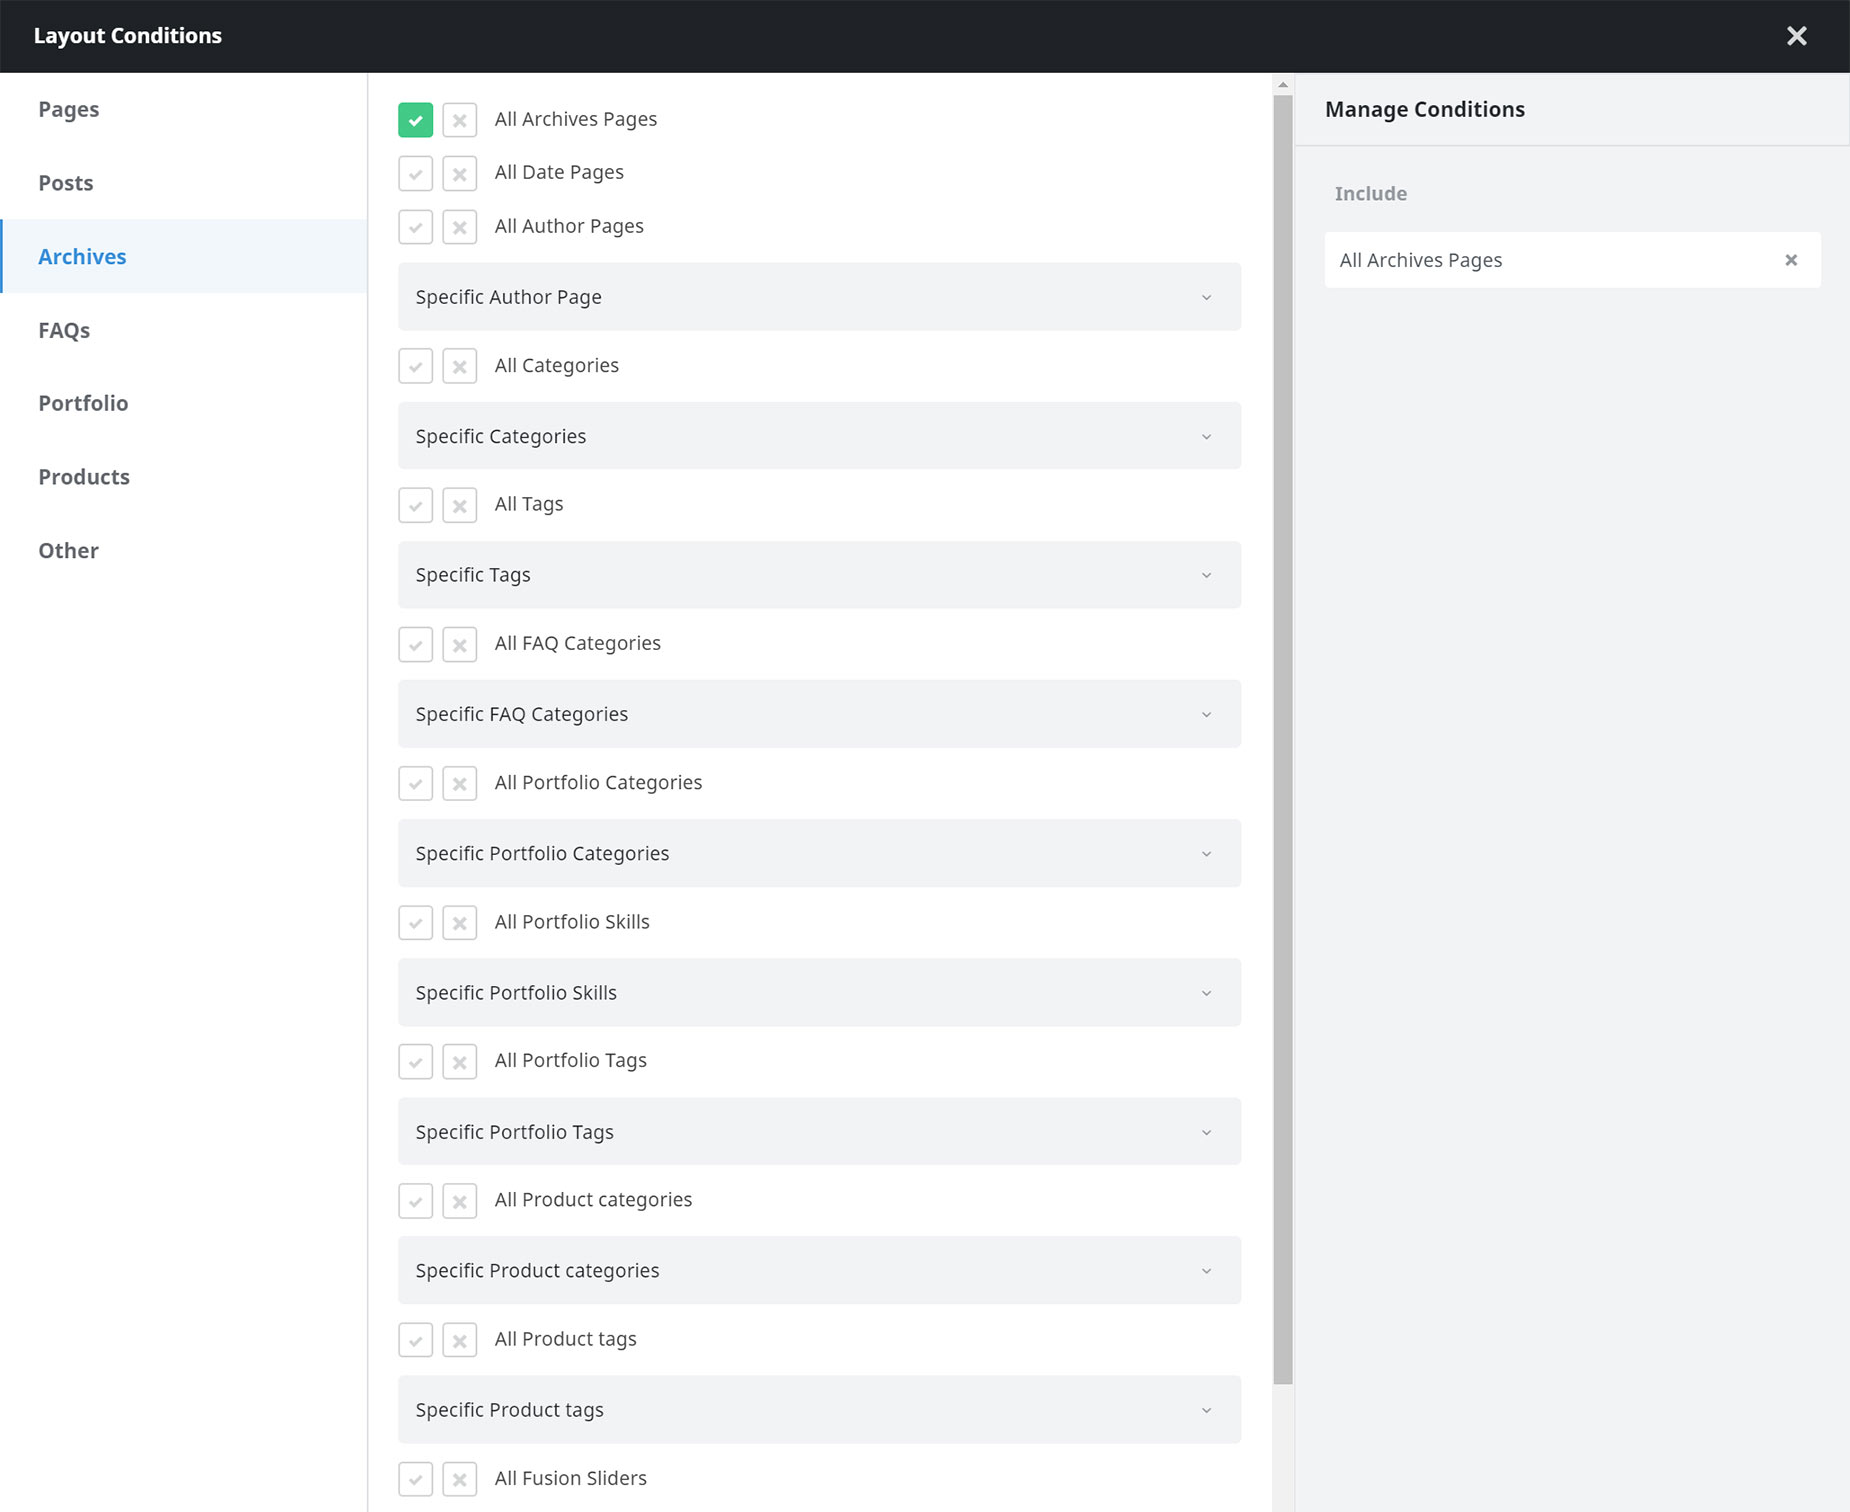
To add a condition, or conditions, simply mouse over the bottom of the Layout, and choose Add A Condition. This brings up the Layout Conditions Dialog, as seen below. Please see Understanding Conditional Layouts for more information on Conditional Layouts, but for this example, as we want this layout to display on All Archives, we just need to go to Archives and select the All Archives Pages condition.
Example Of The Layout
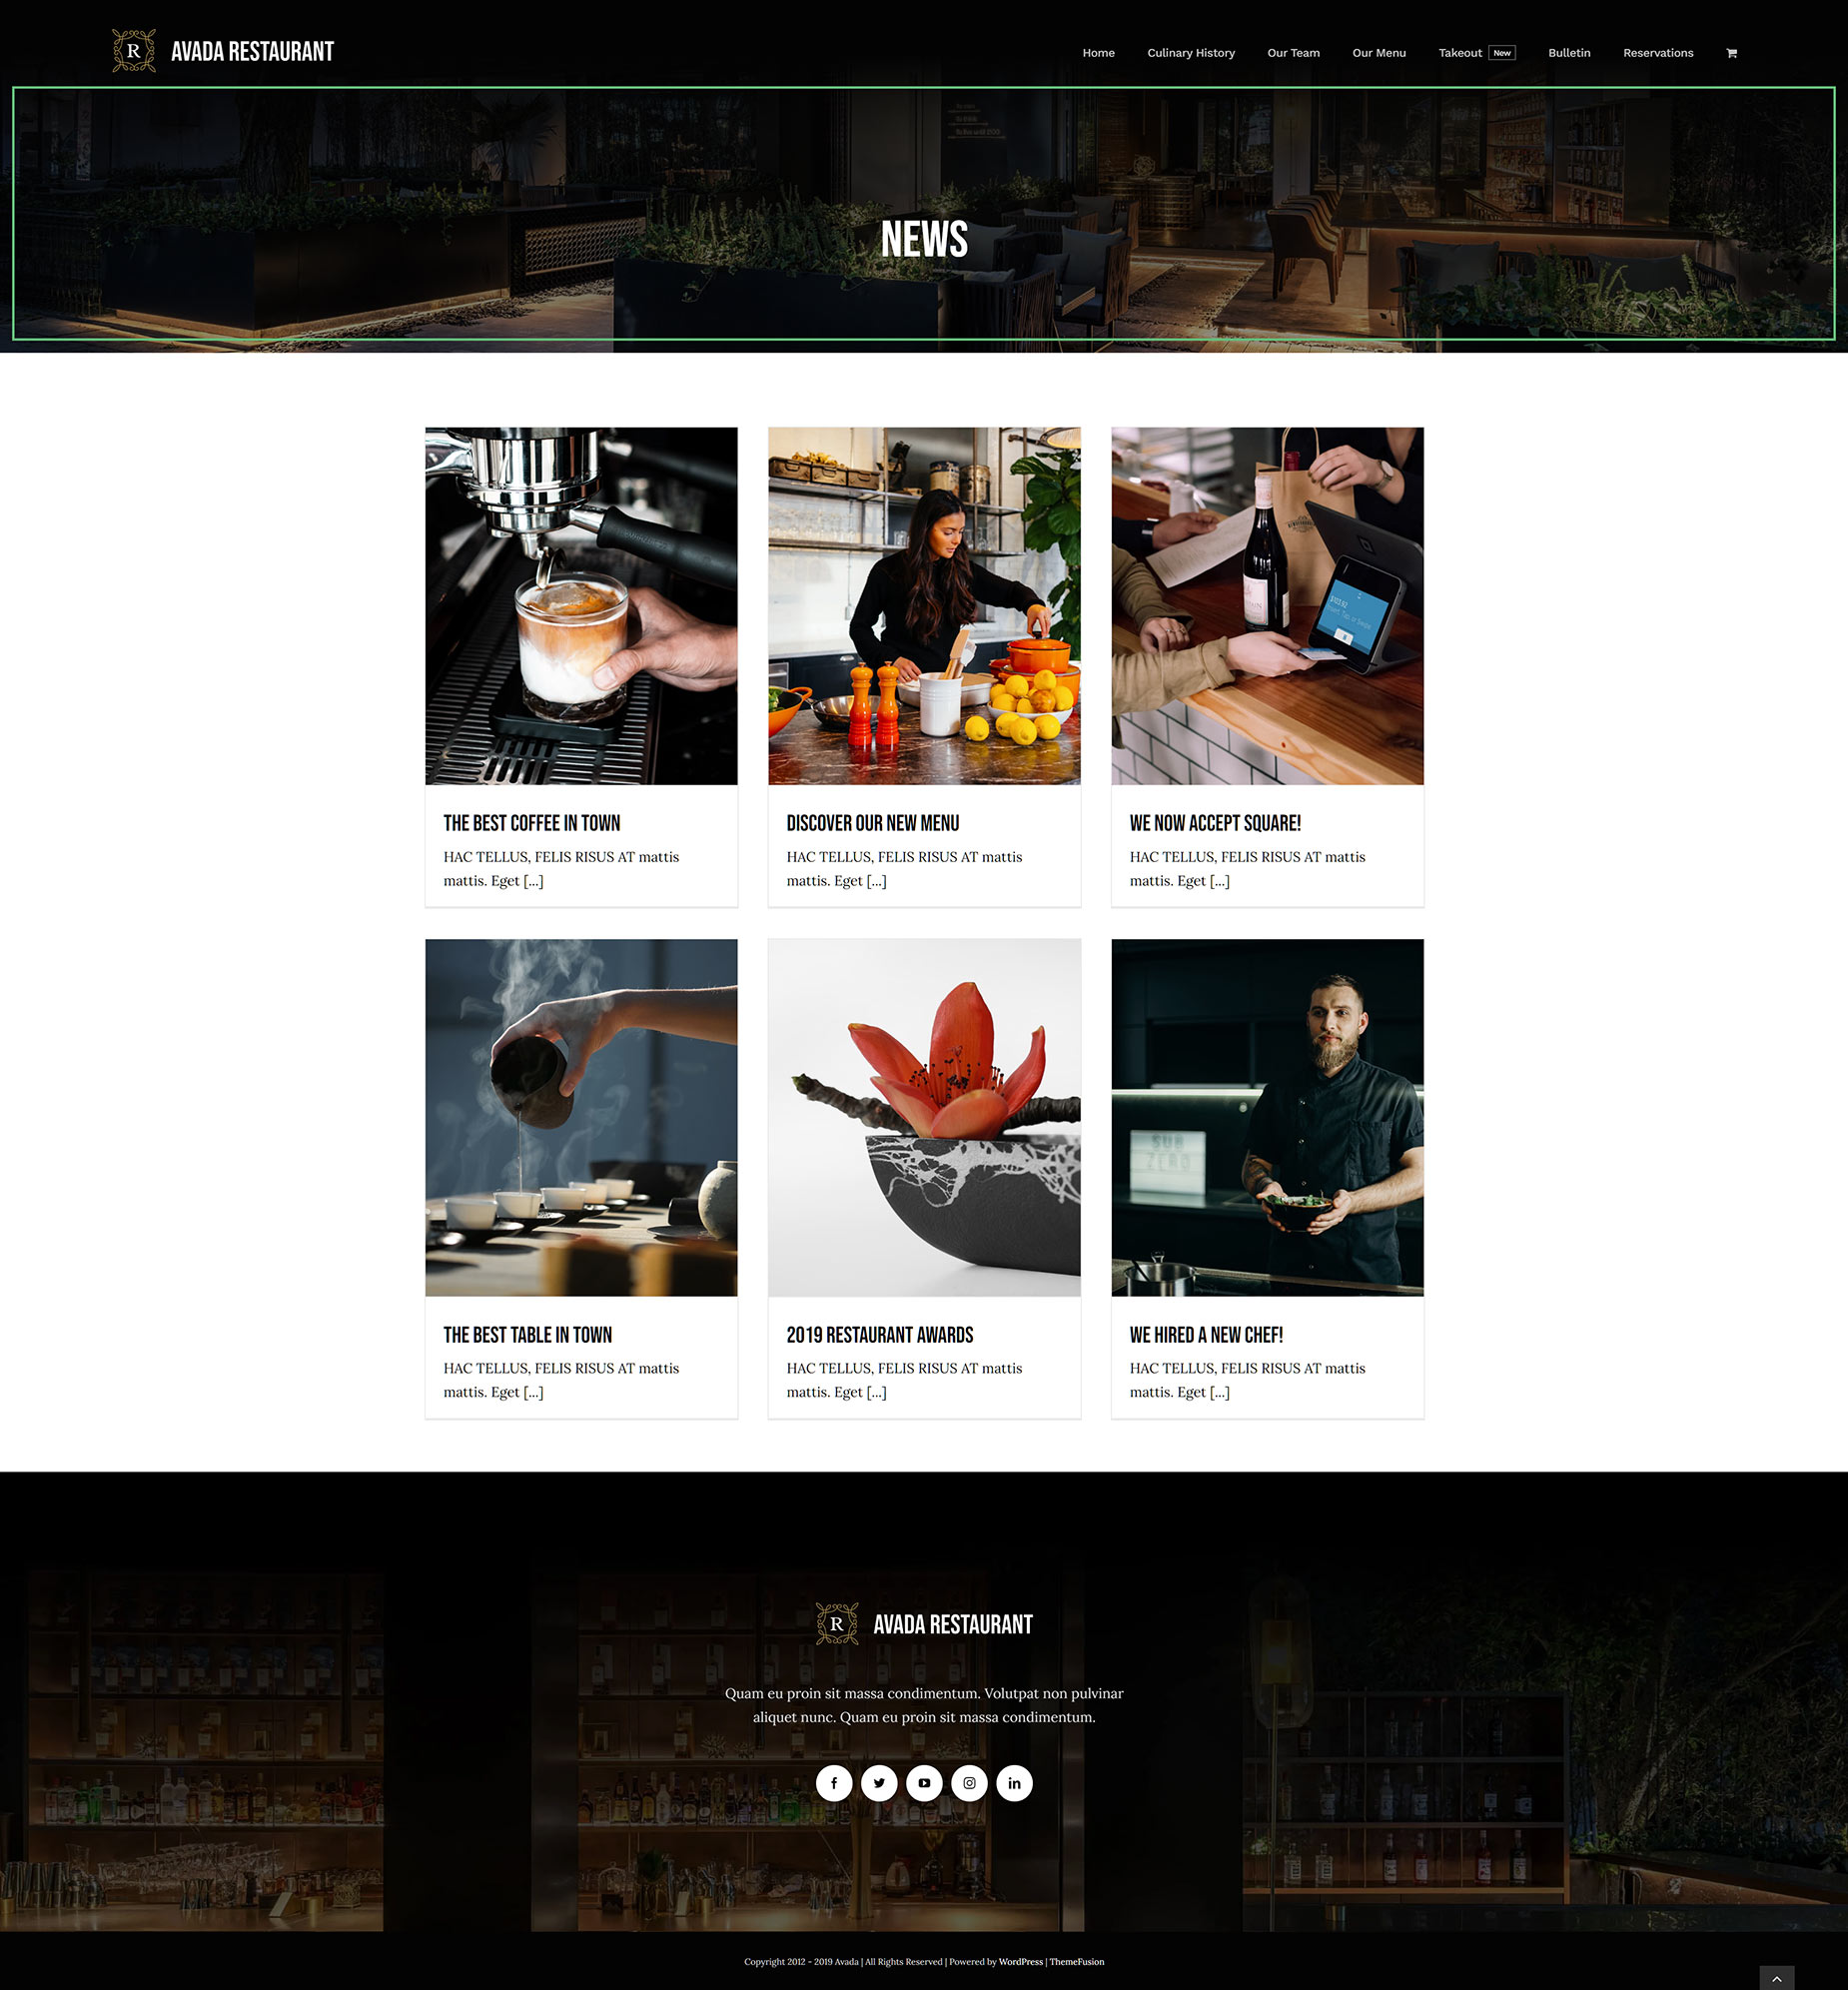
See below for a front end example of an Archives page (Blog category) from the Restaurant Prebuilt Website, showing the Custom Page Title Bar Layout Section that was added to the layout. Here, you can see a live example of this Layout.
Conclusion
With Avada Layouts, creating a custom Layout for your Archives pages is not only now a reality, but rather, an unlimited possibility. You can use the power of Avada Builder to create almost any Layout you can concieve of, and with the power of Conditional Layouts, have it display on all archives, or just specific ones.
Avada Layouts is a game changer in the true sense of the word. It enables such freedom of design, and gives such flexibility in deployment, that building your website layout will simply never be the same again.


