Inline Editing in Avada
Last Update: November 4, 2025
A very handy feature in Avada is the ability to edit text directly on the page. Not only can you edit text, but you can also apply a range of inline editing options, including font color, and size. But several of these options also exist in the element options, so it’s good to know what the best practices are for working with inline editing. Watch the video or read on to find out…
Inline Editing & Formatting

Inline editing is available with any text-based elements in Avada Live. That will be the Title Element and the Text Block primarily, but also any element that has editable text components, like the Button, Alert, Checklist, Content Boxes, Countdown and Progress Bar Elements to name a few.
Inline editing can be seen in two ways. The first is simply changing the content directly on the page. In Avada Live, you can simply click in the text content, and start typing to add or edit existing text.
The second type of inline editing is inline formatting. When we make a selection in our text, the Inline Editor appears, and here we can make a variety of typography changes to our selection.
The guiding principle when it comes to inline editing is that if you want to change the content in its entirety – change the font color, or size, etc – then it’s best to look in the element options for this – but if you just want to change a single word to bold or a different color etc, then inline editing is perfect for that.
Editing Elements As A Whole
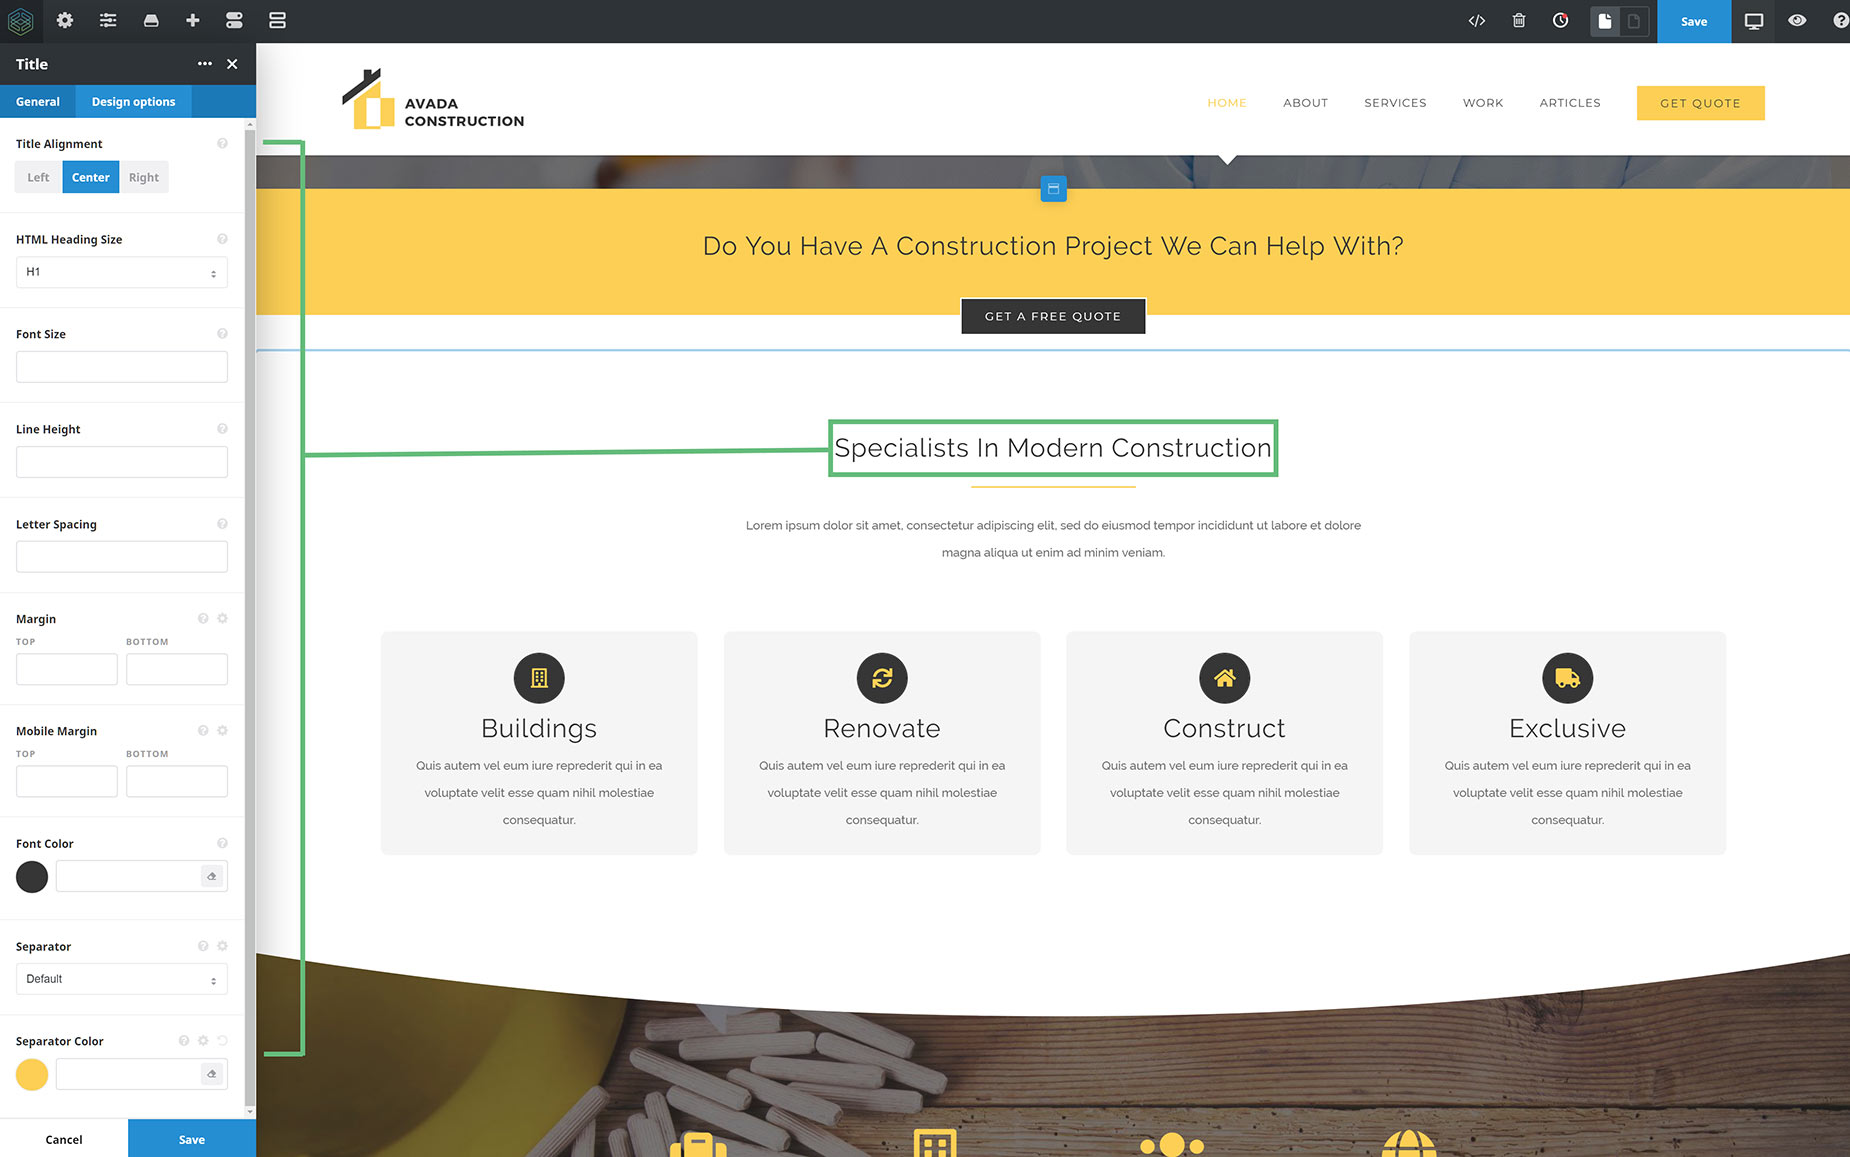
To start with, let’s look at an example of what we can do with the Title Element.
In the design tab of the Title Element, let’s look at the changes we can make to the Element as a whole. Here, we can change the alignment of the title, and set the Heading Size, which itself, has a range of default options set in the individual Header tags in the theme options.
If we wish, we can also override any of these global element options for this single instance of the element, including the font size, the line height, letter spacing, margins, font color and separator style, and color. All the changes made here apply to the title as a whole.
Editing Part of An Element
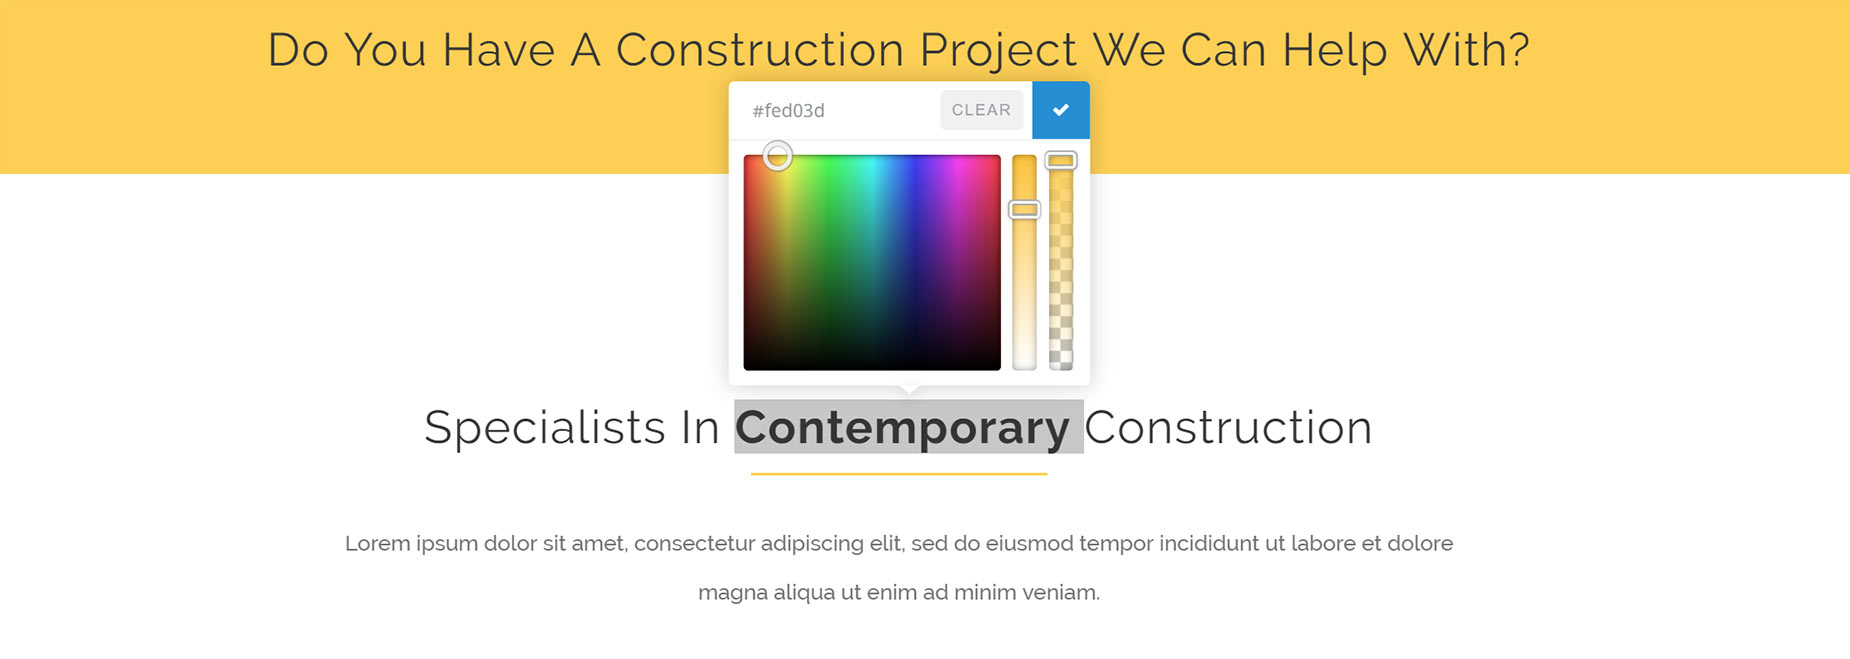
Whereas if we wanted to just change one word, or a section of the Title Element, we can select the desired text, and the Inline Editor appears. There are a variety of typography options that you can change with inline formatting. In this example below, I have edited the actual word, and then made it bold and changed its color.

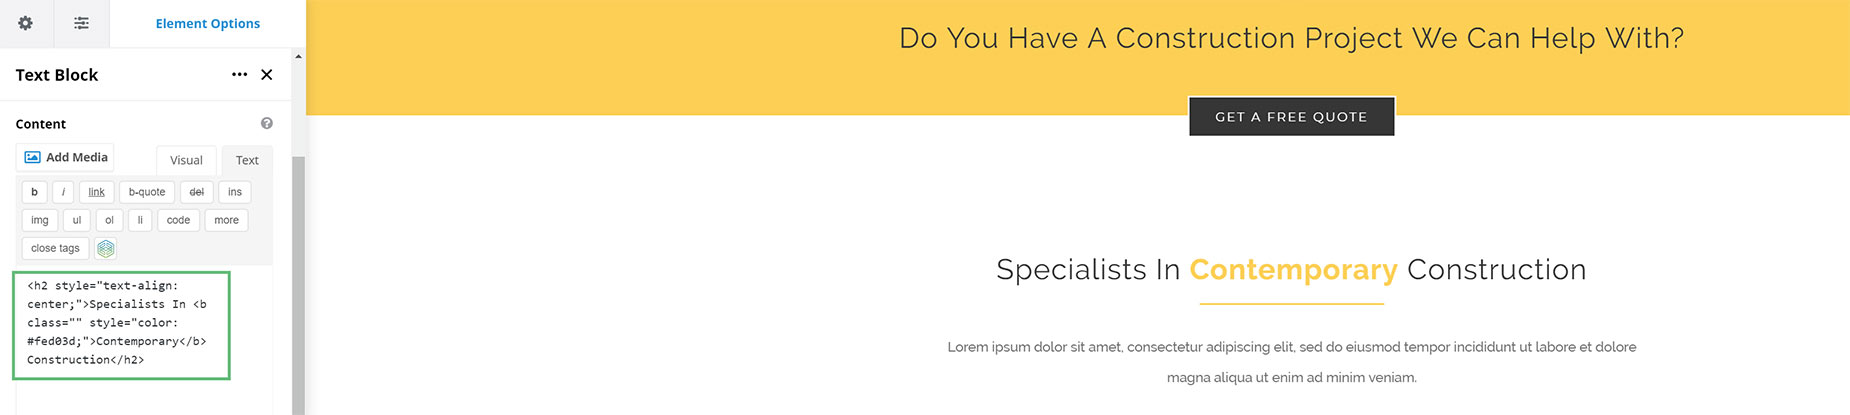
If you look at the element in text view, you can then see the inline HTML that has been applied to the element.
Inline Options
Let’s have a quick systematic look at the inline options.
The first one is typography, where we can change the font size, line height, letter and spacing, as well as the font tag and even the font family and variant. Next is the font color. Then there are a few typical formatting options like Bold, Italic and Underlined. Next, you can quickly add a link to any selected text, and next to that are alignment options. This option will affect the entire paragraph, even if you have just one word selected.

Next to this is the icon for the Extended Options. These are Strikethrough.. Blockquote (again, this will affect the entire paragraph), as will the next four options – unordered and ordered lists and indent and outdent. The next option will remove formatting already applied, and the penultimate one closes the extended options.

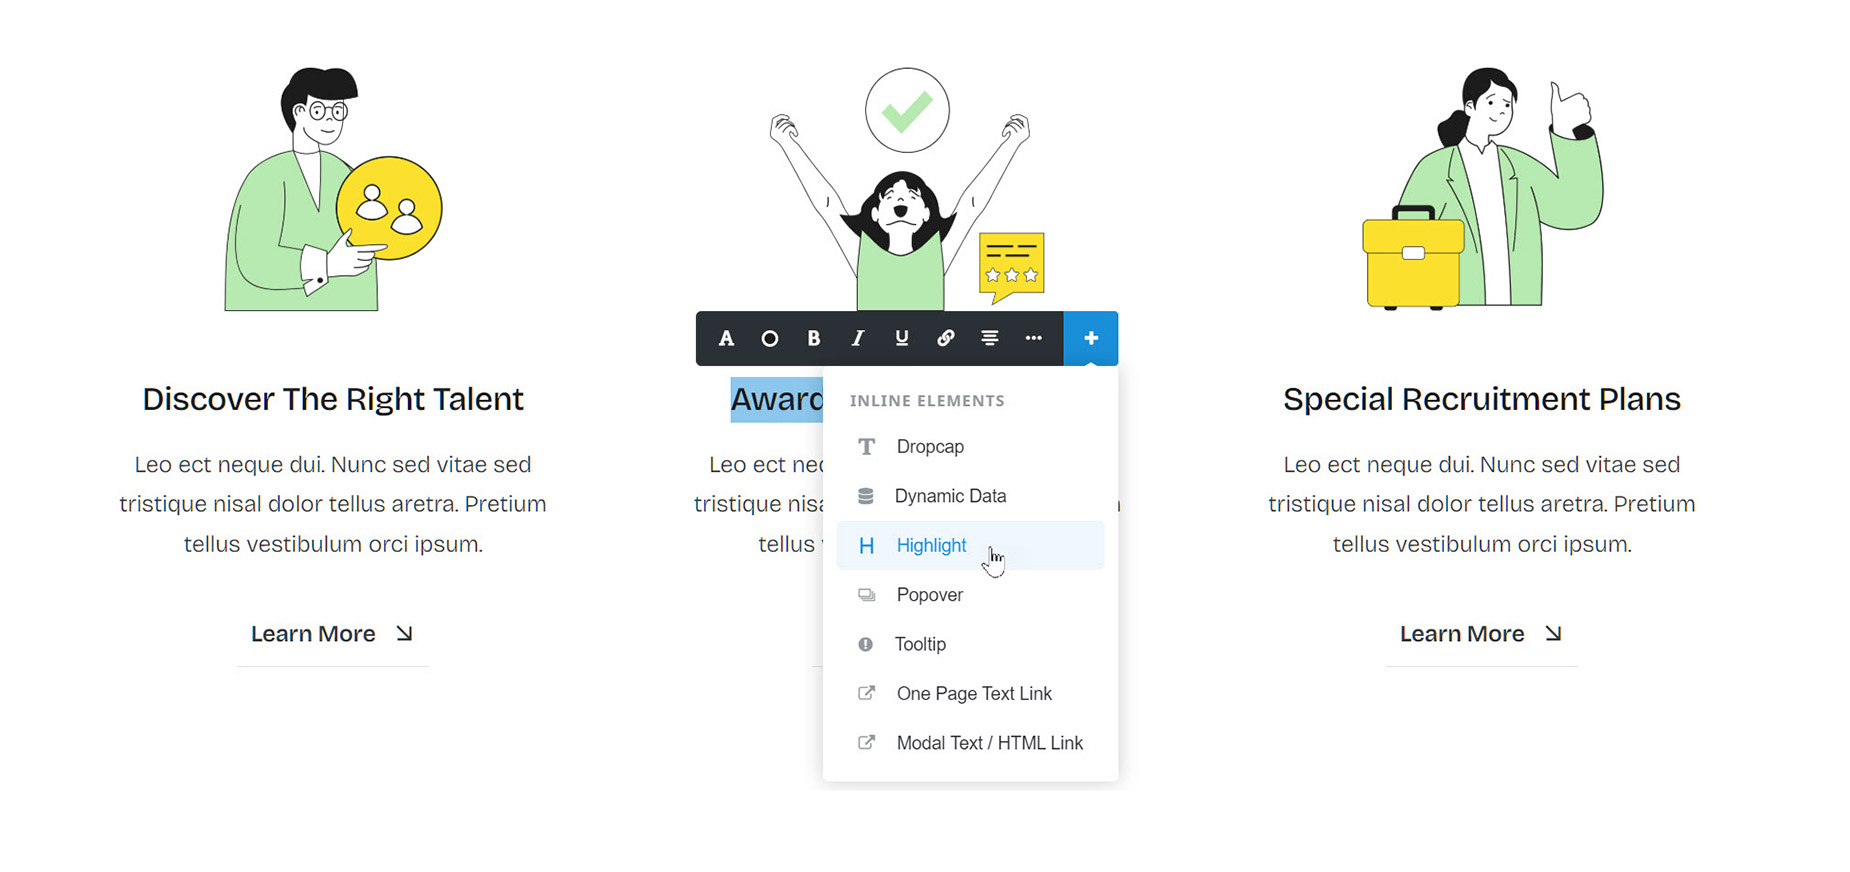
The very last option allows you access to the Inline Elements, like Dropcap, Highlight, and Popover. These are special elements that only work in conjunction with text or other content, and not directly on their own. Please read the Inline Elements Doc for more information on these elements.
Another important thing to note is that inline edit options override element options. If you follow best practices, this won’t be an issue.
Avada also has a great new feature, that if it detects you are making an inline edit on an entire element, it will transfer that change to the element options, instead of leaving it as inline HTML. Now that’s smart!


