Avada Forms Email Notification Placeholders
Last Update: January 22, 2026
When creating email notifications for your Avada Forms, under the Form Options > Notifications tab, you can make any number of notifications when an email is submitted. These might be the message sent to your inbox, or perhaps even a co-worker, or an auto-reply forwarded to the sender. See the How To Set Up Avada Form Notifications documentation for more information on the process as a whole.
In this document however, we will look specifically at the placeholders you can use in an email notification. In the various notification fields, you can use placeholders to pull information from your forms dynamically. Read on to have a look at the multiple options, and watch the video below for an overview of using notifications in Avada Forms.
Avada Form Field Placeholders
A placeholder is a shortcode that pulls the content from the email based on the field name. The most common notification fields to use placeholders are the Email Subject, Email From Name, and Reply To Email fields, but there are also numerous preset placeholders you can add in the Email Message field. By using placeholders, your emails will be customized on arrival, dynamically pulling the data from the form to display in your email. If you wish, you can also use multiple placeholders in fields.
Let’s look at an example. Let’s configure a Contact Form (this one is from the Avada Podcasts prebuilt website) using Placeholders in the Notifications tab of the Form Options, to customize how the email looks upon delivery of the notification.

Email Subject
For Email Subject, use an Avada Text Field Element in the Form with a Field Label of Subject and a field name of Subject. So, in the Email Subject field in the Submission area add [subject]. That way, when the email arrives, it will have the user-entered subject in the email’s Subject Field.

Email From Name
If left empty, an email sent from the form will appear to originate from WordPress. This is not very descriptive. By adding placeholders for the Name fields in the form, you can personalize this email section. We have a First Name and Last Name field in the form. In the Email From Name field in the Submission area, enter [first_name] [last_name] so the email From section is personalized (e.g., John Smith).
Make sure you use the exact field name from your form, with square brackets around it. So [first_name] if first_name is your field name.

Sender Email
This field controls the email address that the form shows as coming from. There is a good reason not to use placeholders here and, instead, to use an email address from your own domain. If you think about it, anyone could send an email on behalf of anyone else using your contact form if it arrives “From” the user’s inputted email address. This means it would be wide open to abuse. Also, most email servers now verify if the sender has the right to use that email address.
And so, when the checks fail, the server identifies the mail as spam, based on a “forged sender address” also known as email spoofing. This hurts deliverability. The visitor’s name can still appear in the Email From Name field using a placeholder, as shown below, but their email address should not be entered in the Sender Email field.
Best practice is to use something like contactform@sitename.com or wordpress@sitename.com, which is the default sender address of WordPress transactional emails, such as password recovery and automatic update notifications. It should end with your domain name and extension, but what you put before the @ doesn’t matter. Do not use an existing address.

Reply To Email
With this field, you can add the email address of the person submitting the form, so you can easily reply to the email, and it will be sent to the right place. Otherwise, the reply would go to the address in the Sender Email field, which, if left empty, is wordpress@sitename.com
The email reply must use a specific format for it to work. This is not Avada– specific; rather, it’s a WordPress convention. The format to use is [text_field] [email_address].
So, for this example, we use the First Name field and the Email Address field as such: [first_name] [email_address]

Placeholders for Email Message Field
By default, the message will be sent with all form fields included. In the Email Message field however, you can also use a range of different placeholders for customizing the data in the email notification. Any form field name inside square brackets is a valid placeholder, and these preset placeholders will help pull various details that can be helpful.
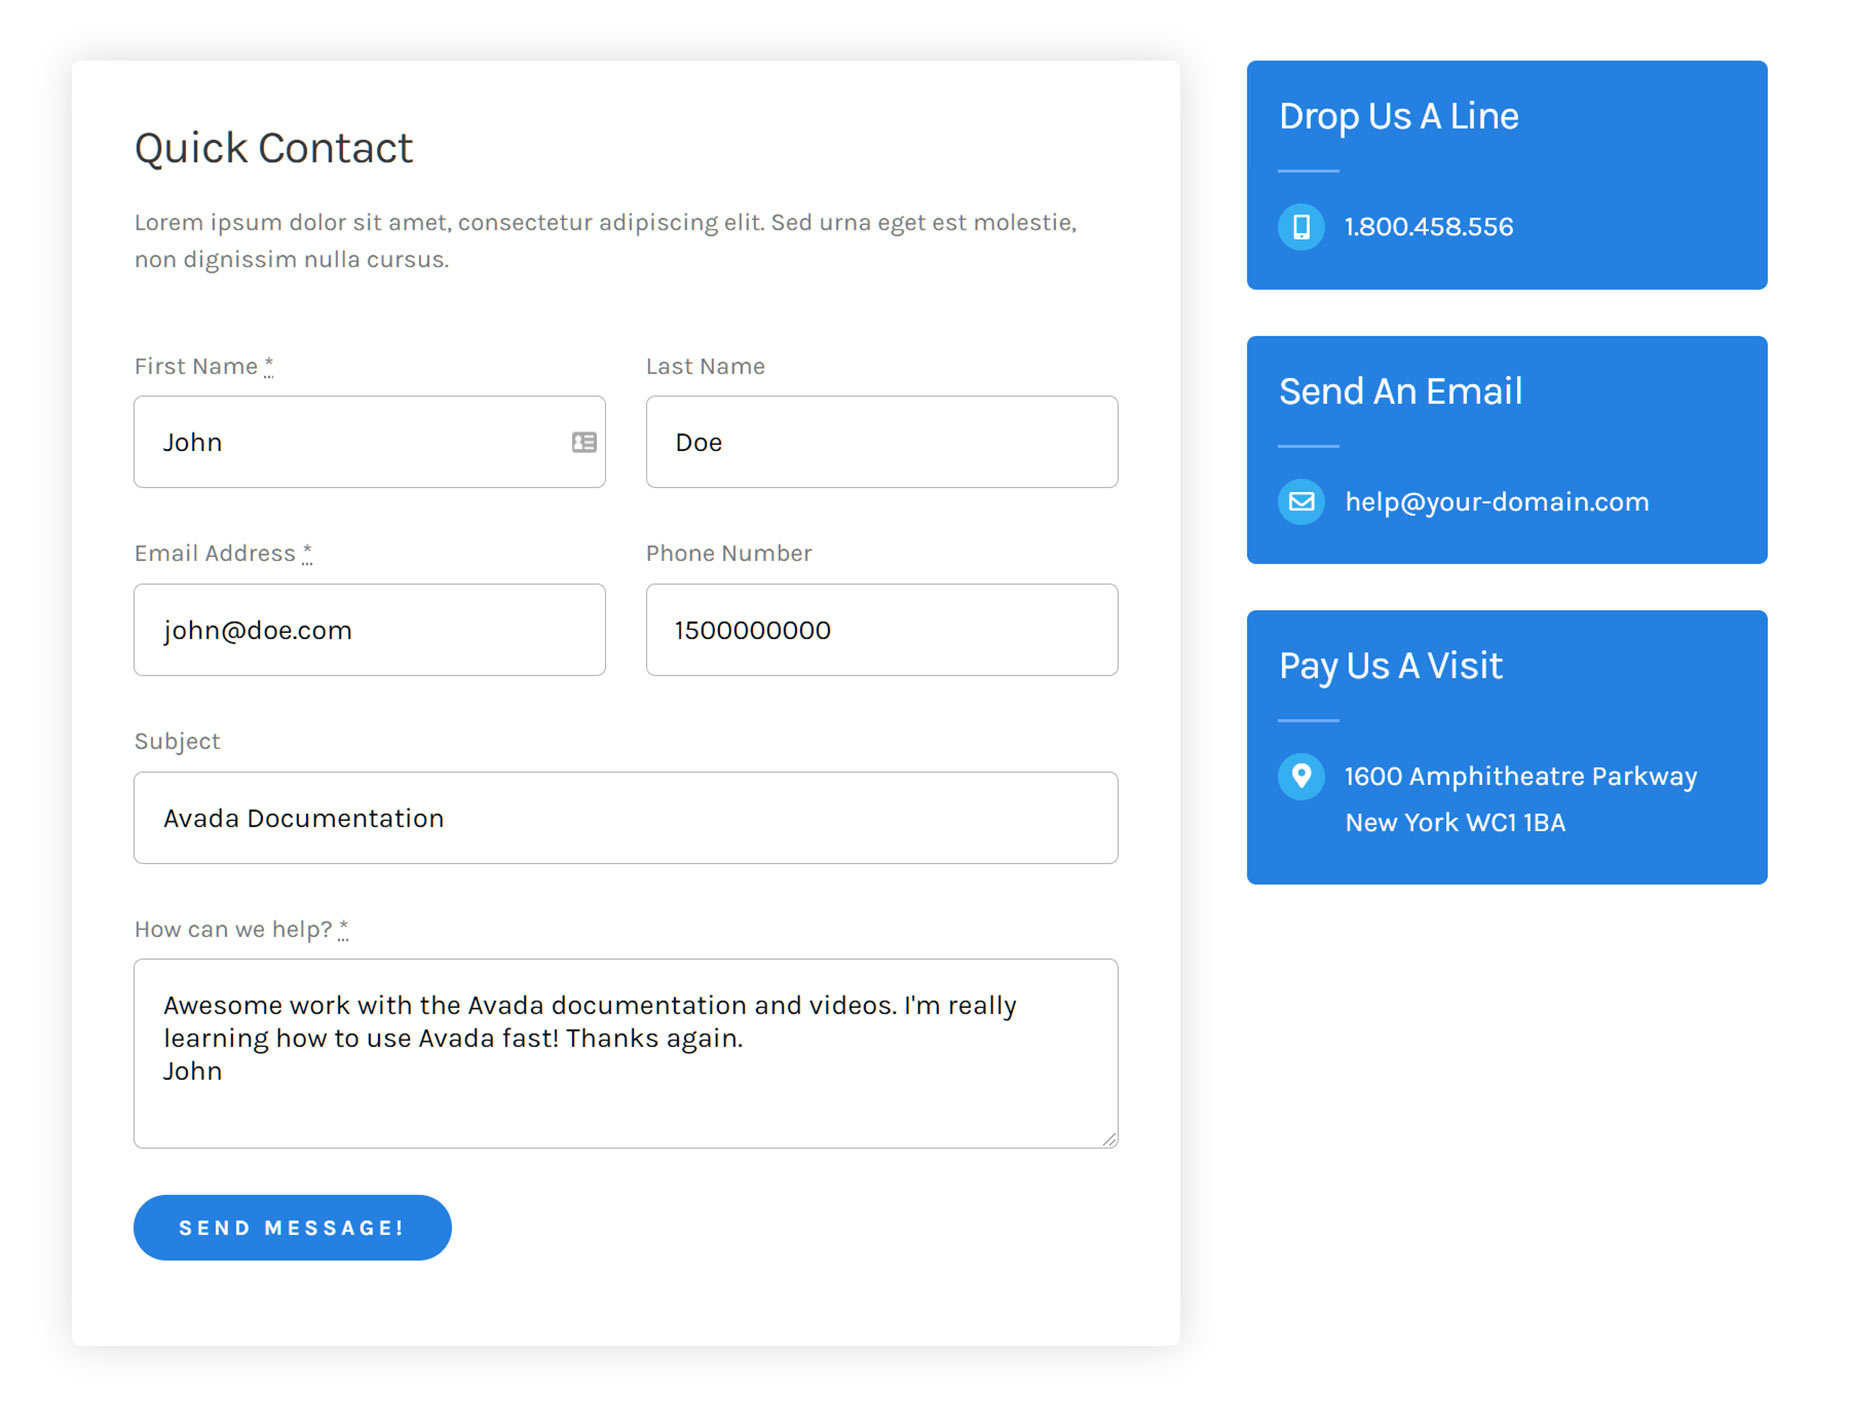
Submitting The Form
When the form is filled out the form as a user, using the following information, and send it, the placeholders in the created Notifications will go to work.
Receiving The Email
When the email is delivered, you’ll see that the placeholders have pulled the information from the form submission. The email title is pulled from the Contact Form’s Subject. The email shows as coming from John Doe, but it uses the WordPress email address.
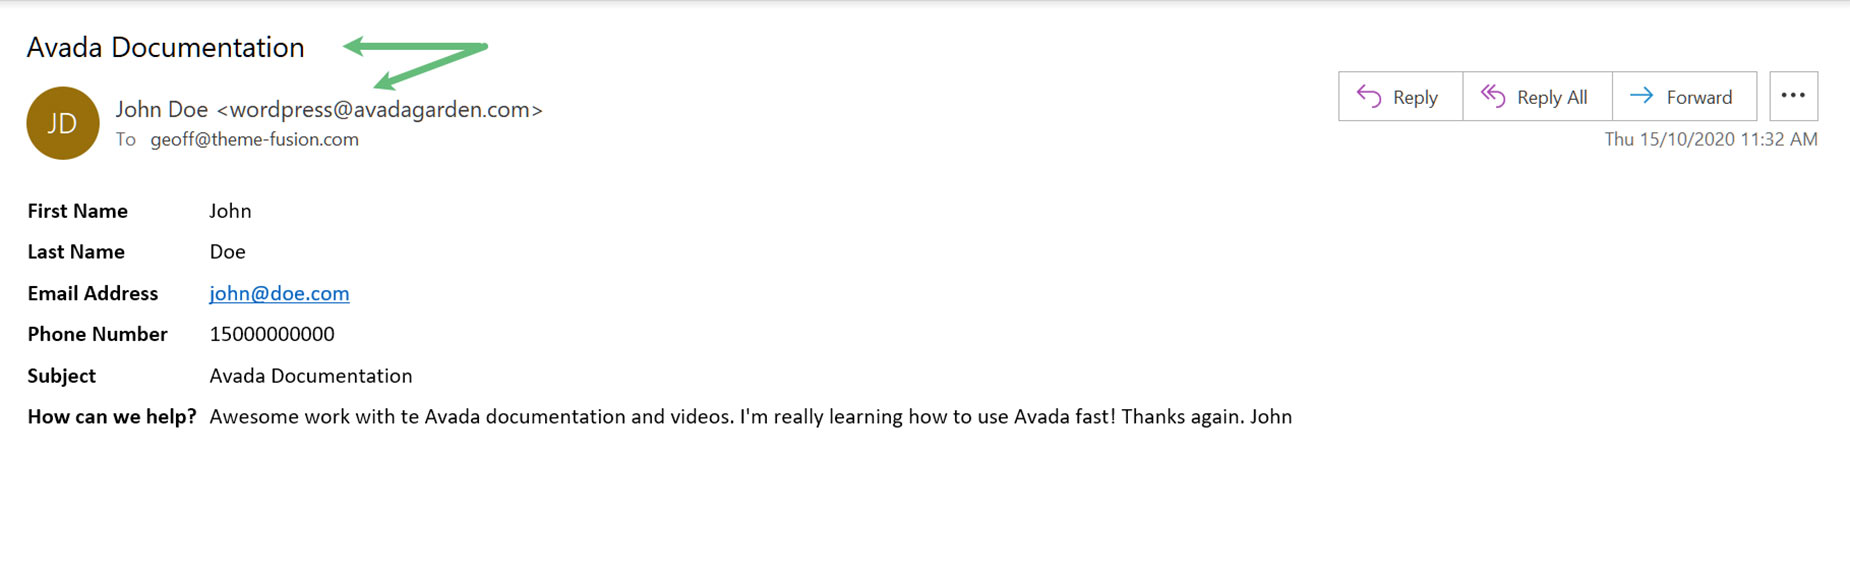
If you hit reply in the email client, the email is addressed correctly, using the First Name and the Email address from the placeholders.


