Share
If you want to streamline your workflow and take control of your day-to-day WordPress development, this article is for you. We will cover one of the simplest steps you can take to organize your workflow: setting up a local WordPress installation on your Mac using an application called XAMPP. Before we get into detail, let’s quickly recap the main reasons why you should consider a localhost WordPress installation.
Overview
10 Benefits of a Local WordPress Installation
A local WordPress installation offers a safe and controlled environment for development, allowing developers and designers to experiment with themes, plugins, and custom code without risking the stability of a production (live) site. It provides faster development speeds due to reduced dependency on internet connections and ensures offline access, which is beneficial in areas with unreliable internet. Complete control over the server environment allows for better replication of production conditions, aiding in accurate testing and debugging.

Additionally, it is cost-effective as it eliminates the need for a hosting plan during the development phase. Local installations also enhance data security, facilitate easy backups and restoration, and provide a risk-free playground for experimentation. This setup is handy for client demonstrations, ensuring the website design and functionality are perfected before live deployment. Overall, a local WordPress installation is crucial for efficient, secure, and flexible WordPress development. Here are some key benefits:
1. Safe Environment for Development
Local installations allow you to develop and test themes, plugins, and custom code without risking the stability or security of a live site. This is especially important when experimenting with new features or making significant changes.
2. Faster Development
Working locally generally offers faster loading times since you’re not dependent on an internet connection or server response times. This speed can significantly boost productivity, allowing for quicker iterations and testing.
3. Offline Access
You can work on your WordPress site without an internet connection. This is particularly useful for developers who might be in areas with unreliable internet access or who prefer to work while traveling.
4. Full Control Over the Environment
With a local installation, you can customize the server environment to match the production environment closely. This includes PHP versions, server configurations, and database settings, ensuring that what works locally will work on the live site.
5. Cost-Effective
Running a local WordPress installation doesn’t require purchasing a hosting plan, which can be a cost-saving measure, especially for beginners or those running multiple test sites.
6. Testing And Debugging
Developers can use debugging tools and error logs without any constraints. This makes it easier to identify and fix issues. Moreover, since there are no visitors, there’s no pressure to resolve problems quickly as there would be on a live site.
7. Data Security
Your local development environment is not accessible via the internet, reducing the risk of cyberattacks or data breaches during the development phase.
8. Ease of Backup and Restoration
Creating backups and restoring your site is straightforward on a local environment. You can quickly duplicate or move your site without dealing with server transfer protocols.
9. Experimentation
A local environment provides a playground for experimenting with different themes, plugins, and configurations. This can help you learn and understand WordPress better without the fear of breaking a live site.
10. Client Demonstrations
You can create and demonstrate websites to clients on your local machine, ensuring that the design and functionality are perfect before deploying to a live server.
Introducing MAMP For MacOS And Windows
MAMP is a software package that stands for (Macintosh, Apache, MySQL, and PHP), designed to create a local web server environment on macOS and Windows. It allows developers to run web applications on their local machine without an internet connection. MAMP includes Apache, and Nginx, as the web server, MySQL as the database management system, and PHP as the programming language.
MAMP simplifies setting up a local server by providing a user-friendly interface for managing server settings and configurations. It is mainly used to develop, test, and debug web projects in a controlled environment before deploying them to a production (live) server. As for WordPress, all that is needed to run is:
Download and Install MAMP
You can download standard free MAMP package here. There’s also a premium version available in MAMP PRO, but the standard version is more than adequate for your initial needs and contains everything necessary for running WordPress locally. Check out the MAMP vs. MAMP Pro comparison table.
Once the package has been downloaded, follow the install prompts. If at any stage you need some assistance with the installation, please consult their detailed documentation:
Configure MAMP Settings for WordPress
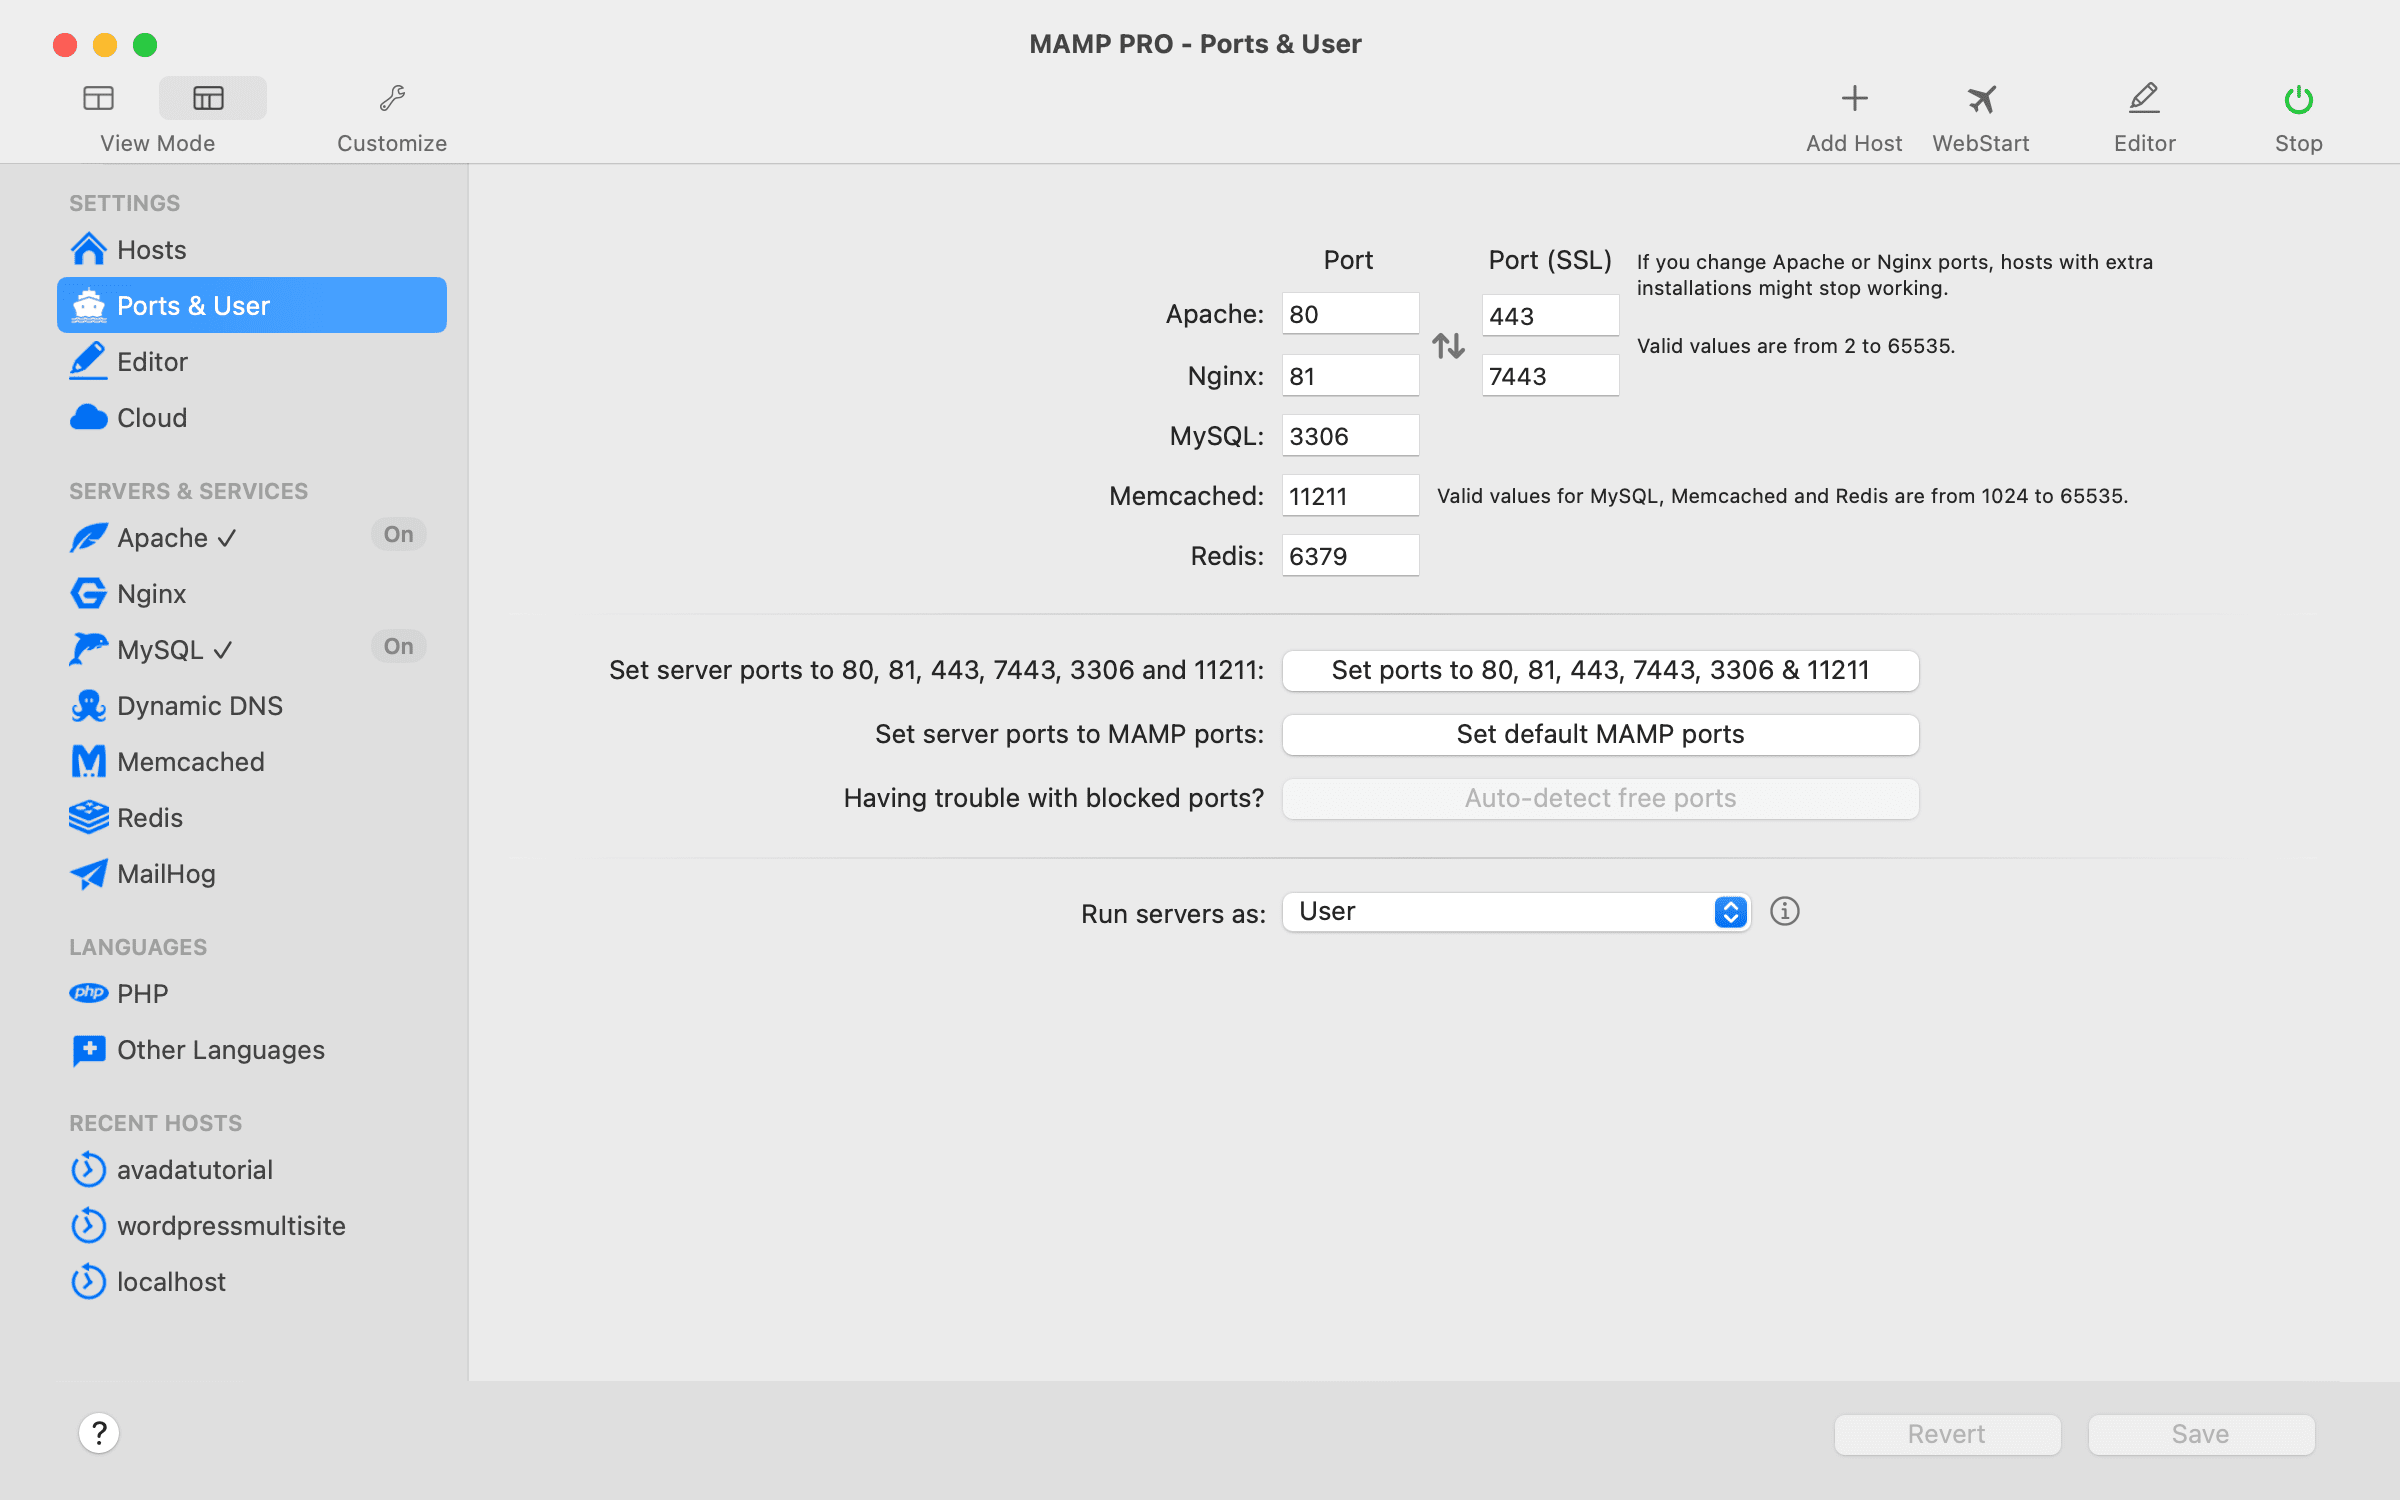
After launching MAMP, the example shown in this article uses MAMP Pro, so you must do some prep work before installing WordPress. Begin with ports by navigating to View > Ports & User, then select “Set default MAMP ports”. These are standard port settings for these services that you’ll also see on remote servers, so it’s a good idea to use them here.
When MAMP PRO is started for the first time, any existing MySQL databases are copied from MAMP to MAMP PRO. The contents of the directory “/Applications/MAMP/htdocs” are copied to “~/Sites/localhost” and set as “Document root” for the site “localhost.” A dialog box will inform you of this action.
At this point, everything should be working smoothly. Check back on the MAMP launch screen and check if services are running by looking for a small green indicator at the top right of the screen. If they are not running, hit Start.
Setting Up A New Virtual Host
Setting up a new site with MAMP PRO is as straightforward as clicking a few buttons. Here are the basic steps:
Step 1: Launch MAMP PRO
Open the MAMP PRO application and start the servers.
Step 2: Add a New Host
Click on the “Hosts” tab and then the “+” button to add a new host.
Step 3: Select a Host Type
When you select WordPress as the host type, WordPress and the database will be pre-installed.

Step 4: Create a WordPress Host
In this step, provide a name for your new localhost website.

Step 5: Set The Document Root
The location of a virtual host’s documents (HTML/PHP files, etc.) is called the document root, which is also known as the web root folder. The name of the document root must match the hostname provided in step 4.

Step 6: WordPress Settings
In this step, you will add the WordPress website username, password, and an email address.

Alternatives To MAMP For Windows & MacOS
Congratulations! You are now covered for basic local development in WordPress. At some stage though, you’re going to be looking to spread your wings a little in terms of the complexity and sophistication of your setup. Here are three more advanced topics to explore when you’re ready to take your local WordPress environment to the next level:
XAMP
XAMPP is a free, open-source, cross-platform web server solution stack that includes Apache, MariaDB, PHP, and Perl. It’s designed to be easy to install and use and provides a comprehensive local development environment for developers. XAMP can be installed on Windows, Linux, and MacOS.
Local By Flywheel
Local by Flywheel is a robust local development tool specifically for WordPress sites. It offers a user-friendly interface, quick WordPress installation, SSL support, and local site sharing, making it an ideal choice for WordPress developers. Local by Flywheel can be installed on Windows, Linux, and MacOS.
Docker
Docker is a platform for developing, shipping, and running container applications. It provides isolated environments for each project, making it highly versatile and scalable. Docker ensures consistent development environments across macOS and Windows. Docker can be installed on Windows, Linux, and MacOS.
Summary
Whether you’re a developer, designer, or site owner, getting WordPress set up locally will save you a lot of time and sleepless nights. As this article has shown, it’s not that difficult to do. Also, check out this article about how to set up a WordPress installation on your PC. Here are the basic steps again to recap: