Share
Social media was a place to showcase your day-to-day life for quite some time. However, as time passes, more businesses and websites have turned to social media to promote their latest stories and products. With its popularity rising, it’s worth looking into how your Avada website can benefit from social media.
Luckily, WordPress offers many plugins that use social media in various ways. You can, for instance, enable website visitors to share posts to their social media accounts at the click of a button or display your own social media feed on your Avada website.
While this last feature is seen across many websites, your social media feed can bring many more benefits than meets the eye. In this article, we’ll take a look at some of the features you might have overlooked and how you can use them to promote your blog or eCommerce website using the Spotlight PRO plugin. Let’s get started!
Overview
Why Social Media Can Help Your Blog or eCommerce Website
Social media is quickly becoming a marketer’s dream. With a free platform to showcase your work and share your stories, social media platforms are easy ways to tap into your consumer or follower market with minimal effort.
Instagram is one such platform. Its popularity and, consequently, its users are increasing every year, making it the strong and powerful go-to social media platform for your blog or eCommerce store.
Displaying your Instagram feed on your Avada website can provide you with fresh, new, automated content and help you connect with your audience in a more personal way. It can also help you increase your follower count and gain direct access to your client base.
On the other hand, a plugin like Spotlight PRO can also allow you to bring in Instagram posts uploaded by your clients and display them on your website in the form of hashtag feeds. Hashtag campaigns act as great social proof and provide free testimonials. At the same time, you’re creating a community around your product or service.
It’s also important to consider how website visitors can access your Instagram account and how Instagram users can easily access your website. Link in bio websites have increased in popularity among many brands. Thanks to their seamless user experience, these landing pages help Instagram users easily access a specific blog post, page, or product.
Complementing your Avada theme or pre-built website with a powerful social media WordPress plugin like Spotlight PRO can enable you to access all these features and more.
How to Choose an Instagram Feed Plugin for WordPress
Once you’ve decided how you wish to use social media to your advantage, it’s time to choose a WordPress plugin. When choosing an Instagram feed plugin for your website, you’re always better off using one plugin for all your Instagram needs.
These features will cover most, if not all, of your Instagram needs. While there are many options to choose from, Spotlight PRO offers all these features in one light but powerful plugin. It was designed with beginners in mind, so you won’t need to enter a line of code to perfect your feed’s appearance.
In the next few sections, we’ll see how well Spotlight PRO integrates with any Avada pre-built website to create a hashtag Instagram feed.
How to Set Up Your Instagram Feed On Your Avada Website (in 5 steps)
Let’s take a look at how you can create a hashtag feed using Spotlight PRO. To start off, you need to install Spotlight’s free plugin from the WordPress plugin directory.
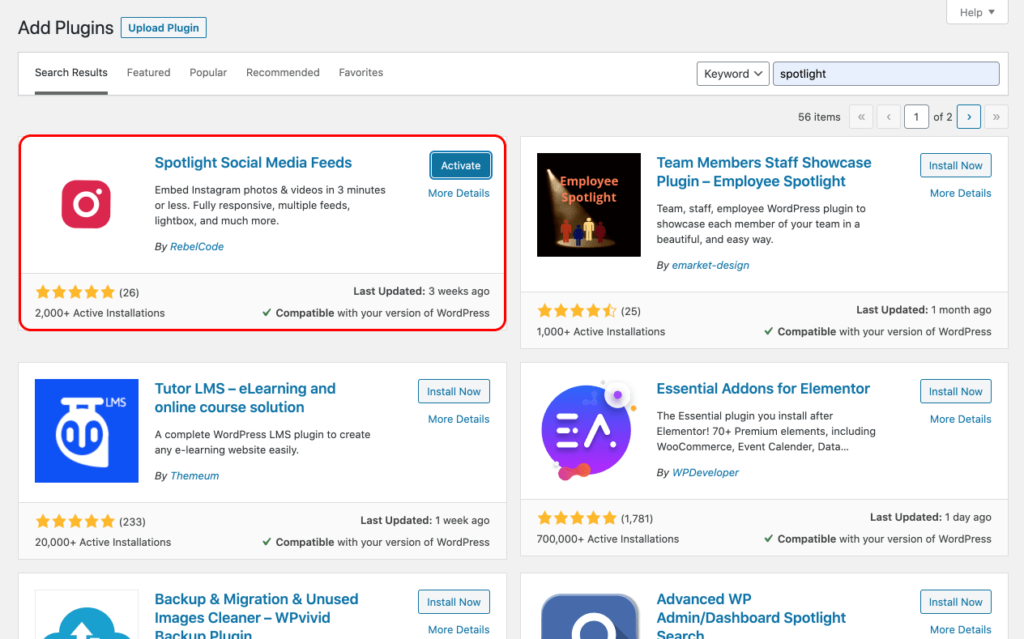
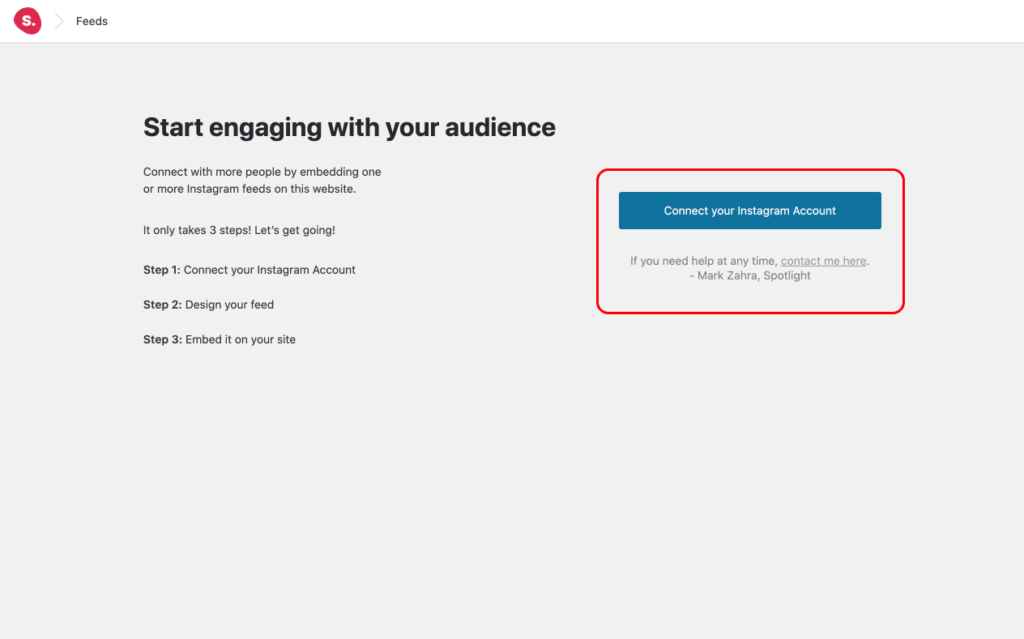
Next, purchase and install Spotlight PRO. In a matter of seconds, you’ll be transported to the Spotlight page where you can start connecting your account and designing your Instagram feed.
Step 1: Connect Your Account and Set Up Your Hashtag Feed
First, log in to your Instagram account in a new tab. Back in your WordPress dashboard, connect your account.
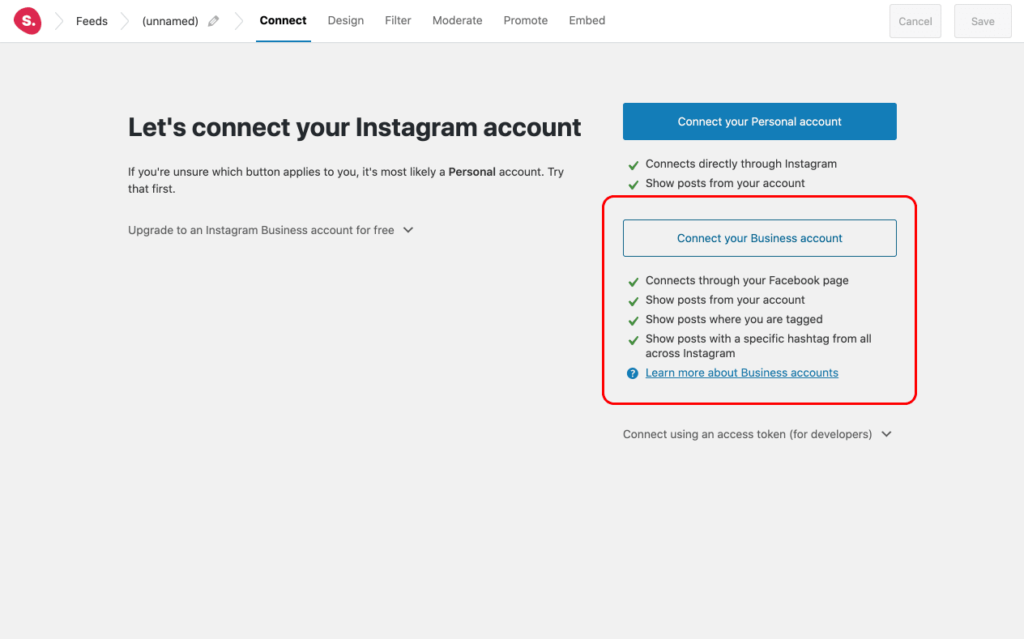
You can choose to connect a personal or business account. Although Spotlight PRO works with both, we suggest you upgrade your Instagram account to a business one for free to unlock all the features Spotlight PRO offers.
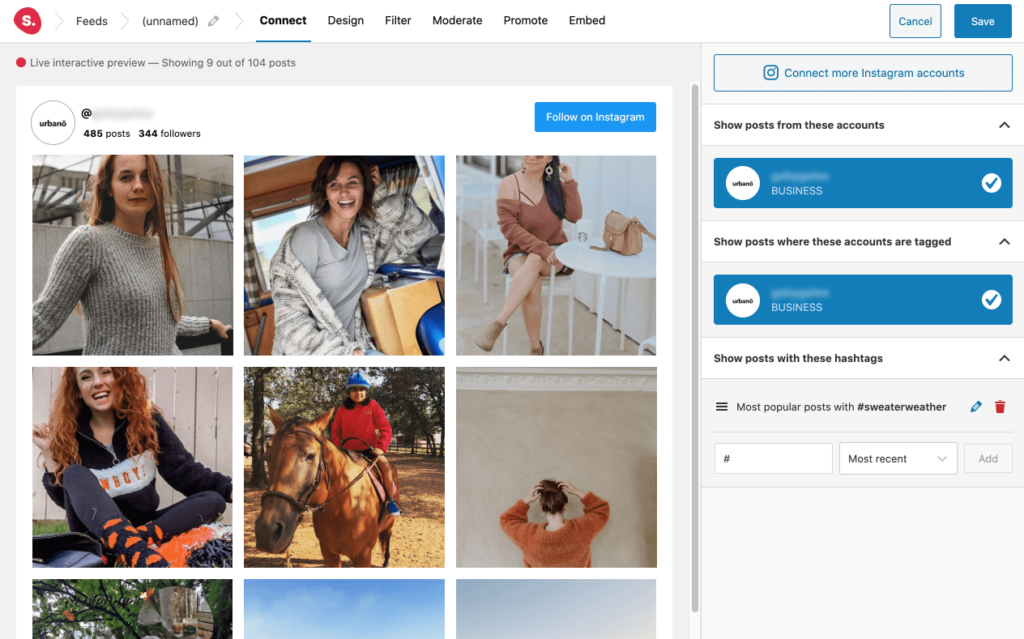
Allow Spotlight to access your Instagram feed and when you’re done, your Instagram feed will show up in Spotlight PRO’s live interactive preview. Let’s start off by going to the Connect tab.
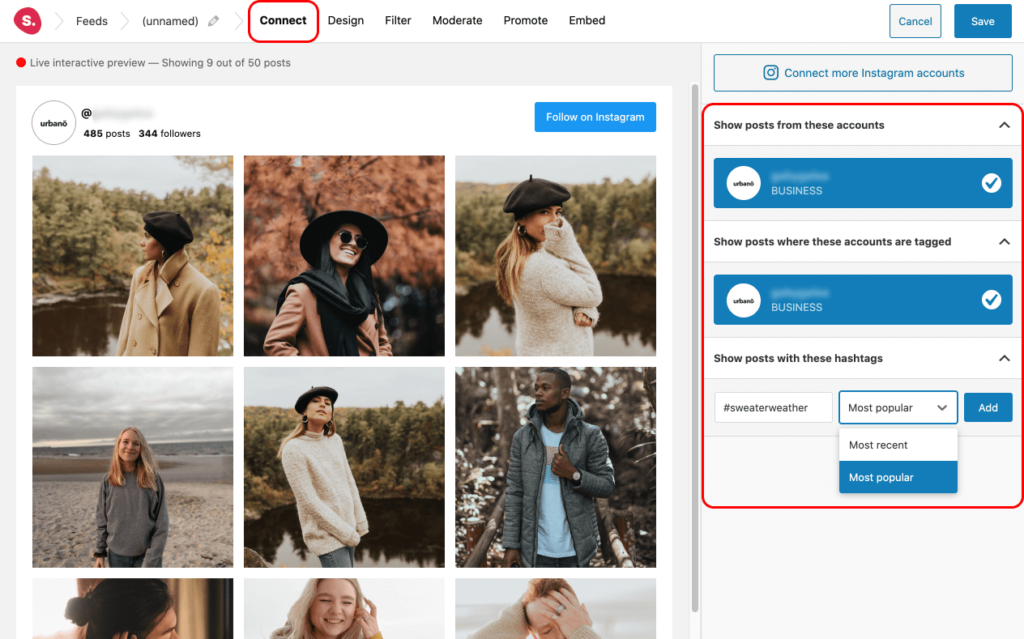
Here you can start creating your feed. In this example, I’ve decided to create a feed using my own posts, as well as bringing in some posts from my clients’ profiles using tagged posts and hashtags.
I’ve already asked clients to tag us or use the hashtag #sweaterweather. To bring in these posts, start by selecting your account under show posts where these accounts are tagged. Next, type in your hashtag. You can choose to filter the imported posts by popularity or date.
Step 2: Design Your Feed
To start designing your feed, go to the Design tab.
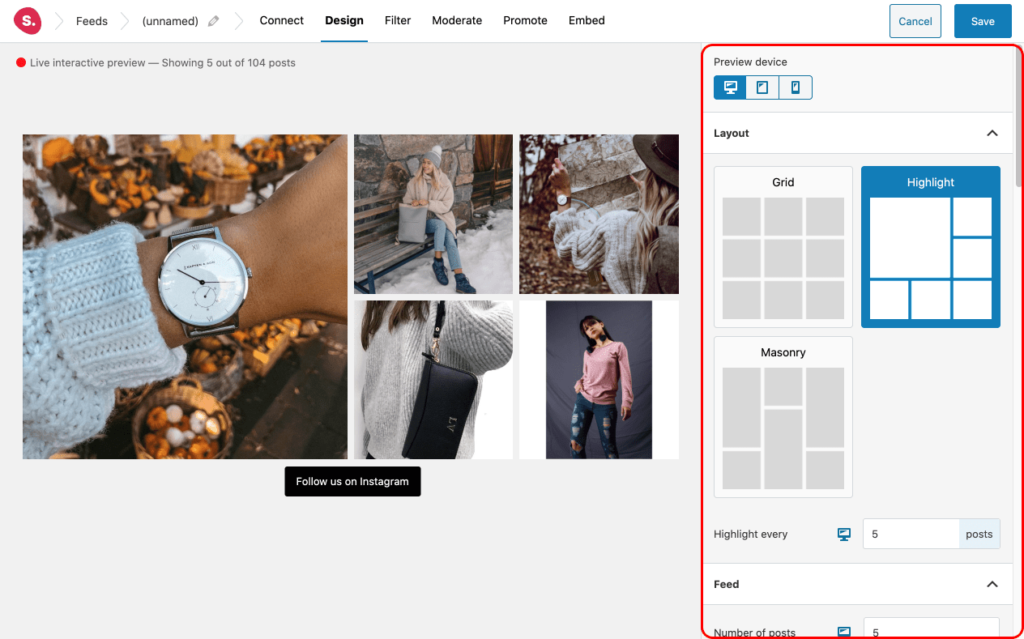
Here Spotlight PRO offers over 40 customization options. Here are a few of our favorite options:
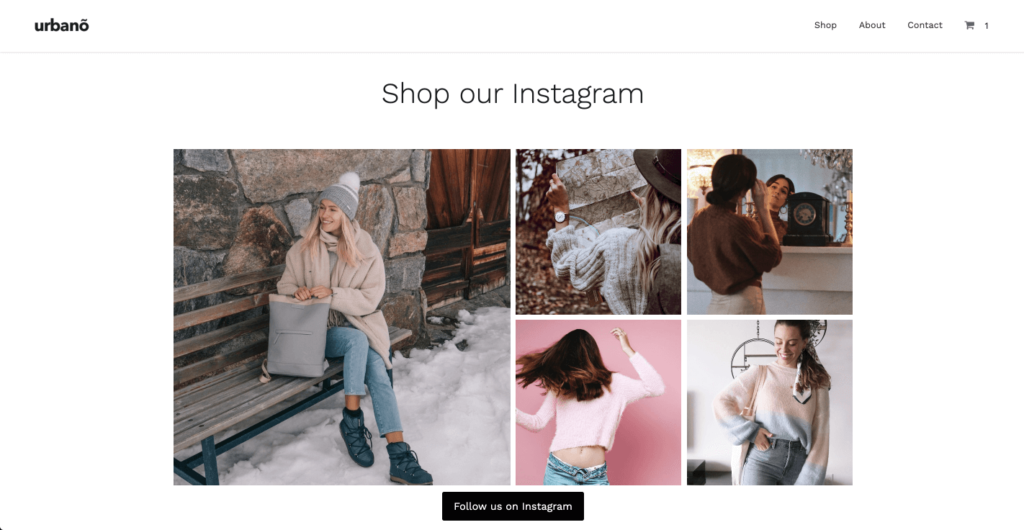
We’ve gone ahead and designed our feed in a way that matches our Avada Interior Design website. We’ve opted for a Highlight layout, set the background color to transparent, and added a “Follow us on Instagram” button at the bottom of the feed.
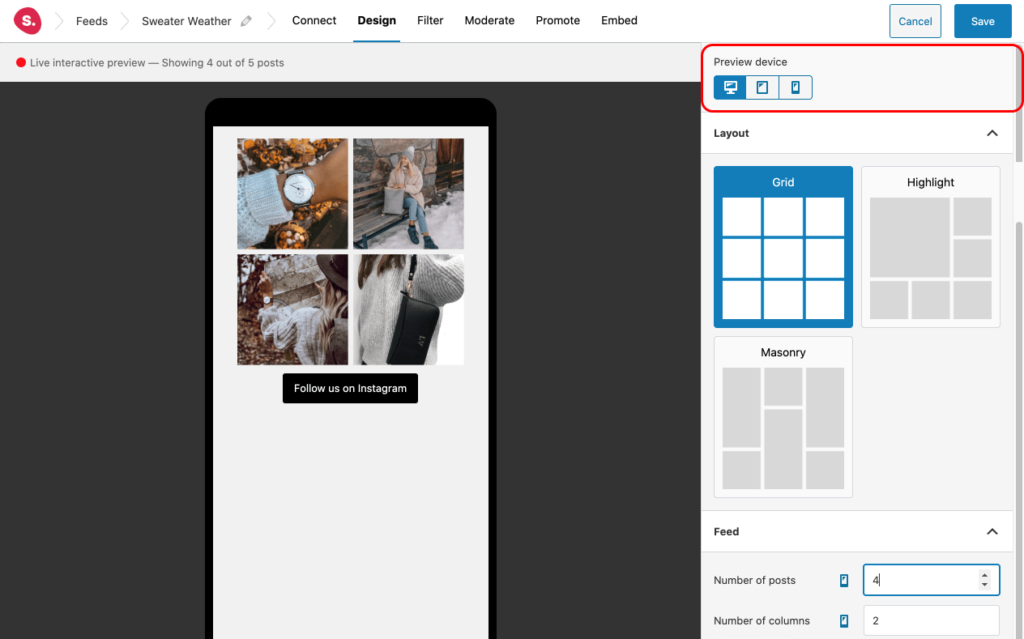
When you’re done, click on the tablet device and adjust your settings accordingly. Then, do the same for mobile devices. Spotlight PRO lets you set different options for desktop, tablet, and mobile, to make sure your posts look great on any device.
In this example, We’ve set the mobile feed to be displayed in a grid format.
Step 3: Filter and Moderate Your Feed
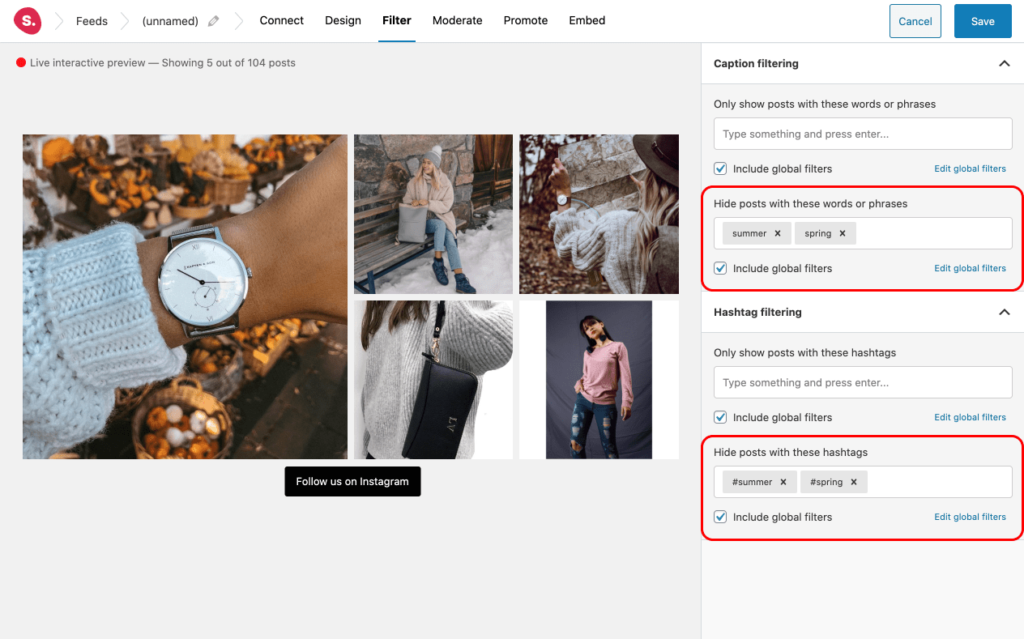
Now it’s time to filter and moderate your feed. Since we’re importing posts from all over Instagram, you’re bound to come across a few which you wouldn’t like to display on your website. You can filter your feed in two ways:
Filtering
Go to the Filter tab. Here you can filter out posts by caption or hashtag. For instance, in this example, I’ve filtered out posts that have the following hashtags or words in their caption: “summer” and “spring”.
Visual Moderation
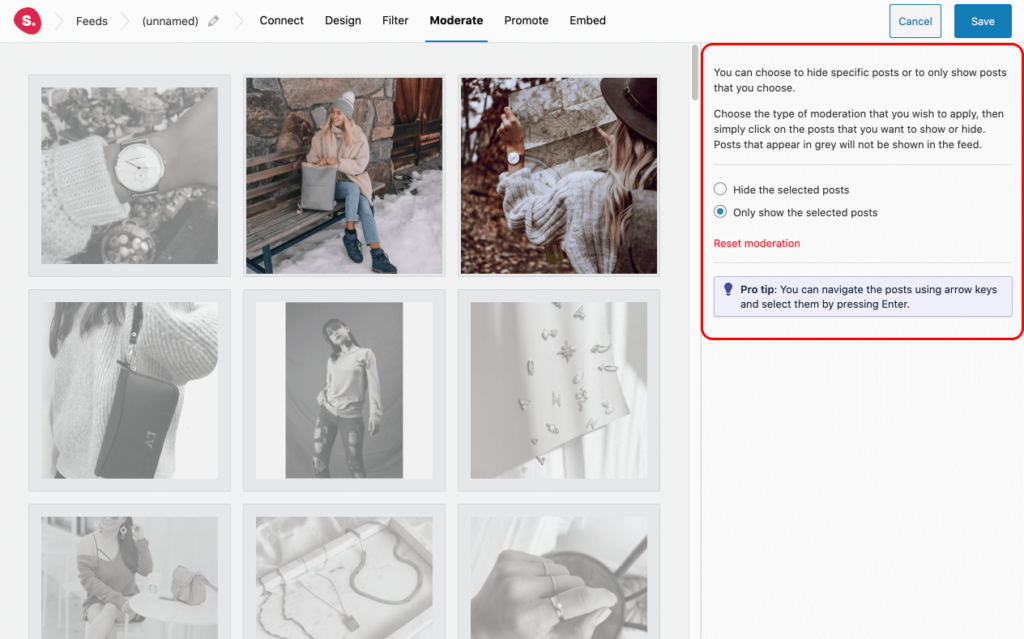
This type of moderation is very straightforward to use and implement. Go to the Moderate tab and simply select the posts you want to show or hide and hit Save!
Step 4: Promote Your Products
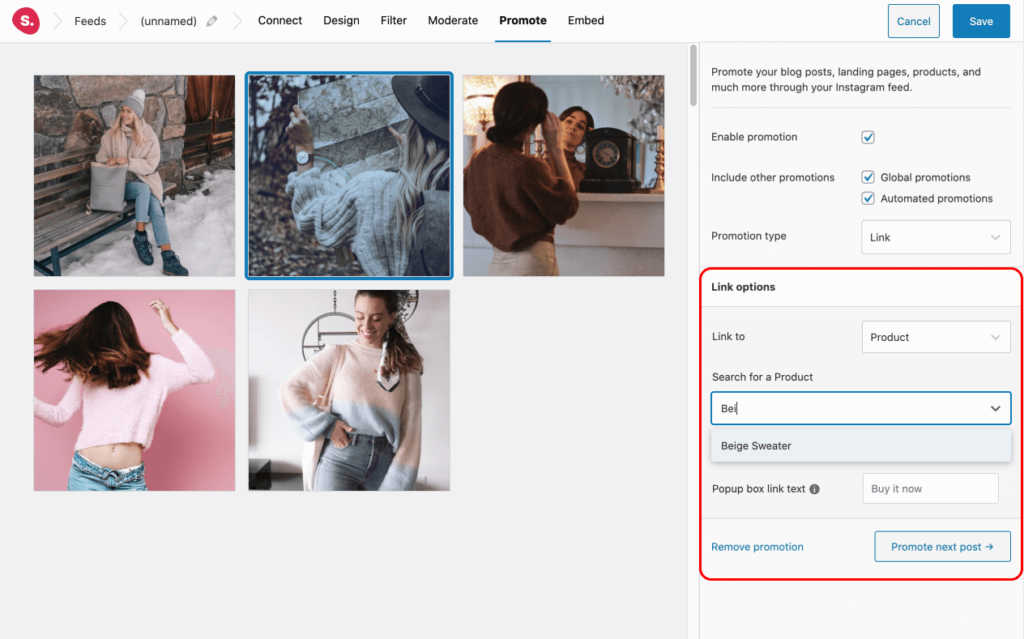
Now that you’re happy with the look of your feed, it’s time to start promoting our products. Start off by going to the Promote tab and clicking on a post. Select the Product from the drop-down menu and start typing in the name of your product. Spotlight PRO will automatically detect it and bring it up. When visitors click on that particular Instagram post, they will be redirected to the product page.
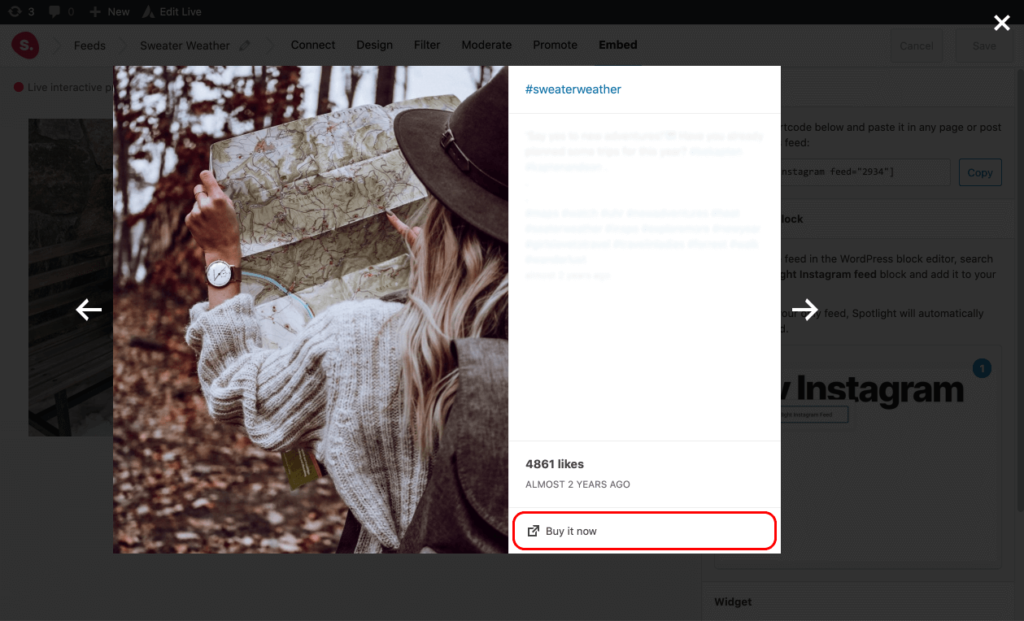
You also have the option to include popup box link text that will show up in the bottom right corner of your popup lightbox. Once again, if a visitor is seeing your posts in lightbox, they can simply click on the “Buy it now” button and be redirected to the relevant product page.
Continue this process for all your posts. This same process can be used to link posts to specific blog posts, pages, or any custom URL.
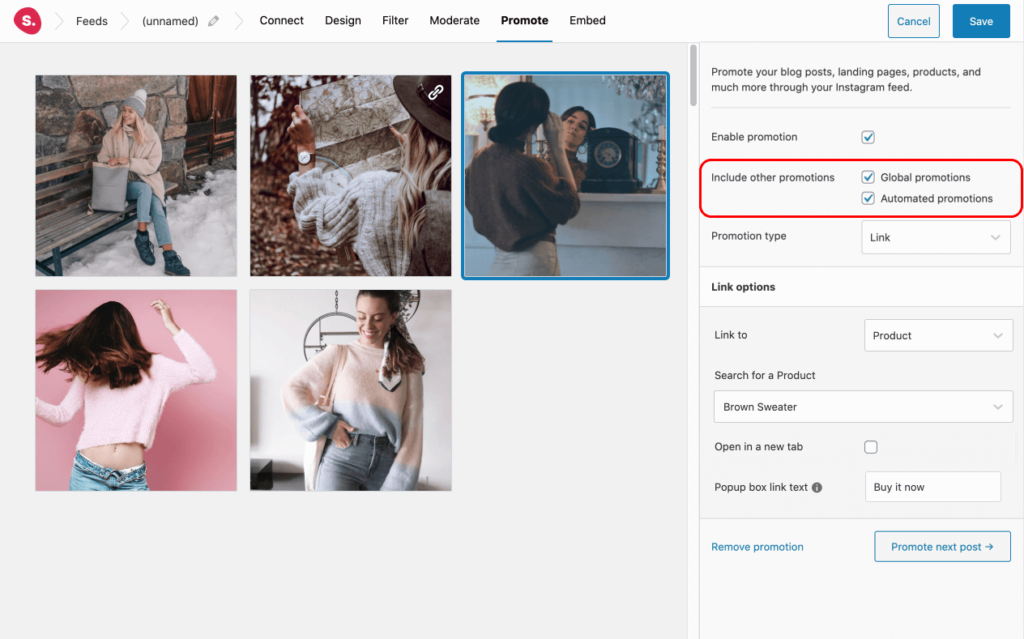
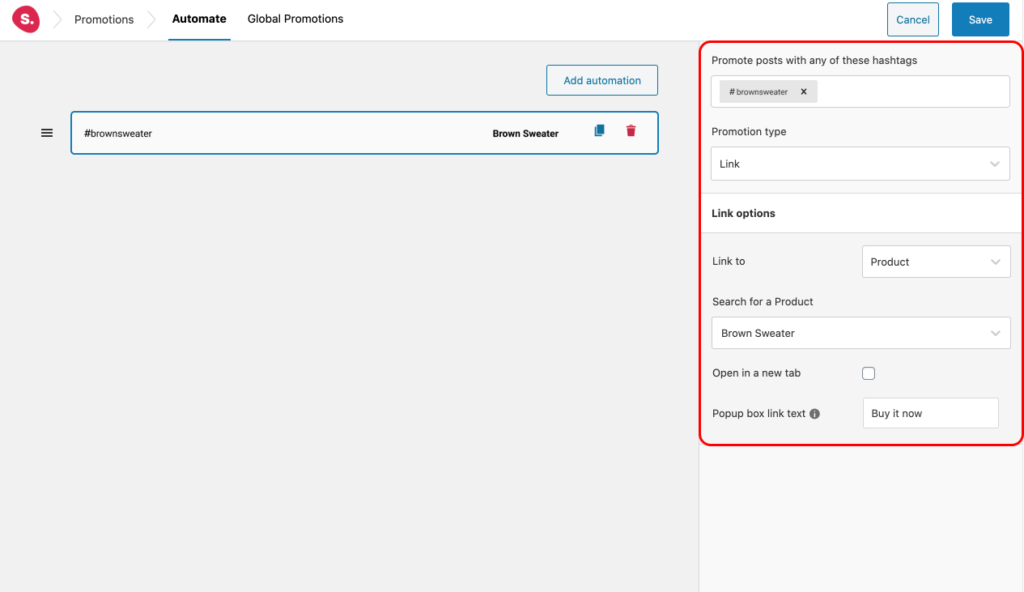
Spotlight PRO has an additional nifty little feature to save you some time. You can instruct the plugin to automatically set posts with a particular hashtag to always link to a specific post. Do so by checking the Automated promotions option at the top right-hand corner of the Promote tab.
Next, go to Promotions > Automate in the WordPress sidebar. In this example, I’ve set all posts with the hashtag #brownsweater to link to the product titled “Brown Sweater”. This setting will be applied across all existing and future feeds.
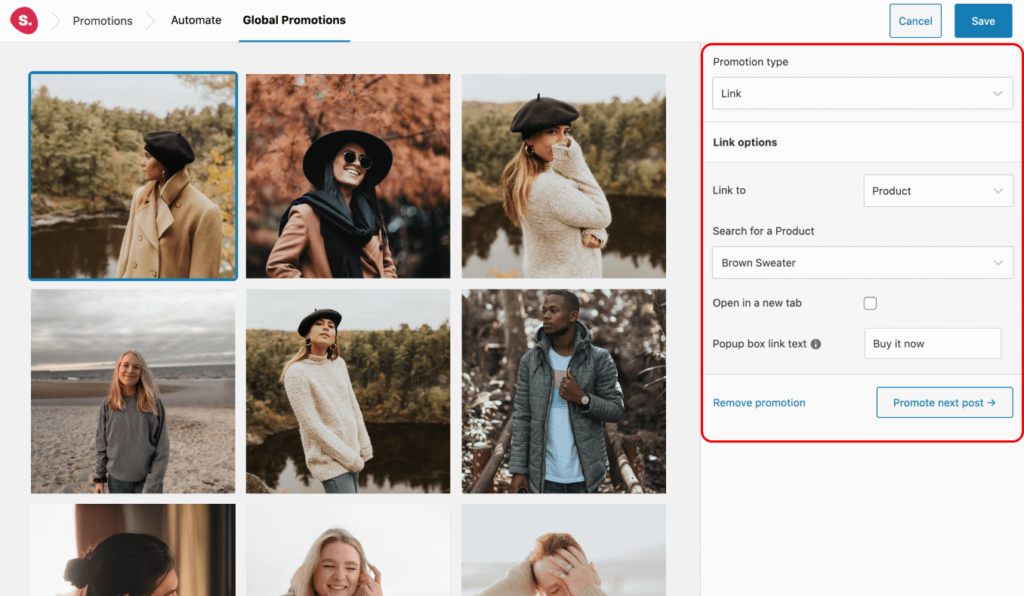
You can also set where each of your personal Instagram posts will link to by creating global promotions. This will save you the time of continuously linking posts in every feed you create. As we’ve done in the previous step, check the box next to Global promotions in the Spotlight editor. Then, go to Promotions > Global Promotions and select a post. Next, set your link options and hit Save.
Step 5: Embed Your Feed
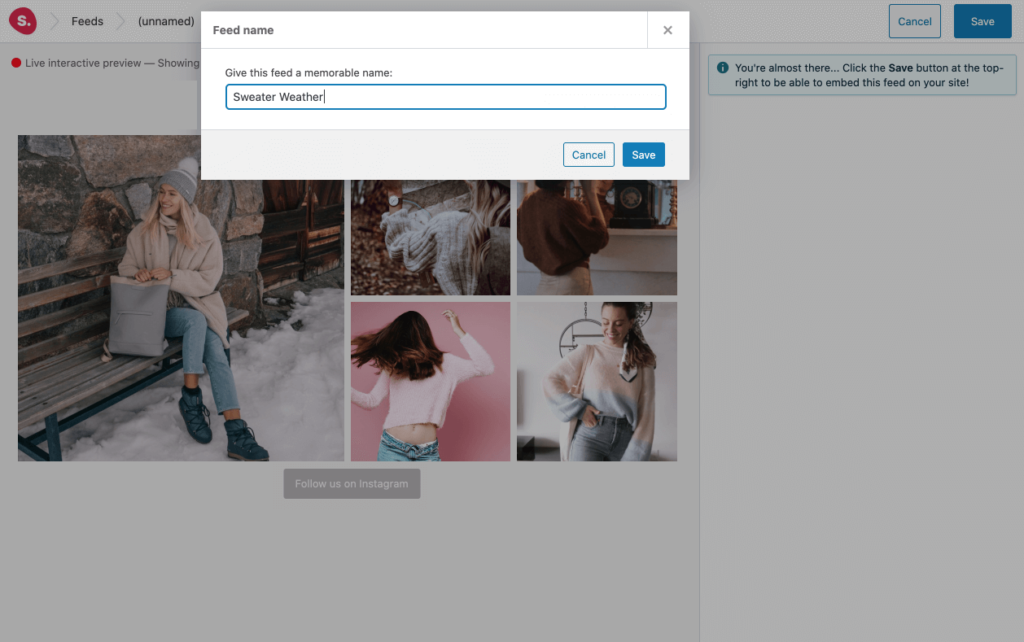
Finally, it’s time to embed your feed. Make sure to name your feed so that you can easily identify it later.
You can embed your Instagram feed by using the dedicated block in the block editor, the Spotlight widget, or using the generated shortcode.
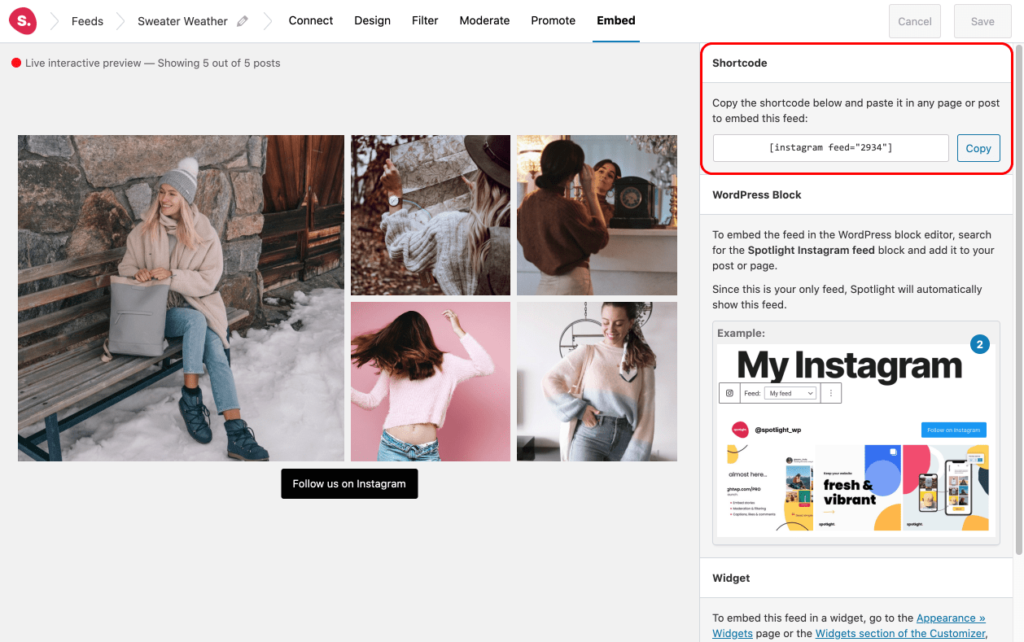
Back in the Avada Live editor, insert a Code Block and paste in the shortcode.
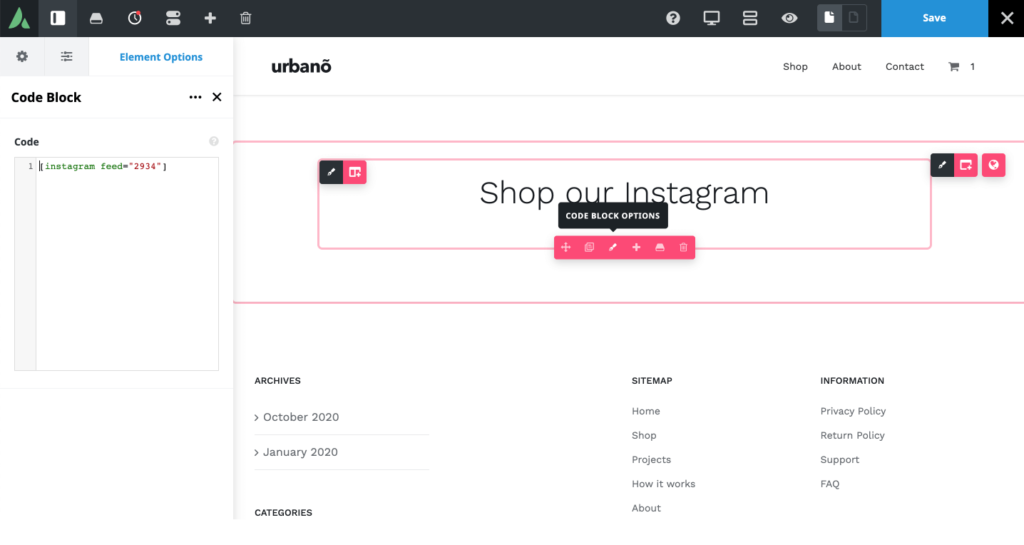
View the page and you will see your Instagram feed. Clicking on the posts will transport you to the relevant product page.
Summary
Displaying a well-curated Instagram feed on your WordPress website can have even more benefits than you would have thought. With the right plugin, you can display your own posts together with your clients’ or followers’ posts to start a conversation around your product, service, or blog posts.
Get started with Spotlight PRO and Avada to create your perfect Instagram feed by following these simple steps:

