Share
Setting up a WordPress Multisite environment can be a game-changer for managing multiple websites efficiently. WordPress Multisite provides a centralized platform for greater control, whether you’re a developer handling numerous client sites, a business managing multiple brand sites, or a blogger expanding your network. In this guide, we’ll walk you through the steps to set up a Multisite network, explore its features, and show you how to leverage its capabilities to streamline your website management process. Let’s get started!
Overview
Benefits Of A WordPress Multisite Setup
With a multisite setup, you can build as many subsites as you want in a WordPress multisite installation. The limit to the number of installs is the amount of resources your hosting plan can support. A multisite setup allows you to manage multiple websites from a single dashboard, streamlining updates and maintenance.
In addition, sharing plugins and server resources across all your sites will benefit you from cost-effective scalability. With centralized control, you can provide a consistent user experience and simplify user management. Whether you’re a business, an educational institution, or a growing blog network, WordPress Multisite offers unparalleled efficiency and flexibility, making it the ultimate solution for managing multiple sites efficiently.
Disadvantages Of A WordPress Multisite Setup
Naturally, all of this flexibility and power comes at a technical cost. The requirements for Multisite regarding hosting resources and technical knowledge are higher than they would be for a single site setup.
Server-side settings must be adjusted, and DNS configuration will undoubtedly rear its head at some point. You’ll also likely need to upgrade from shared hosting if your network reaches any significant size. Further points to consider are the risk of:
Given the potential number of scenarios for matching Multisite to your live setup, we’ll limit ourselves in this article to installing Multisite locally. This is a sensible way of easing into the overall options and taking Avada for a spin in a safe environment. Let’s get started!
Setting Up The Multisite Locally
The benefits of having a local WordPress development environment cannot be understated. We’ve recently taken a deep dive into the subject with detailed guides for how to set them up on both PCs and Macs.
Rather than rehash the basic setups here, we’ll assume you have a single-site WordPress install running locally from the outset on either MAMP or XAMPP. Before we continue, there are a couple of considerations to remember, mostly related to the eventual domain structure we will use. Let’s get them out of the way to begin with.
What Type of Domain Structure Are You Going to Use?
Before installing WordPress Multisite, we highly recommend taking the time to go through WordPress’ excellent prepare a network page in detail. Depending on the peculiarities of your local setup, there are some potential gotchas it can help you avoid. A WordPress Multisite allows two basic types of domain structure:
Which one you go for is a matter of preference. Those on shared hosting may experience problems with the subdomain option due to wildcard restrictions. You will also want to consider the SEO implications of the two different approaches. However, from WordPress’s point of view, they are essentially the same.
It’s unfortunately outside the scope of this article, but it’s still worth noting that you can also map a domain to either of the options above. Those interested in exploring further should start by looking at this Domain Mapping plugin.
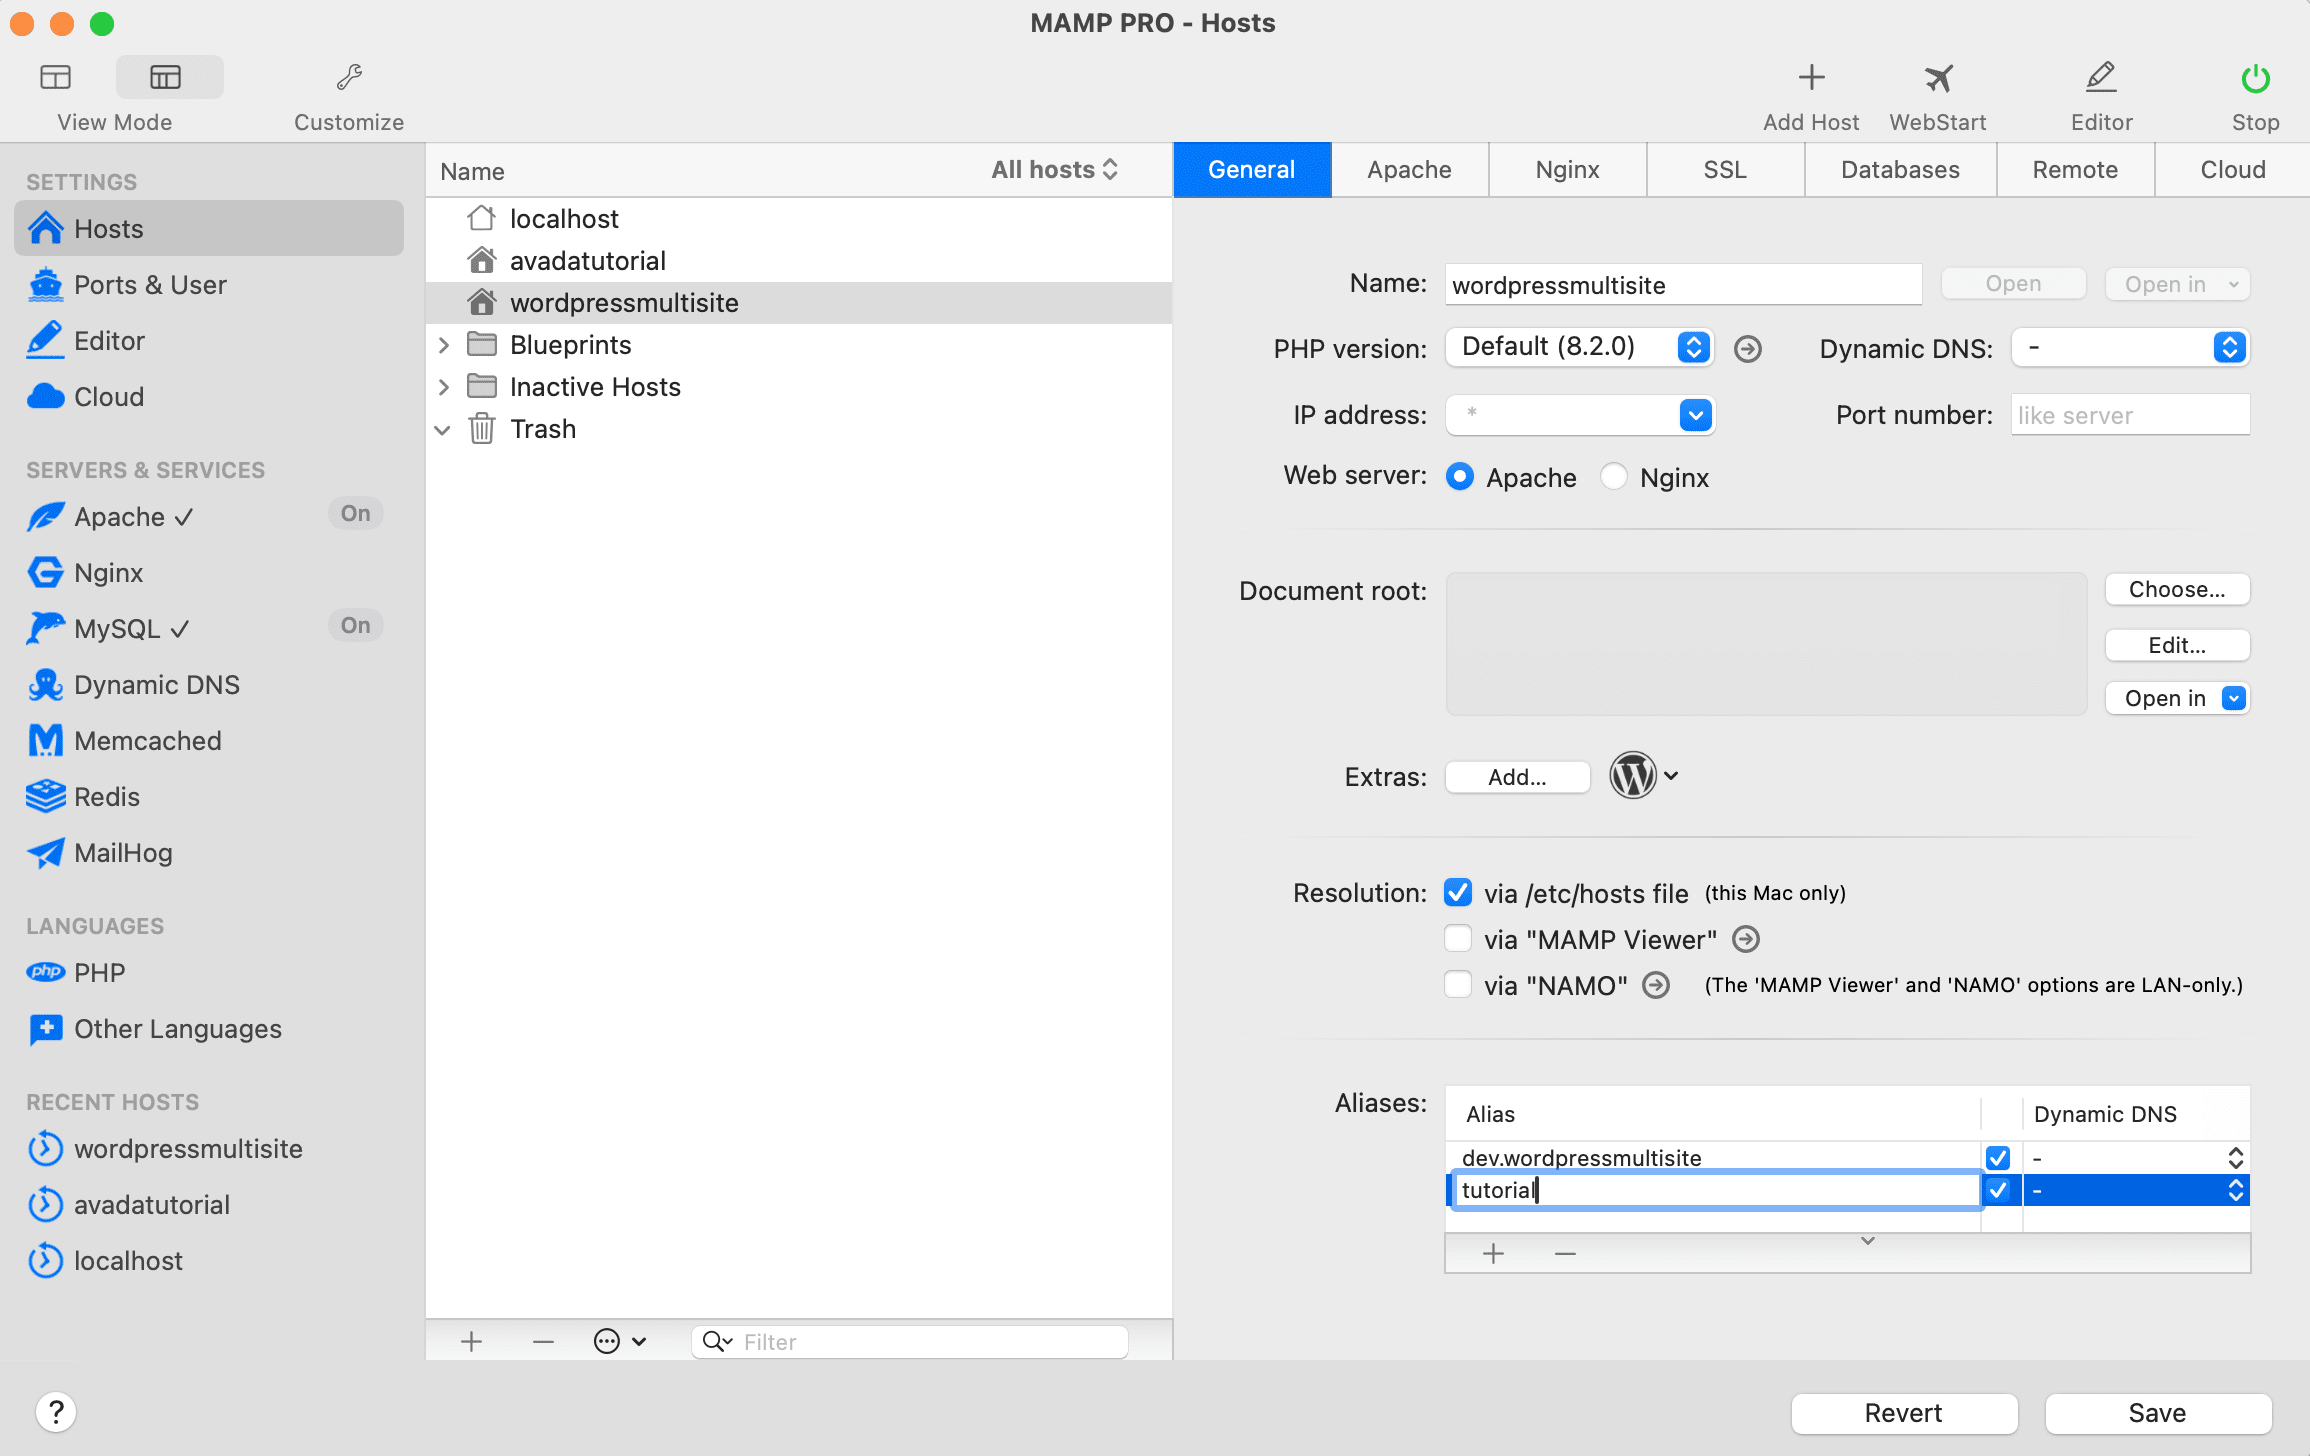
In our example for this article, we’ll select the subdomains option and install them locally. A quick look at the Restrictions section shows we’ll need to create a virtual host to avoid running into problems using either localhost or 127.0.0.1 on the localhost setup. With that in mind, the following has been set up on the local install of MAMP:
Okay, our domain decision is made. Now, we need to do some prep work.
Pre-install Steps
Our first task is double-checking that “Pretty Permalinks” is enabled on your install. This requires the “mod_rewrite” module to be enabled in Apache. With MAMP and XAMPP, that should be by default. If you run into difficulties here, begin your troubleshooting at WordPress’ Using Permalinks page.
The second task is to deactivate any active plugins you might have on your base install.
With those precautions out of the way, we’re ready to enable Multisite.
Enabling Multisite Functionality
The very first step is to enable the Multisite setup, which is as straightforward as editing the “wp-config.php” WordPress file.
Edit the following WordPress file > “wp-config.php” and add the single line above the text that says > /* That’s all, stop editing! Happy blogging. */ and be sure to save the file:
Installing The Multisite Network
Now let’s install the Multisite network by going to “Tools > Network Setup”. Here, we’re faced with the domain choice previously mentioned in the article (Subdomains vs. Sub-directories). We are going with the Subdomain option for this guide.
You’ll also be required to name the network and provide an email address for the person responsible for administering the entire network. Once all the information is entered, click Install to start the process.
Local File Changes Are Required
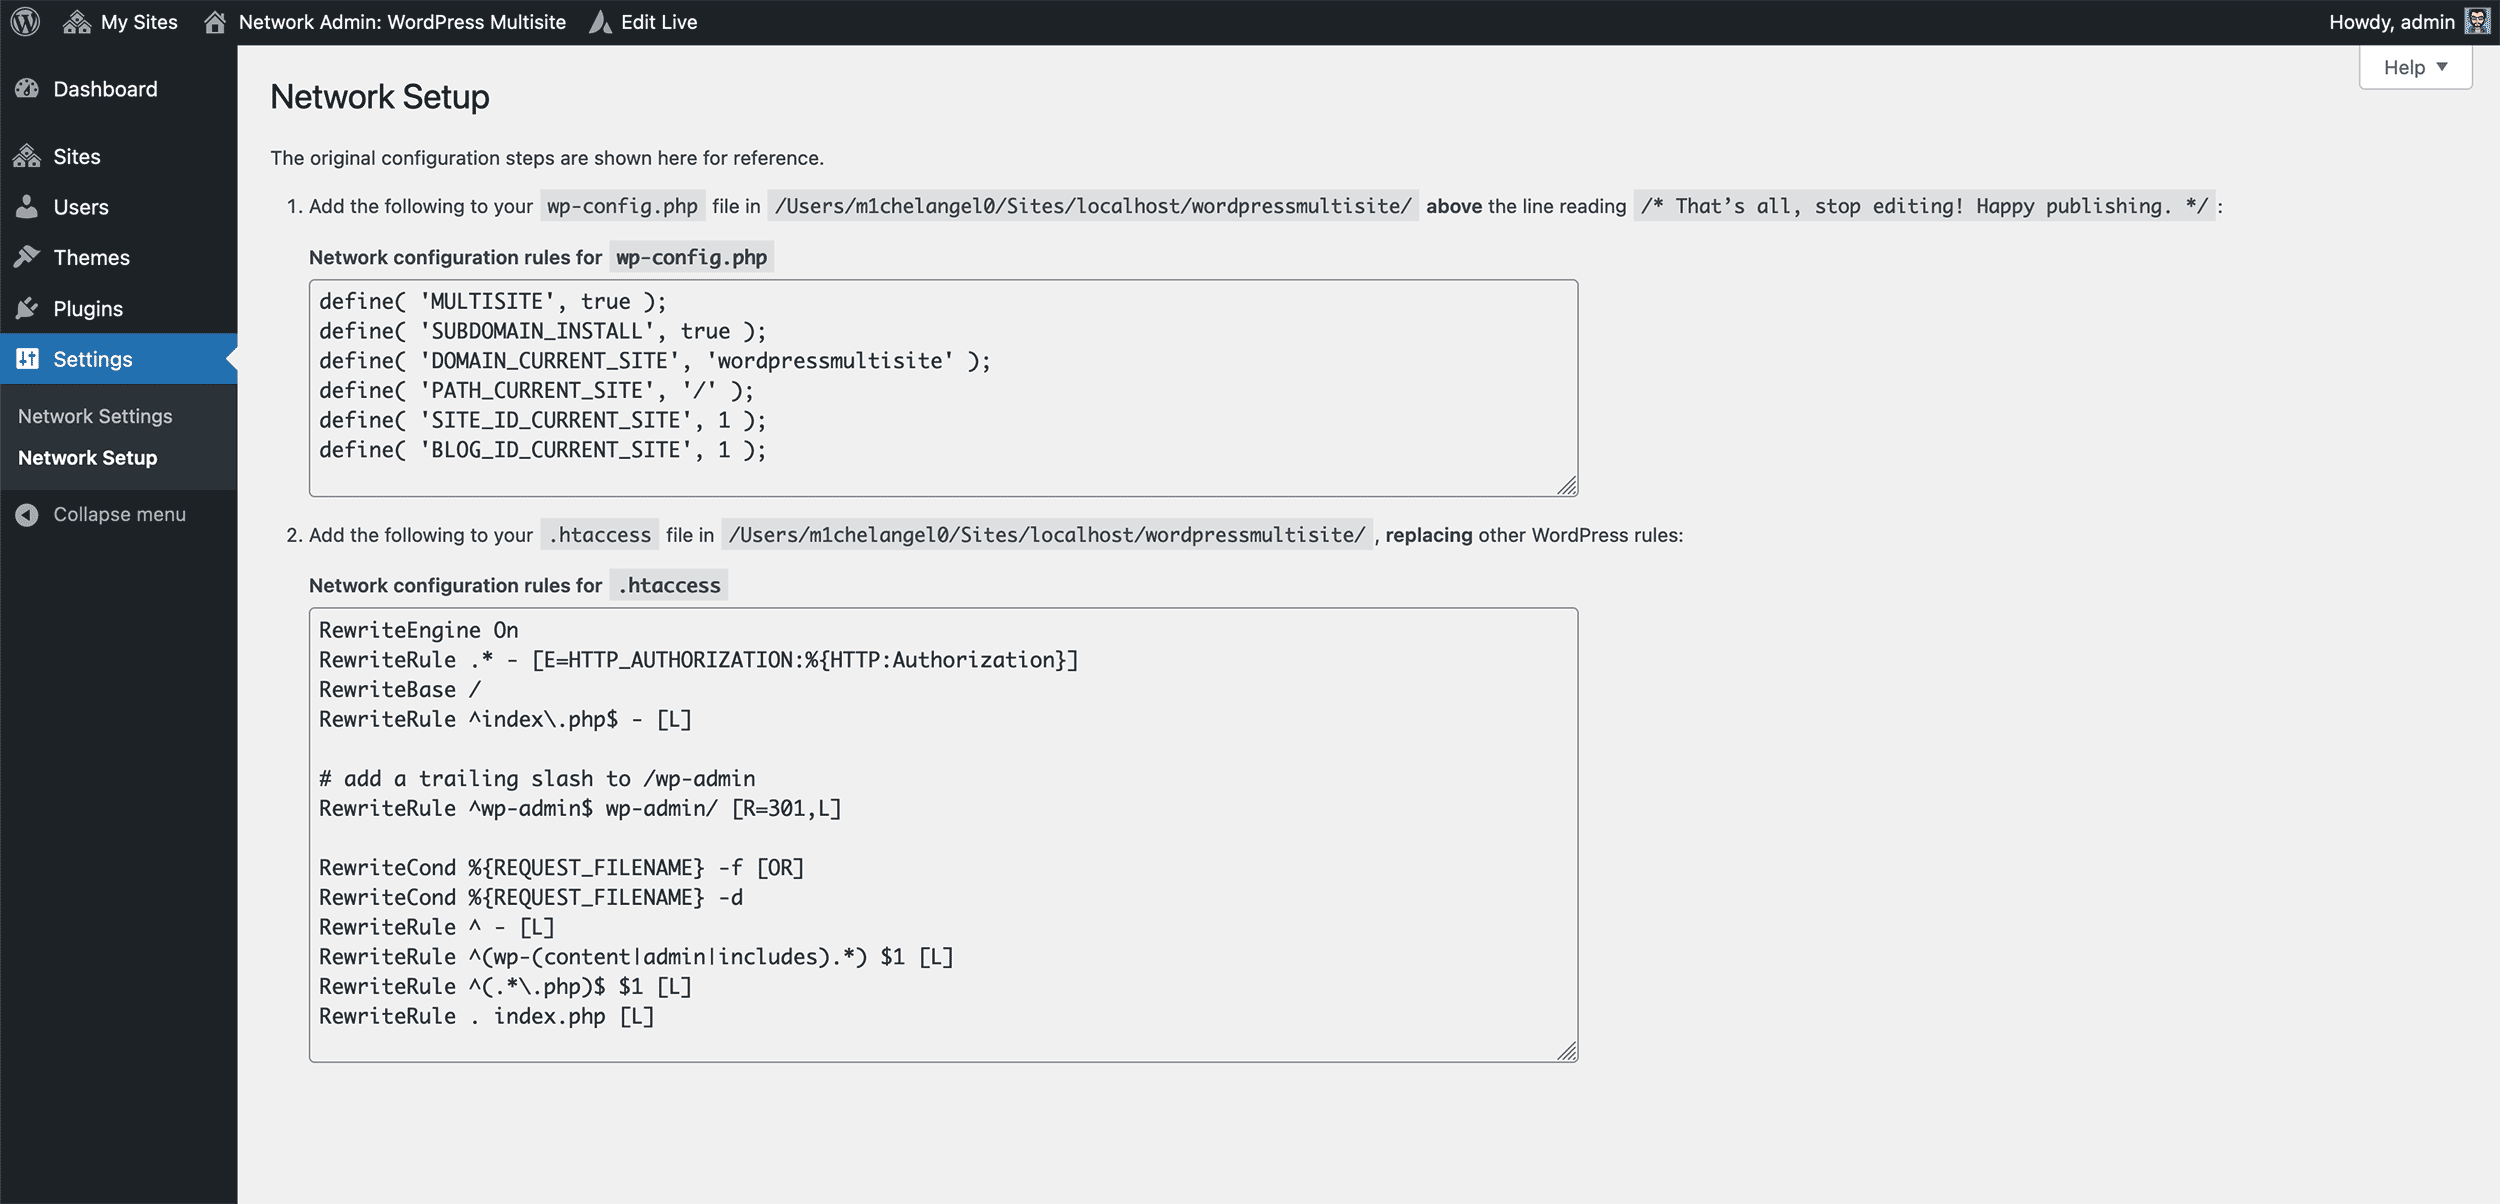
All being well, WordPress will now generate some custom code that you need to add to your “wp-config.php” and “.htaccess” files. Both these files should be in the root folder of your installation. You may need to show hidden files on PC or Mac to access and edit the “.htaccess” file.
Locate both files, enter the changes, and log back into WordPress. You should now be looking at a familiar WordPress Dashboard but with one crucial difference in the top left corner – the My Sites tab.
Network configuration rules for wp-config.php
Network configuration rules for .htaccess
Adding Sites to the Network
The next step would be to visit the Network Admin > Dashboard screen to start adding websites to the Multisite setup.

The WordPress Network Admin Dashboard is the central control panel for managing a WordPress Multisite network. This specialized dashboard allows network administrators to oversee multiple sites within a single WordPress installation.
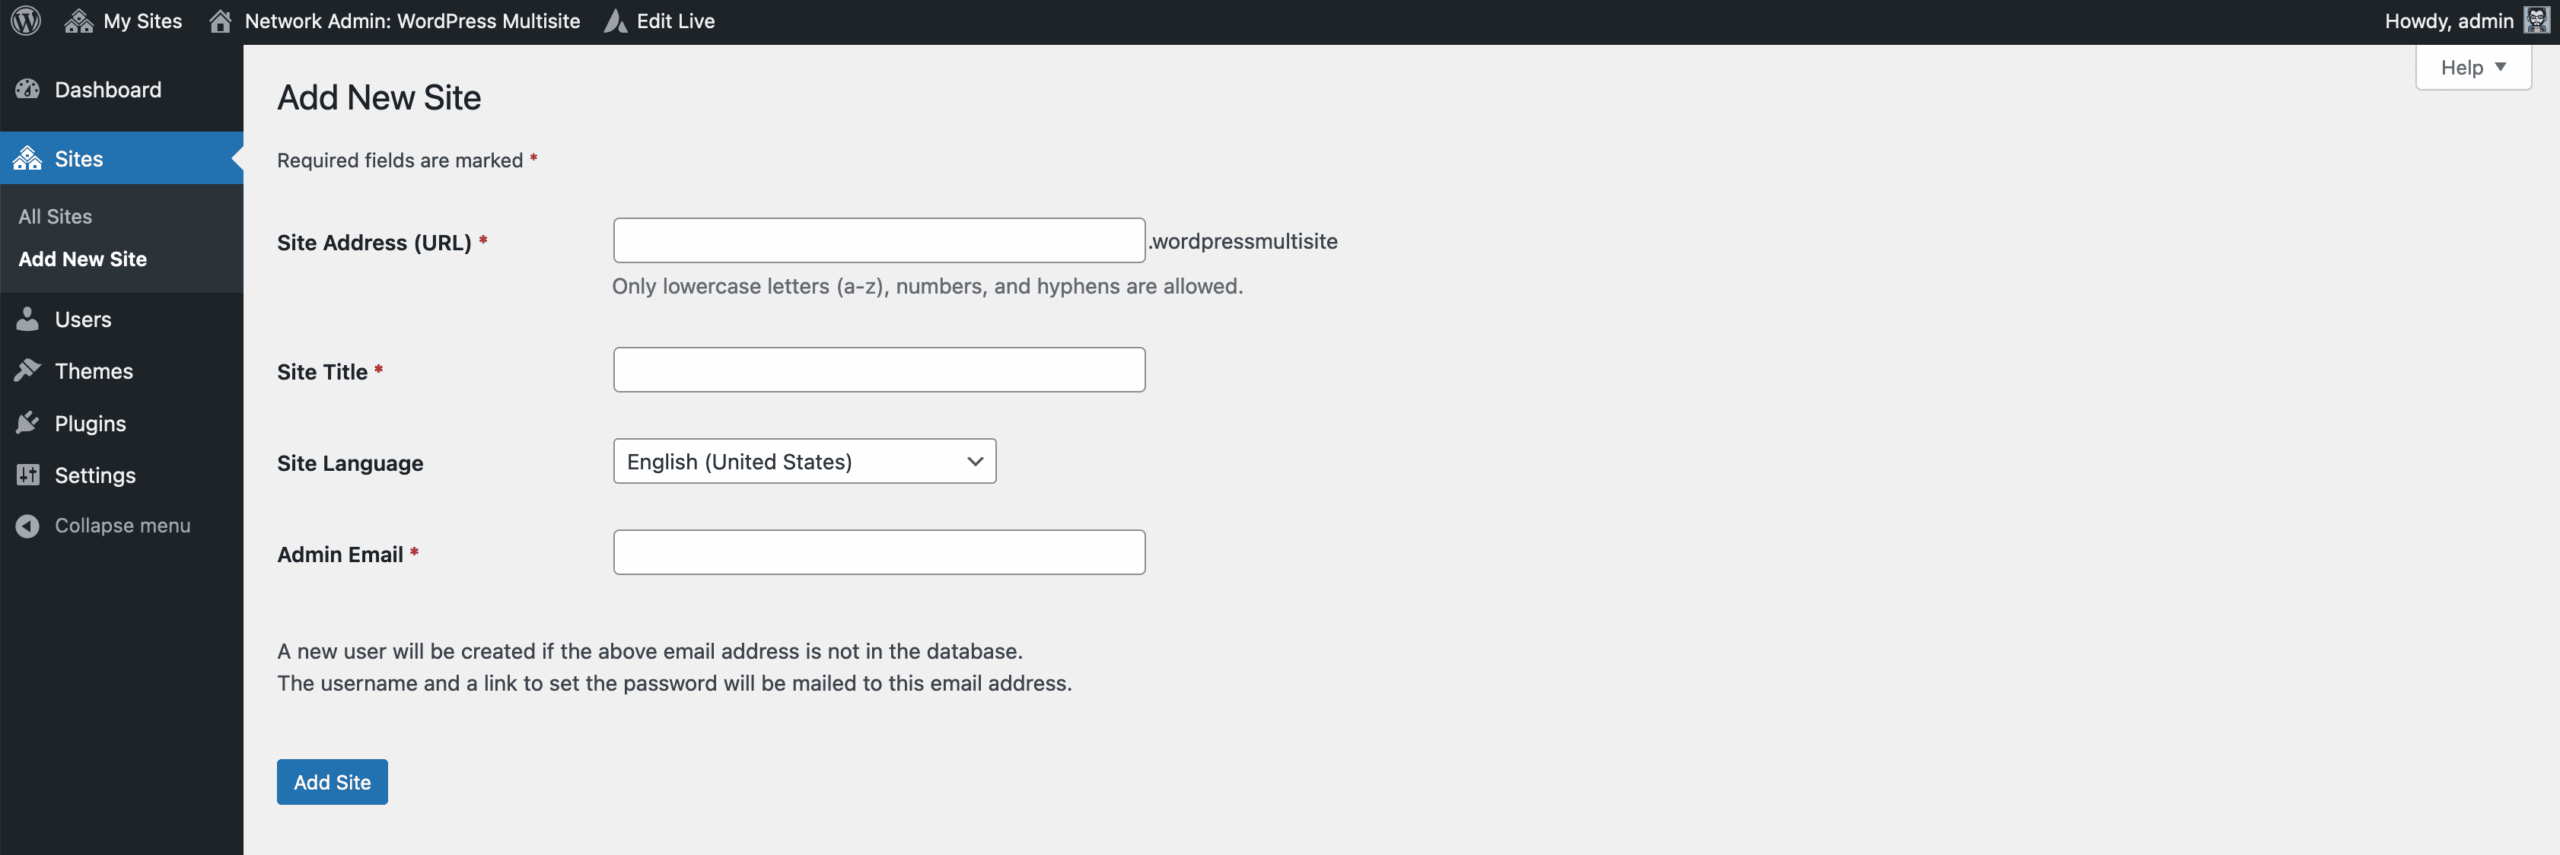
It provides tools for adding and managing sites, users, themes, and plugins across the entire network. Additionally, administrators can configure network settings, manage updates, and monitor site activity from this centralized location, streamlining the process of maintaining a cohesive and efficient network of websites. To create a new website, click on “Create a New Site”.
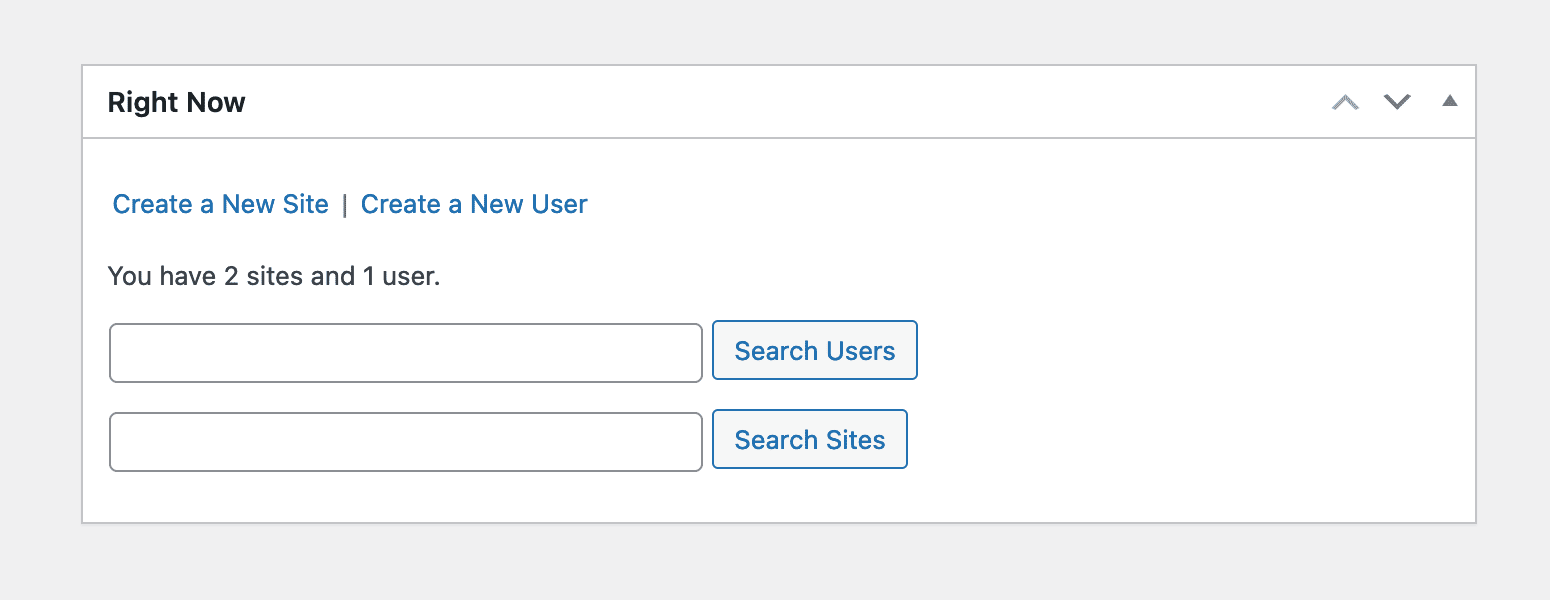
At this point, we will be adding the details for the next website. As mentioned earlier in the article, tutorial.wordpressmultisite is the desired site name.
To view all of the sites you have set up, navigate to Sites > All Sites. The overview lists all websites that have been added to the network and are ready to be accessed.
When using MAMP Pro to create a WordPress multisite as a subdomain, you must add an alias (for each subsequent website) to correctly route subdomain requests to your local web server.
An alias maps the subdomain to the appropriate directory on your local machine, ensuring that it points to the correct site within your multisite network when you visit a subdomain (for example: tutorial.wordpressmultisite).
This setup mimics how subdomains work on a live server, allowing for accurate development and testing of your multisite configuration.
Choose And Install a WordPress Theme
With a WordPress Multisite, the network administrator is the only user who can install themes and make them available for individual sites. You have two options here: allow a theme for just one site or enable it for the entire network. In our case, we’ll do the latter and install Avada.
Navigate to the Themes > Add New screen and install Avada as you would on a regular WordPress install.
How To Network Enable Avada (2 Steps)
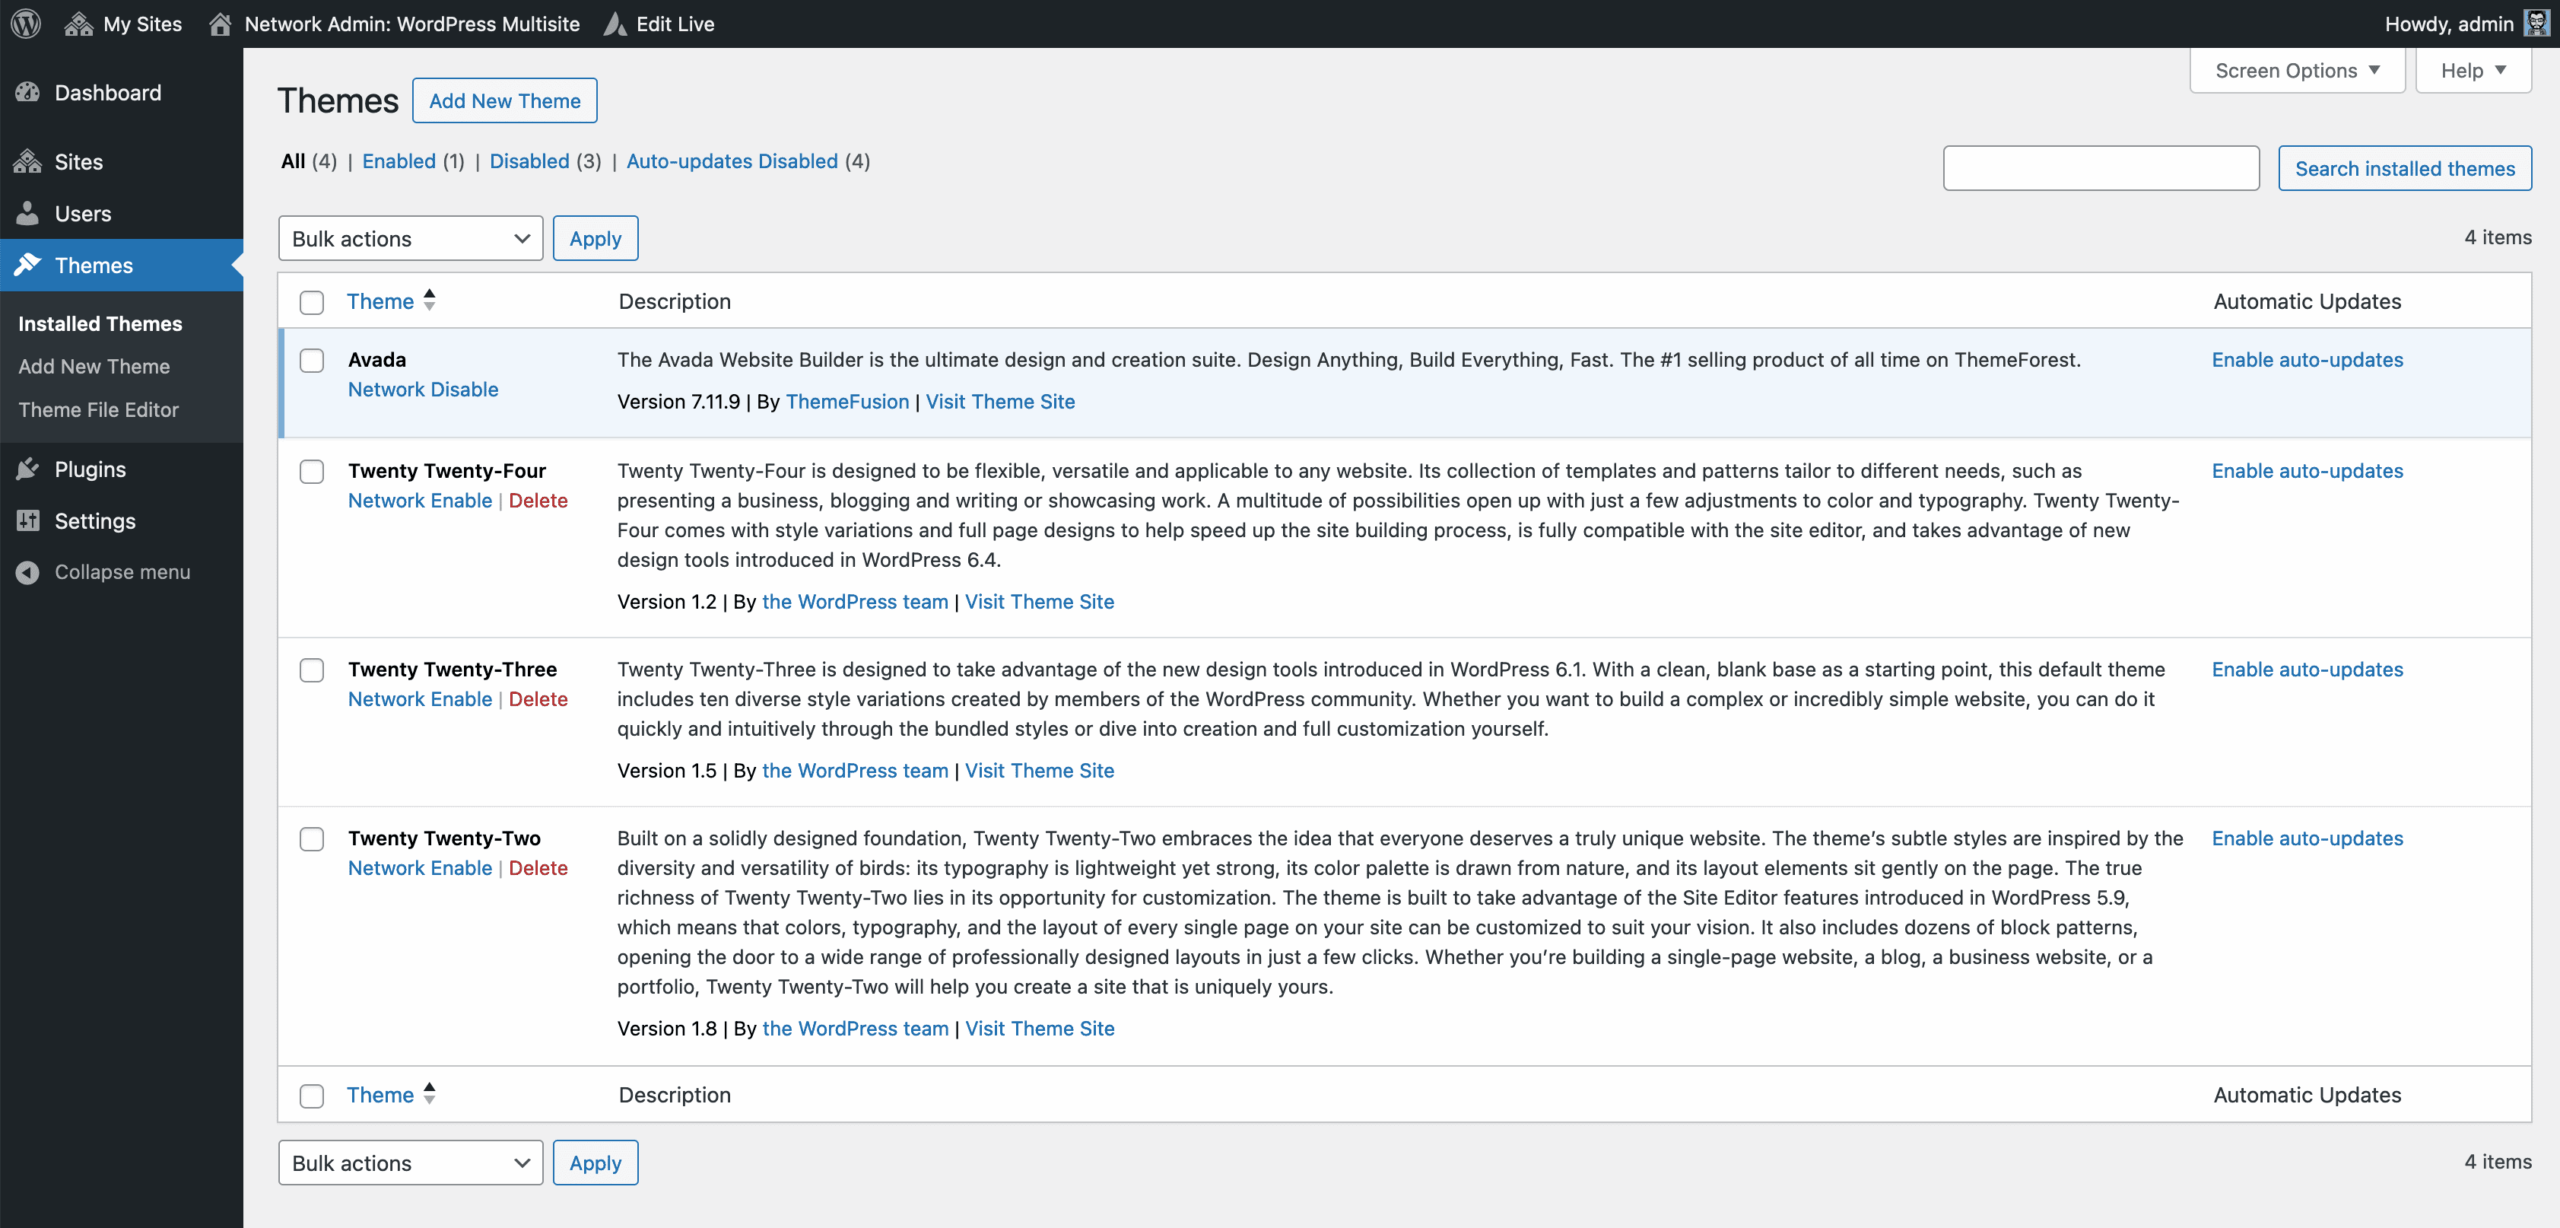
In WordPress, network enabling refers to making a theme or plugin available across all sites within a multisite network. This allows for consistency, and more importantly, it means that with each subsequent website set up, you do not have to go through the initial installation process of the theme or plugin.
Network enabling Avada for all websites will be done in two steps:
Step 1: Network Enable Avada
If you navigate to the Themes page, you’ll see an option next to each theme: the Network Enable/Disable link. Enable this for Avada, automatically adding it as an option for every site on the network.
Step 2: Network Enable The Avada Builder & Avada Core Plugins
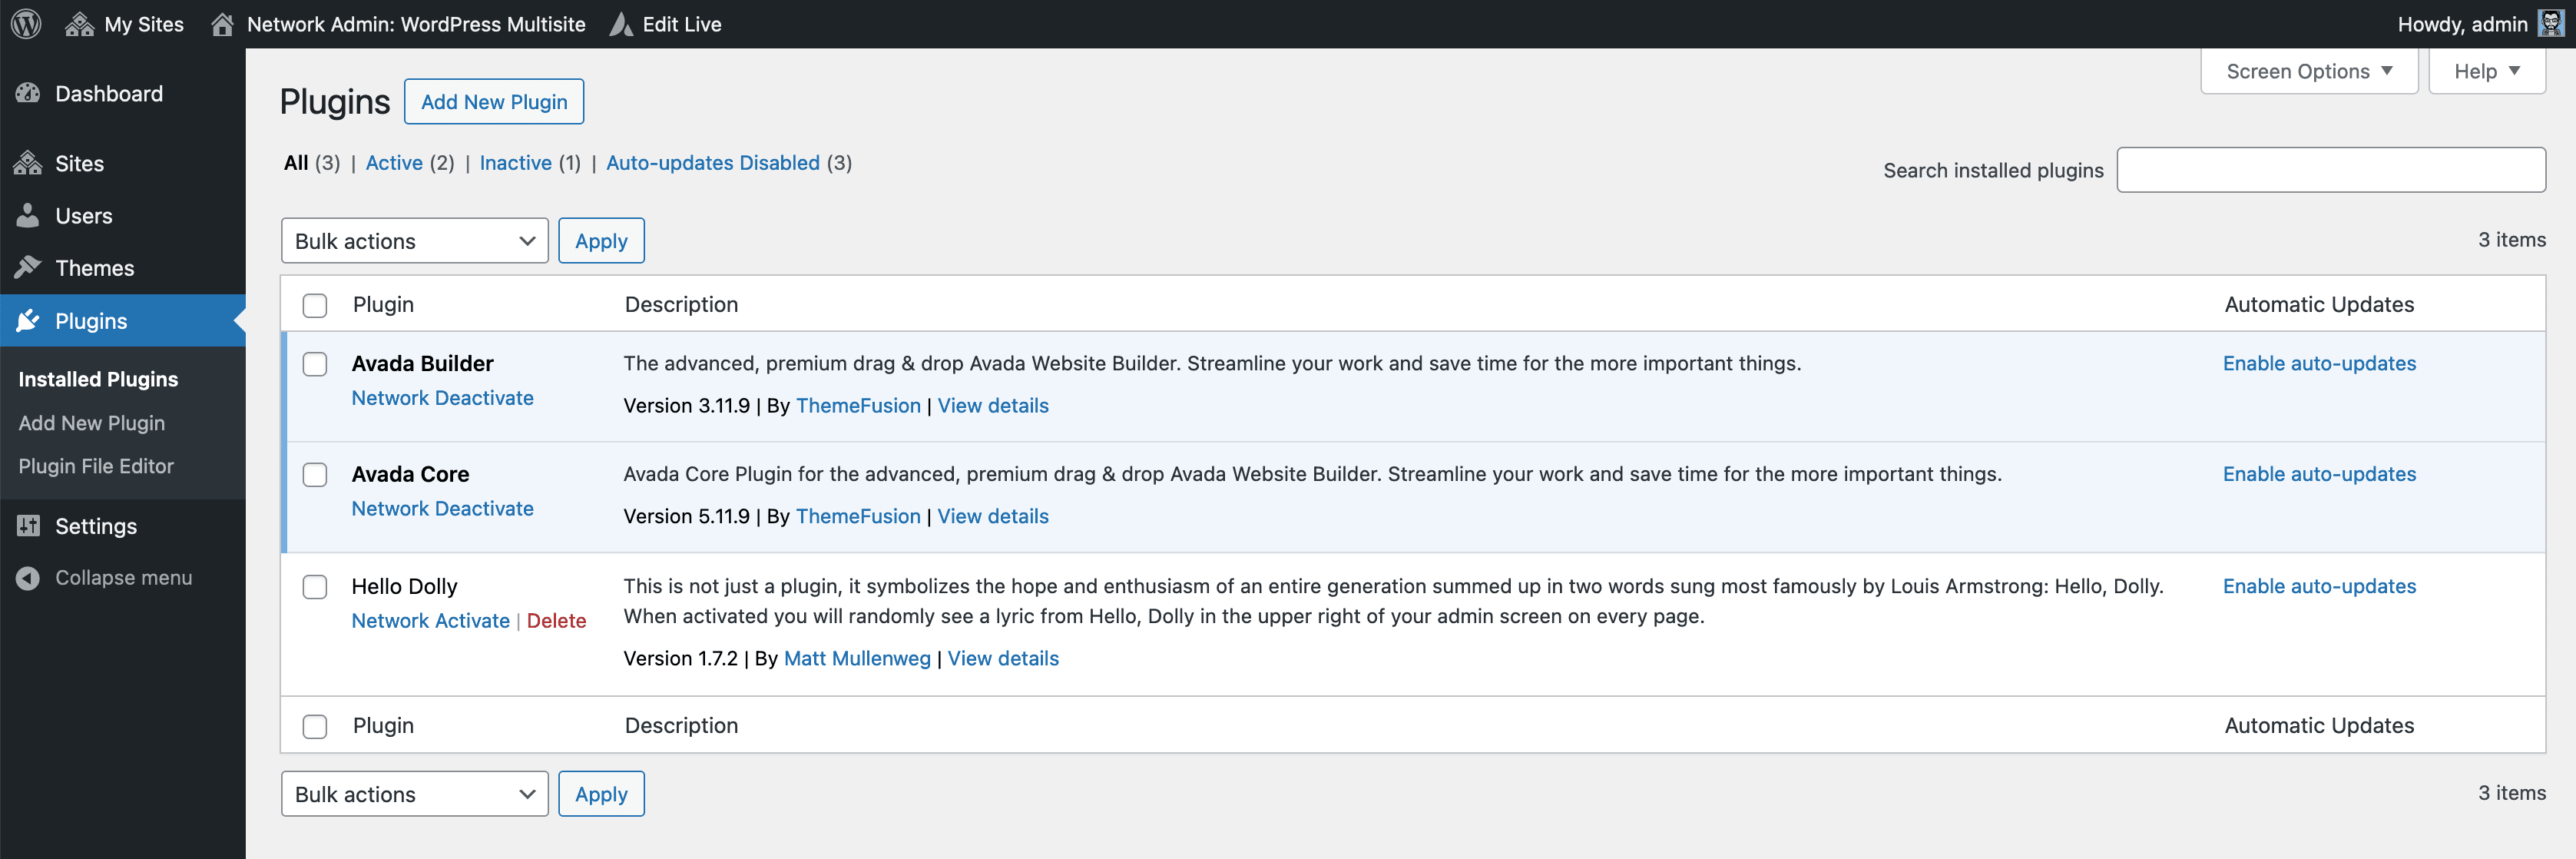
For the second step, navigate to the Plugins page. You’ll see an option next to each plugin: the Network Enable/Disable link. Enable this for the Avada Builder and Avada Core required plugins, automatically adding them for every site on the network.
How To Activate Avada on Each Site
All that is now left to do is go to the Admin Dashboard of an individual site – in this case dev.wordpressmultisite or tutorial.wordpressmultisite – navigate to the Dashboard > Appearance > Themes page and activate the Avada theme.
You will need to register Avada to gain access to free Avada updates as they are released, access to 112 Avada prebuilt websites, and access to all Avada Studio content. Check this detailed article on purchasing Avada and registering it using the purchase code.
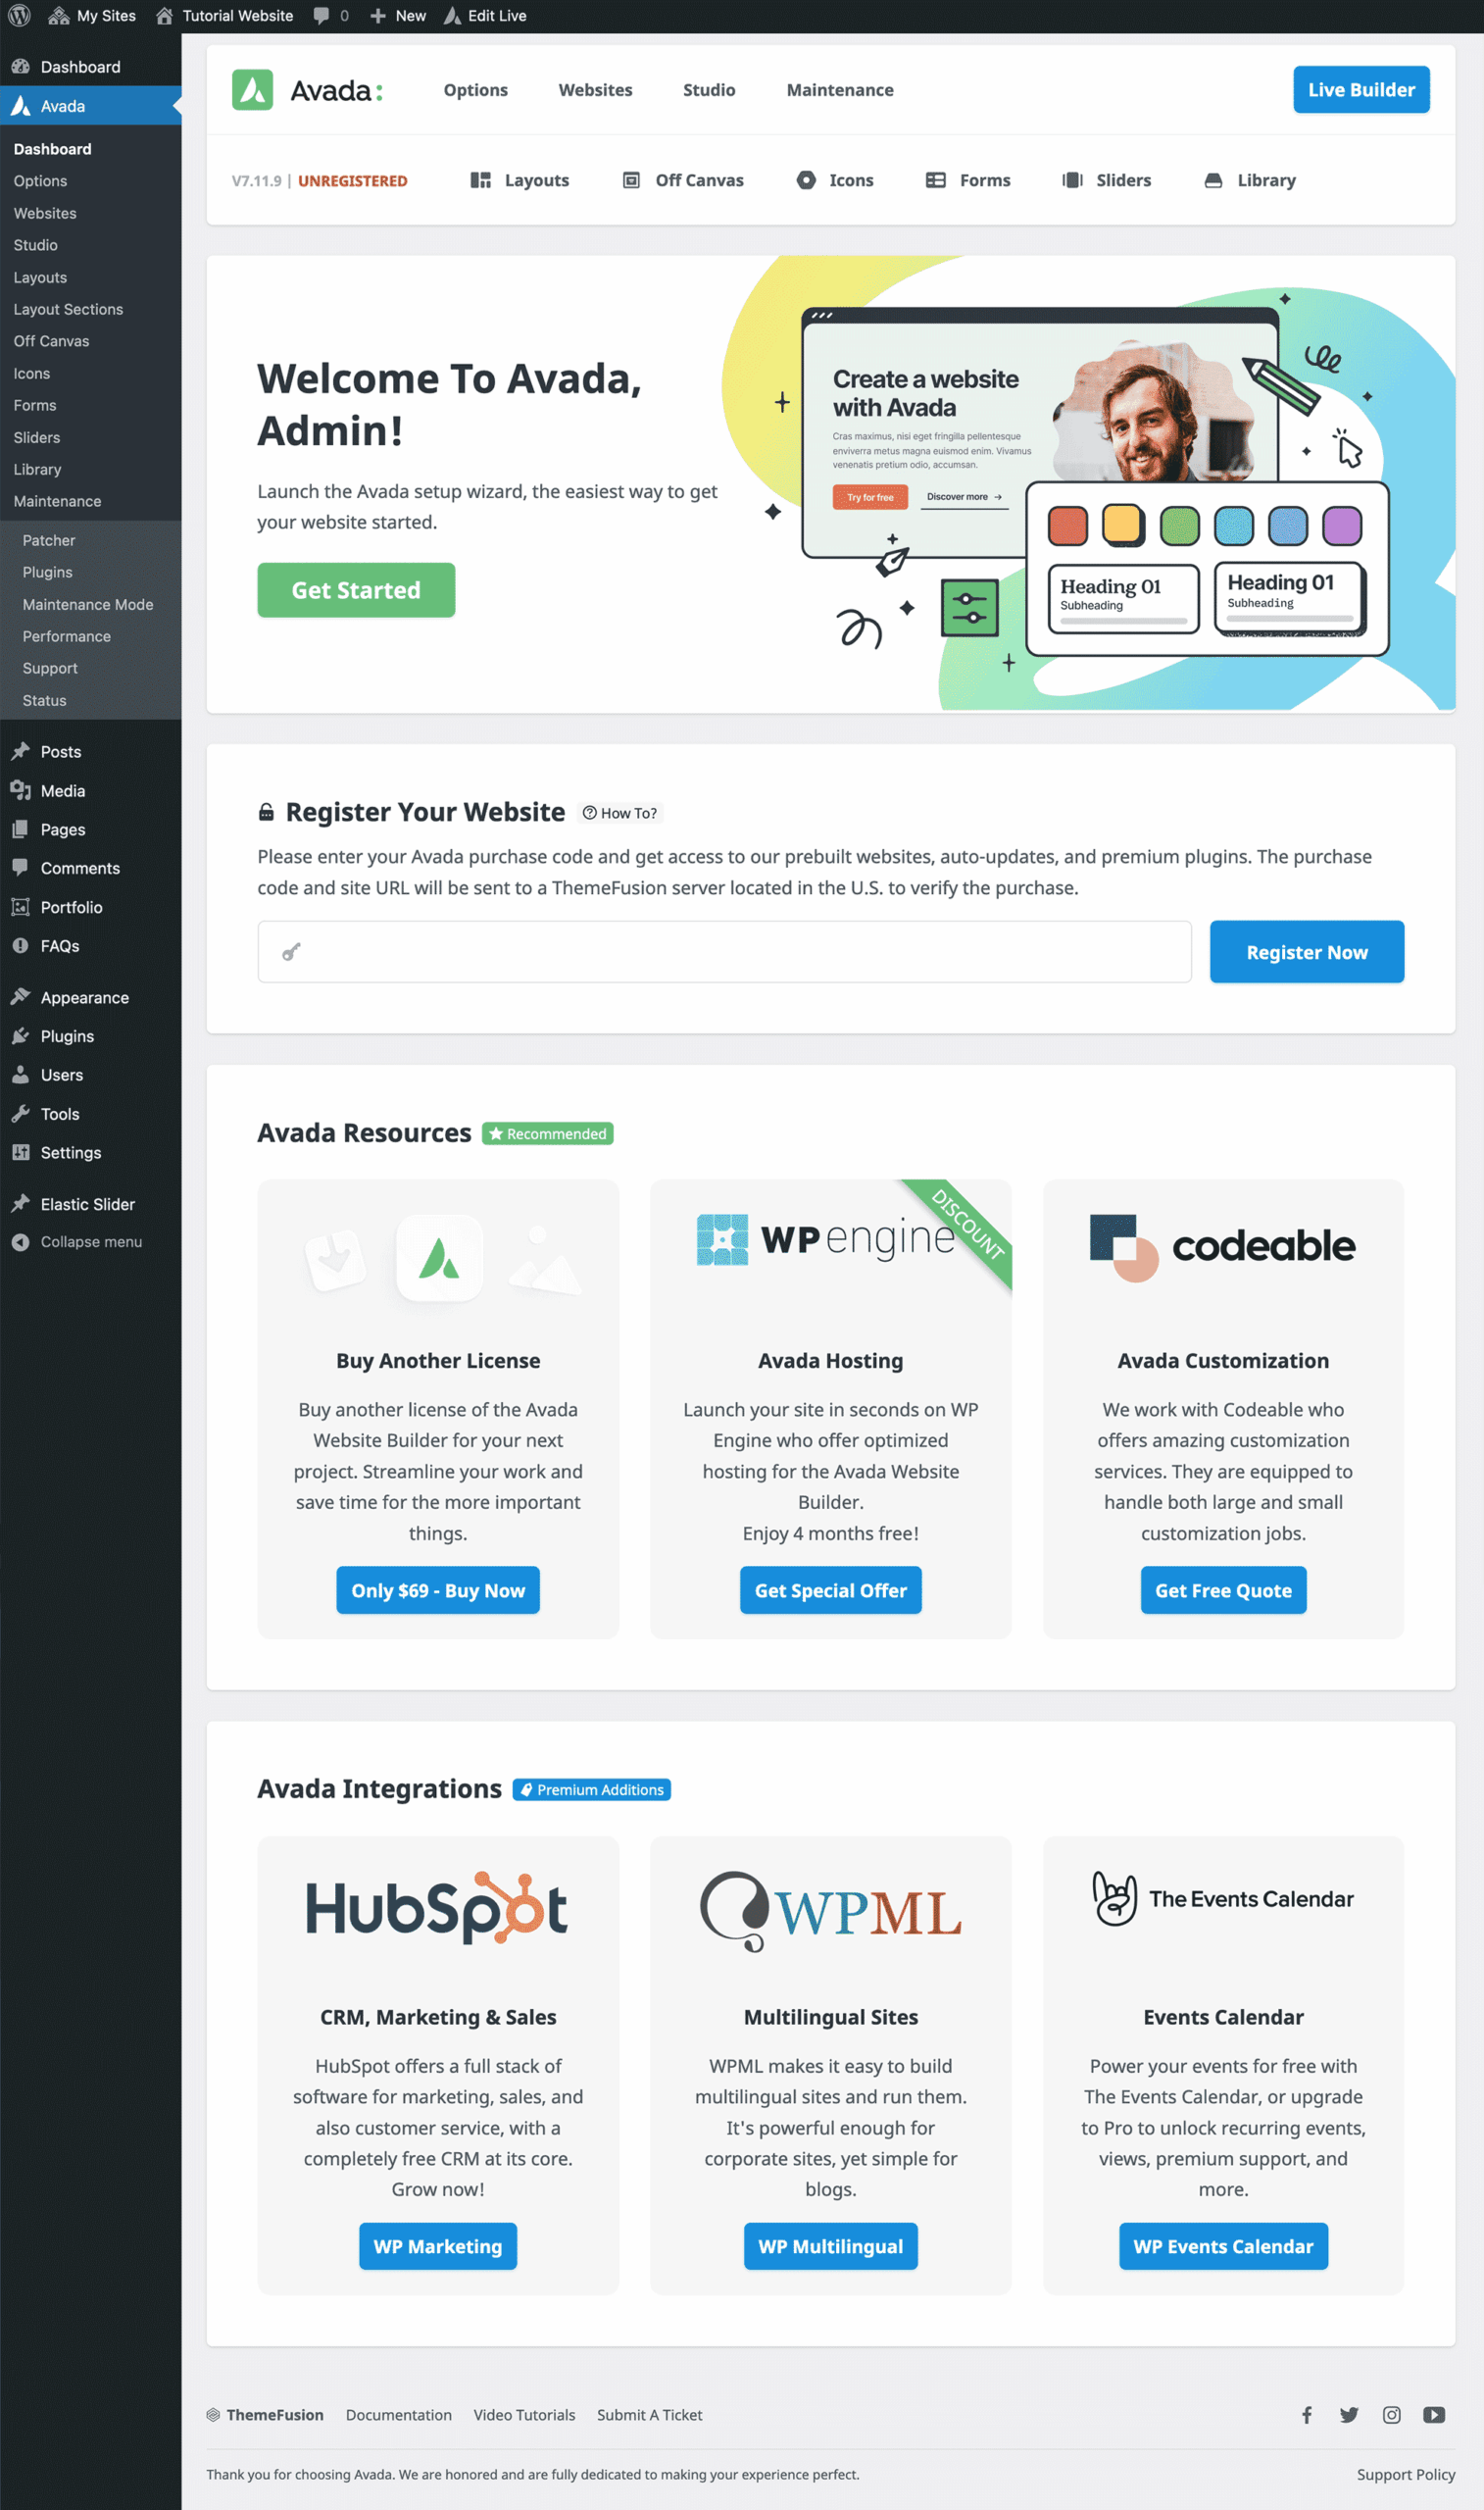
Import an Avada Prebuilt Website
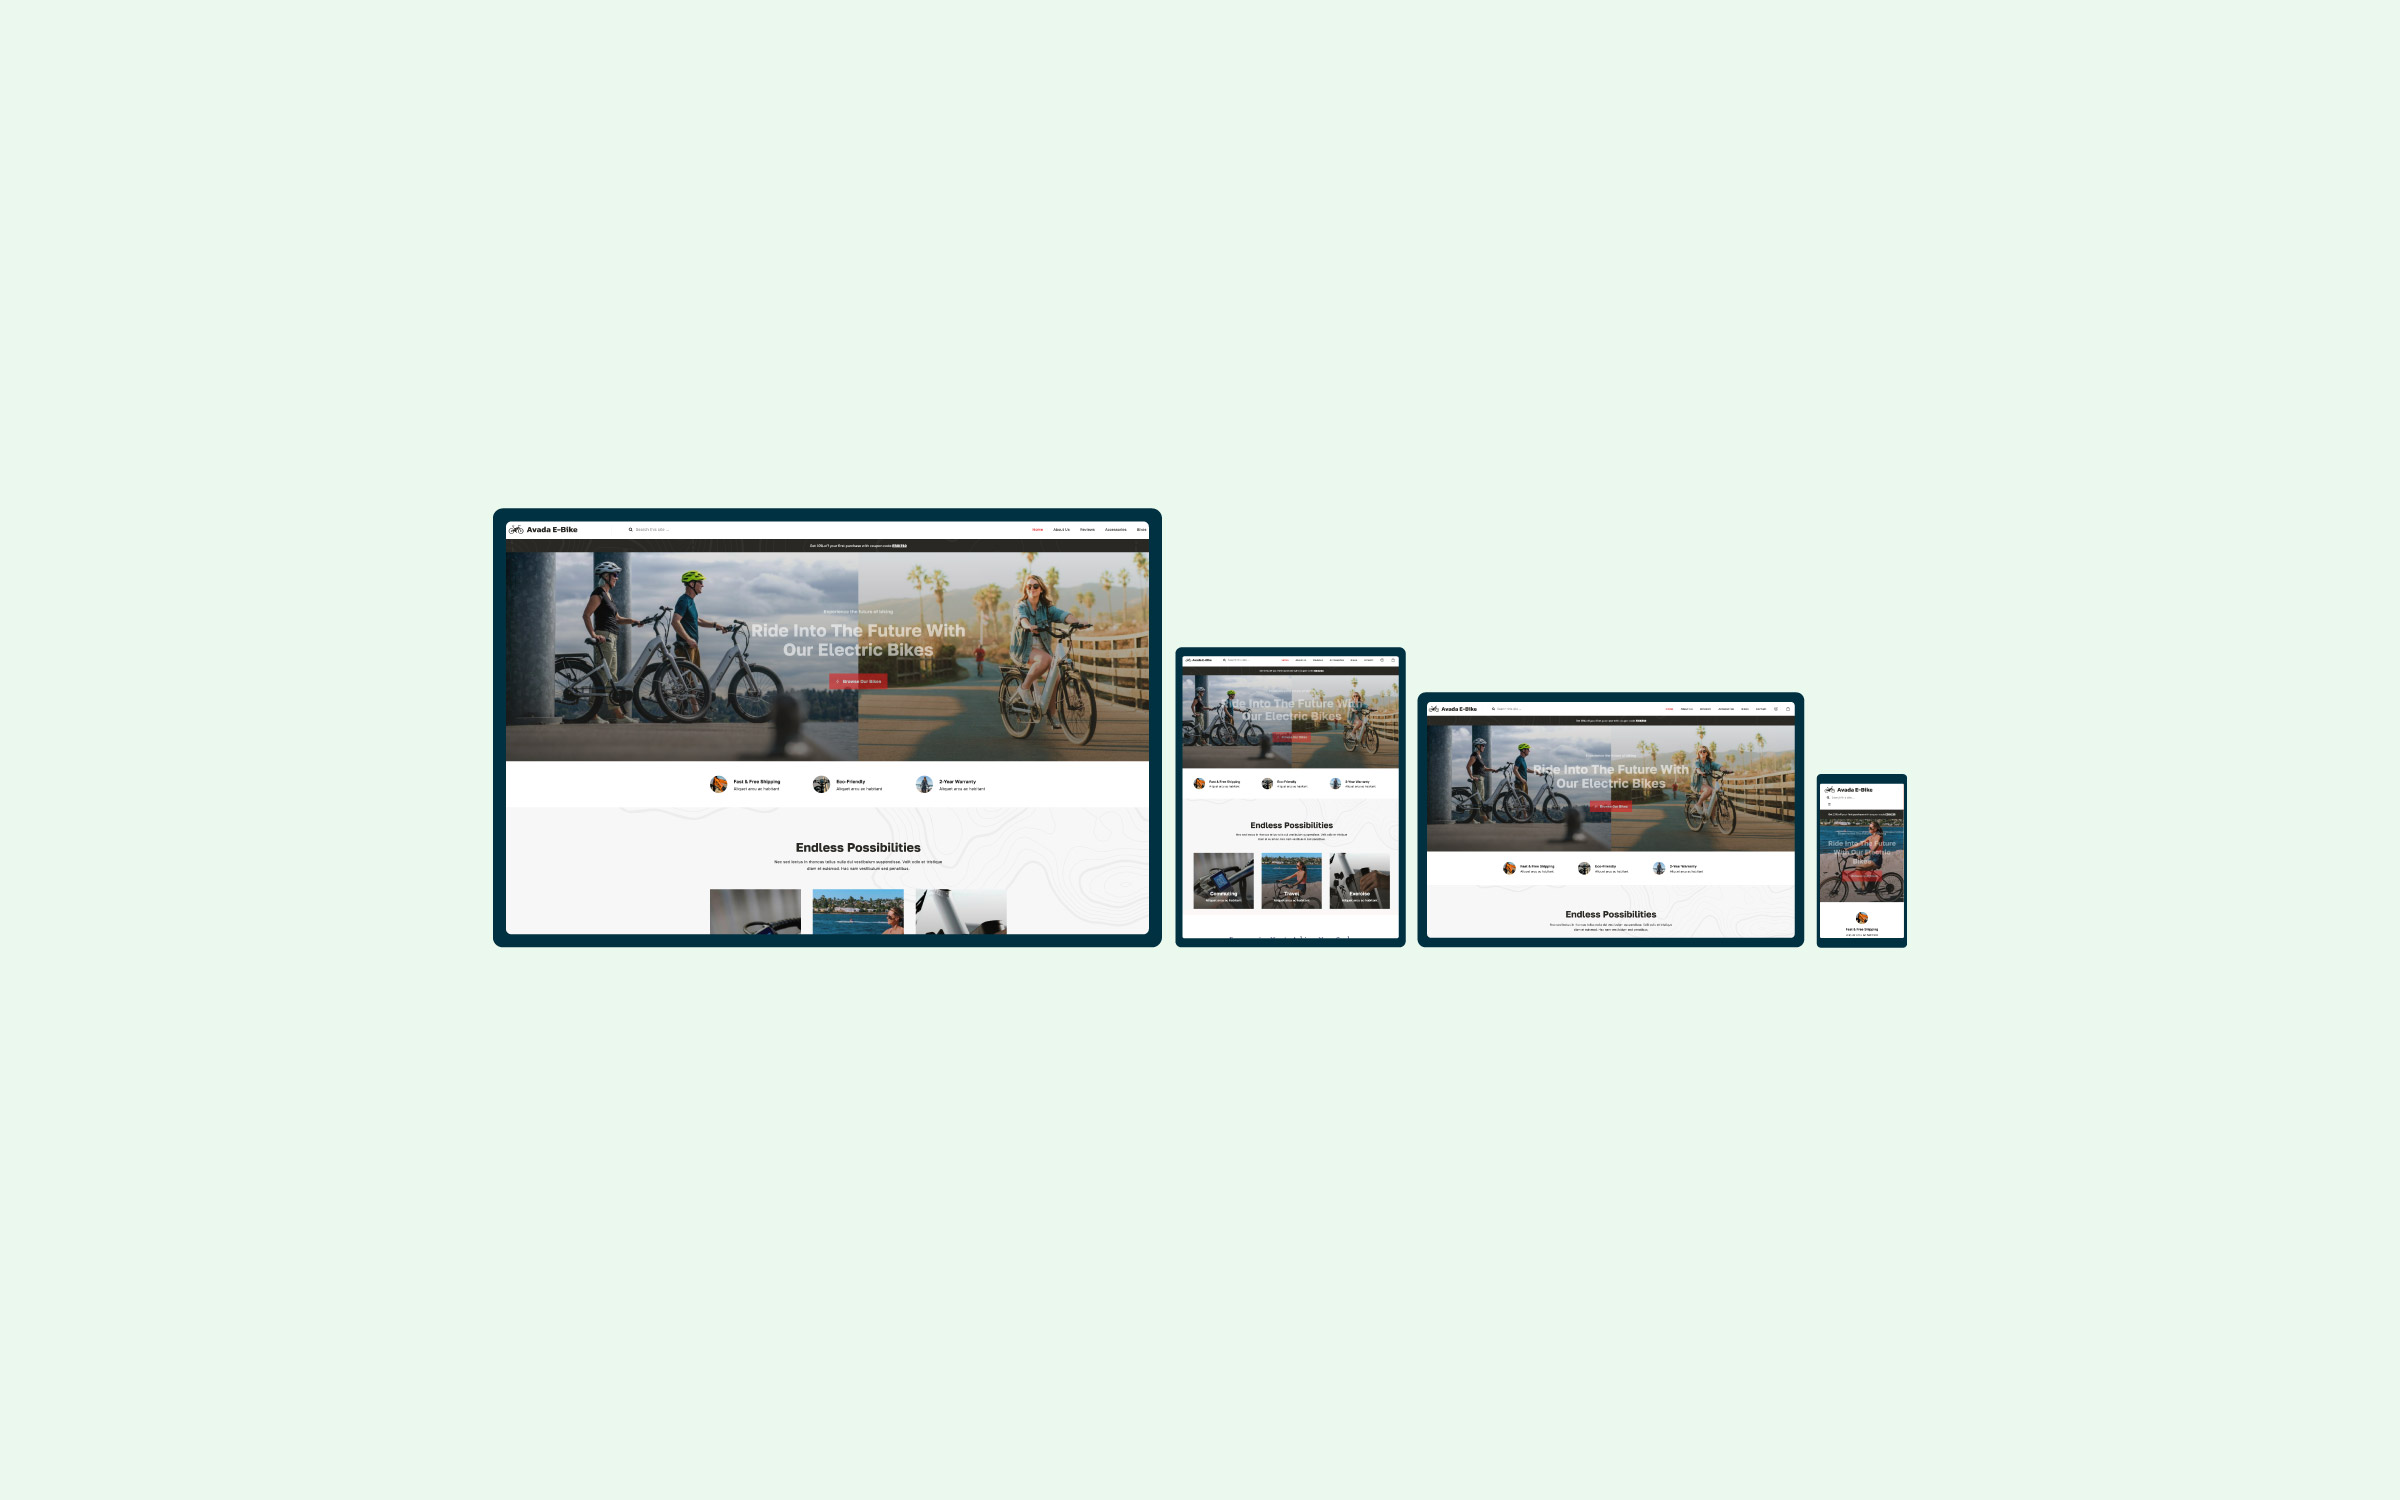
Importing an Avada prebuilt website can significantly streamline the website creation process. These prebuilt sites are professionally designed and fully customizable, saving time and effort. They have all the necessary pages, layouts, and functionalities tailored to various industries and purposes. By importing a prebuilt site, you can quickly achieve a polished, functional website without starting from scratch, allowing you to focus on tailoring the content and design to your specific needs. This approach is ideal for users seeking efficiency and high-quality design.
There are 112 Avada prebuilt websites to choose from, from a wide range of categories. In addition, the Avada Studio provides an extensive array of content that can supplement your designs.
Summary
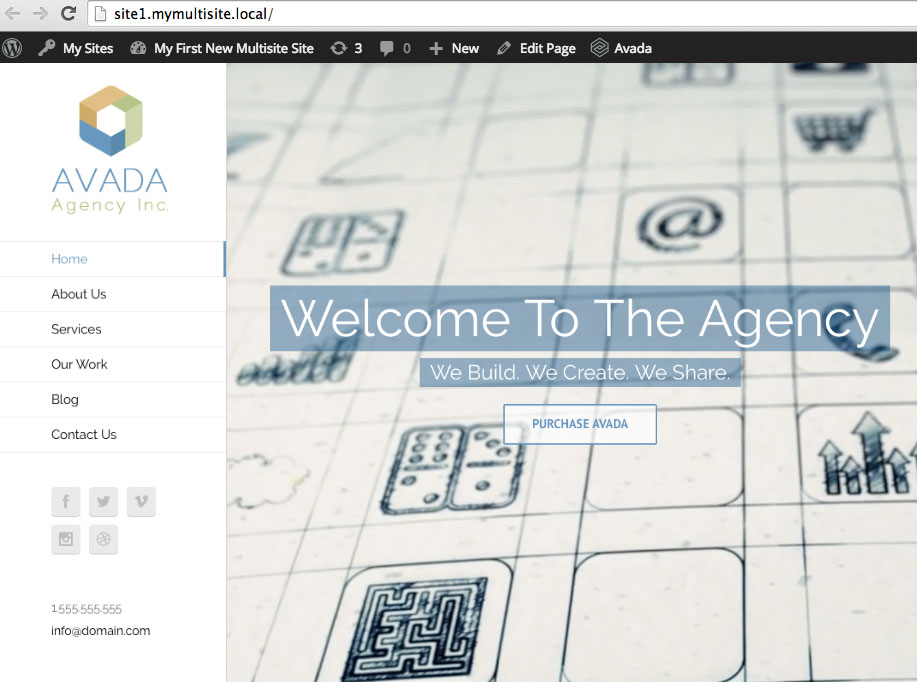
We’ve covered a lot of ground in this article and hopefully shown that getting your Avada up and running in a WordPress Multisite is relatively straightforward. Let’s briefly review the steps we took:

