Share
No matter where in the world you are as a site owner or developer, having to put together multilingual sites is an increasingly common requirement. How best to do this using Avada is also a support question that pops up quite a lot here at Theme Fusion. The recommended route is to use the market-leading multilingual WPML plugin to arrange your translations.
In this article, we’ll cover the available versions of that plugin, look at putting together the basics of a multilingual site with WPML and Avada, and touch on broader issues such as multilingual SEO and the challenges of finding decent translators.
Let’s start with some background on why multilingual sites are becoming increasingly essential.
Overview
Living in a Multilingual World
Two simple facts should be enough to grab the attention of anyone who makes their living online:
When you add in the fact that English is very firmly established as the global lingua franca these days, it becomes evident that an enormous amount of sites will require – at a minimum – English plus one other language.
This is already the case across much of Europe, where multilingualism is common and the default language of business is English. It’s standard practice for businesses looking to address a broader European market to present local-language content for the domestic market and English for everyone else.
The situation is similar in Asia, where local languages such as Thai or Japanese will be served up next to an English offering aimed at the rest of the world.
The United States – the second biggest eCommerce market globally – has an enormous internal Hispanic audience. It’s also geographically close enough to further huge Spanish and Portuguese-speaking markets to make multilingual content a worthwhile investment for many.
For many online businesses, particularly in the area of eCommerce, failure to provide multilingual content is essentially leaving money on the table – a mistake very few firms can afford to make these days.
WordPress Still Lacks Built-in Multilingual Tools
Perhaps a little surprisingly, WordPress still doesn’t have tools for multilingual front end content built into core.
The back end, of course, has long been available in a huge number of languages. Developer-friendly features such as language packs are being rolled out, and the subject of internationalization is definitely on the core team’s agenda – as you can see from the presentation by Andrew Nacin below.
All that said, divvying up your actual content for different audiences still generally requires the use of third-party tools.
As detailed on the WordPress Codex, there are a number of different strategies for handling this, including Google Translate, using WordPress Multisite, multiple languages per post, and a one post per language approach.
This last option is the one taken by the tool we’ll be employing for the rest of this article: the WPML plugin from OnTheGoSystems.
Some Background on WPML
WPML has been the dominant WordPress multilingual plugin since its arrival in 2007; it is deployed on a huge range of sites worldwide.

Originally a free plugin, the software is now available in three basic licensing options, all of which are valid for use on multiple sites:
WPML is split between core and add-on plugins. We’ll cover the highlights of several of the add-ons in due course.
Avada and WPML
Avada has been compatible with WPML since 2013, and the two companies have worked closely to make integration as simple as possible since then.
There’s a dedicated help file on the Avada help center, and WPML have an excellent introduction to using Avada with WPML on their site.
It’s worth mentioning that Avada itself is no slouch regarding internationalization. By default, the theme is packed full of translation features, is RTL ready and ships pre-translated in 23 languages with all outputted front end strings fully translatable out of the box.
Setting up WPML with Avada
For the purposes of this article, we have a local install of Avada set up with the Cafe prebuilt website loaded as sample content.

Before we get going, you may want to have the WPML documentation to hand as you follow along.
Installing WPML itself is a breeze. In our case, we’ve gone for the Multilingual CMS option. Kick things off by visiting the WPML site post-purchase to access your files.
In addition to the core plugin, we’re going to load WPML String Translation and WPML Translation Management. Simply download the relevant files and install and activate them as you would with any other plugin. You’ll be given the option of being taken to the Getting Started guide once you’ve activated the core plugin, which is handy if this is your first time using WPML.

As the screenshot below shows, you’ll also need to register your purchase by entering a valid key.

This key can be generated by logging into your WPML account and adding a site under My Sites. Local (IE: WAMP/MAMP) installations are supported. Now we’re ready to set up a language.

Setting up Your Languages
Setting up a language is a straightforward process. Navigate to WPML > Languages and choose your default language, other active language(s) and language switcher options.

On the next screen you can choose your primary language and any additional languages available, for your translated site.
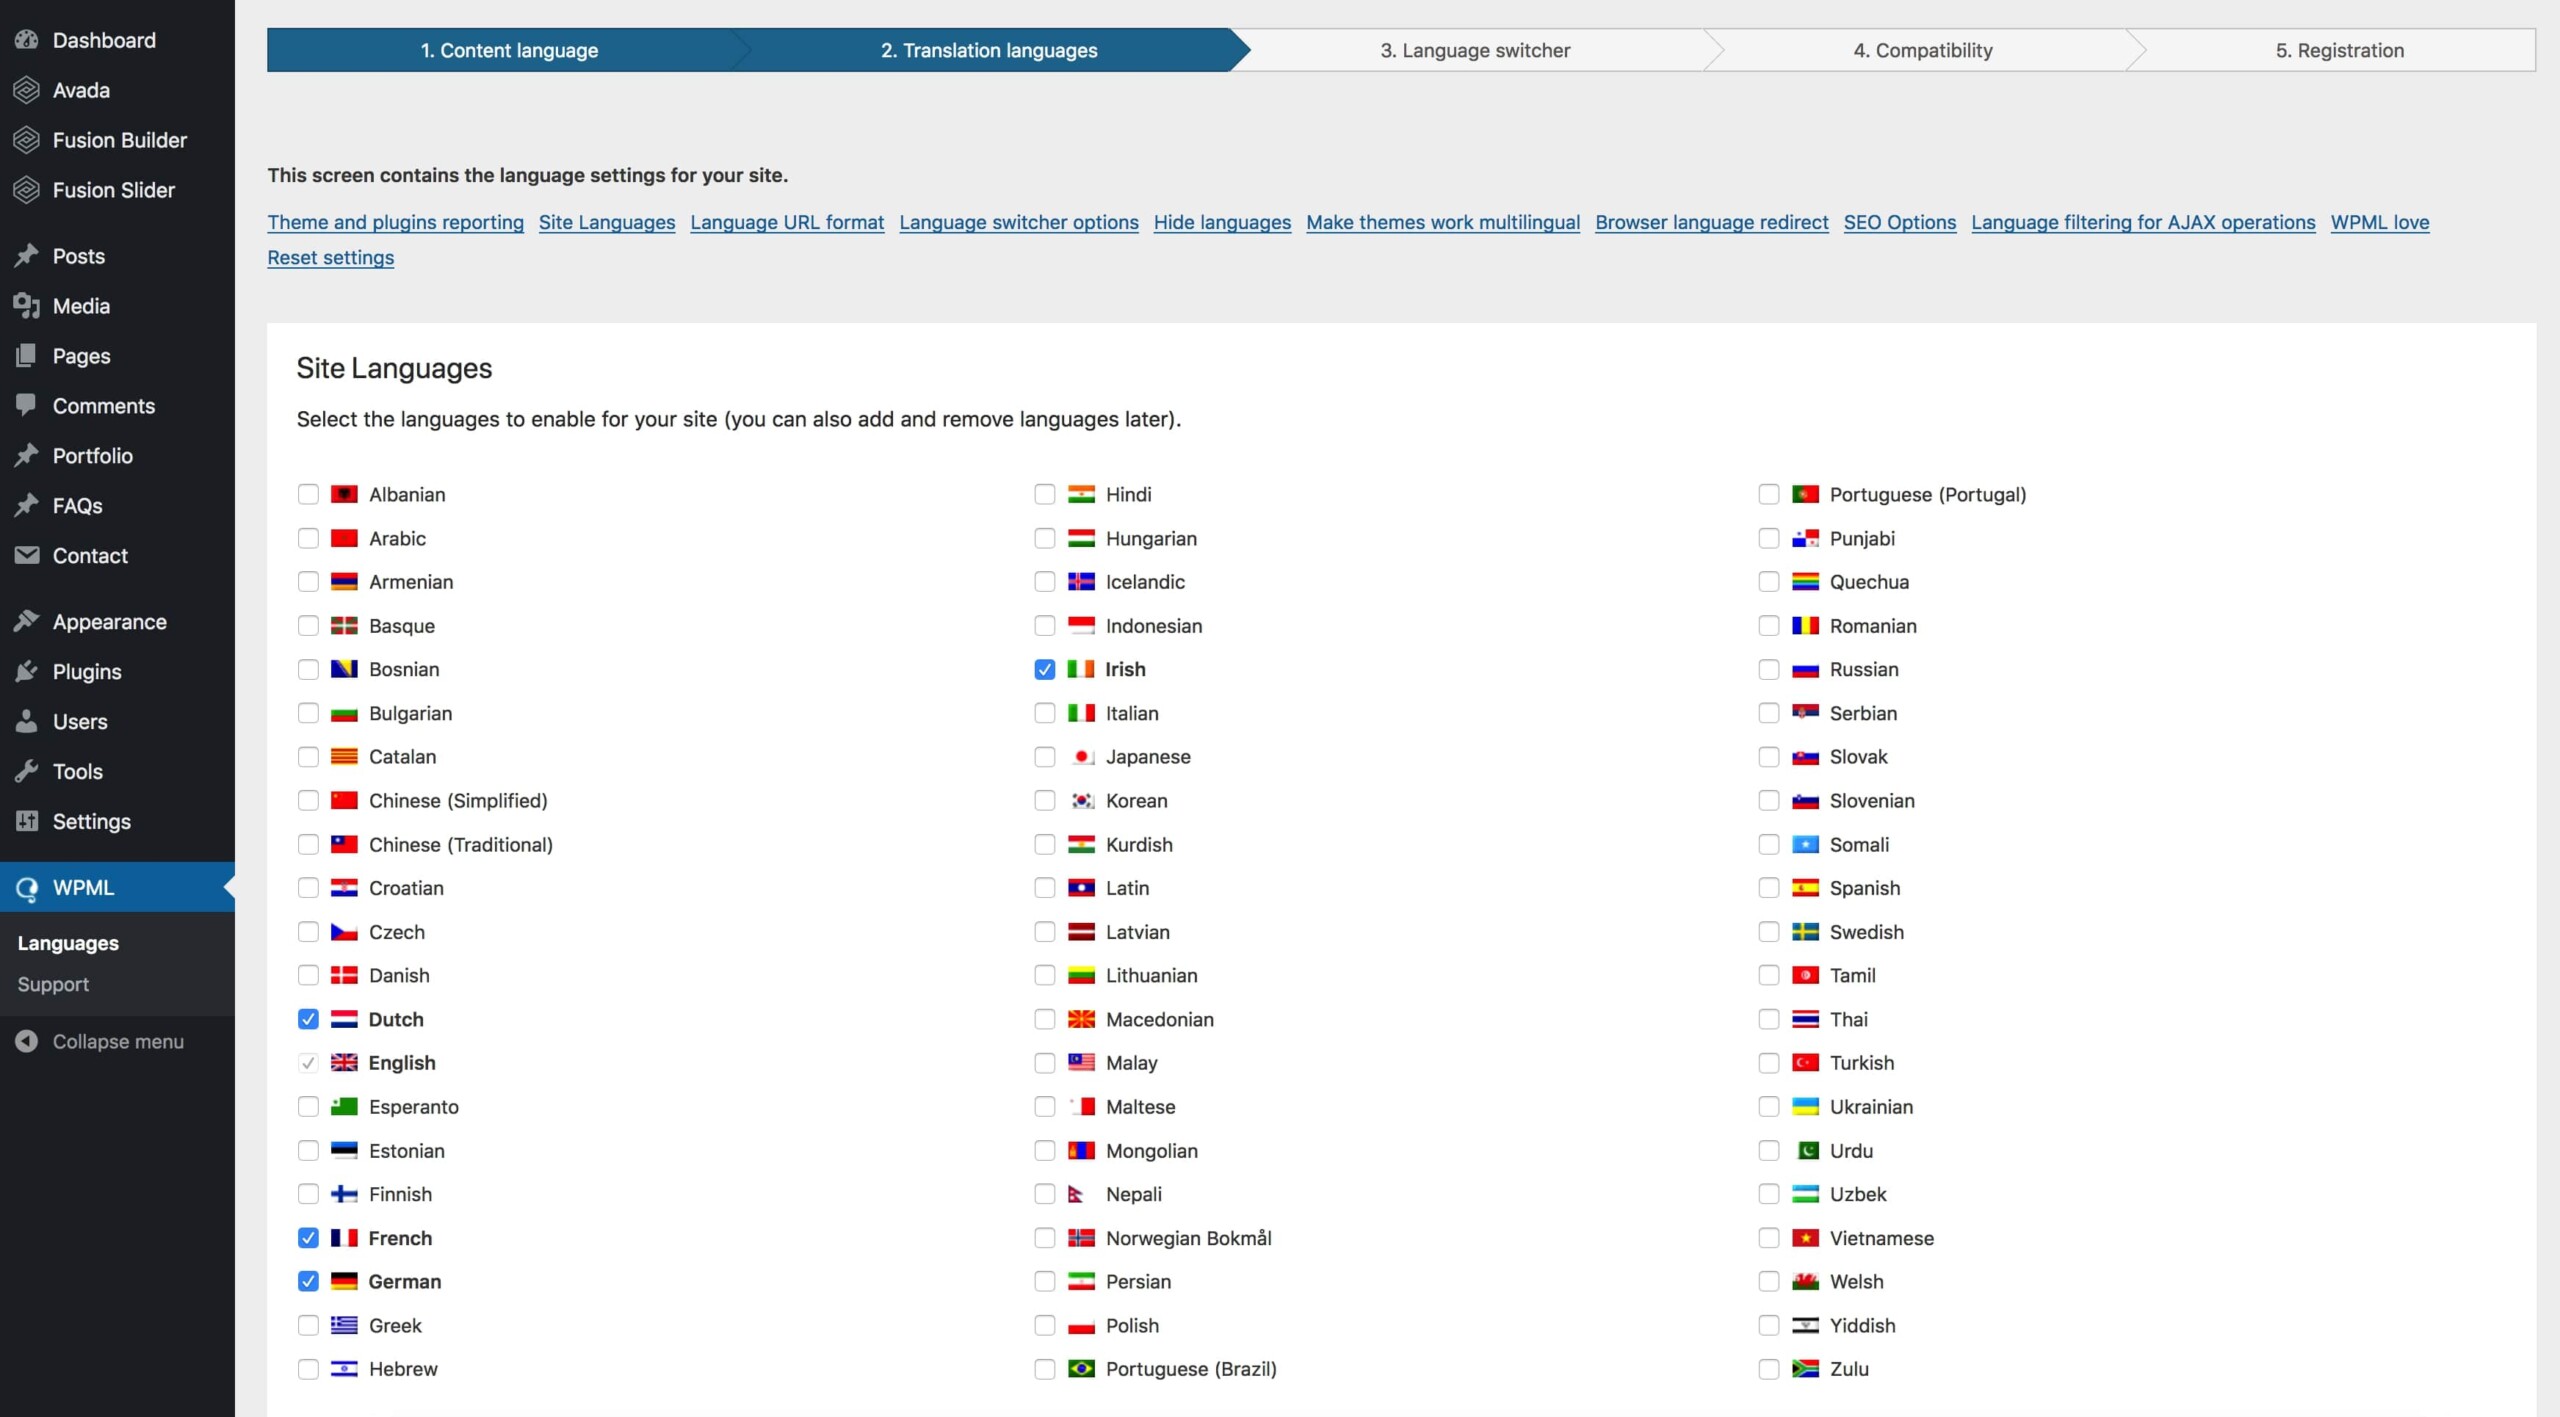
For this example, we’ve added German, Dutch, French and Irish and then selected a simple option for the language switcher. A full guide to language switcher options is available in the WPML documentation.
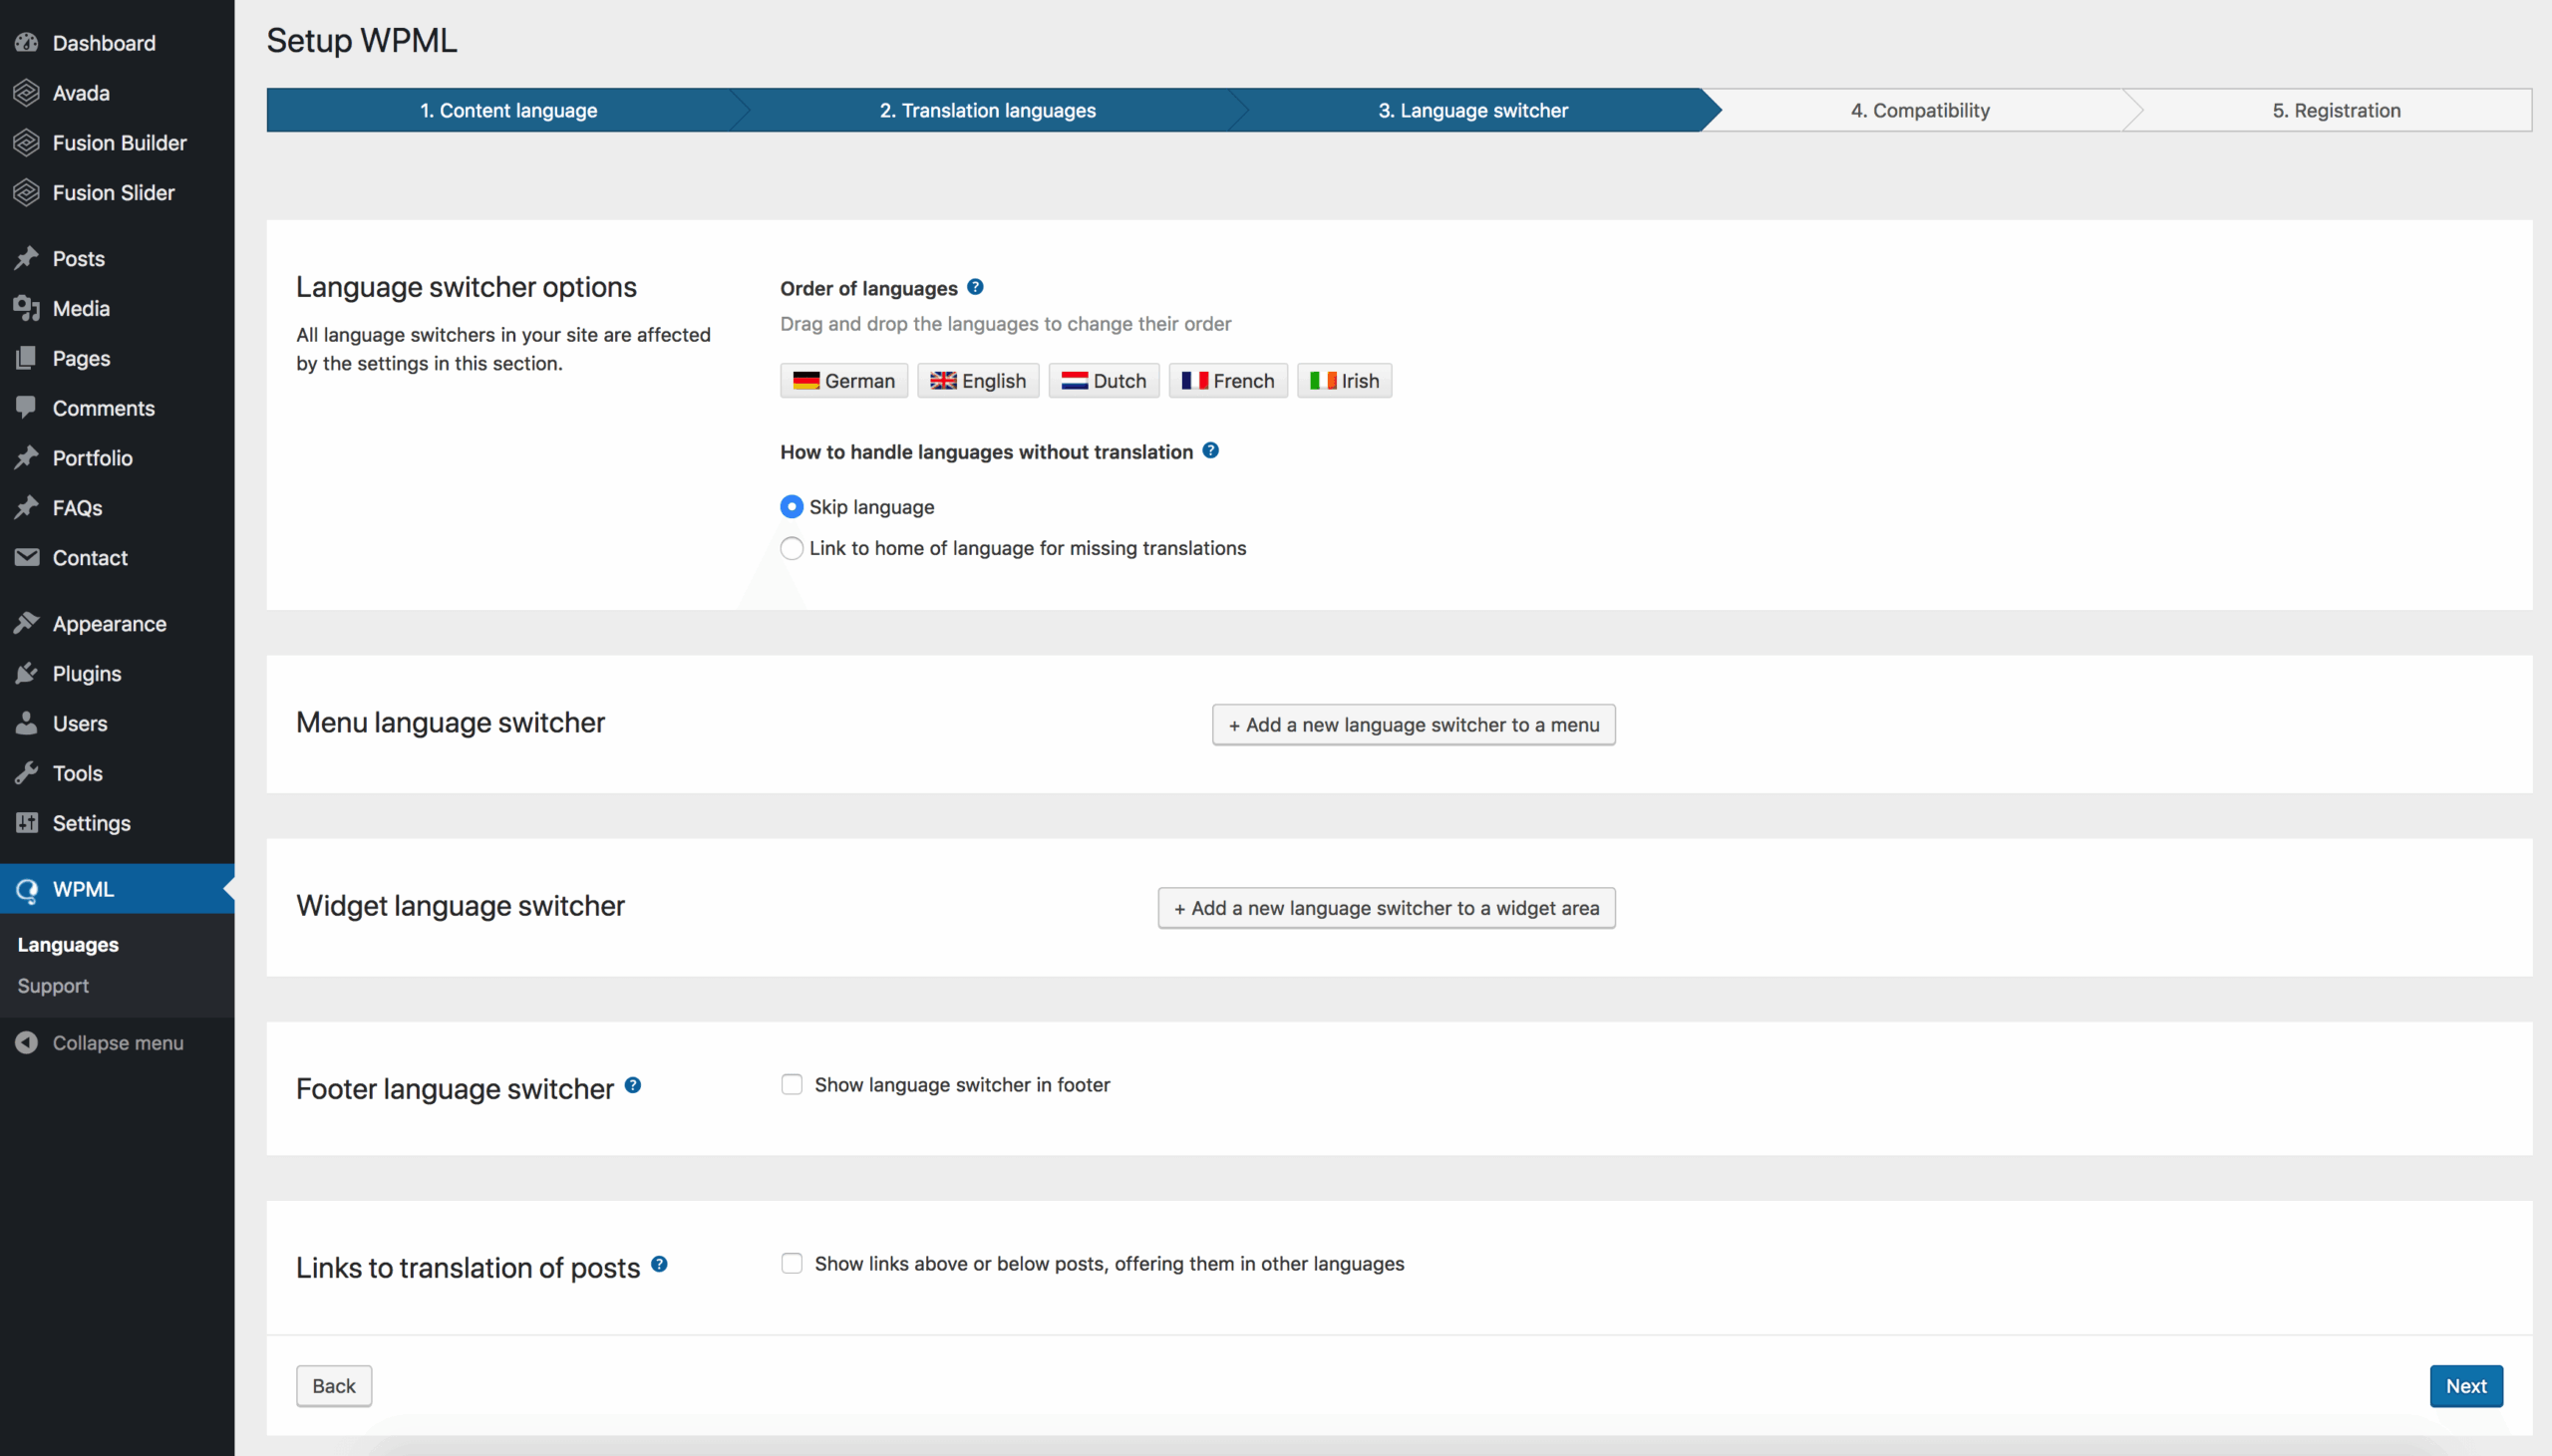
There are a couple of different ways to add the language switcher to your Avada site. Method 1 is to enable the dedicated WPML Menu Language Switcher options. Method 2 is to deploy a dedicated WPML Language Switcher shortcode on your site that can be added to pages, posts, footer widgets, widget areas, and even the Avada Theme Options Tagline Field for this example sites header area. Let’s take a look at both methods:
Method 1:
The WPML Language Switcher Option:
:: WPML >> Languages >> Menu language switcher

We want the language switcher to be included in the main menu and in the configuration screen we have configured the following settings:
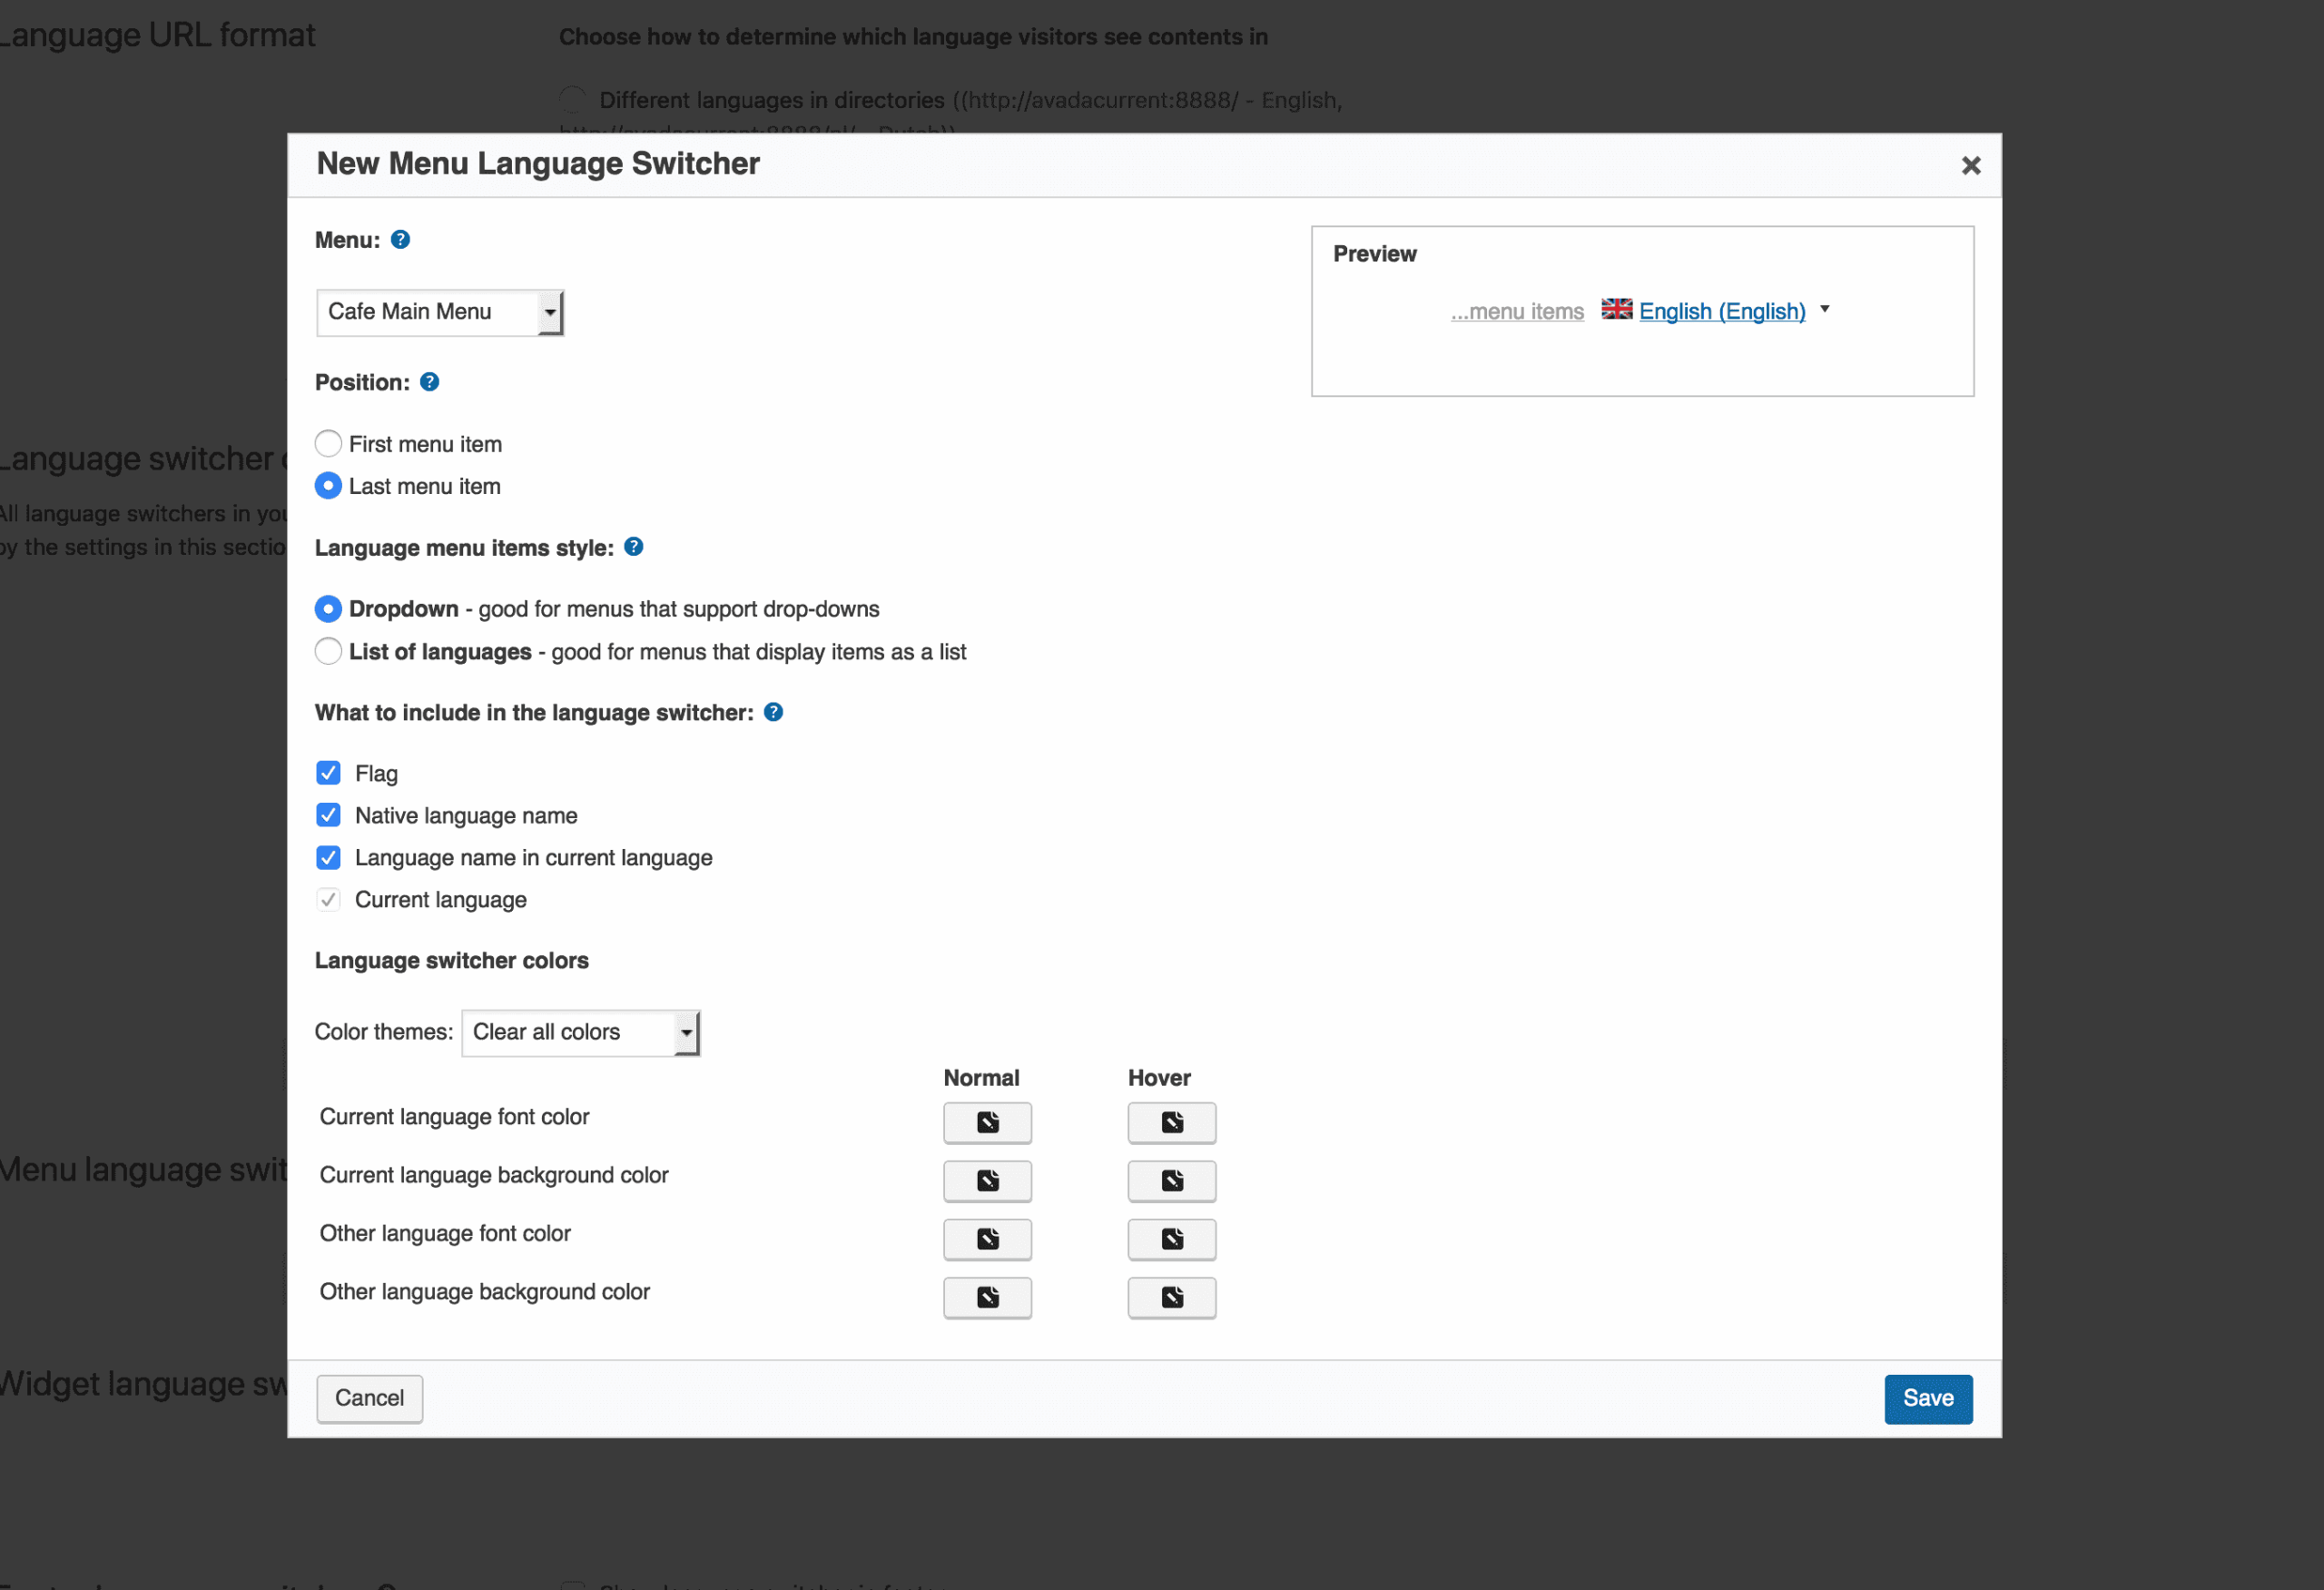
What it looks like on the front end:

Method 2:
The WPML Language Switcher shortcode example:
The shortcode added to the Header Tagline For Content 3 field:
:: Theme Options >> Header >> Header Content >> Tagline For Content 3

What it looks like on the front end:

Things are looking good so far but we should take a minute to describe the options available to you in terms of domains and directories before actually adding some multilingual content.
Deciding on Domains and Directories
You have three basic options when it comes to deciding how your content is split out by country:
Most people will naturally opt for either option one or two. If you’re going down the domain route, bear in mind that you will need to make changes to your DNS and server settings.
The decision you take naturally raises the issue of SEO. It’s a large topic, and outside the main thrust of this article, but WPML offer a number of excellent resources to explore further on their site:
In our case we’ve simply gone for the directories option on the local setup which you can set under WPML > Languages > Language URL format.

Let’s move on to translating some actual content.
Translating Core Content
When you go to the WordPress Dashboard >> Pages section, you will see a + sign for each language, for each page that you have created. In our case teh languages we have decided on are German, Dutch, French and Irish (English being the primary language).
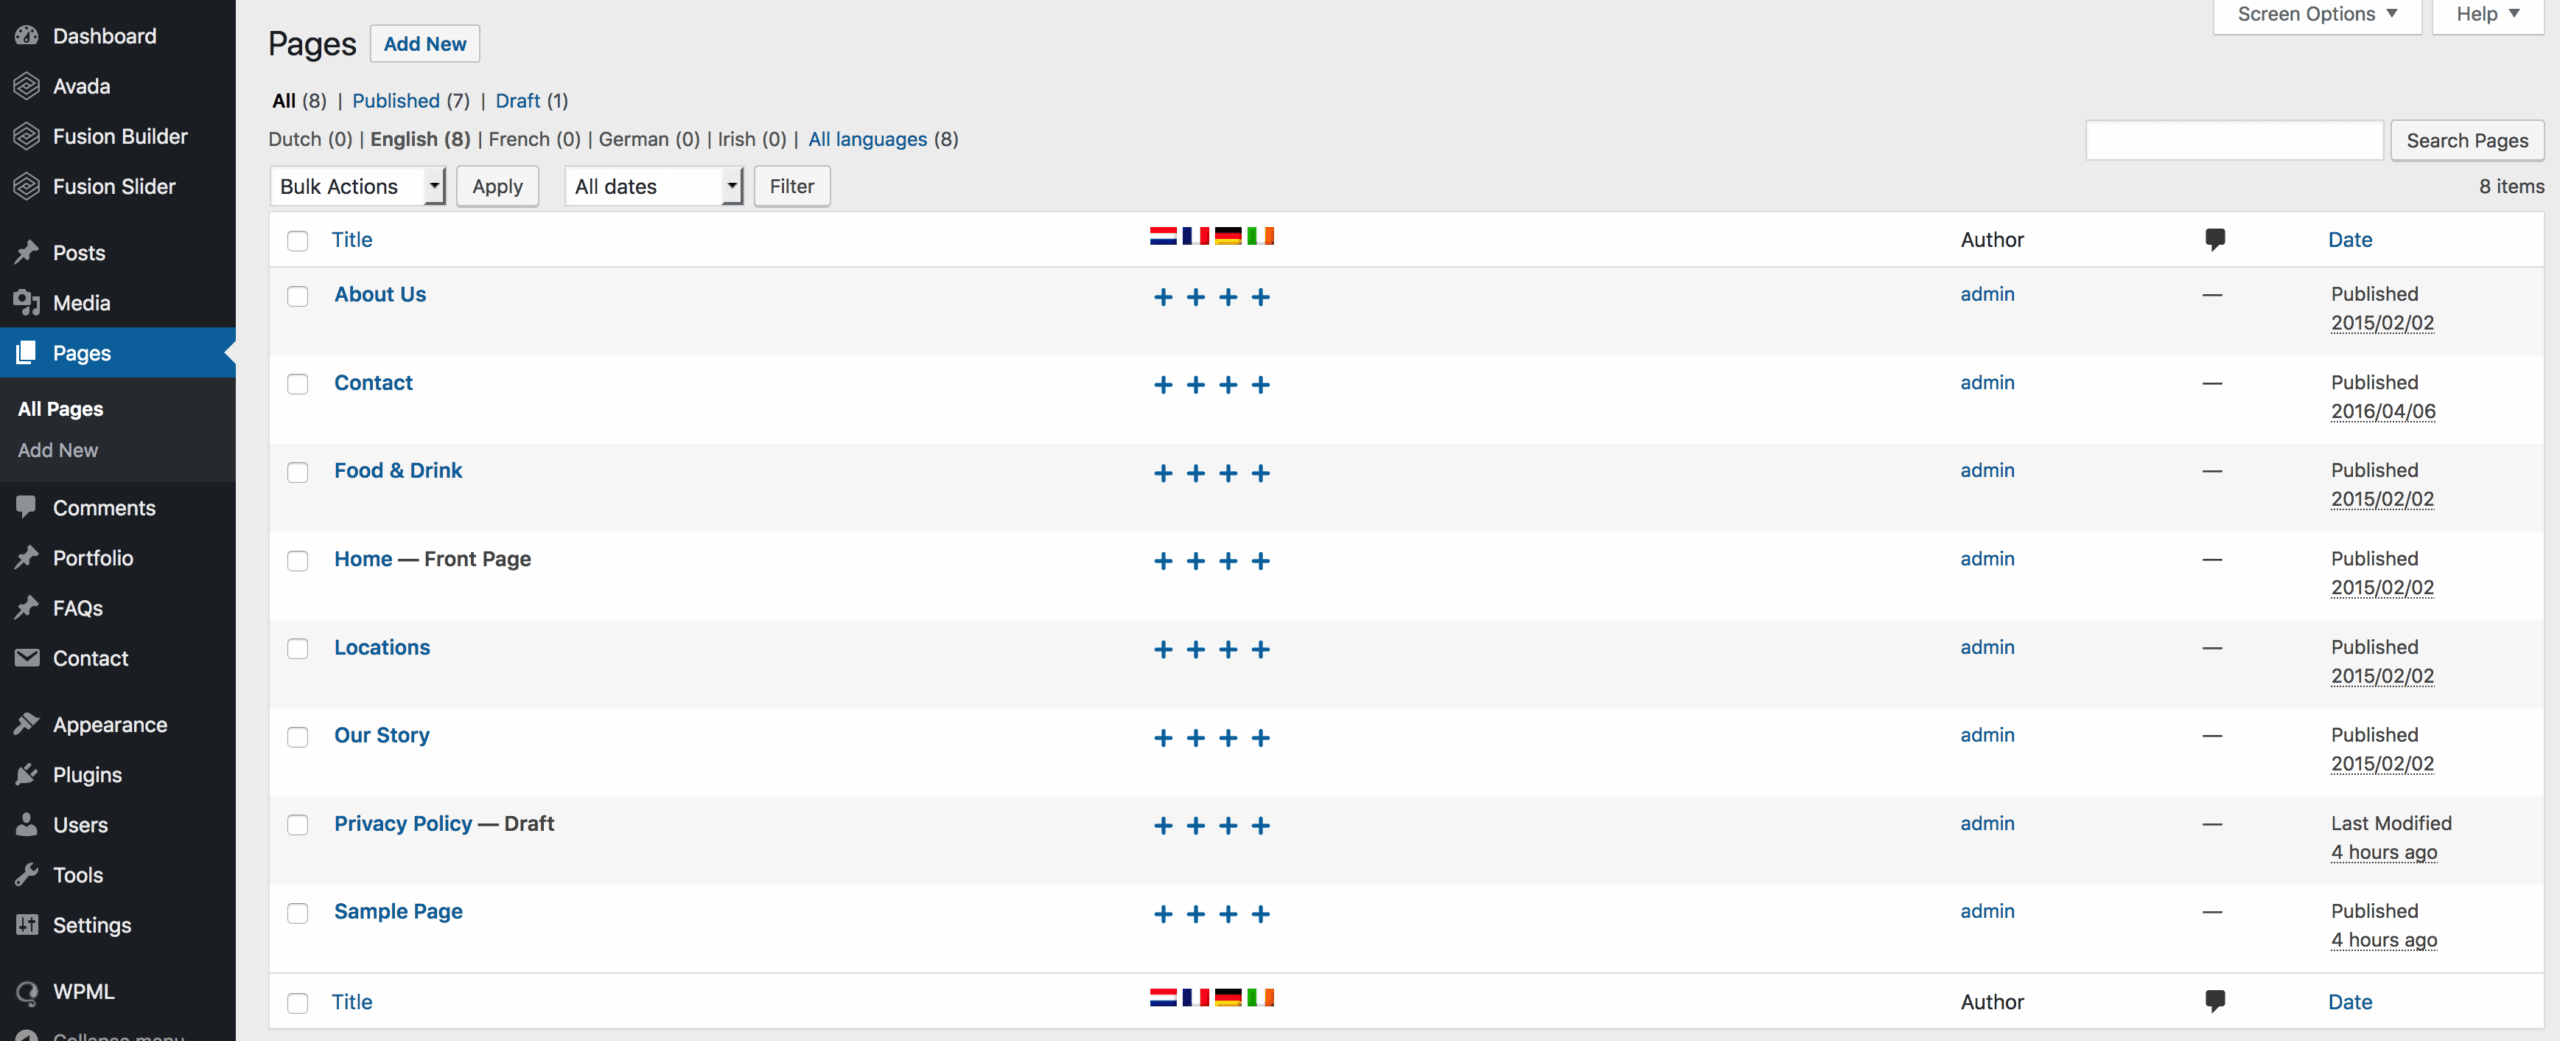
Clicking on the + sign will take you to the WPML page content translation screen where you can address all translatable content and assets:
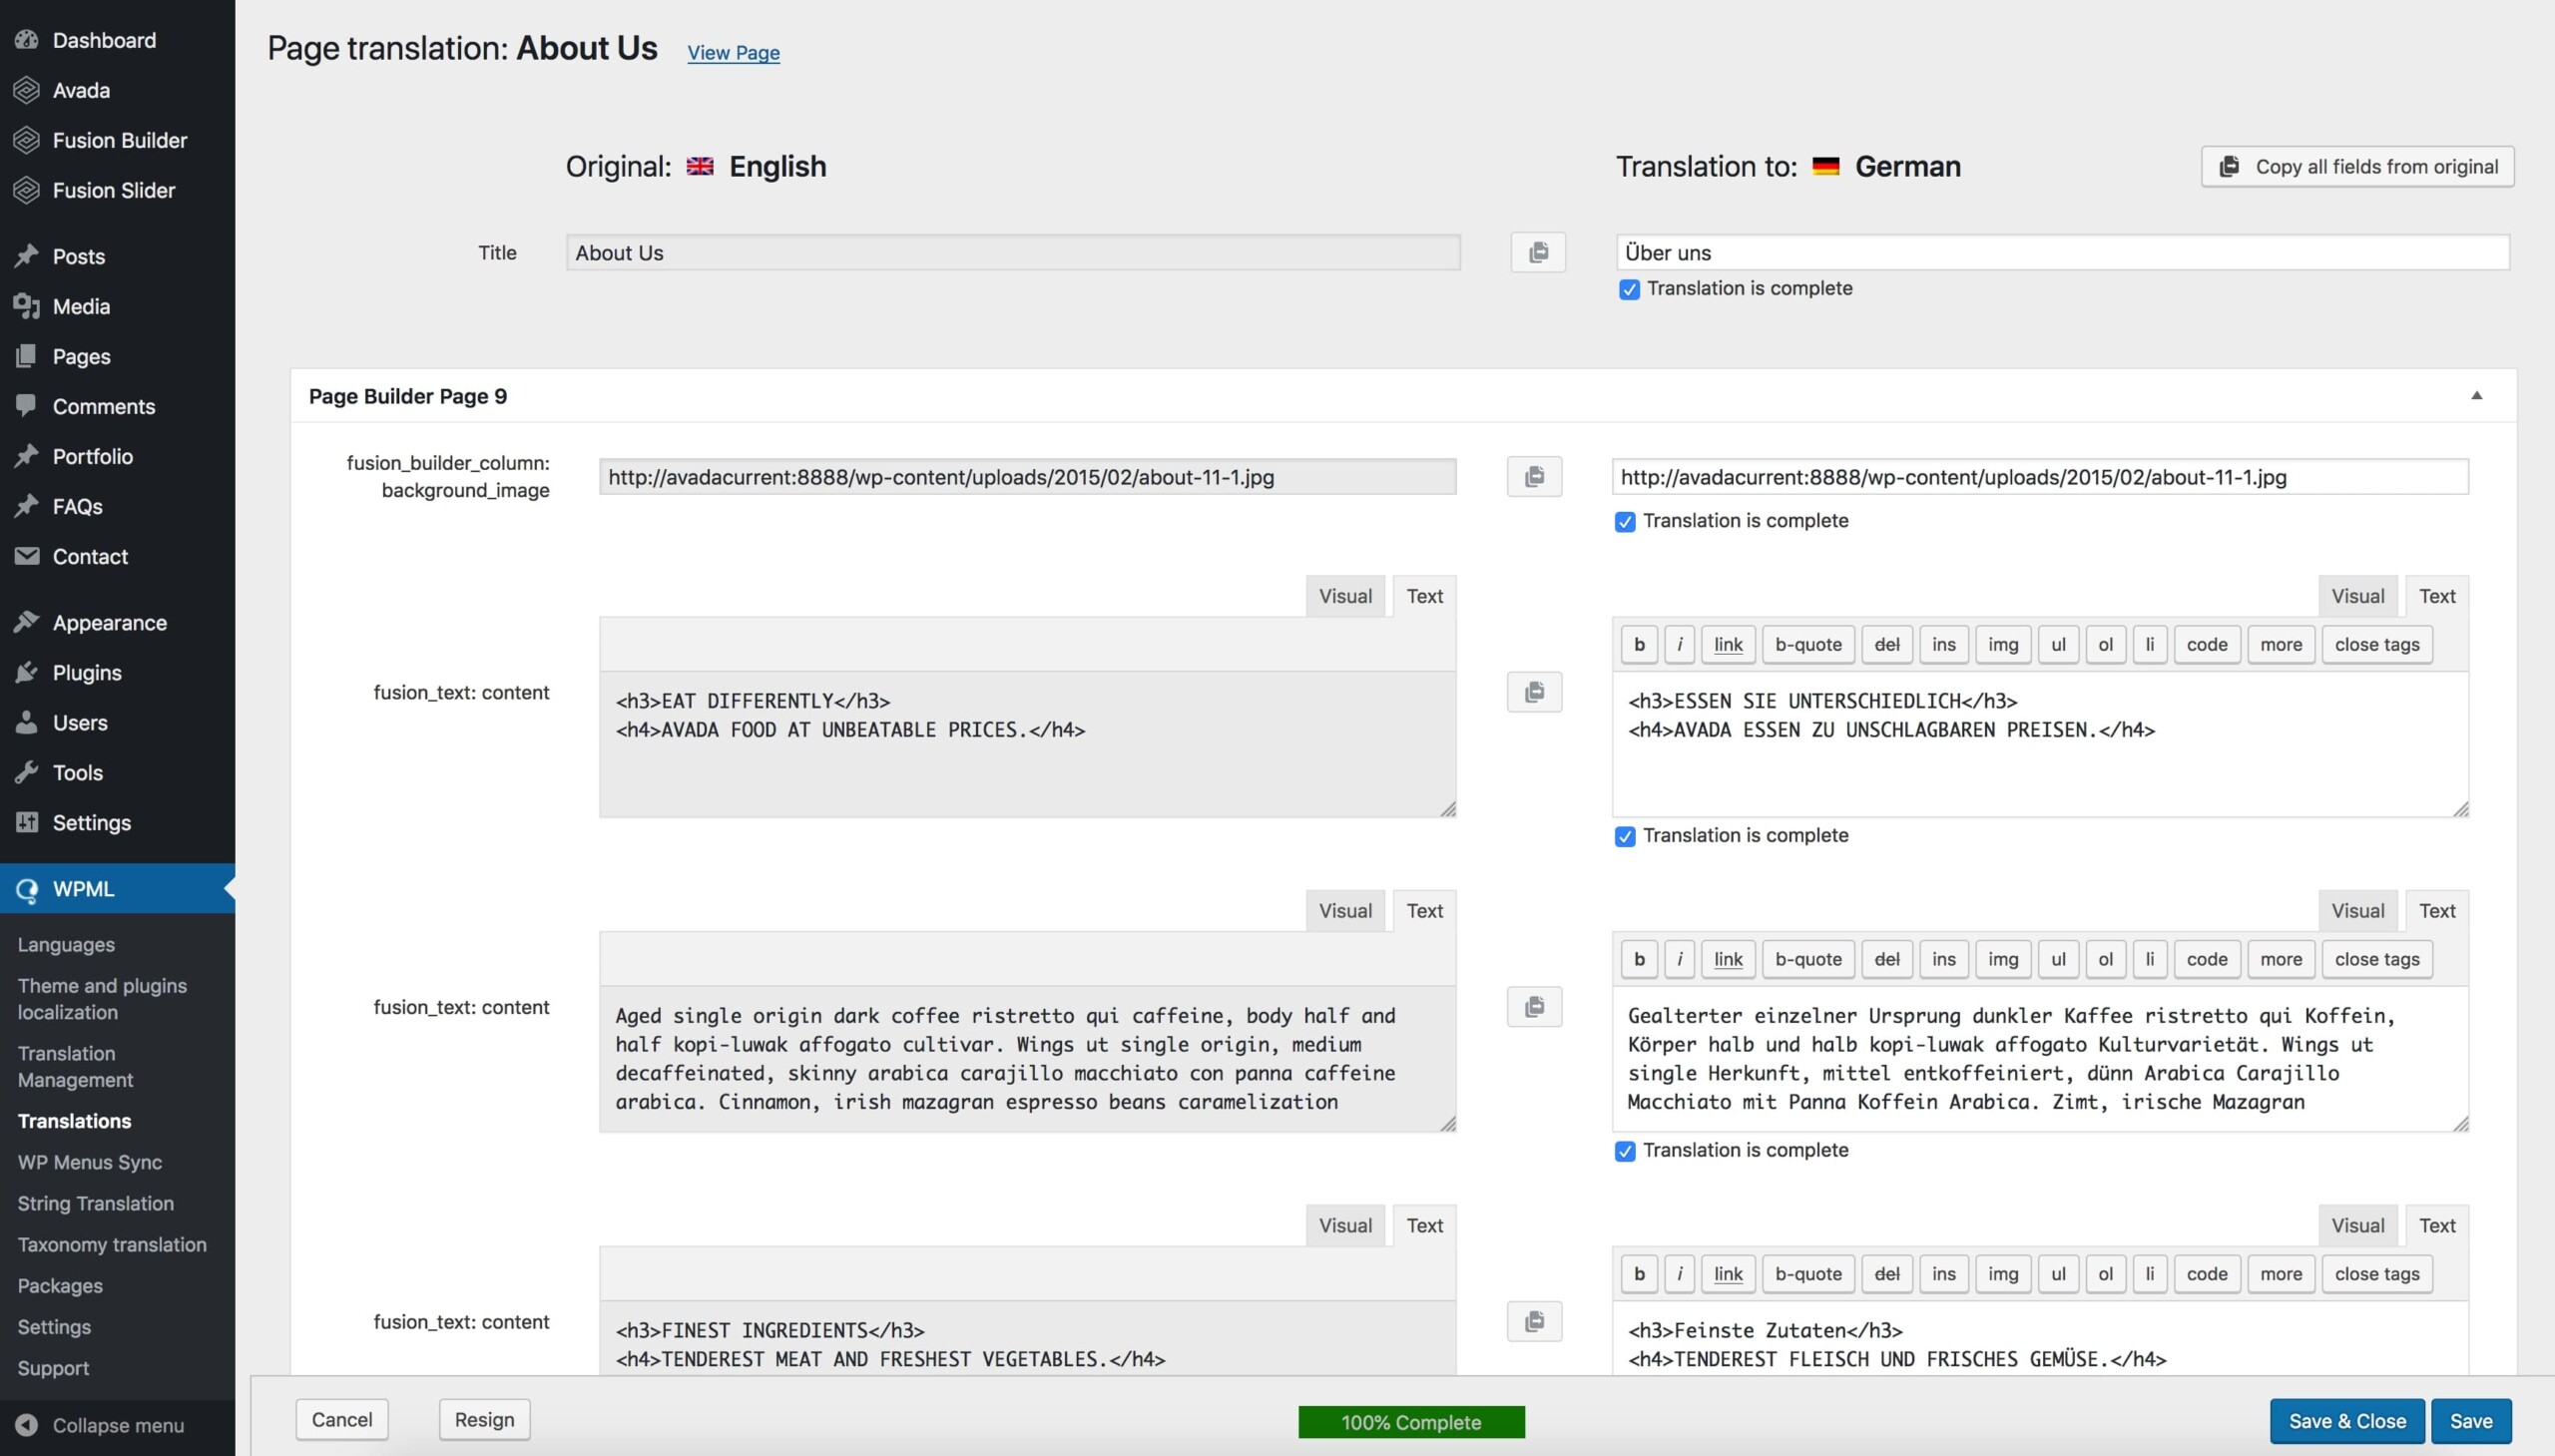
Clicking that option gets you a duplicate of your existing English content and structure which you’re then free to edit. In our case, we’ve translated the ‘About Us’ page content over to German (Über uns) with the new page on the front end looking like as the final translated result:
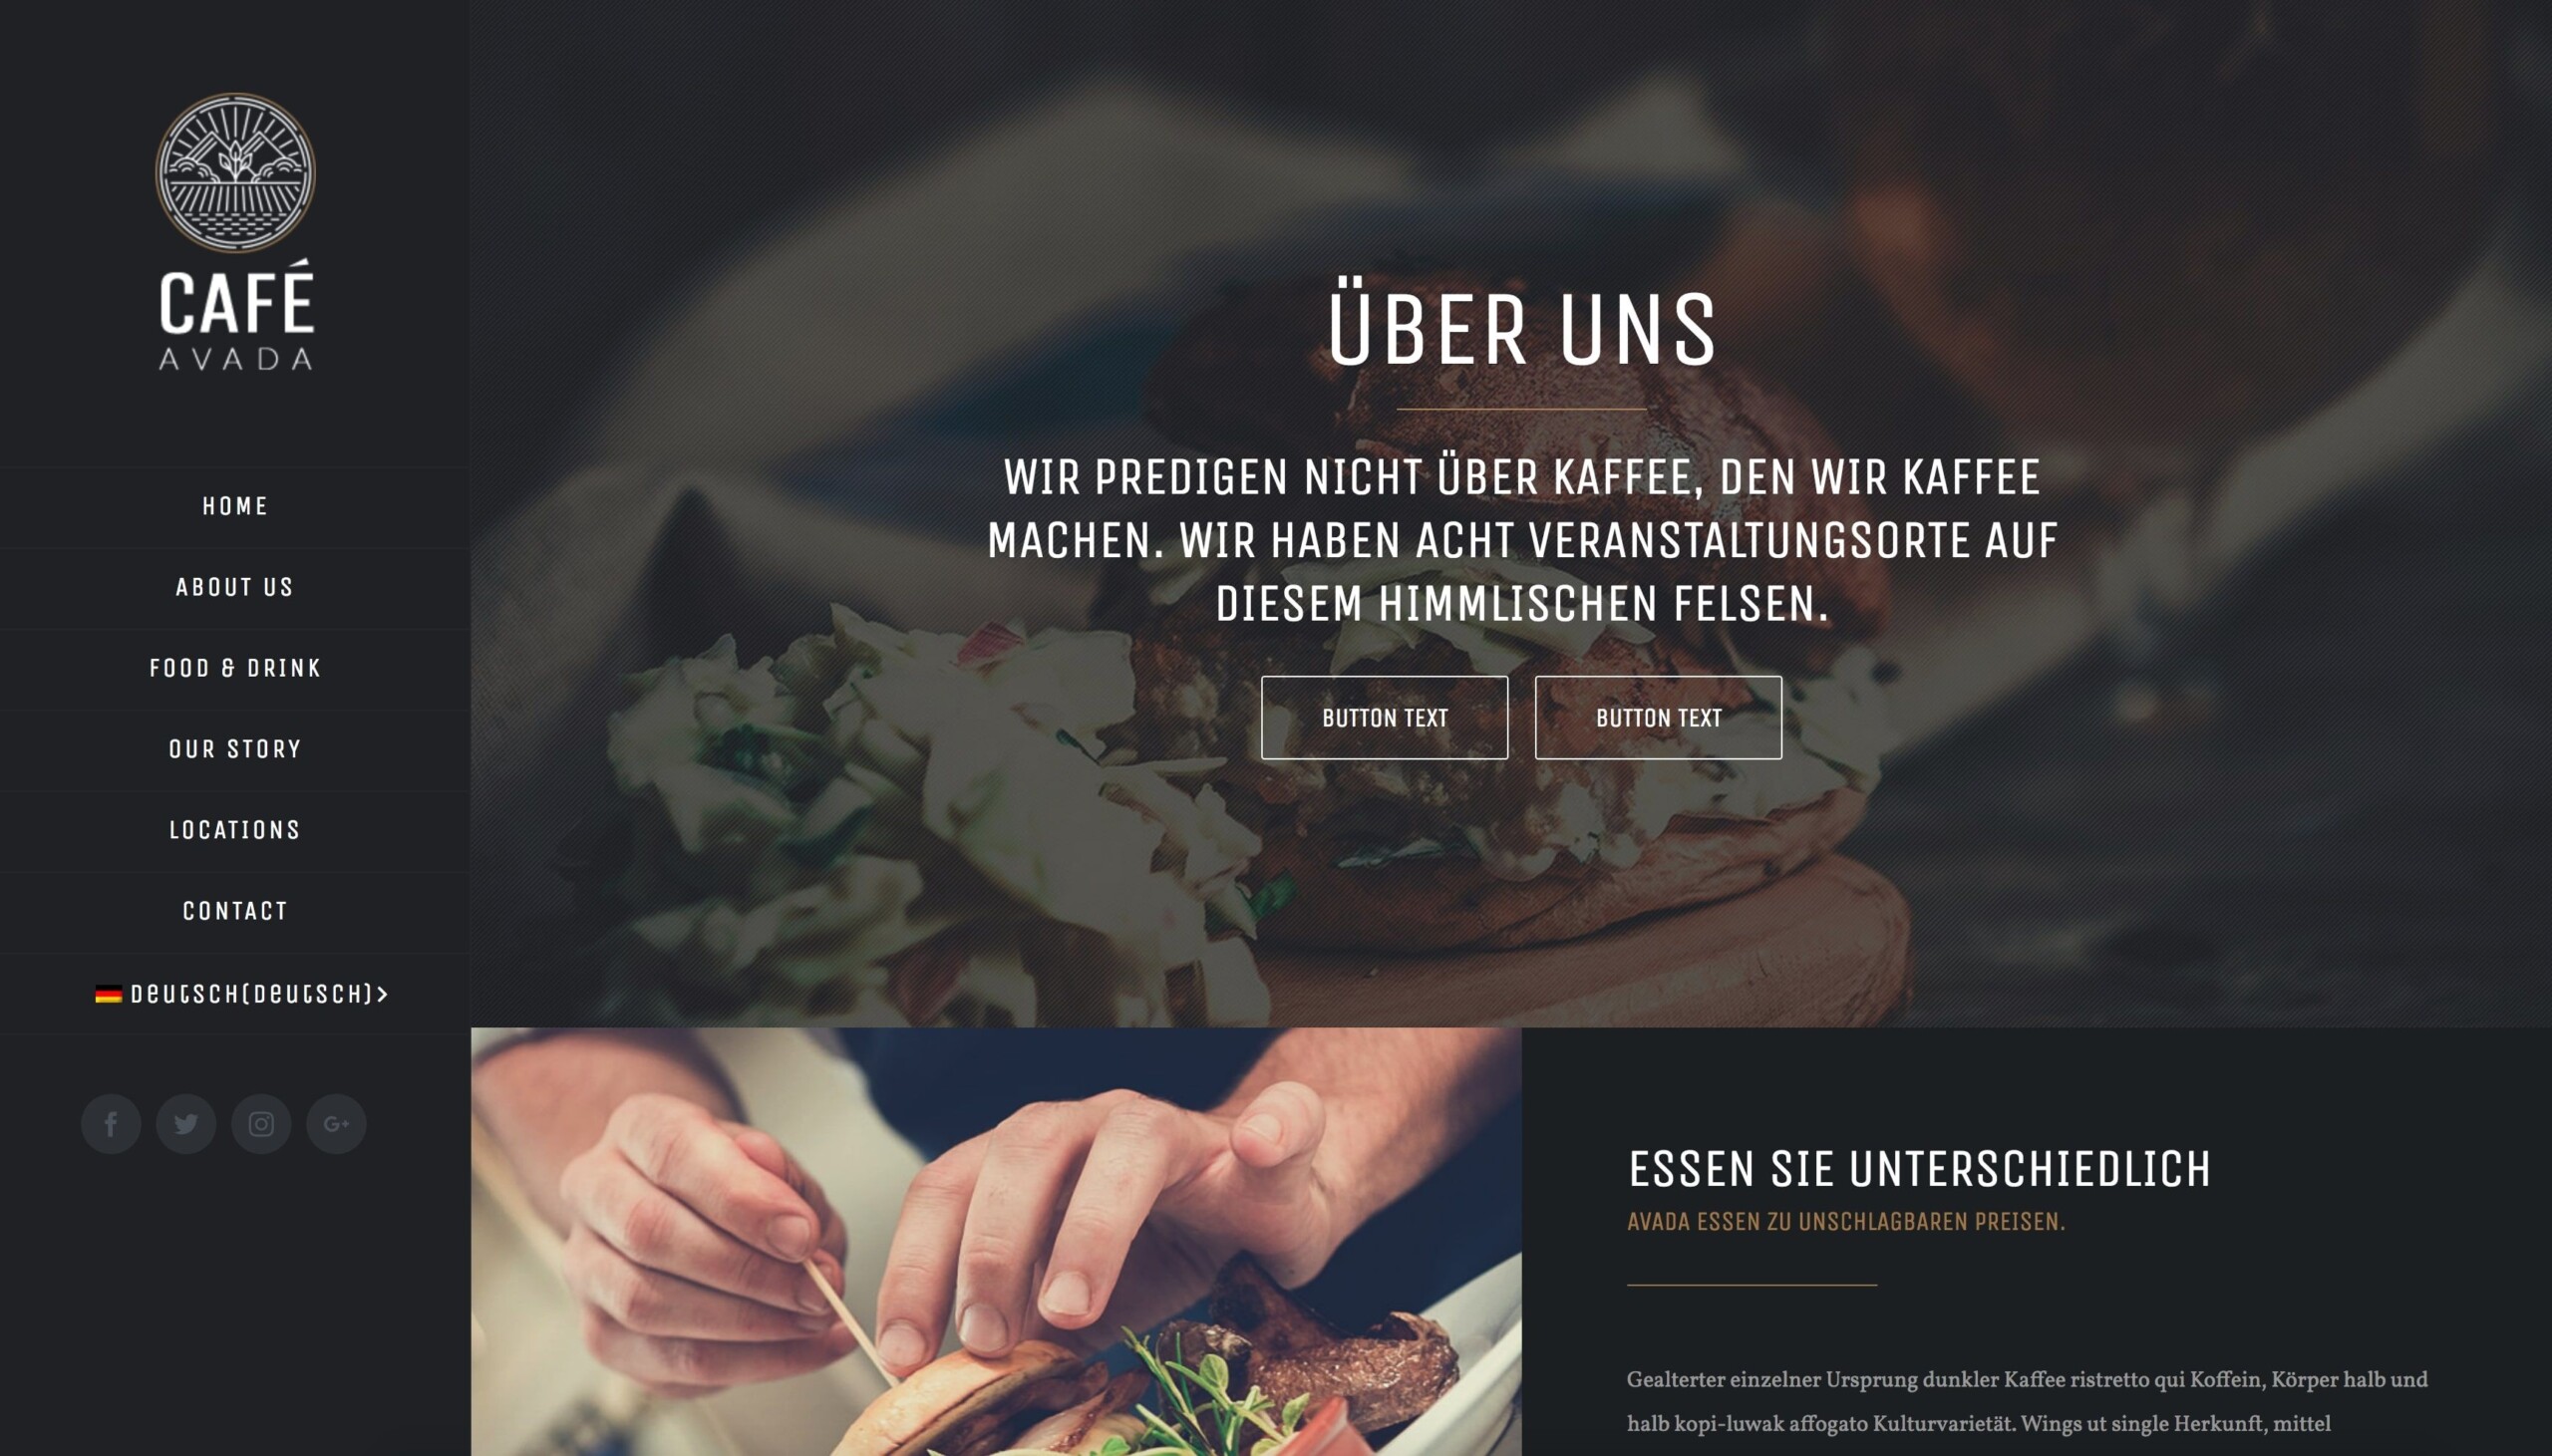
That’s a good start in terms of the main content, but what about the menus? As you begin to fill out your content, you’ll notice that WPML makes these available as potential menu alternatives under WPML > WP Menus Sync.
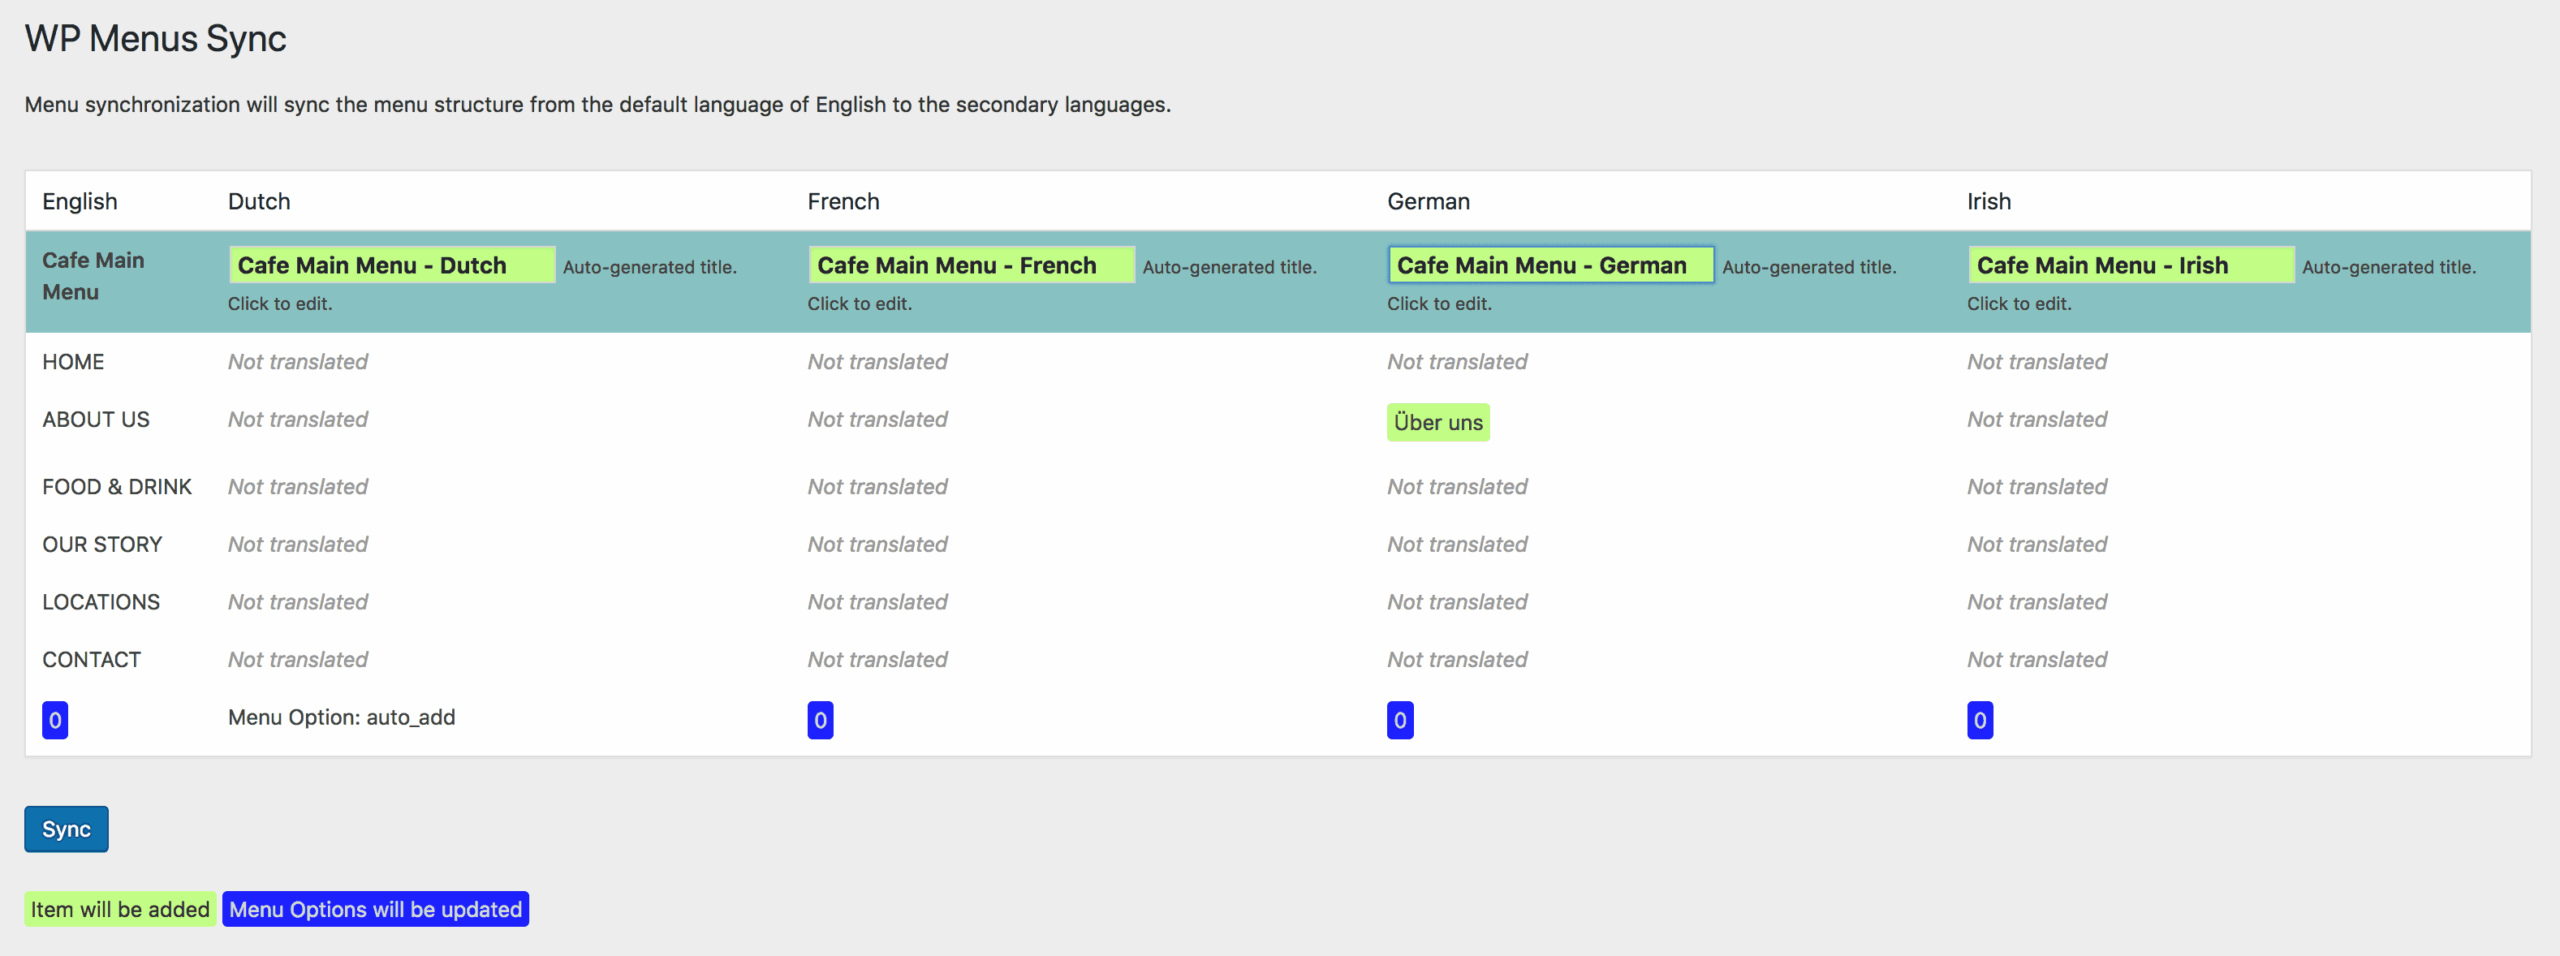
Here we’ve added an extra couple of German pages to work with. Hitting Sync lets us choose which ones should be translated.
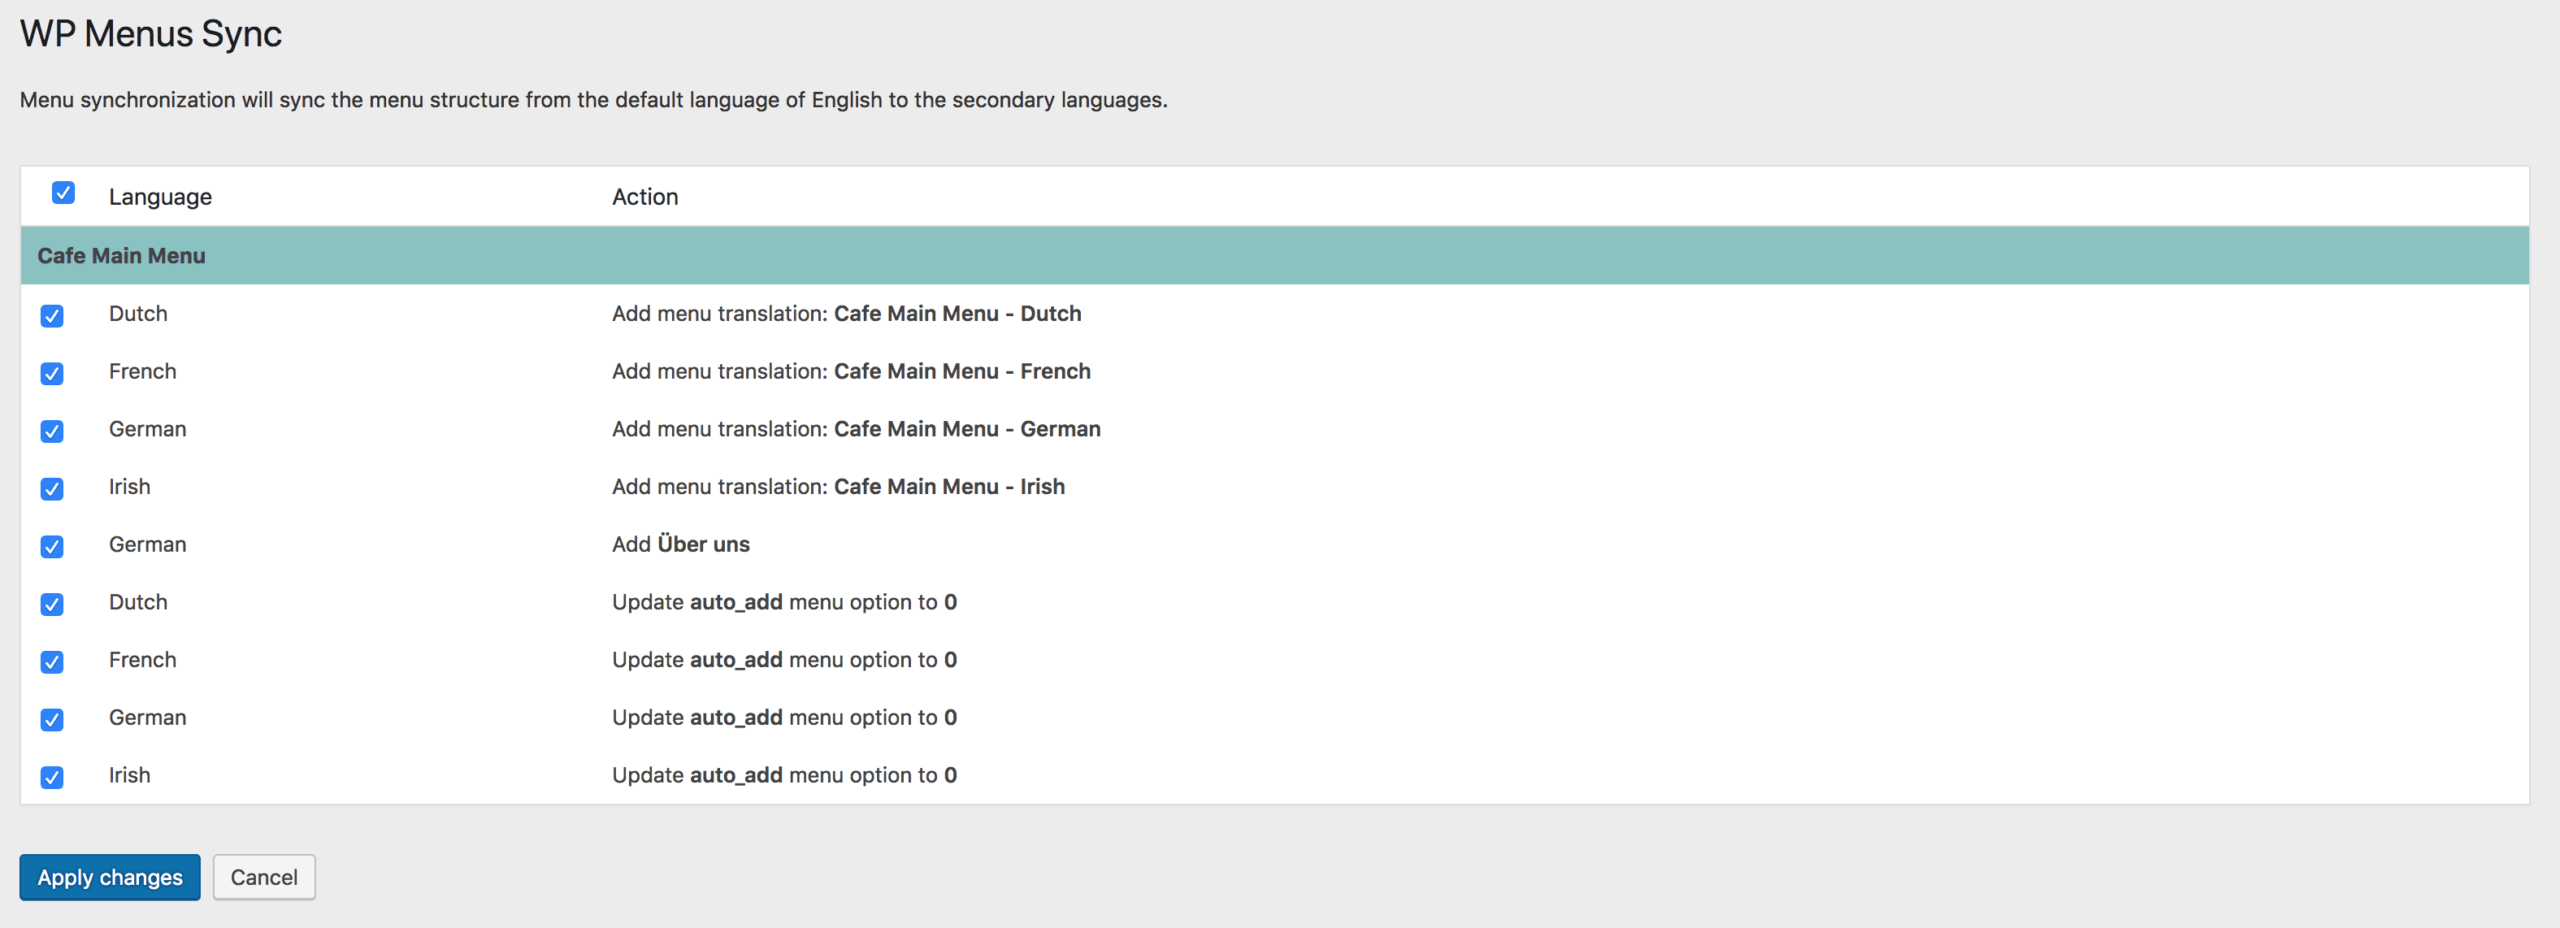
So, by now we have the target language set up and have the ability to control core content and menus in both languages. We’re very much up and running in terms of creating a multilingual site!
Using Advanced Features
As mentioned towards the top, WPML is a modular solution. Once you’ve got the basics of your translated material in place, you can pick and choose from a series of additional plugins to take things to the next level.
Alternatives to WPML
WPML isn’t the only solution on the market. If you’re looking for other multilingual options, consider the following:
Finding a Translator
Finding a reliable long-term translation solution can be a tricky business, particularly if you don’t speak the languages in question.
It’s also an area where you very much get what you pay for, so avoid cheap translations. Prices will naturally vary substantially online, but it’s worth reviewing standard indicative rates to get a feel for what you should expect to pay.
In-house resources, if available, are often the best solution. If you have someone on your team who is a native speaker of your target language and knows your product or service offering, it stands to reason that they may make an excellent translator for your site.
Using the Professional Translation Option, WPML gives you direct access to two translation agencies from within the tool:
There are also many other agencies out there, both on and offline. Make sure you’re following sensible guidelines when it comes to choosing your provider.
Finally, there are also a huge amount of freelance translators available on websites such as Upwork, Proz and Fiverr. You’ll need to vet candidates carefully here.
Conclusion
WPML is by far the leading multilingual plugin solution for WordPress and the best option for integrating with Avada.
Its ongoing success and large, active development team mean you can be confident in investing in its use.
Hopefully this article has given you some solid pointers for getting set up with WPML. Let’s briefly review the steps we looked at:
