Share
If you want to streamline your workflow and take control of your day-to-day WordPress development, this article is for you. We will cover one of the most straightforward steps you can take to organize your workflow: setting up a local WordPress installation on your Mac using an application called XAMPP. Before we get into detail, let’s quickly recap the main reasons why you should consider a localhost WordPress installation.
Overview
10 Benefits of a Local WordPress Installation
A local WordPress installation offers a safe and controlled environment for development, allowing developers and designers to experiment with themes, plugins, and custom code without risking the stability of a production (live) site. It provides faster development speeds due to reduced dependency on internet connections and ensures offline access, which is beneficial in areas with unreliable internet. Complete control over the server environment allows for better replication of production conditions, aiding in accurate testing and debugging.

Additionally, it is cost-effective as it eliminates the need for a hosting plan during the development phase. Local installations also enhance data security, facilitate easy backups and restoration, and provide a risk-free playground for experimentation. This setup is handy for client demonstrations, ensuring the website design and functionality are perfected before live deployment. Overall, a local WordPress installation is crucial for efficient, secure, and flexible WordPress development. Here are some key benefits:
1. Safe Environment for Development
Local installations allow you to develop and test themes, plugins, and custom code without risking the stability or security of a live site. This is especially important when experimenting with new features or making significant changes.
2. Faster Development
Working locally generally offers faster loading times since you’re not dependent on an internet connection or server response times. This speed can significantly boost productivity, allowing for quicker iterations and testing.
3. Offline Access
You can work on your WordPress site without an internet connection. This is particularly useful for developers who might be in areas with unreliable internet access or who prefer to work while traveling.
4. Full Control Over the Environment
With a local installation, you can customize the server environment to match the production environment closely. This includes PHP versions, server configurations, and database settings, ensuring that what works locally will work on the live site.
6. Testing And Debugging
Developers can use debugging tools and error logs without any constraints. This makes it easier to identify and fix issues. Moreover, since there are no visitors, there’s no pressure to resolve problems quickly as there would be on a live site.
7. Data Security
Your local development environment is not accessible via the internet, reducing the risk of cyberattacks or data breaches during the development phase.
8. Ease of Backup and Restoration
Creating backups and restoring your site is straightforward on a local environment. You can quickly duplicate or move your site without dealing with server transfer protocols.
9. Experimentation
A local environment provides a playground for experimenting with different themes, plugins, and configurations. This can help you learn and understand WordPress better without the fear of breaking a live site.
10. Client Demonstrations
You can create and demonstrate websites to clients on your local machine, ensuring that the design and functionality are perfect before deploying to a live server.
Introducing XAMPP For MacOS And Windows
XAMPP is an open-source, cross-platform web server solution stack that simplifies setting up a local server environment. It includes Apache, MariaDB (formerly MySQL), PHP, and Perl. Designed to be easy to install and use, XAMPP allows developers to quickly create and test web applications locally on their computers.
Its user-friendly interface and comprehensive package make it a popular choice for novice and experienced developers needing a reliable development environment for web projects. As for WordPress, all that is needed to run is:
Download and Install XAMPP
You can download the XAMPP package here. Once the package has been downloaded, follow the install prompts. If at any stage you need some assistance with the installation, please consult their detailed documentation and various other channels available:
Once it’s downloaded, double-click on on the executable to launch the setup wizard and begin the installation.
Launch The XAMPP Control Panel
Select the option to start the Control Panel automatically in the final step. You can also start the Control Panel at any time in the future from the Start Menu or by clicking on the Manager-OSX icon in the application dock.

Start The Apache, MySQL, And FTP Servers
As shown below, click on the “Manage Servers” tab. On that screen, you can click “Start” next to Apache, MySQL, and ProFTPD (FTP) to start each of the servers.

Within the “Manage Servers” tab, you can click on “Configure” to manage various configuration options for the MySQL database and Apache web server. For example:
Check The Localhost Homepage in a Browser
Visit http://localhost in a browser of your choice and you should see the default XAMPP homepage being served by Apache from your local /htdocs directory.

Setting Up A New Virtual Host in XAMPP
Apache allows multiple websites or web applications to run on the same physical server, each accessible via a custom domain name through a process known as virtual hosting. This feature is useful for development, enabling developers to isolate and access different applications using unique domain names.
For instance, the domains http://website1.localhost and http://website2.localhost could correspond to two separate applications on the same server. Similarly, separate domains like http://client1/ and http://client2/ can be created for multiple client websites hosted on the same server.
On a Mac, the traditional way to edit and add new hosts would be to edit the httpd-vhosts.conf file.
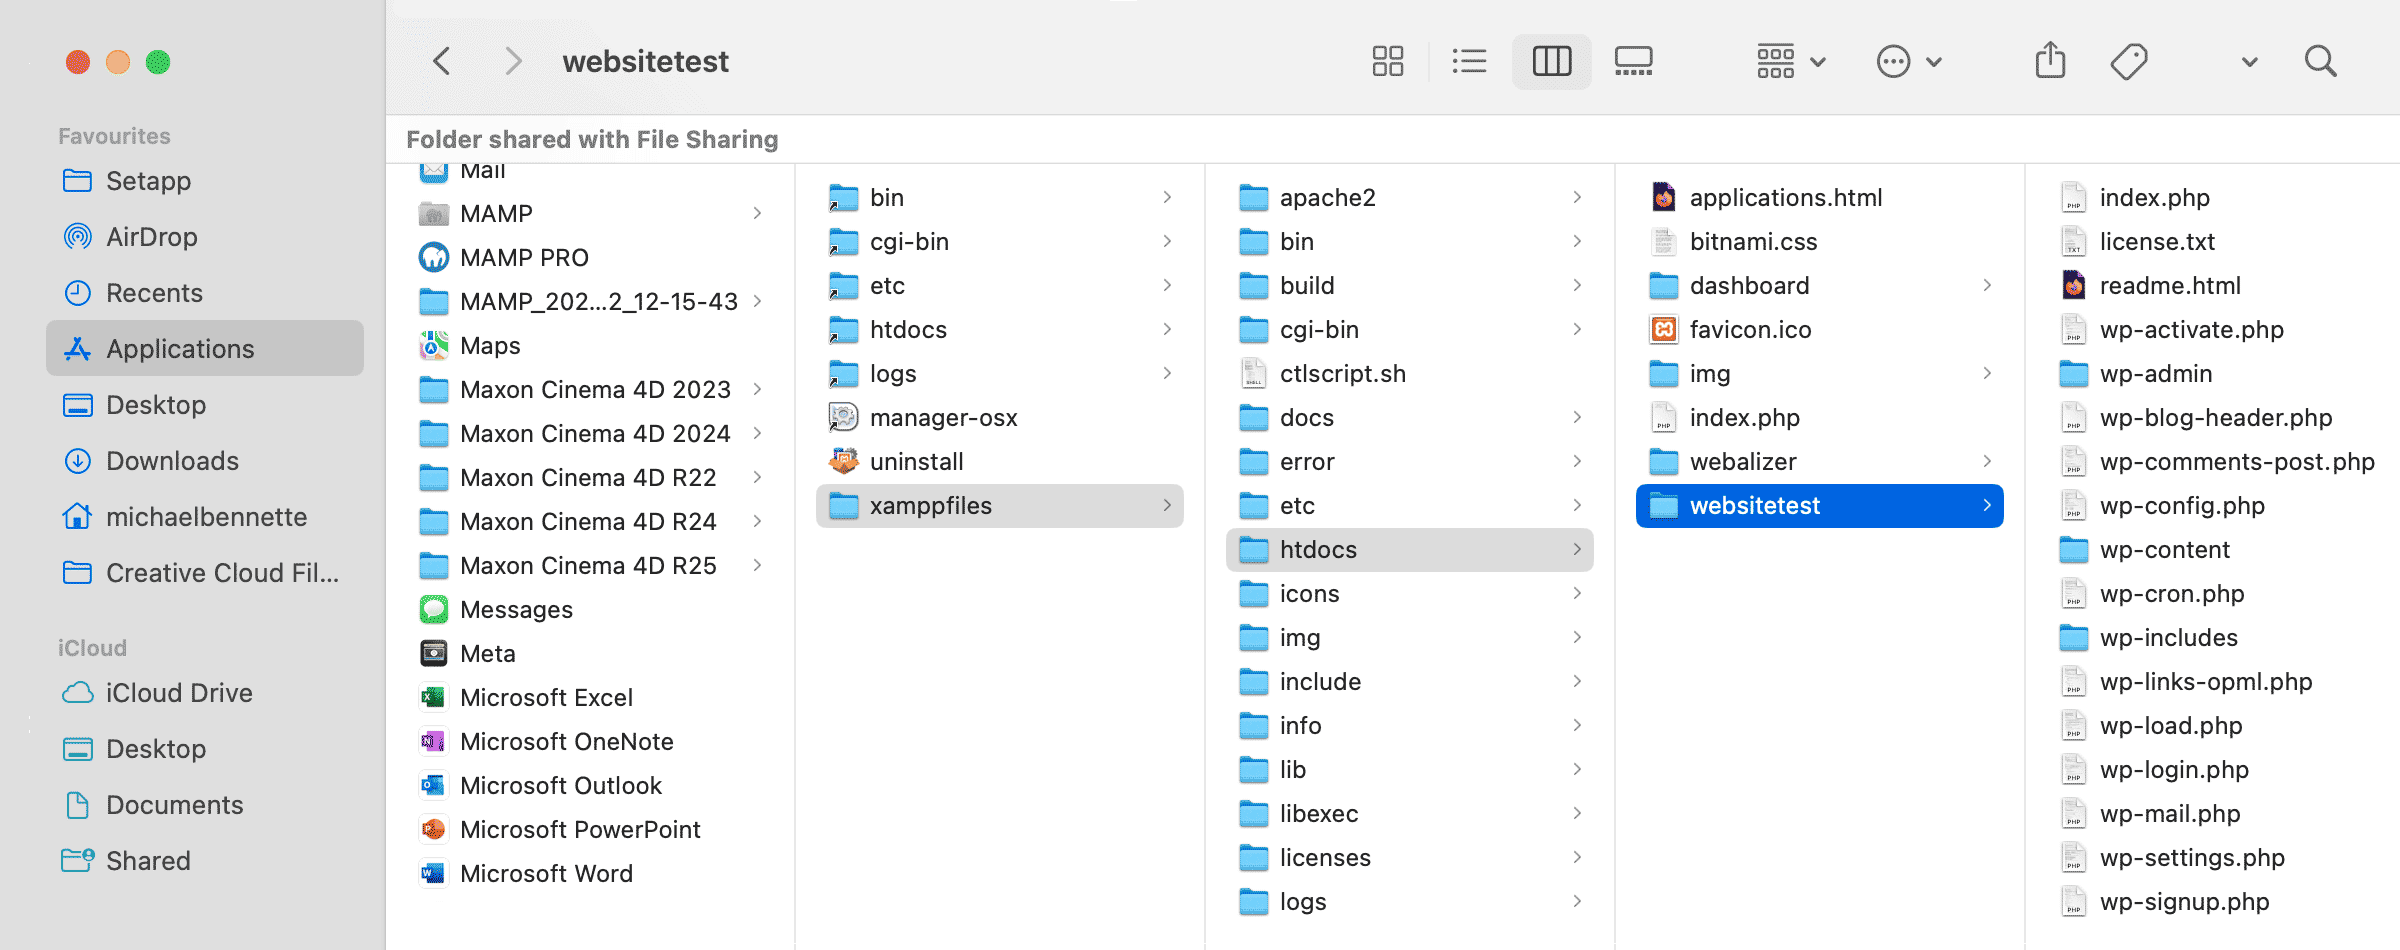
Using XAMPP, it is as straightforward as navigating to (see the screenshot above for the file path) > /Applications/XAMP/xampfiles/htdocs/ and creating the website folder (in this case /websitetest/).
Setting up The Database in XAMPP
A WordPress website consists of two main parts: the back end and the database. The database stores nearly all the information about your site, making it a crucial component. To create a database, open your browser and navigate to http://localhost/dashboard/.
On that page, click on the phpMyAdmin link in the top menu bar. Or, in the browser, navigate to http://localhost/phpmyadmin/.
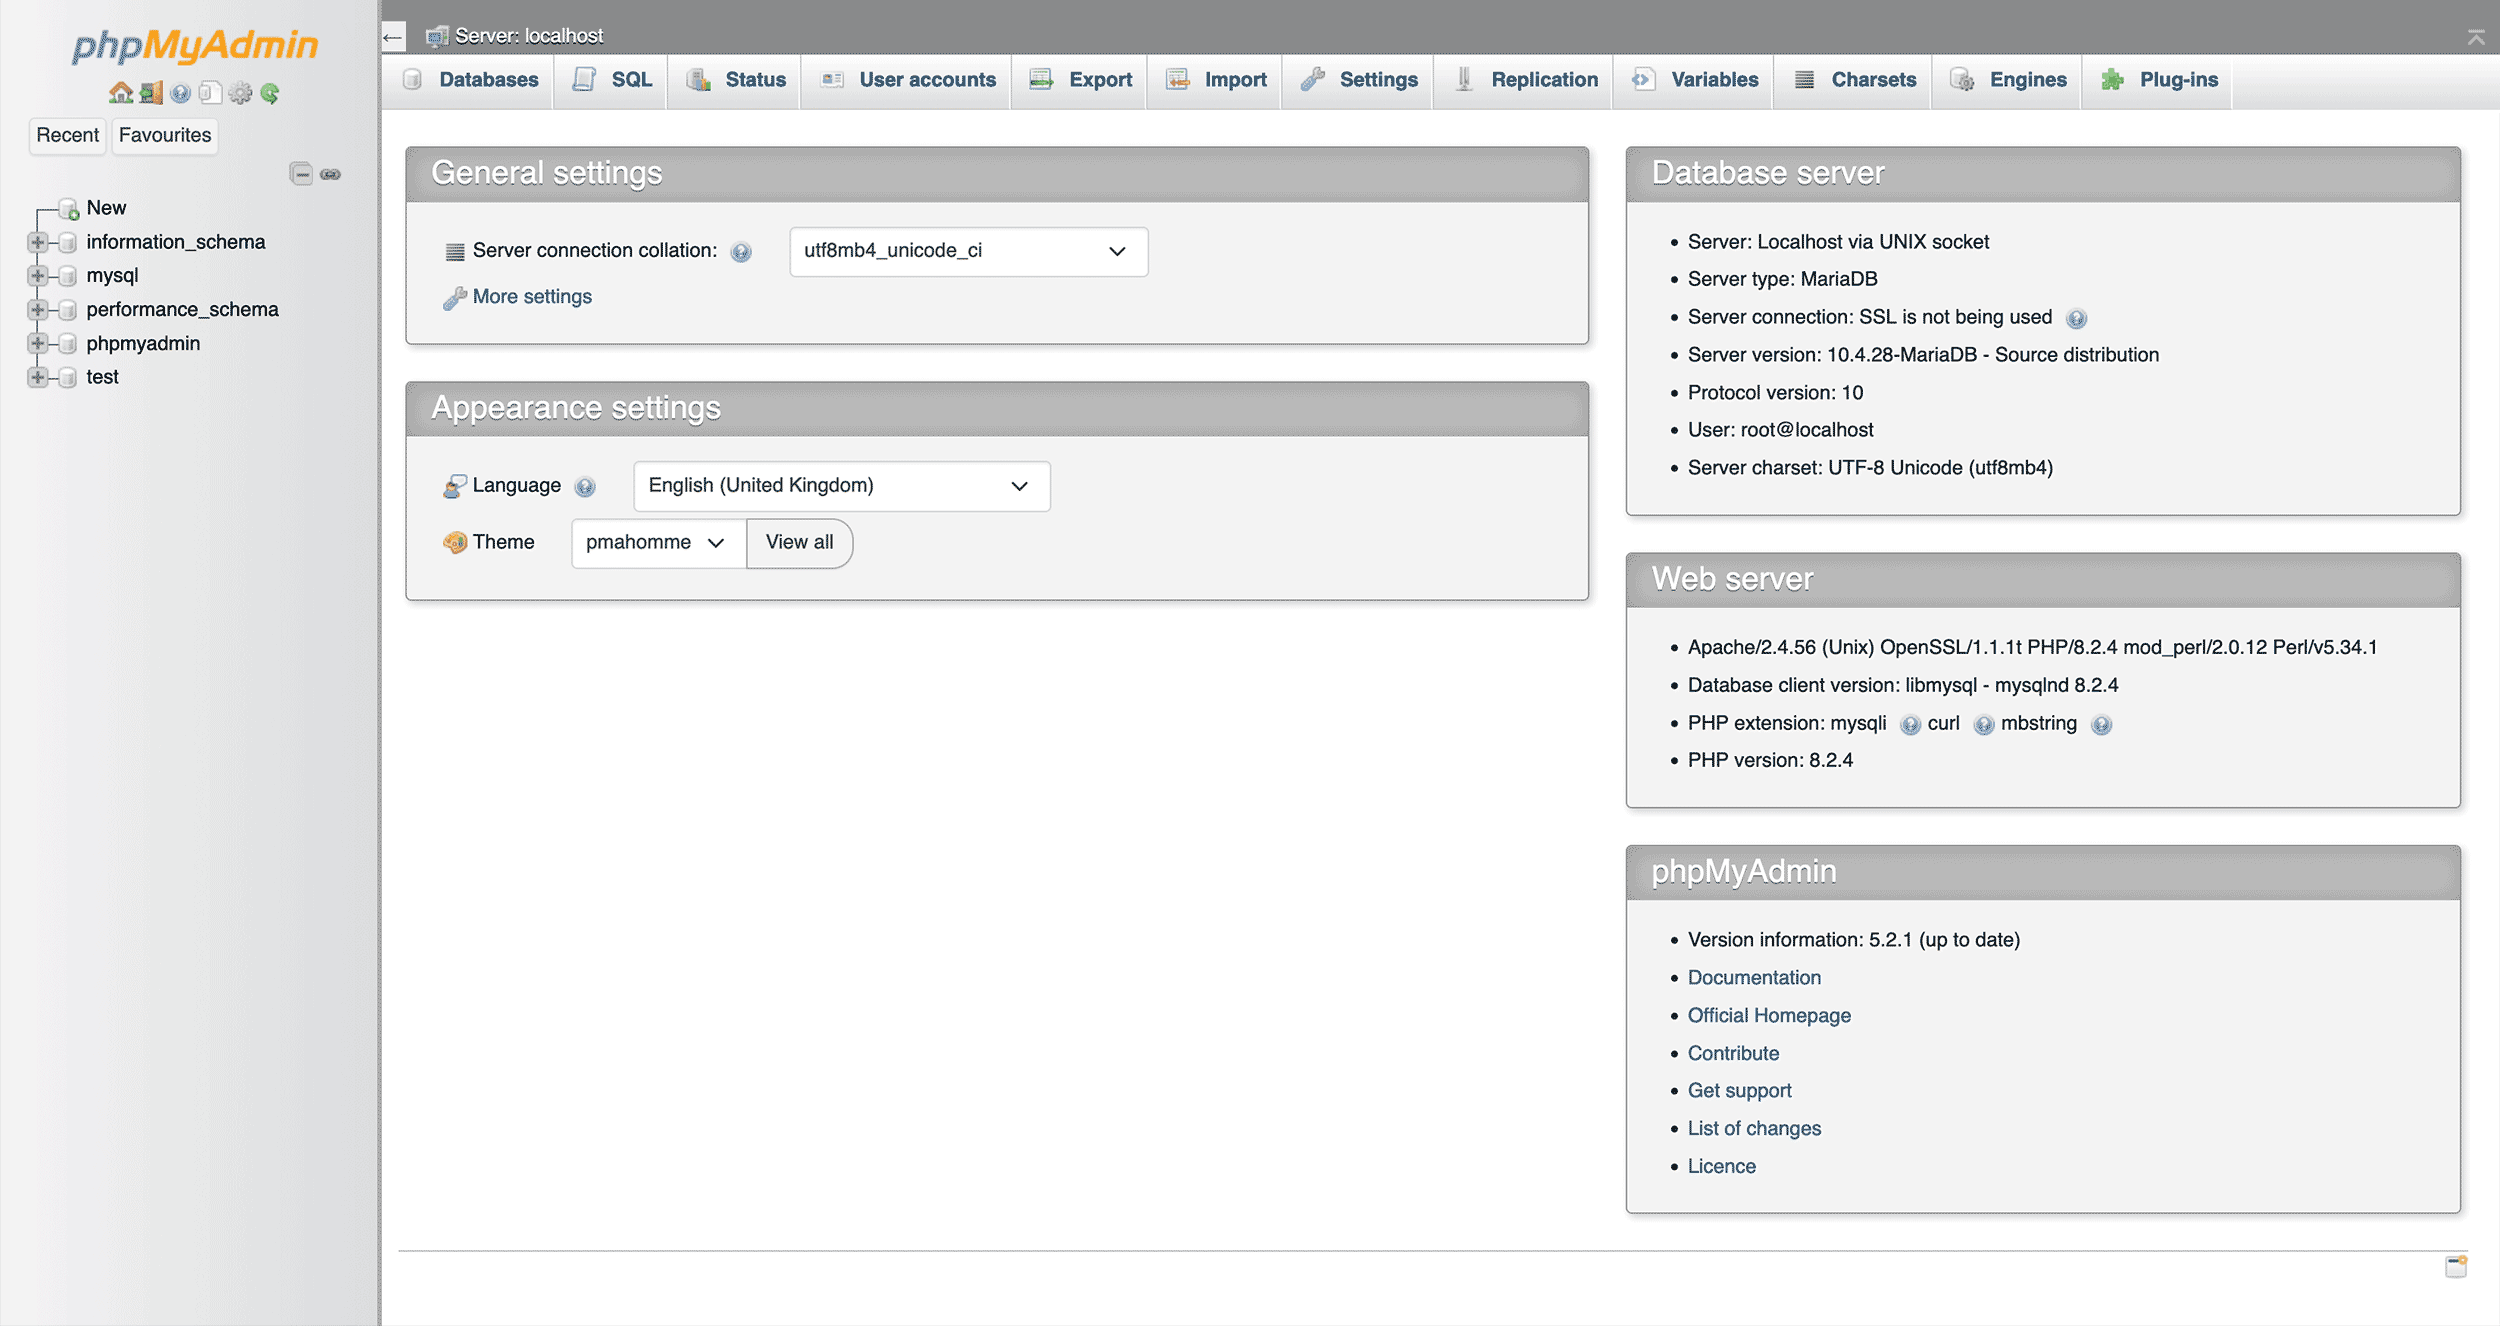
Now, let’s create our first database. Click on the “Databases” tab, enter the name of your database in the “Create database” field, and click Create. Use a UTF-8 collation such as utf8mb4_general_ci to avoid issues with character encoding down the line.
At this point, you do not need to create a database username and password; that will be done when you install WordPress. However, even though this installation is on your local machine (and not a web server online), a secure username and password, etc., is not a bad thing.
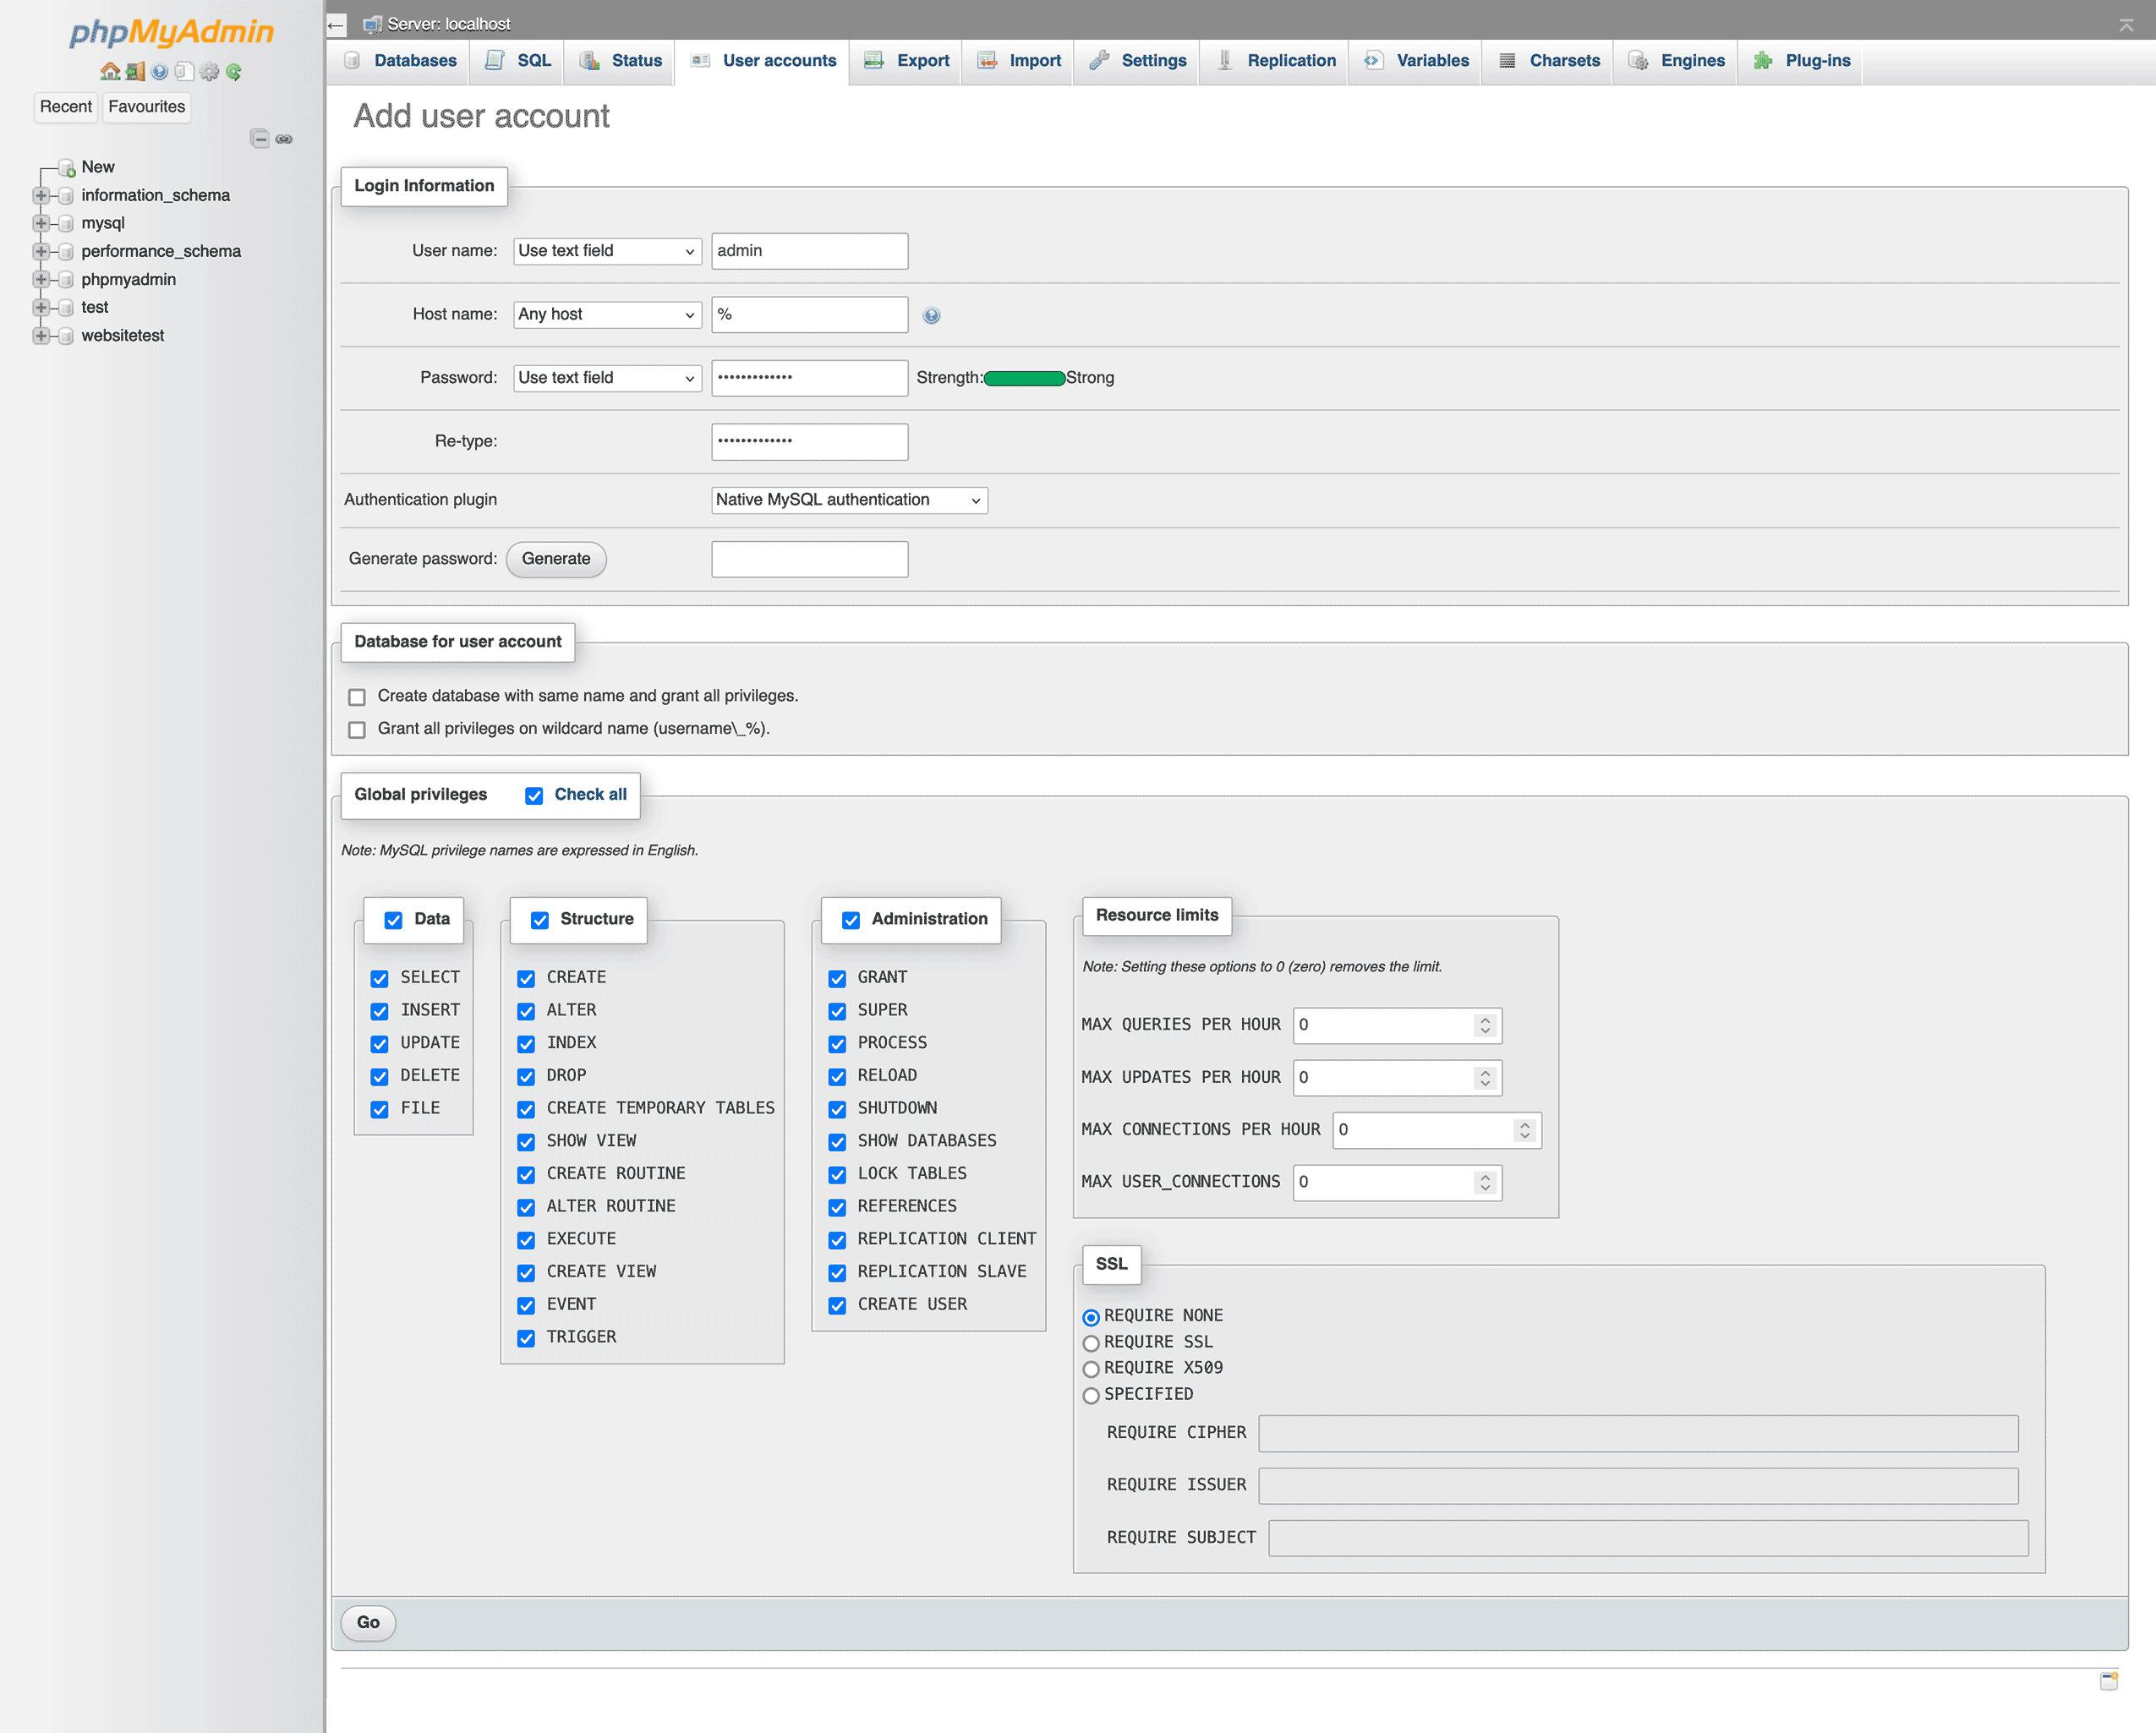
In phpMyAdmin navigate to > “User accounts > Add user account” to create a new database user for the localhost website.
How to Install WordPress in XAMPP
The process of installing WordPress is essentially the same as installing on a live server; the server happens to be located on your Windows machine. There are various ways to install WordPress, but with XAMPP, the best method is a manual installation. Create a folder within XAMPP to store your WordPress site. To do this, navigate to the location where you installed XAMPP. You can easily find this by clicking the “Open Application Folder” link on the Welcome screen.
Begin by downloading the latest version of WordPress and extracting the content of the folder to a folder within (this example is MacOS) XAMP/xamppfiles/htdocs/websitetest/ on your Mac. In this instance, let’s assume you call the website folder > /websitetest/.
pre-install guide and for general installation instructions please check this guide.
Ensure XAMPP is running Apache and MySQL, and then navigate via browser to the WordPress install script in the folder you created earlier. For the example in this guide, the URL will be > http://localhost/websitetest/
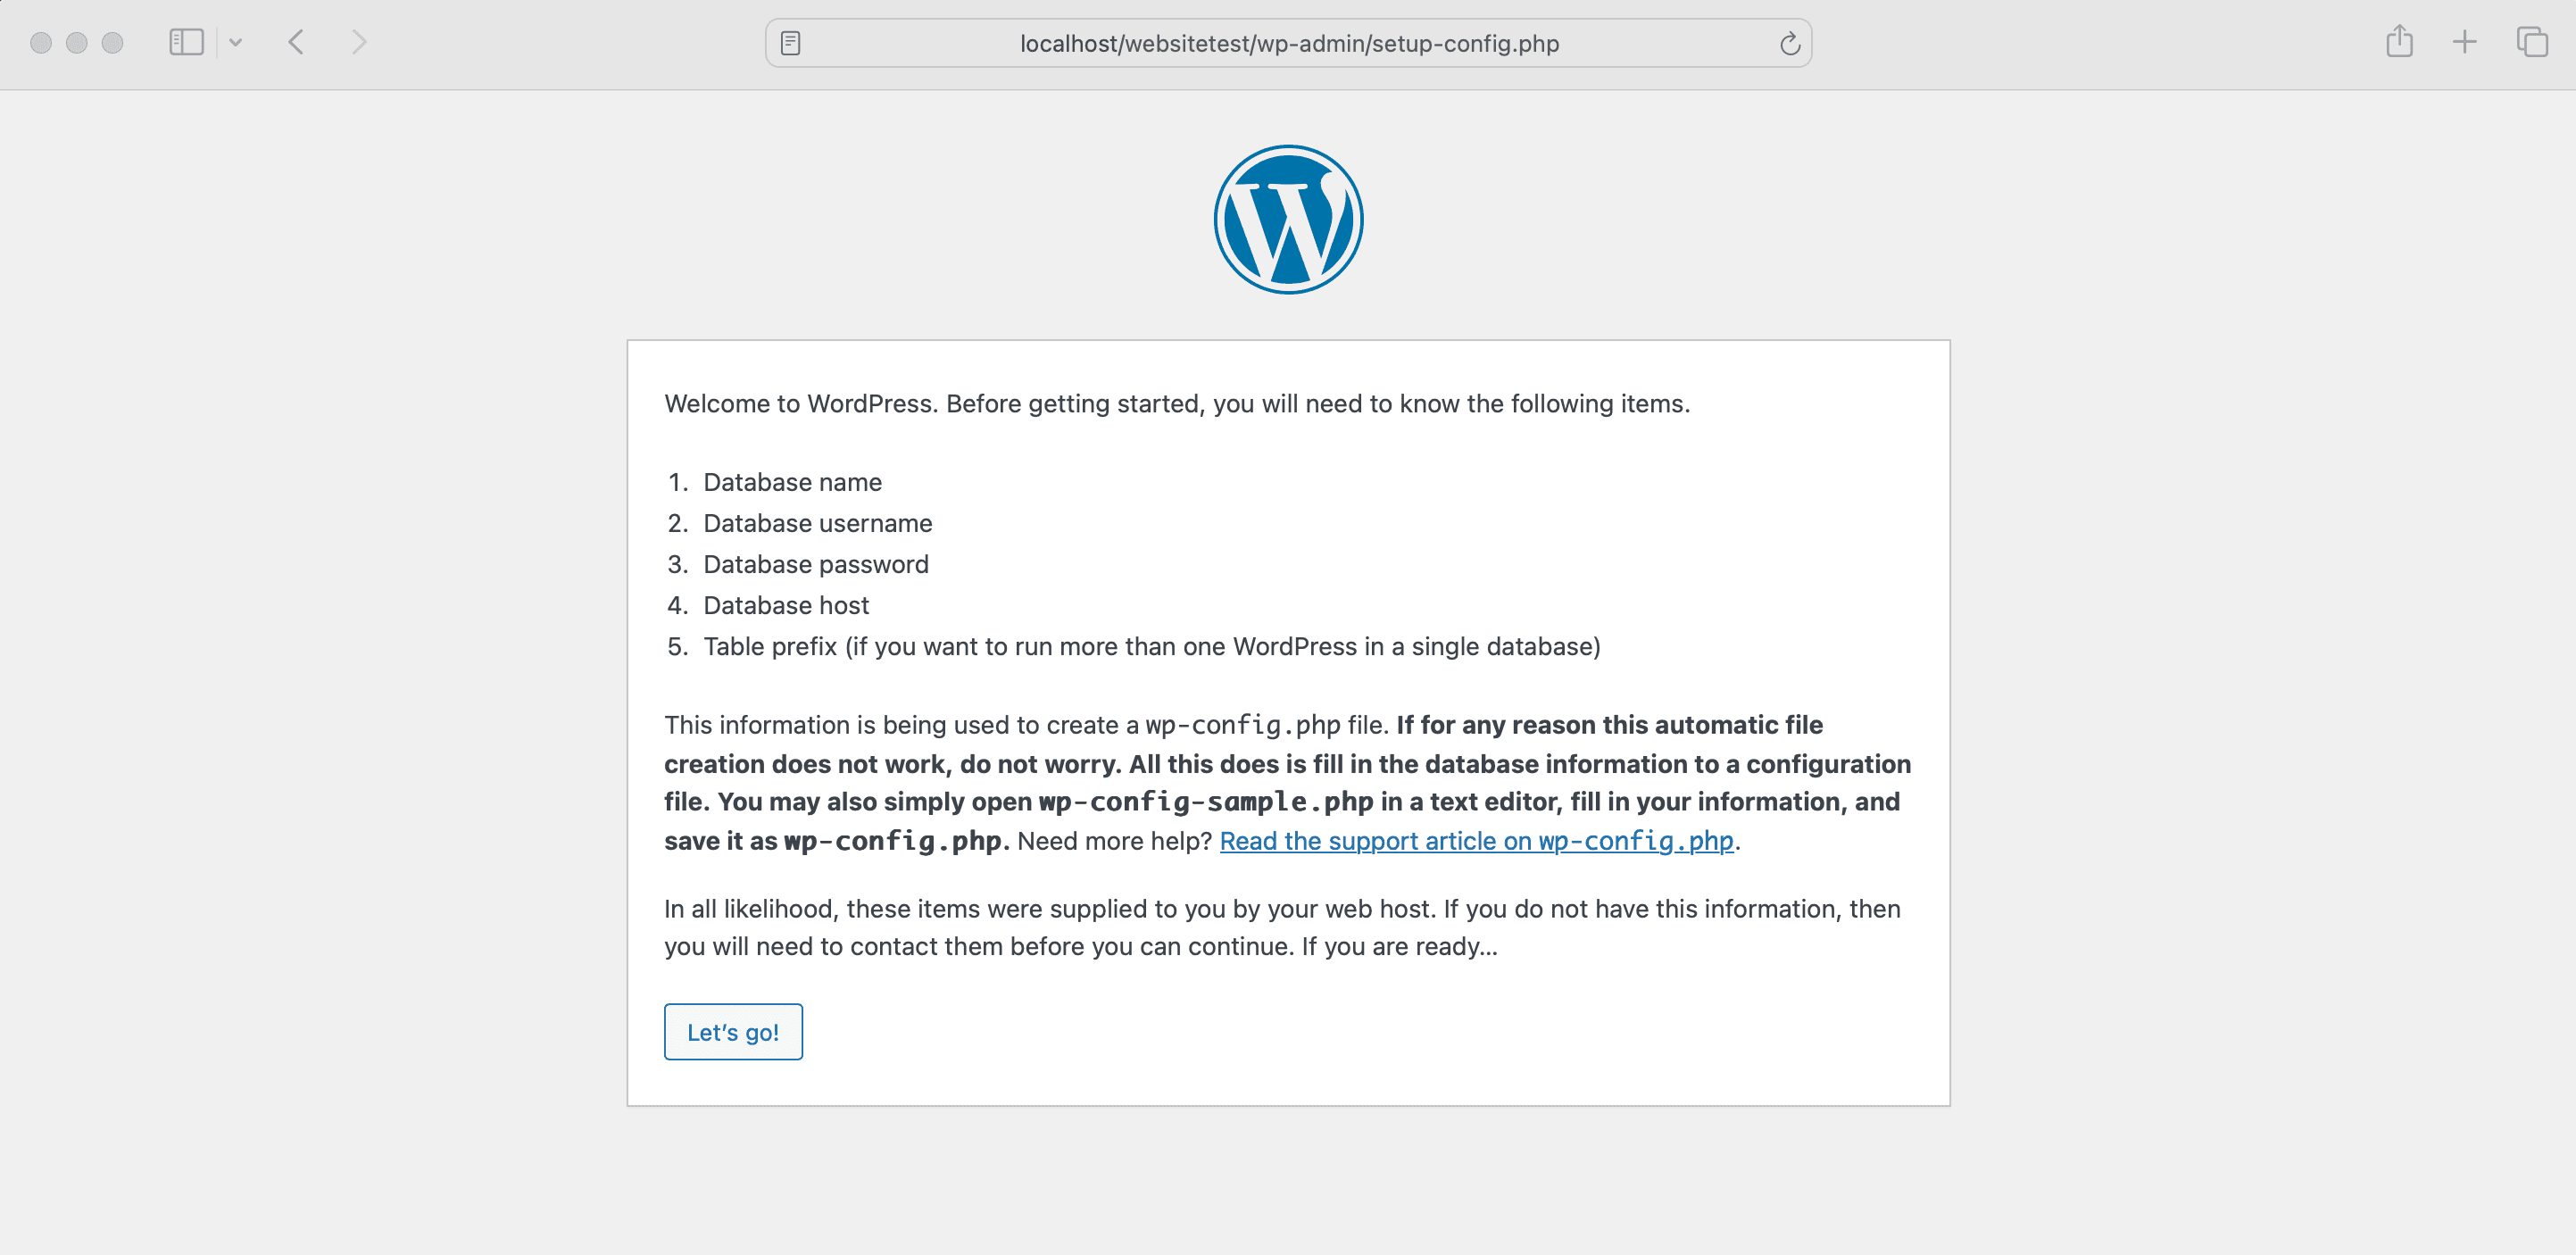
Reaching that page will launch the WordPress 5-Minute Install sequence. The information provided at this stage will be used to create a working wp-config.php file. If, for some reason, the config file is not created, you can open wp-config-sample.php in a text editor, fill in your information, and rename and save it as wp-config.php. Check this help file about how to edit the config file.
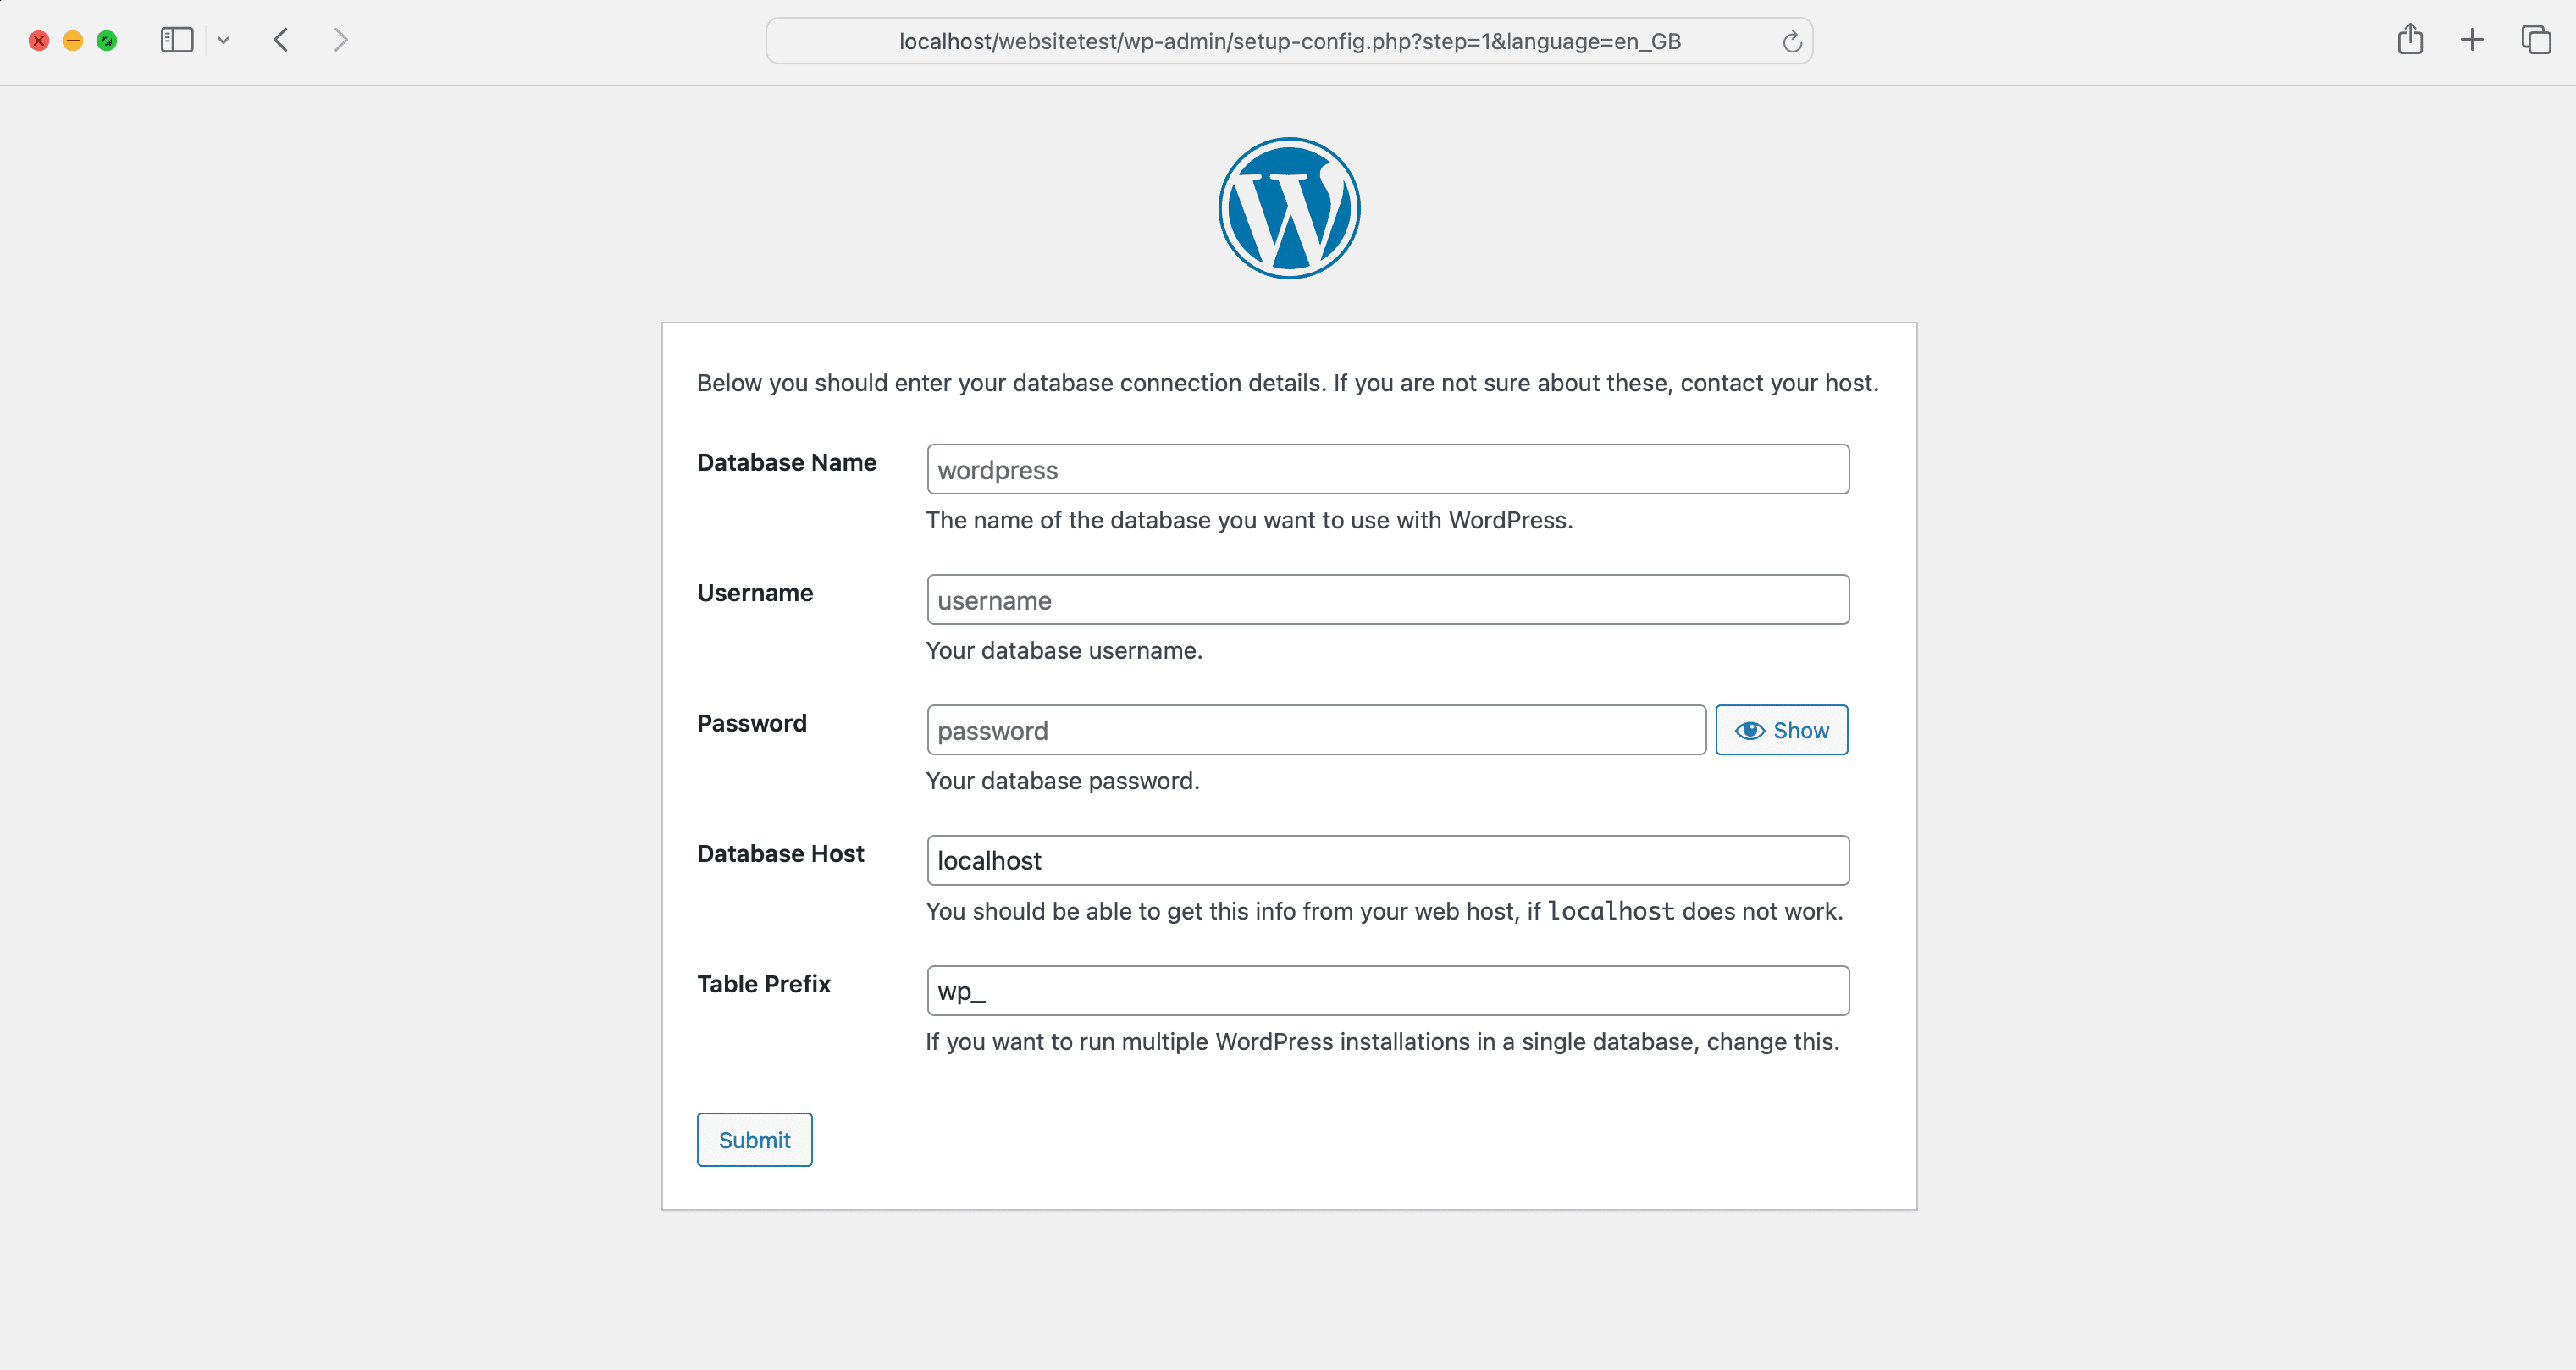
Complete this using the database details you created previously, and you should have a fully functional copy of WordPress running locally for you to use at your leisure. On the next screen, fill in the fields as presented to complete the WordPress install:
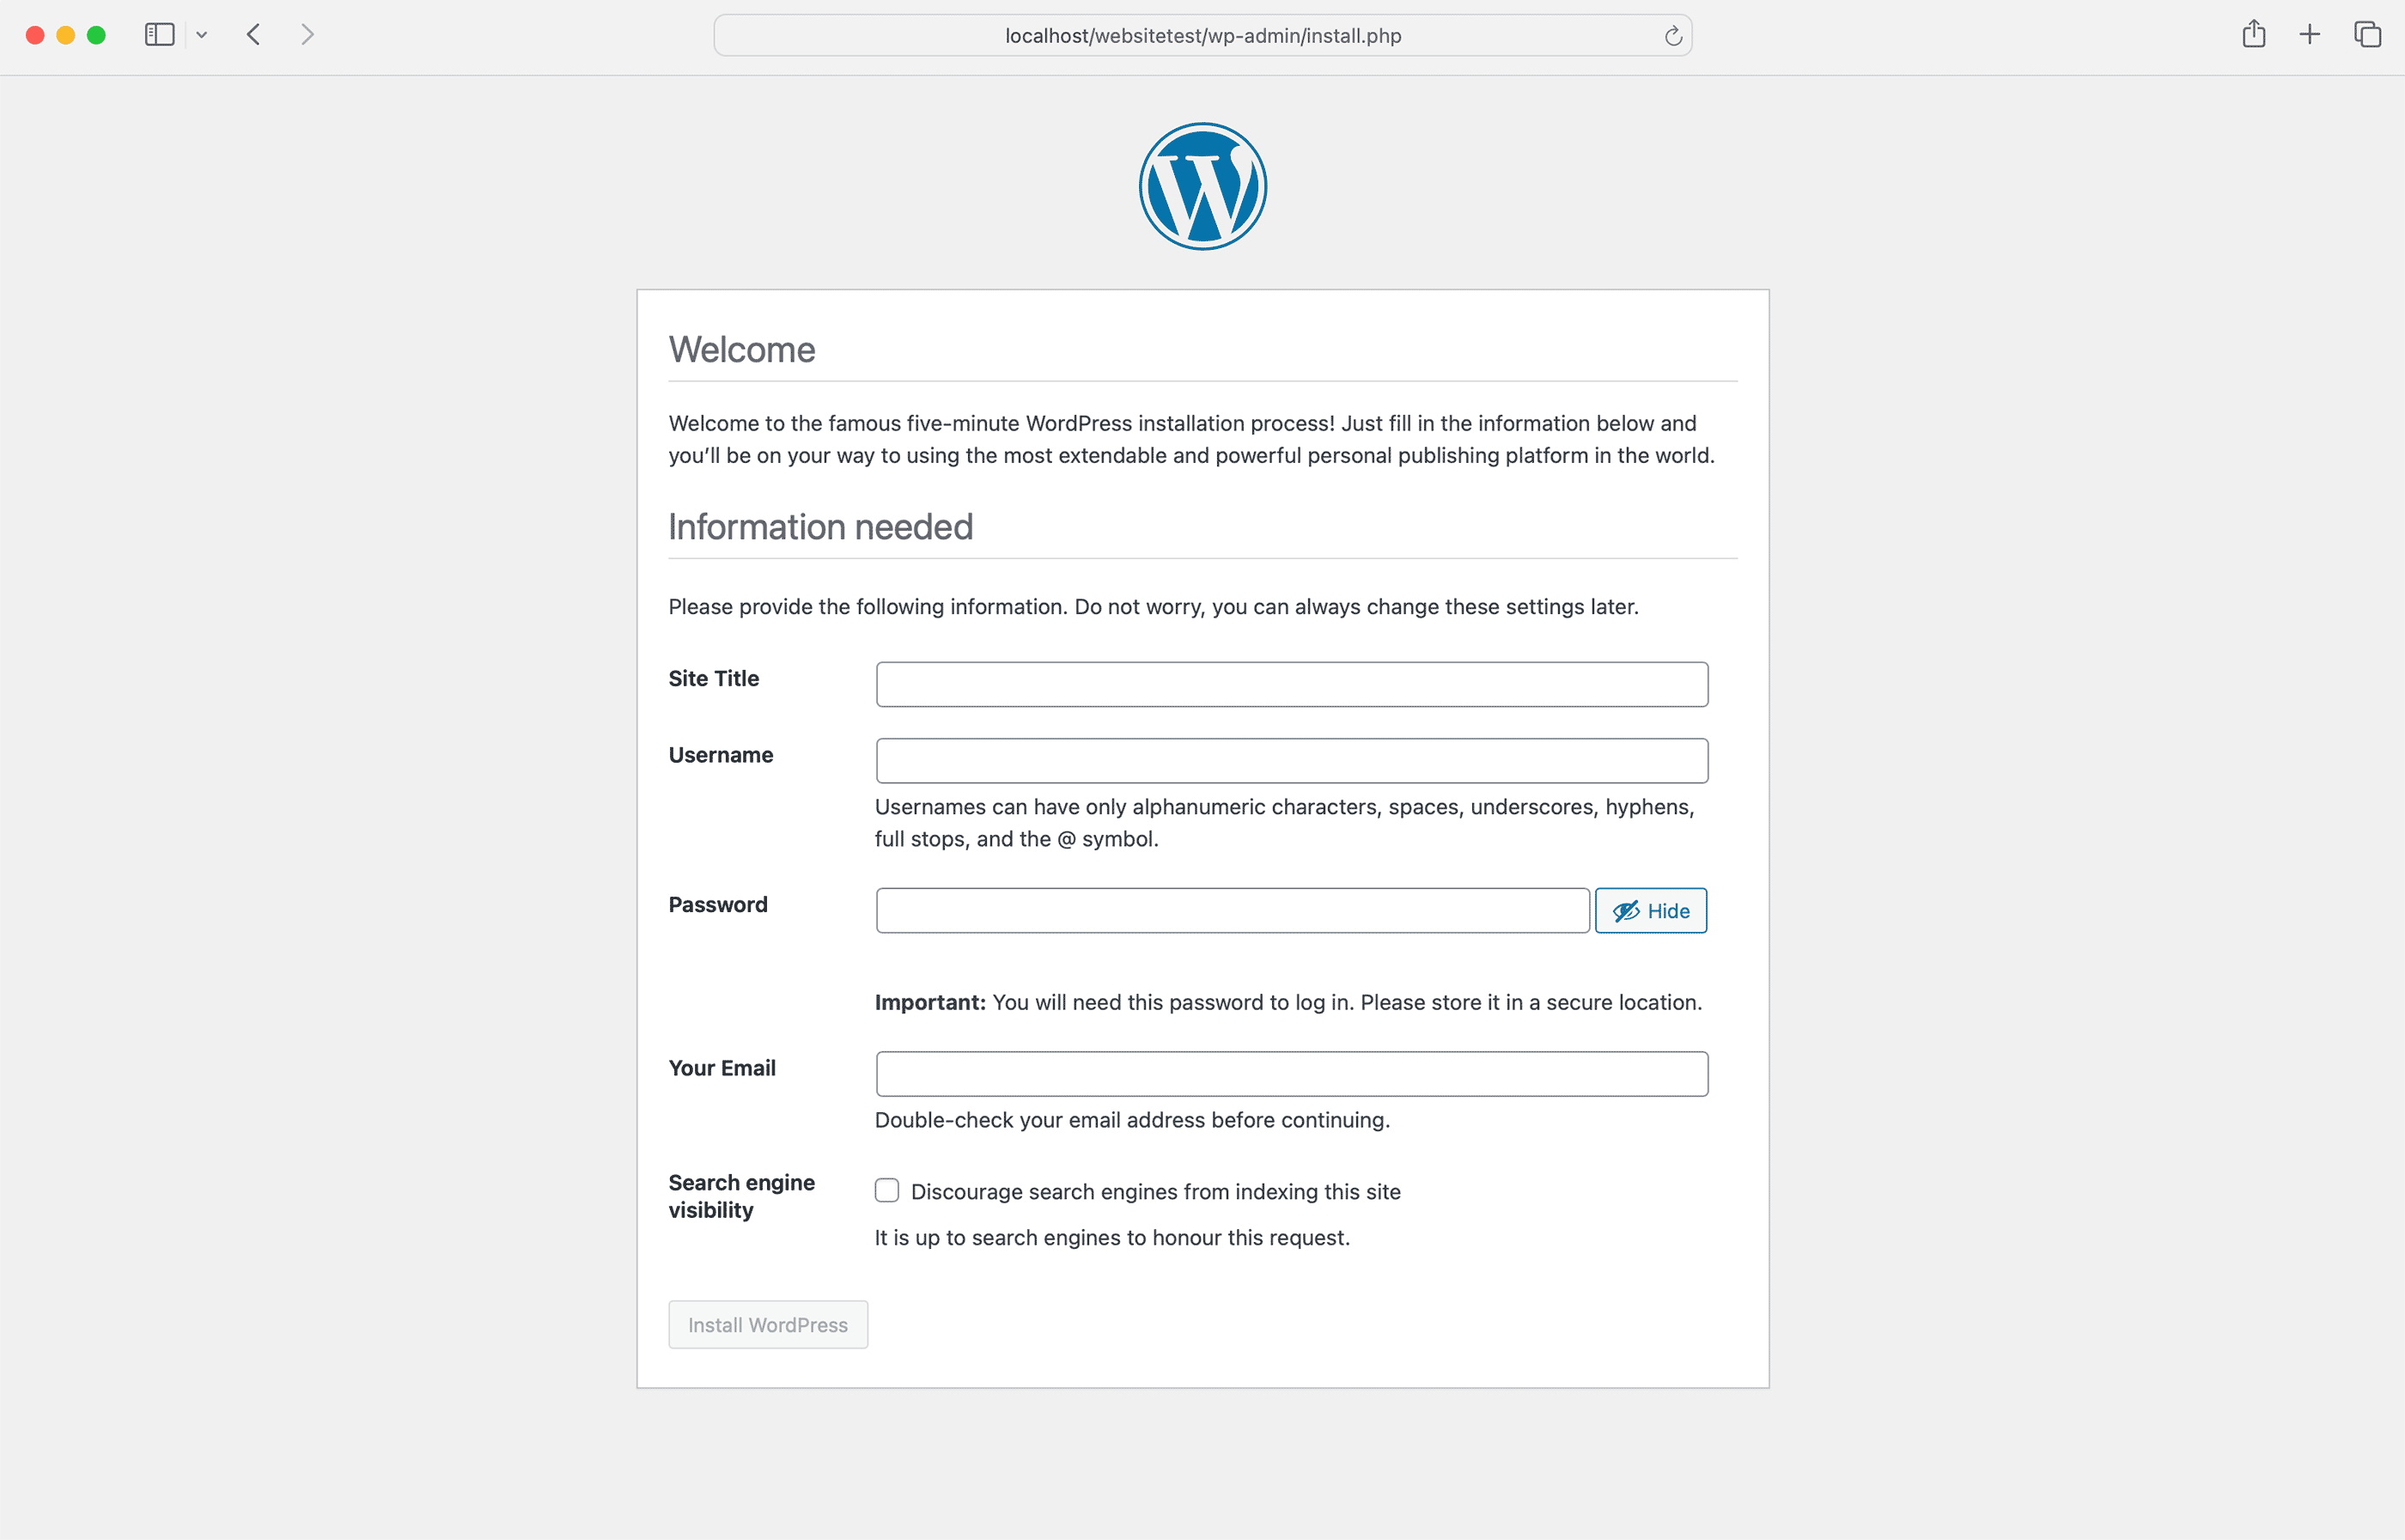
Once you click Install WordPress, you’ll see a success screen. You can click the login link to access your WordPress Dashboard and start building your new localhost website.
Alternatives To XAMPP For Windows & MacOS
Congratulations! You are now covered for basic local development in WordPress. At some stage though, you’re going to be looking to spread your wings a little in terms of the complexity and sophistication of your setup. Here are three more advanced topics to explore when you’re ready to take your local WordPress environment to the next level:
MAMP
MAMP is a local server environment that can create a stable environment for developing web applications on macOS and Windows. It includes Apache, MySQL, and PHP and provides an easy-to-use interface for managing your local web development.
Local By Flywheel
Local by WP Engine (formerly by Flywheel) is a robust local development tool specifically for WordPress sites. It offers a user-friendly interface, quick WordPress installation, SSL support, and local site sharing, making it an ideal choice for WordPress developers. Local by Flywheel can be installed on Windows, Linux, and MacOS.We suggest that you watch the following Avada video guide, “Creating a Local Development Environment With Local.”
Docker
Docker is a platform for developing, shipping, and running container applications. It provides isolated environments for each project, making it highly versatile and scalable. Docker ensures consistent development environments across macOS and Windows. Docker can be installed on Windows, Linux, and MacOS.
Summary
Whether you’re a developer, designer, or site owner, setting up WordPress locally will save you time and sleepless nights. As this article has shown, it’s not that difficult to do. Also, check out this article about how to set up a WordPress installation on your MacOS. Here are the basic steps again to recap: