What is a Masonry layout? Masonry is a grid layout based on columns, but unlike other fixed grid layouts, the images do not have fixed height rows. This layout choice optimizes the use of space any unnecessary gaps between. It is very flexible in that your images do not have to be exactly of the same sizes for them to align edge to edge.
For privacy reasons YouTube needs your permission to be loaded.
IMPORTANT NOTE: Masonry Global Options are located in Avada > Options > Extra > Grid/Masonry. These Masonry global options that apply to the Blog/Portfolio/Gallery Elements and Blog and Portfolio archives. Blog/Portfolio/Gallery Elements also have options that will override the global options.
Setting the Masonry option for your Blog layout
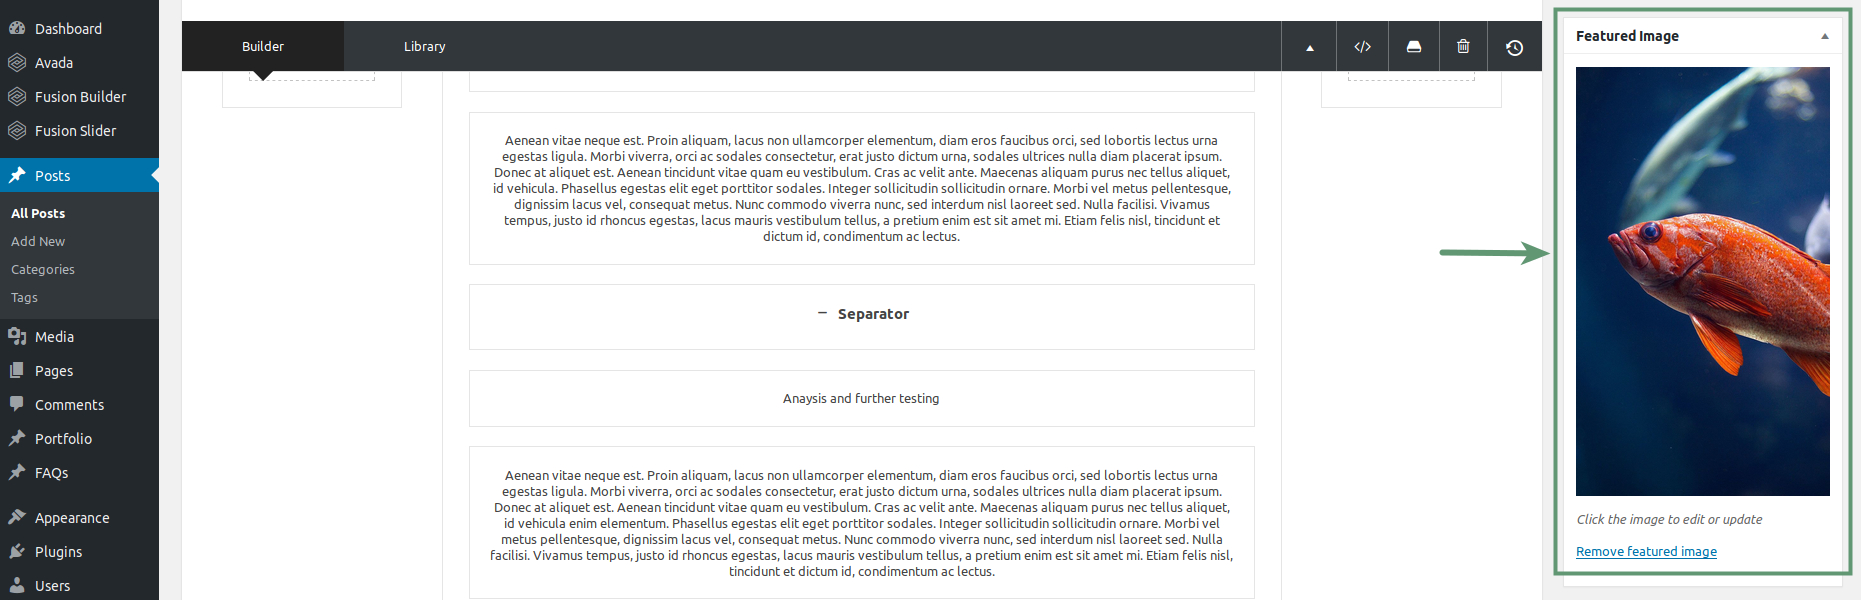
Step 1 – Make sure that you have a featured image assigned to your Blog posts.
Step 2 – Add a ‘Blog’ element to your page/post using the Avada Builder.
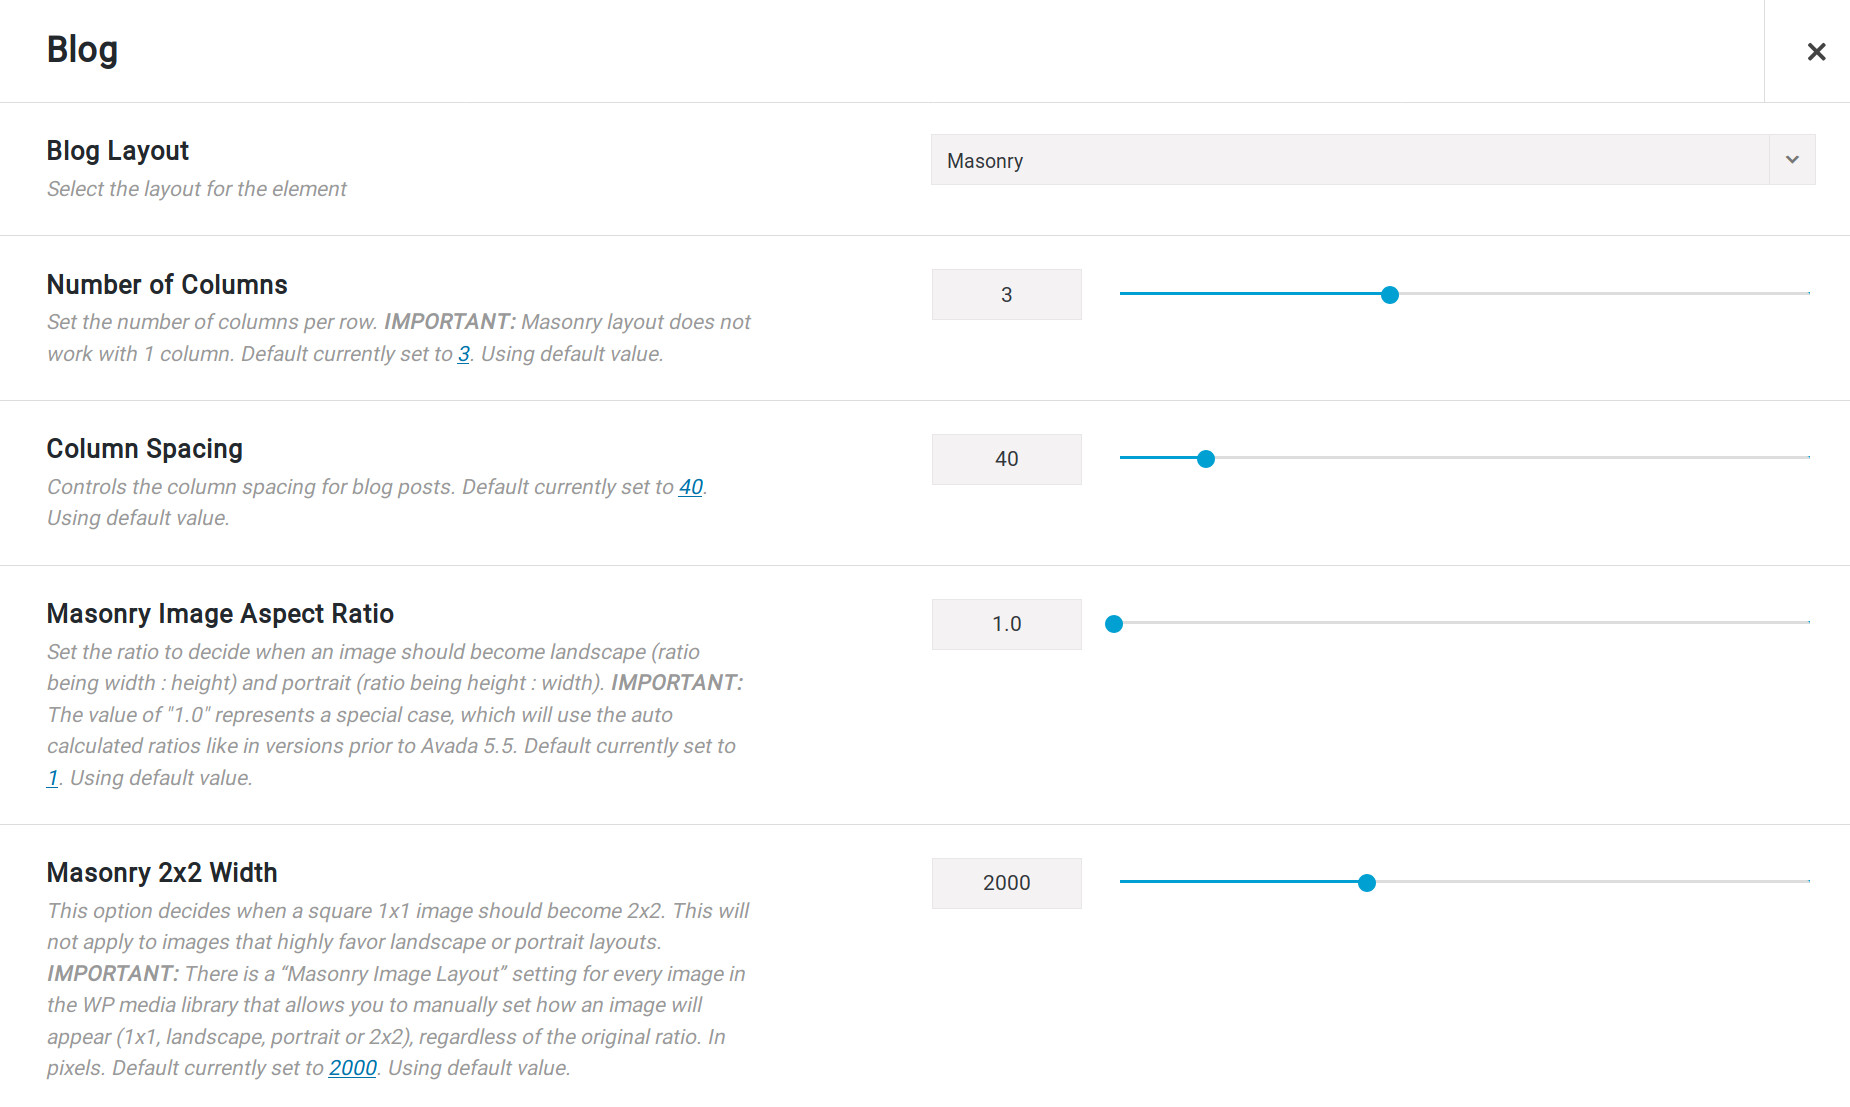
Step 3 – Set the ‘Blog Layout’ option to Masonry.
Step 4 – Choose the number of columns you want using the ‘Number of Columns’ option. The Masonry layout does not work with 1 column and looks best around 3-4 columns when there is no text involved. Then, adjust the ‘Column Spacing’ option, this will be the amount of spacing between blog posts.
Step 5 – Set the ‘Masonry Image Aspect Ratio’ option to decide when an image should become landscape (ratio being width : height) and portrait (ratio being height : width). Note: The value of “1.0” represents a special case, which will use the auto calculated ratios like in versions prior to Avada 5.5.
Step 6 – Setting the ‘Masonry 2×2 Width’ option decides when a square 1×1 image should become 2×2. This will not apply to images that highly favor landscape or portrait orientation.
Step 7 – Set the other options of the Blog element to your preference. When done, click Save.
Setting the Masonry option for your Gallery Layout
Step 1 – Add a ‘Gallery’ element to your page/post using the Avada Builder.
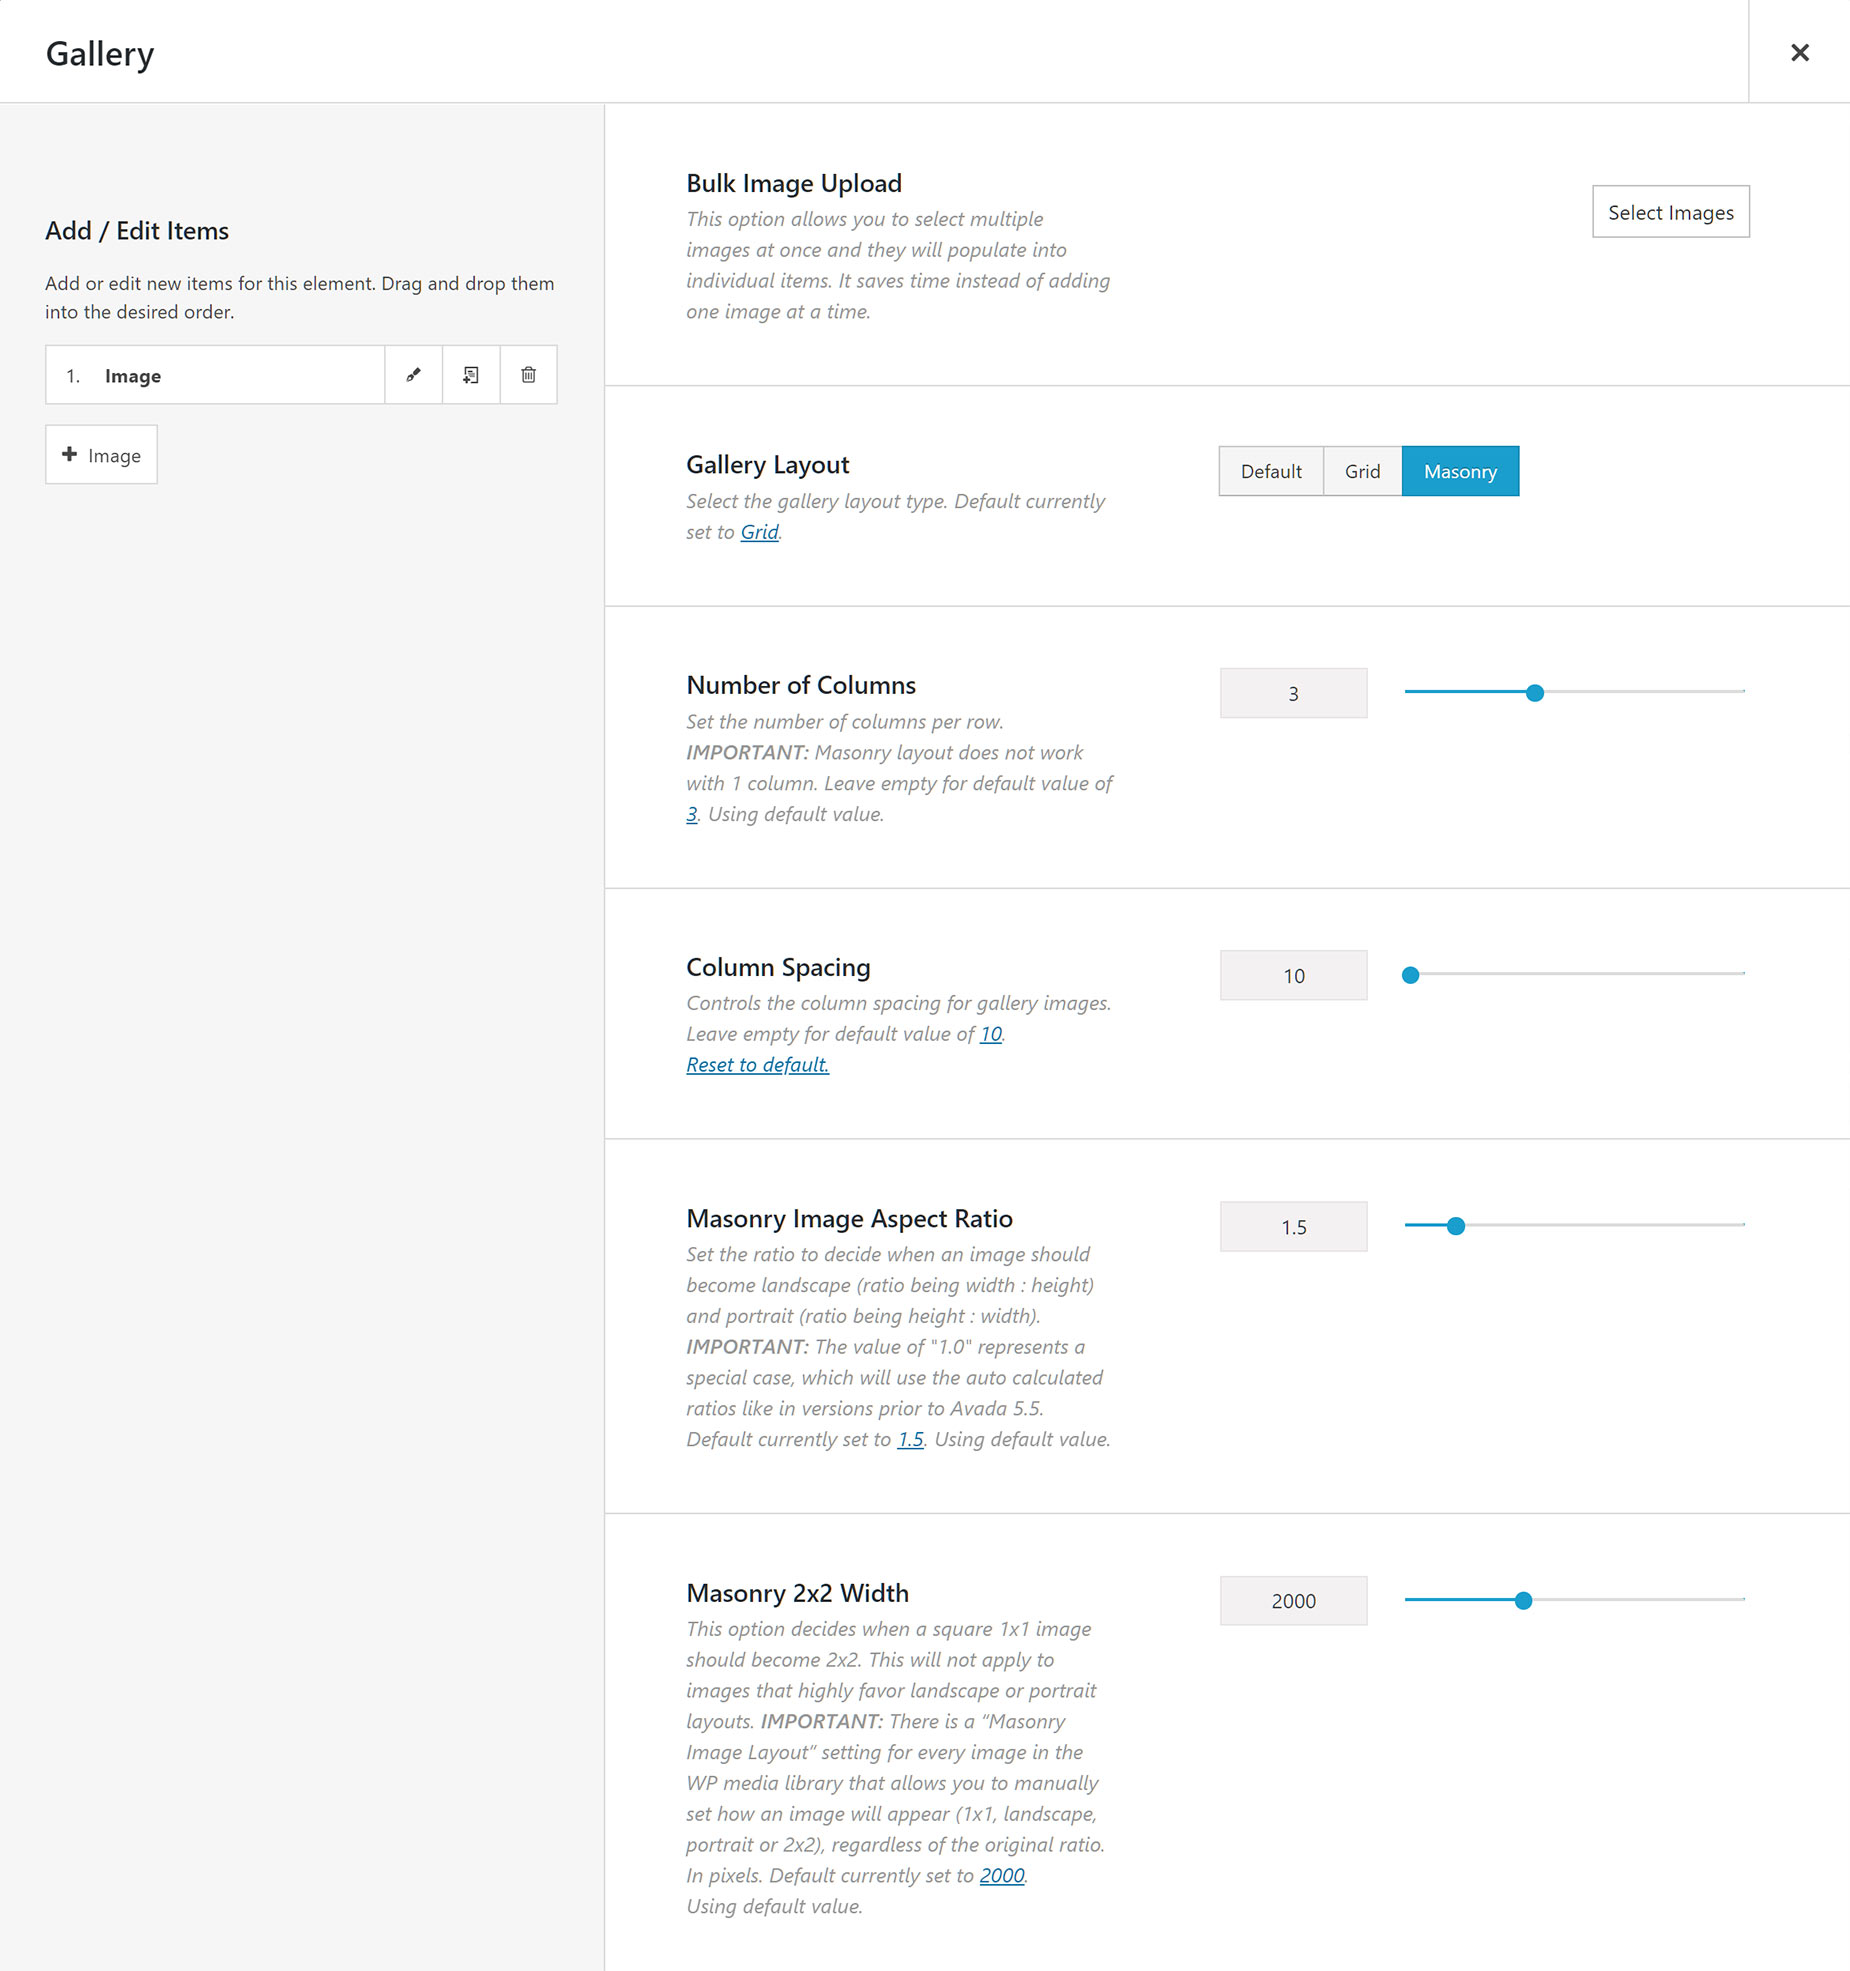
Step 2 – Set the ‘Gallery Layout’ option to Masonry.
Step 3 – Click ‘Select Images’ on the ‘Bulk Image Upload’ option to select and add pictures to the gallery. If there are no images inside the WordPress Media Library, upload your images by clicking ‘Upload Files’ tab in the upper left corner of the window. You can select multiple images by using Ctrl / Cmd click. Once the images are selected, click the ‘Insert into page’ button. Alternatively, you can add your images one at a time in the Add/Edit Items section, by clicking on the + Image button.
Step 4 – In the Add/Edit section, you can adjust the order of your images by dragging them into the desired order that will be displayed on the front end.
Step 5 – Set the ‘Number of Columns’ you want to display. The Masonry layout does not work with 1 column, and looks best around 3-4 columns when there is no text involved. Then, adjust the ‘Column Spacing’ option, this will be the amount of spacing between gallery images.
Step 6 – Set the ‘Masonry Image Aspect Ratio’ option to decide when an image should become landscape (ratio being width : height) and portrait (ratio being height : width). This value is notated as a quotient – i.e. the aspect ratio divided by itself, so 3:2 = 1.5.
Note: The value of “1.0” represents a special case, which will use the auto calculated ratios like in versions prior to Avada 5.5.
Step 7 – Setting the ‘Masonry 2×2 Width’ option decides when a square 1×1 image should become 2×2. This will not apply to images that highly favor landscape or portrait orientation.
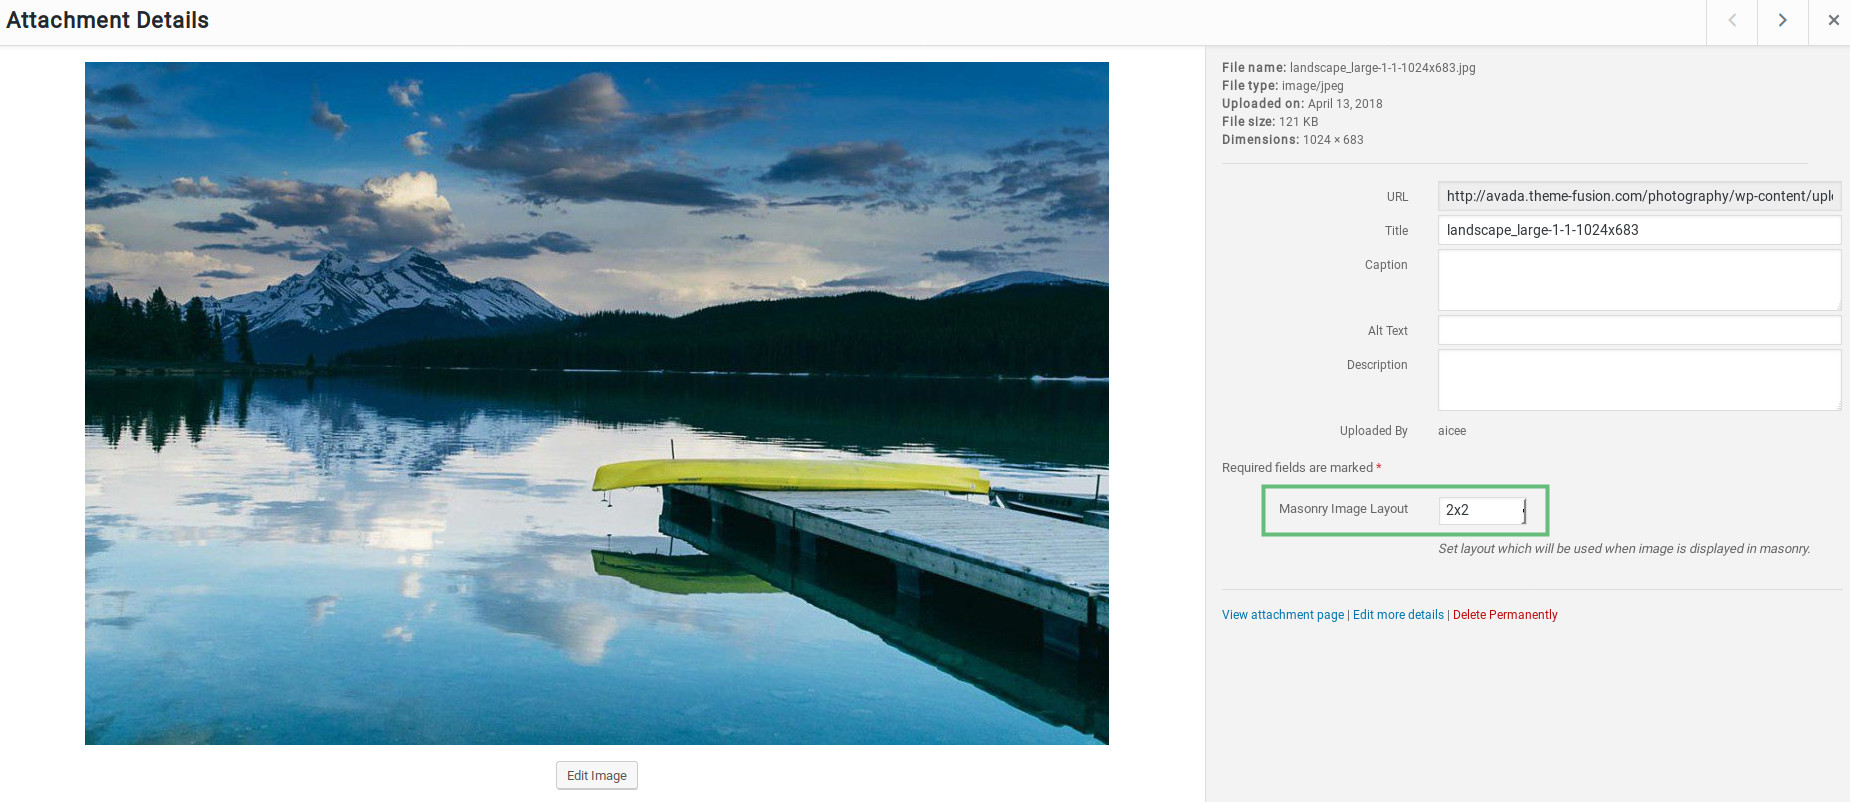
Note: There is a “Masonry Image Layout” setting for every image in the WP media library that allows you to manually set how an image will appear (1×1, landscape, portrait or 2×2), regardless of the original ratio.
Step 8 – Set the other options of the Gallery element to your preference. When done, click Save.
Setting the Masonry option for your Portfolio layout
Step 1 – Please make sure that you have featured image assigned to your Portfolio posts.
Step 2 – Add a ‘Portfolio’ element to your page/post using the Avada Builder.
Step 3 – Set the ‘Layout’ option to Masonry.
Step 4 – For the ‘Text Layout’ option, choose from Default, No Text, Boxed, or Unboxed on how the portfolio text content will be displayed.
Step 5 – In the ‘Number of Columns’ option, set the number of columns you want to display. The Masonry layout does not work with 1 column and looks best around 3-4 columns when there is no text involved. Then, adjust the ‘Column Spacing’ option, this will be the amount of spacing between portfolio items.
Step 6 – Set the ‘Masonry Image Aspect Ratio’ option to decide when an image should become landscape (ratio being width : height) and portrait (ratio being height : width). ‘Note:’ The value of “1.0” represents a special case, which will use the auto calculated ratios like in versions prior to Avada 5.5.
Step 7 – Setting the ‘Masonry 2×2 Width’ option decides when a square 1×1 image should become 2×2. This will not apply to images that highly favor landscape or portrait orientation.
Step 8 – Set the other options of the Portfolio element to your preference. When done, click Save.
There is a Masonry Image Layout setting for every image in the WP media library which allows you to manually set how an image will appear (1×1, landscape, portrait, or 2×2), regardless of the image original ratio when uploaded. This option can also be found in featured image popups when setting a feature image. The chosen layout will be used when image is displayed in masonry.


