How To Use The Mega Menu Builder
Last Update: November 30, 2025
A Mega Menu is a submenu to a main menu that can have multiple columns and diverse content. See the Avada University, Avada Caterer, and Avada Retail prebuilt websites for examples of Mega Menus in the main menu.
The Avada Mega Menu Builder is accessed from the Avada Library and allows you to build custom Mega Menus for your site using the Avada Builder. These Mega Menus are then applied to Menu items via the Avada Menu Options. There is also a dedicated Submenu Element for use in the Mega Menu Builder. Read on to learn more about the Avada Mega Menu Builder, and watch the video below for a visual overview.
How To Create A New Mega Menu
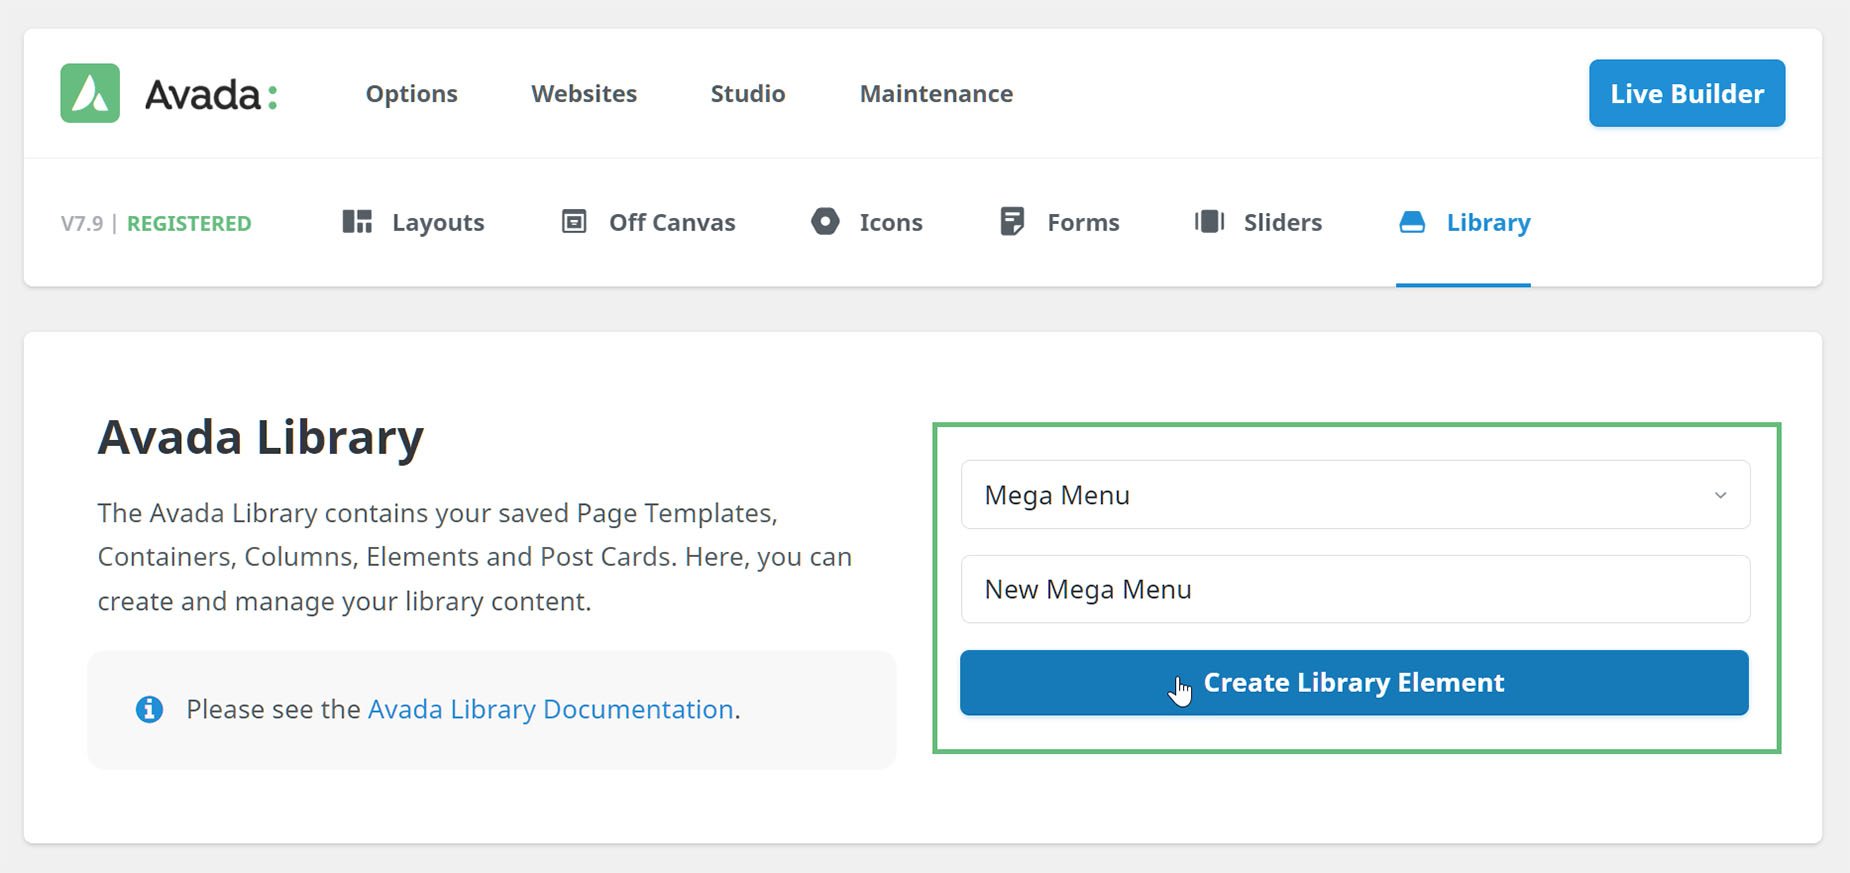
You create a Mega Menu from in the Avada Library, and then you build it with the Avada Builder. So, the first step is to create a Mega Menu in the Avada Library, by selecting Mega Menu from the dropdown list, giving it a name, and clicking on Create Library Element.
Once this this done, the builder will open in your preferred interface (See the How To Use The Avada Builder Options doc to see how to change your preference there).
Once in the builder, you can create your content. Mega Menus are completely flexible, and can have a single or many columns. You could even have multiple containers. There are several Mega Menus in Avada Studio if you want to import an existing design and customize it, or you can build one completely from scratch. Simply choose your layout, and use the builder to add your content.
As ther name implies, Mega Menus often contain menus. For information on how to do this, see the How To Create Menus in Avada doc. But the real beauty of Mega Menus is that they can contain anything you want.
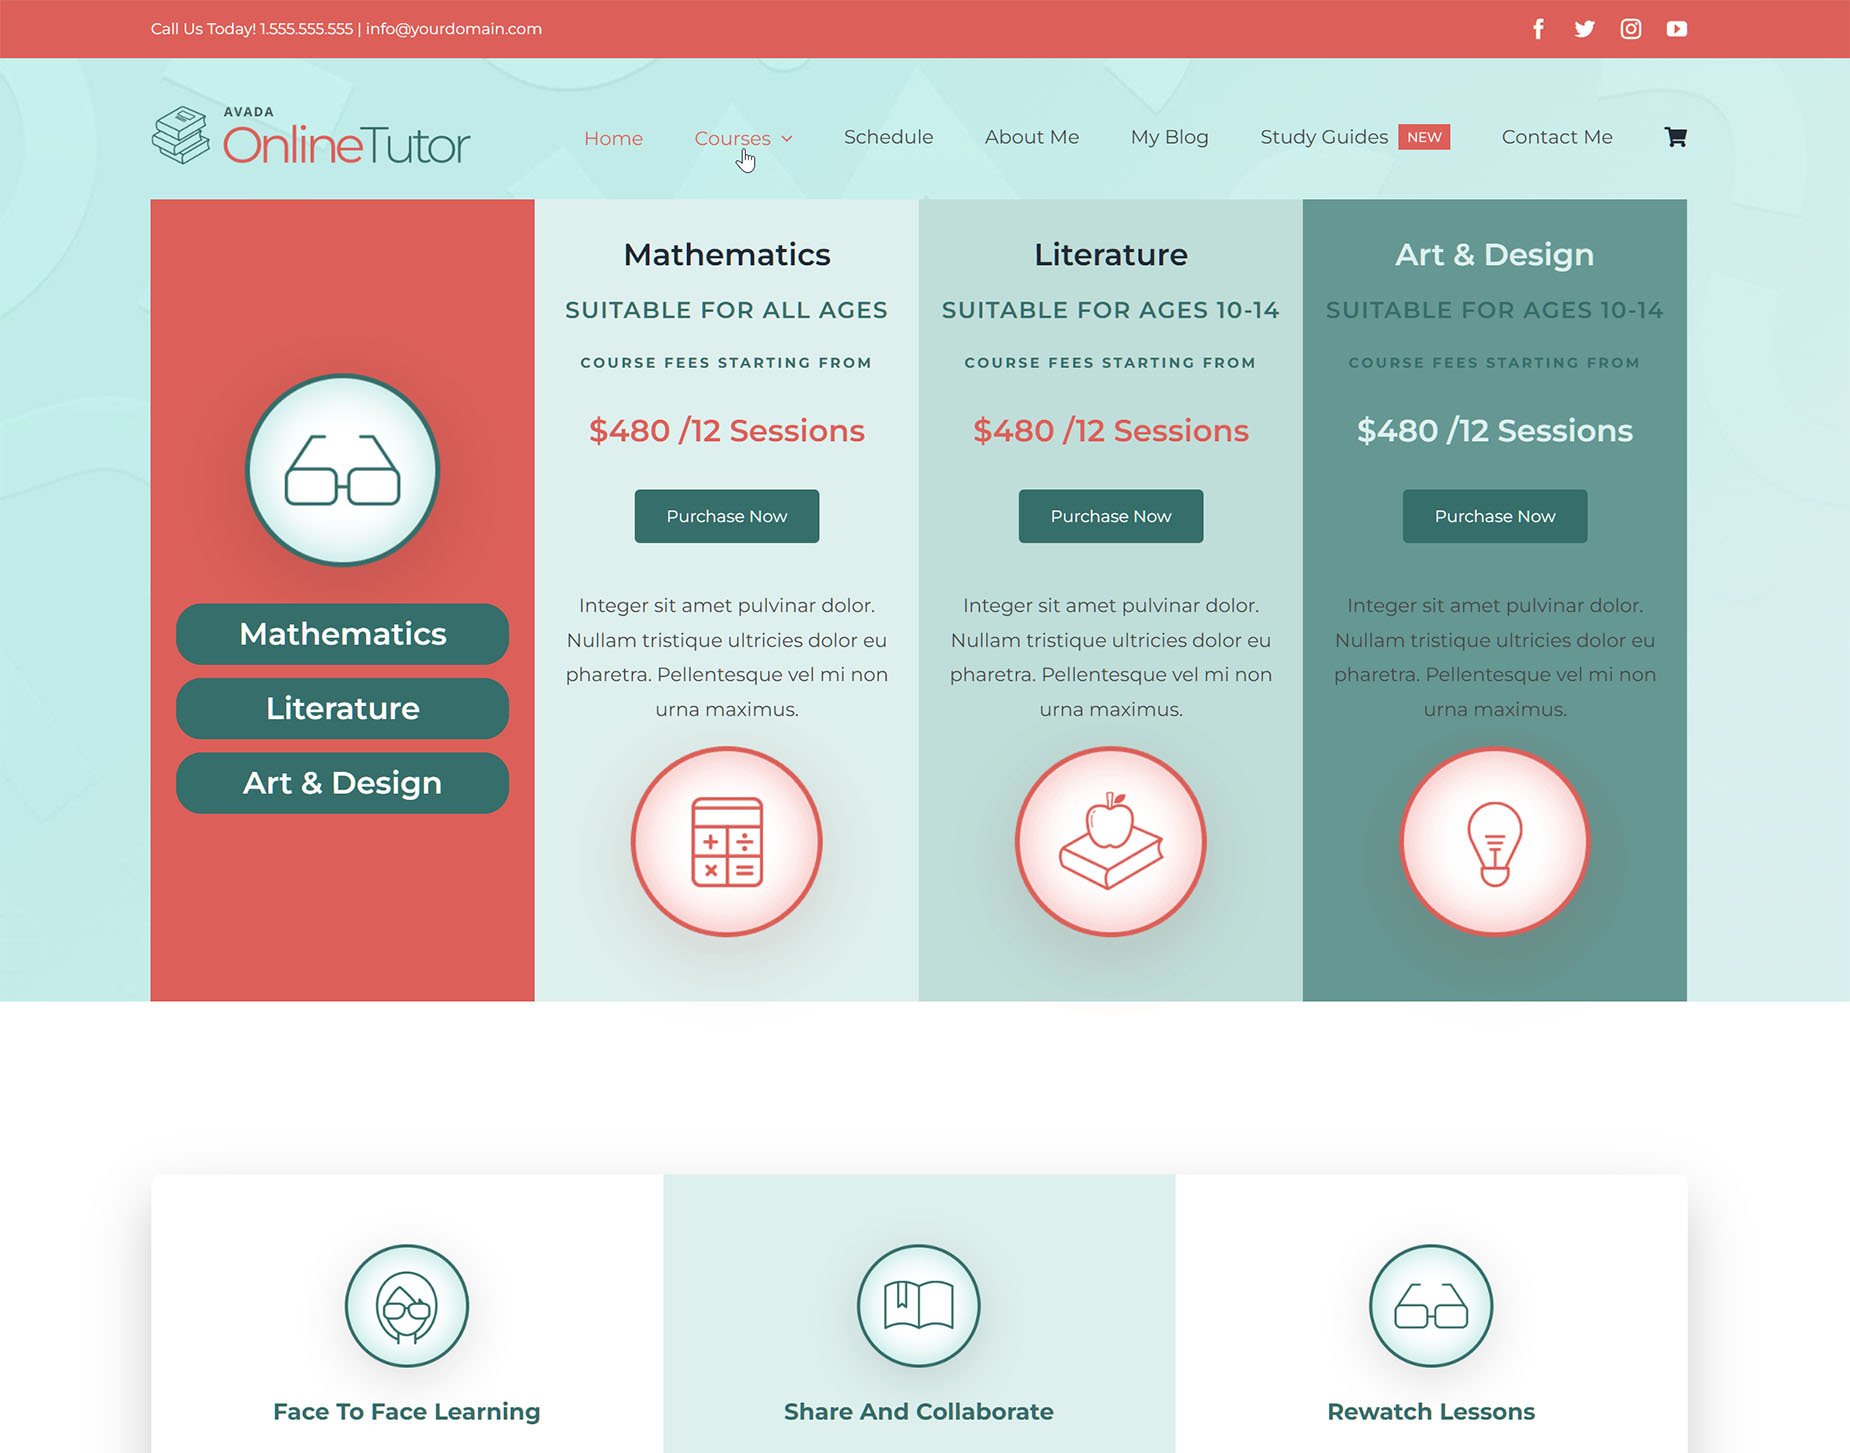
When you want to add a menu to a Mega Menu, there is a Submenu Element for this, which is almost the same as the Menu Element, but designed solely for Mega Menus. Below is an example of a created Mega Menu with four columns, and an instance of the Submenu Element in the first column.
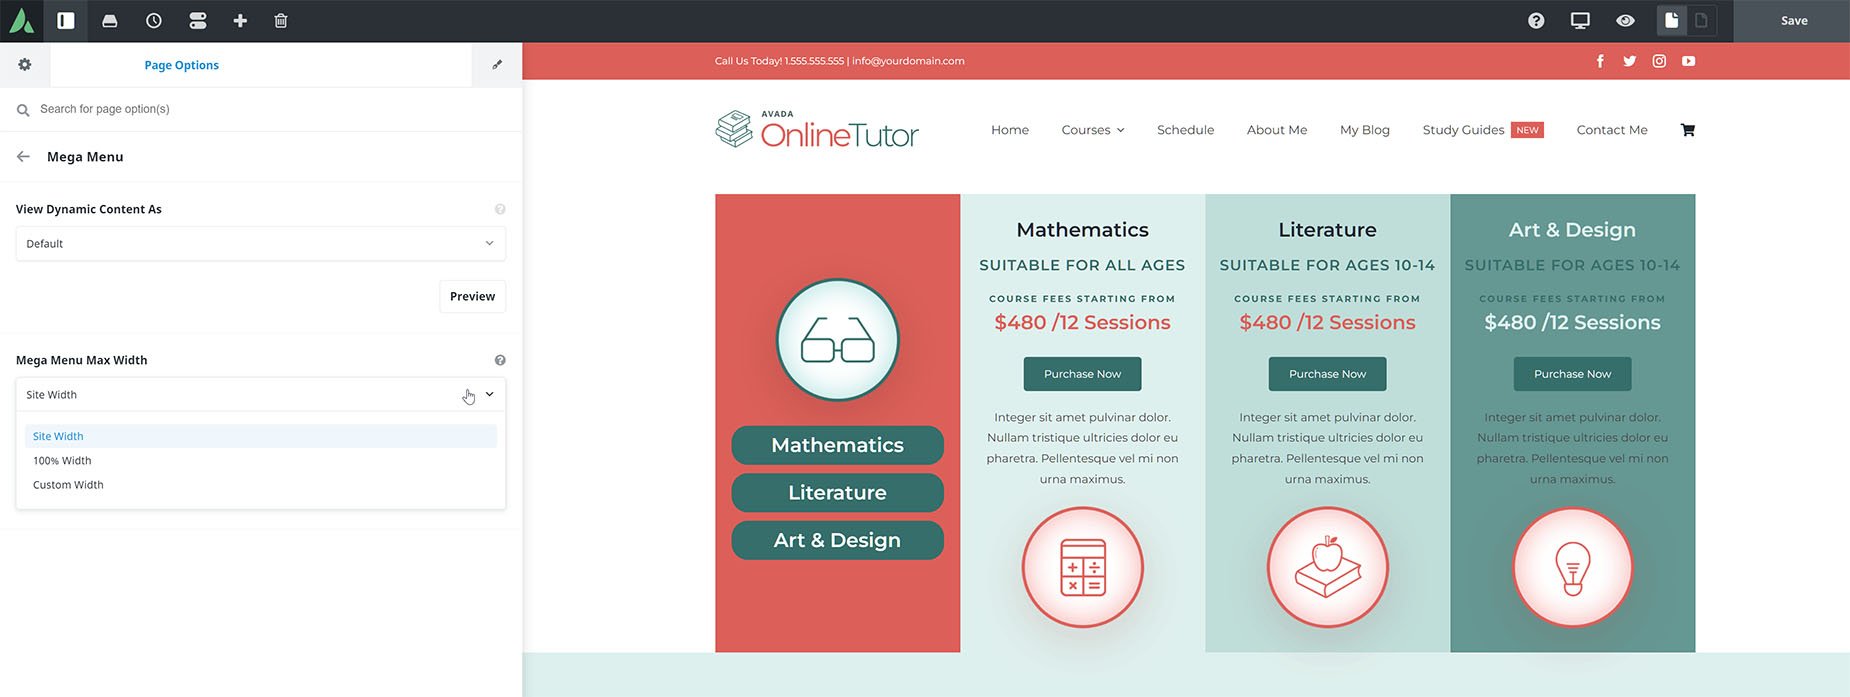
Mega Menu Options
In the usual Page Options spot in the sidebar, you will find the Mega Menu options. There are four tabs – Settings, Mega Menu, Custom CSS, and Import/Export.
How To Assign A Mega Menu
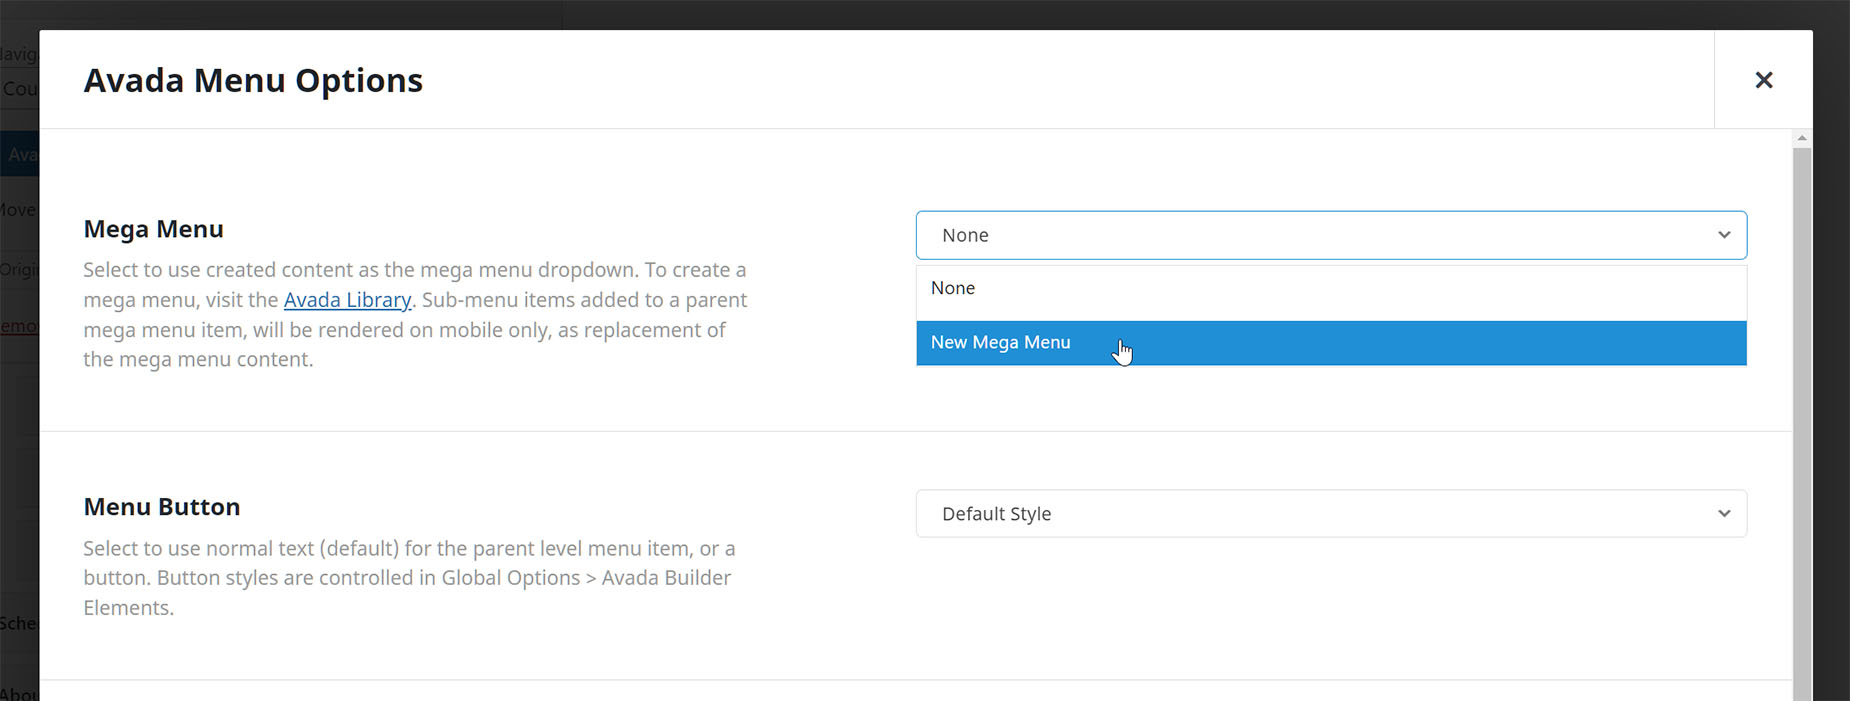
Once you have completed your Mega Menu, you assign it to a menu item, via the Avada Menu Options. Below we can see the menu for the Avada Online Tutor prebuilt site. Here, the parent item we want to add the Mega Menu to is the Courses item. The existing sub-items in this example can be left as is, and will display according to the Mobile Breakpoint set in the menu Element. Alternatively, you could create separate menus for Medium and Small Screens.

The top item in the Avada Menu Options is Mega Menu, and here we select our completed Mega Menu from the dropdown list.
That’s it. Now our Mega Menu will display on the front end when mousing over the Courses menu item.
Legacy Mega Menus
The legacy method of creating mega menus is still available. Just go to Options > Advanced > Features, and make sure Legacy Mega Menu is enabled. With that on, you can create Mega menus as per the previous method.
See the Using The Mega Menu (Legacy Method) doc and video for more information.


