How to Use the ACF Options Page Feature
Last Update: November 26, 2025
An ACF Options page is a dedicated area in the WordPress admin that allows users to manage global, site-wide settings from a single, centralized location, instead of having to edit them on individual pages.
When you create an ACF Options Page, it gets added to the WordPress Admin Sidebar and when you visit the page, you see options that have been added to the area. There are many use cases for this feature, but it’s ideal for allowing users to change or add data on the website without having access to the builder directly.
To learn more about ACF Pro, check out the How To Use ACF Pro With Avada documentation. Read on to learn more about the ACF Options Page feature, and watch the video below for a visual overview.
Step 1: Create The Options Page
No matter your intended usage, the first step is to create an ACF Options Page. This is done at ACF > Options Page, once the ACF plugin has been added to your site from Avada > Plugins.
To create an options page, you just click on Add options Page, and give it a title. For my example, I’ll call it Live Appearances. If you tab away from the field, the menu slug is automatically created, and you can also select a parent page if you want.
Under Advanced Settings, there are some further options around Visibility, Labels and Permissions, and you can do things like choose an icon, give the menu positions and change the label on the update button etc. For my example, I’ll just choose an icon. There is a link here to learn about menu positions, but if I give my menu a value of 6, it will display just under Posts.
With Permissions, you can easily limit the options page access to any WordPress capability and therefore any user role you like.

Step 2: Add Your Field Groups, Fields & Set Location Rules
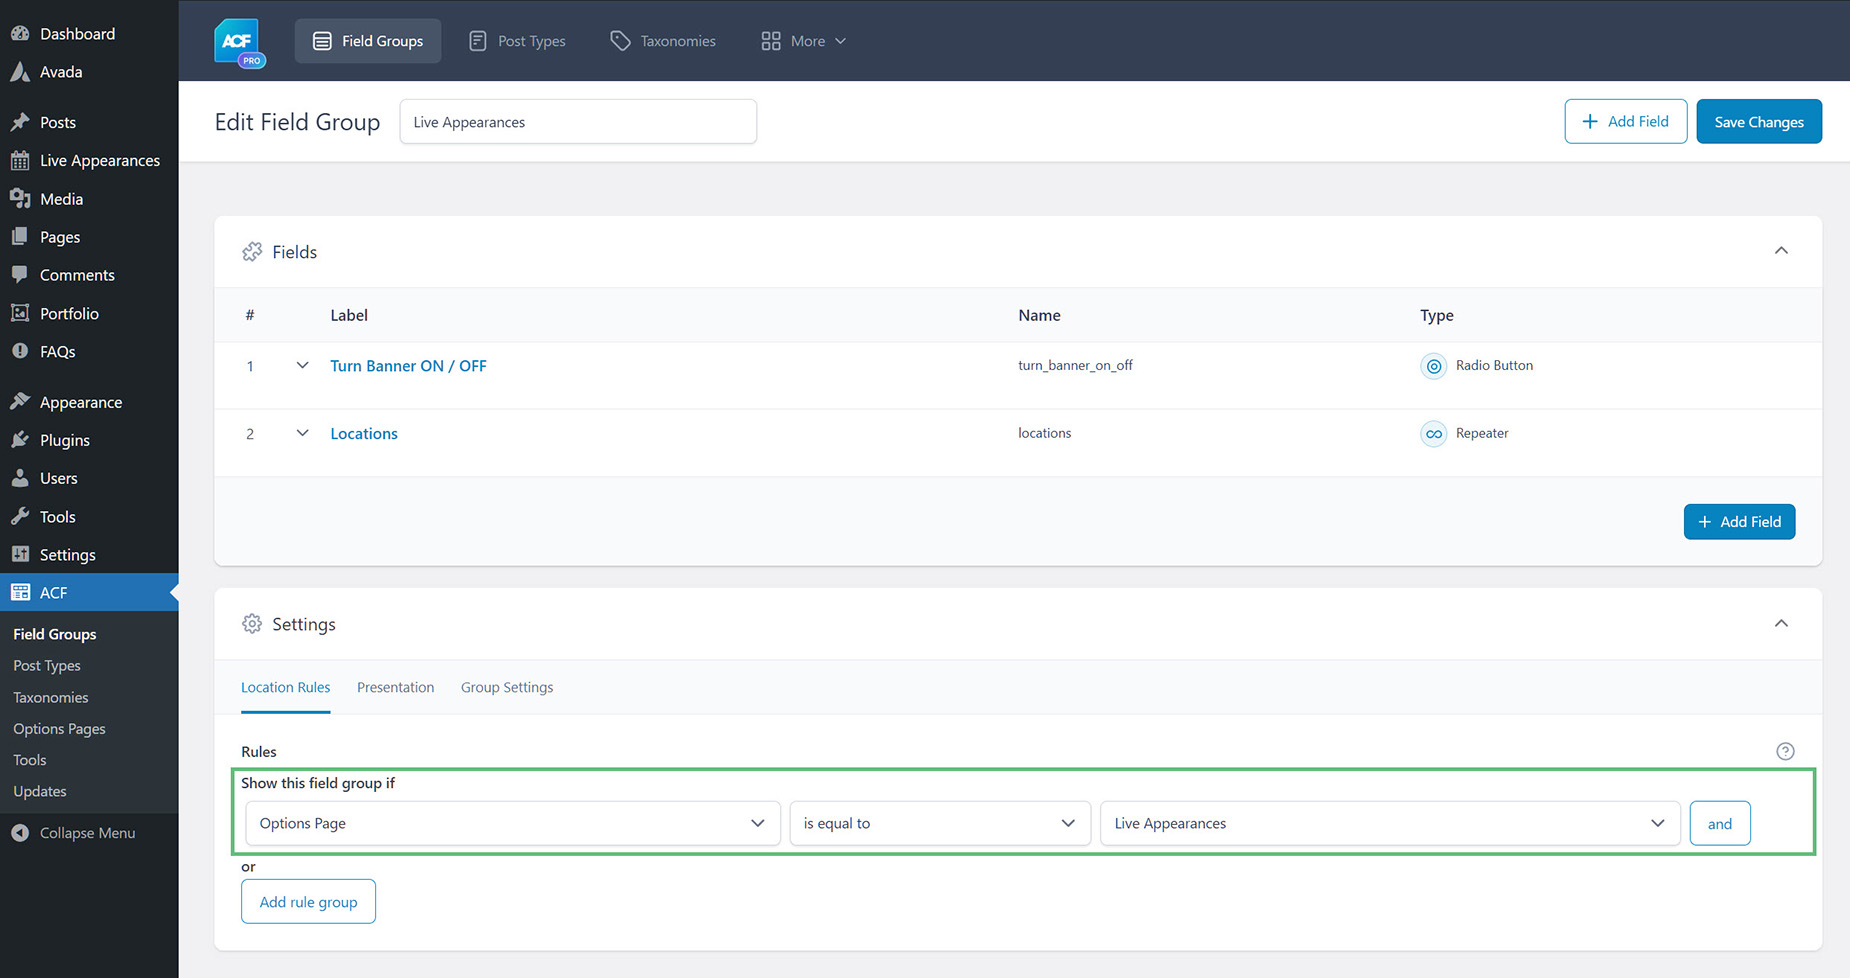
The Field Groups, Fields and Sub-Fields you then create to add to your Options Page will be completely up to the usage you intend. For this example, we created a Field Group called Live Appearances, and then added a Radio Button field to turn a banner on or off, and a Repeater field with a sub-field to add location data to the banner.
Regardless of what fields and sub-fields you might add, the final step here is to set the Location Rules, so that the fields show up on the Options Page you have created. This is done in the Settings at the bottom of the page, with simple conditional logic.

Step 3: Add Data to the Options Page
That’s pretty much all the setup required. What else you might need to do depends entirely on what fields you have added to the Options page, and where they might be displaying on the site.
In my example, I want a team member, probably the publicist in this case, to enter locations for the band’s upcoming appearances, like at radio stations and shopping centers etc. These will then display on a banner in the header. So there are two things I want the user to be able to do here. The first is to enter the details of the live appearances. And the second is to be able to turn the banner off if there aren’t any.
So in this example, the user heads to the Live Appearances tab on the WordPress sidebar, and can enter data for the locations, and set the banner on or off.

Step 4: Display the data
So where the data displays is up to you. As mentioned at the start, this feature is ideal for allowing users to change or add data on the website without having access to the builder directly.
In my example, the data will be displayed in a banner in the header, in a Title Element set to Marquee, and pulling all the inputted locations. The banner will ONLY display if the setting is set to On on the Options Page, and this is achieved by adding conditional logic to the banner container itself.
Important Note: when using dynamic data or conditional logic, you need to add awb_acfop_ as a prefix to your field names, to pull the fields from the Options Page.

Then there’s the Title Element. This is added using Dynamic Data and the ACF Repeater Single Value endpoint, configured to pull all indices from from the location_details sub-fields.

End Result
So the end result for this example is that when the Banner is set to On on the Options Page, and there has been data entered in the Location Details field, this is displayed in a Marquee Title in a banner in the Global Header. If the Banner is set to Off, then it will not disply on the front end.
There are an enormous number of possible use cases for the ACF Option Page feature, but this should show you how they are set up, regardless of how you might use them.


