How To Set Up Form Notifications

Last Update: November 13, 2024

Notifications let you, or others, know about the form submission. You need to set up a notification if you want to recieve the data submitted with the form in an email.

You can set up a notification to have the email sent to a specific address, maybe your own, or a co-worker, or both, or you could also set up a notification that sends an auto-reply to the user. You can add CC and BC email notifications, and you can have an many notifications as you wish for each form you set up. All notifications are created from the Form Options > Notifications tab.
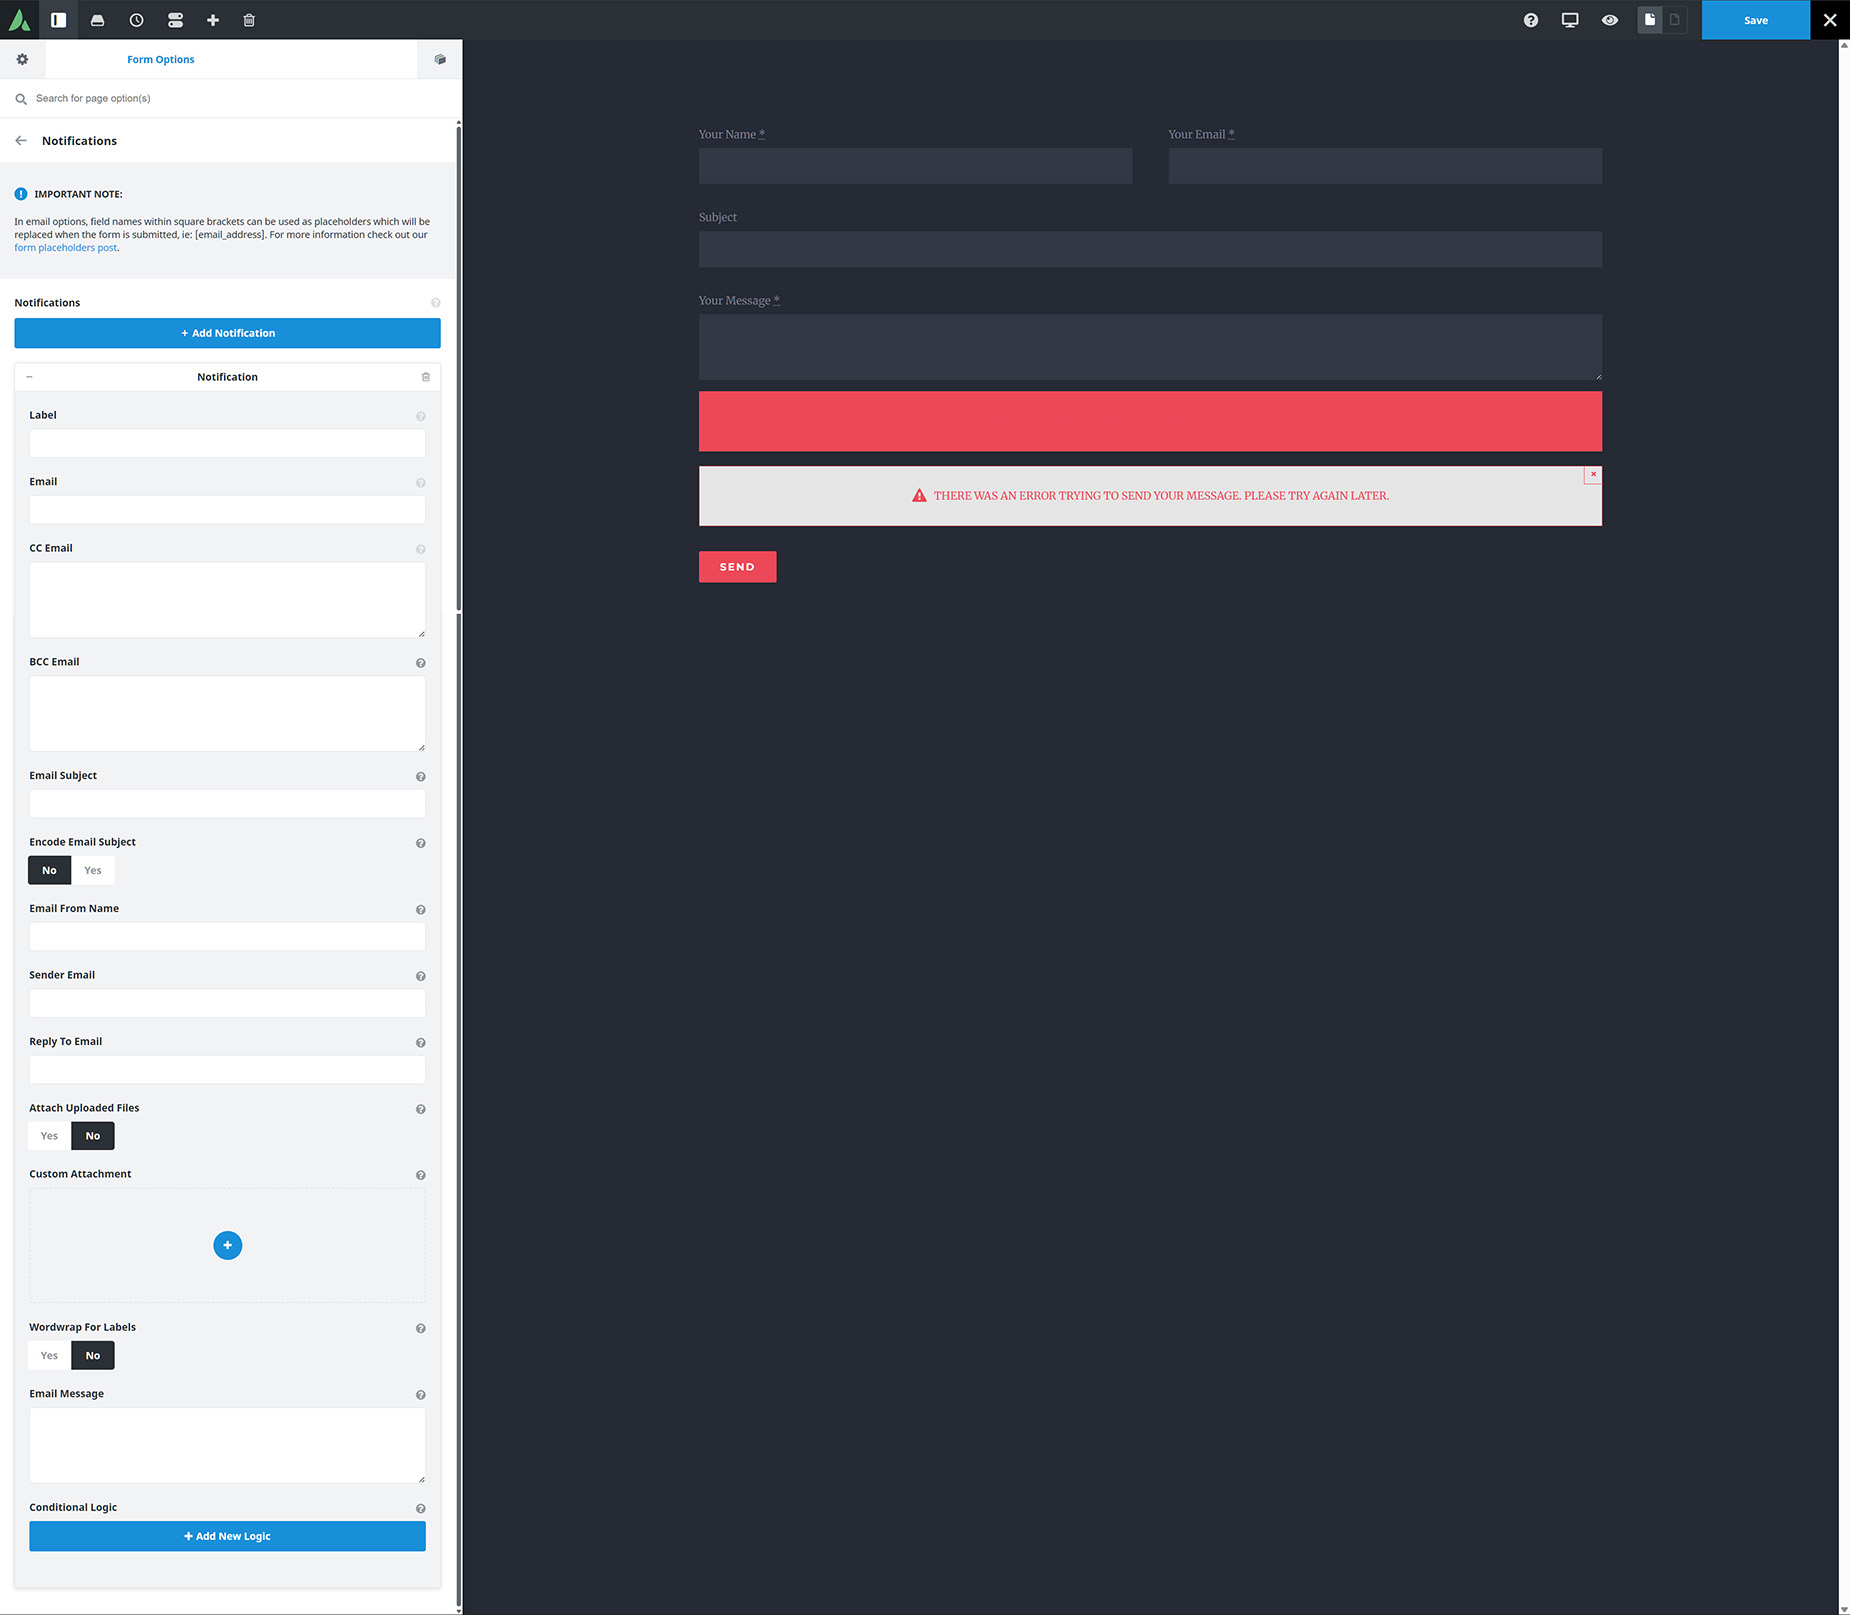
Avada Forms Notifications

Notification Options

In email options, field names within square brackets can be used as placeholders which will be replaced when the form is submitted, ie: [email_address]. For more information check out our Form Placeholders doc.

  • + Add Notification – Click this to add a new notification for the form.

  • Notification
  • Label – Enter notification label.

  • Email – Enter email ID where form data should be sent to. If left empty, email will be sent to the WordPress admin.

  • CC EmailEnter additional CC emails. Add one address per line.

  • BCC EmailEnter additional BC emails. Add one address per line.

  • Email SubjectEnter email subject. If left empty, the form title will be used.
  • Encode Email Subject Select if you want to encode email subjects. This helps to display special characters correctly in the subject field. A few hosting environments and email clients might have issues with this setting.

  • Email From Name – Enter email from name. If left empty, WordPress will be used.

  • Sender Email Enter sender email address. If left empty, wordpress@sitename.com will be used.
  • Reply To Email Enter reply to email address.
  • Attach Uploaded FilesAdd uploaded files as email attachments.

  • Email Message – Enter email message, leave empty to get the default message with all form fields. You can add form fields to the message by insert field name wrapped with square brackets ie: [email_address], also you can add all fields with [all_fields] tag.

Watch the Notifications section of the How To Use Avada Forms by clicking on the video below.

For privacy reasons YouTube needs your permission to be loaded.

Or for a short step by step example of setting up an auto-reply notification, watch the Avada Short below.

For privacy reasons YouTube needs your permission to be loaded.