How to Migrate Your Website With All-In-One WP Migration
Last Update: April 17, 2024
This document will walk you through how to migrate your website from a local install to a live server, or from one server to another, using the All-In-One WP Migration plugin as our example tool. Essentially though, regardless of where you are moving a site from and to, and which method you are using, the process will remain the same. Effectively, we are taking a backup of one site in one place, and restoring that backup in another place. Read on for a step by step walkthrough of migrating you Avada site with All-In-One WP Migration.
Please Note. We are using the free version of All-In-One WP Migration for this example, which has both site size, and destination, limitations. Please see the ServMask site for their paid extensions, including the popular Multisite Extension.
Installing The Plugin
All-in-One WP Migration is available in the WordPress repository. This means it can be installed and activated directly from WordPress. Navigate to the Plugins > Add Plugin page and search for ‘All-In-One WP Migration’. When it shows on the page, you just need to click Install, and then when that is finished, you will need to click Activate. The plugin is now installed, and can be accessed from the WordPress Main Menu.
Export The Site
All-in-One WP Migration does not have any settings, and takes a very streamlined approach to the task of migrating your site. Any options are included in the export and import workflow. The reason for this, and why this process is quite different to the one outlined in How to Migrate Your Website With Duplicator, is that the All-In-One WP Migration plugin only exports your site’s contents and database, and not WordPress itself. As such, to import the site on the new location, WordPress must be already installed. Let’s see how it all works.
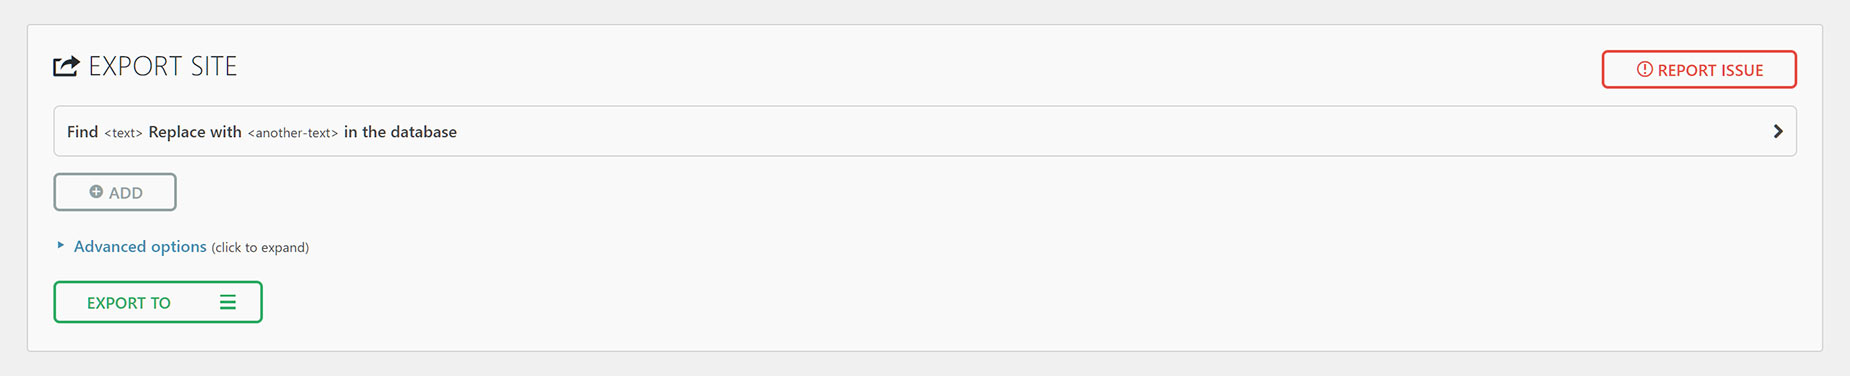
To begin with it, simply click on the All-in-One WP Migration link on the WordPress Dashboard menu. The first thing you see is a very streamlined page, with a large ‘Export To’ button at the bottom. It is in fact as simple as clicking on this button to proceed. There are additional options, and there is a Find and Replace function at the top if needed, but most users can simply click Export To, and continue the process.
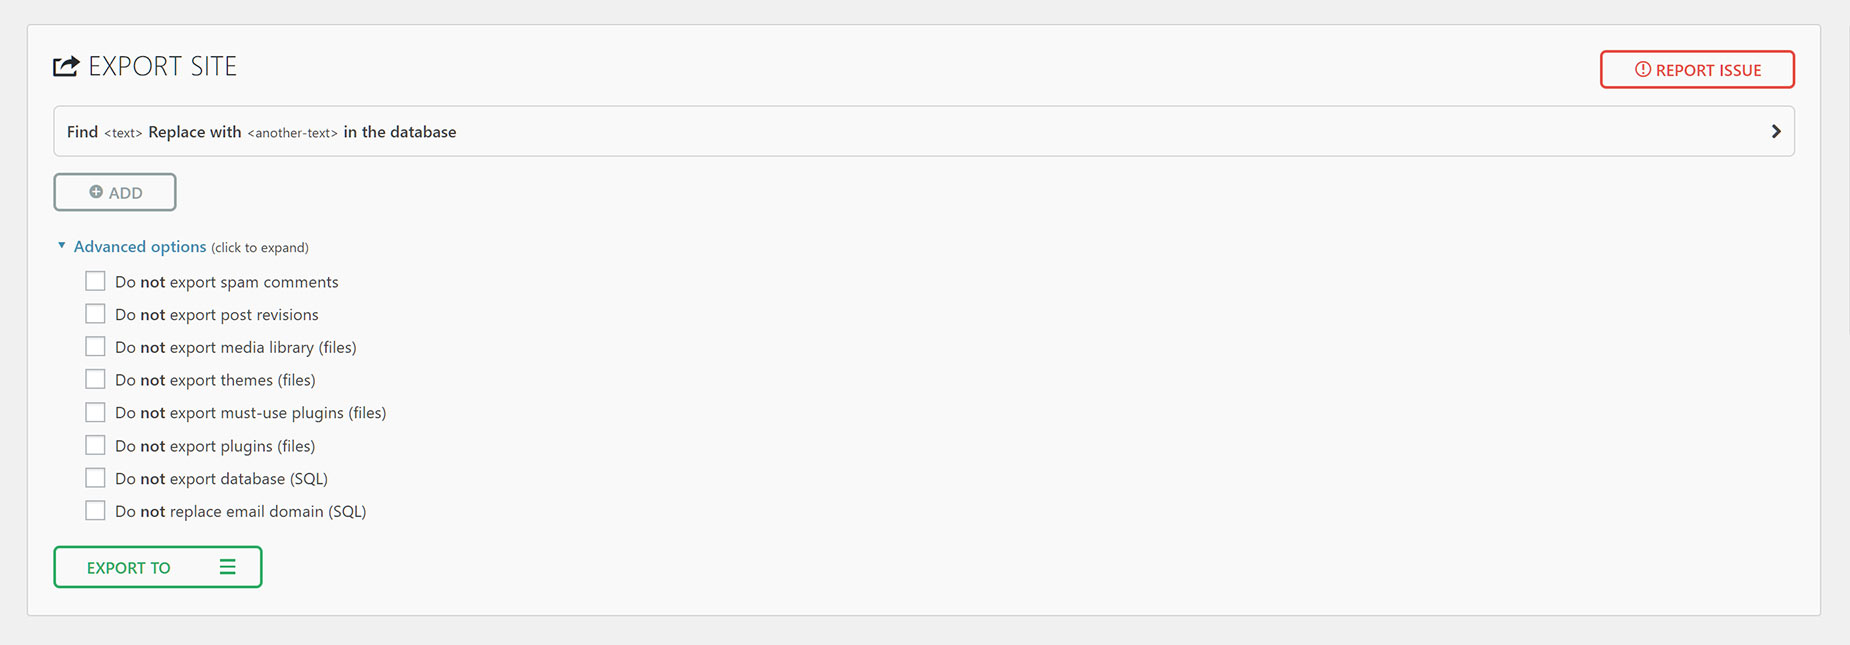
The available options are exclusion options, and some are purely for troubleshooting purposes. Most users will not need, or want, to exclude any of their site’s content, but it’s worth having a look to see if any of the options apply to your site.
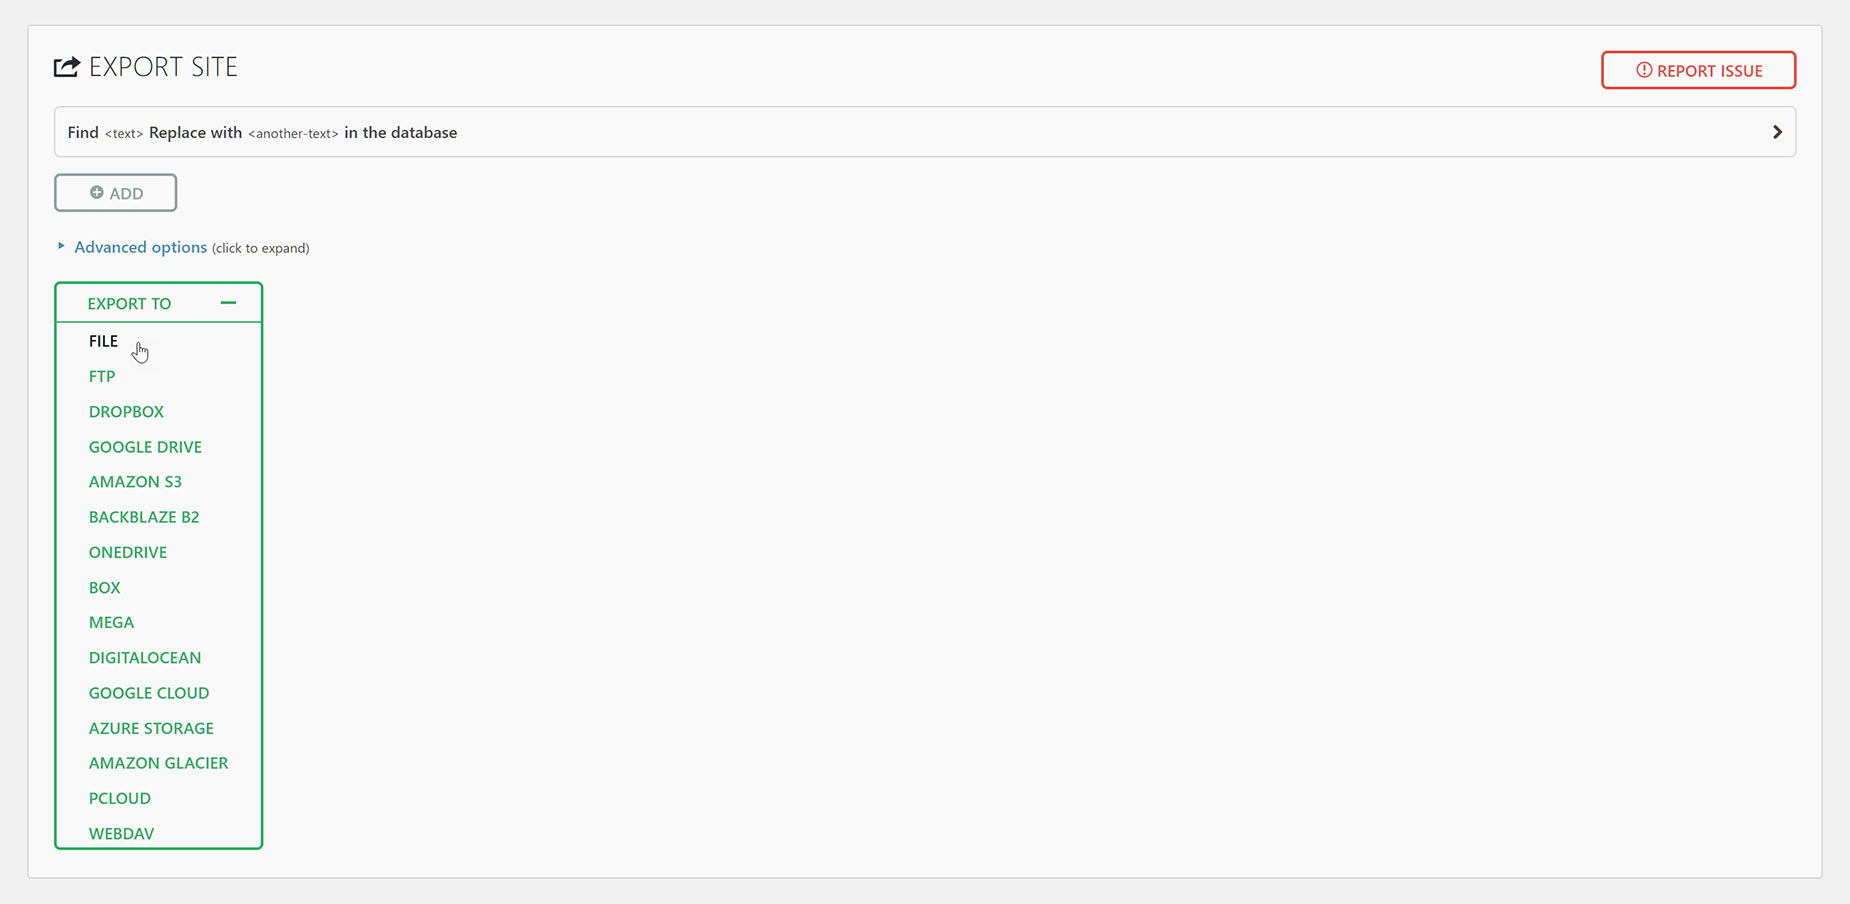
Once you have chosen any options, the next thing to do is to click the ‘Export To’ button. A dropdown appears with apparent choices of where to Export your file to. With the free version of All-In-One WP Migration, only the File option is available. All other options are individual extensions that you can purchase. For our example, we are just going to export to a file.
The plugin then prepares the Export file. This may take some time, depending on the size of your site. At the end of the process, you will see a ‘Download’ button. The file is also stored in the Backups section found at All-In-One WP Migrations > Backups. Click on the Download button to download the Export file to your local computer. Again, this may take some time, depending on the size of the file and your Internet speed.
Once you have your file, you are ready to move on to the Import Process. This takes place on your new server.


Import The Site
Now you have your Export file, it’s time to complete the migration of your site. Regardless of whether you are moving the site from a local production site to a new server, or from one host to another, the process is exactly the same.
The starting point for importing the site is a fresh install of WordPress on your destination location. If it’s a brand new site, then all you need to do is organize the hosting and domain name, and install WordPress in your new account. If you are moving a site from one host to another, and you would like to avoid downtime, there are a few extra steps you need to take. There are many ways to do this, depending on your hosting, but basically, you want to be able to log in to your new account and import the site before changing nameservers. My favorite way of doing this is to get the IP address of the new account and use the hosts file on my computer to temporarily map the IP to the domain name, so we can complete the import and only then, when the site has been migrated, change nameservers.
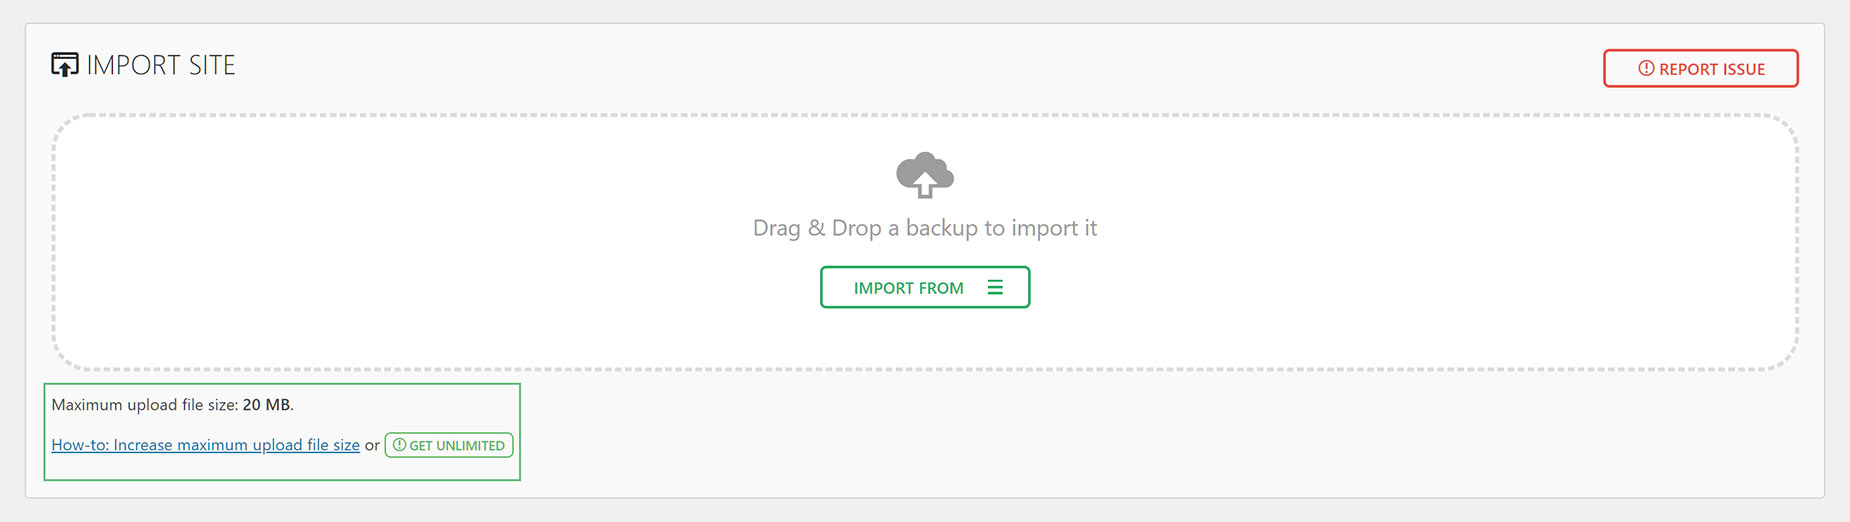
OK, so when you have a fresh copy of WordPress installed on your destination location, you then need to install the All-In-One WP migration plugin again. Once you have done that, head over to Import. The dialog you see is as equally simple as the Export one. The only thing to note here is that you might have a low Maximum Upload File Size, as shown in the image below, depending on your hosting. There are good instructions on the Servmask website for how to fix this.
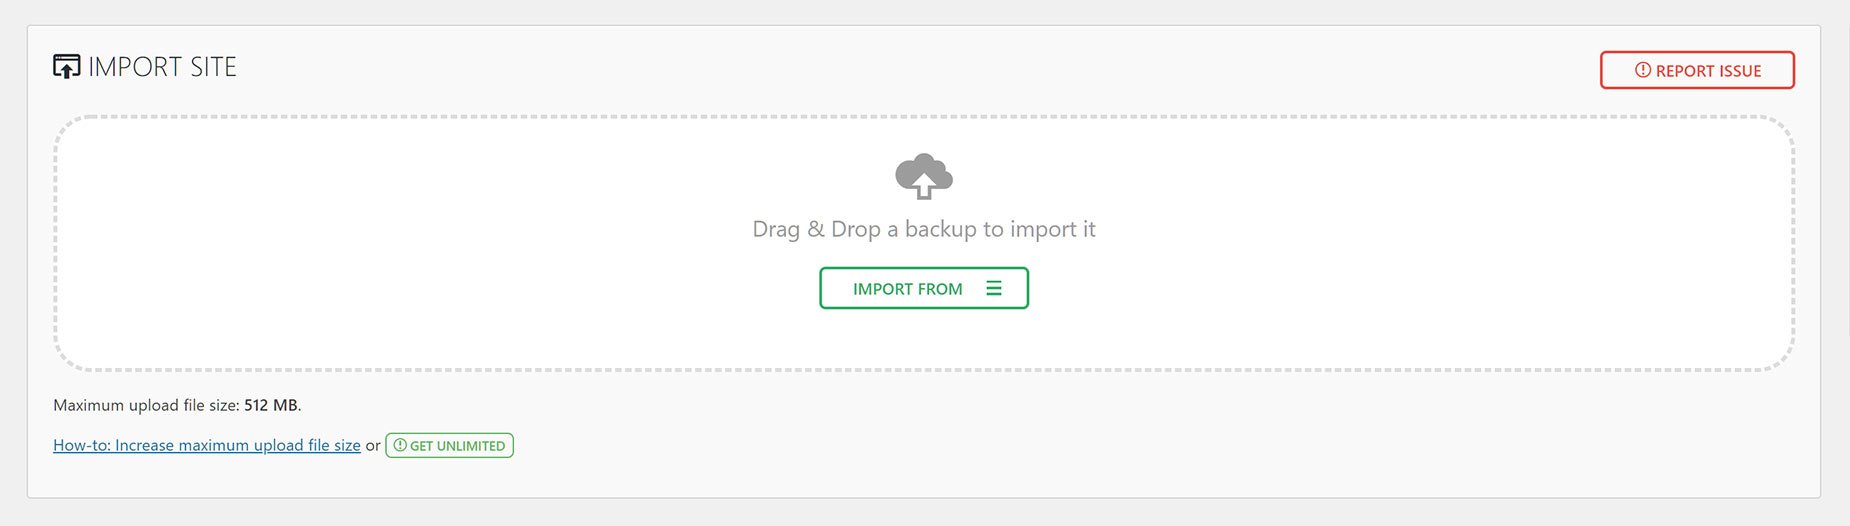
You can see in this second image, that we have increased the file upload size.
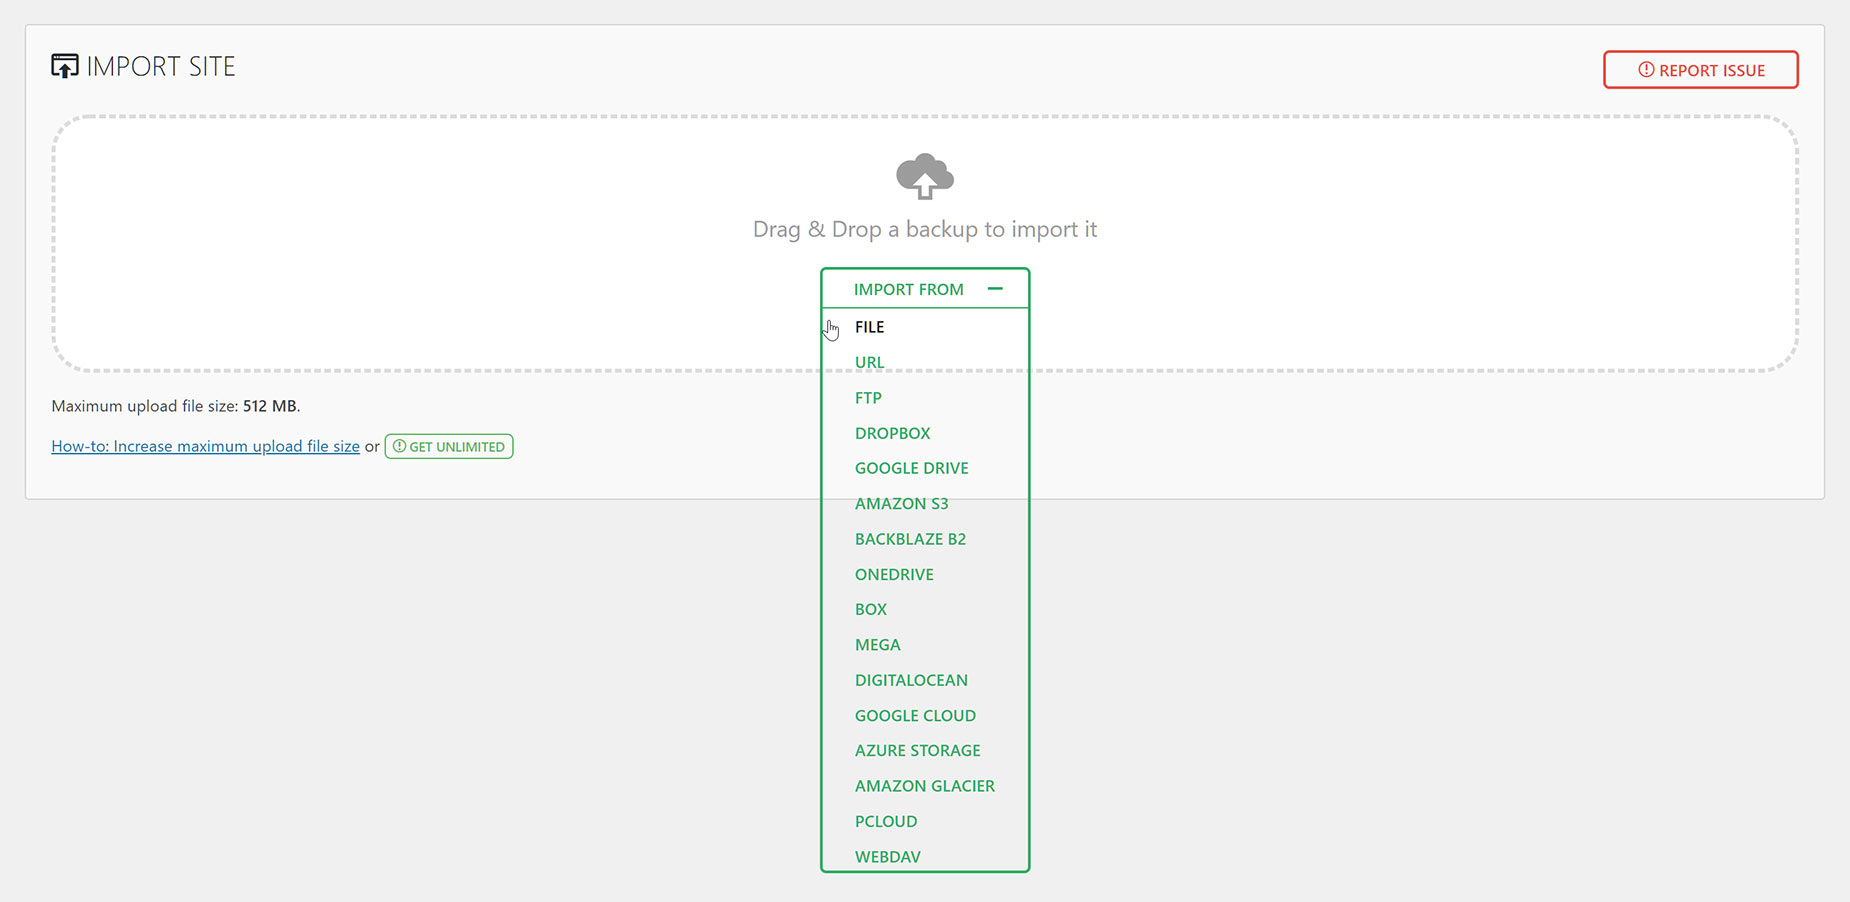
Once you are ready to upload simply click on the ‘Import From’ button and navigate to the file you downloaded earlier.
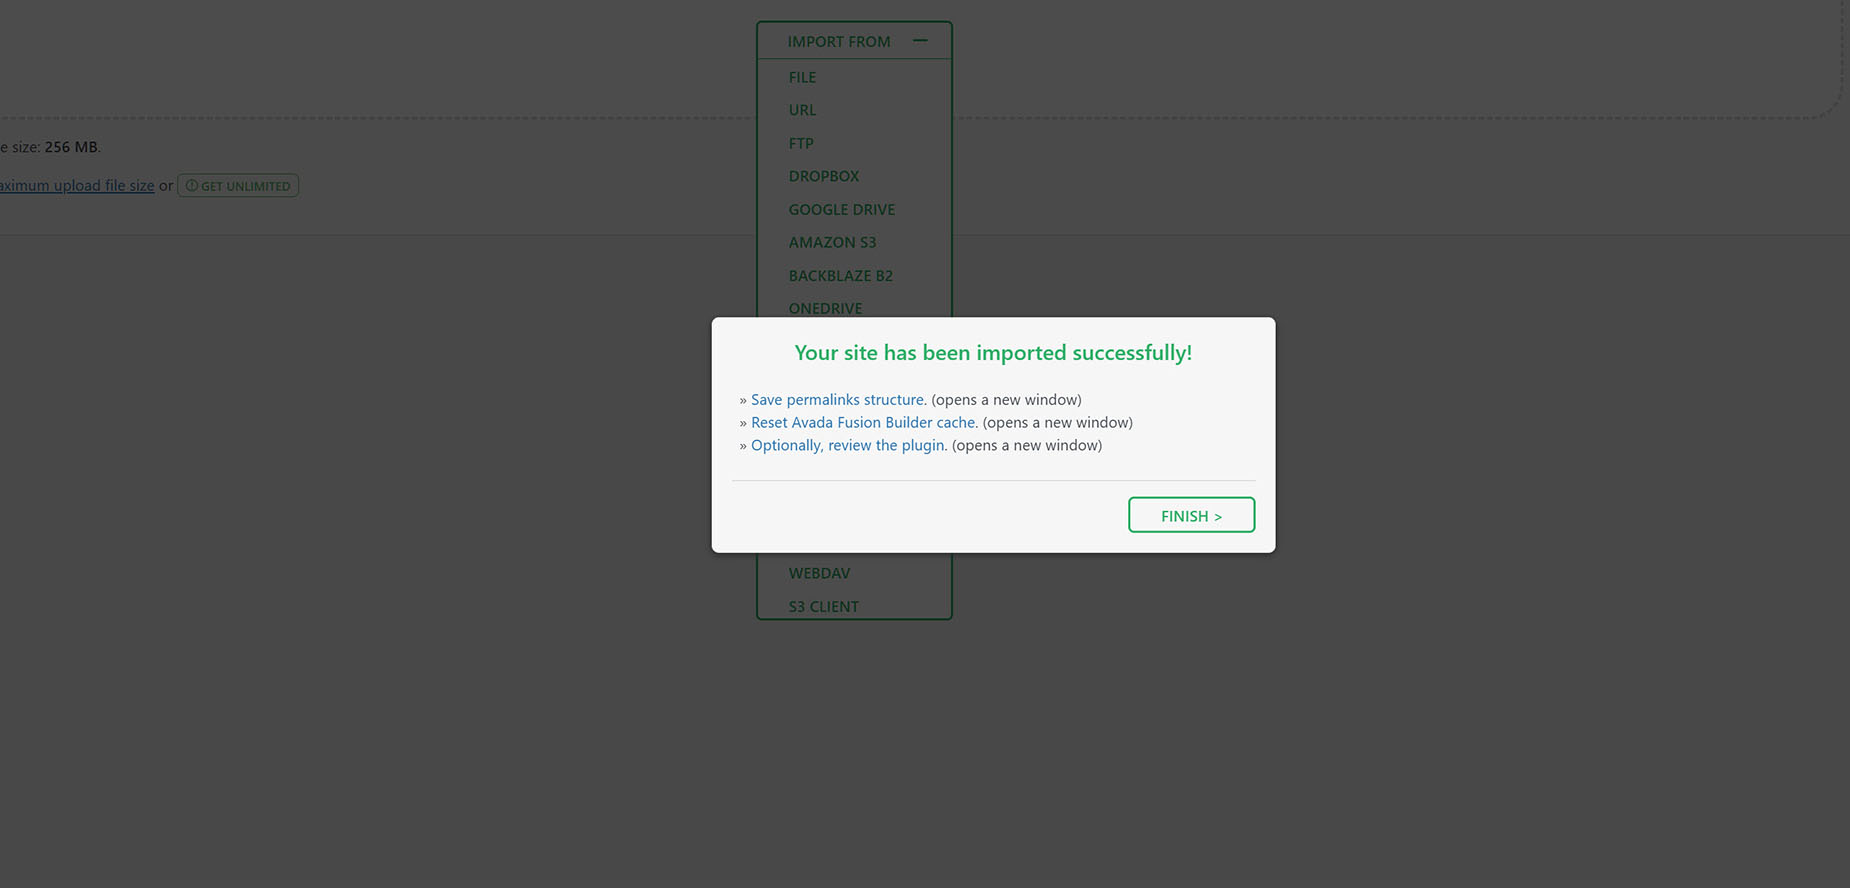
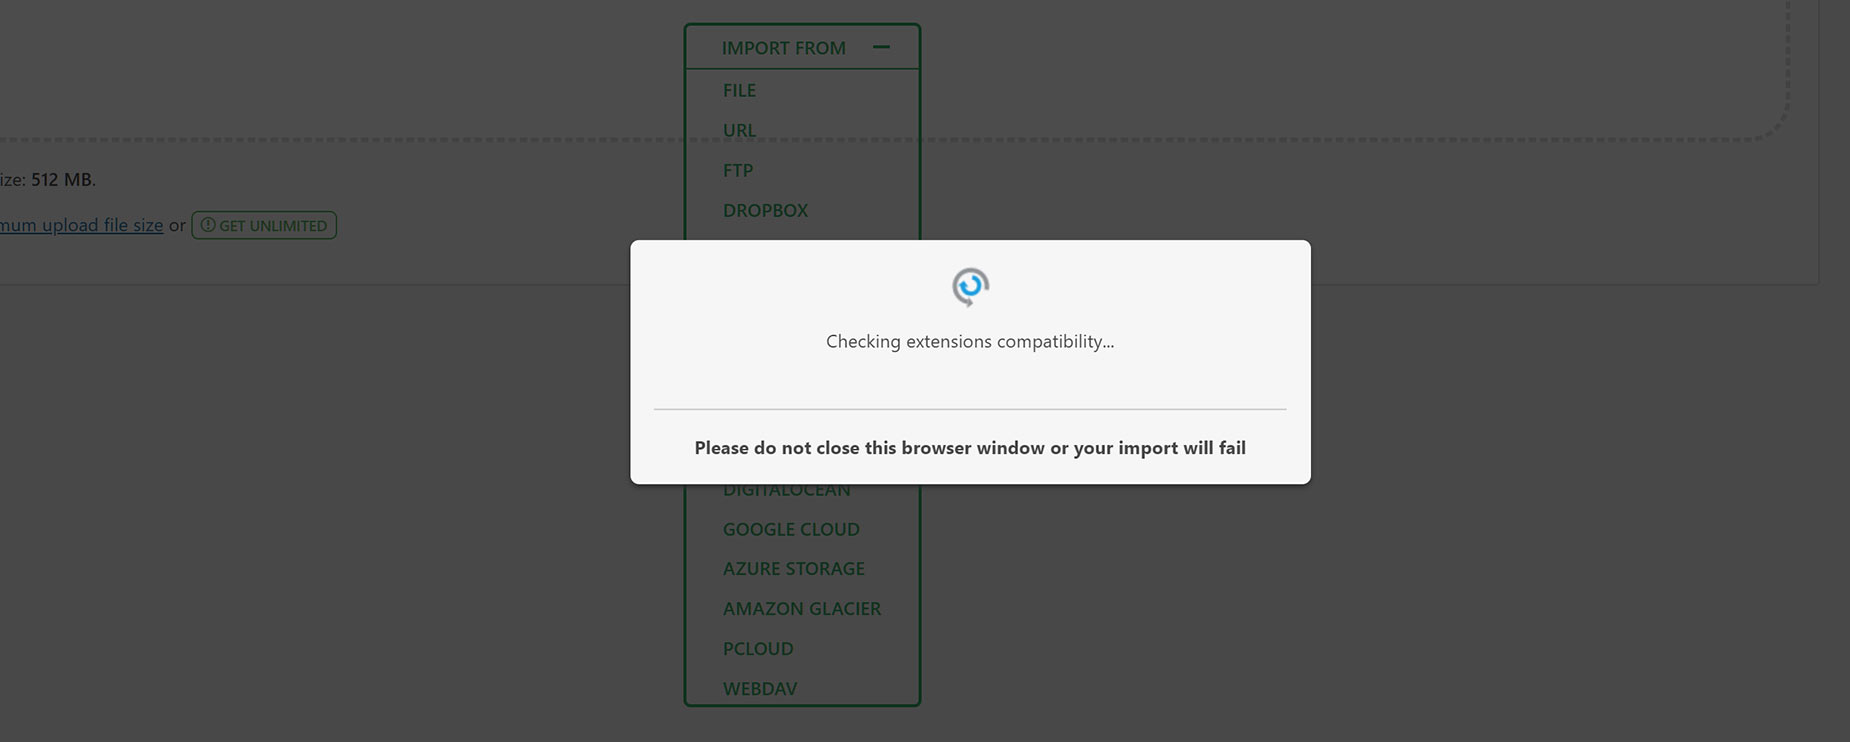
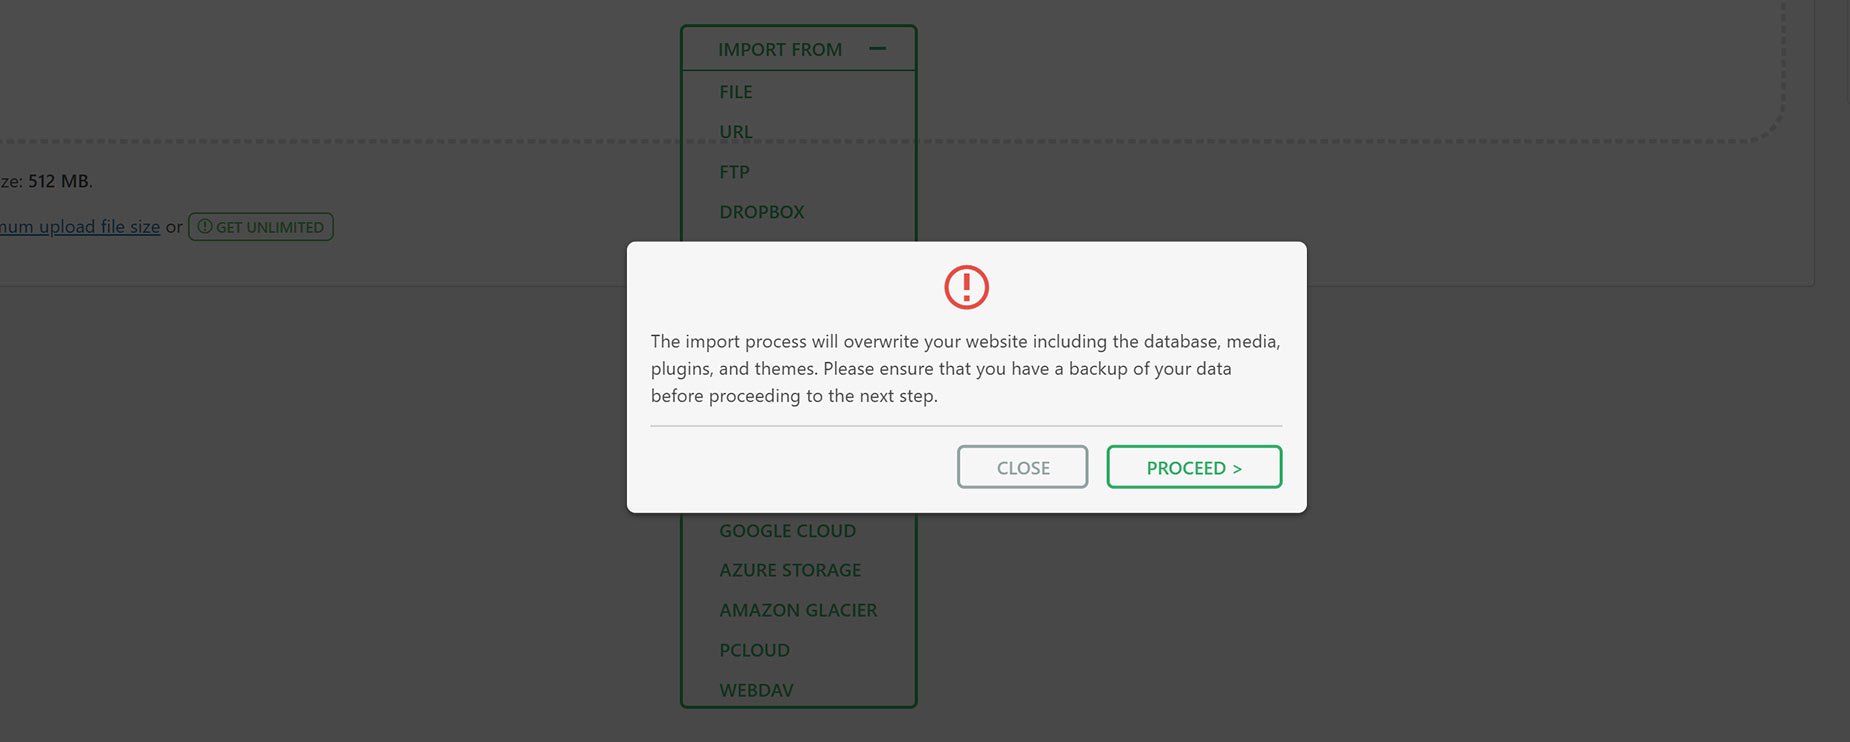
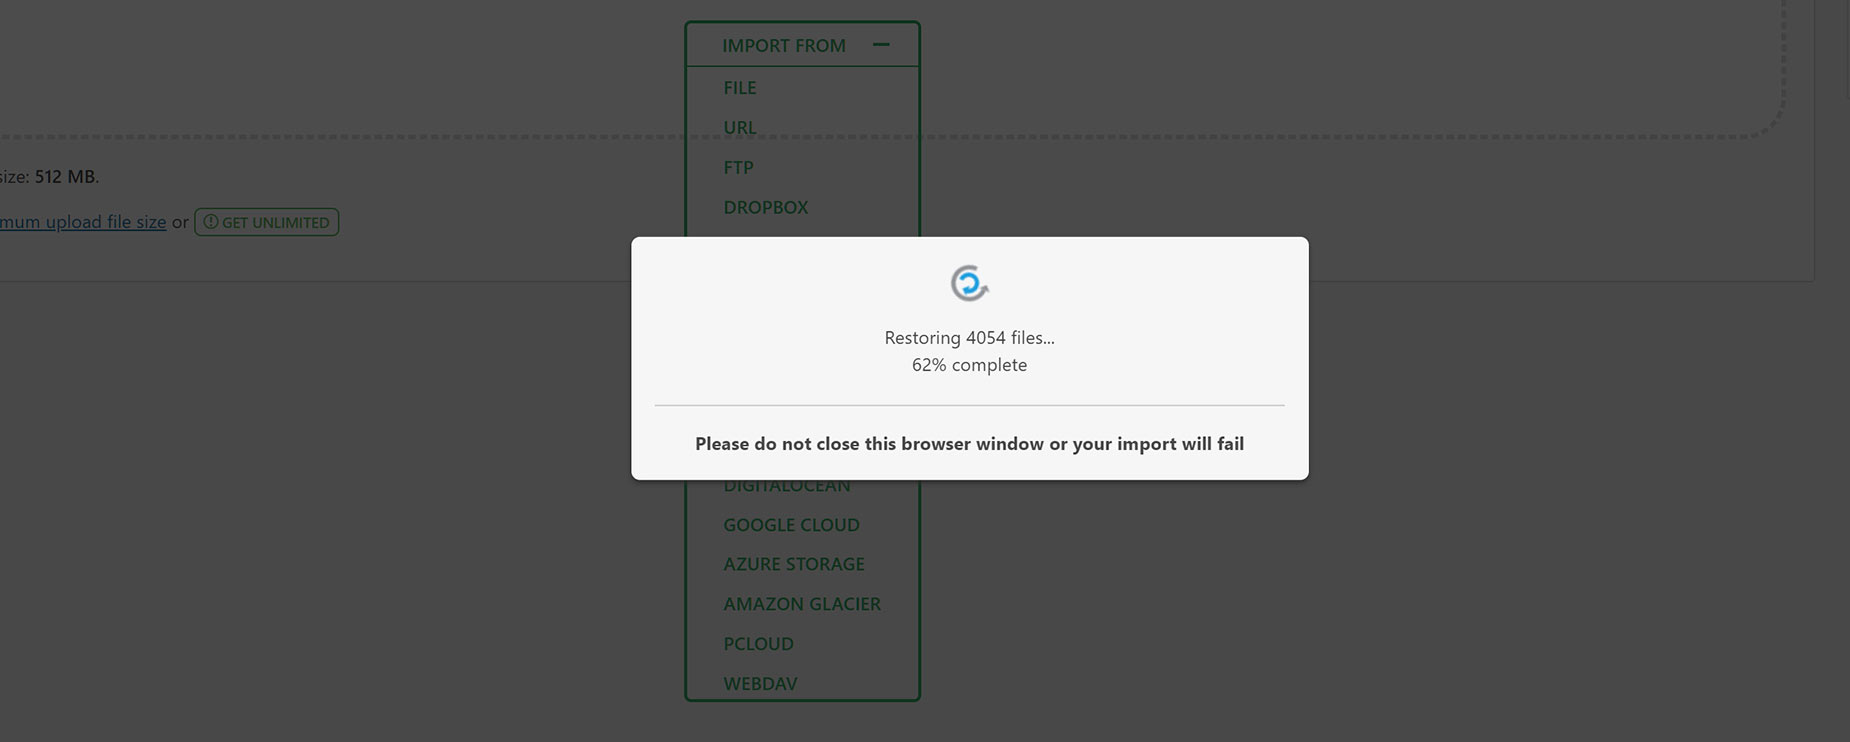
Once you have chose your file, the plugin gets to work preparing the upload. You will see a flurry of activity about Preparing the upload and checking extensions compatibility etc, and then you will be presented with a screen that lets you know that by continuing on from this point, files and databases will be overwritten. Click Proceed to import your site, or Close to abort at this point. If you proceed, the import begins. This might take a while, depending on how big your site is, and the speed of your host.
When the upload is complete, you are presented with a final screen, to let you know that your data has been successfully imported. The final thing to do, as the screen indicates, is to log in to the new site (with the old site’s credentials) and save the Permalinks twice. This completes the process, and your site has now been migrated.