IMPORTANT NOTE: This document relates to the Global Options method of building a Footer. If you are using Avada Layouts to create your footer, then you can simply use the Menu Element to create a Horizontal menu. In our Modern Shop Demo, we feature a simple horizontal menu in the footer area. If you would like to re-create this look, it’ll require just a Horizontal Menu widget.
How To Insert A Horizontal Menu in The Footer
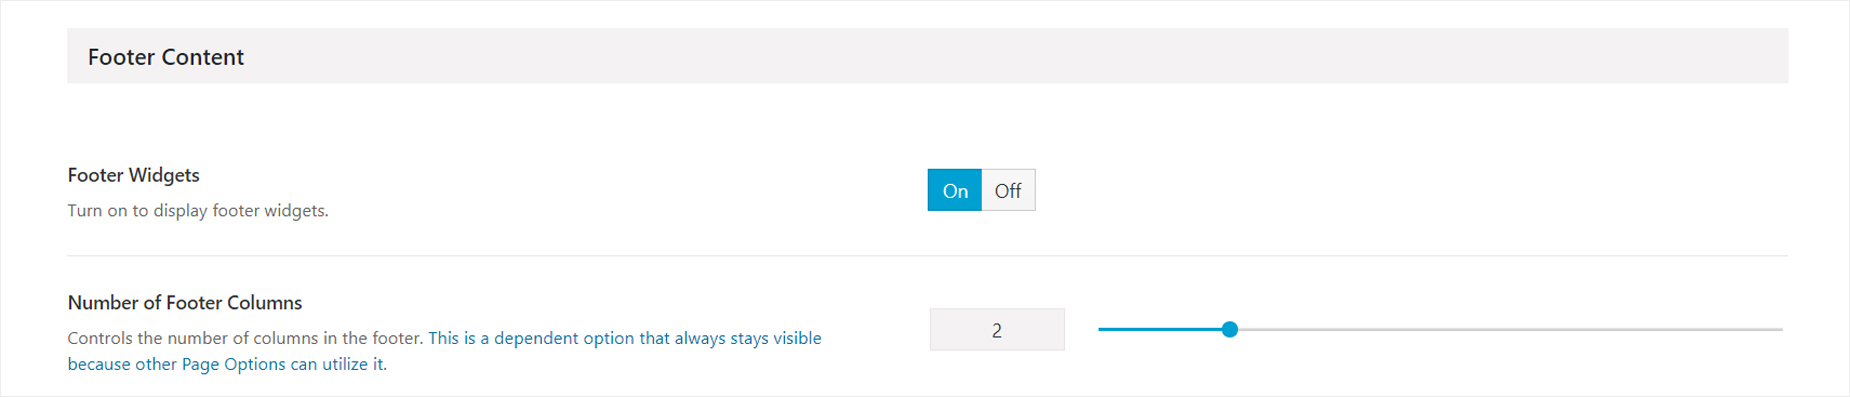
Step 1 – Navigate to Avada > Options > Footer > Footer Content.
Step 2 – Locate the ‘Footer Widgets’ option and set it to On. Once done, click ‘Save Changes’.
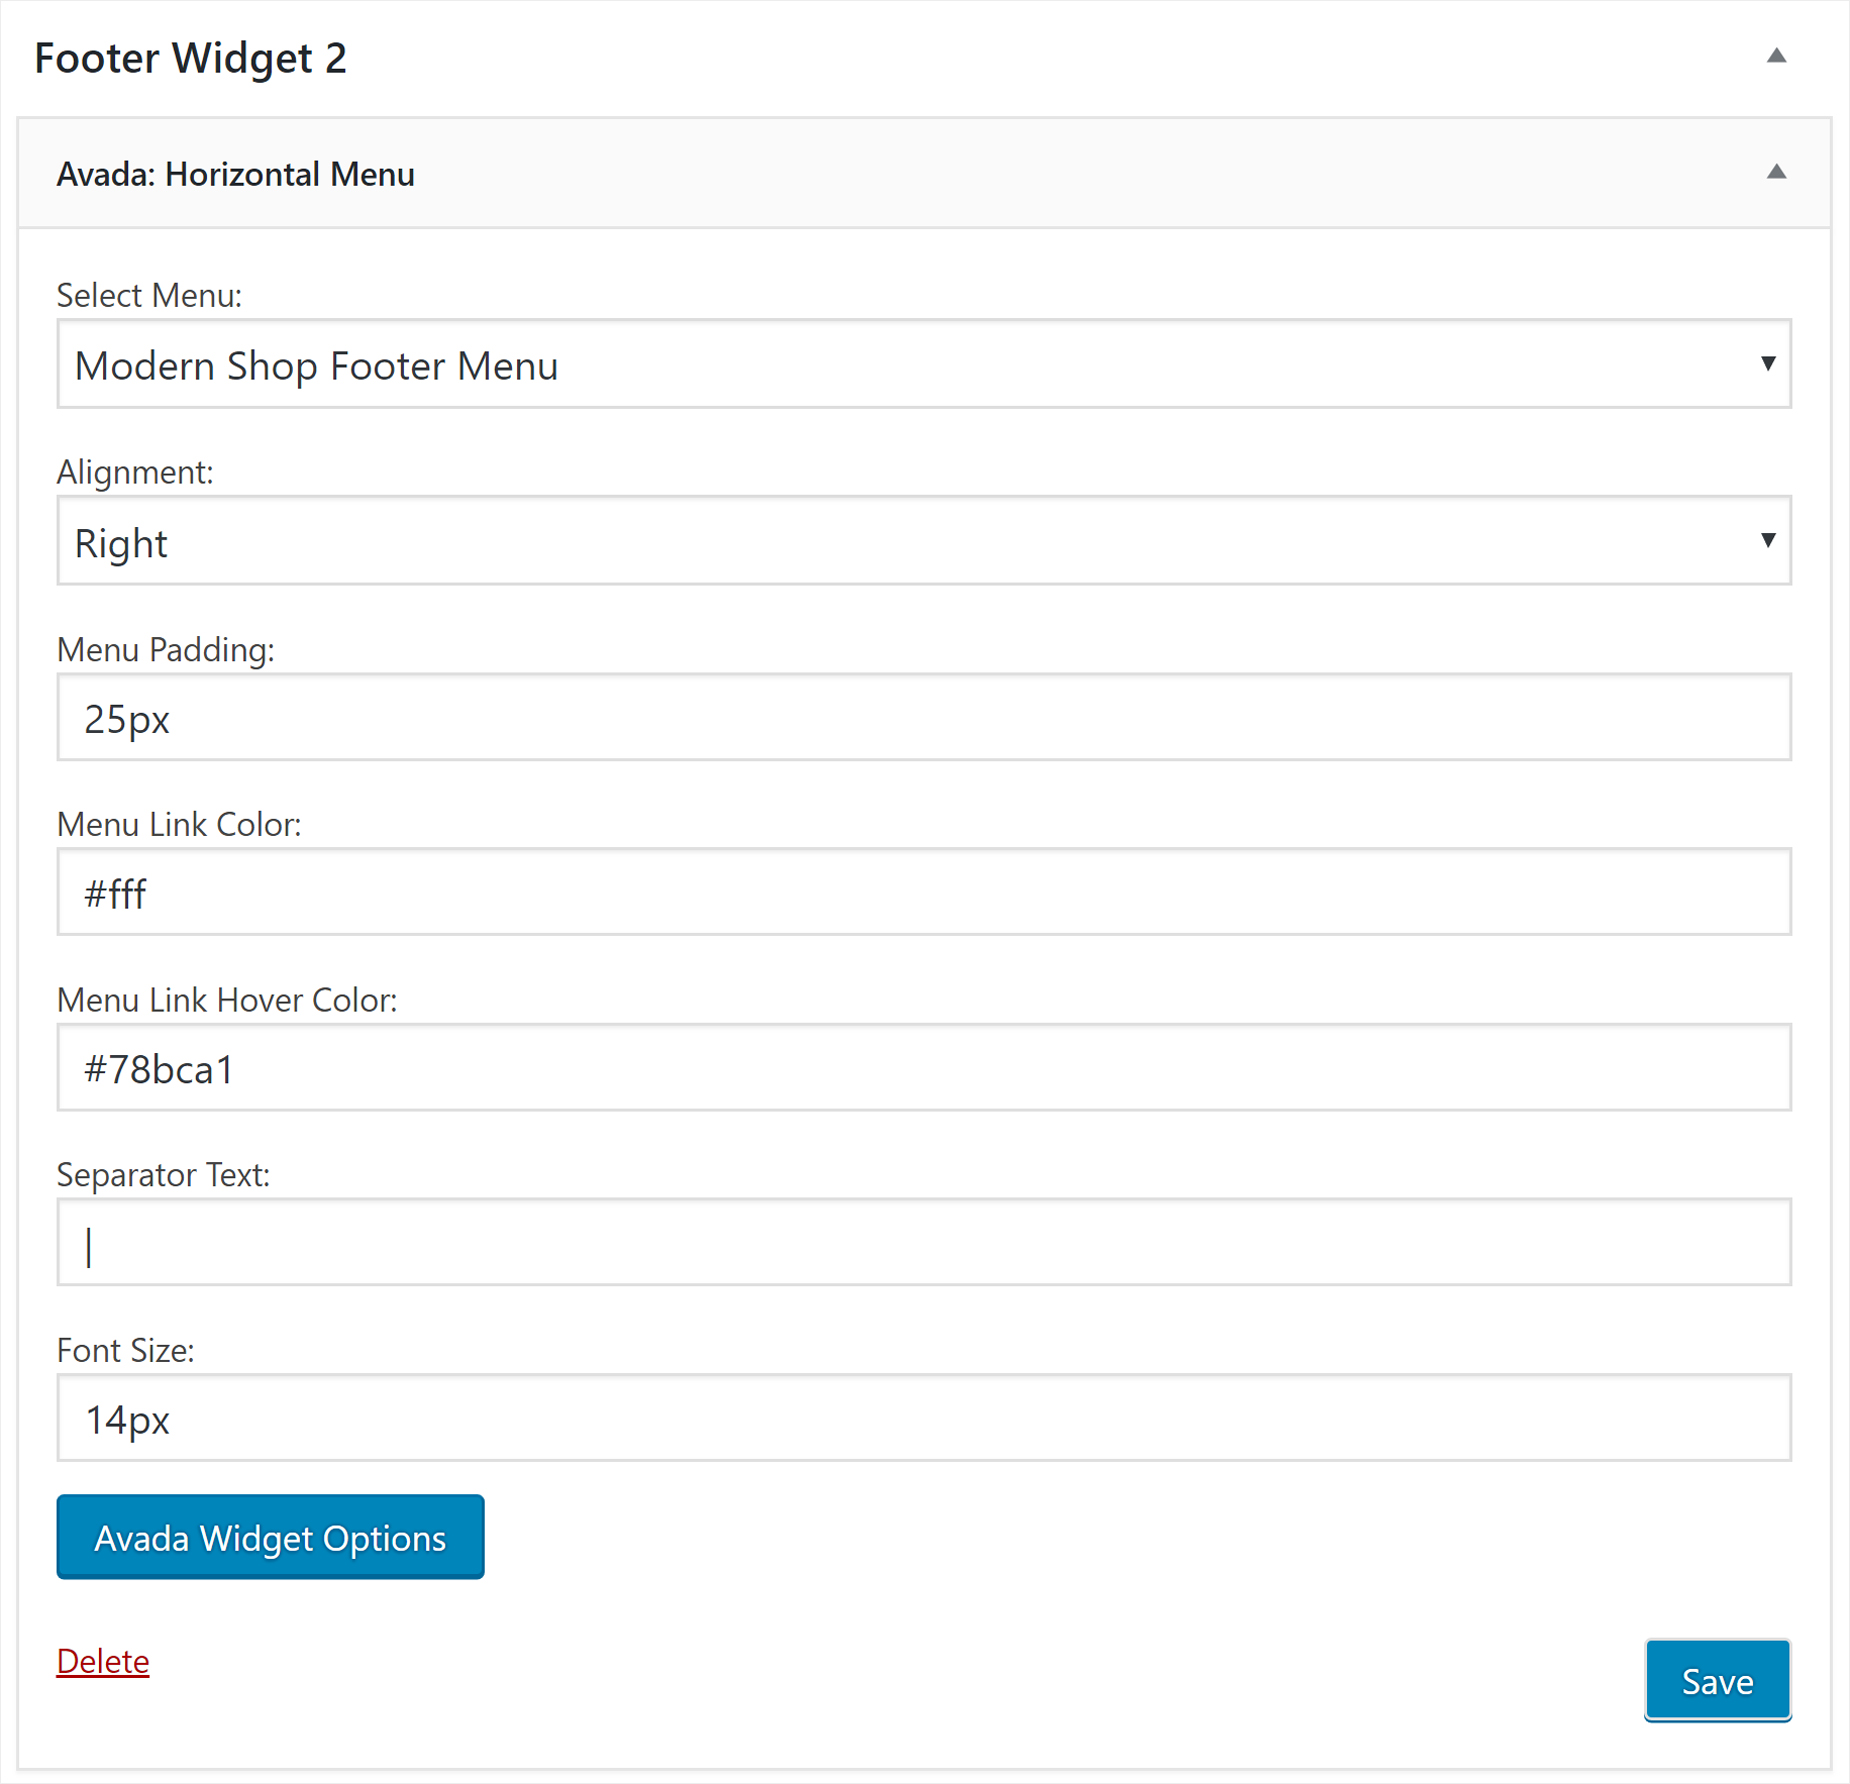
Step 3 – Navigate to Appearance > Widgets. Depending on how many columns you’ve set in the Number of Footer Columns, you can have up to 6 Footer Widget boxes. Select the box you’d like to insert the horizontal menu, for example, Footer Widget 2. Then, drag the “Avada: Horizontal Menu” widget to Footer Widget 2.
Step 4 – Set the menu you want to use. If you want to create a new menu, go to Appearance > Menus section.
Step 5 – Make the selections for the other field: alignment, padding, color, size, etc.
Step 6 – Once you’re finished setting your menu up, click Save button.
To know more about setting up a menu navigation in another way, check this: Avada Vertical and Horizontal Menu Widgets