Blog Single Posts
Last Update: October 29, 2025
At the heart of a Blog are the individual blog posts. Every blog post you create has has its own single post page. The single post page displays the entire blog post, featured images, author details, and comments, etc.
In this article, we’ll be outline all the relevant sections in a single post page and how you can configure the post page using the global Avada Global Options, the local Avada Page Options and how you can use the Avada Builder to create dynamic post content.
Blog Single Post Screen
Here is a screenshot that shows the various areas of the Blog Single post page.
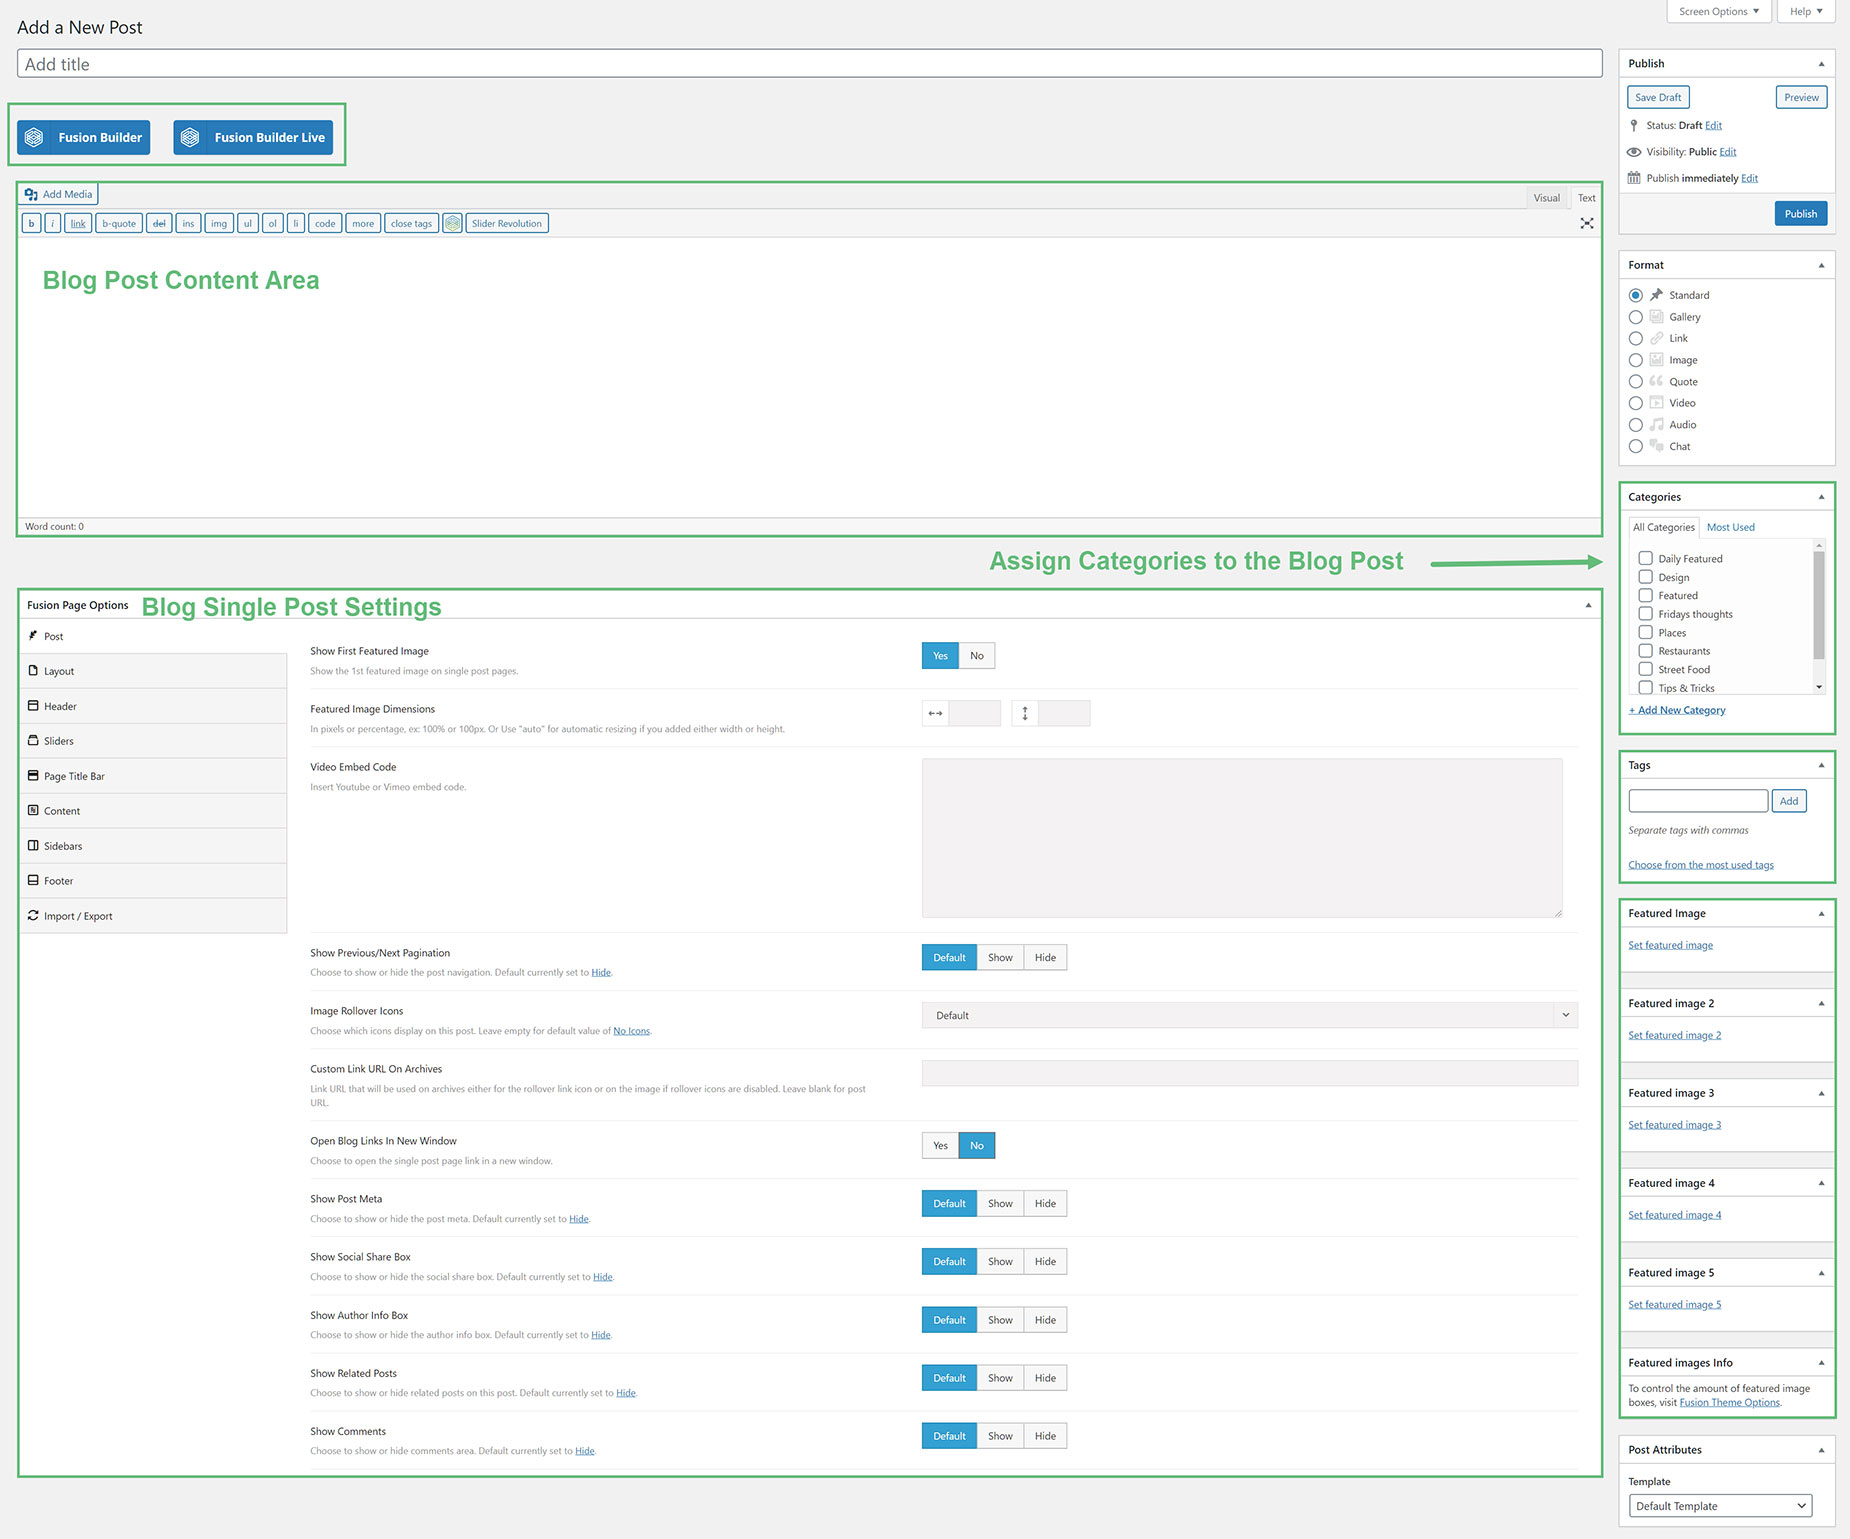
The Post Editor
The Post Editor is where you add your page content for your Blog posts. Avada allows you to use any editor on the single post pages, from the WordPress Editor, the Gutenberg Editor or the Avada Builder. To use the Avada Builder, you can click on either the Avada Builder or Avada Builder Live button above the WordPress Content Editor to access the Avada Builder. If these buttons are not showing, go to Options > Builder Options from the Avada Dashboard and ensure the Post option is selected under the Post Types section.
When using Layouts with Blogs, it’s important to remember that the layout is ultimately responsible for design, with the Content Element pulling the post content, and so it’s often a good idea to keep the actual post content very simple, but the choice is ultimately yours.
The ‘Post’ Post Type Fields
There are three fields added to the ‘Post’ Post Type to allow you to add specific Blog details to your posts – Categories, Tags, and the Featured Images fields.
Avada Page Options – Post Tab
Avada provides a host of options that you can use to configure a single post, located in the Post tab of the Avada Page Options. All options set within an individual Blog post will override the corresponding global option set in the Blog Single Post tab in the Avada Options.
There are also extra fields to add further information to your Blog posts, such as the Video Embed field, and the Featured Image Dimensions, Open Blog Links In New Window, and Custom Link URL On Archives fields.
Please see the Blog Post Options doc for the full range of options. Below, we will look at some of the less understood post options available.
Featured Image Dimensions
The Featured Image you upload to each post will show the full image ratio on the single post page by default. The width of the featured image will be set to the site width, or column width if using sidebars, and the height is set to auto so it displays the original height. So it is important that the featured images you upload are big enough for the area they are to fill, otherwise there will be pixelation.
In addition to this, you can set a custom featured image width and height to control the size of the image, using the Avada Page Options. The Custom featured image sizes works for single post pages and the main blog page, excluding the ‘Grid’ and ‘Timeline’ layouts.
The ‘Featured Image Dimensions’ option (Image width and height) is located in the Post Tab of the Avada Page Options. Values are set in pixels or percentage, ex: 100% or 100px. Or Use “auto” for automatic resizing if you added either width or height.

Featured Videos
You can also upload a Youtube or a Vimeo video to be displayed in the featured image section of the post. You can even have a combination of videos and images, displayed as a slideshow on the single post page. Read below to learn how to upload a Youtube or a Vimeo video.
How To Upload A Youtube/Vimeo Video

Automatic Titles for Blog Posts
We enhanced the handling of H1 & H2 automatic assignment for titles in the Page Title Bar and single posts. The post header for single posts, single FAQ, single portfolio, and WooCommerce single product pages will automatically default to H1 if for example the Page Title Bar >> Page Title Bar Text is set to Hide. if Page Title Bar >> Page Title Bar Text is set to Show then the post header will default automatically to H2.


