Automatic Translation Updates
Last Update: November 4, 2025
To get translation updates, you need to have the Enable Language Update option turned on (found in the Global Options, under Features) and not be using English as your WordPress language. The, on theme / plugin updates will automatically receive updated language files.
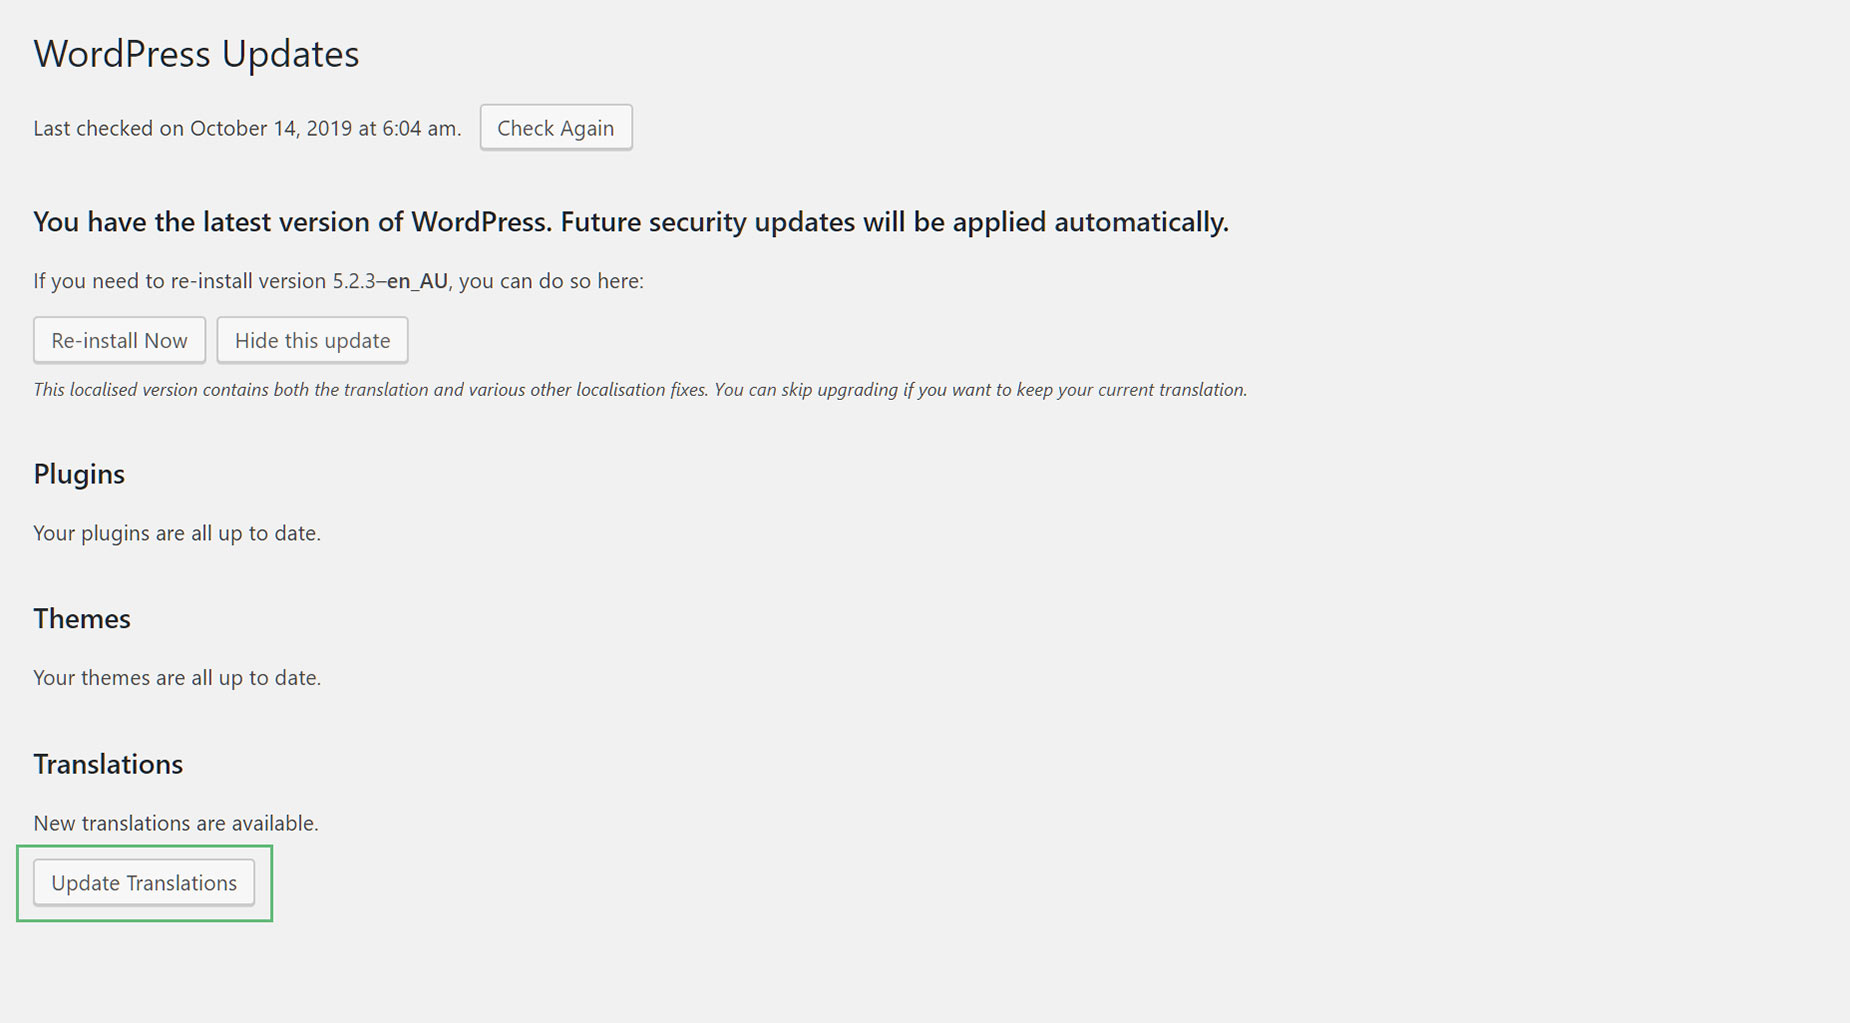
Any time there is an updated translation, you will be notified in the Dashboard > Updates area, and you just need to click the ‘Update Translations’ button, which will update the language files of Avada and its plugins, for which newer translations are available.
When there is an Avada update, it works a little differently. If you update Avada, then once the update is complete, you will see the ‘Update Translations’ button at the bottom of the Updates screen. This is because the translations for a theme update can only be installed AFTER the update is complete. You can download the language updates for Avada at that time, however, if you continue directly to updating the required plugins, as is usually the next step when updating Avada, WordPress updates the Avada language files automatically.
Then, when the plugins have been updated, again you will again see an ‘Update Translations’ button at the bottom of the Update screen. This time, they are the updated translations for the Avada Core and Avada Builder plugins. Just click Update, and they will also be updated automatically.
Please note, that custom translation files in wp-content/languages/plugins and wp-content/languages/themes will get overwritten on update – just like it happens for all other WP plugins & themes.
If you have translations for your own language, you should contribute these translations, either by submitting a Pull Request in our repository or by sending an email to support, who will take care of the submission for you.
In essence, our products now work just like plugins/themes hosted in the wordpress.org repository:
- translations & updates are handled automatically.
- users contribute translations.
Don’t Want Automatic Updates?
No problem. There is also an option to Enable or Disable the Language updates. This can be found at the top of the Features tab, found at Options > Advanced > Features. Just set your preference there. The default is Enabled.


